Hi, everyone! Like making shaker cards? Teri here, and I’m going to show you a way that is easier than ever for making them!
All you need are a couple Keepsake Envelopes and a few basic card making supplies!
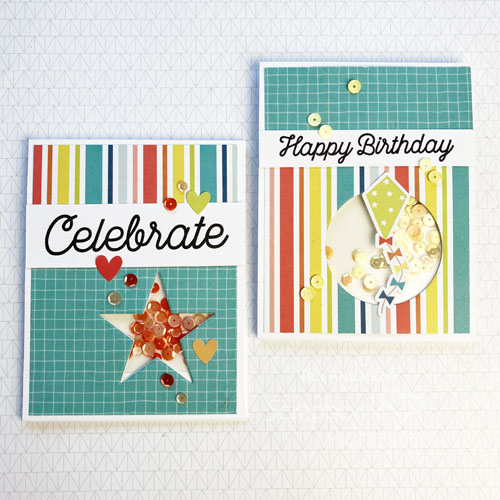
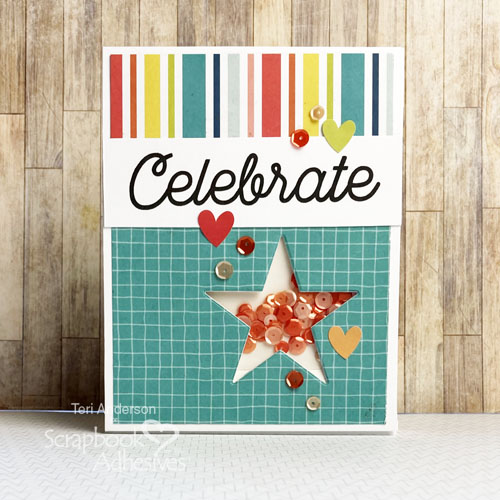
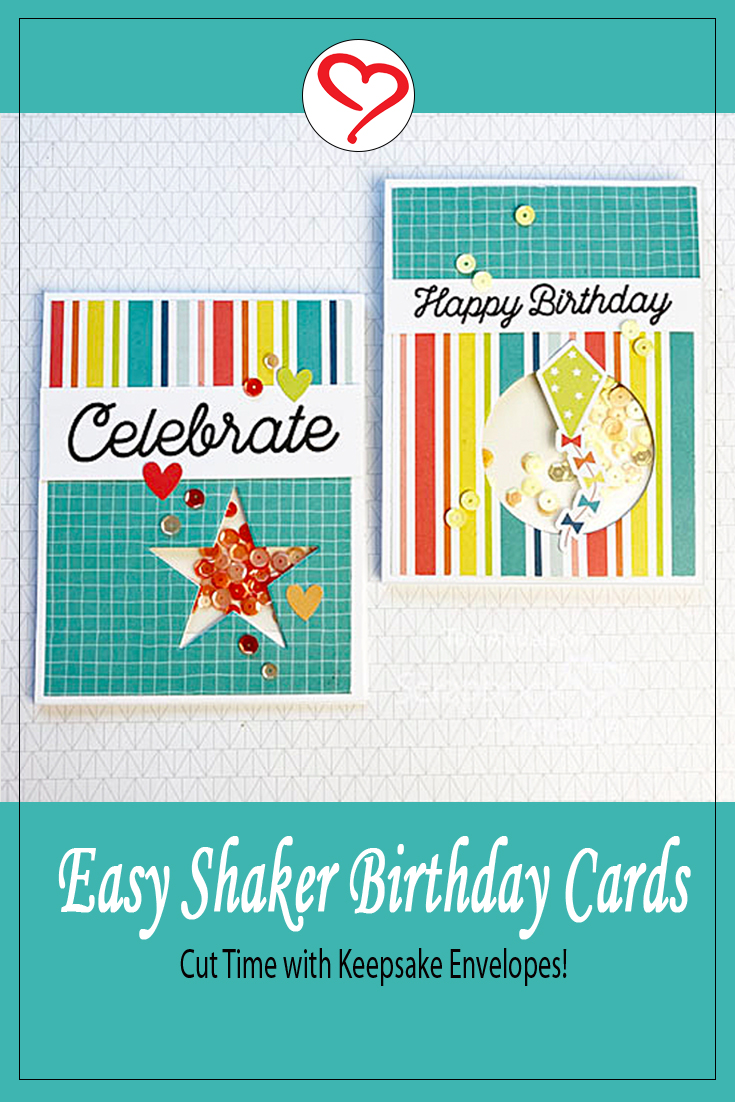
Create a Shaker Birthday Card
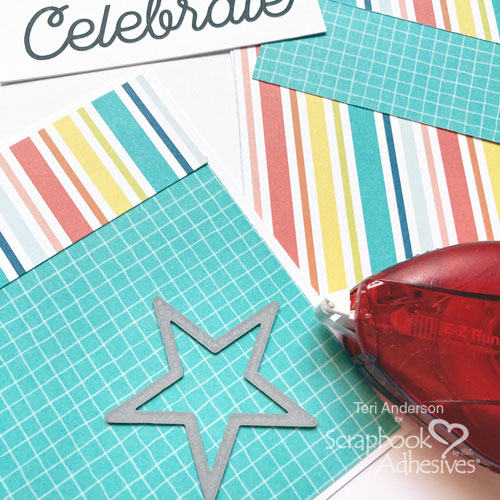
Start with a rectangle of cardstock that is large enough to fit on a card base. Cover the rectangle with patterned paper. You can use just one paper or many. It’s entirely up to you.
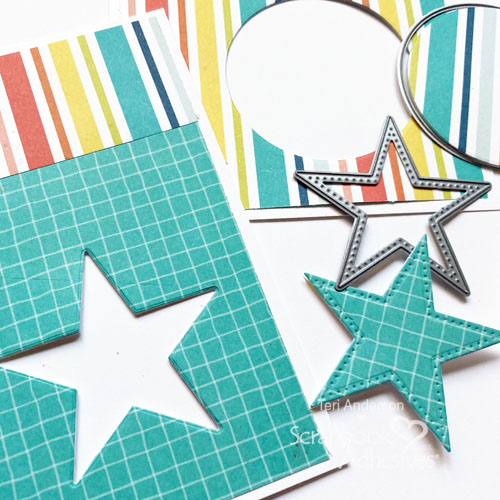
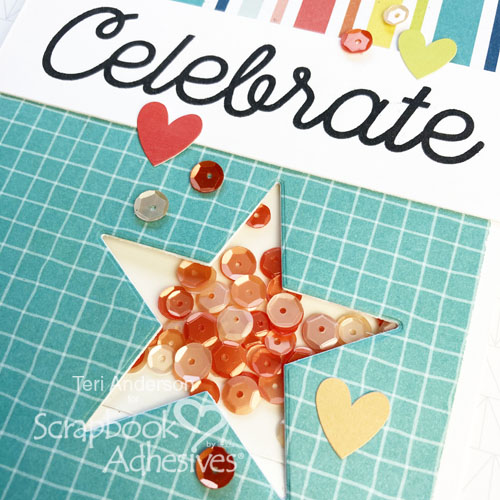
Use a die to cut a shape out of the decorated rectangle panel. (Don’t have a die? Use a paper trimmer to cut a square or rectangle instead!)
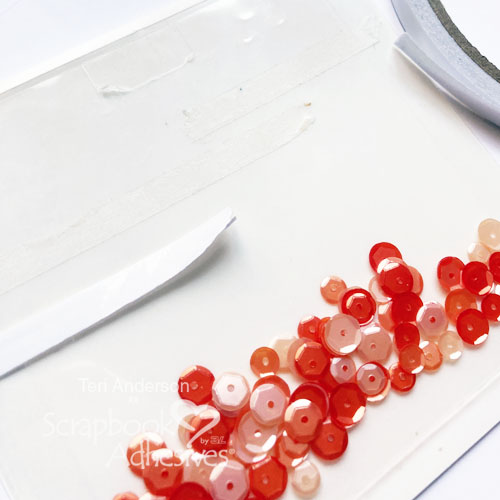
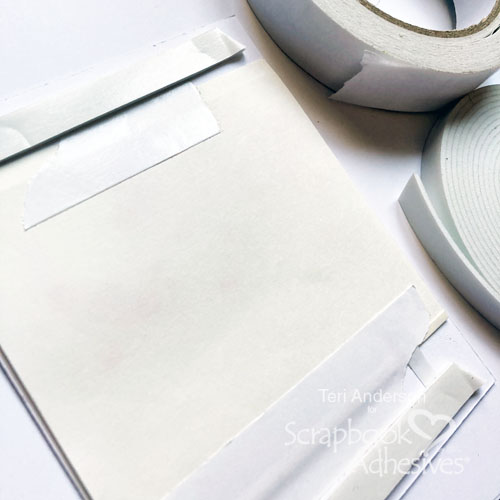
Take a Keepsake Envelope and add sequins to it! Be sure to pick an envelope that is bigger than your cut shape. If you are using an envelope significantly larger than your cut shape, add a few lines of Premium Double-Sided Tape 1/4″ to the inside of the pocket to keep the sequins from moving all over it.
Place the envelope on the back of the rectangle behind the opening. Secure it in place with Premium Double-Sided Tape 1″. Add some additional strips of Crafty Foam Tape to the panel and adhere the panel to a pre-folded card.
Complete your card by adding a sentiment to it, as well as some embellishments. Stickers and sequins are a fun way to spruce up your design! Gems are another fun option!
Change Up Your Design
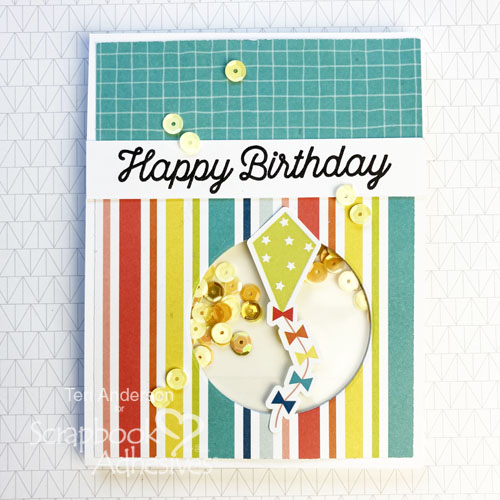
Don’t limit yourself to using just stars to cut your shaker window opens! Try using more generic shapes, like circles.
You can kick things up a notch more by decorating the shaker itself by adding a sticker or rub-on to it!
I hope you are inspired to make a few easy shaker birthday cards of your own!
Other White Cardstock: Neenah Paper; Patterned Papers: Photo Play Paper (We Can Just Stay Home Collection); Dies: Hero Arts (Circle), My Favorite Things (Star); Stamps: My Favorite Things (Big Birthday Wishes Stamp Set); Stickers: Photo Play Paper (We Can Just Stay Home Collection); Sequins: Avery Elle, Doodlebug Design; Black Ink Pad: Ranger Ink
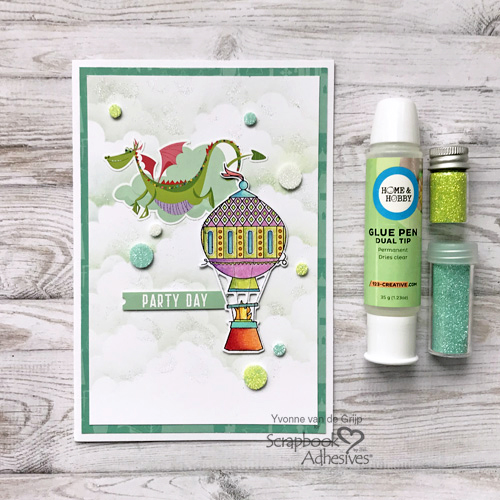
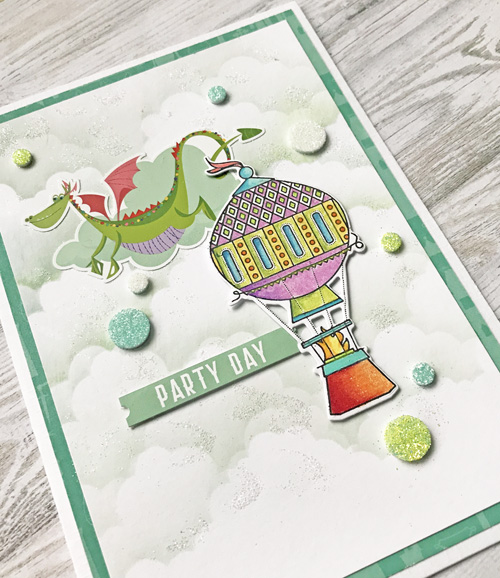
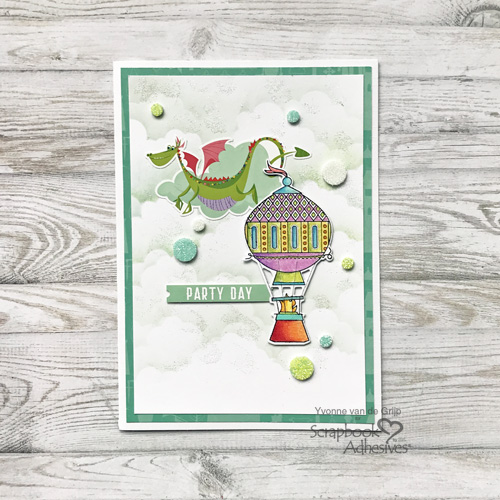
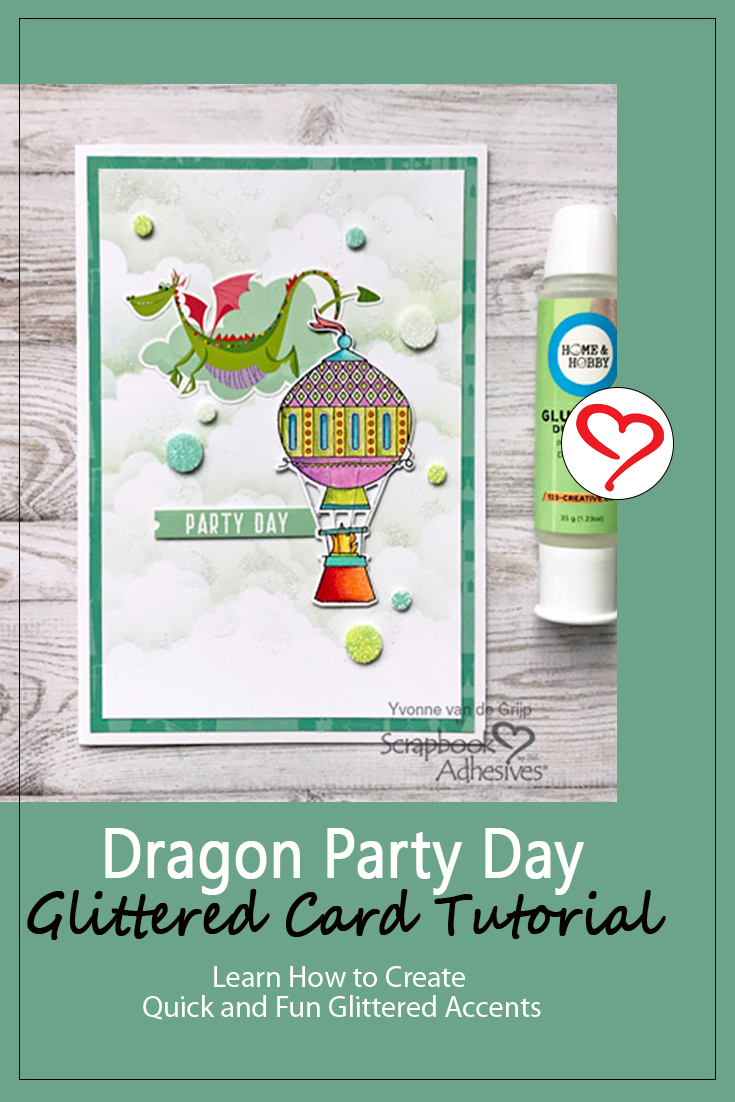
Hi everyone, Yvonne here with a new project using lots of glitter for a Dragon Party Day Card. The design and sparkle make this card perfect for a child’s birthday theme! But to be honest, I would love to receive a card like this too!
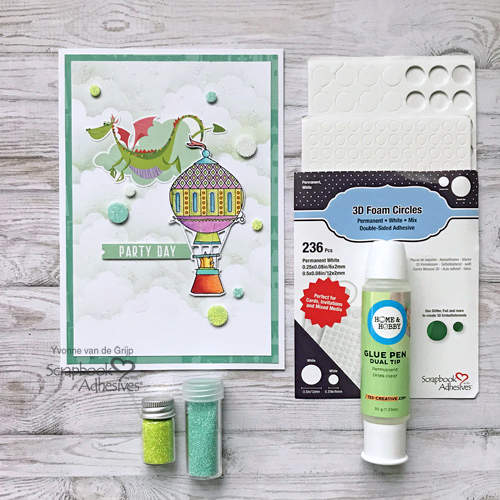
Adding subtle glitter accents to the clouds is super simple using a combination of the Dual Tip Glue Pen and 3D Foam Circles White Mix. Great for some extra bubbly glitter accents!
Dragon Party Card Card Step Outs
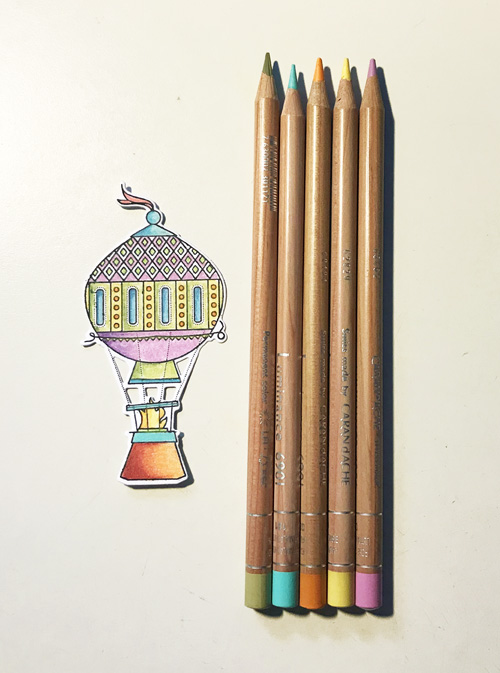
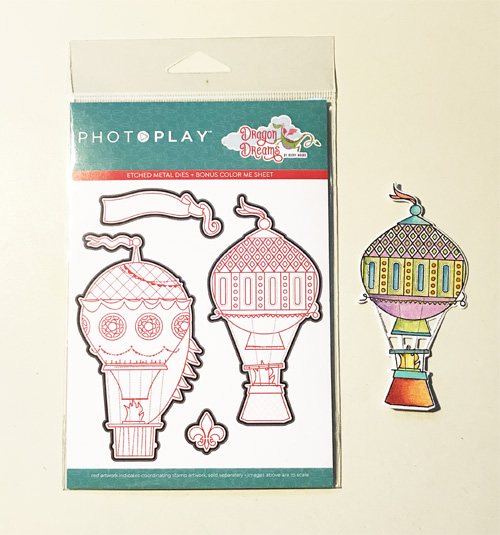
First, stamp the hot air balloon onto white cardstock using a black ink pad. Then color the balloon with colored pencils and die-cut the balloon.
Making a Cloudy Sky
First, trim a piece of white cardstock for the top layer panel for your card.
Using a cloud template or make one yourself by simply cut a cloud line from white cardstock using scissors.
To make the clouds, place the template horizontal onto the white card panel and dab soft grey ink onto the cloudy edge with an ink blending tool.
Work your way down the panel and repeat the ink dabbing to create the cloudy sky until you get your desired look.
The Card Base
Mat the cloudy top card panel onto a green patterned card panel to give it a subtle outline. Next, adhere the layered panel onto a white folded card base. To adhere everything, I used the E-Z Runner® Grand Refillable Dispenser.
Elements to the Card
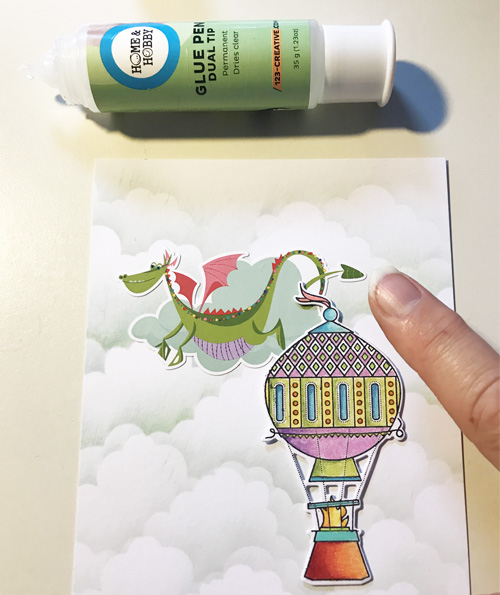
After finishing the cloudy sky, adhere the dragon and cloud sticker to the card. Let’s lift and adhere the hot air balloon die cut using Thin 3D Foam Squares White Mix. The thickness is just enough to give it a subtle uplifting effect.
Now it’s time to add the glitter effect. Using your adhesive to shine is a technique called Wear Your Adhesive on the Outside. I used this technique in two different ways: to add glitter effects to the clouds with glue and by adding glitter bubbles to the card.
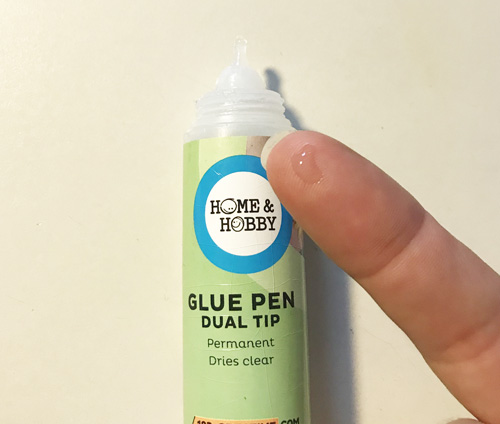
To glitter the clouds, start by putting a drop of Glue from the Dual Tip Glue Pen onto your finger and spread the glue a little over your finger top.
Simply dab your “glue finger” (while the glue is still wet) onto the clouds on the card panel.
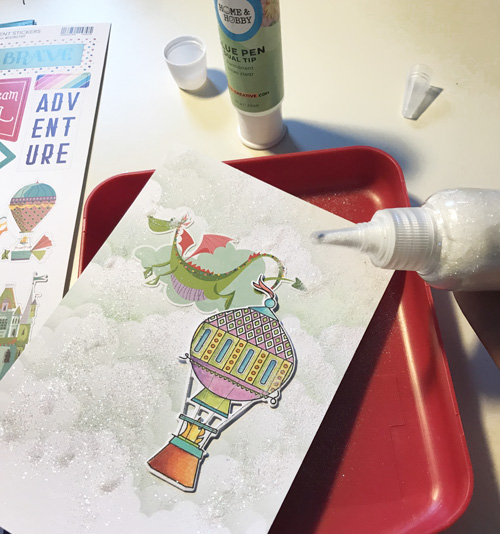
Then sprinkle white glitter over the card panel. Tap off any excess glitter.
Next I adhered some 3D Foam Circles White Mix onto the card panel. Remove the liner to sprinkle green, blue and white glitter on top. Then tap off the excess glitter.
You made a shiny background! And…your Dragon Party Day Glittered card is ready to make someone very happy!
I hope you enjoyed this tutorial and wish you happy crafting. Yvonne van de Grijp
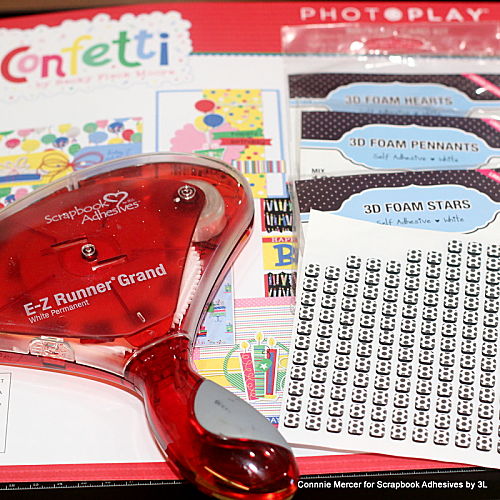
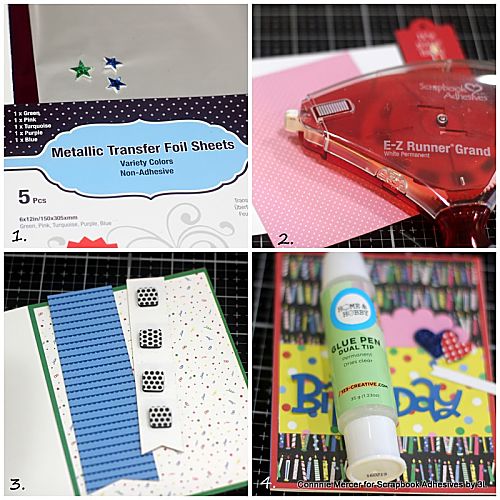
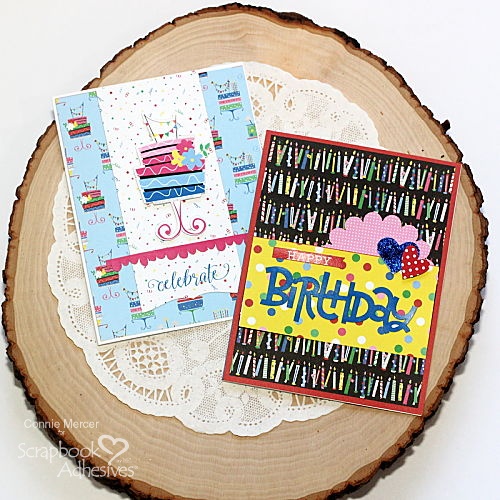
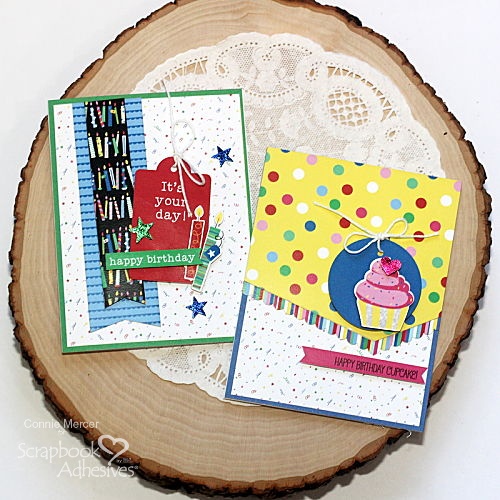
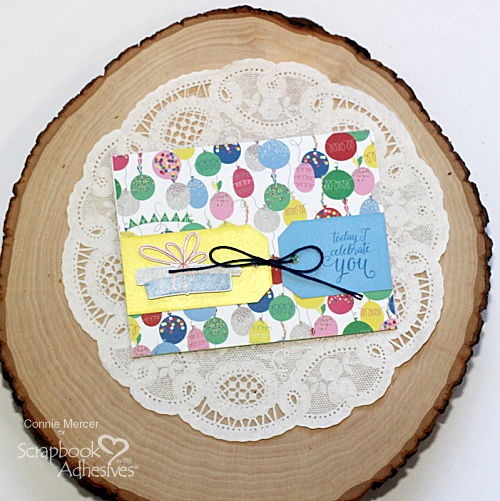
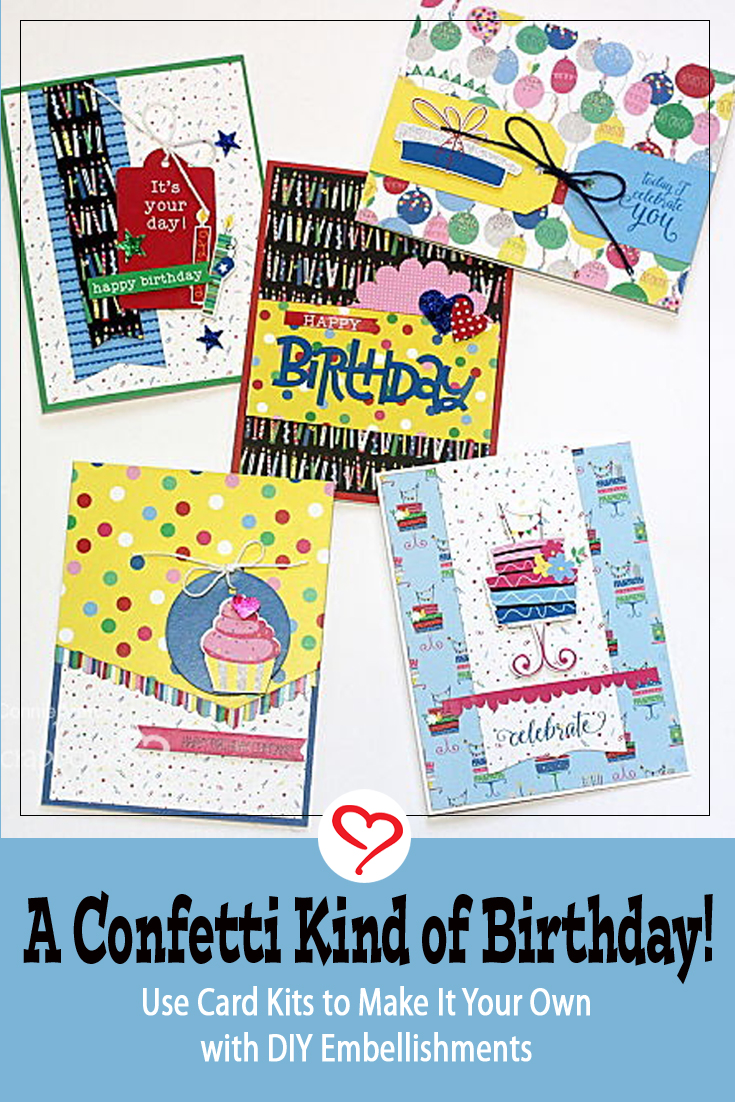
Hi, Connie here with some really easy and super cute cards created using a card kit but making them my own. It’s a throwdown of cardmaking – a confetti kind of birthday!
Working with Confetti Birthday Cards
All you need is 3D Foam Stars, 3D Foam Squares, and your E-Z Runner Grand to help create some fun cards. What perfect timing as today is World Card Making Day!
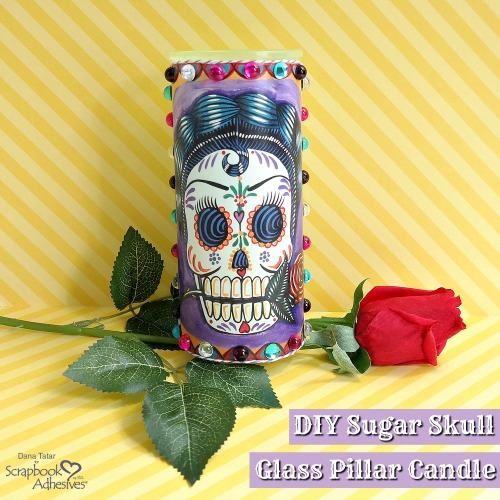
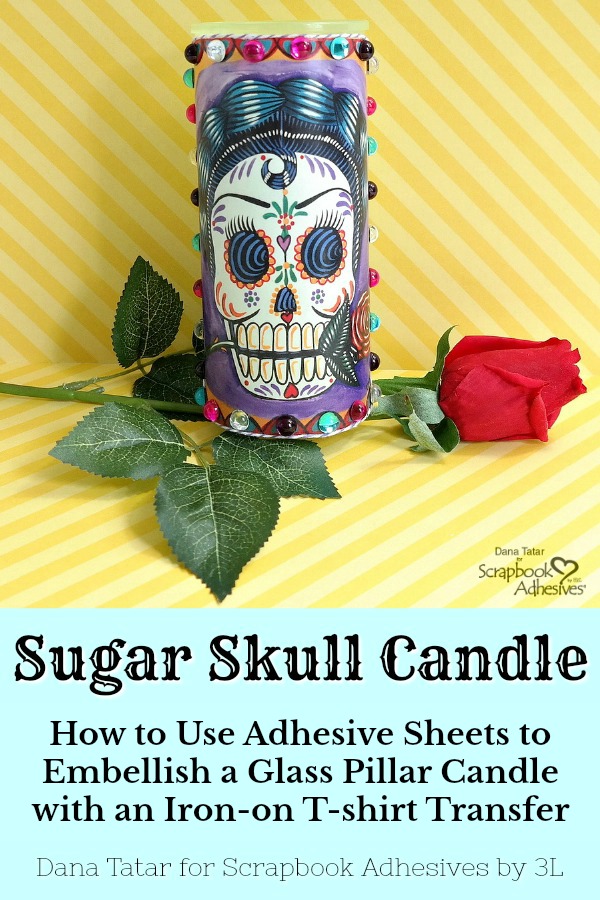
Hi friends! Dana here today sharing a fun décor project for Halloween. A large part of my interior ambiance comes from the flickering light of candles. I thought it would be fun to spook my guests with an embellished glass pillar candle featuring one of my favorite designs: a sugar skull.
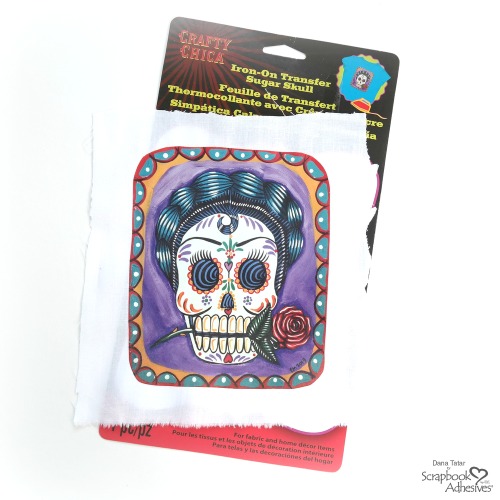
I’ve had a sugar skull iron-on t-shirt transfer in my stash for some time and this project was the perfect excuse to finally use it. There is something about the cooler Fall months that always has me reaching into my fabric stash. I used a square of muslin and an adhesive sheet to transform this transfer into a sticker embellishment. This was the perfect way to wrap a glass pillar candle!
T-Shirt Transfer Sticker Embellishment
To begin, position the sugar skull t-shirt transfer onto a piece of muslin and cover with a thin cloth. Next, empty the water from a household iron and heat on the wool setting. Press the iron over the transfer for about one minute, using a circular motion to evenly spread the heat. Once the design in transferred to fabric, set aside to cool.
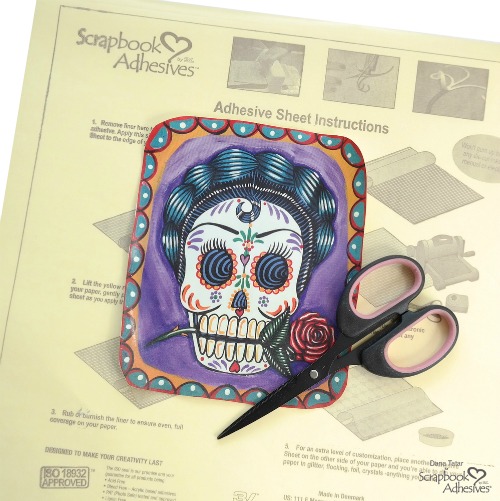
To create a sticker embellishment from the fabric transfer, lift the yellow release liner from a 12×12 inch Adhesive Sheet and place the fabric onto the adhesive. Re-apply the yellow sheet and rub to transfer the adhesive to the back of the fabric. Next, use scissors to cut around the piece of sugar skull fabric.
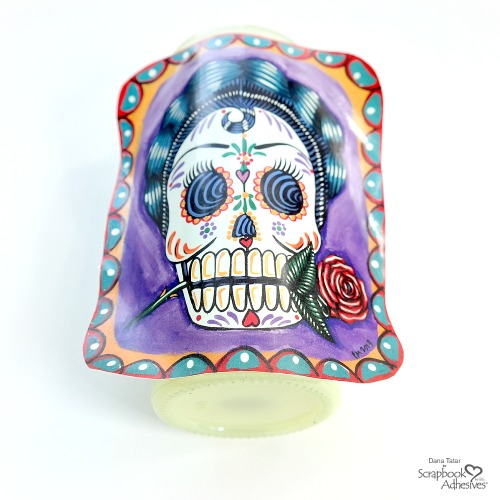
Remove the release liner from the sugar skull fabric and place the sticker embellishment onto a glass pillar candle. Press the design firmly starting from the center and working out towards the edges to secure to the glass.
Sugar Skull Candle Embellishments
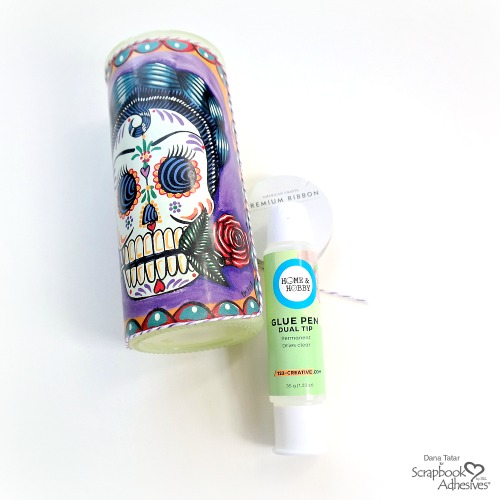
Add a finished edge to the sugar skull sticker by using a Dual Tip Glue Pen to secure a length of twine around the embellishment.
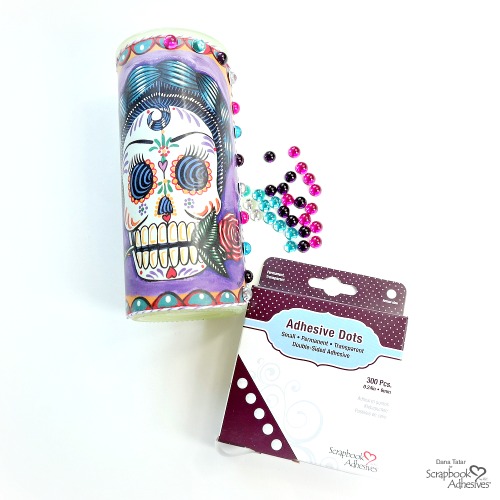
Use Small Adhesive Dots to apply colorful rhinestones around the edge of the sugar skull sticker.
Thanks for stopping by today! I hope I have inspired you to create your own large stickers for use on home décor projects. ~Dana Tatar
It’s National Coffee Day and we’re excited to be part of the National Coffee Day Blog Hop with the Coffee Lovers Community! We have a super fun a Cup of Friendship card that Tracy McLennon will share.
The Coffee Lover’s Blog brews up inspirational coffee-related posts. Read to the end for a chance to win our ADHESIVE GIVEAWAY!! Who are the Coffee Lovers? They are a coffee-loving (or tea or cocoa) group of card makers that’s open to everyone.
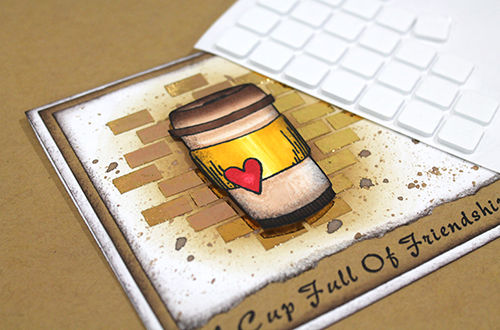
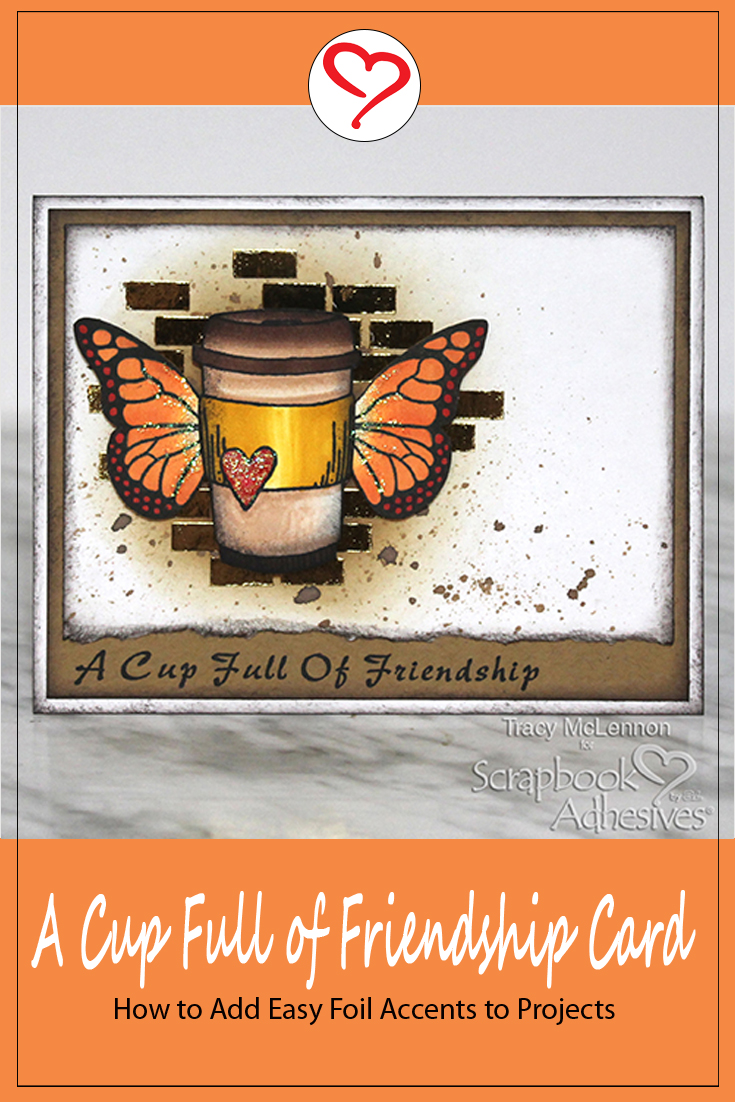
A Cup of Friendship Card
Hello, coffee, tea, or cocoa lovers! It’s Tracy here today to celebrate National Coffee Day with the Coffee Lovers Community and you! I have a Cup of Friendship Card to share! Grab a cuppa and see how I put it together!
Prepping the Card Panel
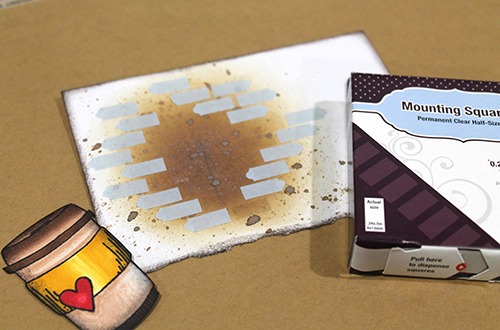
My first step in creating my Cup of Friendship card was to cut, tear and distress my white cardstock card front.
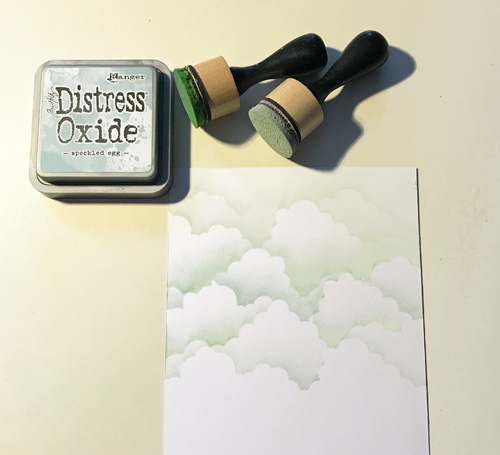
Using Distress Oxide Ink, I blended the area where my coffee cup image was going to live. Then splattered some more ink that I had watered down.
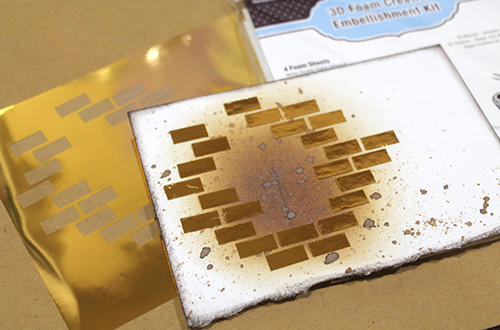
I stamped my card images onto white cardstock using black StazOn ink and then added colour using Chameleon Pens.
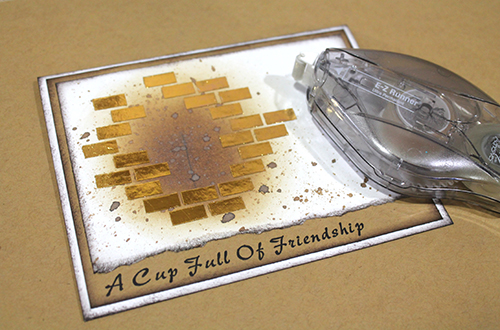
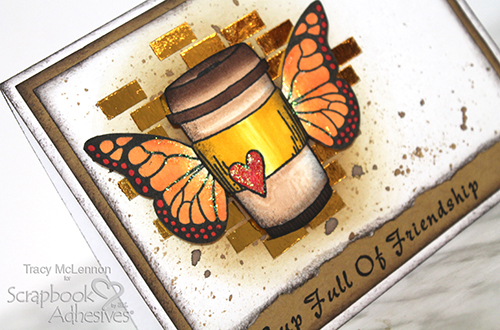
Mat the distressed card front in kraft cardstock that has been stamped with the Cup of Friendship sentiment. Place the layered panel to the white cardstock card base inked on the edges using the E-Z Runner® Ultra Refillable Dispenser.
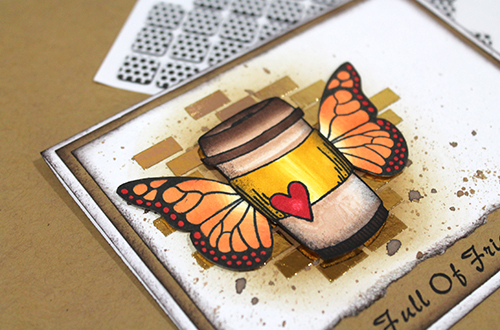
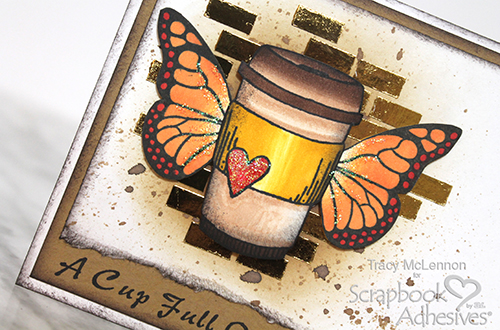
Attach the butterfly wings to the coffee card using Thin 3D Foam Squares Black Mix. I love mixing the different thicknesses of 3D Foam Squares to get so much more dimension to my friendship card.
Finally, add Stickles to the heart and wings of the stamped images.
I hope you love my Cup of Friendship Card! Keep reading for the Blog Hop prize entry details below!
Other Stamps: Cracker Box & Suzy Stamps (Coffee Cup Heart, Monarch, Hot & Steaming, and Skelton Leaf 2); Ink: Ranger Ink (Distress Oxide Ink in Vintage Photo and Ground Espresso) and Tsukineko (StazOn Ink in Jet Black and Timber Brown); Stamp Positioner: My Sweet Petunia (MISTI); Colors: Chameleon Pens; Water Mister; Toothbrush; Stickles; Blending Tool; White and Kraft Cardstock
Save to Pinterest!
Coffee Lovers Blog Hop Details
Enter to win our GIVEAWAY of +$30 Prize Package of Adhesives!
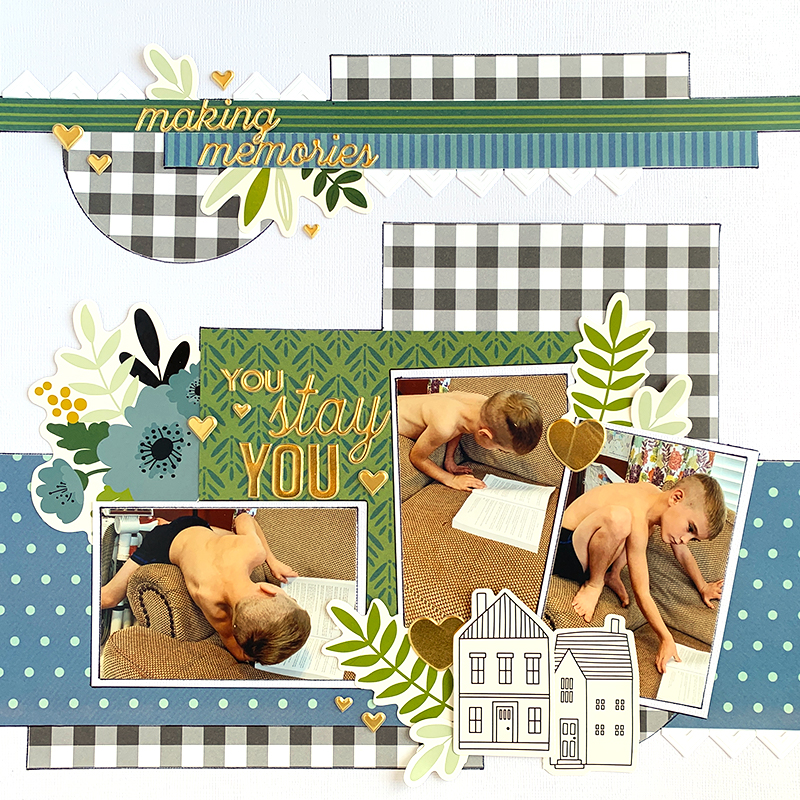
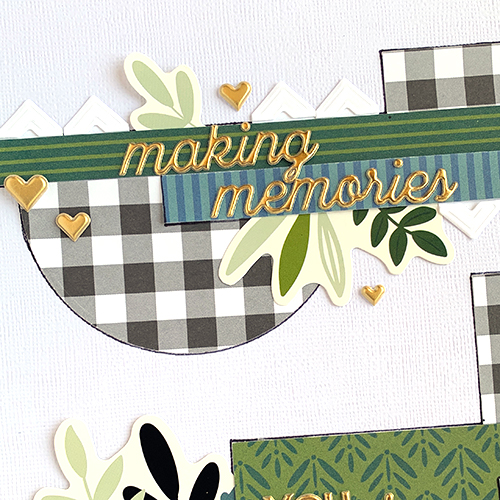
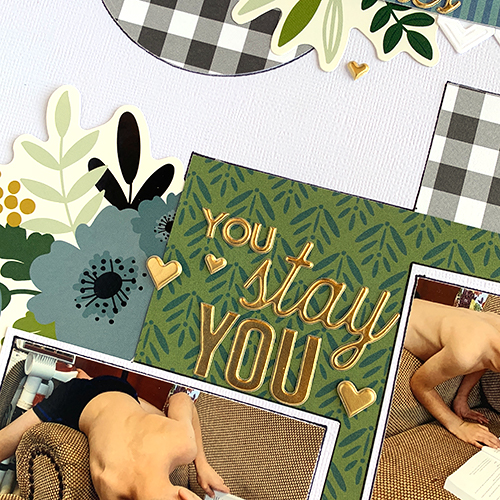
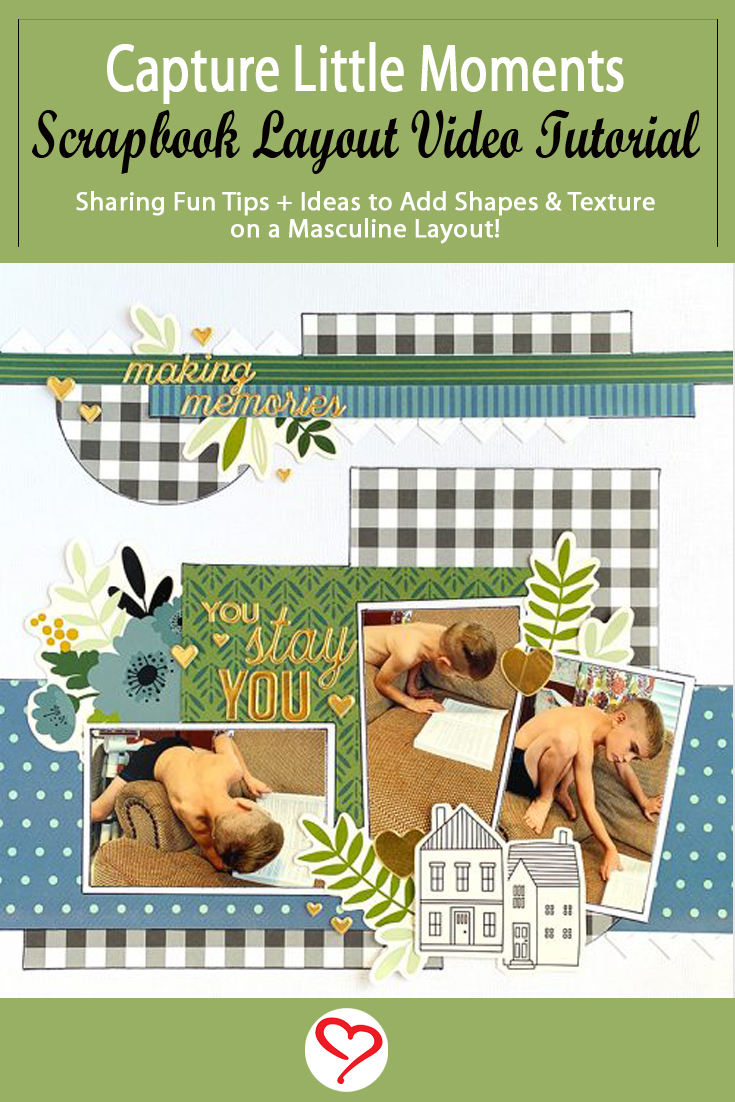
One of my favorite moments to capture on scrapbook layouts are the little day to day moments. Christine joining you today with one of those moments! My youngest son NEVER stops moving! I will often find him in random positions reading. Today’s layout captures several of his positions in just a ten-minute time span. Let’s take a look at what adhesives I used to document this story.
Oftentimes I do fun techniques on my layout with adhesives, but today’s layout is pretty straightforward!
Adhesives Used
To add some interest to my border, I added some Creative Photo Corners. Using white allowed me to add some shape and texture while having a subtle effect.
For all of my flat elements, I used my E-Z Runner Grand. That is such an amazing tool for quickly getting elements onto a layout.
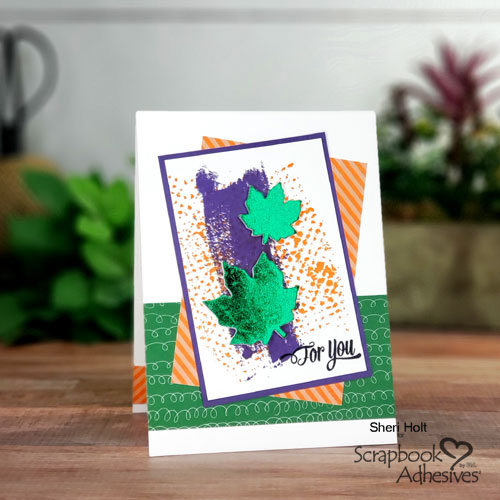
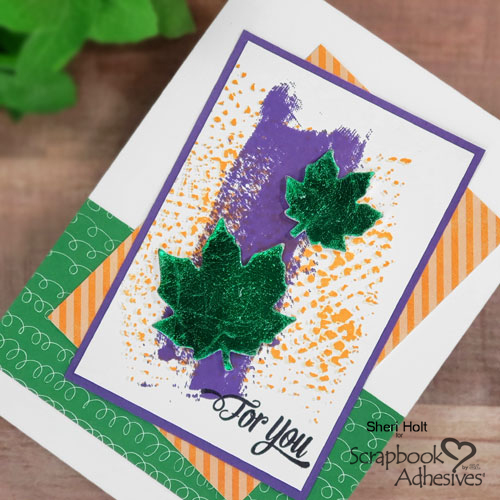
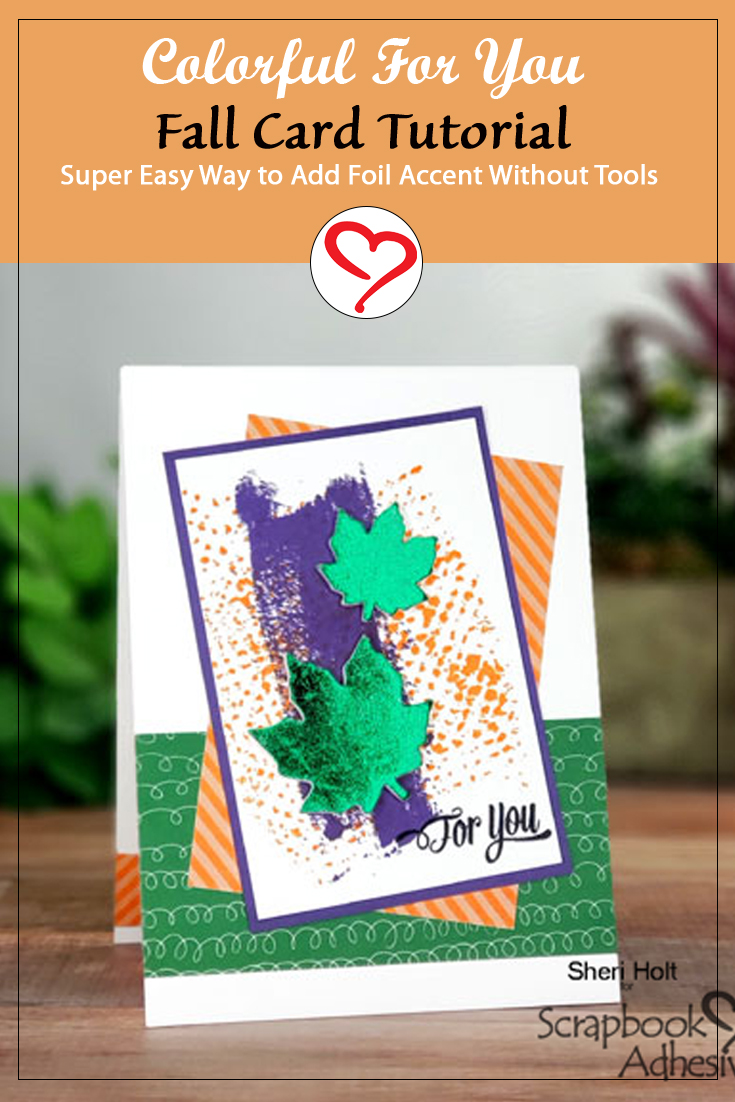
Hello, Sheri here again and I have a very quick & easy Colorful For You Fall Card that uses some scraps of designer papers with 3D Foam Leaves and Metallic Foils! I think you’ll agree with me that it can get any better than this. Let me show you how!
Using Color in Your Fall Card
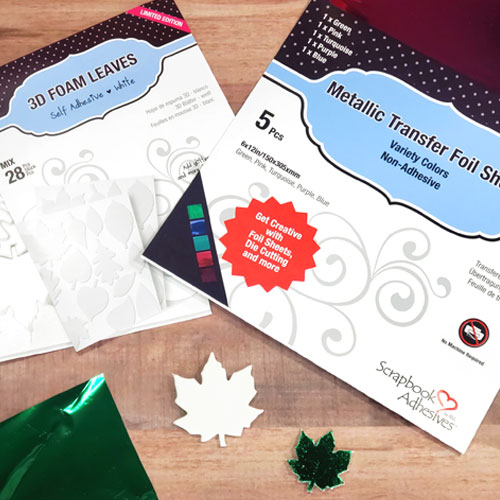
First, select
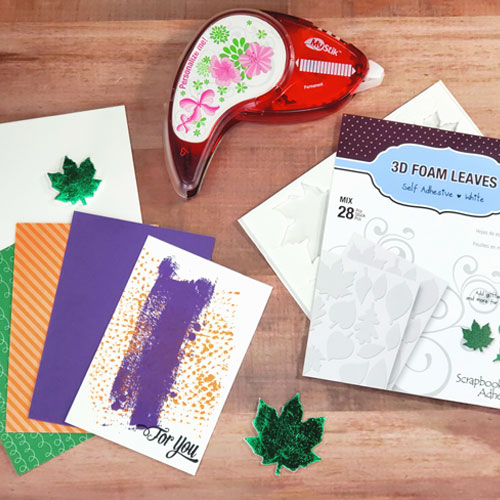
your 3D Foam Leaves and the color of Metallic Transfer Foil Sheets you wish to use. Because the foam
leaves are adhesive on both sides, all you have to do is rub the foil on the
sticky surface and you have foiled dimensional leaves you can then adhere to
your project.
Sometimes I like to use colors that will work on several occasions. The orange, purple and green combo works well for Halloween or autumn but they will also work well for a last-minute birthday card.
The stamped orange background was something I already had lying on my craft table. I added the purple brushstrokes for more color, cut to size, and the all-occasion sentiment
I love how the leaves seem to just pop off the card! There are several sizes and designs of leaves in this 3D Foam Leaves set to choose from. This is a great project to take on the go because there is no die-cutting involved.
I hope you were inspired to try this easy foiling method on your cards! Sheri Holt
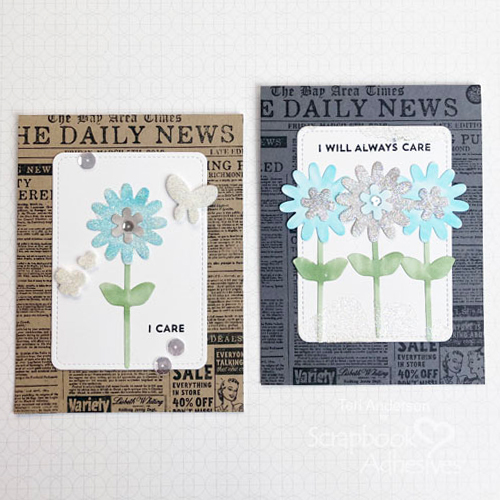
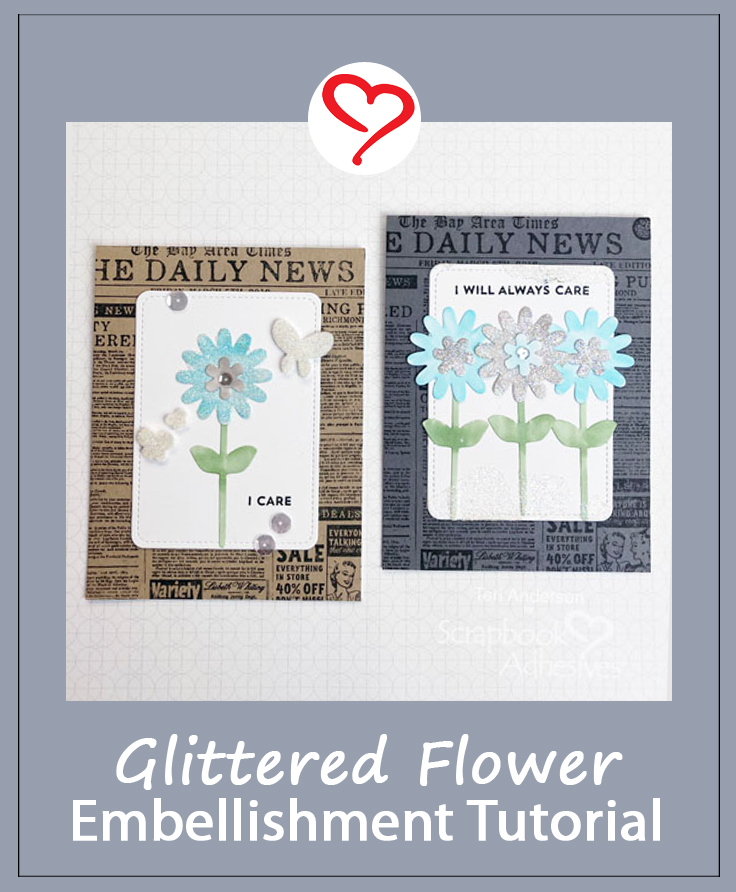
Hi, everyone! Like to add a little to sparkle to your handmade cards? Teri here with a fun way to make glittered flowers for all your cards and scrapbook pages.
These flowers are easy to make and come together rather quickly! Let’s get started.
Make Glittered Flowers
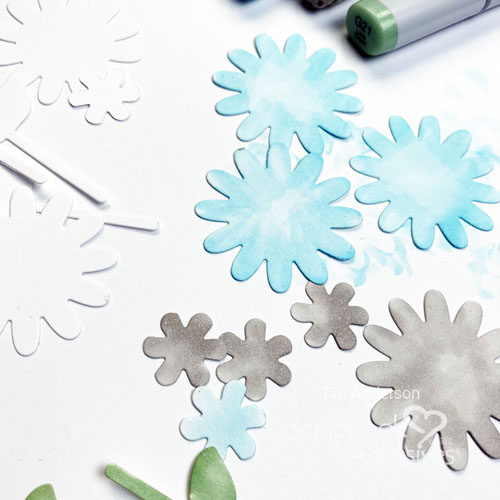
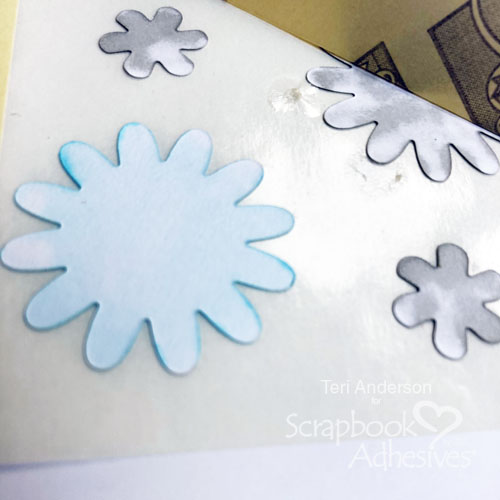
Start by die-cutting several flowers and stems from white cardstock. Use markers to add color to them.
Pick out the flowers you want to add glitter to Apply adhesive with an Adhesive Sheet onto the tops of your flowers. Be sure really burnish the adhesive onto the flowers. If you don’t have a hard touch, use a bone folder or stamping block to do the burnishing.
Designer Note: save a little time on future projects by making several additional glittered flowers at the same time!
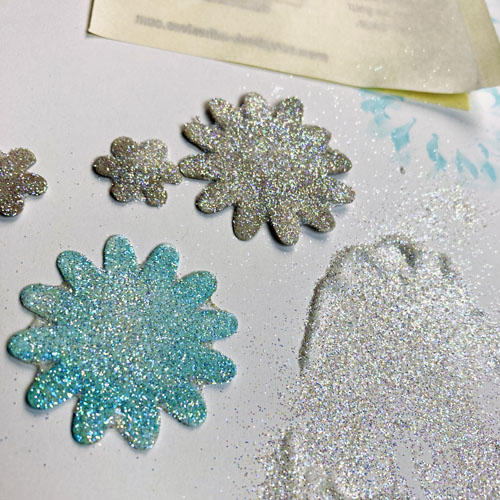
Remove the flowers from the Adhesive Sheet and dip them into glitter. Make sure to use a clear glitter and not a solid colored glitter as the glitter will take on the colors of the flowers. Shake or tap off the excess glitter.
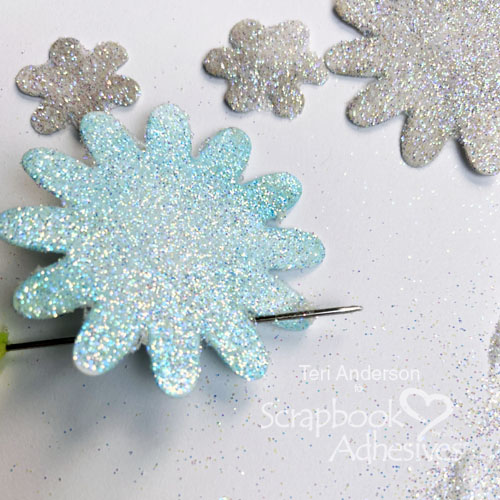
Designer Tip #2: if you have any stray adhesive or glitter sticking out of the edges, use a straight pin to go around the flower petals to remove them.
Embellish Your Card with Glittered Flowers
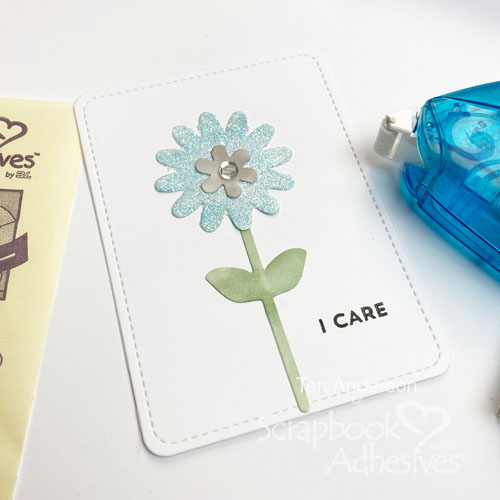
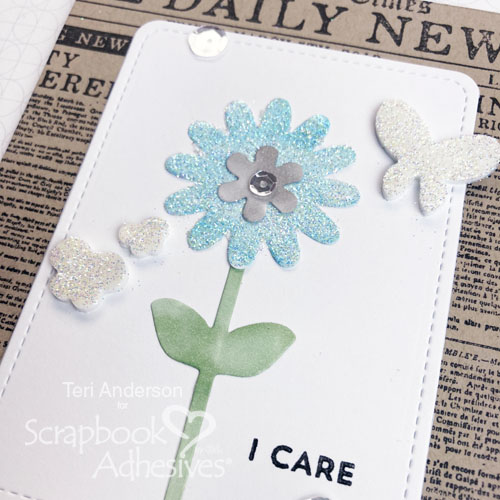
Once you’ve created your glittered flowers, you can use them on a card. For added pop, try sequins or gems to the middle of them with Adhesive Dots Micro.
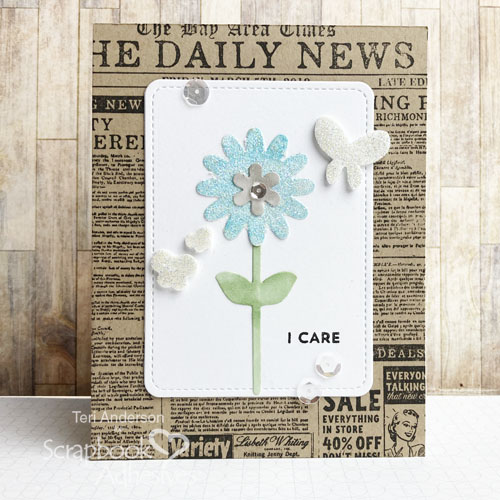
On this card base, I added my glittered flower panel and placed a couple of 3D Foam Butterflies that I applied glitter to.
Then added a few sequins on the flower panel with Adhesive Dots Micro. The end result is a simple, but pretty, card.
Add More Flowers
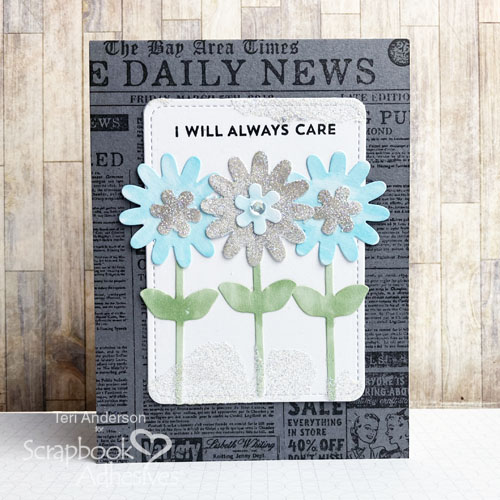
Not a fan of sequins? Here’s a variation from the last card.
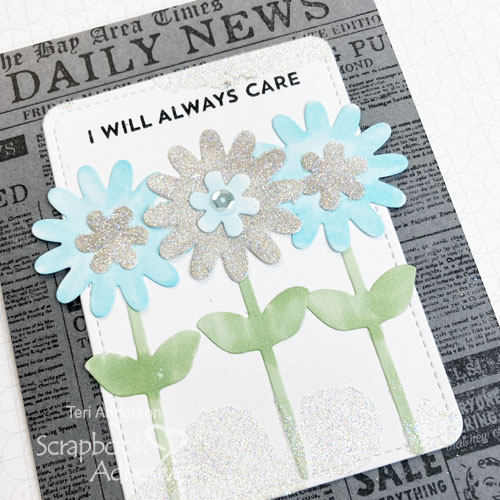
Adding three glittered flowers and notice I added glitter to some of the small flowers and one of the large ones.
The card needed a little more glitz so I applied adhesive with an Adhesive Sheet along the top and bottom of the flower panel. Just simply add glitter over the exposed adhesive, press to secure and tap off the excess.
I hope you are inspired by today’s tutorial! I’d love to see some flowers of your own! Remember, no need to use the same exact supplies I had. Change things up by using different flower dies and a different color scheme!
Other White Cardstock: Neenah Paper; Kraft and Gray Cardstock: My Favorite Things; Stamps: My Favorite Things (From the Heart); Hero Arts (Newspaper); Dies: Lawn Fawn (Stitched Journaling Card), Simon Says Stamp! (Flower Friend); Black Ink Pad: Ranger Ink; Glitter: A Muse Studio; Markers: Copic; Sequins: Pretty Pink Posh
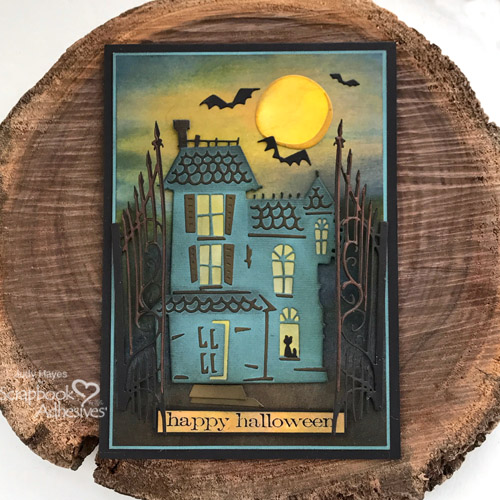
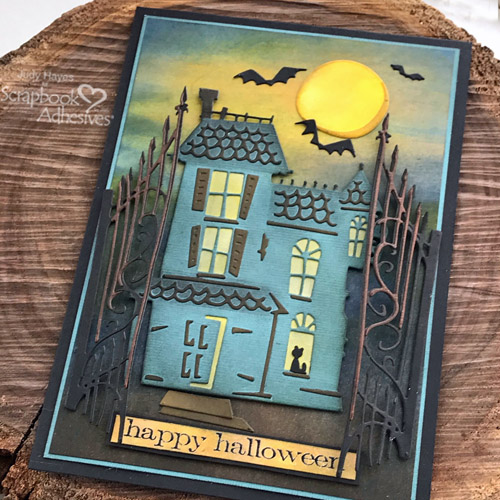
Hello friends! Judy here today to share a Haunted House Halloween Card. Once I got rolling on this card, it was fun to put together. Look at all those little pieces though – gasp! BUT with Adhesive Sheets, it was easy to put them all in place.
Halloween Haunted House Steps
I made this card by die cutting and assembling individual parts, the haunted house, gates, moon, bats and greeting. Once I had parts ready, I assembled the card.
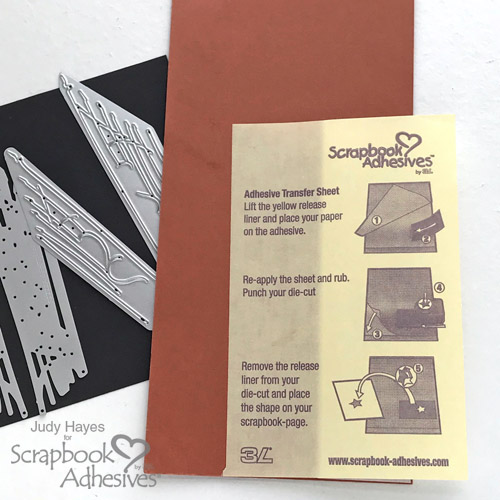
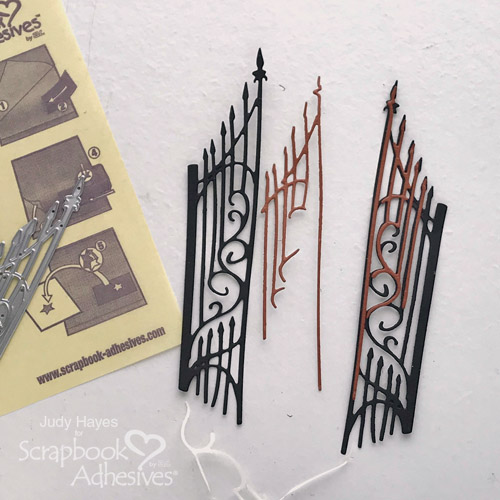
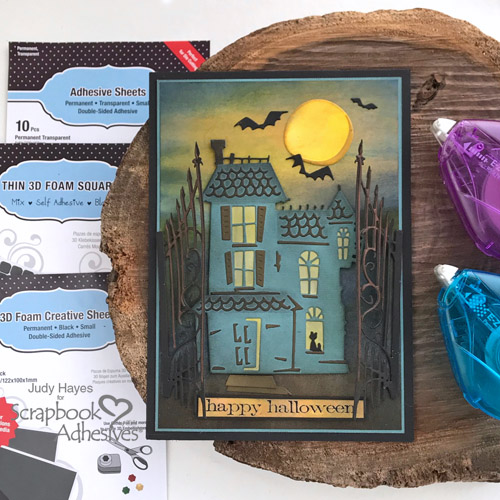
Use a die-cutting machine and die to cut gate from black card stock. Peel off adhesive backing from detail pieces and fasten to the gate. Apply the foam applicator tool with Distress Black Soot ink and darken the rust pieces.
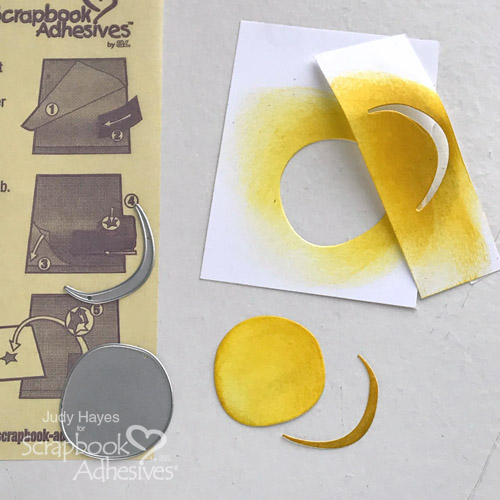
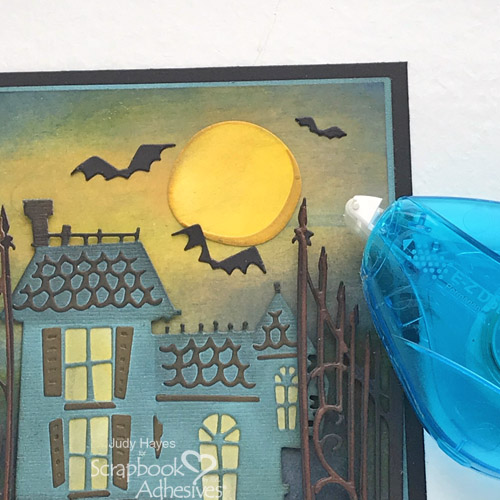
With the foam applicator to apply Distress Squeezed Lemonade and Mustard Seed inks to piece of white card stock. Die-cut the moon shape from it.
Apply Adhesive Sheets 4×6 inch to white card stock scrap. Use foam applicator to rub with Distress Mustard Seed ink and light touch of Hickory Smoke. Use die cutting machine and die to cut shadow sliver for moon. Peel adhesive backing and fasten to moon.
Use die cutting machine and die to cut bats from black card stock.
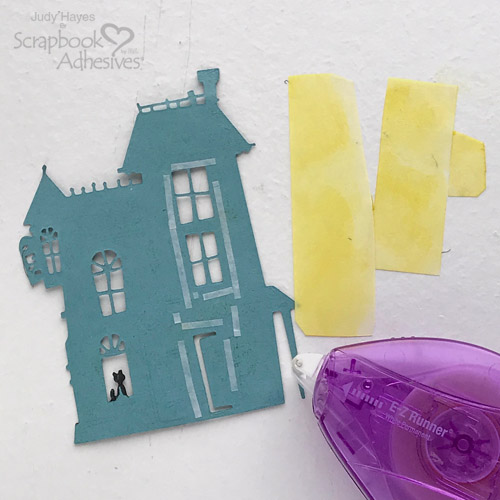
Cut haunted house from dusty blue card stock using die cutting machine and die.
Die-Cutting Details
Apply Adhesive Sheets 4×6 inch to back of small scrap of black card stock. Position scrap under cat on house die. Use die cutting machine to cut out. Cut cat from piece. Remove adhesive backing and fasten cat over blue cat on house.
Apply Adhesive Sheets 4×6 inch to back of olive card stock. Use die cutting machine and die to cut detail pieces and steps for haunted house. Peel adhesive backing from pieces and fasten in place on house.
Cut pieces of vellum to fit behind windows and door. Rub Mustard Seed ink over each piece. Use E-Z Runner® Micro Refillable Dispenser to put adhesive around windows and door on back of house. Fasten vellum with inked side towards front of house. (Cat looks black because I first tried to color it with marker)
Use foam applicator tool to rub Distress Black Soot ink over house adding darker shading to edges. Rub more ink on roof areas to shade them a bit darker than house. Use black marker to color chimney, rail at top of house, and pointed pieces on roof.
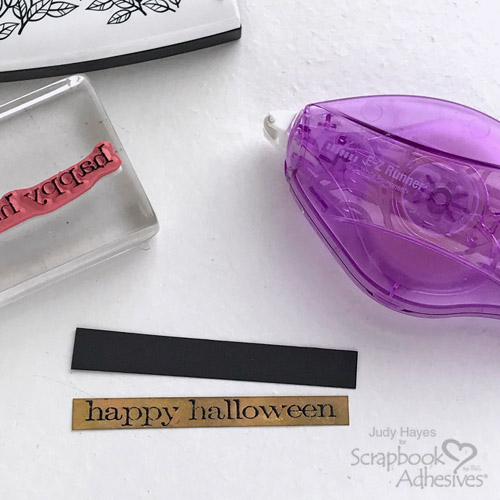
Stamp greeting with Versafine Black Onyx ink on white card stock. Heat emboss with clear embossing powder using heat tool. Trim to size. Use foam applicator tool to apply Distress inks Squeezed Lemonade, Mustard Seed, and light touch of Hickory Smoke over greeting. Cut mat of black card stock. Fasten greeting to mat using E-Z Runner® Micro Refillable Dispenser.
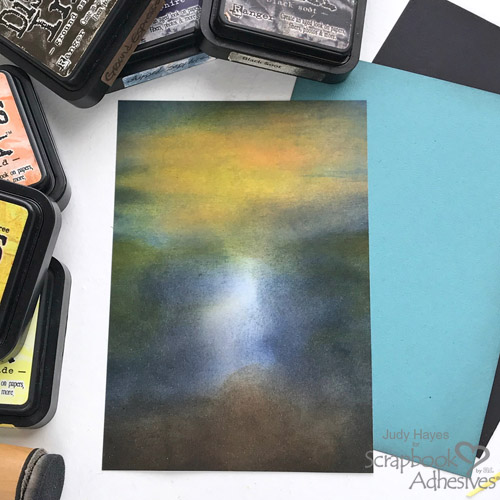
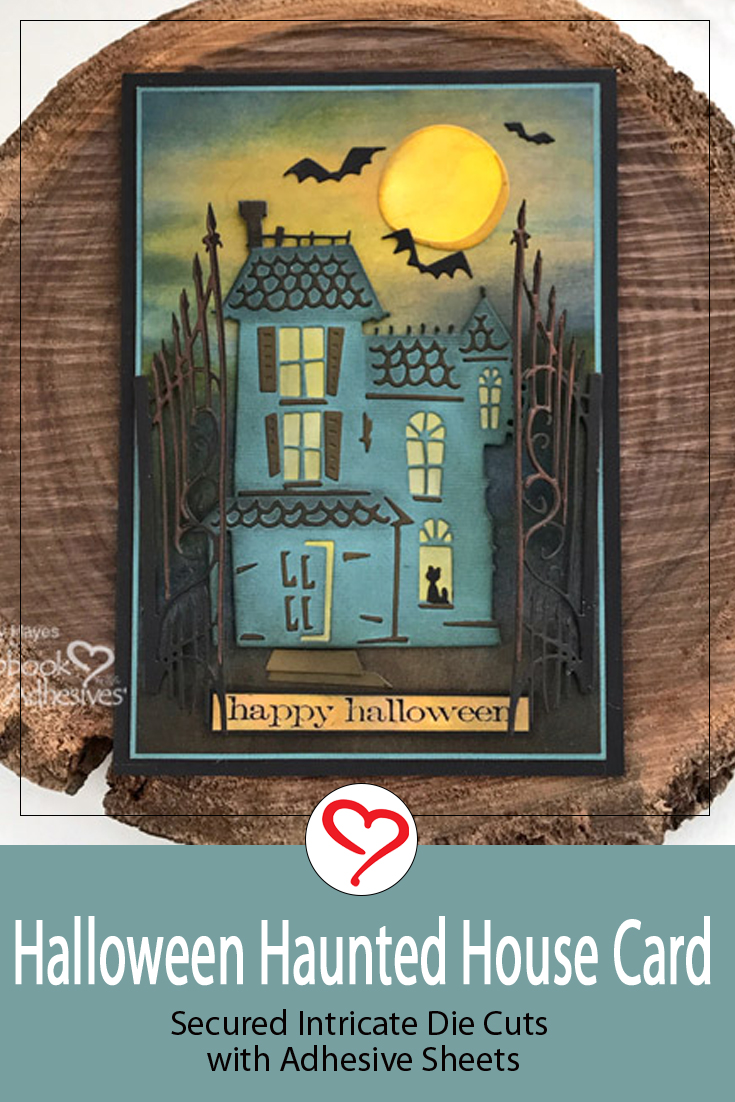
Inking the Background
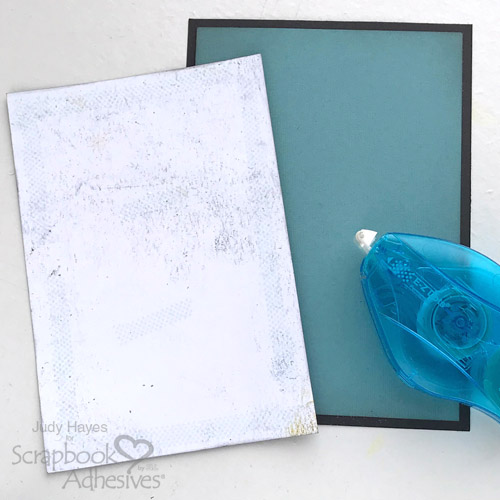
Cut 4.5 x 6.5 inch piece of white card stock. Use foam applicator tool with Distress inks to create sky background. Use Mustard Seed and Dried Marigold in moon area. Add Weathered Wood around edges of sky and work down about half way. As needed, place house against sky to determine areas to color. Next use Chipped Sapphire to add areas of dark in sky and continue down towards bottom of piece. At bottom apply Ground Espresso and Black Soot. Area that will be under house does not need to be colored. Continue until desired results are achieved.
Cut blue card stock 4.625 x 6.625 inches for mat. Lightly rub edges with Black Soot ink using foam applicator.
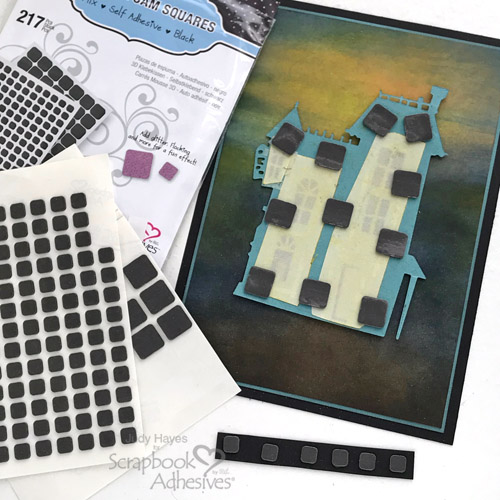
Peel liners from foam squares and fasten haunted house on card. Peel adhesive liner from steps pieces and fasten below door. Rub Black Soot ink over them.
Remove liners from foam squares on greeting piece. Center and fasten below haunted house.
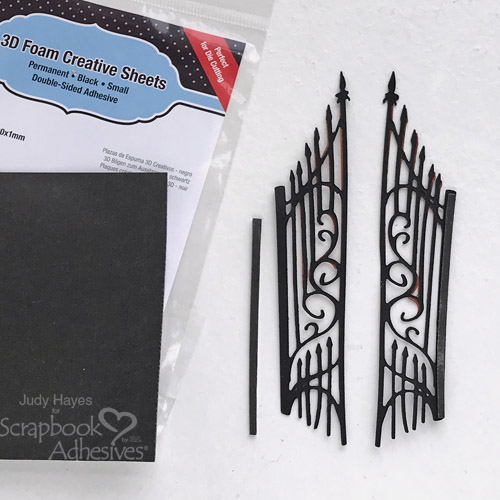
Cut narrow strips from 3D Foam Creative Sheets Small, Black to fit sides of gate. Peel liner and fasten foam on back of outer post of each gate. Peel liner and fasten gates on each side of haunted house on card.
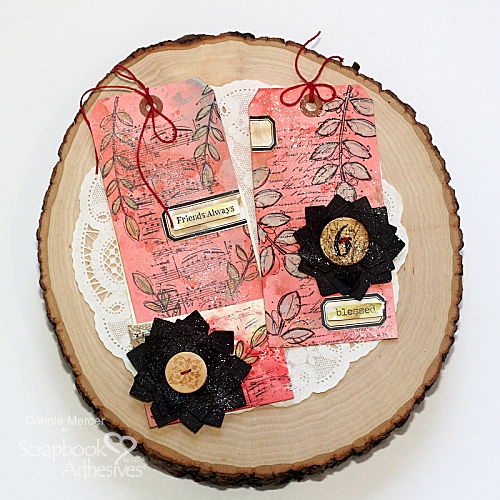
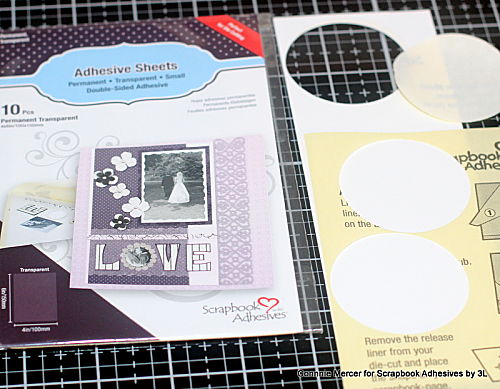
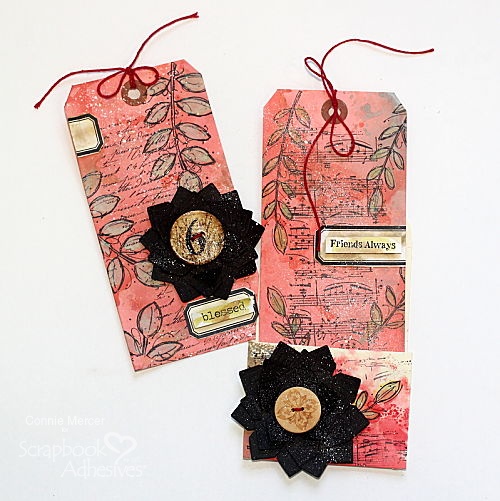
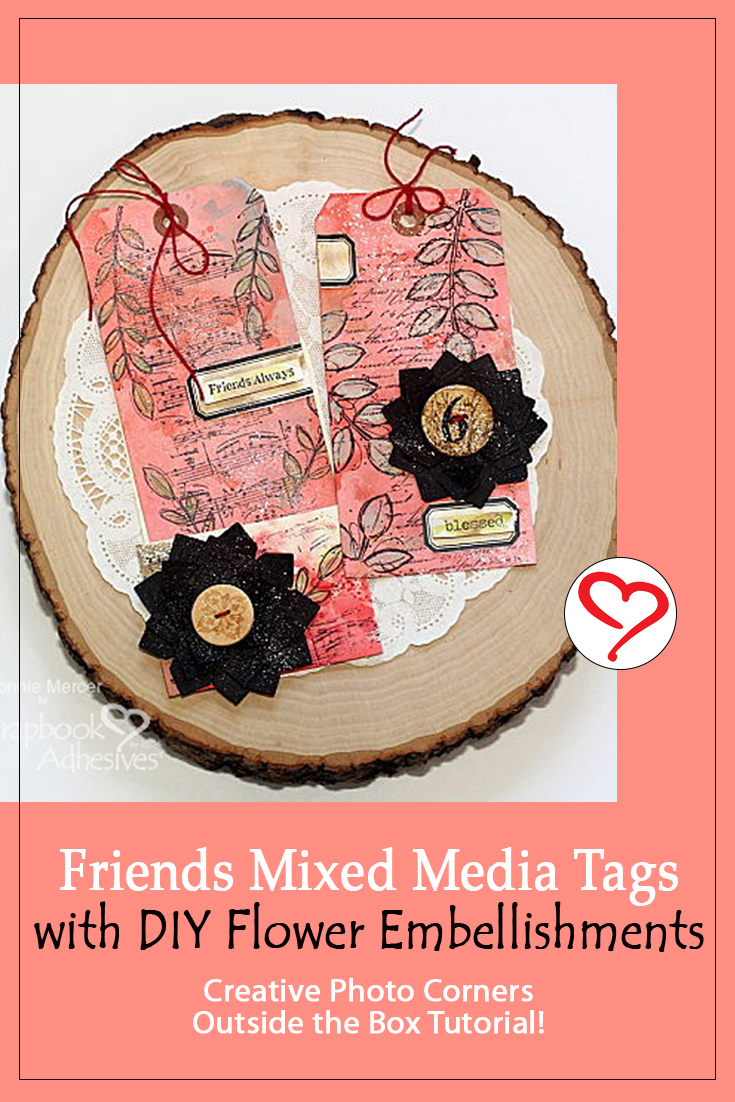
Hi, Connie here using a couple of mixed media tags with a really cool and fun technique. How about making photo corner flower embellishments out of the Creative Photo Corners Black?! The really cool thing is Scrapbook Adhesives carry many colors of Creative Photo Corners which means many different flowers can be made! Take a minute and check them out!!
Photo Corner Flower Embellishments
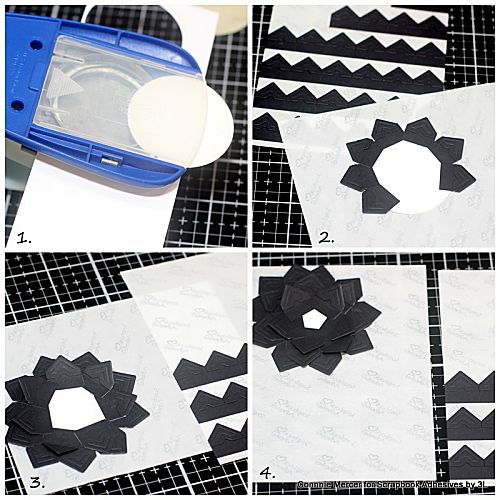
The first thing I did was prepare a base for the Photo Corner Flower to sit on. Place a piece of white cardstock on a sheet of Adhesive Sheet 4×6-inch and punch a large circle. Remove the back liner and you’re ready to make some flowers!
Place the large cardstock circle on a flat surface with the sticky side up.
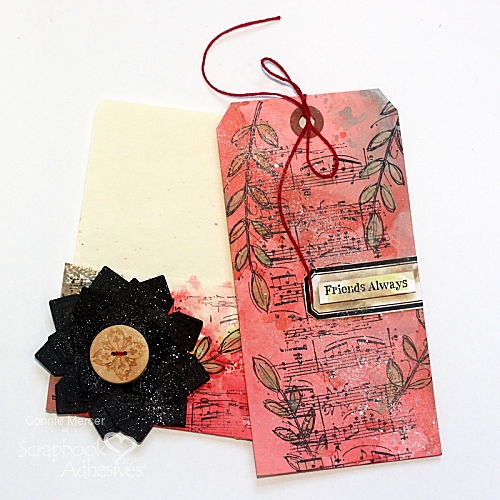
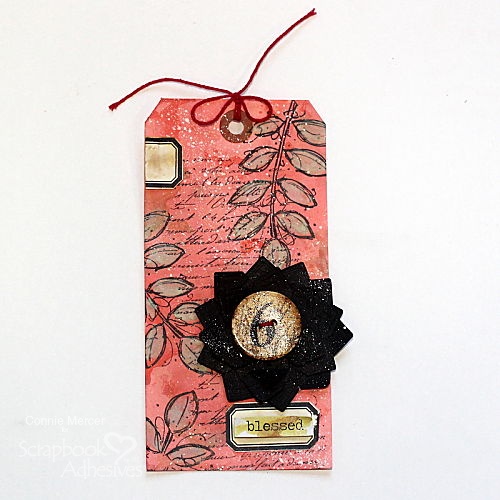
The shipping tags were inked and stamp to create a mixed media backdrop for these flowers. Thread red twine and tie into a simple bow. Note that a library envelope was inked and stamped in the same manner to hold one of the tags.