You are in our US store • Switch to Europe store

Be YOU Scrapbook Layout with Inky Corners

Hello scrappy friends! Today I have a fun way to bring color into your scrapbook layout. Curious? A little hint: inky corners! Using Mounting Corners Maxi View 3in and alcohol inks is all you need to jazz up your page. Here are all of the colorful details.
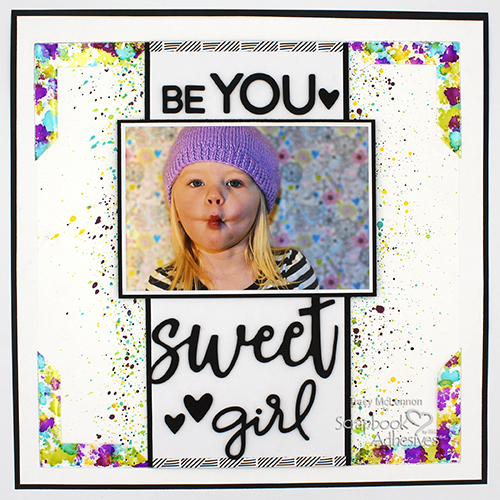
Be YOU Scrapbook Layout with Inky Corners by Tracy McLennon for Scrapbook Adhesives by 3L

Getting Inky with Inky Corners

Start the craftiness by taking one sheet of the Mounting Corners Maxi View 3in and your chosen colours of alcohol inks.
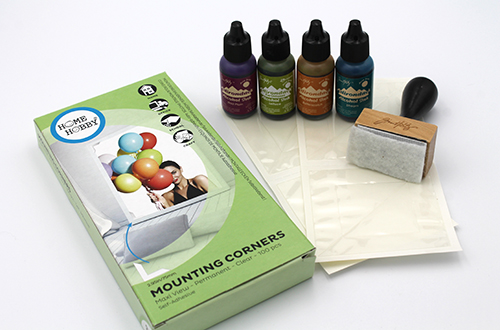
Be YOU Scrapbook Layout with Inky Corners by Tracy McLennon for Scrapbook Adhesives by 3L

Cover the Mounting Corners Maxi View 3in using 2 combinations of alcohol inks. I chose to add cool tones to one, and warm tones to the others. Cover all of the Mounting Corners Maxi View 3in.
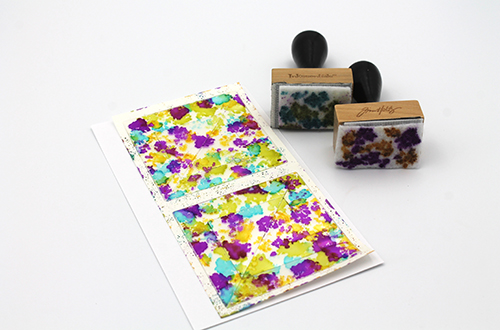
Be YOU Scrapbook Layout with Inky Corners by Tracy McLennon for Scrapbook Adhesives by 3L

I chose misters that coordinated with the alcohol inks that I used for the corners. Cut the white cardstock down to 10.5×10.5, and I put a piece of chipboard down as a mask, just to reduce drying time. Splatter the misters up and down the edges of the mask. Let dry completely.
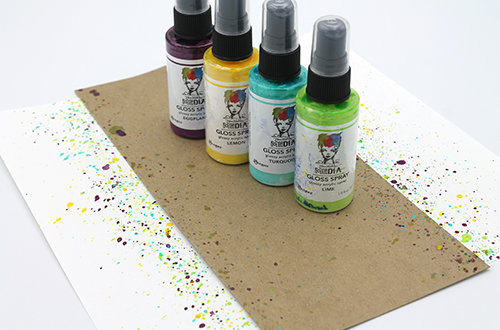
Be YOU Scrapbook Layout with Inky Corners by Tracy McLennon for Scrapbook Adhesives by 3L

Scrapbook Layout Design

Black cardstock is the full background. Cut another piece of white cardstock that is 11.5×11.5 and adhere to the black cardstock using the E-Z Runner® Grand Refillable Dispenser. Add the splattered white cardstock to the background using the alcohol inked Mounting Corners Maxi View 3in.

Cut a white cardstock strip that is 5×10.5, and a piece of black cardstock that is 5.25×10.5. Next adhere them together using the E-Z Runner® Grand Refillable Dispenser. Adhere them to the middle of the layout using Crafty Foam Tape White.
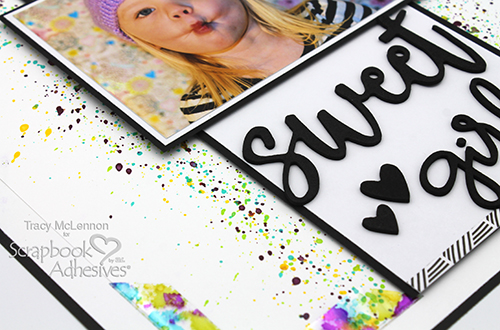
Be YOU Scrapbook Layout with Inky Corners by Tracy McLennon for Scrapbook Adhesives by 3L

Add a narrow little strip of patterned paper to the top and bottom of the border using E-Z Runner® Micro Refillable Dispenser. Mat the 4×6 photo in white and then black cardstock. Then add to the layout using Crafty Foam Tape White.
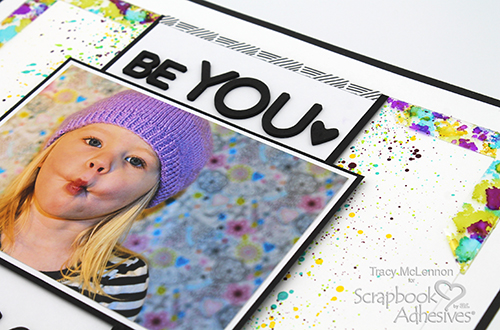
Be YOU Scrapbook Layout with Inky Corners by Tracy McLennon for Scrapbook Adhesives by 3L

Add foam word stickers to the border to create the long title.
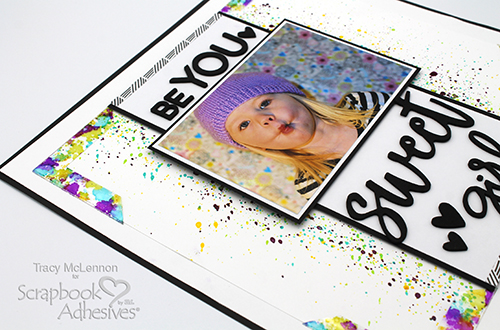
Be YOU Scrapbook Layout with Inky Corners by Tracy McLennon for Scrapbook Adhesives by 3L

I hope this inspires you to dig out those alcohol inks and get crafty.

Thanks so much for stopping by!
Tracy

Creative Time: 1 hour
Skill Level: Intermediate

Materials needed:
Scrapbook Adhesives by 3L®
Crafty Foam Tape White
E-Z Runner® Micro Refillable Dispenser
E-Z Runner® Grand Refillable Dispenser

HomeHobby™ by 3L
Mounting Corners Maxi View 3in

Other:
Cardstock (Black, White), Adirondack Alcohol Ink (Lettuce, Wild Plum, Butterscotch, Stream), Media Gloss Spray (Eggplant, Lemon, Lime, Turquoise), Patterned Paper, Foam Word Stickers

Save it to Pinterest!
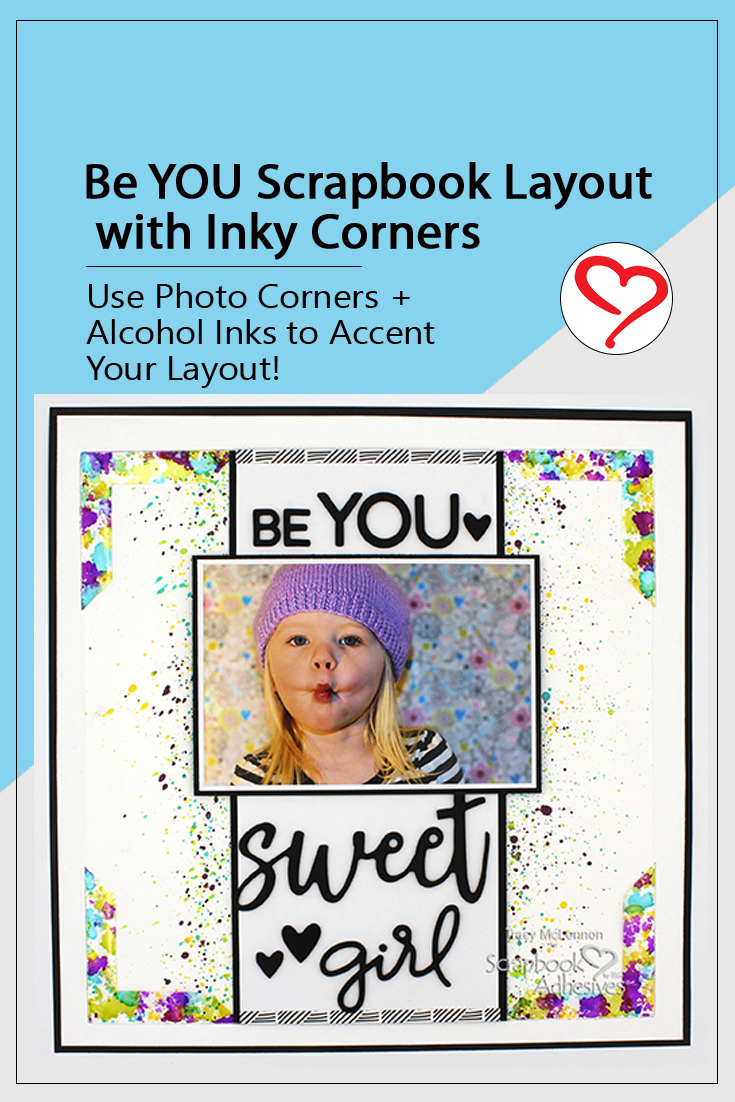
Be YOU Scrapbook Layout with Inky Corners by Tracy McLennon for Scrapbook Adhesives by 3L Pinterest

Visit our Website and Blog!
Sign up for our Newsletter so you never miss a contest or giveaway!

instagram purple icon facebook icon purple pinterest purple icon twitter purple icon YouTube icon blog subscription purple icon

Best Dad Show Interactive Card

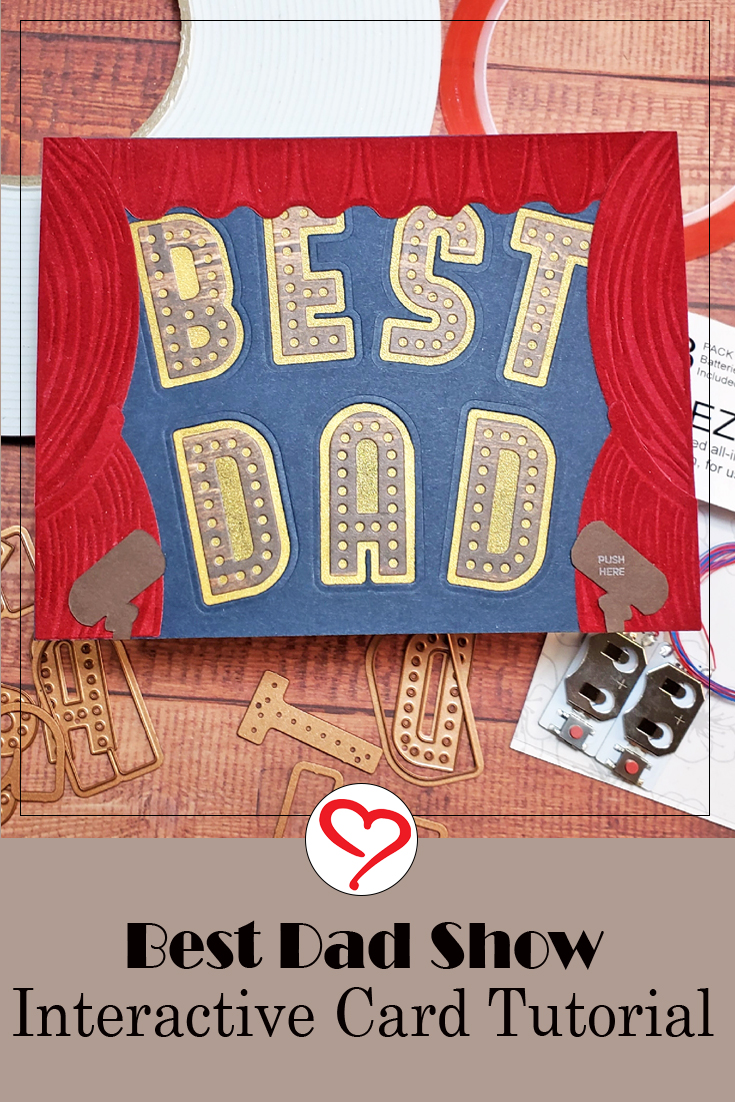
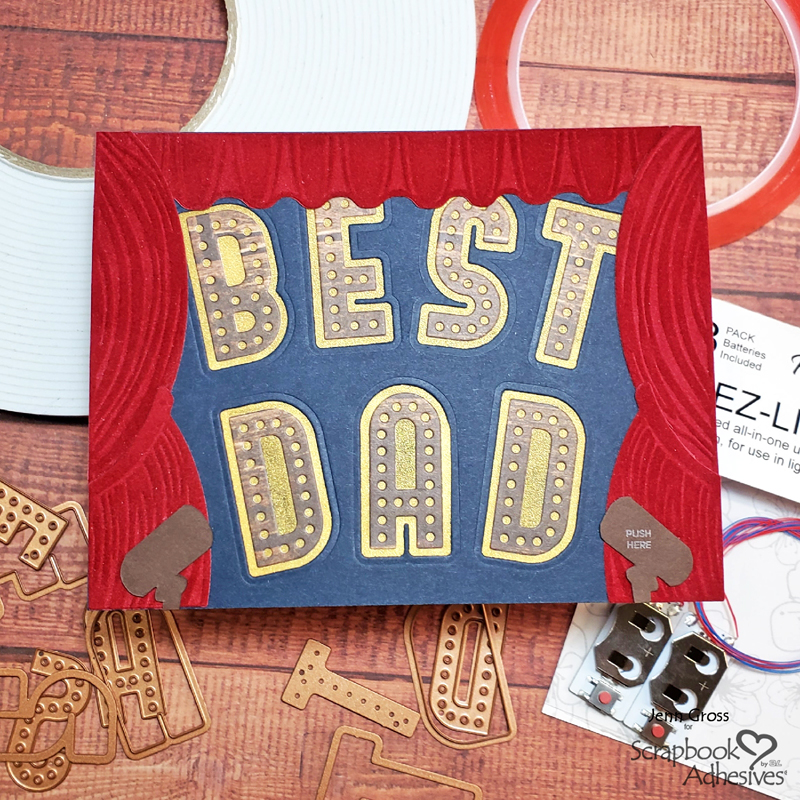
Hello, my crafty friend!  With Father’s day at the end of the month, I thought I would get a head start on a card for my dad.  My Best Dad Show interactive card was inspired by the Deco Bold Alpha Dies that looked like marquee words and I knew I wanted to light them up!

Best Dad Show Interactive Card |by Jenn Gross for Scrapbook Adhesives by 3L

Best Dad Card Panel

Best Dad Show Interactive Card |by Jenn Gross for Scrapbook Adhesives by 3L

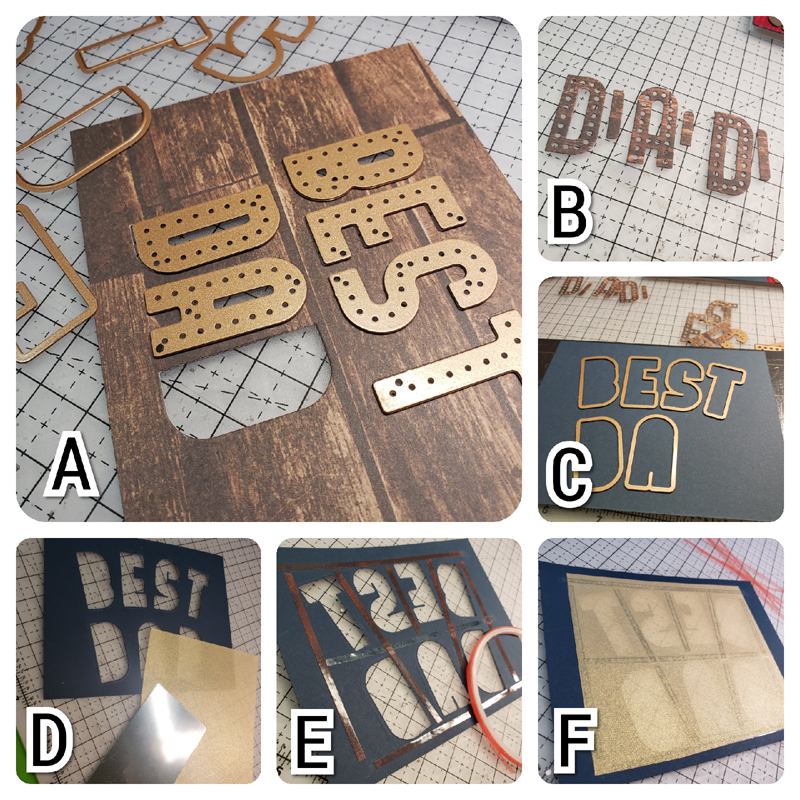
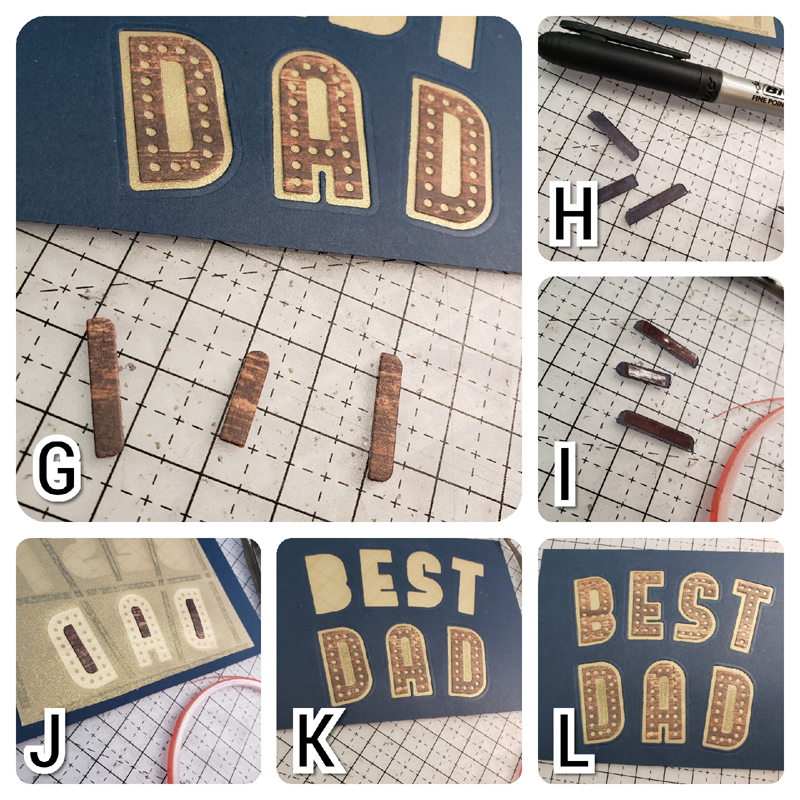
A and B – Die cut the letters to spell “Best Dad” from a piece of woodgrain printed cardstock.  Save the middle pieces from the Ds and A to use later.

C and D – Use the outline alpha dies to position the words on a piece of 4 1/4 x 5 1/2-inch navy cardstock and die-cut to make the letter windows. Cut a piece of 4 x 4 1/2-inch gold vellum to cover the entire backside of the letter windows. Next, cut a piece of 1 3/4 x 3 1/2-inch silver mirror cardstock.

E and F – Frame out the backside of the windows with Extreme Double-Sided Tape 1/8″ and attach the piece of gold vellum.

Best Dad Show Interactive Card |by Jenn Gross for Scrapbook Adhesives by 3L

G – Turn the navy card panel to the front and start adhering the letters DAD to the center of the gold vellum-covered windows.

H, I, and J – Take the middle pieces for the Ds and A, and color them with a black sharpie marker. Adhere Extreme Double-sided Tape 1/8″ to the back.  Turn over the navy card panel and place the middle pieces of DAD as shown

K and L – Turn the navy card panel over and attach the remaining letters.

Stage Lights

Best Dad Show Interactive Card |by Jenn Gross for Scrapbook Adhesives by 3L

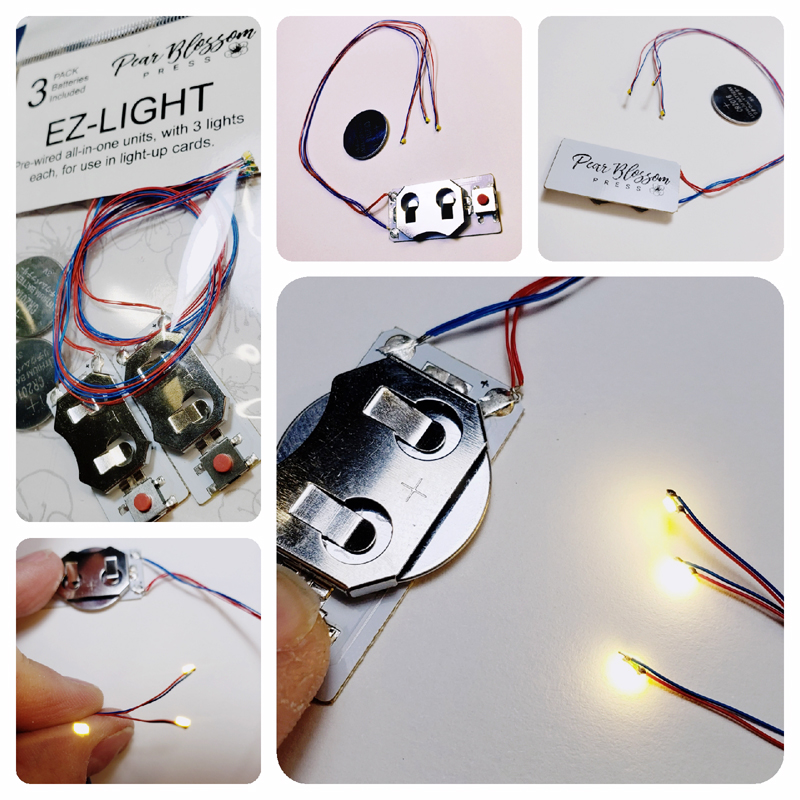
Next, we are going to attach a set of EZ-Lights by Pear Blossom Press.  It has a battery pack with three tiny lights in a set. Insert a battery and press the red button to light up. Perfect for an interactive card creation like my Best Dad Show card!

Best Dad Show Interactive Card |by Jenn Gross for Scrapbook Adhesives by 3L

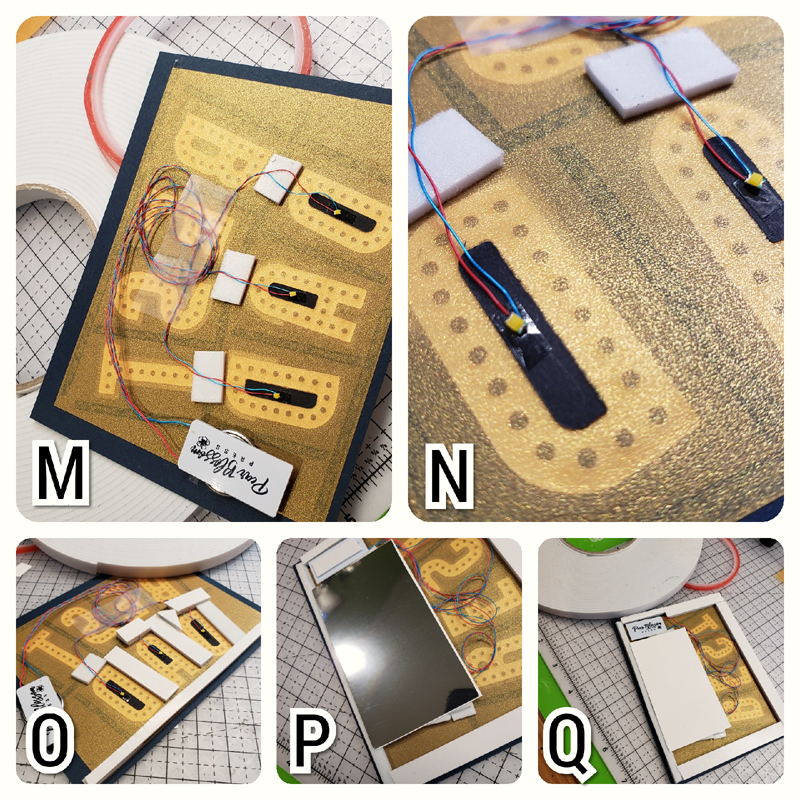
M – DAD will be lighting up so flip the card panel to the back. Cut three small pieces of Crafty Foam Tape White in 54ft and place each piece over each letter of DAD. Remove the liners. 

N – Position each light face up in the middle of each letter (where the black pieces are) so they shine away from the letters. Arrange the light wires to adhere over the foam pieces to secure. Wrap the wires flat over the word BEST, secure with tape, and place the battery pack on the left side of the word DAD.

O – Double up on the Crafty Foam Tape White in 54ft as the battery pack is a little thick (about double the foam tape). Do this by cutting the foam tape the length of the card panel bottom and then cut in half the long side to create two thinner strips of foam tape. Stack the two pieces together and adhere to the card panel bottom. Next, frame out each letter of DAD with Crafty Foam Tape White in 54ft in double thickness (using the previous steps). 

P and Q – Finish framing the sides of the card with a double thickness of Crafty Foam Tape White in 54ft. Remove the liner around the word DAD, adhere the silver mirror cardstock (shiny side down) to seal the letters with the lights inside.  It will add additional reflection creating a brighter and more diffused light for the letters

Curtain Time

Best Dad Show Interactive Card |by Jenn Gross for Scrapbook Adhesives by 3L

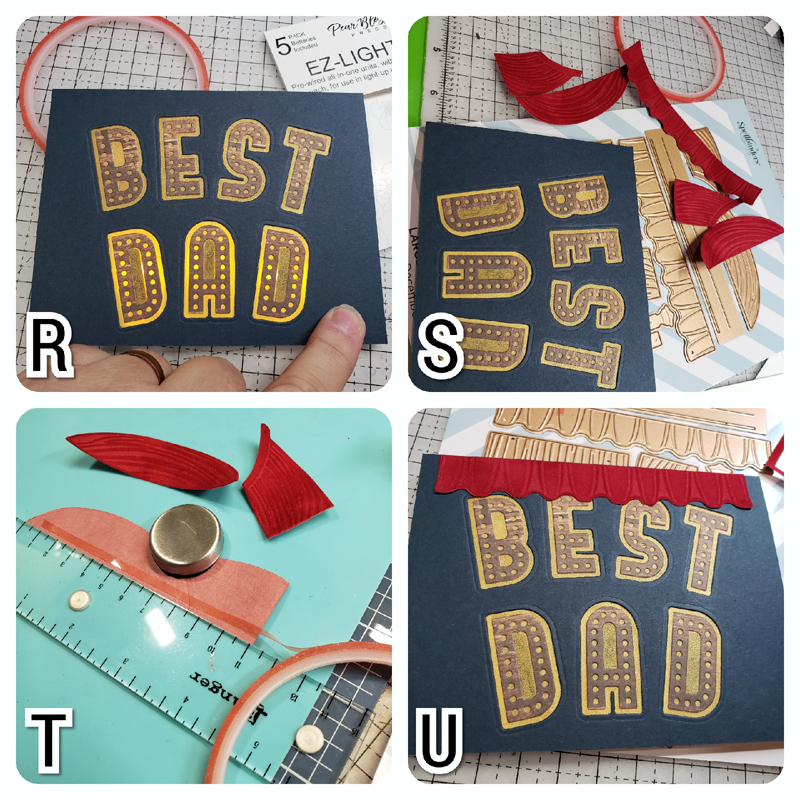
R – Turn over the card panel and test the light switch.  Remove the remaining liner around the back of the card panel and add Extreme Double-sided Tape 1/8″ to the silver mirror cardstock. Attach the card panel to an A2-sized card base.

S – Die-cut the curtain die to cut the top and two side curtains piece from a red flocked specialty paper.

T – Assemble and adhere the side curtain pieces with Extreme Double-sided Tape 1/8″ and set them aside.

U –  Add Extreme Double-sided Tape 1/8″ to the back of the top curtain and attach it to the middle top of the card.

Final Details

Best Dad Show Interactive Card |by Jenn Gross for Scrapbook Adhesives by 3L

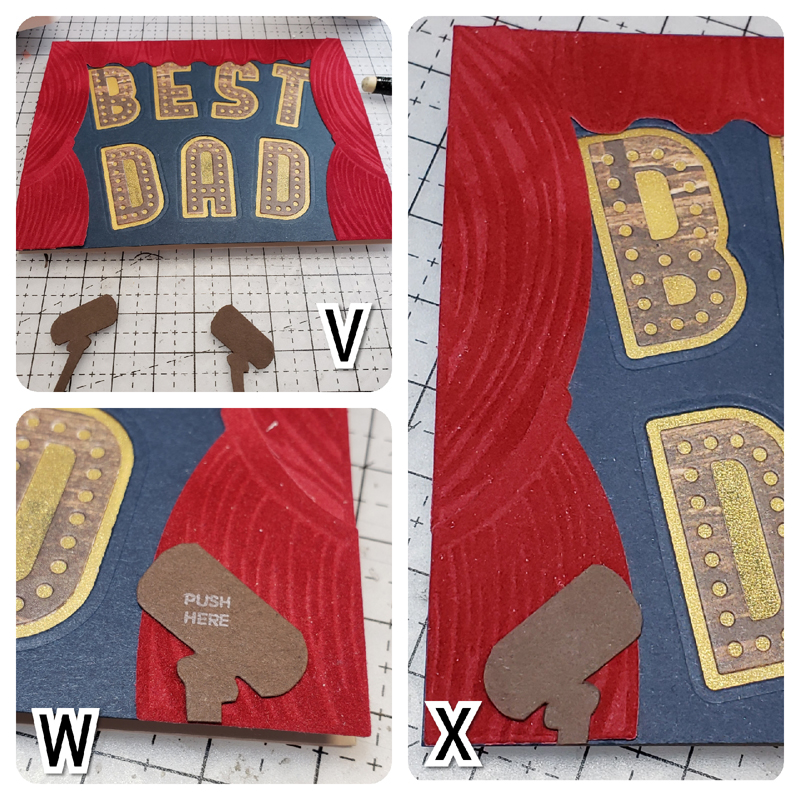
V – Adhere the side curtains. Hand draw two theater can lights and cut from brown cardstock.

W – Stamp/write Push Here on the right can light and position it over the battery pack button. Adhere in place and trim off the excess light post.

X – Add the left can light and cut off the excess light post.

Best Dad Show Interactive Card |by Jenn Gross for Scrapbook Adhesives by 3L

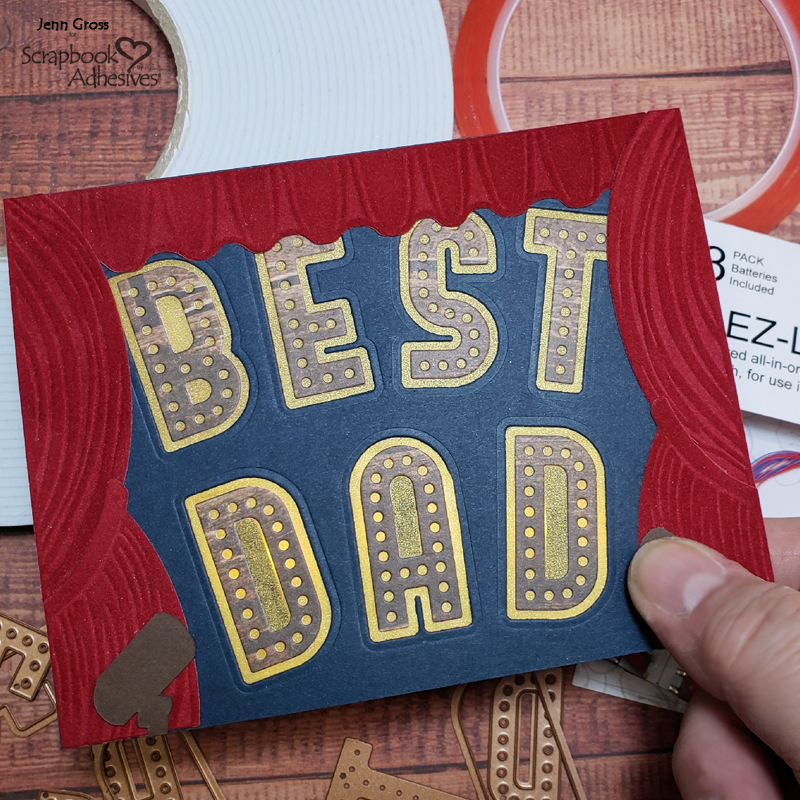
Now you have a competed light up Best Dad card!

Thank you for stopping by todays’ blog.  I hope you enjoyed learning how to create my Best Dad Show Interactive Card. Let me know in the comments how you would use these lights!

Be Creative ~ Stay Inspired
Jenn Gross

Creative Time: 90 minutes
Skill Level: Advanced

Materials Needed:
Scrapbook Adhesives by 3L®

Crafty Foam Tape White in 54ft

HomeHobby™ by 3L
Extreme Double-sided Tape 1/8″

Other:
Craft Dies: Spellbinders Paper Arts (Deco Bold Alpha, and Look Behind the Curtain); Lights: Pear Blossom Press (EZ Lights Pre-wired All in One Lights); Woodgrain Printed Cardstock, Navy Cardstock, Yellow Gold Vellum, Silver Mirror Cardstock, and Red Flocked Specialty Paper 

Save it to Pinterest!

Best Dad Show Interactive Card |by Jenn Gross for Scrapbook Adhesives by 3L Pinterest

Visit our Website and Blog!
Sign up for our Newsletter so you never miss a contest or giveaway!

instagram purple icon facebook icon purple pinterest purple icon twitter purple icon YouTube icon blog subscription purple icon

Sunny Cards for Summer

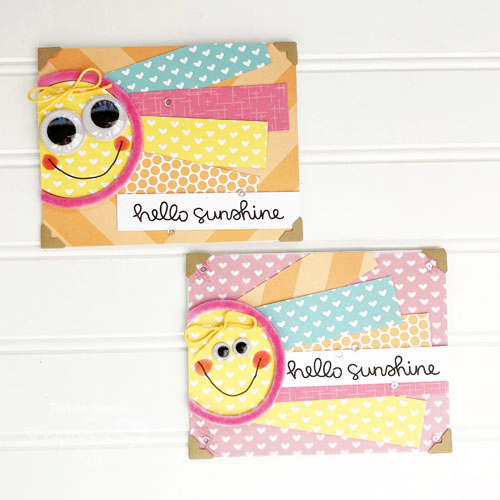
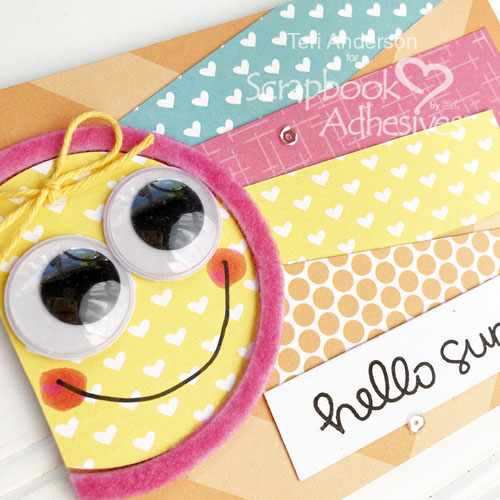
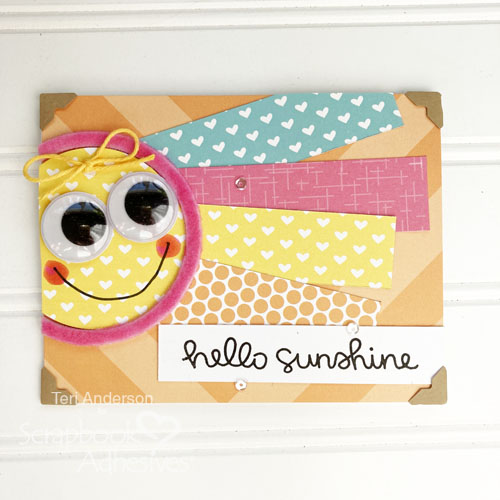
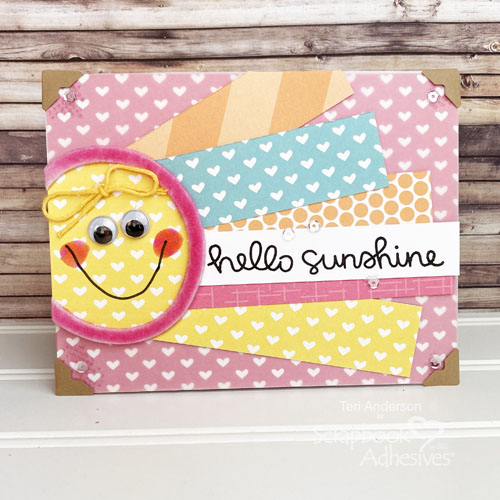
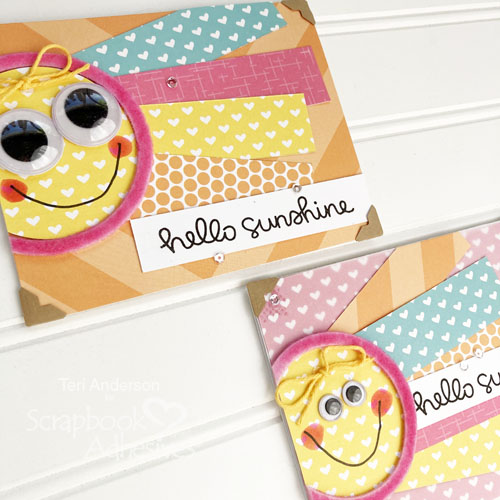
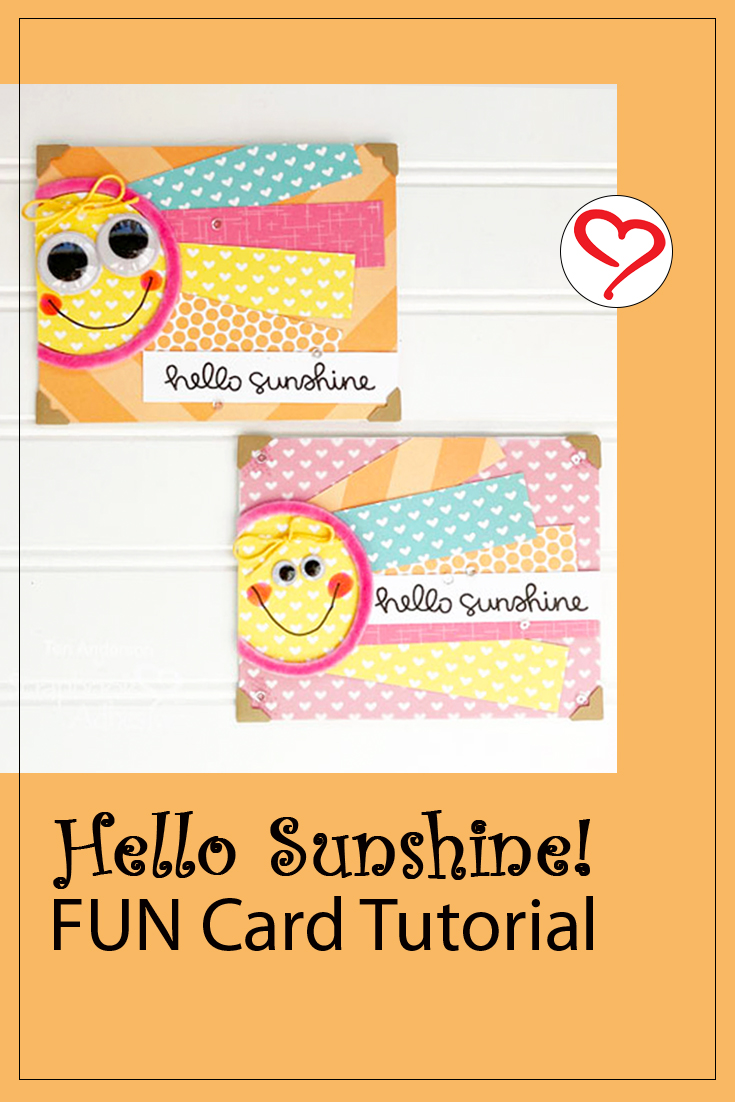
Hi, everyone! Things are heating up outside so why not make a few cards inspired by none other than the Sun! Teri here with a tutorial on how to make some Sunny Cards to send to all your favorite folks! Let’s get started 🙂

Sunny Cards for Summer by Teri Anderson for Scrapbook Adhesives by 3L

Sunny Cards with Sun and Ray Designs

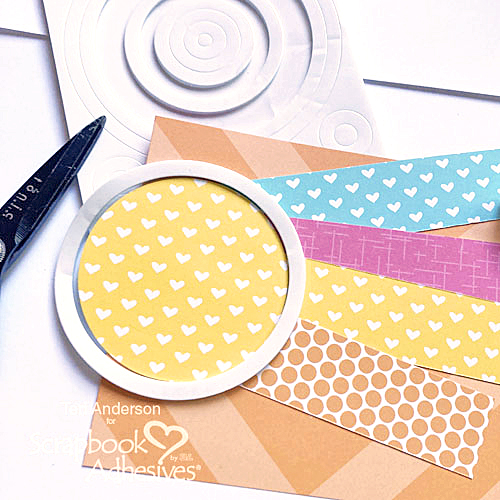
Start by cutting panel of patterned paper to fit on the front of a card. You’ll also want to cut several strips of patterned paper, which you’ll adhere to the paper panel.

Sunny Cards for Summer by Teri Anderson for Scrapbook Adhesives by 3L

Cut a circle from yellow patterned paper and mount it to the paper panel. Trim any excess paper hanging off the edge of your paper panel.

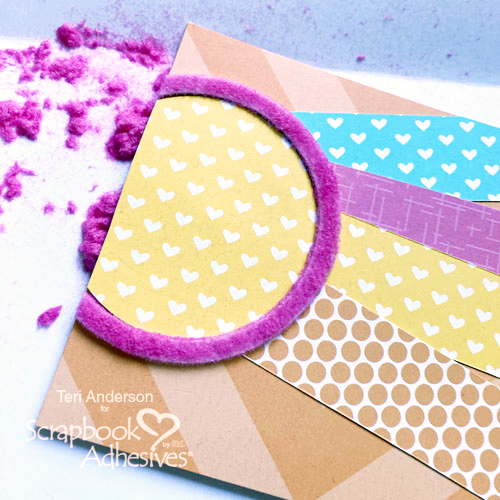
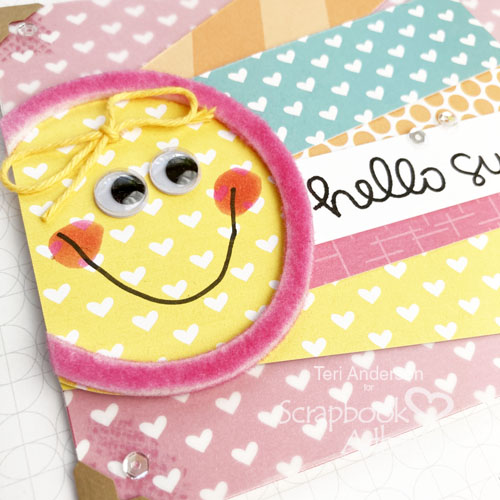
Place a 3D Foam Circle Frame onto the panel, over the circle. Use your scissors to cut away the excess. Apply flock to the circle. Use your fingers to really mash the flock onto the circle so that no sticky parts are left exposed.

Sunny Cards for Summer by Teri Anderson for Scrapbook Adhesives by 3L

Sunny Card Details

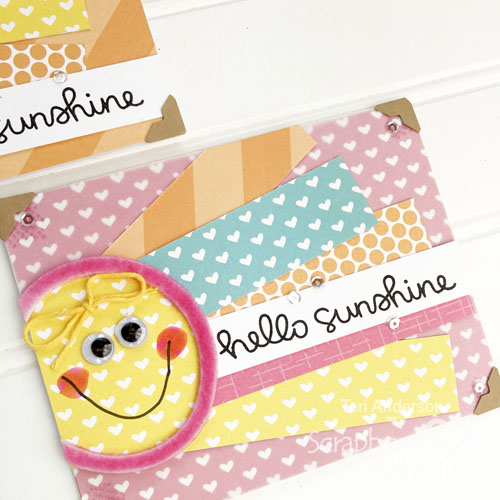
Add two wiggle eyes. Draw a mouth with a pen. Use a pink marker to draw circles for cheeks. Chalk would work as well! Add a bow made with twine or embroidery floss

Complete the card by stamping a sentiment on cardstock and adding it to paper panel. You’ll also want to add a few sequins and a couple photo corners. Affix the panel to a card.

Sunny Cards for Summer by Teri Anderson for Scrapbook Adhesives by 3L

Tip on Using Busy Patterned Papers Combos

Want to use a piece of paper on your card’s background that clashes with your patterned paper strips? Here’s an easy fix for that! Cut a panel of vellum and mount into onto the background paper. The vellum is kinda, sorta… magical! It will soften the color of the background paper!

Sunny Cards for Summer by Teri Anderson for Scrapbook Adhesives by 3L

I used E-Z Runner® Petite Permanent Dots Refillable Dispenser to adhere the vellum to the panel since I didn’t have the E-Z Runner Permanent Fine (used to adhere vellum) in my stash. To hide my adhesive, I placed embellishment and paper strips over it but I like the dotted background that peeks behind them.

Sunny Cards for Summer by Teri Anderson for Scrapbook Adhesives by 3L

I hope this quick tutorial inspires you to make some cute Sunny Cards of your own!

Sunny Cards for Summer by Teri Anderson for Scrapbook Adhesives by 3L

Happy creating,
Teri Anderson

Creative Time: 45 Minutes
Skill Level: Beginner

Materials Needed
Scrapbook Adhesives by 3L®

Other
White Cardstock and Vellum: Neenah Paper; Patterned Papers: Avery Elle; Stamps: Lawn Fawn (Hello Sunshine Stamp Set); Ink Pad: Ranger Ink; Sequins: Pretty Pink Posh; Pink Flock: Stampendous; Twine: The Twinery; Wiggle Eyes: Darice; Black Pen and Pink Marker: Copic

Save it to Pinterest!

Sunny Cards for Summer by Teri Anderson for Scrapbook Adhesives by 3L Pinterest

Visit our Website and Blog!
Sign up for our Newsletter so you never miss a contest or giveaway!

instagram purple icon facebook icon purple pinterest purple icon twitter purple icon YouTube icon blog subscription purple icon

Glittered Birthday Wishes Card

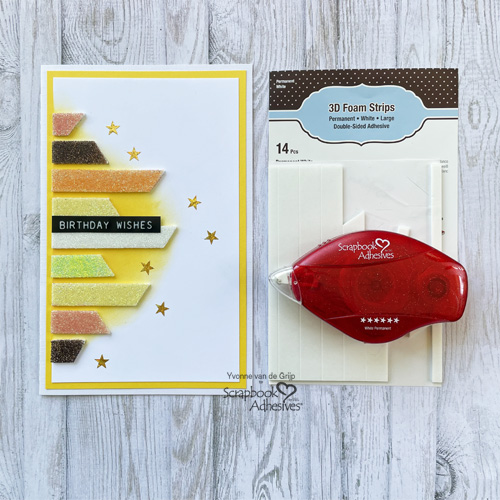
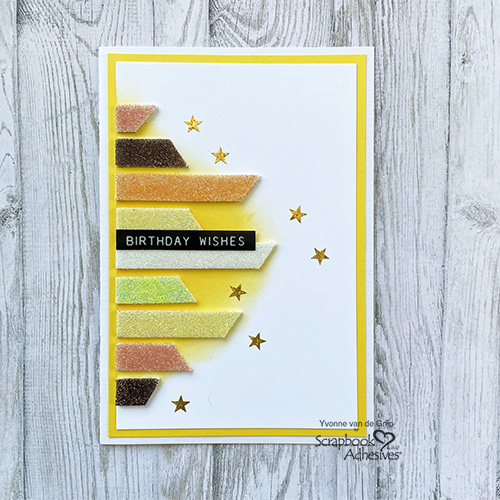
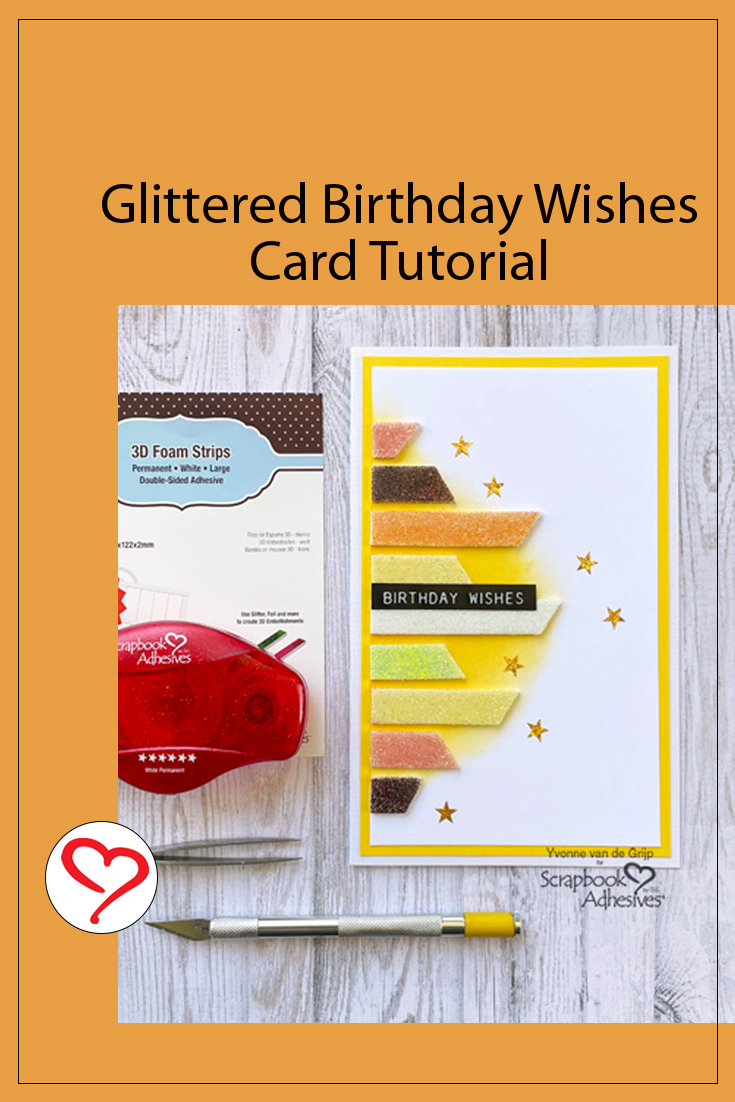
Hi everyone, Yvonne here a super easy to create a birthday card. Make glittered accents with the brand new 3D Foam Strips Large White and create your own Glittered Birthday Wishes card. This project is so simple to create that it’s also suitable for beginning card makers.

Glittered Birthday Wishes Card by Yvonne van de Grijp for Scrapbook Adhesives by 3L

Let me show you how I made the card using the technique Wear your Adhesive on the Outside.

Glittered Birthday Wishes Card Panel

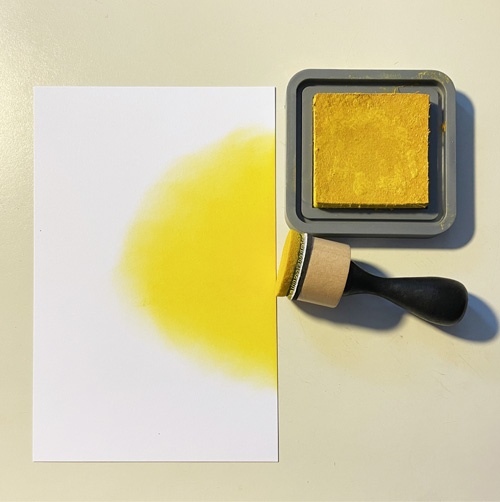
First trim a piece of white cardstock to a rectangular size. Then use yellow ink and an ink blending tool to create a yellow circle on the card panel.

Glittered Birthday Wishes Card by Yvonne van de Grijp for Scrapbook Adhesives by 3L

Prep the Glittered Stripes

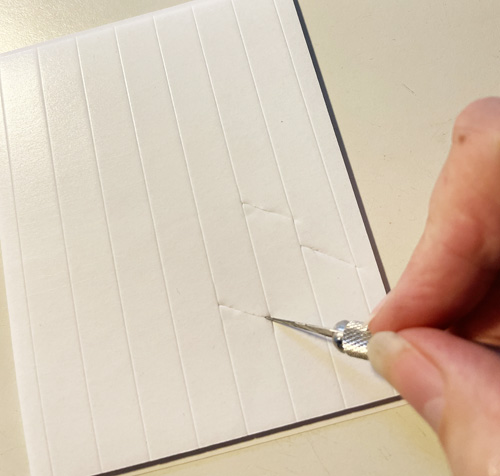
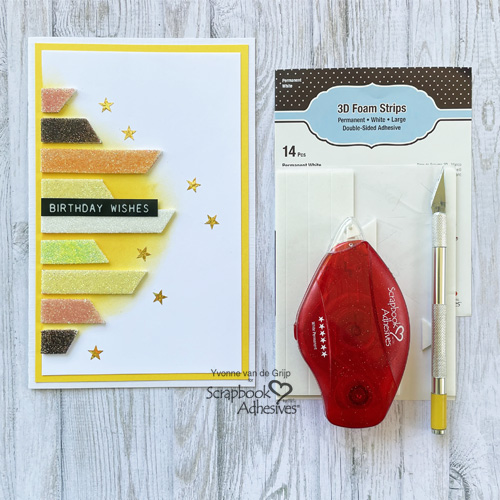
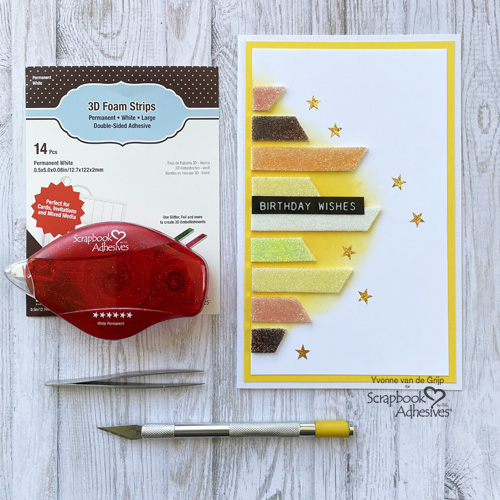
To make the glittered stripes I used 3D Foam Strips Large White. The strips are pre-cut so the only thing you need to do is cut the strips into pieces using a craft knife.

Glittered Birthday Wishes Card by Yvonne van de Grijp for Scrapbook Adhesives by 3L

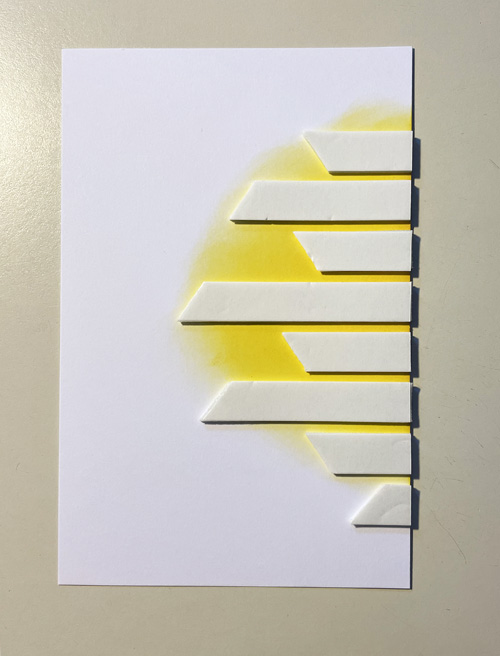
Then adhere the strips onto the colored cardpanel.

Glittered Birthday Wishes Card by Yvonne van de Grijp for Scrapbook Adhesives by 3L

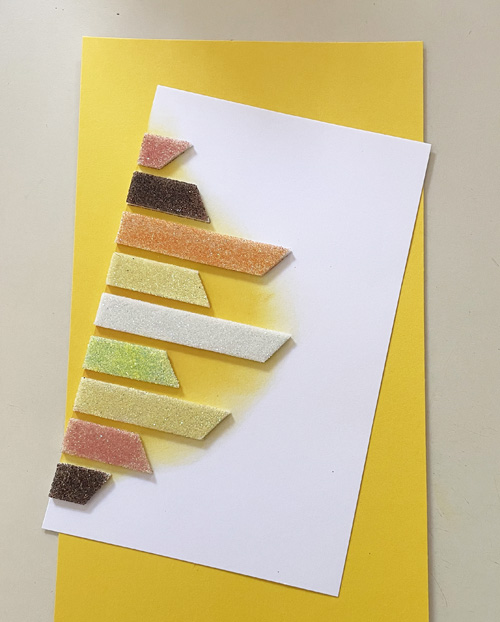
Next remove the liner of one 3D Foam Strips Large White and sprinkle glitter upon. Gently rub the glitter over the adhesive strip to secure the glitter. Then tap off any excess glitter. Repeat using different colors of glitter for the other strips. 

Glittered Birthday Wishes Card by Yvonne van de Grijp for Scrapbook Adhesives by 3L

This technique, making your adhesive shine is also known as Wear your Adhesive on the Outside.

Foiling the Star Accents

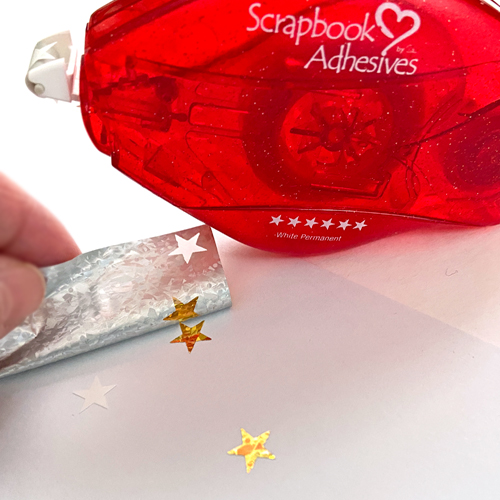
To make the stars I used the E-Z Runner® Stars Refillable Dispenser Simply peel off the stars from the E-Z Runner® Stars Refillable Dispenser using tweezers and adhere them onto the card panel. Next use a piece of gold holographic and dab onto the adhesive stars (with the holographic color facing up). Then gently rub over the Metallic Transfer Foil Sheets Holographic Colors for secure adhering.

Glittered Birthday Wishes Card by Yvonne van de Grijp for Scrapbook Adhesives by 3L

Finishing the Card

Adhere the glittered card panel onto a (slightly larger) yellow card panel using the E-Z Runner® Permanent Strips Refillable Dispenser to adhere. Then adhere onto a white card base also using the E-Z Runner® Permanent Strips Refillable Dispenser for adhering. And finally, add the birthday wish sticker sentiment.

Glittered Birthday Wishes Card by Yvonne van de Grijp for Scrapbook Adhesives by 3L

And voila, your Glittered Birthday Wishes card is ready. I hope you enjoyed this simple tutorial and wish you happy crafting!
Yvonne van de Grijp

Glittered Birthday Wishes Card by Yvonne van de Grijp for Scrapbook Adhesives by 3L

Creative Time: 30 minutes
Skill Level: Beginner

Materials needed:
Scrapbook Adhesives by 3L®
E-Z Runner® Permanent Strips Refillable Dispenser
E-Z Runner® Stars Refillable Dispenser
3D Foam Strips Large White
Metallic Transfer Foil Sheets Holographic Colors

Other
Sticker: Tim Holtz (Label Sticker); White and Yellow Cardstock; Glitter; Paper Trimmer; Tweezers

Save to Pinterest!

Glittered Birthday Wishes Card by Yvonne van de Grijp for Scrapbook Adhesives by 3L Pinterest

Visit our Website and Blog!
Sign up for our Newsletter so you never miss a contest or giveaway!

instagram purple icon facebook icon purple pinterest purple icon twitter purple icon YouTube icon blog subscription purple icon

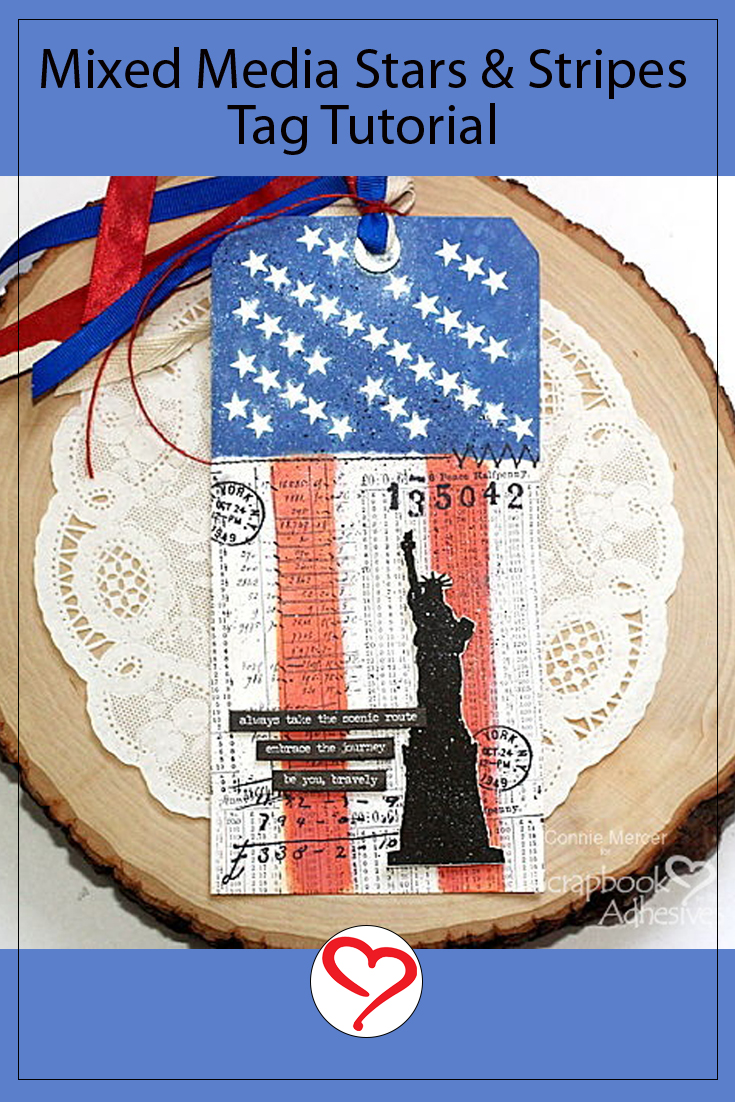
Mixed Media Stars & Stripes Tag

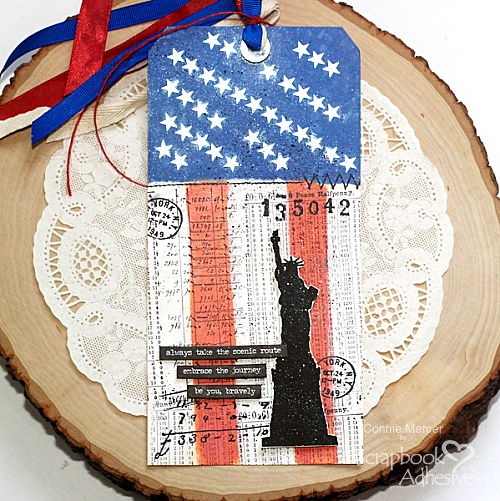
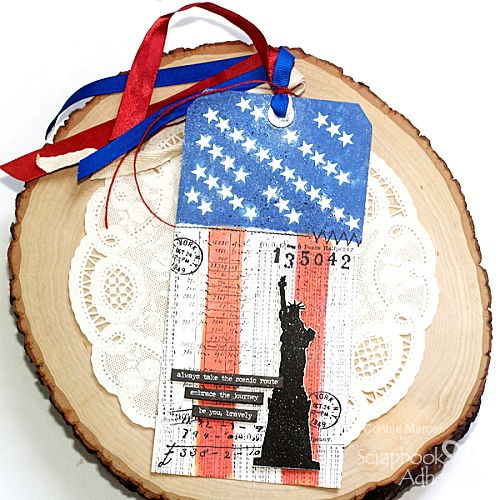
Hi, Connie here with a Mixed Media Stars & Stripes Tag using the new E-Z Runner Stars Refillable Dispenser to add stars on the tag. Could not have been easier!! Such a clever product by Scrapbook Adhesives by 3L. I hear they have hearts too!!! Check out the steps for this project below and follow along. Enjoy!

Mixed Media Stars & Stripes Tag by Connie Mercer for Scrapbook Adhesives by 3L

Mixed Media Stars & Stripes Tag Steps

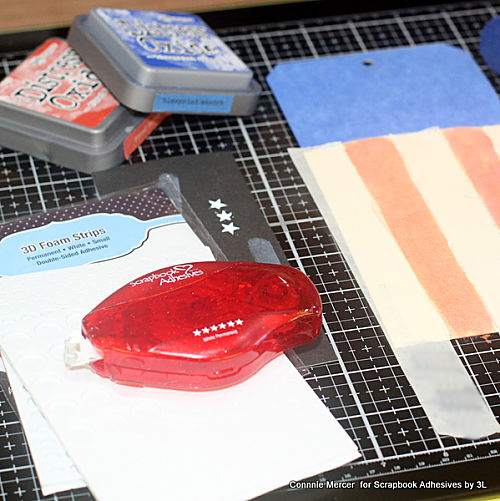
I did a little background preparations to start the tag. Using Distress Oxide ink or the medium of your choice, I painted a flag design. Mask off a grid and just add color. Stamp out a focal image which was a Lady Liberty silhouette and trim out.

Mixed Media Stars & Stripes Tag by Connie Mercer for Scrapbook Adhesives by 3L

Assembly Details

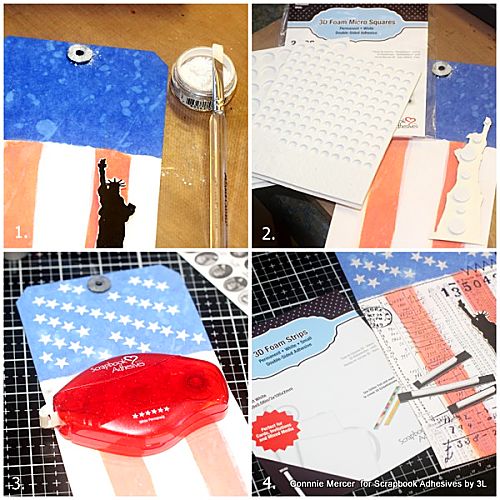
  • 1. Add the small reinforcement from the 3D Foam Circle Frames Black and brush on Perfect Pearls in off-white.
    2. Add 3D Foam Circles White Mix and the 3D Foam Squares Micro White to the Lady Liberty silhouette shape. Tip: I used the Micro Squares for the very tip of the torch. – perfect size to keep the tip secured.
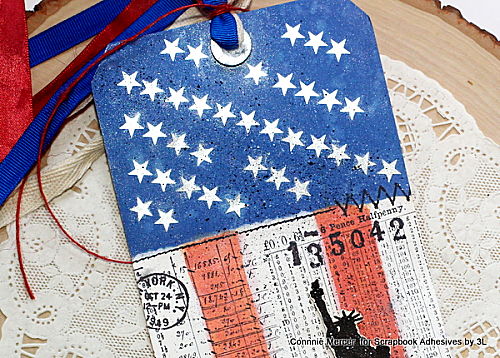
    3. Now the fun part! Roll on those stars. Yes, it is that easy. I rolled at an angle for interest. The E-Z Runner Stars Refillable Dispenser skipped a few times but no worries, this is mixed media at its finest!! Next, brush on Perfect Pearls and dust off the excess.
    4. Stamp some mixed media-themed stamps to the tag background for interest. The 3D Foam Strips (my new favorite product) were used to adhere to the word strips. Add twine and ribbons to finish the Mixed Media Stars & Stripes Tag.
Mixed Media Stars & Stripes Tag by Connie Mercer for Scrapbook Adhesives by 3L

Up close look at the beautiful stars from the E-Z Runner Stars Refillable Dispenser.

Hope you enjoyed my Mixed Media Stars & Stripes Tag. Thanks for stopping by!
Connie Mercer

Creative Time: 60 minutes
Skill Level: Intermediate

Materials Needed
Scrapbook Adhesives by 3L®

E-Z Runner Stars Refillable Dispenser
3D Foam Circle Frames Black, 3D Foam Squares Micro White, 3D Foam Strips and 3D Foam Circle White Mix

Other:
Stamps: Blue Knight Rubber Stamps (Statue of Liberty) and Darkroom Door (Mixed Media Stamps); Stickers: Idea-ology/Tim Holtz (Small Talk Stickers); Ink: Tsukineko (Versafine Ink) and Ranger Ink (Archival Ink, Distress Oxide Ink); Tag: Ranger/Inkssentials (#10 Manila Tag); Pigment Powder: Ranger Ink (Perfect Pearls)

Save It!

Mixed Media Stars & Stripes Tag by Connie Mercer for Scrapbook Adhesives by 3L Pinterest

Visit our Website and Blog!
Sign up for our Newsletter so you never miss a contest or giveaway!

instagram purple icon facebook icon purple pinterest purple icon twitter purple icon YouTube icon blog subscription purple icon

Fluttering Butterfly Slimline Card

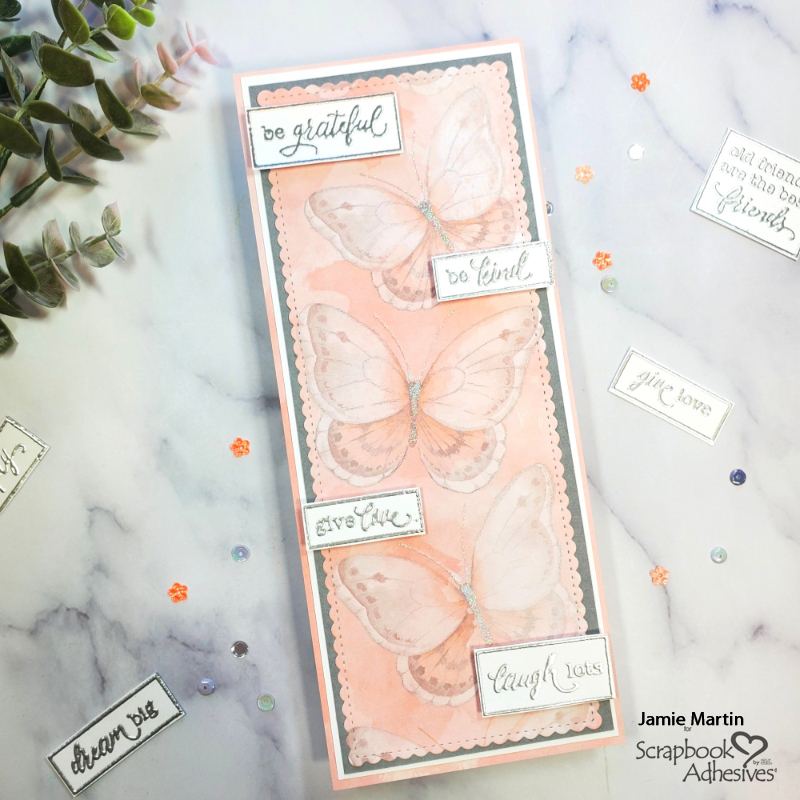
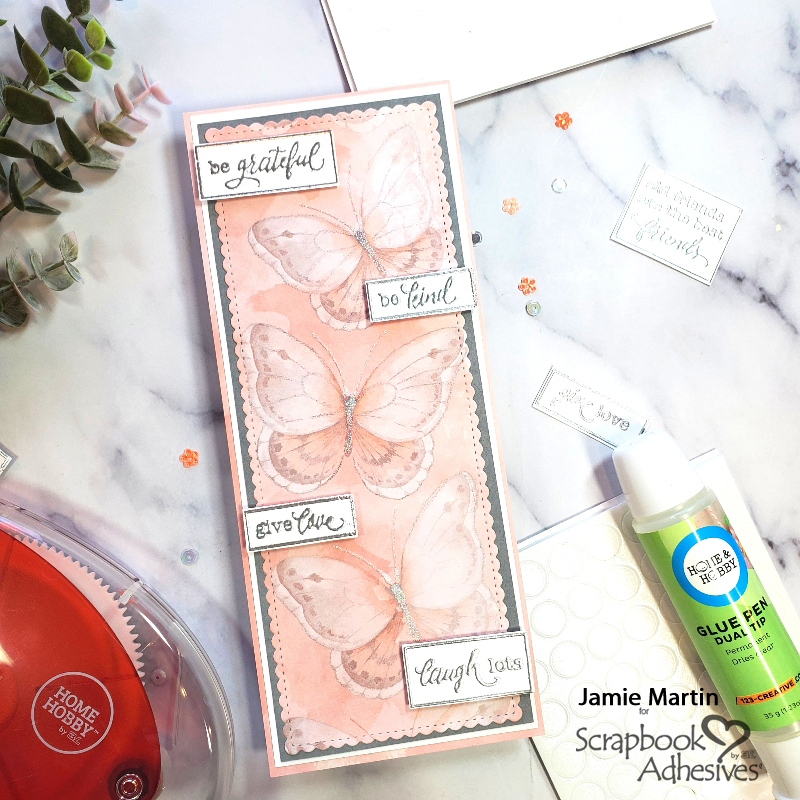
Hi, Jamie here with you today with a quick & easy card – perfect for the paper crafter and/or paper hoarder. Also, for those who like to make pretty cards but don’t want to color them. I fall into the paper hoarder category and have quite a bit of 12″ x 12″ decorative paper.

Usually, I use the small patterns on cards but never used the large patterns until now! Come see how I created this lovely Fluttering Butterfly Slimline Card.

Fluttering Butterfly Slimline Card by Jamie Martin for Scrapbook Adhesives by 3L

Fluttering Butterfly Card Panel

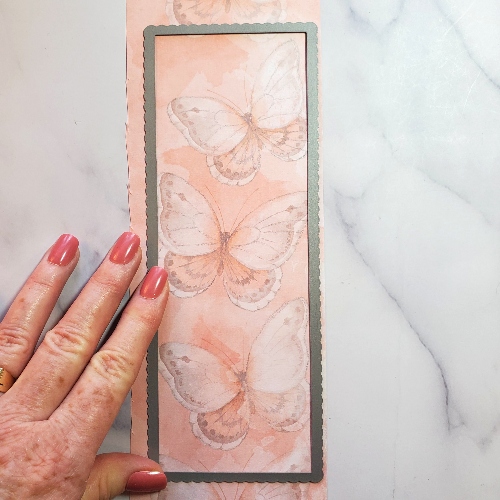
Pick out some pretty decorative paper with big images and die-cut it using a slimline die.

Fluttering Butterfly Slimline Card by Jamie Martin for Scrapbook Adhesives by 3L

Embellishing the Card Panel

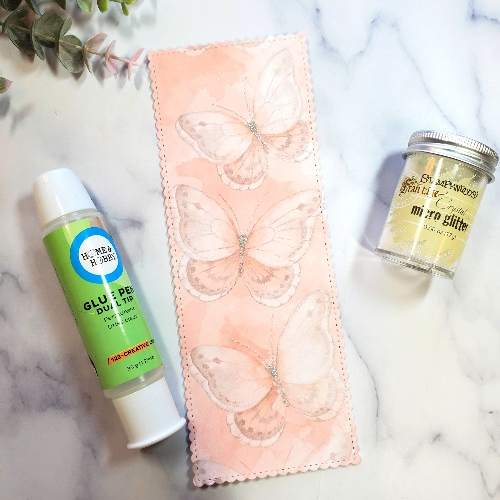
Use the Dual Tip Glue Pen to apply glue onto the body and antennas of the fluttering butterfly designs, then sprinkle Crystal Micro Glitter over the wet glue and let it dry.

Fluttering Butterfly Slimline Card by Jamie Martin for Scrapbook Adhesives by 3L

Fluttering Butterfly Card Base

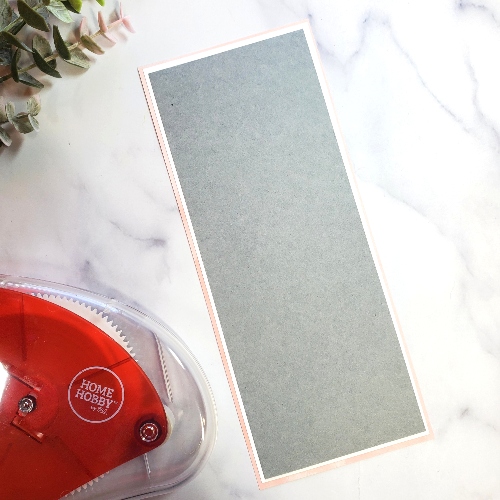
While this is drying, cut gray cardstock slightly larger than your slimline panel and use the E-Z Runner® Grand Refillable Dispenser to adhere it to a slightly larger white cardstock panel then glue it to a peach slimline card.

Fluttering Butterfly Slimline Card by Jamie Martin for Scrapbook Adhesives by 3L

Adding More Details

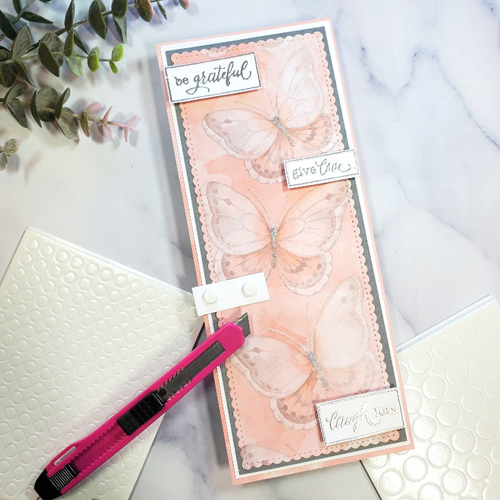
Stamp Slim Cling Boxed Words on white cardstock with VersaMark Ink and emboss with Sterling Silver Embossing Powder.

Cut the boxed words that you want to use apart and pop them up using 3D Foam Circles White Mix.

Fluttering Butterfly Slimline Card by Jamie Martin for Scrapbook Adhesives by 3L

There you have it a lovely Fluttering Butterfly Slimline Card to send to someone special. Find some pretty patterned paper in your stash and create one!

Thanks for stopping by!
Jamie Martin

Creative Time: 20 minutes
Skill Level: Beginner

Materials Needed
Scrapbook Adhesives by 3L®

E-Z Runner® Grand Refillable Dispenser
3D Foam Circles White Mix

HomeHobby™ by 3L
Dual Tip Glue Pen

Other
Stamps, Embossing Powder and Glitter: Stampendous (Slim Cling Boxed Words, Sterling Silver Embossing Powder, and Crystal Micro Glitter); Craft Dies: Rubbernecker Stamps (Slimline Nested Scallop w/ Stitch); Patterned Paper

Save to Pinterest!

Fluttering Butterfly Slimline Card by Jamie Martin for Scrapbook Adhesives by 3L Pinterest

Visit our Website and Blog!
Sign up for our Newsletter so you never miss a contest or giveaway!

instagram purple icon facebook icon purple pinterest purple icon twitter purple icon YouTube icon blog subscription purple icon

Holographic Circles Card

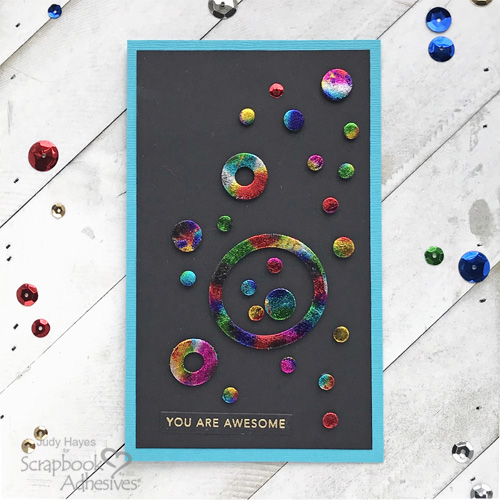
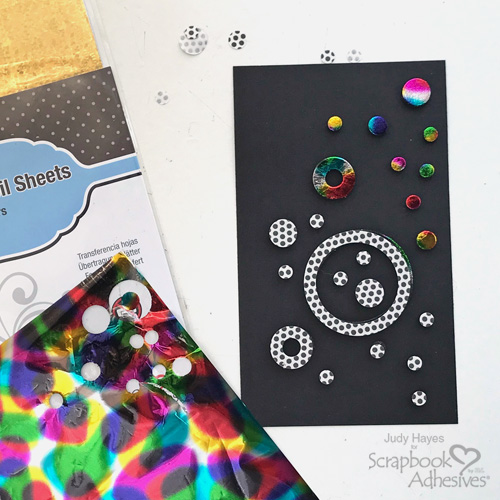
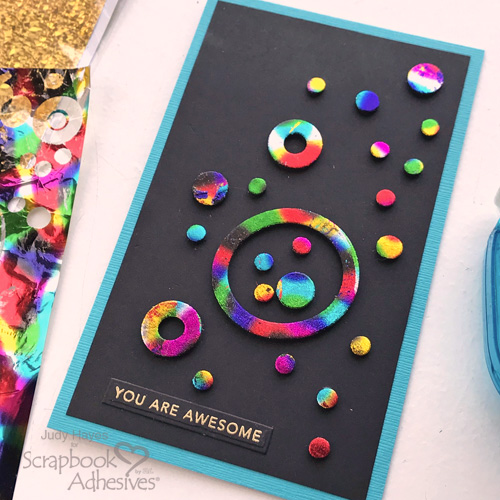
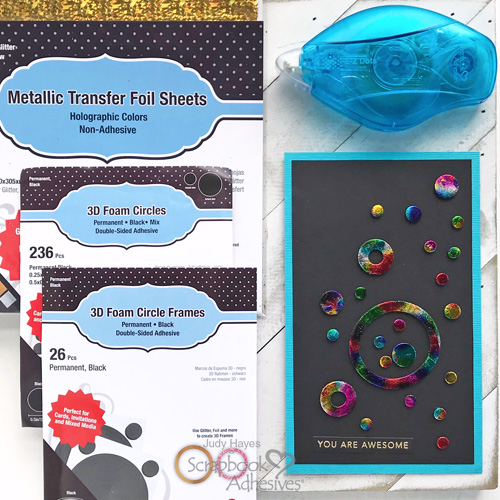
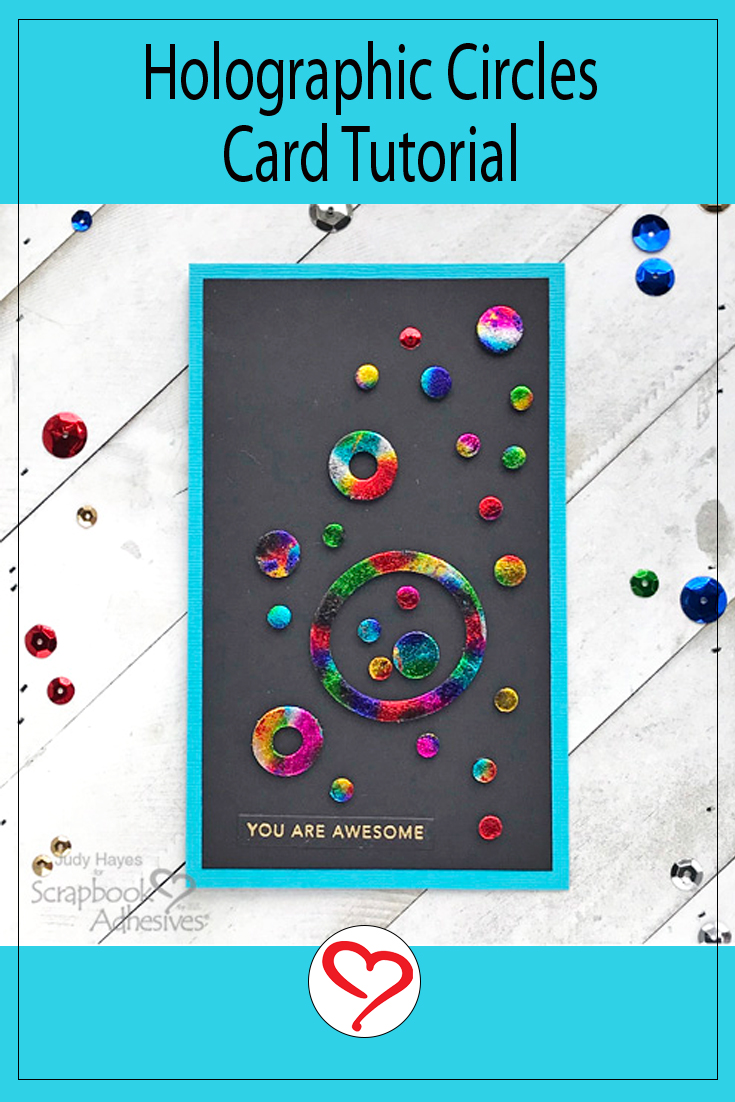
Hello crafty friends! Today I’m sharing a fun Holographic Circles card! So easy to make with 3D Foam Circle Frames Black, 3D Foam Circles Black Mix and Metallic Transfer Foil Sheets Holographic Colors! I used a stamped, embossed and die cut verse from my stash.

Holographic Circles Card by Judy Hayes for Scrapbook Adhesives by 3L

Make Holographic Circles

Holographic Circles Card by Judy Hayes for Scrapbook Adhesives by 3L

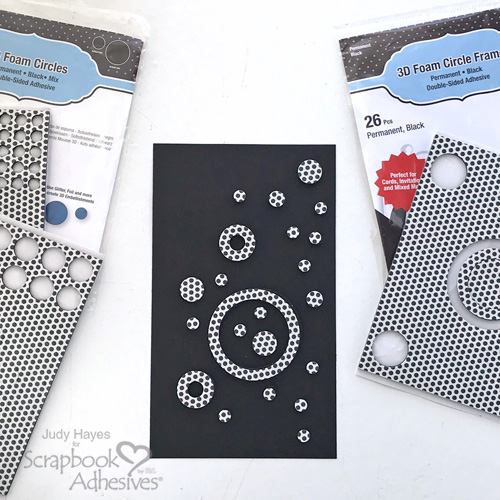
Cut black cardstock to 3.625 x 6.125 inches.

Place assorted circles from 3D Foam Circle Frames Black and 3D Foam Circles Black Mix to black cardstock. Press firmly in place.

Remove a few liners form 3D Foam Circles and 3D Foam Circle Frames.

Holographic Circles Card by Judy Hayes for Scrapbook Adhesives by 3L

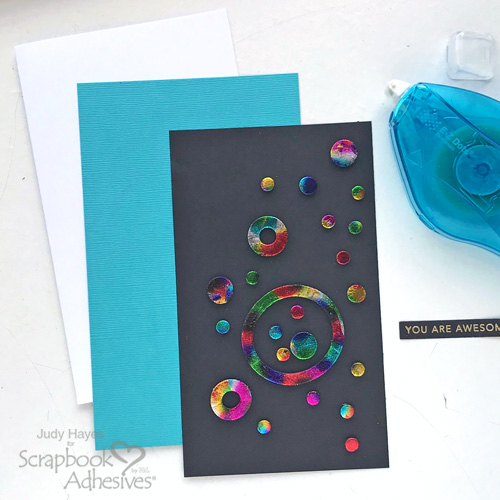
Cover bright multi-colored foil from Metallic Transfer Foil Sheets Holographic Colors over foam circles (color side UP), rub with fingertips, and peel off.

Continue to remove liners and apply foil to cover all circles and circle frames.

Reapply foil to any missed spots.

Assemble the Card

Holographic Circles Card by Judy Hayes for Scrapbook Adhesives by 3L

Form a 4 x 6.5 inch card base from white cardstock.

Cut turquoise mat to 4 x 6.5 inches. Use E-Z Dots® Permanent Refillable Dispenser to apply adhesive to it and fasten to the card front.

Also use E-Z Dots® Permanent Refillable Dispenser to fasten holographic circles piece over turquoise mat. Applying adhesive to card front rather than back of holographic circles piece may be easier.

Add Verse

Holographic Circles Card by Judy Hayes for Scrapbook Adhesives by 3L

Apply pre-stamped and embossed verse near bottom of card with E-Z Dots® Permanent Refillable Dispenser

Holographic Circles Card by Judy Hayes for Scrapbook Adhesives by 3L

Thanks for Visiting!
Judy Hayes

Creative Time: 20 Minutes
Skill Level: Beginner

Materials Needed
Scrapbook Adhesives by 3L®

Other
Card Stock (Black, Turquoise, White); Ranger Gold Embossing Powder; Taylored Expressions (Mini Strips – Life Saver Stamp, Mini Strips Die) Tsukineko Versamark Ink

Save It to Pinterest!

Holographic Circles Card by Judy Hayes for Scrapbook Adhesives by 3L Pinterest

Visit our Website and Blog!
Sign up for our Newsletter so you never miss a contest or giveaway!
instagram purple icon facebook icon purple pinterest purple icon twitter purple icon YouTube icon blog subscription purple icon

Together Watercolor Layout

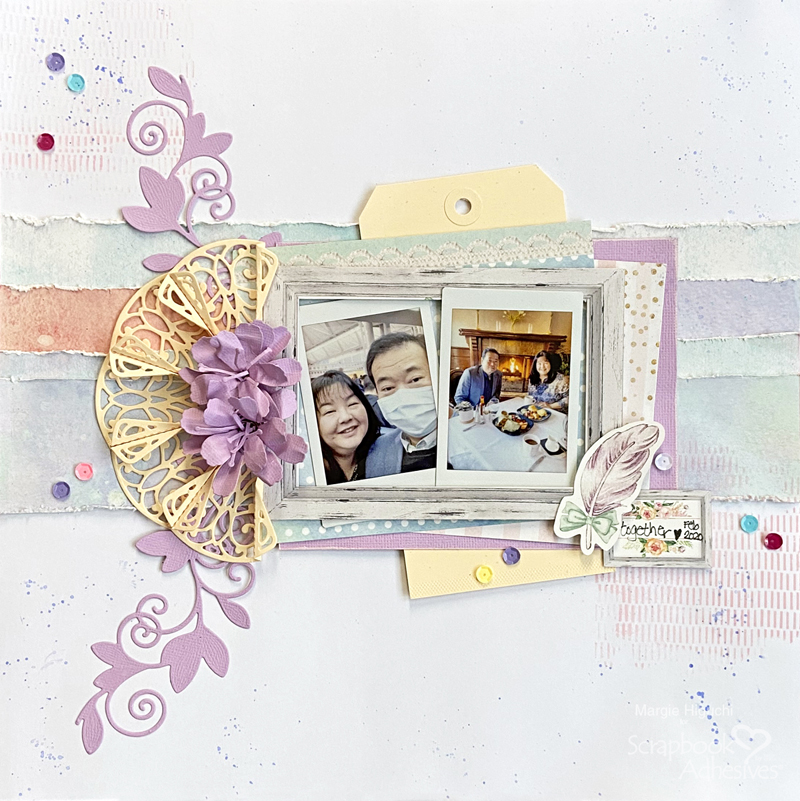
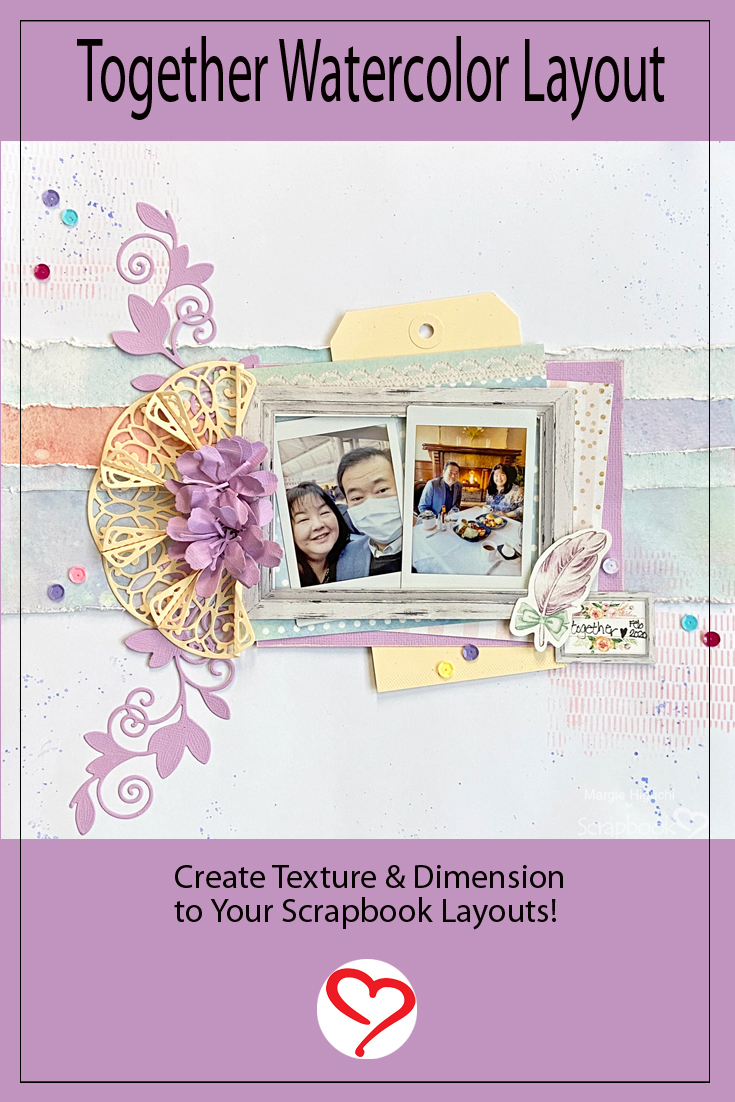
Hello friends! I am sharing my Together Watercolor Layout that documents my travel before the Pandemic. My husband took me on a last-minute trip to California for an early Valentine’s present. Grab a cup of coffee and pull up a chair…let’s go!

Together Watercolor Layout by Margie Higuchi for Scrapbook Adhesives by 3L

Together Watercolor Layout Background

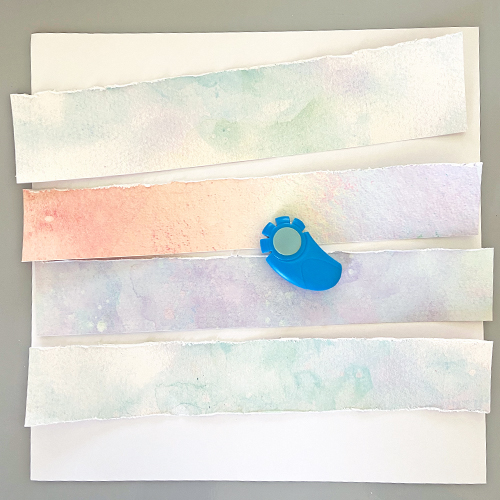
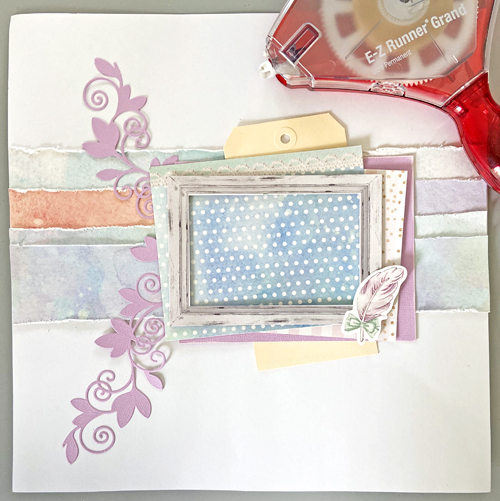
For the background, I cut four approx. 2 x 12-inch strips and then I distressed the edges by tearing and using a distressing tool. I was going for a textured background with the watercolor patterned papers.

Together Watercolor Layout by Margie Higuchi for Scrapbook Adhesives by 3L

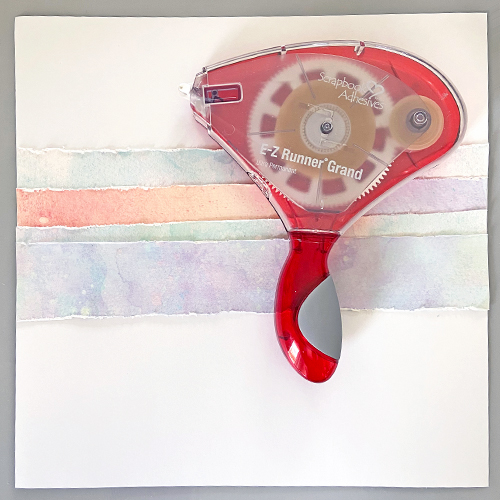
Since the strips will be supporting layers, I am using the E-Z Runner® Grand Dispenser and adding the E-Z Runner® Ultra Strong Refill. This tape adhesive is so light considering its size and the 150 ft. of adhesive it houses. LOVE!

Together Watercolor Layout by Margie Higuchi for Scrapbook Adhesives by 3L

Here’s a quick How to Use and Refill E-Z Runner® Grand Dispensers video below.

Layers of Love

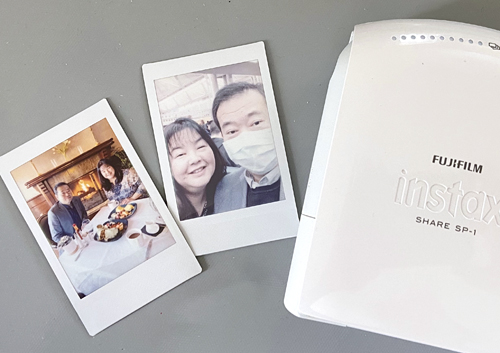
I picked out a couple of images from my phone and printed them on through my Instax printer. Yes, hubby is wearing a mask – we were at the airport. It’s part of our travel kit. I wore mine on the plane. We’ve been doing this for years…before the Pandemic.

Together Watercolor Layout by Margie Higuchi for Scrapbook Adhesives by 3L

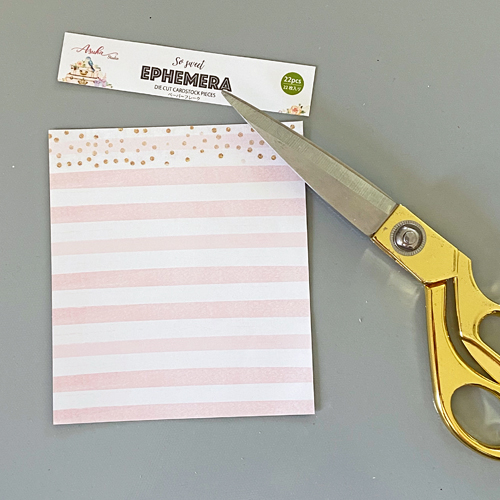
Now the fun part! Making layers of patterned papers I had on my work surface. The packaging was so cute that I had to use it. Just cut off the top.

Together Watercolor Layout by Margie Higuchi for Scrapbook Adhesives by 3L

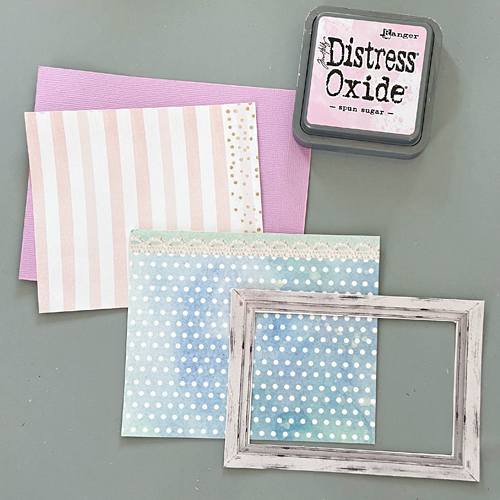
I also found and cut a 6 x 4.5-inch lavender cardstock, 5.25 x 4.5-inch white dotted patterned paper, and a frame patterned paper that was fussed cut out. Distress the cardstock by inking the edges with pink ink and a small blending brush. Designer’s Note: I also edged with pink ink on all four sides of the white cardstock base. Later, I added a shipping tag to anchor the layer behind it.

Together Watercolor Layout by Margie Higuchi for Scrapbook Adhesives by 3L

Once I got my desired look in the layers, I applied the E-Z Runner® Grand Permanent Strips in between the layers to secure and set it aside to work on the die cuts.

Die Cut Power

Creative friends who know me well know how much I LOVE DIE-CUTTING!! I’ve been die-cutting since 2000. So using the Adhesive Sheets is a no-brainer!

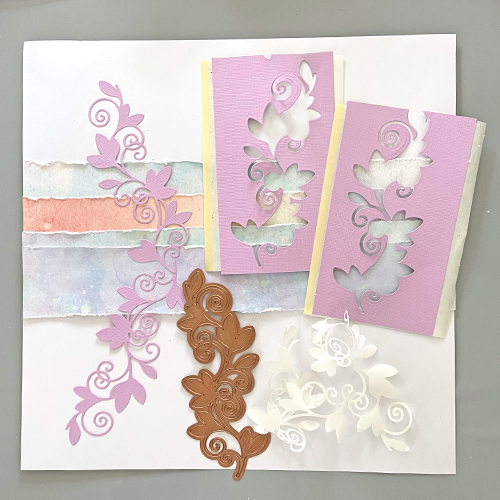
Apply an Adhesive Sheet 4×6-inch on the back of each lavender cardstock. Then die-cut two leafy vines from the Flower Bundle Die Set. Now they are die-cut stickers! Take off the backing and place them on the left side of the scrapbook layout. It’s that easy!

Together Watercolor Layout by Margie Higuchi for Scrapbook Adhesives by 3L

See the How to Use Adhesive Sheets for Die Cutting video below.

Delicate and Dimensional Elements

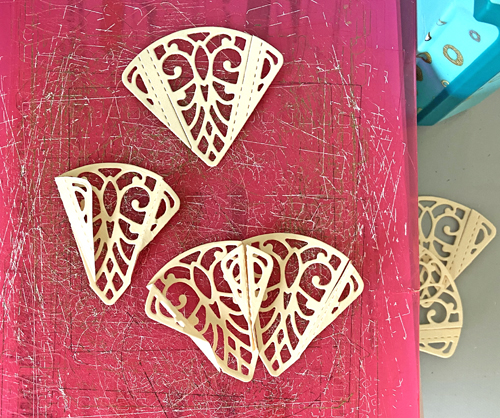
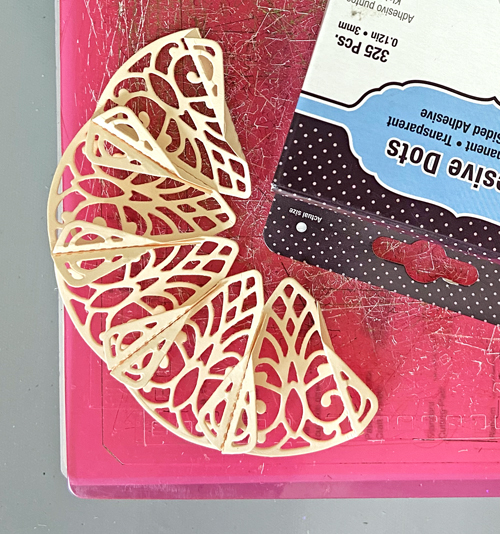
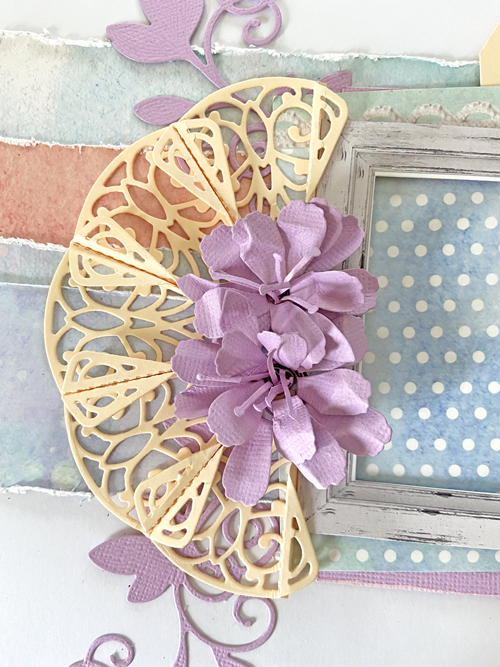
Using another shipping tag that I used for the layer, I die-cut Timeless Grace Doily Die to get five petals that form a half-circle shape. On each petal die cut, valley-fold on the inner perforated line with the slit, and mountain-fold the outer perforated line. Take two die cuts and interlock the ends to start.

Together Watercolor Layout by Margie Higuchi for Scrapbook Adhesives by 3L

Once done, I tucked a couple of Adhesive Dots Micro between each petal for extra hold but they interlock tightly so this part is up to you.

Together Watercolor Layout by Margie Higuchi for Scrapbook Adhesives by 3L

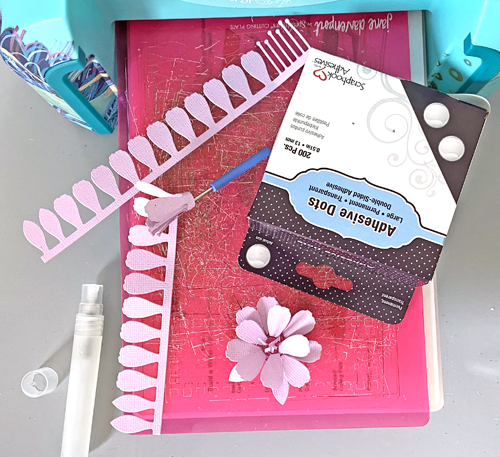
For the flowers, I die-cut twice the largest flower from the Rolled Flowers Die Set. This is a clever set. Everything is included from the stamen to the blossom to the leaves. All you have to do is roll it. Secure the end with a couple of Adhesive Dots Micro and sits on an Adhesive Dot Large. When I’m ready to adhere, I simply take off the liner and place it on the page.

Together Watercolor Layout by Margie Higuchi for Scrapbook Adhesives by 3L

Assemble the Together Watercolor Layout

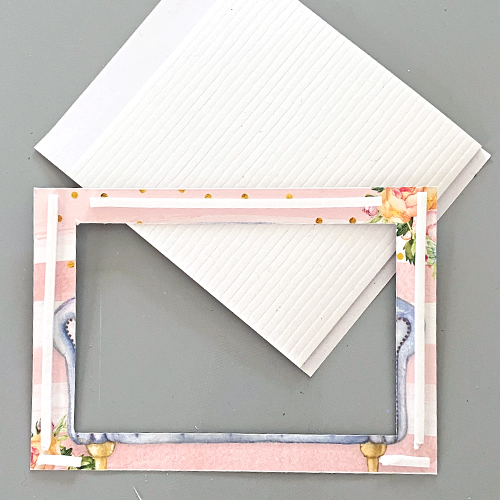
Using the half-circle doily as a guide, I adhered the layered papers with the E-Z Runner® Grand Ultra Strong. Then lift and adhere the frame with 3D Foam Strips (leave the bottom open) on top of the layers. I found a feather die cut on my table and thought it was cute so I added that in the lower right corner with an Adhesive Dot Large. LOL!

Together Watercolor Layout by Margie Higuchi for Scrapbook Adhesives by 3L

Then add the doily on the left of the frame with Adhesive Dots Micro. Adhere the flowers in the center opening of the doily.

Together Watercolor Layout by Margie Higuchi for Scrapbook Adhesives by 3L

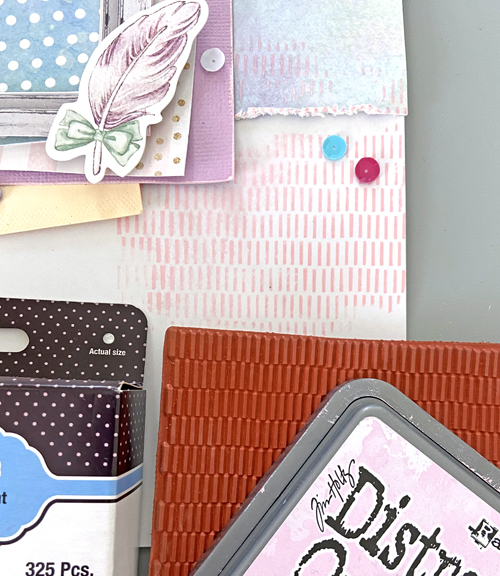
Randomly stamp with pink ink on the white cardstock base. Add water to the lavender ink and splatter the base with a watercolor brush. Add sequins with Adhesive Dots Micro.

Together Watercolor Layout by Margie Higuchi for Scrapbook Adhesives by 3L

Lastly, tuck in the two images with a combination of the E-Z Runner® Grand Ultra Strong, and 3D Foam Strips. Add the little journal box in the lower right corner of the frame. That’s it!

Thank you for sticking with me this far! LOL! I’m thrilled about how it came out. Hope that the Together Watercolor Layout tutorial inspired you or remind you of a design idea.

Margie Higuchi

Creative Time: 40 minutes
Skill Level: Intermediate

Materials Needed:
Scrapbook Adhesives by 3L®
E-Z Runner® Grand Refillable Dispenser
E-Z Runner® Grand Ultra Strong Refill
Adhesive Dots Micro
Adhesive Dots Large
3D Foam Strips
Adhesive Sheets 4 x 6-inch

Other
Patterned Papers: Kawaii Paper Goods (Watercolor and Forest Friends Collections, and Feather Die Cut Ephemera Pack); Craft Dies; Spellbinders Paper Art (Timeless Grace Doily Die, Rolled Flowers Etched Dies Set by Marisa Job (retired), Flower Bundle Etched Dies Set (retired), Tool ‘n One with Quill Tip, and Deep Sea Die-Cutting and Embossing Machine); Inks: Ranger Ink (Distress Oxide Ink in Spun Sugar + Distress Ink in Shaded Lilac); Distress Tool: Creative Memories; Background Stamp: Impression Obsession; Sequins: MultiCraft (Baby Cup Sequins); White and Lavender Cardstock; Shipping Tags; Water Mister; WaterColor Brush

Save on Pinterest!

Together Watercolor Layout by Margie Higuchi for Scrapbook Adhesives by 3L Pinterest

Visit our Website and Blog!
Sign up for our Newsletter so you never miss a contest or giveaway!
instagram purple icon facebook icon purple pinterest purple icon twitter purple icon YouTube icon blog subscription purple icon

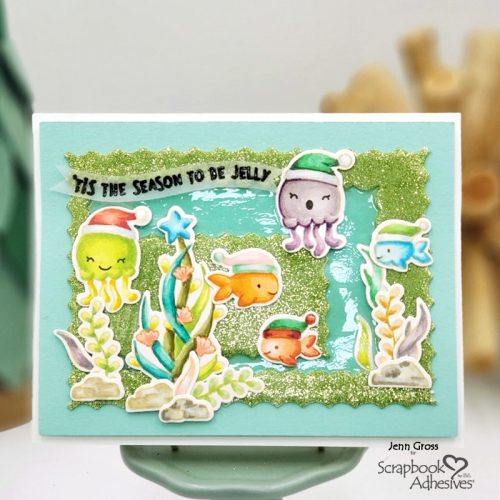
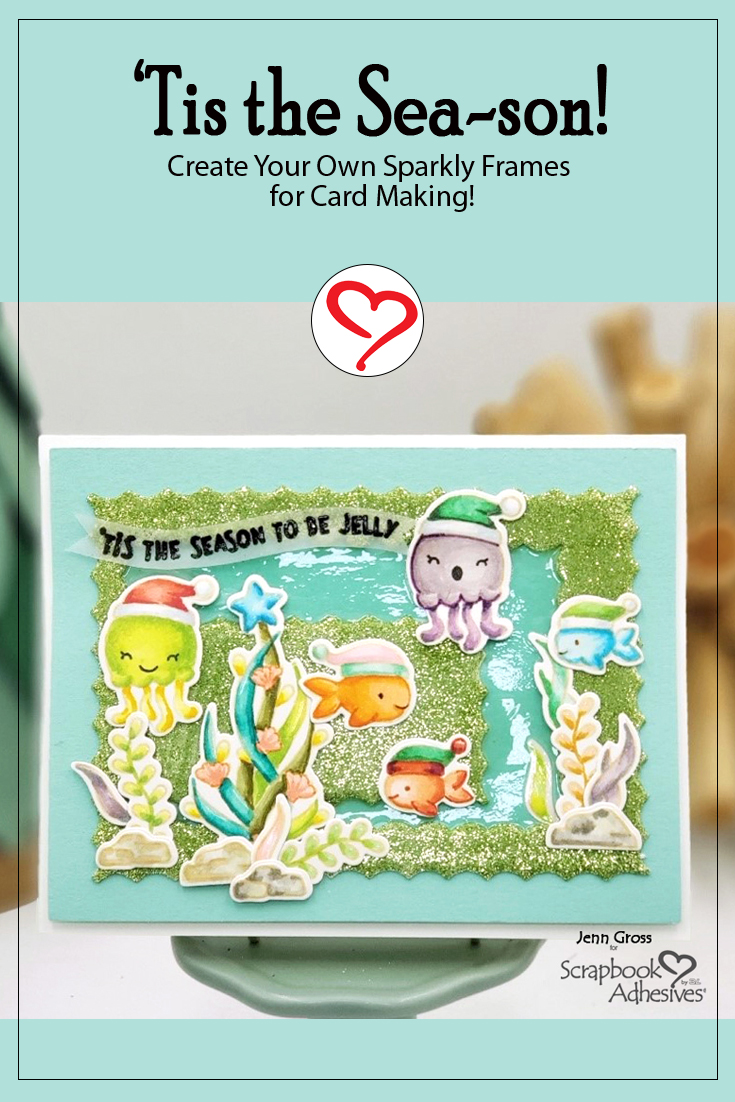
Tis the Sea-son Card

Hello my crafty friends and welcome to today’s blog.  Although it’s early, I thought I would get a jump on a holiday card like this fun and adorable Tis the Sea-son Card. Using the Wear Your Adhesive on the Outside technique, I will show you how I used the 3D Foam Creative Sheet and glitter to make this sparkle!

Tis the Sea-son Card by Jenn Gross for Scrapbook Adhesives by 3L

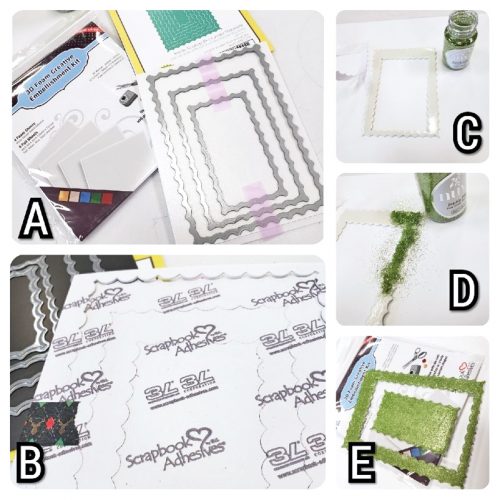
Tis the Sea-son Card Step Outs

Tis the Sea-son Card by Jenn Gross for Scrapbook Adhesives by 3L

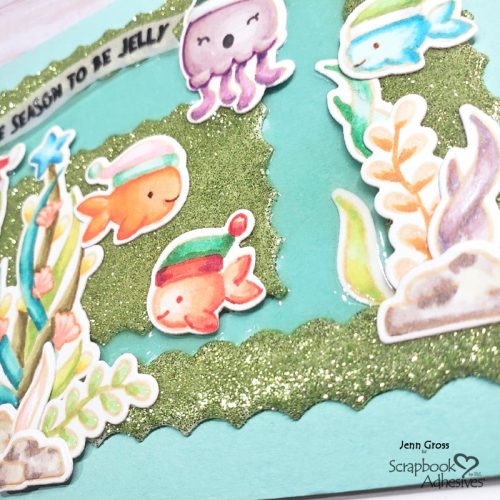
A and B: Die-cut three of the Inside Scallop Rectangle Stacklet dies with a sheet of 3D Foam Creative Sheet in White from the 3D Foam Creative Embellishment Kit. This creates a solid foam rectangle and two foam frames (set aside the smaller foam frame for another day).

C and D: Peel off the liner of one side of the large foam frame and sprinkle the green micro-fine glitter over the exposed foam adhesive. Tap off the excess glitter and set the frame aside.

E: Repeat the process with the solid rectangular foam die cut as above.

Building Details

Tis the Sea-son Card by Jenn Gross for Scrapbook Adhesives by 3L

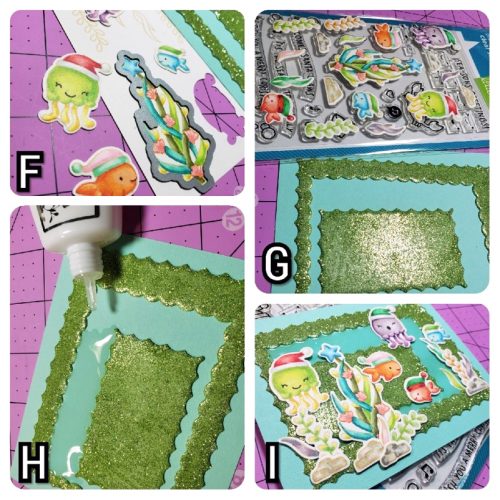
F: Stamped out the images onto the Premium Marker Paper with Cream ink. Color them with Copic alcohol markers to create a no-line coloring look. Then die-cut each image from its coordinating die.

G and H: Peel off the backing from the large foam rectangle frame and center it to a 4 x 5 1/4-inch piece of Cool Pool cardstock. Note to keep the narrow side of the frame on the left side. Peel off the backing from the solid foam rectangle and position it toward the lower left side by that narrow side of the frame. Fill in the open space between the frame and the solid rectangle with glaze and set it aside to dry.

I: Position the seaweed Christmas Tree first and then add the rest of the seaweed, rocks, fish, and jellyfish to the card front. Make sure to leave the top left clear for the sentiment.

Assembling the Sea-son Card Front

Tis the Sea-son Card by Jenn Gross for Scrapbook Adhesives by 3L

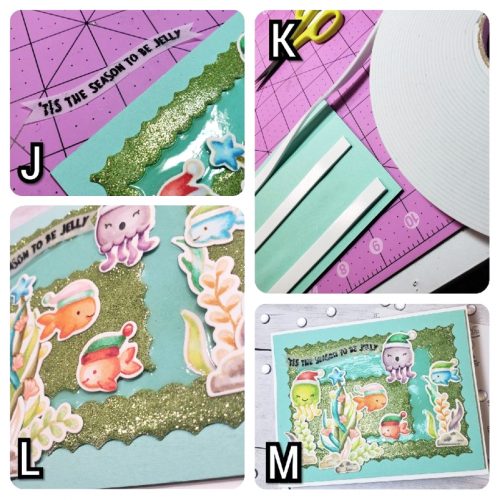
J: Stamp the ’tis the season to be jelly sentiment on to vellum with watermark in, and heat set it with black embossing powder.  Fussy cut the banner and attached it to the upper left of the card panel.

K, L, and M: Apply three strips of the Crafty Foam Tape White 54ft to the back of the card panel, and center it on a white A2-size (5.5 x 4.25-inch) card base to complete the card.

Tis the Sea-son Card by Jenn Gross for Scrapbook Adhesives by 3L

I think these fun glittered frames add just the right amount of Christmas bling.  As I continued to handle the card, I notice there was NO glitter rubbing off. Yay! No glitter except where you want it!!

With this Tis the Sea-son Card, I hope to inspire you to start your holiday cards EARLY! Thank you for stopping by.  I hope you enjoyed learning an easy way to add some bling to your cards and creations!

Be Creative ~ Stay Inspired
Jenn Gross

Creative Time: 40 minutes
Skill Level: Intermediate

Materials Needed:
Scrapbook Adhesives by 3L®

3D Foam Creative Embellishment Kit
Crafty Foam Tape White (2mm) in 54ft

Other:
Stamps: Sweet Sentiment and Lawn Fawn (Christmas Fishes Stamp and Die Set), Paper: Premium Marker Paper, Dies: Taylored Expressions (Inside Scallop Rectangle Stacklet), Inks: Nuvo (Almond Cream Ink and Clear Mark Ink), Sequins: Nuvo (Prickly Pear Pure Sheen Sequins), Glaze: Nuvo (Crystal Glaze), Alcoholic Markers: Copic, and Black Embossing Powder

Save It to Pinterest!

Tis the Sea-son Card by Jenn Gross for Scrapbook Adhesives by 3L Pinterest

Visit our Website and Blog!
Sign up for our Newsletter so you never miss a contest or giveaway!
instagram purple icon facebook icon purple pinterest purple icon twitter purple icon YouTube icon blog subscription purple icon

Easy Grids of Circles Card

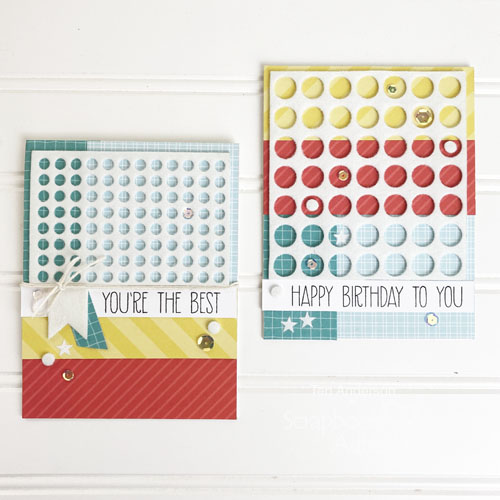
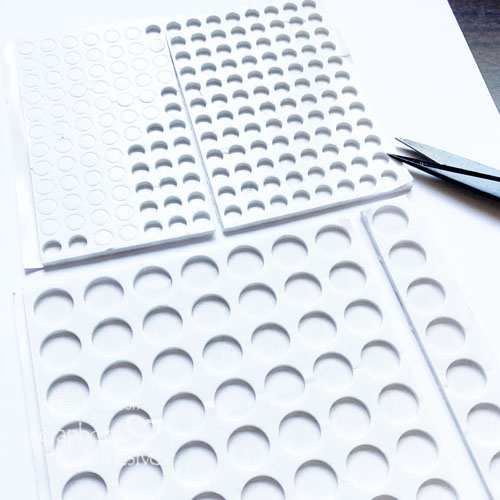
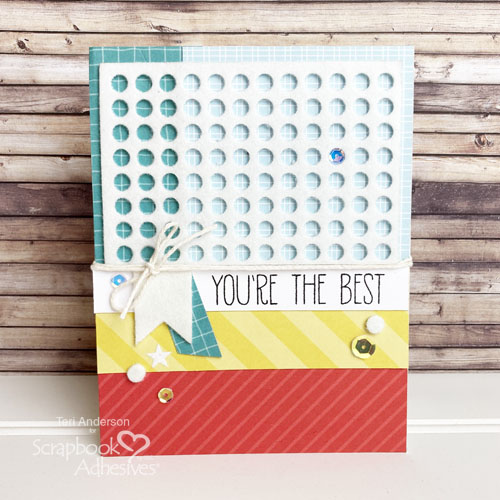
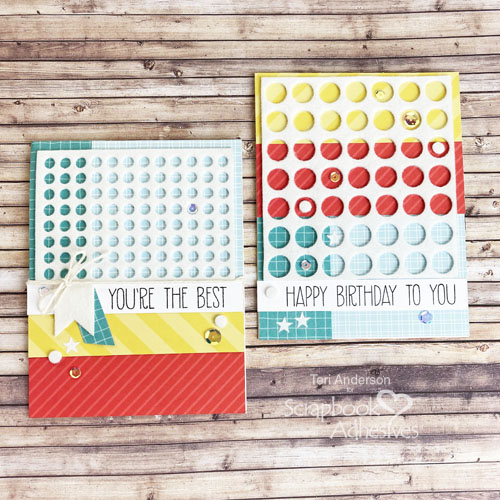
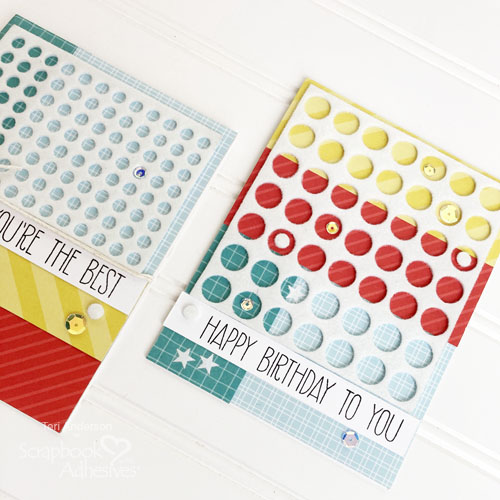
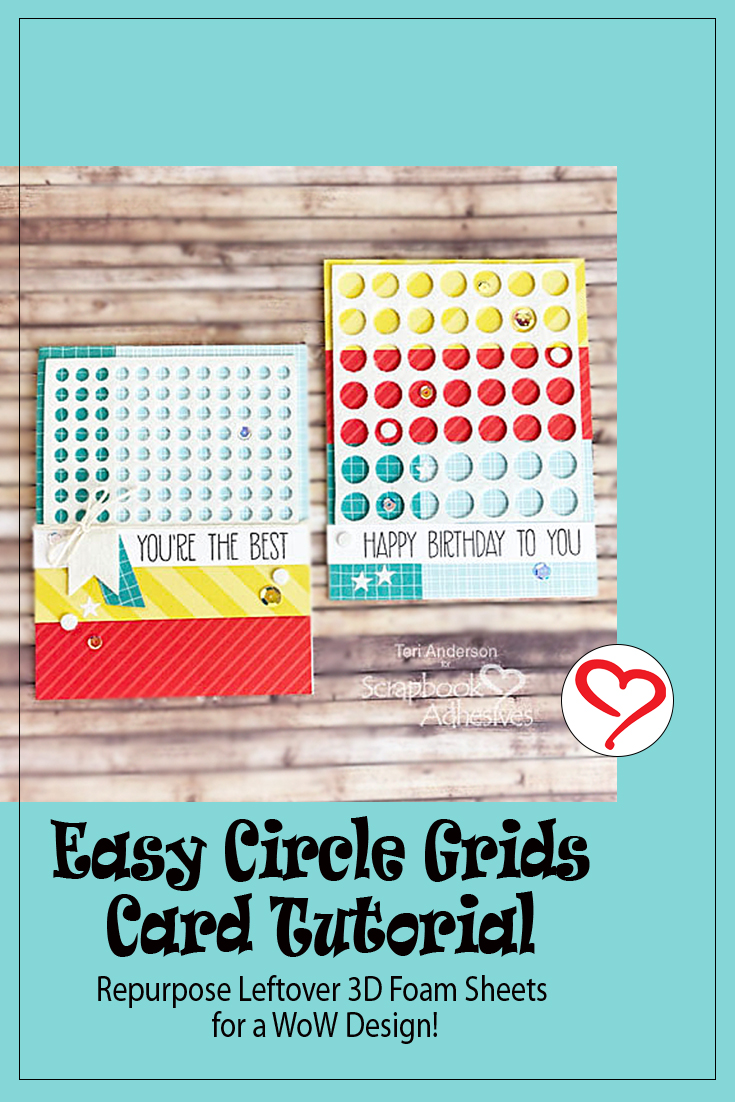
Hi, everyone! Teri here with a fun way to use up the leftover negative pieces of 3D Foam Circles: Create cards with circle grids! These cards are easy to recreate!

Easy Grids of Circles Card by Teri Anderson for Scrapbook Adhesives by 3L

Creating the Circles Grids

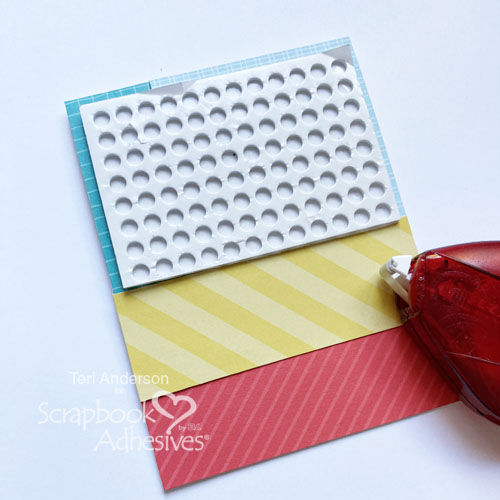
Start by taking the negative pieces of a couple 3D Foam Circles sheets and trimming them down so you have a couple grids. You can use a paper trimmer or scissors to do this. You might need take a few passes at cutting the foam, due to the height of it!

Easy Grids of Circles Card by Teri Anderson for Scrapbook Adhesives by 3L

Cover a card with patterned paper. Place one of your “grids” on the card.

Easy Grids of Circles Card by Teri Anderson for Scrapbook Adhesives by 3L

Wear Your Adhesive on the Outside Technique

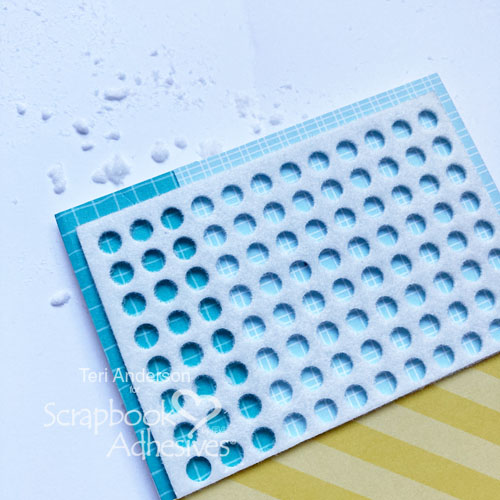
Apply flock or glitter to the grid. Make sure the foam is completely covered. I suggest running your finger over it to make sure there are no sticky spots exposed! If there is, dump a little extra flock (or glitter) onto the grid. Tap off the excess and DONE!

Easy Grids of Circles Card by Teri Anderson for Scrapbook Adhesives by 3L

Final Details

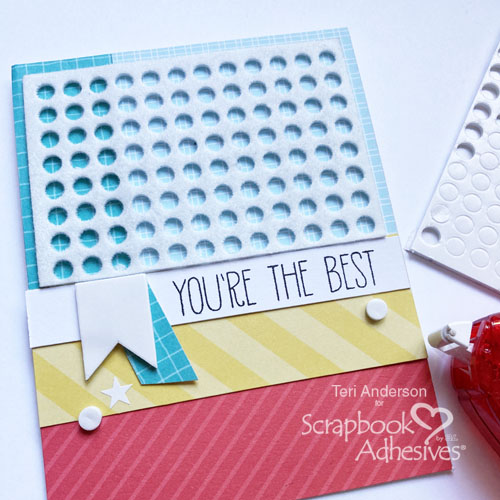
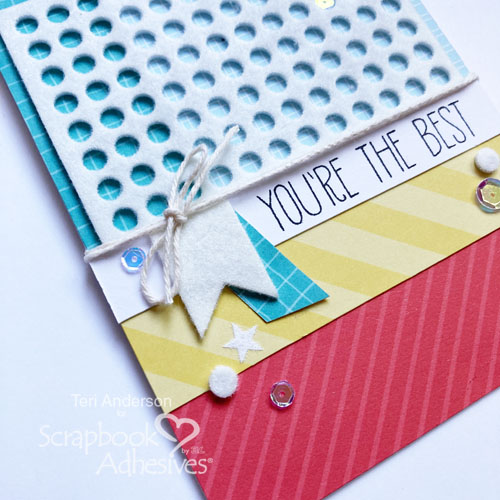
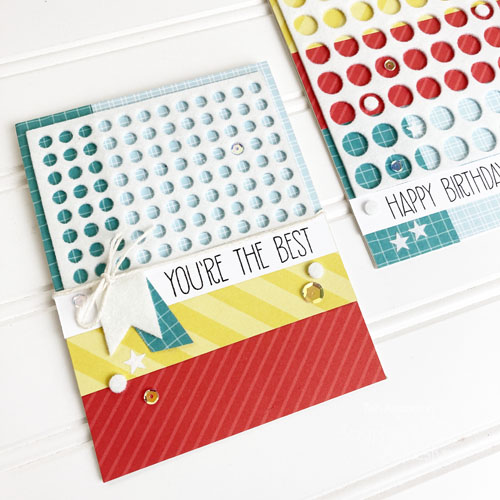
Add to your card’s design by placing a sentiment on it, as well as a few embellishments. Use additional 3D Foam Shapes, I used the 3D Foam Pennants, and E-Z Runner® Stars with flock to round out the design. Don’t forget the sequins too for extra sparkle.

Easy Grids of Circles Card by Teri Anderson for Scrapbook Adhesives by 3L

Finish your card with a piece of twine or floss! Adhesive Dots work great for holding bows in place so they don’t move around!

Easy Grids of Circles Card by Teri Anderson for Scrapbook Adhesives by 3L

Go BIG with a Bigger Circles Grid

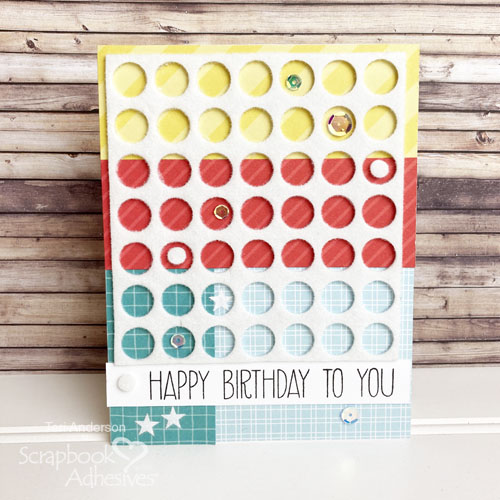
Here’s a second card created with a “grid” from another leftover negative!

Easy Grids of Circles Card by Teri Anderson for Scrapbook Adhesives by 3L

The grid for this card is much larger than on my first card so I decorated some of the grid by embellishing the insides with stars, sequins and smaller circles. I also didn’t feel like using twine on this card so I went without! It would have looked great with twine though if I had decided to do so!

Easy Grids of Circles Card by Teri Anderson for Scrapbook Adhesives by 3L

I hope you are inspired to give this “grid” technique a try next time you have a leftover negative piece of 3D Foam Circles! It’s a great way to get the most bang for your creative buck and let nothing to waste!

Happy creating,
Teri Anderson

Creative Time: 45 Minutes
Skill Level: Beginner

Materials Needed
Scrapbook Adhesives by 3L®

Other
White Cardstock: Neenah Paper; Patterned Papers: Sunny Studio Stamps, Photo Play Paper Co. ; Stamps: Avery Elle (Handwritten Notes Stamp Set); Ink Pad: Ranger Ink; Sequins: Pretty Pink Posh; White Flock: Stampendous; Twine: The Twinery

Save it to Pinterest!

Easy Grids of Circles Card by Teri Anderson for Scrapbook Adhesives by 3L Pinterest

Visit our Website and Blog!
Sign up for our Newsletter so you never miss a contest or giveaway!
instagram purple icon facebook icon purple pinterest purple icon twitter purple icon YouTube icon blog subscription purple icon