You are in our US store • Switch to Europe store

Your Own Kind of Beautiful Card

Who doesn’t love a beautiful and colorful card to brighten one’s day? I’d like to share that kind of card with you today 🙂

Hello, Linda Lucas here! I am honored to be sharing a card on the Scrapbook Adhesives by 3L Blog. If you know me, you would know how much I LOVE their products – they are part of my staple creative diet!
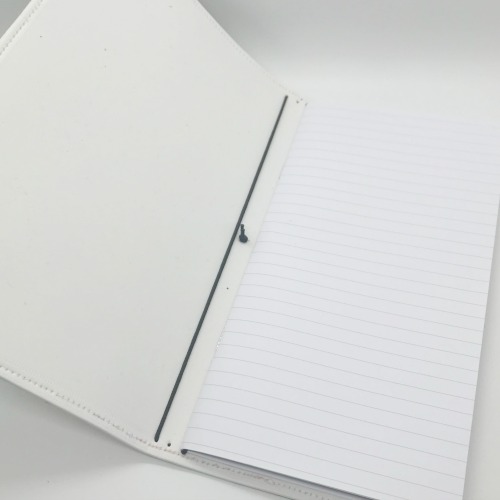
Your Own Kind of Beautiful Card in the Making by Linda Lucas for Scrapbook Adhesives by 3L

Making it Beautiful

I have a colorful card using 3D Foam Butterflies and Adhesive Dots Medium for the embellishments. The E-Z Dots® Permanent Refillable Dispenser and 3D Foam Squares White Regular were mostly used to assemble the card. You can see how easy my card is to create using the right adhesives.

For the card base, you can use watercolored paper or a patterned paper.

To start, place two different sizes of 3D Foam Butterflies shapes onto a circle die cut. Make sure they are placed more on the left side of the circle. First, remove the liner from the top of both butterflies and sprinkle white glitter on top to cover well. Next, press the glitter into the butterflies to secure and tap off excess glitter.

Add a button to each butterfly using a Adhesive Dots Medium, these adhere firmly to the glitter.  Then place an embellished tag next to the butterflies with E-Z Dots® Permanent Refillable Dispenser.

Next, layer strips teal and pink cardstock, along with an intricate die cut strip on top of the card panel with E-Z Dots® Permanent Refillable Dispenser. To pop up the circle and tag ensemble, I used 3D Foam Squares for added interest and a finishing touch. Voila! Beautiful!

  • Creative Time: 30 Minutes
  • Skill Level: Beginner

Scrapbook Adhesives by 3L®:
3D Foam Butterflies
Dodz Adhesive Dots Medium
3D Foam Squares, White, Regular
E-Z Dots® Permanent Refillable Dispenser

Other:
Tag and Button: Authentique Paper; Self-Adhesive Pearls: Want2Scrap; Etched Dies: Spellbinders® Paper Arts (S4-116 Standard Circles SM, S4-504 Arched Elegance and PE-100 Platinum 6™ Die Cutting and Embossing Machine); White, Teal and Pink Cardstock; Glitter

Thank you for joining me! Get your “craft on!”

{{{hugs}}} and happy crafting
Linda Lucas

Making a Mother’s Gift Ensemble

I’m thinking ahead to spring and have Mother’s Day on my mind. My gift ensemble displayed at the Creativation trade show is perfect for the occasion. Hello everyone, it’s Judy! My sweet Mother’s Gift Ensemble features a mini canvas, card and gift bag. I chose a verse about mother on the mini canvas. Another gift idea is a verse for a friend.

Making a Mother's Gift Ensemble by Judy Hayes for Scrapbook Adhesives by 3L

Creating the Canvas Gift

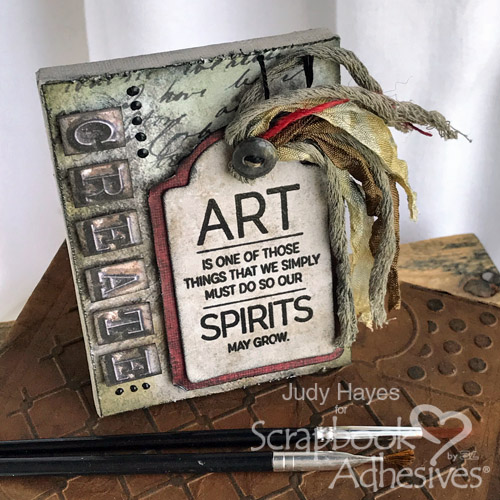
The mini 4 x 4 inch canvas painted with chalk paint to coordinate with my paper. The little teapot was fussy cut from patterned paper and placed in the corner of the canvas with Dual Tip Glue Pen. I used a brush to spread it over the canvas.  Stamp the verse and heat with clear embossing on tissue paper. Remove excess paper around the verse with a wet brush by outlining the verse and then pulling the paper away. Apply Dual Tip Glue Pen to the back of tissue and spread with my finger. Place over the canvas. Finally, the words are popped up with Crafty Foam Tape White. Wrap red twine around the bottom and tie into a tiny bow.

Card Making Details

The card features two die cut oval die cuts and pretty paper flowers. In the smaller white oval, thread twine for a unique accent. In addition, the darker paper behind the large oval shows through the tiny holes would add for another dimension. Ovals are fastened together with E-Z Dots® Permanent Refillable Dispenser and popped up on the card front with Thin 3D Foam Squares Mix White.

Die cut paper flowers and leaves are fastened with Adhesive Dots Small and Adhesive Dots Medium. The blue flower centers were made with a Adhesive Dots Medium covered with tiny beads. The words are popped up with Crafty Foam Tape White.

Assembling the Gift Bag

Using a coordinating two-sided 11 x 12 inch patterned paper, I folded 2.5 inches on the 12-inch side. Also, I added borders of red and striped papers for the top.  Next, score and make the folds vertical to form the sides. Premium Double-Sided Tape ¼ʺ was applied to the edge to fasten into a bag shape. The bottom was scored, folded and secured with Premium Double-Sided Tape ¼ʺ. Note: I found the basic directions online and adjusted the dimensions. At the top, I fastened two white ribbon handles inside the bag top using Premium Double-Sided Tape ¼ʺ. I fastened patterned paper over the ribbon ends. Tie a small tag to the handle with twine.

Simply slip the mini canvas into the gift bag, the card into an envelope and the gift ensemble is ready to give to someone special!

Thanks for visiting!
Judy Hayes

Scrapbook Adhesives by 3L®:
Crafty Foam Tape White
Adhesive Dots Small
Adhesive Dots Medium
E-Z Dots® Permanent Refillable Dispenser
Thin 3D Foam Squares Mix White

HomeHobby By 3L®:
Dual Tip Glue Pen
Premium Double-Sided Tape ¼ʺ

Other:
DecoArt® Chalky Finish, Imagine Crafts/Tsukineko Versafine Onyx Black, KaiserCraft High Tea Collection, Little B Tags, Penny Black Happy Wishes, Spellbinders Hemstitch Ovals,  Spellbinders Cinch and Go Flowers III, Spellbinders Bitty Blossoms, White & Red Cardstock, White Tissue Paper, Red Twine, White Ribbon, Mini Canvas 4 x 4ʺ

Valentines Owl Card Duo with Adhesive Sheets

Looking for a sweet Valentines idea for a card? It’s Valentine’s Day! Although we don’t usually go all out for this day, I do like to personalize little things here and there for my kiddos.

This year we kept it simple with each receiving a card with a gift card inside to a favorite place of theirs for a mommy or daddy date. This is where they get one on one quality time doing something they love. I can never give gift cards in the boring packaging it comes in so I made these sweet cards today with some left over pieces I had on my crafting desk.

Valentines Owl Card Duo with Adhesive Sheets by Latrice Murphy for Scrapbook Adhesives

Sweet Valentines for the Kids

First, gather up my supplies such as patterned papers, clear stickers, colored cardstock card bases and my Adhesive Sheets 4×6 in. These adhesive sheets make attaching large cardstock pieces a total breeze! Also I love to have full adhesion all along the card base some nothing comes apart later. I also grabbed my 3D Foam Squares White Regular. I knew that all my pieces were flat so I would need to raise a few to add some dimension to the card front.

You can see in the photo below that it covers perfectly.

Both cards were created the same way. I layered white cardstock on an angle, then layered patterned paper on the opposite angle for a fun asymmetrical look.

Next, I used my 3D Foam Squares White Regular to adhere the next piece of paper. This is actually a card base with wood grain patterned that I love so I just cut it up for this project. Then I did the same for the owl piece and placed it right in the center.

For the finishing touches on both cards, I pulled out some clear stickers, wood veneer, and my Dual Tip Glue Pen.

I love how these turned out! So excited to give these to my kids. Some more images below – super cute and colorful!

Scrapbook Adhesives by 3L®:
3D Foam Squares White Regular
Adhesive Sheets 4×6 inch

HomeHobby by 3L®:
Dual Tip Glue Pen

Other:
Cardstock, Patterned Papers, Stickers and Wood Veneer


Pin this!

Valentines Owl Card Duo tutorial by Latrice Murphy for Scrapbook Adhesives by 3L

Colorful Dimensional and Glittery Valentine Cards

Sharing a few fun cards that are colorful with dimension and of course, glittered to celebrate the people you love! Good morning, Michele here. I find coloring to be so therapeutic and relaxing.

Colorful Cards Countdown

This boat image was colored with a combination of watercolors and markers.  Using Crafty Foam Tape, I adhered to a pink card panel to pink and then polka dotted cardstock for interest.

Colorful Dimensional and Glittery Valentine Cards by Michele Kovack for Scrapbook Adhesives by 3L

I adhered the silk bow and gem using Dodz Adhesive Dots Mini to the top of the boat for a fun little added touch!

For my next card I watercolored the image and added gems to the centers of the X’s and the little silver heart using Dodz Adhesive Dots Mini.  The colored image was adhered to pink, silver, and white cardstock using Crafty Foam Tape for dimension.

I wanted the O’s to be glittery, so I used the Dual Tip Glue Pen and sprinkled glitter over it.

My last card was colored with markers and colored pencils.  I used the E-Z Squares® Refillable Dispenser to adhere the image to the two pink colored card stocks and then Crafty Foam Tape for the final layer on the kraft cardstock.

Once again I love adding little “extras” to my cards, so I adhered a pink satin bow and glittery heart to the corner using Dodz Adhesive Dots Mini.

Happy Valentine’s Day (a bit early) to all of you! Thank you so much for popping in!

Scrapbook Adhesives by 3L®:
Crafty Foam Tape White
E-Z Squares® Refillable Dispenser
Dodz Adhesive Dots Mini

HomeHobby by 3L®:
Dual Tip Glue Pen

Other:
Colored Pencils, Watercolors, Markers, Ribbon, Rhinestones, Glittery Hearts

Spring-Inspired Lattice Card

Hello crafty friends, Tracy here today with a little Spring-inspired Lattice Card to share. In my neck of the woods, the weather is blustery and cold. I just keep dreaming of longer, warmer days and the bloom of Spring. So I created this little project to reflect those feelings.

Spring-Inspired Lattice Card by Tracy McLennon for Scrapbook Adhesives by 3L

Cardmaking Details

I started this project by cutting strips of patterned paper and painting my wood frame with white paint.

I added Adhesive Lines all the way around the back of the wood frame.

Add strips of patterned paper evenly spaced all in one direction to the back of the wood frame.

Weave strips of patterned paper through in the other direction tacking the ends of the strips onto the Adhesive Lines.

Using the E-Z Runner Permanent Fine adhesive, and Crafty Foam Tape to assemble the larger layers of the card.

To add dimension between layers, add small 3D Foam Squares to the back of the patterned lattice and frame. Adhere to the layered card base.

Using Adhesive Dots and more 3D Foam Squares, I added the die cuts and chipboard accents to complete.

Thanks for stopping by!
Tracy

Scrapbook Adhesives by 3L Supplies:
Adhesive Dots Medium Ultra Thin
Adhesive Lines
Crafty Foam Tape White
3D Foam Squares White Small Size
E-Z Runner® Permanent Fine Adhesive Dispenser

Other:
Patterned Papers: Simple Stories (Bloom & Grow Collection), White Cardstock, DecoArt: White Paint

Announcing our 2018 Design Team!

These talented design team members will inspire you in 2018!

Announcing our 2018 Design Team
Many thanks to those who took the time to submit. We are overwhelmed and grateful for all the entries. Many hard decisions were made. Please join us in welcoming our new team!

Welcome new Design Team members, starting on April 1st:
Linsey Rickett
Shannon Morgan
Shellye McDaniel
Teri Anderson
Valerie Ward

Joining our current members:
Christine Emberson
Christine Meyer
Dana Tatar
Judy Hayes
Terri Burson
Tracy McLennon
Yvonne van de Grijp

Masking Technique Background using E-Z Dots Repositionable

The more I play with E-Z Dots Repositionable Adhesives the more I find that they are a necessity in my crafting arsenal.  They have a wide variety of uses and my current favorite is to use them to create unique backgrounds.  Today I am going to showcase how you can use the E-Z Dots® Repositionable Refillable Dispenser to create a unique background on your paper crafts.

Masking Technique using repositionable adhesive on a background

A Closer Look at the Background

I used the  E-Z Dots® Repositionable Refillable Dispenser as a mask on my background.  First I applied it and then I painted over it with mist.  Once it dried I just rubbed the adhesive right off. As you can see it creates a unique but subtle background. This was a completely new technique for me but I am so happy with the end result!

Additionally I had to bring in another favorite of mine these days: 3D Foam Embellishments, more specifically 3D Foam Snowflakes! I’ve been foiling these adhesives like crazy lately, but today I opted for glitter. Mostly because I wanted them to be white. Believe me, if I could have found a way to use foil, I would have gone for it! I’m all about the “Wear Your Adhesive on the Outside” approach these days!

Masking Technique using E-Z Dots on a Scrapbook Layout

I also incorporated Creative Photo Corners into the layout – adding them to my pictures.  The black ones were a perfect choice to bring out not only the black in the pictures but also the black title! They are available in a variety of colors from white to gold to kraft and more!

Process Video

All of these details and my process for doing them can be found in my process video below:

Thanks so much for joining me today!
Christine

Scrapbook Adhesives by 3L®:
3D Foam Snowflakes
E-Z Dots® Repositionable Refillable Dispenser
Creative Photo Corners
E-Z Runner® Grand Refillable Dispenser

Other:
February Kit from The ScrapRoom Kit Club, Mist from Dylusions

Intricate Die Cut Sticker made with Adhesive Sheets

Do you love intricate die cuts for your cards? They are so hard to cover with adhesives and sometimes so messy, especially with liquid forms. Hello everyone, Yvonne here! I’m sharing how to adhere those detailed die cuts in a QUICK AND EASY WAY by simply using our Adhesive Sheets!

Adhesive Sheets give you incredibly strong, clear, edge-to-edge coverage without stringy application! Specifically created for die-cutting machines and punches and will not gum up the cutting elements. Perfect for intricate die cuts like mine!

Create an Intricate Die Cut Sticker with Adhesive Sheets by Yvonne van de Grijp for Scrapbook Adhesives by 3L

It’s always handy to have some cards in your stash to send someone you want to show your appreciation for something. Accent card by using mulberry flowers, it’s like sending a sweet bouquet!

The Intricate Details

Run the E-Z Runner® Grand Refillable Dispenser horizontally over a rectangular size patterned cardstock. Tip: I like to use a ruler to run it along to make sure to get a straight line.

Simply press a piece of white ribbon upon and fold the ends around the card.

Adhere the ends to the back using the E-Z Runner® Grand Refillable Dispenser.

Next, adhere to a slightly larger rectangle shaped piece of green (patterned) cardstock using 3D Foam Squares for dimension. Then adhere to a white card base using the E-Z Runner® Grand Refillable Dispenser.

Making an Intricate Die Cut Sticker:

Lift the yellow release of a sheet Adhesive Sheets 4×6″ and place a piece of gold cardstock on top. Trim the gold cardstock to the size of the die-template you are going to use. Then die-cut and emboss the etched die from the gold cardstock.

Remove the release liner and place the golden strip on the card.

Embellishing the Card:

Use Adhesive Dots to adhere the flowers, leaves, and bow to the card. I used Adhesive Dots Large for the flowers and Dodz Adhesive Dots Medium for the leaves and the bow. For the stamens, I used the Dual Tip Glue Pen to place on the card.

The sentiment was popped up with 3D Foam Squares White in a small size on the card front. Finally, add some rhinestones. Tip: if you have rhinestones that are not self-adhesive: use Adhesive Dots Mini or Adhesive Dots Micro.

Scrapbook Adhesives by 3L®:
Adhesive Sheets 4×6″
E-Z Runner® Grand Refillable Dispenser
3D Foam Squares White Mix
Adhesive Dots Large
Dodz Adhesive Dots Medium

HomeHobby by 3L®:
Dual Tip Glue Pen

Other:
Cardstock (white, patterned, gold), mulberry flowers, leaves, stamens, rhinestones, satin ribbon, Spellbinders Paper Arts® (Fabulous Fretwork), Mama Elephant (labeled Messages), scissors, paper trimmer, ruler.

I hope you enjoyed the tutorial and wishing you happy crafting!

Hugs from Holland,
Yvonne

Making Planner Borders with Scrap Paper

Most of us are over-run with scrap papers, right? Hello, Terri here, to show you a fun and easy way to make use of your scrap paper pile and decorate your planner at the same time, using tools you probably already have.

Making Planner Borders with Scrap Paper by Terri Burson for Scrapbook Adhesives by 3L

BEGIN WITH THE SCRAP PAPERS:

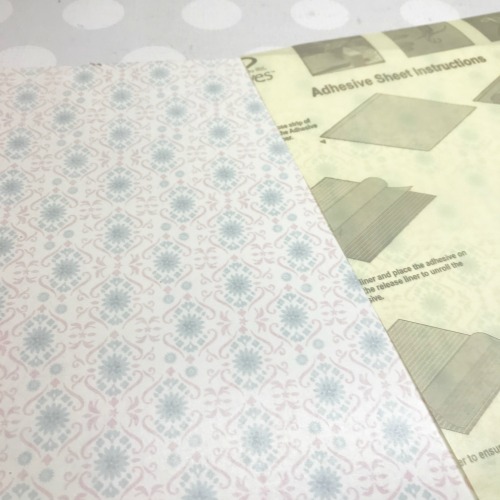
Large open spaces can be intimidating when working in your planner.  Selecting a few choice colors can be an easy way to get started.  February is the month of love, so I’ve chosen a pink and grey theme for my pages.  My selected piece of scrap paper just so happens to be the perfect size to match the Adhesive Sheets 4×6″.

MAKING THE BORDERS:

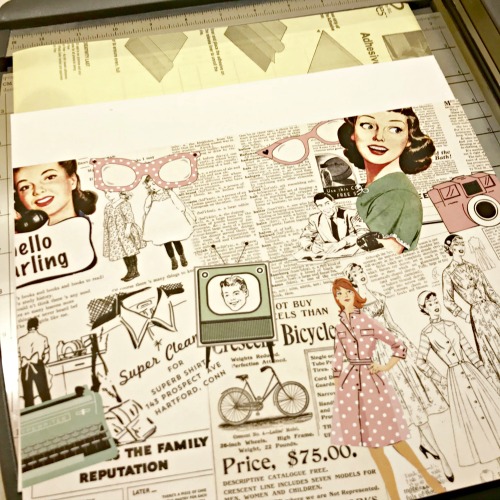
Creating these 1.25″ by 1/4″ borders were so easy.  Simply peel the backing from your Adhesive Sheets 4×6″ and apply to the backside of your cardstock.  Place a decorative edged die on your paper and run through a manual die cutting machine.  Decorative scissors or a decorative border punch are alternative options.

GLITTER AND GLUE:

Since we’re already decorating our planner, let’s add some sparkle and shine!  Dab a few drops of glue, using the Dual Tip Glue Pen, as I’ve done on the heart banner below, then sprinkle with extra fine glitter.  Now, you’re “Wearing Your Adhesive On The Outside”!

POP IT UP:

My 3D Foam Squares White Mix make an appearance as well, by adding interest and added dimension to my cardstock stickers by popping them out.  Simply add a bit of paper backing to your stickers, then place your foam squares.  This prevents the sticker from adhering to your planner pages when closed.  It’s also another fabulous way of stretching your sticker stash!

Thanks so much for stopping in.  Be sure and check out my process video below!  See you next time – Terri

Scrapbook Adhesives by 3L®:
3D Foam Creative Embellishment Kit
3D Foam Squares White Mix
Dodz Adhesive Dots Medium
Adhesive Sheets 4×6″

HomeHobby by 3L®:
Dual Tip Glue Pen

Other:
Paper; Ephemera; Stickers; Die-cutting Machine; Scalloped Die; Glitter; Scissors; Trimmer

Paper Cactus Trio Tutorial with Premium Double-Sided Tape

Hi friends! Dana Tatar here today sharing a fun paper craft tutorial. I have purchased several different types of succulents  and cactus for my home. Sadly, they all eventually meet the same fate. My house plants suffer from either too much or too little attention. Despite my best efforts I really struggle to keep my houseplants alive. I’ve solved my problems by folding up a super cute paper cactus trio!

Paper Cactus Trio tutorial by Dana Tatar for Scrapbook Adhesives by 3L

I found the templates for these succulents on the Oxygami Facebook page. They are offering 6 wonderful designs for free! I selected three of my favorite cactus designs to brighten up my décor. After assembling each cactus I added embellishments to help bring these designs to life.

How to Fold and Embellish a Paper Cactus Trio

Oxygami Paper Cactus Assembly by Dana Tatar

1: Download the patterns and instructions. Print the patterns onto colorful paper and carefully cut out. Score and fold each piece of the pattern according to the instructions.

2: Apply Double-Sided Tape to the flaps on each pattern.

3: Remove the paper liner from the Double-Sided Tape and assemble each cactus as directed.

Oxygami Paper Cactus Embellishment by Dana Tatar

4: Embellish! I mimicked the look of spines by adding a length of white fringe ribbon to the first design. To replicate the look of potting soil, I applied brown floral ribbon to the top of the planter on the second design. Finally, I used a Large Adhesive Dot to add a pink flower to the top of the third design. The Large Adhesive Dots offered both transparency and a strong, flexible hold that was perfect for this project.

I hope I have inspired you to create some dimensional art for your home!
Thanks for stopping by!
~Dana Tatar

Scrapbook Adhesives by 3L Supplies:
Adhesive Dots Large

HomeHobby by 3L®:
Premium Double-Sided Tape 1/8″

Other:
English Cactus Patterns (Oxygami); Colored Copy Paper (Astro Brights); Ribbon