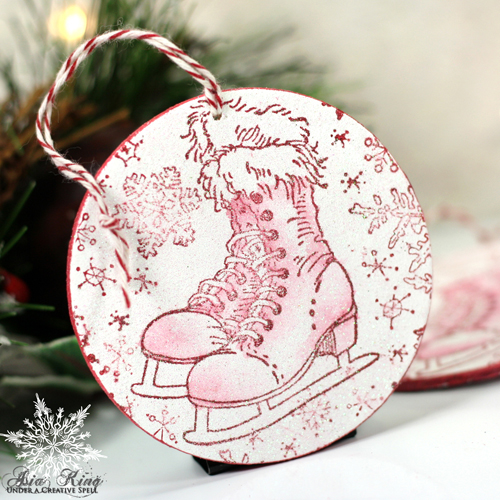
Hello everyone! Asia King here :). Did you all have a nice Christmas? Christmas may be over but winter is still here and what a better way to make the most of it than go ice skating! Sadly, there’s no snow around where I live so DIY ornaments with stamped Ice Skates will have to do for now :). I prepared a short ‘pin-torial’ for you for this fun and easy project.
You will need:
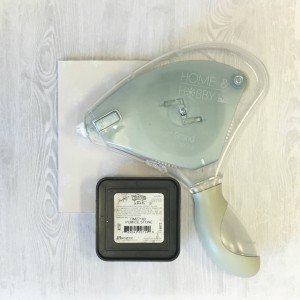
Scrapbook Adhesives by 3L®: Adhesive Sheets 4×6″
Other supplies: Ice Skates and Snowflake Sky rubber stamps , Crystal Micro Glitter (Stampendous); DecoArt Chalky Finish Paint – Everlasting; Brilliance Pearlescent Poppy ink; water brush; wooden flat coasters; baker’s twine
Here are the steps explained:
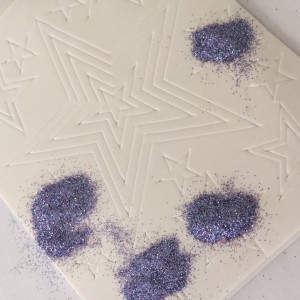
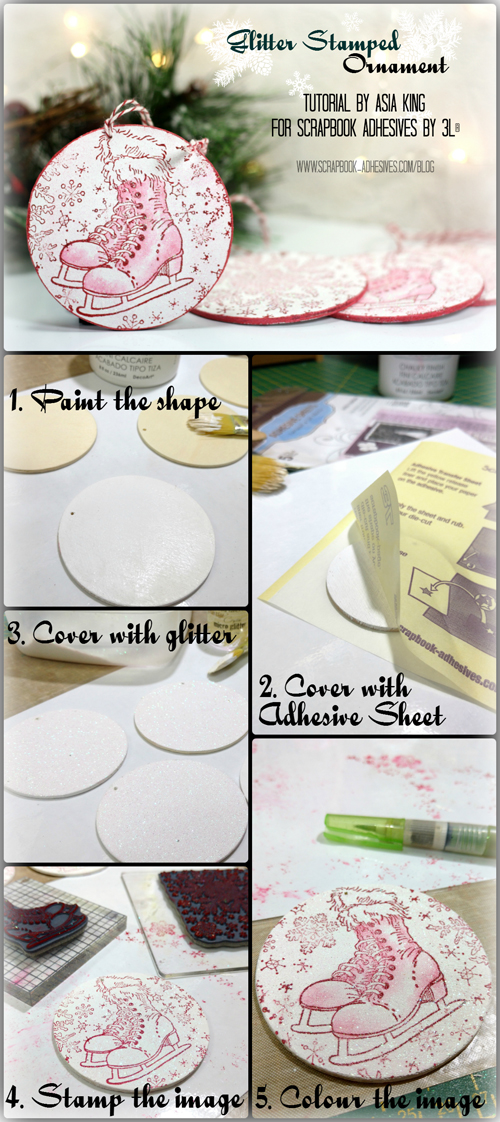
- Paint your wooden coasters both sides with white chalky finish paint and allow to dry. Chalky finish paint will take the adhesive better that ordinary acrylic or poster paint.
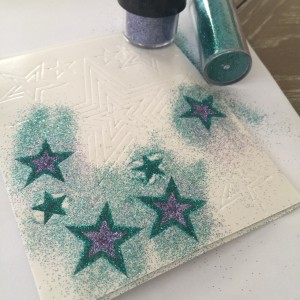
- Cover the coasters with adhesive using Adhesive Sheets 4×6″. Use a wooden spoon or spatula to burnish over the protective sheet to make sure the adhesive transfers fully.
- Sprinkle the glitter over the adhesive, press to cover fully and shake off the excess. No need to wait for the adhesive to dry! 🙂
- Stamp the ice skates and snowflake images directly onto the glittered surfaces and heat set with a heat tool.
- Pick up some ink from a craft mat with a water brush and add some shading to the ice skates. Swipe the ink pad around the edges to add a finishing touch. Allow the ink to dry.
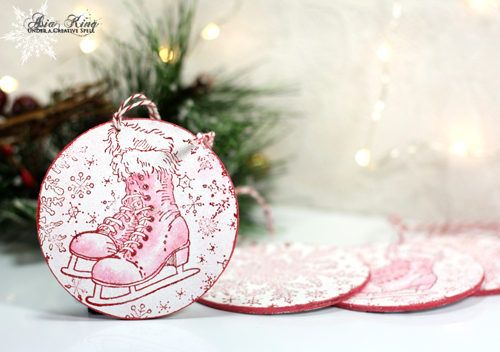
And that’s it – you’ve got yourself a nice glittery set of ice skate ornaments. I’m going to use mine as tree ornaments so after drilling a small whole I added a twine for hanging. But you can use yours as mulled wine coasters after a chilly day of ice skating! If you do, be sure to cover them with a proper varnish for a waterproof finish.
This is my last post this year so I’d like to wish you all a wonderful New Year 2016, full of accomplished dreams and crafty goodness!
Big hugs