You are in our US store • Switch to Europe store

You Are Strong Mixed Media Canvas

Hi everyone! It’s Lisa back with another mixed media piece today and I had such a good time creating this one…it just flowed. I LOVE when that happens.  Here’s what I created:

LisaAdametz-MixedMiediaStrong-01272016-1

Fun, isn’t it? And (as usual for me) it’s not that hard to create. The finished piece is a 5″ x 7″ flat panel canvas. So it’s perfect for gift giving.

Start by using Art Medium to adhere pieces of torn tissue paper randomly to the canvas.  Make sure that the pieces are dry before moving on.

Once the medium is dry then you may begin adding the acrylic paints of your choice. This part is entirely subjective. What I find appealing YOU may not. 😉 I used a teal, lime, and orange.

LisaAdametz-MixedMiediaStrong-01272016-3

Then I added some Gauze and stuck in place with more Art Medium. Once dry, I applied more paint on top of the gauze and on the canvas. I used a spatula adding the paint this time to create more depth and deeper color.

(In the photo below the medium is not dry so it still appears white, once it dries it is transparent and blends in.)

LisaAdametz-MixedMiediaStrong-01272016-4

I had some die-cut butterflies.

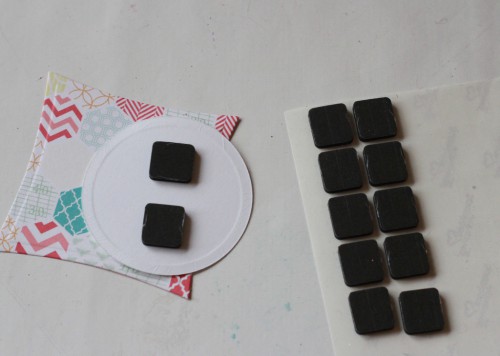
Then add a small square from the 3D Foam Squares – Black, Mix to the back of each butterfly and slightly curve the wings to make them look more dimensional.

LisaAdametz-MixedMiediaStrong-01272016-5

(The shimmer of the Silver Pigment Powder really shows in this photo!)

LisaAdametz-MixedMiediaStrong-01272016-6

Lastly stamp a selected sentiment. Using an archival ink is preferable.

LisaAdametz-MixedMiediaStrong-01272016-7

I added a touch of a white pigment pen around the sentiment to help highlight it. Using your finger with this type of pen is super easy. A watered down white acrylic paint (or Gesso) is an alternative if you don’t have this type of pen.

And here’s a little close-up of the where the gauze is so you can see all the texture it has:

LisaAdametz-MixedMiediaStrong-01272016-8

I hope you enjoyed the tutorial today and how to use some of the new products that will be coming soon.

Scrapbook Adhesives by 3L® Products:

3D Foam Squares – Black, Mix

Other products used:
Golden Acrylics
Ranger Jet Black Archival Ink
Donna Downey Stamp
White Pigment Pen
Spellbinders Paper Arts Die – Cascading Butterflies
Paintbrushes
5″ x 7″ flat panel canvas (Artist’s Loft)
Art Medium
Gauze
Pigment Powder Silver

LisaAdametz-sig

Visit our Website and Blog!
Sign up for our Newsletter so you never miss a contest or giveaway!

instagram purple icon facebook icon purple pinterest purple icon twitter purple icon YouTube icon blog subscription purple icon

Hello Card & Mini Canvas

0116LY-hellocard

Hello Latisha here with you, and today I am sharing two projects.  A diecut hello card and a painted mini canvas.  These are part of an ensemble with a large canvas that I blogged about earlier this month here.

I used the same technique on all three projects, where I added Scrapbook Adhesives by 3L E-Z Dots Permanent to my project, and then added glitter.  I love how this looks on a project, how the paint and pattern paper are able to shine through the glitter.


0116LY-minicanvas

This mini canvas is 4×4 inches.  I painted the canvas first. Then layering the diecuts.

  1. Paint canvas
  2. Apply Scrapbook Adhesives by 3L E-Z Dots Permanent Refillable to the canvas.
  3. Apply glitter, tap off excess.
  4. Adhere heart diecut to the canvas by using Home & Hobby Extreme Double Sided tape.
  5. Adhere the star using Scrapbook Adhesives by 3L 3D Foam squares.
  6. Adhere the xoxo diecut using E-Z Dots adhesive.
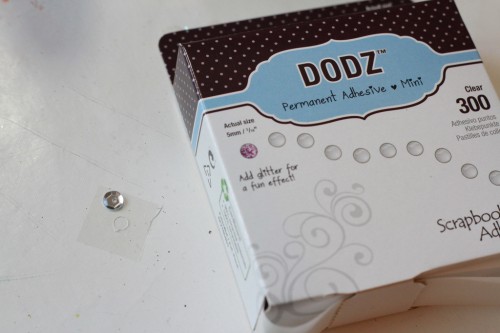
  7. Apply sequins to the canvas by using Scrapbook Adhesives by 3L Dodz small

Materials Used:
Scrapbook Adhesives by 3L E-Z Dots Permanent Refillable
Scrapbook Adhesives by 3L Dodz small
Home & Hobby Extreme Double Sided tape
Lawn Fawn pattern paper
stickers
acrylic ink (aqua, yellow & black)
sequins
glitter
Scrapbook Adhesives by 3L 3D squares (white small)

white card stock

Lava Lamp!

Michele here with a fun Valentine to share with you today!  I loved lava lamps as a kid and decided it would be perfect for a love card!  I used E-Z squares® to adhere the polka dot paper and the center piece as well.  I added glittery hearts in shades of pink as well as a random gold sticker from my stash.

lava lamp

I used Dodz™-small to attach the hearts, clear dots, and the ribbon.  I love that they are so easy to use!

lava lamp2

lava lamp3

Thank you so much for stopping by!  Enjoy your Sunday!

Supplies: Dodz-Small,™, E-Z Squares®,  die cut machine, ribbon, glitter, Dew Drops, glitter, ink (pink), card stock

Planner Pages

Hi everyone, Laurel here with my planner pages for next week.  I love planners, have for as long as I can remember.  I can’t believe I never thought of making them pretty before!  What a great way to combine 2 passions of mine… my planner and my crafting!

Planner Pages by Laurel Seabrook

When I do my projects I like to include as many supplies as I can – stamps, papers, die cuts…. must get my money’s worth out of them 😉  Decorating a planner is the perfect way to use up some scraps.  To mount my stamped image I used the 3D Foam Squares as I always love a bit of dimension in my projects.

2016 01 22_2386

The E-Z Runner® Grand Permanent Strips works well for adhering the little bits and pieces.

2016 01 22_2394

Are you a planner addict?  How do you use yours?

Products Used

E-Z Runner® Grand Permanent Strips (150′)

3D Foam Squares

Other Products:

  • Stamps: Unity Stamp Company, Technique Tuesday, Precious Remembrance, Hero Arts, Studio L2E
  • Papers: Pebbles
  • Die Cut: Silhouette
  • Punch: American Crafts

Save

“Be Happy” Mixed Media Card with Pigment Powder

Hi there,

Today I want to show you again a mixed media card “Be Happy” with awesome Pigment Powders.

Be Happy card by Stephanie Schutze for Scrapbook Adhesives by 3L

Here is how I created this card.

Stephanie_Karte_BeHappy_2

1. I used a watercolor paper and the high pigment powder in Blue, Gold and Silver colors.

I used the Pigment Powders dissolved in water and rubbed with a brush.
These are the three different colors on my background. I cut out the background into stripes and adhered it onto my card with the E-Z Dots® Permanent.

2. I created a little flower by using canvas ribbons, lace ribbons, die cut flowers, and a piece of organza and burlap ribbons. I used the Dodz Adhesive Dots Medium to adhere it together.

3. From threads of canvas ribbons and twine I created this little loop.

4. I used the Adhesive Dots Medium to adhere it onto my card.

5. I used the Adhesive Dots Medium to adhere the flower onto my card.

6. I made some little branches by using a paper punch and adhered them with the E-Z Dots® Permanent.

7. The heart is also a die cut and I used a 3D Foam Squares White Mix to adhere it.

8. Also this little butterfly is painted by using the gold pigment powder and adhered with a 3D Foam Squares White Mix.

9. For the finishing touches I used die cut alpha letters.

Stephanie_Karte_BeHappy_3

Stephanie_Karte_BeHappy_1

I wish you a nice creative day and want to show you also my projects I made for the CHA 2016 by using different products from Scrapbook Adhesives by 3L® .

Stephanie_CHA_2016

Stephanie 🙂

Supplies from Scrapbook Adhesives by 3L®

Other materials:

  • Pigment Powder Blue
  • Pigment Powder Silver
  • Pigment Powder Gold
  • Twine – blue
  • Canvas Ribbons
  • Lace Ribbons
  • Texture Ribbons
  • Die Cut machine
  • Heart Die, Flower Die
  • Paper Punch Butterfly and branch
  • Watercolor Paper

Visit our Website and Blog!
Sign up for our Newsletter so you never miss a contest or giveaway!

instagram purple icon facebook icon purple pinterest purple icon twitter purple icon YouTube icon blog subscription purple icon

Winter Card

Hi everyone, Christine here today with a simple Winter card, ideal for a friend who has their birthday at this time of year or could be used as a thank you card.

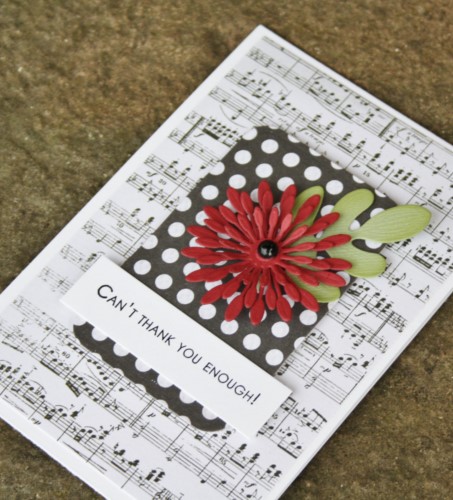
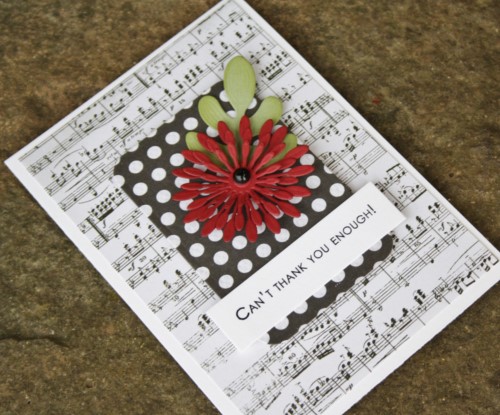
I gathered the items I needed, a white card base with rounded corners, snowflake and flower die cuts, E-Z Runner® Permanent Strips Refillable and 3D Foam Squares – White, Regular.

I layered and attached the die cut snowflakes using E-Z Runner® Permanent Strips Refillable.  One of the snowflakes is cut from cork which adds another dimension to the card.

CEmberson - Winter Card 4

To assemble and affix the flower I used 3D Foam Squares – White, Regular and these also worked to attach the sparkly button.  It was nice to use a mix of both snowflakes and flowers.

Thanks for stopping by today and don’t forget to check out all the great products on the website.

Christine Emberson

Products used:

E-Z Runner Permanent Strips Refillable3D Foam Squares – White, Regular,

Spellbinders dies: Create A Flake Six and Daisy Flower Topper

White and blue cardstock, cork, distress ink and button

How to Alter a Tin With Washi Tape

I am SO excited to share with you one of my CHA Mega Show projects!

Girlie Grunge Tissue Tape Tin by Margie Higuchi

To give the surface “tooth” to grab on to, I sanded the entire tin with fine grade sand paper which you can get at your local hardware store.

MargieHiguchi GirlieGrungeTissueTapeTin Step1

Next I painted two coats of Gesso (dry time between coats) and then painted white acrylic paint. When the paint dried, I went to town! First I covered the base with washi tape in wood colors. Using strips of the tape, I covered about two layers for a wonderful natural color. Repeat the same process with the lid, using washi tape in oak.

MargieHiguchi GirlieGrungeTissueTapeTin Step2

For the embellishment, I looped white fabric covered wire twice and colored with brown Pigment Powder Brown and water as the base. Then added gold Pigment Powder  and water into a mister to spray the ring as an accent. Place on the lid with Dodz Adhesive Dots Medium. With two feather and “YOU” die cuts, I used different sizes of 3D Foam Squares White, Mix pack for dimension.

MargieHiguchi GirlieGrungeTissueTapeTin Step5

As the finishing touch, I tied natural colored Twine to the feather’s stem and it’s ready to be given away…

Girlie Grunge Tissue Tape Tin by Margie Higuchi

This tin is part of a three-piece ensemble…

MargieHiguchi 500WM GirlieGrungeTissueTapeTinEnsemble CHAW16

I hope this inspired you to get your tissue tape ON!

Thanks for stopping by!
Margie Higuchi

Supplies:
• Scrapbook Adhesives by 3L®: Dodz Adhesive Dots Medium and 3D Foam Squares White, Mix
• Dies: Spellbinders® Creative Arts
• Gold Metallic Foil Cardstock: WorldWin Papers®
• Gesso: Faber-Castell® Design Memory Craft®
• Altoids Tin
• White Fabric Wire
• Fine Grade Sand Paper
• Mister

See my Gold Feathered Thank You card here:

Pigment Powder Gold Feathered Thank You Card by Margie Higuchi

Today Is A Good Day – Art Tag With Pigment Powders

Hello everyone! Asia King here. This is my first post here in 2016 so let me say ‘Happy New Year!’ (it’s still January so I think I’m allowed lol). Today I have an art tag for you with a beautiful shimmery background I made using gorgeous pigment powders.

Today is a good day tag_Asia King1

I started my background by covering a manila tag with Adhesive Sheets 4×6″. I peeled the protective sheet off in stages, tearing sections off one at a time and covering them with different colours of Pigment Powders. From the bottom up I used Silver, Brown, Wine, Gold, Pink, Gold again, Brown and Silver.

Today is a good day tag_Asia King3

Next I stamped the script with Chiffon ink and heat embossed it with clear embossing powder. The Pigment Powders reacted with the ink and heat embossing in different ways creating cool colour variations. Next, I added a few pieces of Ash Washi Tape and added some black rub-ons.

I tucked my flower bouquet in a little canvas bag embellishment but if you don’t have one it would be really easy to make your own using Canvas Ribbons. To secure my flower basket I used layers of DODZ 3D. I then added a seam binding ribbon hand dyed with my DIY Pigment Powder shimmer mists.

Today is a good day tag_Asia King2

I also added a small Lace Ribbon trim under the basket adhered with the Adhesive Sheets 4×6″. The smaller rose and berries at the top were secured with DODZ Small. I finished the tag with Liquid Pearls accents and with a quote sticker popped over small Thin 3D Foam Squares – Mix Black.

Today is a good day tag_Asia King4

Supplies:

Adhesive Sheets 4×6″,  DODZ SmallDODZ 3D, Thin 3D Foam Squares – Mix Black

Other supplies:

  • Stampendous: Cling Vintage Letter stamp, Clear Detail Embossing Powder
  • Clearsnap MIX’D MEDIA INX – Chiffon
  • Liquid Pearls, flowers, ornamental berries, manila tag, seam binding ribbon


I hope you like my first project of the year! Thank you for stopping by and your lovely comments!

Big crafty hugs

Asia King Blog signature

Save

Embellished Mixed Media Canvas

Hello everyone!  Latisha here with you today.  Right now Scrapbook Adhesives by 3L finished up having a booth and teaching a class at the Craft & Hobby Association trade show.  This show is where the craft industry reveals new product lines for the upcoming year.  The 3L design team provides stunning artwork for the booth, and today I am sharing one of the projects that I created for this years show.

I painted, embellished a 9×11 inch canvas.  I call it mixed media-clean-latisha-style lol.  I love mixed media, but I also love clean lines and design and seem to over edit.  Maybe I need to learn to just let go and add more layers?  Anyhow, I do not have a photo tutorial for you, but I will walk you through the steps on how I created the canvas below.


IMG_1459


  1. Decide on a photo to use, then select acrylic paints that compliment the photo.
  2. I used, yellow, aqua and black for my acrylic paints.
  3. To get the mixture of colors, I added in the yellow paint right before the aqua paint was dry, to get some green.
  4. Once dry (you can use a heat gun to speed up the process) adhere the photo using  Home and Hobby Extreme Double Sided Tape.  This is a strong permanent adhesive that will keep the photo in place.
  5. Using Scrapbook Adhesives by 3L E-Z Dots Permanent Refillable, apply strips of adhesive at the bottom of the canvas.
  6. Sprinkle green and aqua glitter over the adhesive.
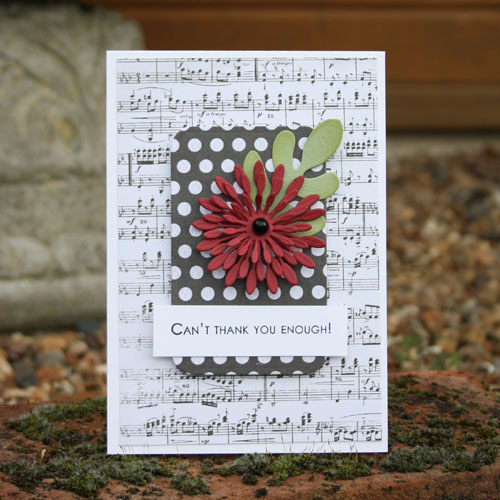
  7. This gives the canvas another layer of texture, it looks cool, plus its glitter…super score for me.
  8. Adhere strips of pattern paper using the Double Sided tape again.
  9. Using Scrapbook Adhesives by 3L E-Z Dots Permanent Refillable, adhere the xoxo diecuts to the canvas.
  10. Apply sequins to the canvas using Scrapbook Adhesives by 3L Dodz small.
  11. Create a title using stickers.

IMG_1460


Materials Used:

Scrapbook Adhesives by 3L E-Z Dots Permanent Refillable

Scrapbook Adhesives by 3L Dodz small

Home & Hobby Extreme Double Sided tape

Lawn Fawn pattern paper

stickers

acrylic ink (aqua, yellow & black)

sequins

glitter
CHA Mini Canvas

Hi everyone! It’s Lisa “reporting” live from #CHA2016 and sharing one of my mini canvases that I brought to the show with me. I love doing projects like these because you can really get a full use of the adhesive line in a full spectrum of ways that you may (or may not) have thought of before. I hope to spark your inspiration today.

LisaAdametz-CloudSilverLining-01112016-1

(Why is glitter so hard to photograph? Someone, please tell me. 😉 )
This cute little mixed media piece was created using so many goodies. I colored the gauze with pigment powder (silver) by adding a tiny mixture of water and the pigment.

To make the cloud, I die-cut the shape using 3D Foam Creative Sheets, Mix- Black & White and then coated it completely with the most gorgeous glitter from Fun Stamper’s Journey. It’s super fine and does NOT come off after being burnished in. To make the cloud look more “puffy”, I tucked some Dodz underneath to give it that cloud-like appearance.
The blue background was created with Gelatos® in a few blue shades and a bit of water. Adding shimmer with the pigment powder in blue. Additional interest was then achieved by adding the starssheets. After they were applied, they were dusted with the pigment powder in gold.

I scraped some Glass Bead Bead Glitter Gel onto the surface in a few areas to add some additional texture and shimmer. And I also used scraps of 4″ x 6″ Adhesive Sheets with remnants of silver foil to add high shine.

Here is a close-up:

LisaAdametz-CloudSilverLining-01112016-2

And saving the best for last is a photo of myself, our Media Director, Beth Pingry, and my fellow Teamie, Margie Fujii Higuchi, at the Scrapbook Adhesives by 3L® booth! 🙂

LisaAdametz-CloudSilverLining-01112016-3

Don’t we look happy?! Our feet haven’t started to ache yet, I bet. Hahha!! It’s been a fun show so far and I hope to see more tomorrow after the demo.  😀

Supplies from Scrapbook Adhesives by 3L®:

Adhesive Sheets 4″ x 6″
3D Foam Creative Sheets, Mix Black & White

LisaAdametz-sig

Save

Save

Visit our Website and Blog!
Sign up for our Newsletter so you never miss a contest or giveaway!

instagram purple icon facebook icon purple pinterest purple icon twitter purple icon YouTube icon blog subscription purple icon