You are in our US store • Switch to Europe store

Be Colorful Scrapbook Layout

Hello crafty friends! Tracy here, and today I have a bright Be Colorful Scrapbook Layout to share. Learn how quick and easy it is to create a dimensional layout packed with bright and beautiful colors. Here are all of the details.

Be Colorful Scrapbook Layout by Tracy McLennon for Scrapbook Adhesives by 3L

Let’s Get Crafty!

My first step is to mat the photo in white and black cardstock. Adhere these layers together using both Creative Photo Corners Black and E-Z Runner® Ultra Strong Refillable Dispenser. This frames this sweet photo just perfectly for this bright and dimensional layout.

Be Colorful Scrapbook Layout by Tracy McLennon for Scrapbook Adhesives by 3L

Next step is to add the matted photo to the background using 2 layers of Crafty Foam Tape Black. This ensures lots of room to add dimensional embellishments around the matted photo.

Be Colorful Scrapbook Layout by Tracy McLennon for Scrapbook Adhesives by 3L

Add the title piece and embellishments to background using a combination of Thin 3D Foam Squares Black Mix and 3D Foam Squares White Mix. Dimension between the pieces creates such a sense of space and layers.

Be Colorful Scrapbook Layout by Tracy McLennon for Scrapbook Adhesives by 3L

Thanks so much for stopping by!
Tracy

Creative Time: 30 minutes
Skill Level: Beginner

Materials needed:
Scrapbook Adhesives by 3L®
Creative Photo Corners Black
E-Z Runner® Ultra Strong Refillable Dispenser
Crafty Foam Tape Black
Thin 3D Foam Squares Black Mix
3D Foam Squares White Mix

Other: Patterned Papers: Vicki Boutin (Color Study Collection); White and Black Cardstock

Save to Pinterest!

Be Colorful Scrapbook Layout by Tracy McLennon for Scrapbook Adhesives by 3L Pinterest

Visit our Website and Blog!
Sign up for our Newsletter so you never miss a contest or giveaway!

instagram purple icon facebook icon purple pinterest purple icon twitter purple icon YouTube icon blog subscription purple icon

Dimensional Butterfly Spring Card

Hi, Margie here today! I wanted to create a simple card but with a little piazza like this Dimensional Butterfly Spring Card featuring 3D Foam Butterflies and Metallic Transfer Foil Sheets Pastel Colors. Let me show you my process.

Dimensional Butterfly Spring Card by Margie Higuchi for Scrapbook Adhesives by 3L

Butterfly Spring Card Layers + Card Base

Gather and trim the following layers: 4 x 3-inch yellow cardstock (card panel), 4 x 3.75-inch patterned paper (panel mat), and for the card base, 4 x 12-inch yellow cardstock and fold in half for a 4 x 6-inch top-fold card.

Dimensional Butterfly Spring Card by Margie Higuchi for Scrapbook Adhesives by 3L

Prepping the Card Panel

Use a hot foil plate sentiment and a piece of foil color from the Metallic Transfer Foil Sheets Pastel Colors. Following the directions on your hot foil system. Foil a sentiment on your 4 x 3-inch yellow cardstock card panel. Make sure to leave enough room to place your butterflies/dragonflies on the panel. If an overfoiling occurs, use a sand eraser.

Dimensional Butterfly Spring Card by Margie Higuchi for Scrapbook Adhesives by 3L

Adhere the foiled yellow card panel to the patterned paper panel mat with the Crafty Power Tape Polybag 81ft. Place your 3D Foam Butterflies and Dragonflies on the yellow panel until you get your desired look.

Dimensional Butterfly Spring Card by Margie Higuchi for Scrapbook Adhesives by 3L

Wear Your Adhesive on the Outside with the 3D Foam Butterflies + Metallic Transfer Foil Sheets

Remove the top liner of one of the 3D Foam Butterflies or Dragonfly. Apply a piece of the Metallic Transfer Foil Sheets Pastel Colors on top of the exposed adhesive with the foil color facing you. Gently rub the foil with your fingertips to transfer the color to the 3D Foam Butterflies. Reapply foil in missed areas. Repeat the foiling step until you’re done.

Assemble the Butterfly Spring Card

Emboss your card base with an embossing folder. Place four strips of 3D Foam Strips Large White on the back of the embellished card panel and secure it on the card base. This gives more dimension with a 1/16-inch height, and the strips don’t curl up like the rolls.

Thanks for Visiting!
Margie Higuchi

Creative Time: 40 mins
Skill Level: Beginner

Materials Needed:
Scrapbook Adhesives by 3L®

Crafty Power Tape Polybag 81ft., Crafty Power Tape Dispenser 81ft.

3D Foam Strips Large White

3D Foam Butterflies

Metallic Transfer Foil Sheets Pastel Colors

Other: Patterned Paper: PhotoPlay Paper Company (Name Collection); Glimmer Hot Foil System, Sentiment Hot Foil Plate, Platinum 6, and Embossing Folder: Spellbinders Paper Arts; Yellow Cardstock: Bazzill Papers (Marshmallow Chick); Scoreboard; Bone Folder

Click Preferred Retailers List

Save to Pinterest!

Dimensional Butterfly Spring Card by Margie Higuchi for Scrapbook Adhesives by 3L Pinterest

Visit our Website and Blog!
Sign up for our Newsletter so you never miss a contest or giveaway!

instagram purple icon facebook icon purple pinterest purple icon twitter purple icon YouTube icon blog subscription purple icon

Dimensional Explore Card

Hi everyone, Yvonne here with a Dimensional Explore Card. There is always someone you would like to wish a happy summer vacation and what better way than sending a vacation-themed card?

Dimensional Explore Card by Yvonne van de Grijp for Scrapbook Adhesives by 3L

This card is all about layering and…it’s fairly easy to create. I would love to share how I made the card. Please join me!

Explore Card Panel

Trim a piece of white cardstock to a rectangular size to create a card panel. Next, cut a strip of dotted cardstock and adhere to the bottom of the panel using the E-Z Runner® Permanent Strips Refillable Dispenser. Center the notebook page onto the panel with the E-Z Runner® Permanent Strips Refillable Dispenser.

Dimensional Explore Card by Yvonne van de Grijp for Scrapbook Adhesives by 3L

Place the sentiment chipboard sticker onto the card. From patterned papers, fussy cut several suitcases, and bags using a combination of a pair of scissors and a craft knife.

Dimensional Explore Card by Yvonne van de Grijp for Scrapbook Adhesives by 3L

With a combination of Thin 3D Foam Squares White Mix and 3D Foam Squares White Mix, adhere the bags and suitcases onto the card panel to create a dimensional scenery.

Card Base

Mat the card panel with a sea-green card panel. Next, using the E-Z Runner® Permanent Strips Refillable Dispenser, adhere it to a white cardstock card base.

Finishing Touch

Lastly, I adhered smaller sentiments to the card as accents with the Thin 3D Foam Squares White Mix.

And voilá, the Dimensional Explore Card is ready to send someone extra happy summer vacation vibes. I hope you enjoyed this tutorial and wish you a happy summer crafting!

Yvonne van de Grijp

Dimensional Explore Card by Yvonne van de Grijp for Scrapbook Adhesives by 3L

Creative Time: 35 minutes

Skill Level: Intermediate

Materials needed:

Scrapbook Adhesives by 3L®

E-Z Runner® Permanent Strips Refillable Dispenser

3D Foam Squares White Mix

Thin 3D Foam Squares White Mix

Other: Patterned Paper: Simple Stories™ (Collector’s Essential Kit – Safe Travels); Scissors; Craft Knife; Paper Trimmer; Bone Folder; White and Sea Green Cardstock

Save to Pinterest!

Dimensional Explore Card by Yvonne van de Grijp for Scrapbook Adhesives by 3L Pinterest

Visit our Website and Blog!
Sign up for our Newsletter so you never miss a contest or giveaway!

instagram purple icon facebook icon purple pinterest purple icon twitter purple icon YouTube icon blog subscription purple icon

Enjoy the Little Things Mini Album

Hi, Lara here again today with this amazing Enjoy the Little Things Mini Album! Are you looking for a fun way to use some of the scraps from your other paper crafting projects? This album was pretty much done with one sheet of 12 x 12″ paper and some other leftover scraps so it is quick and easy to complete. It would also be a great project to create with kids.

Enjoy the Little Things Mini Album by Lara Scott for Scrapbook Adhesives by 3L

The Enjoy the Little Things Mini Album base is created from a piece of cream color card stock about 4.5″ tall and 12″ wide. I scored it at 2.75″ and 3″ to create a spine so it would lay flat, the other pages are about 3.375″ wide but you can change them to fit the project you are working on.

Enjoy the Little Things Mini Album Cover

Enjoy the Little Things Mini Album by Lara Scott for Scrapbook Adhesives by 3L

Here is a closer shot of the Enjoy the Little Things mini album cover. A magnetic closure is used but they are under the cardstock so you don’t see them. Stamp the Enjoy the Little Things sentiment, but you could use any stamp of your choice, stickers, etc.

Add a few assorted die cuts and other ephemera pieces. I did all the line work by hand with a black pen. Use the 3D Foam Squares White Regular and 3D Foam Squares Micro White under the bird to give it some dimension.

Inside Pages

Enjoy the Little Things Mini Album by Lara Scott for Scrapbook Adhesives by 3L

Cut a piece of the cream cardstock to create the pocket and add Extreme Double-Sided Tape 1/8in. along the side and bottom edge. Designer’s Tip: Make it just a touch smaller so it fits inside the fold lines and then use a hole punch to create the half circle. Add a tag with some ribbon. I cut down the tag a little so it would fit in the pocket.

Enjoy the Little Things Mini Album by Lara Scott for Scrapbook Adhesives by 3L

Create your own tags by simply cutting out a rectangle and trimming off two top corners at an angle. This one fits in the little pocket. Add a few assorted stickers, die-cut pieces, etc to embellish it.

Enjoy the Little Things Mini Album by Lara Scott for Scrapbook Adhesives by 3L

This Enjoy the Little Things mini album has lots of flip ups and fold outs even though it is only .25″ thick. I used the E-Z Runner® Grand Ultra Strong Refillable Dispenser to add adhere all the photo matts and the Extreme Double-Sided Tape 1/8in. for all the pockets, etc.

Hope you have a great time creating some memories!
Lara Scott

Creative Time: 35 minutes
Skill Level: Beginner

Materials Needed:
Scrapbook Adhesives by 3L®

E-Z Runner® Grand Ultra Strong Refillable Dispenser

3D Foam Squares White Regular, 3D Foam Squares White Small, and 3D Foam Squares Micro White

HomeHobby™ by 3L

Extreme Double-Sided Tape 1/4in., Extreme Double-Sided Tape 1/8in., Dual Tip Glue Pen,

Other: Stamps: Heidi Swapp and Ali Edwards; Ink: Versafine Tsukineko (Onyx Black); Craft Dies: Heidi Swapp; Off White Textured Cardstock; Peach, Pink, Green, Light Blue, and Navy Blue Cardstock; Black Pen; Misc. Patterned Papers and Craft Dies

Click Preferred Retailers List

Save to Pinterest!

Enjoy the Little Things Mini Album by Lara Scott for Scrapbook Adhesives by 3L Pinterest

Visit our Website and Blog!
Sign up for our Newsletter so you never miss a contest or giveaway!

instagram purple icon facebook icon purple pinterest purple icon twitter purple icon YouTube icon blog subscription purple icon

Just Plane Awesome Card

Hello, friends! Welcome! Hi, Jingle here! I am so happy that you stopped by today, as I have a super fun Clean, and Simple design to share with you, Just Plane Awesome Card! We are using our adhesives on the OUTSIDE as embellishments. The technique is called Wear Your Adhesive on the Outside 🙂

Just Plane Awesome Card by Jennifer Ingle for Scrapbook Adhesives by 3L

Just Plane Awesome Card Design

To begin, you will want to stamp and color your images. I usually stamp several different images at once and color them, so I have some ready for another card later. It tends to save some time as well as giving me plenty to choose from when making my design.

Just Plane Awesome Card by Jennifer Ingle for Scrapbook Adhesives by 3L

You will then want to die-cut each image after they have been colored. Play with different arrangements until you find the one you like the best for this card.

Just Plane Awesome Card by Jennifer Ingle for Scrapbook Adhesives by 3L

Once you have an arrangement chosen, you can use the 3D Foam Circles to adhere the images to your card. I made the paper airplane look like it is flying right across the card front!

Just Plane Awesome Card by Jennifer Ingle for Scrapbook Adhesives by 3L

Now, we are going to create our own embellishments using 3D Foam Party Shapes and the Metallic Transfer Foil Sheets in Pastel Colors. Choose three stars from the sheet and adhere where desired on your card front.

Just Plane Awesome Card by Jennifer Ingle for Scrapbook Adhesives by 3L

After adhering each star, carefully remove the release paper from the top of each star and press a small square of foil over each one. Smooth out with your finger for the best results.

Just Plane Awesome Card by Jennifer Ingle for Scrapbook Adhesives by 3L

Gently lift the foil to reveal your gorgeous shiny star embellishments! I love doing this. It is so simple and adds so much to a card design. And, because you are simply using foam adhesives, it does not add weight or bulk to the card, keeping it easy to mail with regular postage!

Just Plane Awesome Card by Jennifer Ingle for Scrapbook Adhesives by 3L

Finally, using the Crafty Foam Tape White 54 ft., adhere your card front to the card base, adding just a bit more dimension.

Just Plane Awesome Card by Jennifer Ingle for Scrapbook Adhesives by 3L

I hope you give this card design a try! It is super fun and produces an absolutely adorable clean and simple greeting for a friend!

Thanks for stopping by!
Jennifer Ingle (aka Jingle)

Creative Time: 30 mins
Skill Level: Intermediate

Materials Needed:
Scrapbook Adhesives by 3L®

3D Foam Squares White Mix and 3D Foam Circles White Mix

Crafty Foam Tape White 54ft.

3D Foam Stars and 3D Foam Party Shapes

Metallic Transfer Foil Sheets Pastel Colors

Other: Stamps and Dies: Lawn Fawn (Just Plane Awesome); Markers: Olo; Ink: Giną K Designs (Amalgam in Black); White Cardstock: Hammermill

Click Preferred Retailers List

Save to Pinterest!

Just Plane Awesome Card by Jennifer Ingle for Scrapbook Adhesives by 3L Pinterest

Visit our Website and Blog!
Sign up for our Newsletter so you never miss a contest or giveaway!

instagram purple icon facebook icon purple pinterest purple icon twitter purple icon YouTube icon blog subscription purple icon

Bright and Colourful Layout

Hello scrappy friends! Tracy here, and today I have a bright and colourful layout to share with lots of dimensions. Here are all of the details.

Bright and Colourful Layout by Tracy McLennon for Scrapbook Adhesives by 3L

Let’s Get Crafty

I absolutely love the bright and beautiful patterned papers in this Vicki Boutin collection. They make such a fabulous background for this bright and colourful layout. With a strip of yellow patterned paper, flag both ends and adhere to the background using the E-Z Runner® Grand Refillable Dispenser. Next, add the chipboard sticker border strip.

Bright and Colourful Layout by Tracy McLennon for Scrapbook Adhesives by 3L

Double mat a 4×6 photo in black and white cardstock securing them with the E-Z Runner® Grand Refillable Dispenser. Add a chunk of lime green patterned paper as well. Adhere the whole matted picture to the layout using the Crafty Foam Tape Black.

Bright and Colourful Layout by Tracy McLennon for Scrapbook Adhesives by 3L

Adhere the title chipboard sticker to the background using 2 layers of 3D Foam Squares White Mix. This gives lots of room for adding dimensional pieces around it.

Bright and Colourful Layout by Tracy McLennon for Scrapbook Adhesives by 3L

Add the die-cut floral pieces around the title of the bright and colourful layout using a combination of Thin 3D Foam Squares Black Mix and 3D Foam Squares White Mix. Next, add floral pieces to the top left and bottom right-hand corner of the layout.

Bright and Colourful Layout by Tracy McLennon for Scrapbook Adhesives by 3L

Next step is to add some other embellishment pieces around the title and matted photo.

Bright and Colourful Layout by Tracy McLennon for Scrapbook Adhesives by 3L

Thanks so much for stopping by!
Tracy

Creative Time: 45 mins
Skill Level: Intermediate

Materials Needed:
Scrapbook Adhesives by 3L®
E-Z Runner® Grand Refillable Dispenser
Thin 3D Foam Squares Black Mix
3D Foam Squares White Mix
Crafty Foam Tape Black

Other: Patterned Papers, Chipboard Stickers, and Ephemera: Vicki Boutin (Color Study Collection); Black and White Cardstock

Save to Pinterest!

Bright and Colourful Layout by Tracy McLennon for Scrapbook Adhesives by 3L Pinterest

Visit our Website and Blog!
Sign up for our Newsletter so you never miss a contest or giveaway!

instagram purple icon facebook icon purple pinterest purple icon twitter purple icon YouTube icon blog subscription purple icon

You’re Beary Special Card

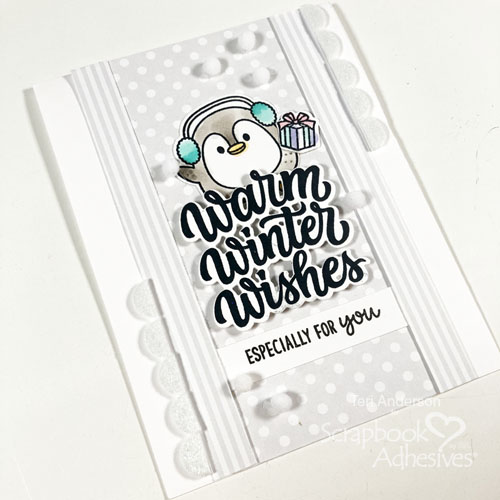
Hi, friends! Are you looking for ways to make your next handmade card go from “wow” to “WOWZERS”? Teri here to show you how to make a card for a special friend, You’re Beary Special Card, and share a few tricks you’ll love trying next time you create!

You're Beary Special Card by Teri Anderson for Scrapbook Adhesives by 3L

Create the You’re Beary Special Card Front

Start by covering a card base with patterned paper and cardstock. Consider giving your cardstock panel some texture by adding some embossing to it with an embossing folder.

You're Beary Special Card by Teri Anderson for Scrapbook Adhesives by 3L

Embellish with Creative Photo Corners

Add a row of Creative Photo Corners Silver to your panel. Try to make a straight line, but don’t worry if you need to spread them to go to both ends of the card.

You're Beary Special Card by Teri Anderson for Scrapbook Adhesives by 3L

Sentiment

Add a strip of Premium Double-Sided Tape over the top of your corners. Apply flock or glitter to the tape. Stamp a sentiment on a thin strip of cardstock. Apply it, partly over your flocking and partly over row of photo corners.

You're Beary Special Card by Teri Anderson for Scrapbook Adhesives by 3L

Create a Stamped Scene

Stamp, color, and die-cut several images. If you don’t have bears, no worries! Just pick out some cute images to make a scene of your own. Keep a couple of the stamped images and adhere the rest onto your card with a flat adhesive like the E-Z Runner® Petite Permanent Dots Refillable Dispenser.

You're Beary Special Card by Teri Anderson for Scrapbook Adhesives by 3L

Grab the remaining images and place 3D Foam Squares White Mix onto them. Mount them on the card. These images will stand out from your others.

You're Beary Special Card by Teri Anderson for Scrapbook Adhesives by 3L

Complete your card by adding a few sequins to it. Adhesive Dots Micro work great for securing most sequins down. Simply place a dot on your card and mount a sequin on top.

You're Beary Special Card by Teri Anderson for Scrapbook Adhesives by 3L

I hope you are inspired to try a few of the tricks I’ve shared today next time you sit down to create!

Happy Creating!

Teri Anderson

Creative Time: 60 minutes

Skill Level: Intermediate

Materials needed:

Scrapbook Adhesives by 3L®

E-Z Runner® Petite Permanent Dots Refillable Dispenser

3D Foam Squares White Mix

Creative Photo Corners Mix Pack

Adhesive Dots Micro

HomeHobby™ by 3L

Premium Double-Sided Tape 1/2in

Other: Patterned Paper: Sunny Studio (Subtle Grey Tones 6×6 Paper Pack); Stamps and Dies: Sunny Studio (Bighearted Bears Stamp Set and Dies); Embossing Folder: Sunny Studio (Quilted Hearts); Flock: Stampendous; Markers: Copic; Ink: Ranger Ink; Sequins: Pretty Pink Posh

Save to Pinterest!

You're Beary Special Card by Teri Anderson for Scrapbook Adhesives by 3L Pinterest

Visit our Website and Blog!
Sign up for our Newsletter so you never miss a contest or giveaway!
instagram purple icon facebook icon purple pinterest purple icon twitter purple icon YouTube icon blog subscription purple icon

Seagull Card

Hi everyone, Yvonne here sharing a beach-themed Seagull Card with a little fun gift for the receiver. Yes, the seashell I tied around the card is a bracelet!

Seagull Card by Yvonne van de Grijp for Scrapbook Adhesives by 3L

This card is perfect to wish someone a great summer holiday. I would love to share how I made this card. Wanna join me?

Seagull Card Panel

Stamp the seagull image onto a piece of smooth white cardstock. To make a mask, stamp the image onto a sticky note and cut out the seagull and the sign he is standing on with scissors.

Place the mask over the seagull. Color its surrounding area with a soft blue ink and an ink blending tool. Remove the mask and color the image with alcohol markers. To seal and give a glossy effect on the card, I an enamel liquid. Let it dry.

Wear Your Adhesive on the Outside

To add a golden, sandy accent, I used the Wear Your Adhesive on the Outside technique. Place the mask you used earlier back onto the image; this is to prevent glue stains. Cut a small piece of an Adhesive Sheets 4×6 inch. Remove the yellow liner and start dabbing tiny bits of adhesive around the stamped image.

Seagull Card by Yvonne van de Grijp for Scrapbook Adhesives by 3L

Next wrinkle a piece of gold foil sheet from the Metallic Transfer Foil Sheets Pastel Colors. Make sure to the foil color is facing you and start dabbing onto the sticky parts.

Seagull Card by Yvonne van de Grijp for Scrapbook Adhesives by 3L

This leaves a lovely crushed golden effect on the Seagull Card.

Seagull Card by Yvonne van de Grijp for Scrapbook Adhesives by 3L

Mat a blue cardstock with the stamped card panel and then adhere it on a white card base with the E-Z Runner® Grand Refillable Dispenser.

Add a Unique Element

For a side accent to the card front, I simply tied a seashell bracelet around the card! To secure the shell, an adhesive dot from the Adhesive Dots 3D. Designer’s Tip: Hit it with a heat gun to soften the dot into the shell for more security! Secure the rest of the bracelet with an Adhesive Line on the inside of the card. Don’t forget to alleviate any stickiness with an anti-static powder.

Seagull Card by Yvonne van de Grijp for Scrapbook Adhesives by 3L

And voilá your Seagull Card is ready! I hope you enjoyed this tutorial and wish you a happy summer crafting!

Yvonne van de Grijp

Seagull Card by Yvonne van de Grijp for Scrapbook Adhesives by 3L

Creative Time: 30 minutes (drying time excluded)

Skill Level: Intermediate

Materials needed:

Scrapbook Adhesives by 3L®

E-Z Runner® Grand Refillable Dispenser

Adhesive Sheets 4×6 inch

Metallic Transfer Foil Sheets Pastel Colors

Adhesive Dots 3D and Adhesive Lines

Other: Cardstock (White, Blue); Stamp (Crafty Individuals: Counting Seagulls); Coloring (Copic Markers); Sticky Note Pad; Sealer (Ranger: Glossy Accents); Seashell Bracelet; Scissors; Paper Trimmer

Save to Pinterest!

Seagull Card by Yvonne van de Grijp for Scrapbook Adhesives by 3L Pinterest

Visit our Website and Blog!
Sign up for our Newsletter so you never miss a contest or giveaway!

instagram purple icon facebook icon purple pinterest purple icon twitter purple icon YouTube icon blog subscription purple icon

Enjoy the Now Folio

Hi, Lara here today! I love to create projects that are fairly simple with some complex elements. This little Enjoy the Now Folio is fun and easy to make. The folio base only took one sheet of 8.5 x 11″ cardstock. You could also change any of the measurements to adjust the size you want.

Enjoy the Now Folio by Lara Scott for Scrapbook Adhesives by 3L

Enjoy the Now Folio Base

Fold one sheet of cardstock in half the long way so it is 4.25 x 11″, score the bottom at 2″, and fold up to create a pocket. I cut the slight v in the center so it would close and reduce the paper bulk. The sides are adhered with the Dual Tip Glue Pen.

Folio Cover

For the front cover of the folio, I cut a piece of patterned paper just a tiny bit less than 8.75 x 4 so that it has about a .125″ border. Adhere it down with the E-Z Runner® Grand Ultra Strong Refillable Dispenser. Layer all the elements and use a few of the 3D Foam Circles White Mix under the gold flower and the pink ticket.

Wear Your Adhesive on the Outside with 3D Foam Circles and Foils

Using the purple foil from the Metallic Transfer Foil Sheets Pastel Colors and the 3D Foam Circles White Mix, I created little metallic circles that give a little height and an unexpected pop of color. Don’t forget to place the foil color side facing you before rubbing the foil into the circles. I added a little bit of gold thread to the slide frame.

Here are close-ups of the elements on the front cover, the stamp, and the label.

Finishing Touches

Create a tag and add some seam binding ribbon and some line work with a pen. It would also be fun to add several tilt ins and flip ups. Also, think about using it as a gift card or extra page element on a scrapbook page.

I really enjoy working with all these different types of adhesives. WHAT is your favorite adhesive?

Happy Creating!
Lara Scott

Creative Time: 30 mins
Skill Level: Intermediate

Materials Needed:
Scrapbook Adhesives by 3L®

E-Z Runner® Grand Ultra Strong Refillable Dispenser

3D Foam Circles White Mix

Metallic Transfer Foil Sheets Pastel Colors

HomeHobby™ by 3L

Dual Tip Glue Pen

Other: Patterned Papers Stickers + Ephemera: Heidi Swapp; Stamp: Kerri Bradford (Found Set); Ink: Tsukineko (Onyx Black Versafine); Gold Thread: DMC; White Seam Binding Ribbon: Zipperstop; Green Cardstock

Click Preferred Retailers List

Save to Pinterest!

Enjoy the Now Folio by Lara Scott for Scrapbook Adhesives by 3L Pinterest

Visit our Website and Blog!
Sign up for our Newsletter so you never miss a contest or giveaway!

instagram purple icon facebook icon purple pinterest purple icon twitter purple icon YouTube icon blog subscription purple icon

Quick Graduation Cards

Who has a graduate in the house?! Hi, Shannon here today! I needed a couple of Quick Graduation Cards for high school graduation celebrations. I grabbed the cutest collection from Photo Play and my trusty Scrapbook Adhesives By 3L products and got right to work!

Quick Graduation Cards by Shannon Allor for Scrapbook Adhesives by 3L

Quick Graduation Cards Design – Plaid Graduate

Start with premade card bases in a nice bright white. I cut my patterned papers to 4.25″ x 5.25″. I love the bold patterns against the white. My favorite E-Z Runner® Grand Permanent Strips Refillable Dispenser came in handy to attach my papers.

Quick Graduation Cards by Shannon Allor for Scrapbook Adhesives by 3L

Use the sticker sheet in the collection as your sentiments or elements to accent the card. For the plaid card front graduation card, I used Crafty Foam Tape White 108ft to pop up my corner accents. Then did the same with the graduate shape and speech bubbles. So FUN!

Quick Graduation Cards by Shannon Allor for Scrapbook Adhesives by 3L

Quick Graduation Cards Design – Let’s Party

For this Quick Graduation Card, I wanted to make sure that the sentiment sticker had some over the top dimension. My solution was to stack two layers of the Crafty Foam Tape White 108ft.

Quick Graduation Cards by Shannon Allor for Scrapbook Adhesives by 3L

For the banner embellishments, I used 3D Foam Strips Black. The black foam is perfect against the black background. You cannot see it at all! To finish it off I used some cute little black gems!

Thanks for visiting!
Shannon Allor

Creative Time: 30 mins
Skill Level: Beginner

Materials Needed:
Scrapbook Adhesives by 3L®

E-Z Runner® Grand Permanent Strips Refillable Dispenser

Crafty Foam Tape White 108ft

3D Foam Strips Black

Other: Patterned Papers: Photo Play Paper (The Graduate Collection); Bling: Want2Scrap (Spellbinders Nestabling)

Click Preferred Retailers List

Save to Pinterest!

Quick Graduation Cards by Shannon Allor for Scrapbook Adhesives by 3L Pinterest

Visit our Website and Blog!
Sign up for our Newsletter so you never miss a contest or giveaway!

instagram purple icon facebook icon purple pinterest purple icon twitter purple icon YouTube icon blog subscription purple icon