You are in our US store • Switch to Europe store

Poster Calendar Holiday Layout

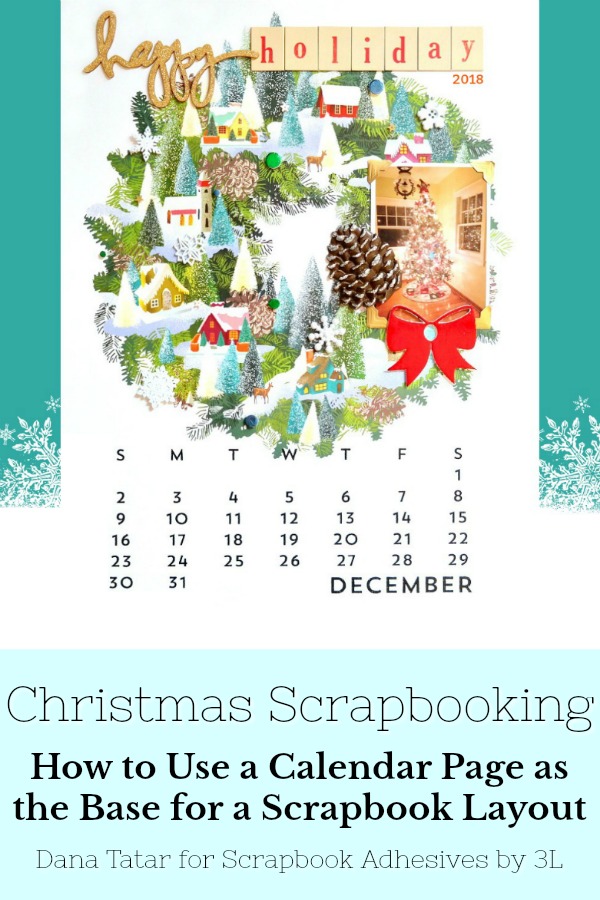
Hi friends! Dana here today sharing a holiday scrapbook layout. I switched up my usual layout size from 12×12 to 11×14 by using a gorgeous Linnea poster calendar as the base. The expanded size was fun to embellish with some of my favorite adhesive techniques.

Poster Calendar Holiday Layout by Dana Tatar for Scrapbook Adhesives by 3L

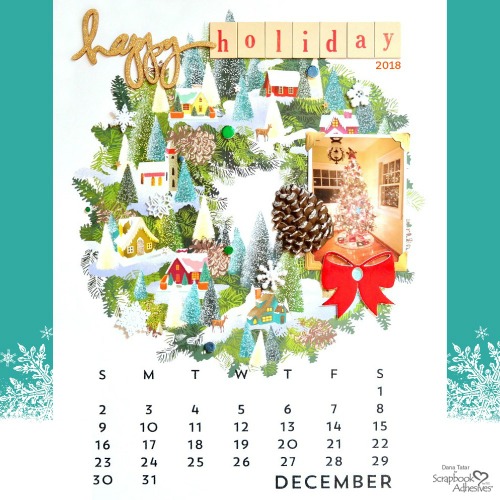
All the pretty trees on this calendar poster had me thinking of my own decorated Christmas tree. The 2018 holiday season was extra special because it was the first year we celebrated the holiday in our new home.

Adhesive Techniques for Holiday Crafting

Poster Calendar Holiday Layout by Dana Tatar for Scrapbook Adhesives by 3L

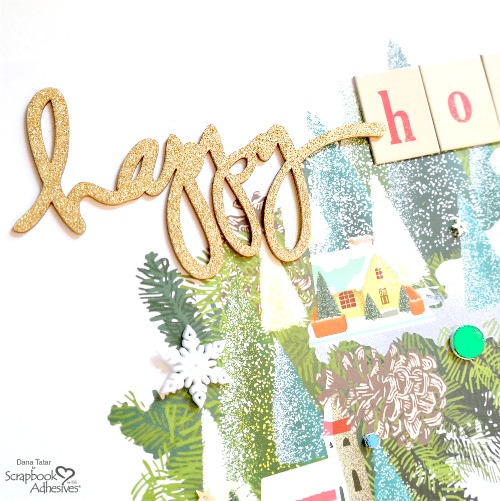
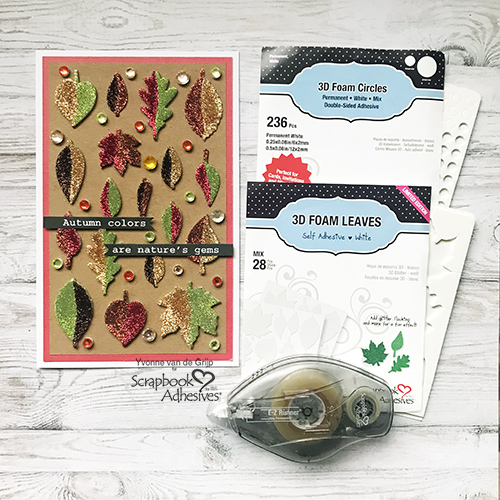
Chipboard is a great way to add texture and dimension to a project. My go-to adhesive for chipboard, especially script or intricate designs with lots of curves, is the E-Z Runner Petite Permanent Dots Dispenser. A quick swipe of this runner over chipboard applies a layer of adhesive dots. Don’t let the size of these dots deter you from using them on large chipboard pieces. The adhesive dots are small but extremely strong!

Poster Calendar Holiday Layout by Dana Tatar for Scrapbook Adhesives by 3L

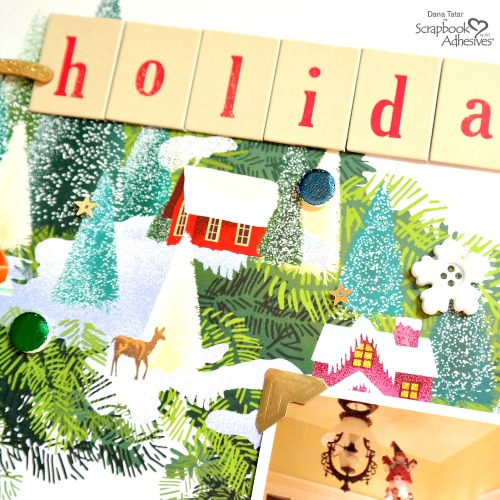
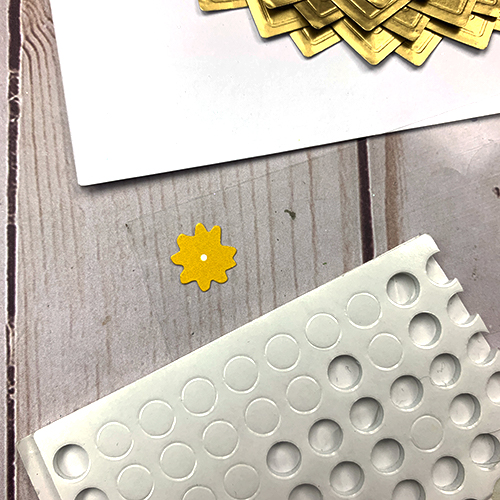
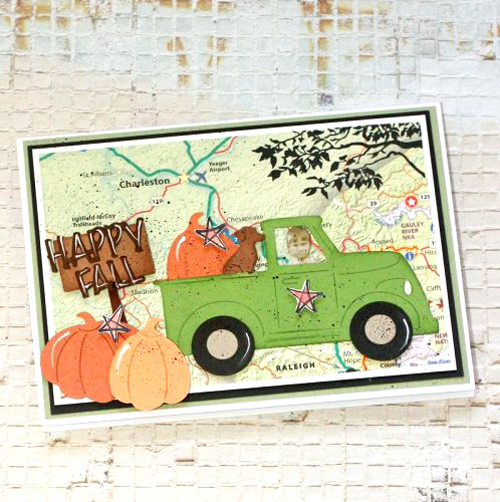
I used Adhesive Dots Medium to secure the chipboard letter tiles across the top of the poster calendar. The 3D Foam Holiday Embellishment Kit with Foil is themed for Winter and includes pre-cut 3D Foam shapes of trees, stars, snowflakes, and other Christmas designs, with 5 sheets of Metallic Transfer Foil. I used several different sizes of 3D foam circles and the metallic transfer foil in several colors to add shimmery dots around the poster. I added mini gold star sequins to the background using Adhesive Dots Micro.

Finishing Touches

Poster Calendar Holiday Layout by Dana Tatar for Scrapbook Adhesives by 3L

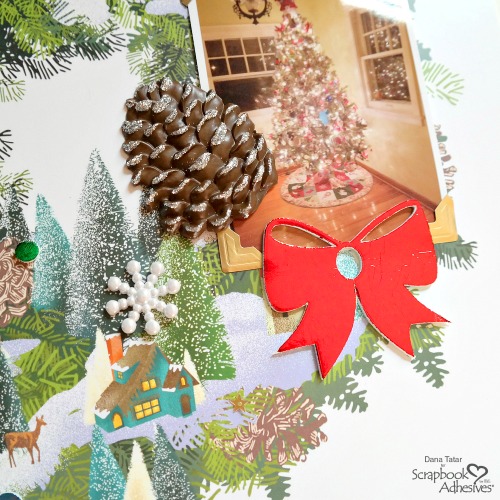
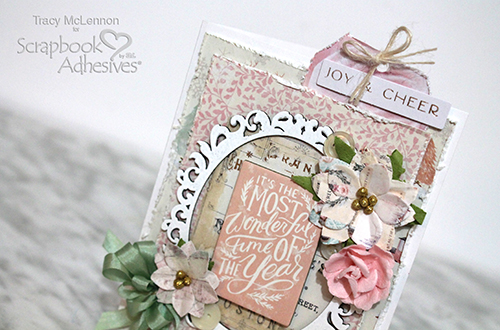
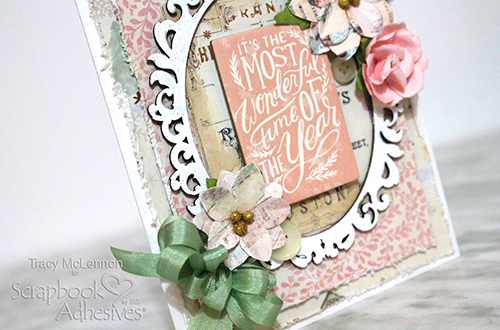
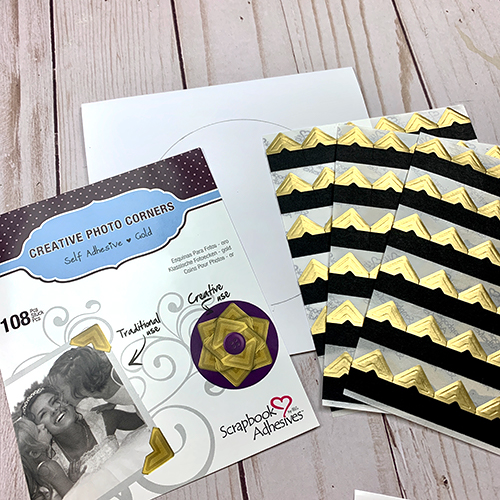
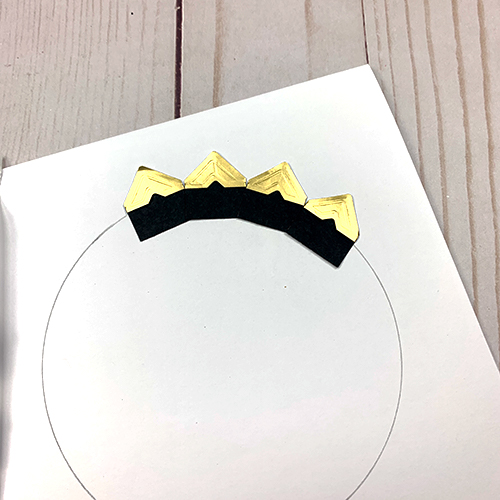
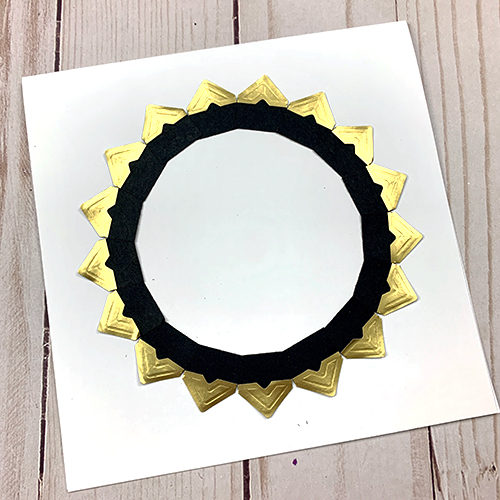
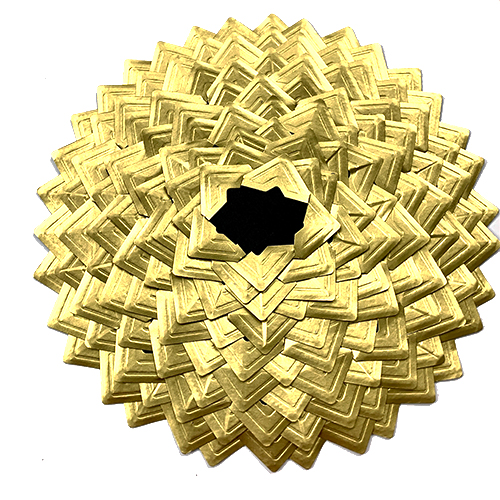
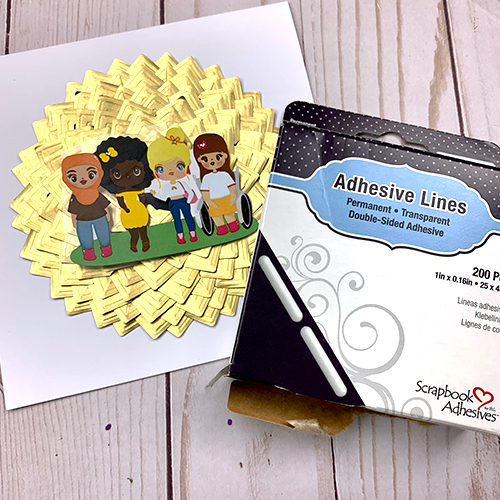
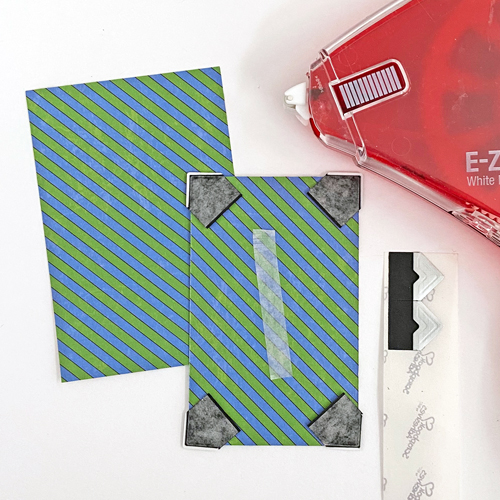
The gorgeous dimensional bow shown above is a 3D foam design from the Holiday Embellishment Kit that I covered with red metallic transfer foil. I used Crafty Foam Tape to attach the pinecone, a more heavy embellishment, and my photo to the poster. Creative Photo Corners in Gold were the perfect finishing touch to add a bit of sparkle.

Thanks for stopping by today! I hope I have inspired you to save old calendar pages to use in your crafting.
~Dana Tatar

Creative Time: 30 minutes
Skill Level: Beginner

Materials needed:
Scrapbook Adhesives by 3L®

Adhesive Dots Micro
Adhesive Dots Medium
Creative Photo Corners Gold
3D Foam Holiday Embellishment Kit with Foil
Crafty Foam Tape White
E-Z Runner Petite Permanent Dots Dispenser

Other
Calendar Poster: Linnea Designs; Chipboard Word: Heidi Swapp; Chipboard Letter Tiles: The Girls’ Paperie; Star Sequins: Clique International; Pinecone; Snowflake Buttons
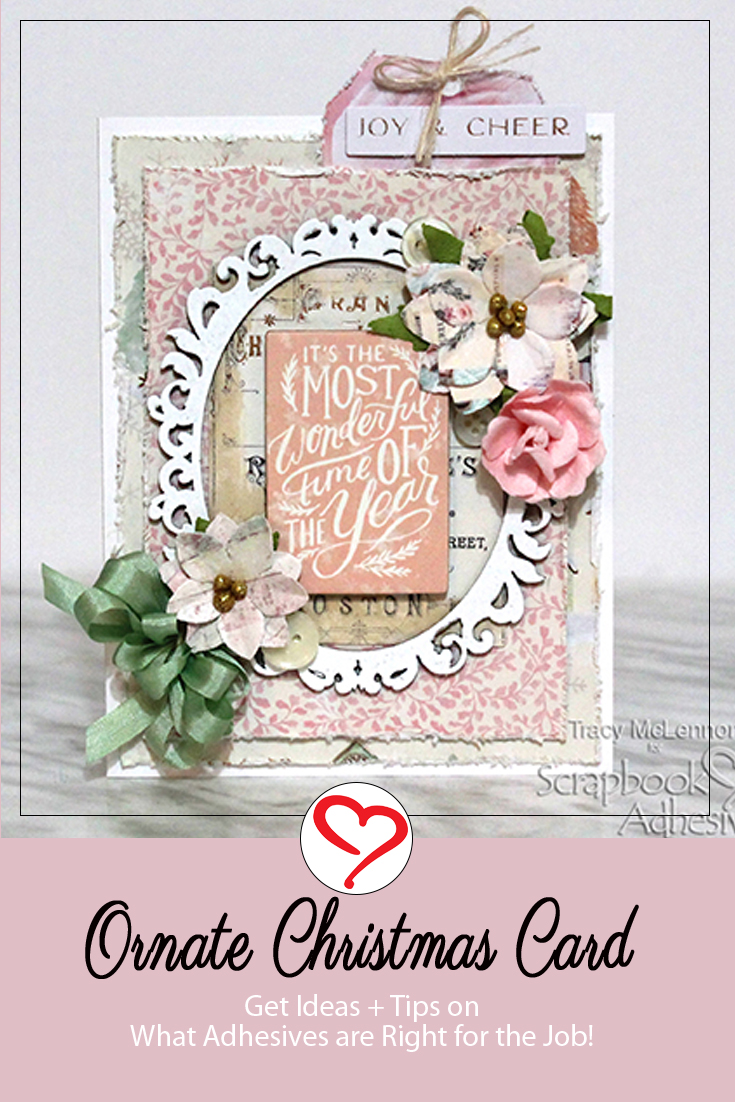
Pin It!

Poster Calendar Holiday Layout by Dana Tatar for Scrapbook Adhesives by 3L Pinterest

Visit our Website and Blog!
Sign up for our Newsletter so you never miss a contest or giveaway!

instagram purple icon facebook icon purple pinterest purple icon twitter purple icon YouTube icon blog subscription purple icon

Foil + Inky Leaves Card Technique

Hello crafty friends! Judy here today. As I put together this Thanksgiving card, the wind was whipping leaves everywhere. Brown crispy leaves not nearly so pretty as the foil + inky leaves on this card!

The foiled leaves are made with aluminum foil from my kitchen! Can you believe it? Let me show you how.

Foil + Inky Leaves Technique

Attach Adhesive Sheets 6×12 inch to the back of a 6 x 12-inch Kraft cardstock. I chose Kraft because I have a lot of it. Black cardstock is also a good choice.

Foil + Inky Leaves Card Technique by Judy Hayes for Scrapbook Adhesives by 3L

Remove the liner and place the adhesive side down on aluminum foil. I find it easier to keep foil smooth this way.

Foil + Inky Leaves Card Technique by Judy Hayes for Scrapbook Adhesives by 3L

Next, add various colors of alcohol inks and blend them with a felt blending tool. Mist rubbing alcohol over the inks for a mottled pattern. Repeat these steps until you get your desired color.

Foil + Inky Leaves Card Technique by Judy Hayes for Scrapbook Adhesives by 3L

Use a die-cut machine and leaf dies to die cut three different leaf shapes with the foiled paper. With the shape still in the die, trace the vein lines with a black permanent marker using the die as a stencil.

Foil + Inky Leaves Card Technique by Judy Hayes for Scrapbook Adhesives by 3L

Card Panel Details

Ink grid design stamp with Fossilized Amber Oxide ink. Stamp on the 1.125 x 5.5-inch piece blue calypso cardstock strip. Re-ink stamp and stamp again to continue pattern over the entire piece. Apply Monarch ink to craze stamp. Stamp over grid pattern.

Foil + Inky Leaves Card Technique by Judy Hayes for Scrapbook Adhesives by 3L

Form into a 4.25 x 5.5-inch card base with a buff-color cardstock. For a card panel, cut a light brown paper to 4.25 x 5.5 inches. My light brown paper was not heavy enough to make the card but I wanted to use this color. Use E-Z Runner® Petite Permanent Dots Refillable Dispenser to secure the light brown paper to the card front.

Foil + Inky Leaves Card Technique by Judy Hayes for Scrapbook Adhesives by 3L

Card Front Embellishing

Attach the stamped strip near the left edge using E-Z Runner® Petite Permanent Dots Refillable Dispenser. Cut about a narrow strip of 0.125-inch wide x 5.5-inches long from the alcohol inked foil paper.

Use E-Z Runner® Micro Refillable Dispenser to apply adhesive to the back of the strip. Adhere to the card panel near the edge of the stamped blue calypso border.

Foil + Inky Leaves Card Technique by Judy Hayes for Scrapbook Adhesives by 3L

Place Adhesive Squares on the back of leaves. I used 3D Foam Squares Black Mix on the maple and solid leaf (not sure what kind it is!) and Thin 3D Foam Squares Black Mix on the oak leaf. Arrange and attach the leaves to the card.

Foil + Inky Leaves Card Technique by Judy Hayes for Scrapbook Adhesives by 3L

Stamp the sentiment with Monarch ink and heat emboss with clear embossing powder.

Foil + Inky Leaves Card Technique by Judy Hayes for Scrapbook Adhesives by 3L

Thanks for Visiting!
Judy Hayes

Foil + Inky Leaves Card Technique by Judy Hayes for Scrapbook Adhesives by 3L

Creative Time: 40 Minutes
Skill Level: Intermediate

Materials Needed
Scrapbook Adhesives by 3L®

Other
Craft Dies: Sizzix/Tim Holtz (Fall Foliage); Stamps: Stampers Anonymous/Tim Holtz (Craze & Planks, Mixed Media) and Taylored Expressions (Bushel of Blessings Stamp Set); Ink: Ranger Ink ( Distress Oxide Ink in Fossilized Amber) and Tsukineko (Versafine Clair in Monarch); Embossing Powder: Ranger Ink; Alcohol Inks: Ranger Ink (Boysenberry, Glacier, Laguna, Monsoon, Moss, Rosewood, Sienna, and Alloy Mined); Cardstock: Bazzill Basics Paper (Blue Calypso); Kraft, Buff and Tan Cardstock; Aluminum Foil; Black Permanent Marker

Save It!

Foil + Inky Leaves Card Technique by Judy Hayes for Scrapbook Adhesives by 3L Pinterest

Visit our Website and Blog!
Sign up for our Newsletter so you never miss a contest or giveaway!

instagram purple icon facebook icon purple pinterest purple icon twitter purple icon YouTube icon blog subscription purple icon

Ornate Christmas Card

Hello crafty friends! Tracy here, and today I am sharing a pretty little ornate Christmas card, and all of the fabulous stickiness that made it happen. Here are the details.

Ornate Christmas Card by Tracy McLennon for Scrapbook Adhesives by 3L

Tips + Tricks That Sticks

Anytime that I create an ornate Christmas card or project that may carry some weight, I turn to my trusty E-Z Runner® Ultra Strong Refillable Dispenser. This will make sure that all of my tricky layers will stay put.

The top patterned paper layer is added to the card using Crafty Foam Tape White for a little extra dimension between layers. Then I added the chipboard frame and buttons using Adhesive Dots Micro.

Ornate Christmas Card by Tracy McLennon for Scrapbook Adhesives by 3L

My Adhesive Dots Micro came in handy for attaching the silk ribbon bow also. I upgraded to the Adhesive Dots Medium when adding the dimensional flowers.

Ornate Christmas Card by Tracy McLennon for Scrapbook Adhesives by 3L

I used Crafty Foam Tape White again to add the chipboard sticker sentiment to my ornate Christmas card. The “Joy & Cheer” ephemera piece is added to the top tag using Thin 3D Foam Squares White Mix.

Ornate Christmas Card by Tracy McLennon for Scrapbook Adhesives by 3L

Adding dimension and texture to a project is easy. It’s making that stick last is what’s tricky. Hope these tips help with your next Ornate Christmas Card project.

Ornate Christmas Card by Tracy McLennon for Scrapbook Adhesives by 3L

Thanks so much for stopping by!
Tracy

Creative Time: 30 minutes
Skill Level: Beginner

Materials Needed
Scrapbook Adhesives by 3L®

Crafty Foam Tape White
Thin 3D Foam Squares White Mix
Adhesive Dots Micro
Adhesive Dots Medium
E-Z Runner® Ultra Strong Refillable Dispenser

Other
Prima Sugar Cookie Christmas Collection (paper, flowers, ephemera, chipboard stickers); Cardstock (White); Buttons; Green Silk Ribbon; Ivory Burlap String; Creative Embellishments Chipboard- Ornate Oval; Paper Distresser; Embossing Pad; White Embossing Powder

Save It!

Ornate Christmas Card by Tracy McLennon for Scrapbook Adhesives by 3L Pinterest

Visit our Website and Blog!
Sign up for our Newsletter so you never miss a contest or giveaway!

instagram purple icon facebook icon purple pinterest purple icon twitter purple icon YouTube icon blog subscription purple icon

Be The Change Card Tutorial

Have you ever had a sticker that was just so cool you had to make a card with it? Be The Change card is one of those cool cards! Christine joining you today with an encouraging card with a technique using the Creative Photo Corners!

Be the Change Card Tutorial by Christine Meyer for Scrapbook Adhesives by 3L

If this technique looks familiar, it’s because you’ve seen me do it a couple of times before! I have used it on a scrapbook layout and. a home decor piece. But this is the first time that I have done it on a card! Let’s dive into how it came together!

Be the Change Card Background Technique

Be the Change Card Tutorial by Christine Meyer for Scrapbook Adhesives by 3L

For today’s card, I used the Creative Photo Corners in Gold.

Be the Change Card Tutorial by Christine Meyer for Scrapbook Adhesives by 3L

Draw a circle on your card. It will be covered up, so don’t worry about erasing anything. Use your Creative Photo Corners to outline the circle. You will need to overlap a little.

Be the Change Card Tutorial by Christine Meyer for Scrapbook Adhesives by 3L

Keep going until you finish a full circle. Keep building up the layers.

Be the Change Card Tutorial by Christine Meyer for Scrapbook Adhesives by 3L

Eventually, you will end up with a beautiful, golden shape to add texture and dimension to your card background!

The Rest of the Adhesives

To finish off the card I used several different adhesives. The layers are assembled with a combination of Crafty Foam Tape and the E-Z Runner Grand. Adding the stickers was a little trickier because of the background.

Be the Change Card Tutorial by Christine Meyer for Scrapbook Adhesives by 3L

I added the small details using Small 3D Foam Circles. This gave them some dimension and a strong hold.

Be the Change Card Tutorial by Christine Meyer for Scrapbook Adhesives by 3L

The big sticker was flat and I was concerned about how well it would hold against the Creative Photo Corners. So I added Adhesive Lines to the back of that to give it a really strong hold.

Thanks so much for joining me today! I hope you’ve been inspired to bust out those Creative Photo Corners and try something new!

-Christine Meyer

Creative Time: 60 minutes
Skill Level: Intermediate

Materials Needed
Scrapbook Adhesives by 3L®
E-Z Runner Grand Permanent Strips Dispenser
Crafty Foam Tape 108′
3D Foam Circles White Mix
Creative Photo Corners Gold
Adhesive Lines

Other
Stickers & Patterned Paper from Paper House Productions

Save It!

Be the Change Card Tutorial by Christine Meyer for Scrapbook Adhesives by 3L Pinterest

Visit our Website and Blog!
Sign up for our Newsletter so you never miss a contest or giveaway!

instagram purple icon facebook icon purple pinterest purple icon twitter purple icon YouTube icon blog subscription purple icon

Don’t Leaf Me Hanging Card

Hi, Crafty Friends! Meghan Kennihan here today and I am SO EXCITED to be Guest Designing for the next three months. I have a fall-themed card with a bit of humor, Don’t Leaf Me Hanging. So cute! Let me share with you my tutorial. Let’s get started!

Don't Leaf Me Hanging Card by Meghan Kennihan for Scrapbook Adhesives by 3L

Don’t Leaf Me Hanging Card Background

Pick the background paper that you will die-cut and apply it to the Adhesive Sheet 4 x 6-inch. I choose a rich brown card stock for my die cut shape and metallic gold for my card base.

Don't Leaf Me Hanging Card by Meghan Kennihan for Scrapbook Adhesives by 3L

Die-cut your cover plate design, peel off the Adhesive Sheet and adhere to your base.

Don't Leaf Me Hanging Card by Meghan Kennihan for Scrapbook Adhesives by 3L

Card Panel Details

I adhered my stenciled and inked leaf cardstock strip across the middle of my card panel using E-Z Runner® Petite Permanent Dots Refillable Dispenser.

Don't Leaf Me Hanging Card by Meghan Kennihan for Scrapbook Adhesives by 3L

I placed Creative Photo Corners Gold around my stenciled and inked leaf strip. Also, on the corners of my card panel so that everything is framed in that golden metallic accent.

Don't Leaf Me Hanging Card by Meghan Kennihan for Scrapbook Adhesives by 3L

Adhere the sentiment, Don’t Leaf Me Hanging, and the metallic gold leaf shapes on to my stenciled and inked leaf strip with the E-Z Runner® Petite Permanent Dots Refillable Dispenser.

Don't Leaf Me Hanging Card by Meghan Kennihan for Scrapbook Adhesives by 3L

Die Cuts and Sentiments

For a little more dimension and interest, I added 3D Foam Circles White Mix to the backs of the squirrels and popped them up.

Don't Leaf Me Hanging Card by Meghan Kennihan for Scrapbook Adhesives by 3L

Finish the card by accenting my sentiment with these darling little squirrel faces popped up for extra cuteness!

Don't Leaf Me Hanging Card by Meghan Kennihan for Scrapbook Adhesives by 3L

That’s how my card is all put together! Now, Don’t LEAF me HANGING let me know what you think!

Thanks for stopping in!
Meghan Kennihan

Don't Leaf Me Hanging Card by Meghan Kennihan for Scrapbook Adhesives by 3L

Creative Time: 30 minutes
Skill Level: Intermediate

Materials Needed:
Scrapbook Adhesives by 3L®
3D Foam Circles White Mix
Creative Photo Corners Gold
E-Z Runner® Petite Permanent Dots Refillable Dispenser
Adhesive Sheet 4 x 6-inch

Other
Digi Doodle Studios So Squirrely Pairables
Taylored Expressions Diamond Panel Die
Paper Smooches Leaf Dies
LDRS Leaf Stencil

Save It!

Don't Leaf Me Hanging Card by Meghan Kennihan for Scrapbook Adhesives by 3L Pinterest

Visit our Website and Blog!
Sign up for our Newsletter so you never miss a contest or giveaway!

instagram purple icon facebook icon purple pinterest purple icon twitter purple icon YouTube icon blog subscription purple icon

Robot Coffee Card with Coffee Lovers

Welcome! It’s time for the Fall/Winter Coffee Lovers Blog Hop with this adorable Robot Coffee Card project! As a SUPER SPONSOR, we’ve provided great prizes too! Grab a cuppa and join the hop with your own beverage-themed artwork!

What is Coffee Lovers? It is a coffee-loving (or tea or cocoa) community of card makers open to everyone. Their blog offers inspirational coffee-related posts and bi-annual coffee blog hops that YOU can join. You get a chance to win the giveaways as a blogger! So read until the very end!

You Charge Me Up Card by Teri Anderson

Hi, coffee-loving friends! Teri here today sharing a Robot Coffee Card to get your creative juices buzzing!

Robot Coffee Card with 2020 Fall/Winter Coffee Lovers Blog Hop by Teri Anderson for Scrapbook Adhesives by 3L

Building the Scene

This card was easy to put together! Start stamping, coloring in, and die-cutting several coffee cups and accessories, as well as a few robots. You’ll also want to cut a few extra shapes without any stamping on them.

Robot Coffee Card with 2020 Fall/Winter Coffee Lovers Blog Hop by Teri Anderson for Scrapbook Adhesives by 3L

Stack and adhere the extra shapes below your stamped images. This will give some of your shapes extra dimension when it comes time to put the scene together.

Robot Coffee Card with 2020 Fall/Winter Coffee Lovers Blog Hop by Teri Anderson for Scrapbook Adhesives by 3L

Adhere your scene onto a panel of inked up cardstock (or patterned paper). Add a coffee-themed sentiment and set the panel aside.

Adding Glitter to the Card

Take an A2 card and add strips of Extreme Double-Sided Tape along the sides of it to “frame” the card. I find it’s helpful to fold the liner back on the ends as I go.

Robot Coffee Card with 2020 Fall/Winter Coffee Lovers Blog Hop by Teri Anderson for Scrapbook Adhesives by 3L

Remove the liner pieces and cover the tape with glitter. Not a glitter fan? Try using flock instead. Add several strips of Crafty Foam Tape to your card, in the glitter frame opening. Mount your Robot Coffee Card panel onto it.

Robot Coffee Card with 2020 Fall/Winter Coffee Lovers Blog Hop by Teri Anderson for Scrapbook Adhesives by 3L

You’ll notice my glitter frame is really thin. You may want a thicker frame. If you do, trim 1/4″ to 1/2″ off of each side of your scene before you mount it onto the card.

Robot Coffee Card with 2020 Fall/Winter Coffee Lovers Blog Hop by Teri Anderson for Scrapbook Adhesives by 3L

Complete your Robot Coffee Card by adding a few sequins or gems to it.

Robot Coffee Card with 2020 Fall/Winter Coffee Lovers Blog Hop by Teri Anderson for Scrapbook Adhesives by 3L

Keep reading for the Coffee Lover’s giveaway details!

And thanks for stopping in!
Teri Anderson

Creative Time: 60 minutes
Skill Level: Intermediate

Materials Needed:
Scrapbook Adhesives by 3L®
E-Z Dots® Permanent Refillable Dispenser
E-Z Runner® Permanent Strips Refillable Dispenser
Crafty Foam Tape 108ft
Adhesive Dots Micro

HomeHobby™ by 3L
Extreme Double-Sided Tape 1/2in

Other
Cardstock: Neenah; Stamps and Dies: Lawn Fawn (Charge Me Up, Thanks a Latte); Stencil: Paper Smooches (Buffalo Check); Sequins: Pretty Pink Posh; Glitter: A Muse Studio; Markers: Copic; Blue Ink Pad: My Favorite Things; Black Ink Pad: Ranger Ink

Save It to Pinterest!

Robot Coffee Card with 2020 Fall/Winter Coffee Lovers Blog Hop by Teri Anderson for Scrapbook Adhesives by 3L Pinterest

Click the button below to participate, and/or see more inspiration

Coffee Lovers 2020 Fall/Winter Blog Hop Logo (Nov 6 - 13, 2020)

If you can’t find the comment section at the bottom of this post, click on this button and scroll down to the bottom of the post and leave a comment.

Visit our Website and Blog!
Sign up for our Newsletter so you never miss a contest or giveaway!

instagram purple icon facebook icon purple pinterest purple icon twitter purple icon YouTube icon blog subscription purple icon

Autumn Color Leaves Card

Hi everyone, Yvonne here with a glittered Autumn card. What I love about autumn so much is seeing the green leaves turn into beautiful and bright colors like yellow, orange, and even bright red. These colors inspired me to make this card.

Autumn Color Leaves Card by Yvonne van de Grijp for Scrapbook Adhesives by 3L

What’s great about this card is that it’s really super simple to make using 3D Foam Leaves. With a technique called Wear Your Adhesive on the Outside, even beginning card makers can achieve this look. Shall we get crafty?

Autumn Card Base Layers

Use the E-Z Runner® Ultra Strong Refillable Dispenser to adhere a rectangle Kraft card panel on top of a slightly larger dark salmon panel.

Glittered Autumn Leaves

Start by adhering 3D Foam Leaves onto the kraft card panel until you get your desired look.

Autumn Color Leaves Card by Yvonne van de Grijp for Scrapbook Adhesives by 3L

Using a craft knife, cut through the top liner over the length of each leaf.

Autumn Color Leaves Card by Yvonne van de Grijp for Scrapbook Adhesives by 3L

Randomly gently peel off half of some of the leaves and sprinkle an Autumn color glitter over the exposed adhesive. Press the glitter to secure and tap off any excess glitter.

Repeat this process with several autumn color glitter until all the leaves are covered. This technique showcasing your adhesive is called Wear Your Adhesive on the Outside.

Autumn Gems Placement

To add the gems in autumn colors in a unique way, I first adhered 3D Foam Circles White Mix in between gaps of the leaves. Then peel off the top liner and placed rhinestones on top. Perfect sparkle and lifts the rhinestones so it doesn’t get lost with the glittered leaves.

Autumn Color Leaves Card by Yvonne van de Grijp for Scrapbook Adhesives by 3L

For a finishing touch, I printed an autumn sentiment and adhered it to the card using 3D Foam Squares White Small Size.

And voila…your Autumn card is ready to make someone happy.

I hope you enjoyed this tutorial and wish you happy crafting!
Hugs,
Yvonne van de Grijp

Autumn Color Leaves Card by Yvonne van de Grijp for Scrapbook Adhesives by 3L

Creative Time: 30 minutes
Skill Level: Beginner

Materials Needed
Scrapbook Adhesives by 3L®

3D Foam Leaves
E-Z Runner® Ultra Strong Refillable Dispenser
3D Foam Squares White Small Size
3D Foam Circles White Mix

Other
Cardstock (White, Dark Salmon, Kraft); Printed sentiment; Rhinestones; Paper Trimmer; Bone Folder; Tweezers; Craft Knife

Save It!

Autumn Color Leaves Card by Yvonne van de Grijp for Scrapbook Adhesives by 3L Pinterest

Visit our Website and Blog!
Sign up for our Newsletter so you never miss a contest or giveaway!

instagram purple icon facebook icon purple pinterest purple icon twitter purple icon YouTube icon blog subscription purple icon

Vintage Map Fall Card

Hi, Connie here with a unique card creation using a vintage map as a background against a truckload of pumpkins. Perfect for a fall-themed card! A combination of etched dies and Scrapbook Adhesives by 3L products really makes it easy for this kind of paper piecing project.

Vintage Map Fall Card by Connie Mercer for Scrapbook Adhesives by 3L

Vintage Map Fall Card Supplies

Vintage Map Fall Card by Connie Mercer for Scrapbook Adhesives by 3L

Start with determining what cardstock or patterned paper will fit the theme of the card. Then die-cut the shapes. To give it more depth and interest, shade the images with ink. I ended up cutting the pumpkins down to make them smaller.

Embellish the Card Front

Vintage Map Fall Card by Connie Mercer for Scrapbook Adhesives by 3L
  1. Add 3D Foam Circles White Mix to the back of the pumpkins, sign, tires, and small dog shapes.
  2. Adhere Happy Fall to the sign with the Dual Tip Glue Pen.
  3. Attach the truck to the map panel and the pumpkins in the bed of the truck with the E-Z Runner Grand White Permanent Dispenser. Add the other shapes to the panel.
  4. Next, place the vintage map on a white cardstock panel using the E-Z Runner Grand Permanent Strips.
Vintage Map Fall Card by Connie Mercer for Scrapbook Adhesives by 3L

For more dimension, use the Crafty Foam Tape 108′ on the back of the matted map, and adhered to a black cardstock panel. Then mat on a sage green cardstock panel and lastly to the card base with the E-Z Runner Grand Permanent Strips.

Add acrylic paint to enhance the die cuts. Highlight the scene with stamps. Place stars and a paper doll boy face on the card to complete.

Creative Time: 60 minutes
Skill Level: Intermediate

Materials Needed
Scrapbook Adhesives by 3L®
E-Z Runner Grand White Permanent Dispenser
Crafty Foam Tape 108′
3D Foam Circles White Mix

HomeHobby™ by 3L
Dual Tip Glue Pen

Other
Craft Dies: Stampendous ( Truck Load Die Set): Ephemera: Tim Holtz Idea-ology (Boy Face); Chalk Ink: Quick Quotes (PowderPuff Chalk Inks); Stamps: Darkroom Door and Blue Knight Rubber Stamps; Vintage Map; Cardstock; Acrylic Paint

Thanks for stopping by.
Connie Mercer

Pin It!

Vintage Map Fall Card by Connie Mercer for Scrapbook Adhesives by 3L Pinterest

Visit our Website and Blog!
Sign up for our Newsletter so you never miss a contest or giveaway!

instagram purple icon facebook icon purple pinterest purple icon twitter purple icon YouTube icon blog subscription purple icon

Glitter Tape Serving Tray

Hi friends! Dana here today sharing how to add a touch of glamor to a rustic wood serving tray using Extreme Double-Sided Tape and glitter. With the holiday season fast approaching, I wanted to be sure to have an extra tray on hand.

Glitter Tape Serving Tray by Dana Tatar for Scrapbook Adhesives by 3L

I had a lot of fun embellishing this serving tray. I kept the wood natural, but some stenciling or a coat of paint would also look fantastic in addition to the glitter stripes.

How to Add Glitter to a Wood Serving Tray

Glitter Tape Serving Tray by Dana Tatar for Scrapbook Adhesives by 3L

Apply 1/4-inch Extreme Double-Sided Tape across the bottom of a wood serving tray. The tray I used was made of wood pieces placed in a chevron pattern. I simply applied the tape over the seams on the bottom of the tray.

Glitter Tape Serving Tray by Dana Tatar for Scrapbook Adhesives by 3L

Next, remove the top red liner from the tape and sprinkle glitter onto the adhesive.

Glitter Tape Serving Tray by Dana Tatar for Scrapbook Adhesives by 3L

Once the tape is covered in glitter, seal the sparkly stripes using the fine tip of a Dual Tip Glue Pen. Let dry.

Glitter Tape Serving Tray by Dana Tatar for Scrapbook Adhesives by 3L

Finishing Steps

After the glitter stripes have dried, use the wide brush on a Dual Tip Glue Pen to add a layer of glue to the bottom of the serving tray in preparation for a layer of resin. Spread the layer of glue smooth with a paintbrush. Let dry.

Glitter Tape Serving Tray by Dana Tatar for Scrapbook Adhesives by 3L

Mix up a batch of resin according to the manufacturer instructions and pour over the bottom of the tray. Let dry.

Glitter Tape Serving Tray by Dana Tatar for Scrapbook Adhesives by 3L

The glitter and resin finish on this serving tray really catches the light in a fantastic way!

Thanks for stopping by today! I hope I have inspired you to try using adhesives in home décor projects.
~Dana Tatar

Creative Time: Active Crafting Time: 30 minutes; Drying Time: 3 Days
Skill Level: Beginner

Materials needed:
HomeHobby™ by 3L

Extreme Double-Sided Tape 1/4in
Dual Tip Glue Pen

Other
Rustic Wood Serving Tray: Jillibean Soup; Glitter: Clearsnap; Resin

Pin It!

Glitter Tape Serving Tray by Dana Tatar for Scrapbook Adhesives by 3L Pinterest

Visit our Website and Blog!
Sign up for our Newsletter so you never miss a contest or giveaway!

instagram purple icon facebook icon purple pinterest purple icon twitter purple icon YouTube icon blog subscription purple icon

Birthday Origami Wallet Tutorial

Hello, everyone! Margie Higuchi here today with a fun project. Scrapbook Adhesives by 3L participated in a retailer’s symposium at the Creativation trade show back in January. This birthday origami wallet project was the make ‘n take that we shared there. Many inquired about this project so why not share here on the blog for all to enjoy!

Birthday Origami Wallet Tutorial by Margie Higuchi for Scrapbook Adhesives by 3L

Origami Wallet Base

Using an 8.50 x 11-inch blue cardstock, score 2.50, 5.50, and 8.50-inch on the long side. Turn the cardstock on its short side and score at 4.25-inch. Burnish all the score lines.

Keeping the cardstock on the short side, cut 0.50-inch inward on the top and bottom right side up to the intersecting scoreline.

Birthday Origami Wallet Tutorial by Margie Higuchi for Scrapbook Adhesives by 3L

Staying on the short side, fold the cardstock in half. This will be your wallet base. 

Birthday Origami Wallet Tutorial by Margie Higuchi for Scrapbook Adhesives by 3L

Folding Details

On the long side of the folded cardstock, bring the left end panel in towards the center.

Birthday Origami Wallet Tutorial by Margie Higuchi for Scrapbook Adhesives by 3L

Take the upper right corner and pull it towards the outer edge. It will form a triangle. With a bone folder, crease the line to make a triangle flap.

Birthday Origami Wallet Tutorial by Margie Higuchi for Scrapbook Adhesives by 3L

Secure the back corner with Adhesive Dots Medium. Repeat on the other side.

Birthday Origami Wallet Tutorial by Margie Higuchi for Scrapbook Adhesives by 3L

To finish, apply Crafty Power Tape 81-ft. to the bottom of the back pocket and adhere to make a back pocket. Repeat on the other side.

Birthday Origami Wallet Tutorial by Margie Higuchi for Scrapbook Adhesives by 3L

Embellishing the Wallet

Now for the fun part! Cut the following to create the wallet front and belly band.

  • Two rectangles: 2.75 x 3.75-inch stripe patterned paper and 2.25 x 3.25-inch birthday patterned paper.
  • Two circles: 2-inch diameter striped patterned paper and 1.5-inch orange cardstock.
  • Two strips: 7 x 1.50-inch orange cardstock and 7 x 0.50-inch blue cardstock.
Birthday Origami Wallet Tutorial by Margie Higuchi for Scrapbook Adhesives by 3L

Layer the smaller rectangle on top of the larger piece by placing a Creative Photo Corner Silver on each corner and then add a strip of the E-Z Runner Grand Refillable Dispenser. Center the layered panel on the wallet front.

Birthday Origami Wallet Tutorial by Margie Higuchi for Scrapbook Adhesives by 3L

Making the Belly Band

Adhere the two strips together (the blue over the orange) by adding an Adhesive Lines in the middle. Wrap the layered strip around the wallet to figure out how long you need the band to be. Place the end facing up and on top of your wallet front. Trim excess and secure the end with an Adhesive Dots Medium.

Birthday Origami Wallet Tutorial by Margie Higuchi for Scrapbook Adhesives by 3L

Embellishing the Band

With the belly band end facing up, slowly roll the E-Z Heart Runner (a 15-year anniversary adhesive distributed at the trade show) on top of the blue cardstock strip, place Metallic Transfer Foils Variety Colors in teal color-side up and rub with your fingertip to transfer the color to the hearts. Re-foil in missed areas. Set aside.

Birthday Origami Wallet Tutorial by Margie Higuchi for Scrapbook Adhesives by 3L

Let’s work on the circle pieces. Layer the smaller circle on top of the larger striped one by adding 3D Foam Strips on the back. Trim the 3D Foam Strips to size to fit the back of the circle. Using the Adhesive Lines, apply a couple on the back of the layered circle and adhere on top of the belly band.

Birthday Origami Wallet Tutorial by Margie Higuchi for Scrapbook Adhesives by 3L

Add a 3D Foam Hearts in the largest size on top of the orange circle. Remove its top liner, place Metallic Transfer Foils Variety Colors in teal color-side up and rub with your fingertip to transfer the color to the heart. You’re Done!

Birthday Origami Wallet Tutorial by Margie Higuchi for Scrapbook Adhesives by 3L

I hope you enjoyed this Birthday Origami Wallet. It was a lot of fun to create! Below I am sharing some pictures from the event.

Birthday Origami Wallet Tutorial by Margie Higuchi for Scrapbook Adhesives by 3L The Collins Group Sample Frenzy Event at AFCI SAby3L Table
Birthday Origami Wallet Tutorial by Margie Higuchi for Scrapbook Adhesives by 3L The Collins Group Sample Frenzy Event Retailer showing off the EZ Runner Grand

Thanks for stopping by!
Margie Higuchi

Creative Time: 35 minutes
Skill Level: Intermediate

Materials Needed:
Scrapbook Adhesives by 3L®
E-Z Runner Grand Refillable Dispenser
Creative Photo Corners Silver
3D Foam Strips
3D Foam Hearts
Adhesive Dots Medium
Adhesive Lines
Metallic Transfer Foils Variety Colors
Crafty Power Tape 81-ft.

Other
Patterned Papers: Photo Play Paper Co. (Time to Party Patterned Paper fm: Birthday Boy Wishes Collection); Cardstock: My Color Cardstock/My Mind’s Eye (Marine Blue and Sweet Potato); Craft Dies: Spellbinders® Paper Arts (Standard Circles Large); Score Board and Bone Folder; Paper Trimmer

Save to Pinterest!

Birthday Origami Wallet Tutorial by Margie Higuchi for Scrapbook Adhesives by 3L Pinterest

Visit our Website and Blog!
Sign up for our Newsletter so you never miss a contest or giveaway!

instagram purple icon facebook icon purple pinterest purple icon twitter purple icon YouTube icon blog subscription purple icon