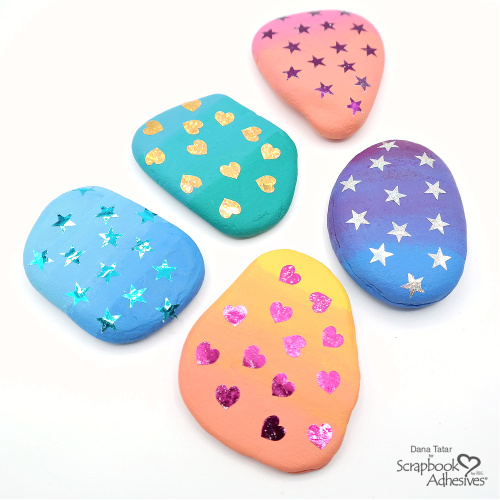
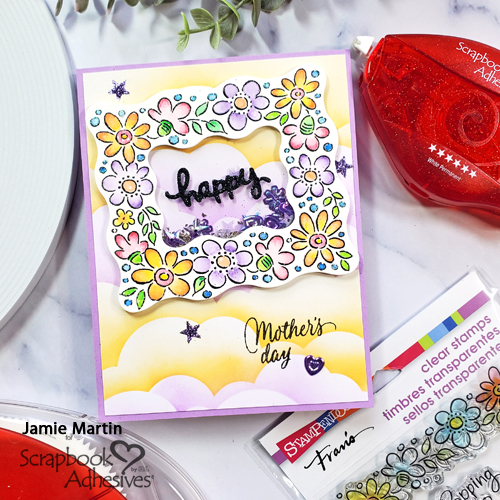
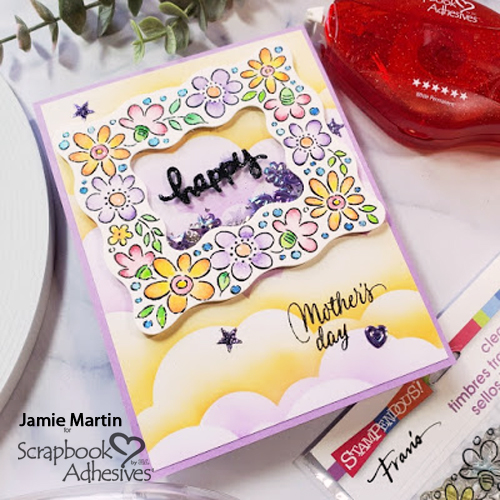
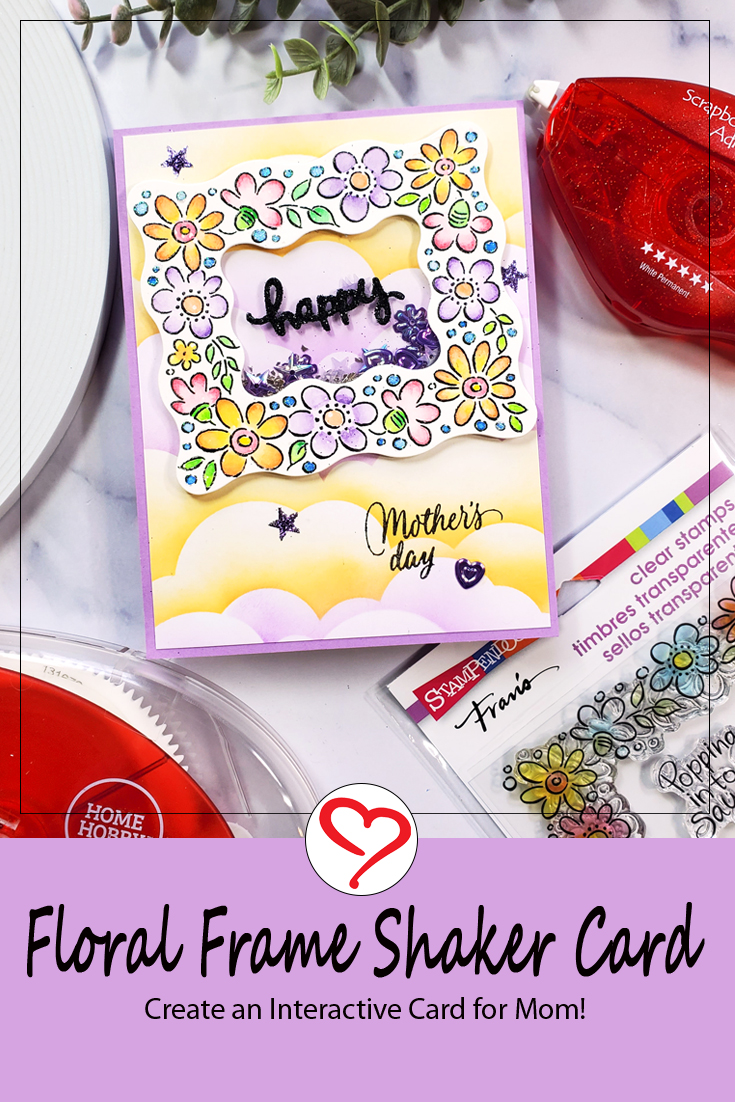
Welcome, guest designer Jamie Martin! We are excited to have her share her inspiration with you for the next three months! She is sharing a lovely interactive card, Floral Frame Shaker Card for Mother’s Day. Let’s get started!
Floral Frame Prep
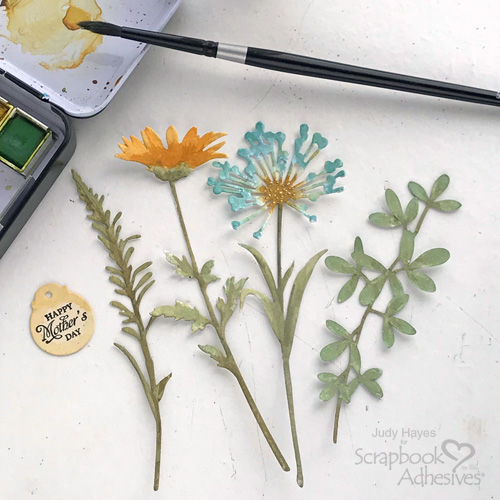
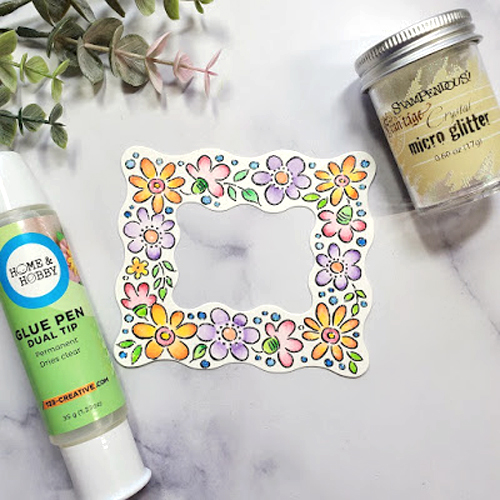
Start by stamping the Flower Frame on watercolor paper with Onyx Black VersaFine Ink and emboss with clear embossing powder. Then color the flowers with Zig Clean Color Real Brush Pens.
Use the coordinating POP Frame Die Set to die-cut the flower frame. Then apply glue from the Dual Tip Glue Pen to the colored dots on the frame. While the glue is wet, sprinkle Crystal Micro Glitter on the glue and set it aside to dry.
Create the Background
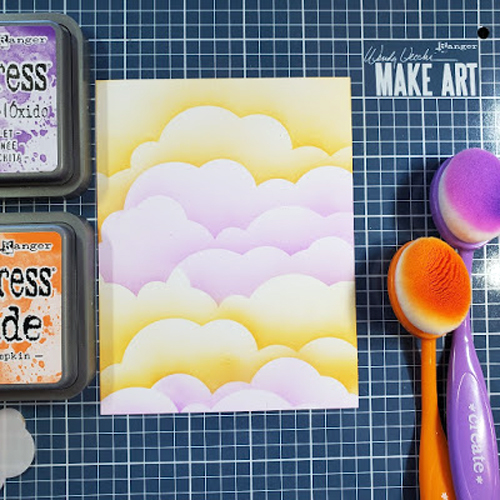
Place a cloud stencil at the top of a panel of white cardstock, using Carved Pumpkin and Wilted Violet Distress lightly swipe up with a brush starting on the stencil with Carved Pumpkin ink going across the width of the paper. Move the stencil down and repeat, continue to do this with both colors until complete.
Card Layers
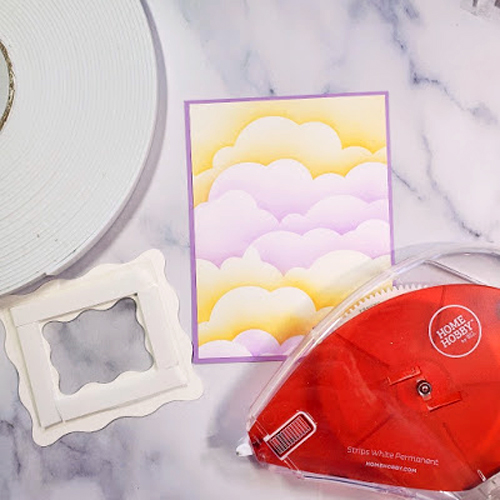
Adhere the cloud panel onto a purple card using the E-Z Runner® Grand. Use the E-Z Runner® Grand again to apply tape around the back of the floral frame and place acetate to cover the open frame. Place Crafty Foam Tape 108ft on the acetate around the opening making sure that the corners are touching so that the shaker bits won’t fall out.
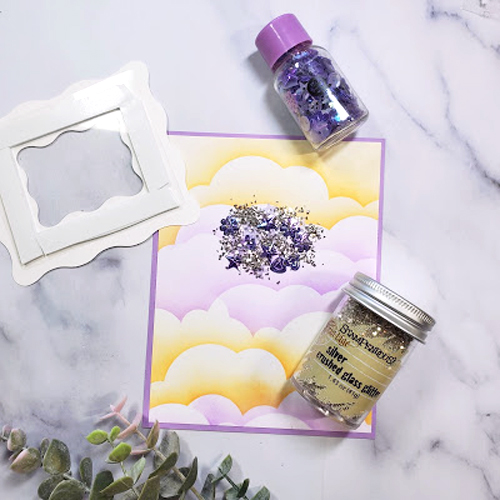
Place Silver Crushed Glitter Glass and Purple Hearts and Stars on the card. Remove the Foam liner, then place the frame over the shaker bits and press all around the square where the tape is.
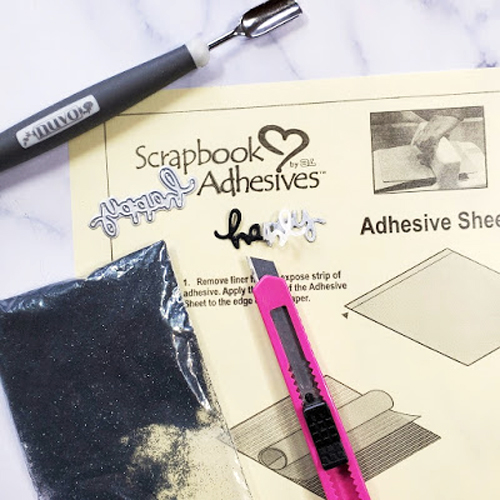
Cut a piece off of the Adhesive Sheets, peel off one side of the liner and place it on black cardstock. Put a word die on the adhesive side of the cardstock and run it through your die-cutting machine. Remove the second liner from the Adhesive Sheets piece using a craft knife to peel it off. Pour black glitter on the adhesive. Glue the die-cut word to the acetate using the Dual Tip Glue Pen.
Finishing the Card
Stamp Mother’s Day on the clouds at the bottom right of the card with Onyx Black VersaFine Ink. Glue a purple heart at the end of the sentiment using the Dual Tip Glue Pen. Using the E-Z Runner® Stars, place three stars on the cloud panel around the frame and sprinkle with Lavender Ultra Fine Glitter. Rub off excess glitter.
Thanks for stopping in!
Jamie
Creative Time: 60 minutes
Skill Level: Intermediate
Materials Needed:
Scrapbook Adhesives by 3L®
E-Z Runner® Grand Dispenser
E-Z Runner® Stars
Crafty Foam Tape 108ft
Adhesive Sheets 12 x 12-inch
Dual Tip Glue Pen by HomeHobby™ by 3L
Other
Stamp: Stampendous (Flower Frame Stamp Set) and Rubbernecker Stamps (Sentiment); Cloud Stencil: Rubbernecker Stamps; Glitter: Stampendous (Lavender Ultra Fine Glitter and Black Ultra Fine Glitter)
Save It to Pinterest!
Visit our Website and Blog!
Sign up for our Newsletter so you never miss a contest or giveaway!