You are in our US store • Switch to Europe store

Jeweled Birthday Wishes Card

Hi everyone, Yvonne here! Today I am sharing how to make a Jeweled Birthday Wishes Card. With a little help of the 3D Foam Circles White Mix, it’s easy to create these sparkly accents to Wear Your Adhesive on the Outside.

Spring (and Easter) is around the corner so why not use a cute bunny as a focal piece on my card. Let me show you how I made my card.

Jeweled Birthday Wishes Card by Yvonne van de Grijp for Scrapbook Adhesives by 3L

Jeweled Birthday Wishes Accents

Start by die-cutting a lattice rectangular shape from green cardstock. On the edges, I will make the glitter jewel accents.

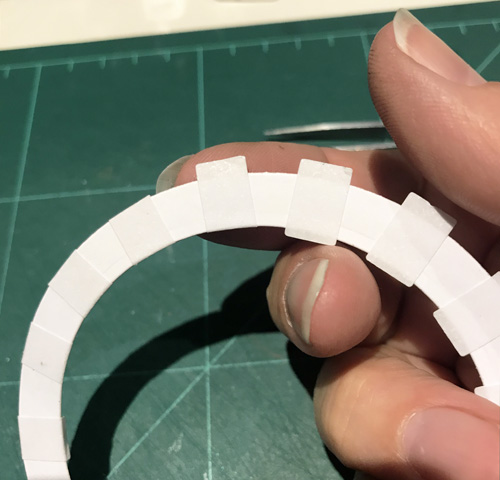
Wear Your Adhesive on the Outside by adhering 3D Foam Circles White Mix to the edges of the lattice rectangular shape. I used the small circles from the 3D Foam Circles White Mix.

Jeweled Birthday Wishes Card by Yvonne van de Grijp for Scrapbook Adhesives by 3L

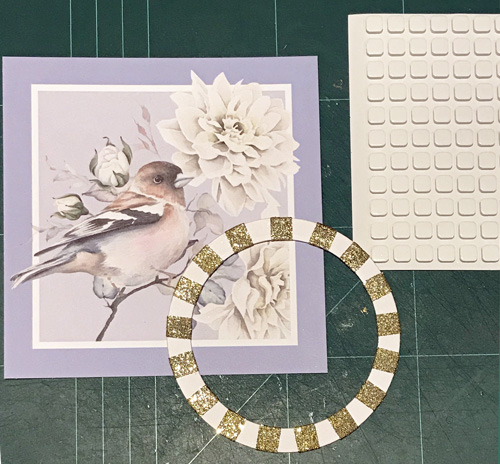
Remove the top liners from the 3D Foam Circles White Mix. Adhere small rhinestones on top of each circle. Make sure that the rhinestones are smaller in diameter.

Jeweled Birthday Wishes Card by Yvonne van de Grijp for Scrapbook Adhesives by 3L

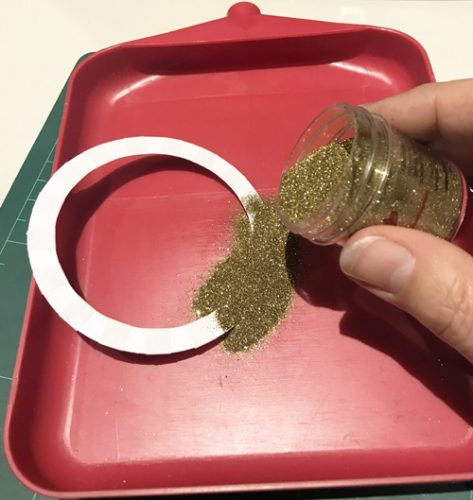
Next, sprinkle green fine glitter over the 3D Foam Circles White Mix and then tap and brush off the excess glitter. I loved how this part of my Jeweled Birthday Wishes Accent Card turned out!

Jeweled Birthday Wishes Card by Yvonne van de Grijp for Scrapbook Adhesives by 3L

Card Layers

Print a digi-stamp and matching sentiment out onto white cardstock. Use markers to color the image. Then die-cut it into a rectangle size that fits the green jeweled card panel. Lift and attach the white cardstock panel with Crafty Foam Tape White to the green jeweled card panel.

Jeweled Birthday Wishes Card by Yvonne van de Grijp for Scrapbook Adhesives by 3L

Secure the layered card panel onto a dark green card panel with Thin 3D Foam Squares White Mix for a subtle dimension.

Jeweled Birthday Wishes Card by Yvonne van de Grijp for Scrapbook Adhesives by 3L

Finally, adhere the stacked card panel onto a white card base using the E-Z Runner® Petite Permanent Dots Refillable Dispenser.

Jeweled Birthday Wishes Card by Yvonne van de Grijp for Scrapbook Adhesives by 3L

Finishing Touches

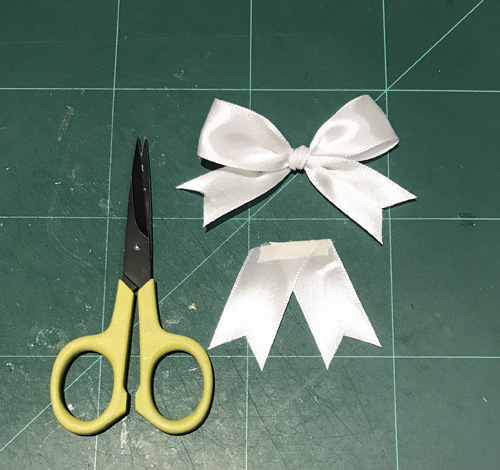
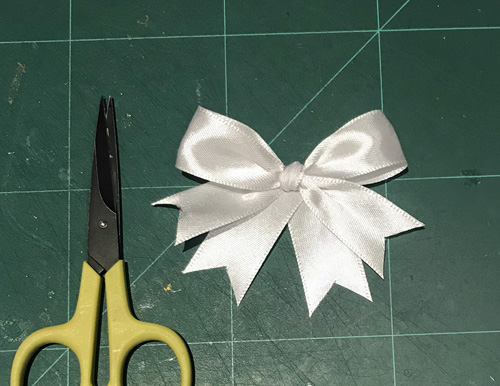
Make a pink satin bow and adhere to the card base using Premium Double-Sided Tape 1/8in. This tape is a great way to prevent any glue shining through the ribbon! And voila…your bunny card with glitter jewels is ready.

I hope you enjoyed the tutorial and wishing happy jeweled crafting day!

Jeweled Birthday Wishes Card by Yvonne van de Grijp for Scrapbook Adhesives by 3L

Creative Time: 30 minutes
Skill Level: Intermediate

Materials needed:
Scrapbook Adhesives by 3L®
3D Foam Circles White Mix
Crafty Foam Tape White
Thin 3D Foam Squares White Mix
E-Z Runner® Petite Permanent Dots Refillable Dispenser

HomeHobby™ by 3L
Premium Double-Sided Tape 1/8in

Other
Etched Dies and Die Cutting Machine: Spellbinders® Paper Arts (5×7 Matting Basics B Card Creator, 5×7, Fanciful Lattice Card Creator, Platinum 6 Die-Cutting and Embossing Machine); Lili Of the Valley (Digi-stamps: Bunnies Flower Basket, Little Friends Extra); Cardstock (White, Soft Green, Olive Green); Pink Satin Bow;  Paper Trimmer; Tweezers; Bone Folder

Save It to Pinterest!

Jeweled Birthday Wishes Card by Yvonne van de Grijp for Scrapbook Adhesives by 3L Pinterest

Visit our Website and Blog!
Sign up for our Newsletter so you never miss a contest or giveaway!

instagram purple icon facebook icon purple pinterest purple icon twitter purple icon YouTube icon blog subscription purple icon

Cherry Blossom Frame Tutorial

Hi friends! Dana Tatar here today sharing a Spring home décor tutorial. One of my favorite flowers is the cherry blossom. I know it is Spring when I see floral branches full of these beautiful blooms. I created my own floral branches to decorate a frame using brown paper bags and Adhesive Sheets.

Cherry Blossom Frame Tutorial by Dana Tatar for Scrapbook Adhesives by 3L

Cherry Blossom Branches from Paper Bags

Cherry Blossom Frame Tutorial by Dana Tatar for Scrapbook Adhesives by 3L
  • Cut a paper bag to lay flat. Crumble the bag and then smooth out onto work surface.
  • Cut a piece of Adhesive Sheets 12×12 Inch to cover the paper bag.
  • Remove the yellow backing paper. Place the adhesive sheet onto the bag and press.
  • Remove the white backing paper. Starting from one corner, roll the paper bag up into a thin roll. Crunch and press the bag while rolling to create texture.
Cherry Blossom Frame Tutorial by Dana Tatar for Scrapbook Adhesives by 3L

Apply 3D Foam Strips to the paper branches. Press the branches onto the frame, bending and connecting several branches into a realistic design.

Embellishing the Frame for Spring

Cherry Blossom Frame Tutorial by Dana Tatar for Scrapbook Adhesives by 3L

Note: For a more distressed look, like the one on this finished frame, rub away some of the foiled adhesive dots immediately after foiling.

  • Apply Crafty Foam Tape 108ft. to the back of each wood letter. Press onto the frame over the paper branches.
  • Stack layers of fabric cherry blossom petals, holding them together with Adhesive Dots Small. Apply a Small Adhesive Dot onto the center of each flower and cover with yellow glitter.
  • Stick the glittered cherry blossoms to the paper branches using Adhesive Dots Small.
Cherry Blossom Frame Tutorial by Dana Tatar for Scrapbook Adhesives by 3L

To finish, attach several bright green leaves to the frame.

I’m really enjoying the way this beautiful décor piece freshens up my space. I used cherry blossoms for this project, but any flower would look fantastic on an altered frame.

Thanks for stopping by today!
~Dana

Creative Time: 60 minutes
Skill Level: Intermediate

Materials needed:
Scrapbook Adhesives by 3L®

3D Foam Strips
Adhesive Dots Small
Adhesive Sheets 12×12 Inch
E-Z Runner® Grand Permanent Dots Refillable Dispenser
Crafty Foam Tape 108ft.
Metallic Transfer Foil Sheets Holographic Colors

Other
4×6 Photo Frame; Wood Letters; Brown Paper Bags; Fabric Cherry Blossoms; Fabric Leaves; Yellow Glitter; Patterned Paper

Love It! Save It to Pinterest!

Cherry Blossom Frame Tutorial by Dana Tatar for Scrapbook Adhesives by 3L Pinterest

Celebrate Partner Giveaway with Scrapbook and Cards Today Magazine!

We’re celebrating our featured partnership on Scrapbook and Cards Today Magazine Blog yesterday (March 12th) with a project tutorial. Today (March 13th) for a fun giveaway to recreate this amazing project!

Why not celebrate with a CAKE? Bonus: no calories! LOL! We shared a photo tutorial on this fabulous Birthday Cake Gift Box by Dana Tatar on Scrapbook and Cards Today Magazine Blog. Click on the image to take you there!

Enter to Win from Scrapbook and Cards Today Magazine

Do you love this project and want to recreate it? We’re thrilled to be sponsoring this adhesive prize package (valued over $25) to do just that on the Scrapbook and Cards Today blog!

Follow the instructions provided in their blog post. Enter through March 19, 2020. A winner will be announced on March 20, 2020. Good Luck!

Visit our Website and Blog!
Sign up for our Newsletter so you never miss a contest or giveaway!

instagram purple icon facebook icon purple pinterest purple icon twitter purple icon YouTube icon blog subscription purple icon

DIY Travel Journal

Hello! It’s Judy here today. I’ve put together a DIY Travel Journal to take on a trip this month. Can you believe I made the covers with Self-Laminating Pouches – Cards Medium? I’m super pleased with how nice they look!

DIY Travel Journal by Judy Hayes for Scrapbook Adhesives by 3L

DIY Travel Journal Step Outs

Each cover consists of a Self-Laminating Card, patterned paper and heavy card stock. Attach the two together using Adhesive Sheets 4×6 inch. I stamped the script design randomly on outside of covers and added a title to the front cover.

DIY Travel Journal by Judy Hayes for Scrapbook Adhesives by 3L

The inside covers are stamped with the script design. Once the ink dries, placed each of the covers into Self-Laminating Pouches – Cards Medium and firmly sealed the edges. Inside the cover, I added a brown card stock page that shows through the clear edge of the Self-Laminating Card. This also serves to hide page edges if the alignment is off a little when binding it.

DIY Travel Journal by Judy Hayes for Scrapbook Adhesives by 3L

The back cover looks very much like the front without the title.

DIY Travel Journal by Judy Hayes for Scrapbook Adhesives by 3L

Making the Inside Pages

Cut the inside pages to 4 x 6 inches from heavier text paper and mixed media paper. Three sections divide the book using Kraft card stock and the mixed media paper in the center section. The reason I like to create these books is that I can choose the papers! To bind the pages together, use a binding machine and attach them together with O-wire rings.

Creating the Dividers

Three sizes of Keepsake Envelopes Mix were added to the dividers. These will be perfect for tickets or other memorabilia collected on a trip. For now, I’ve tucked in some die cut labels that I can add to my journal pages as I make entries. Apply Adhesive Sheets 4×6 inch on the back of the paper and die-cut the label shapes for stickers. Simply remove adhesive backing and stick them in place.

Tip: Use leftover letters to make more labels by putting them on strips of card stock that have Adhesive Sheets applied to the back. Letters are adhesive-backed so its easy to do! The ocean label was done that way.

DIY Travel Journal by Judy Hayes for Scrapbook Adhesives by 3L

Other Details

Apply Adhesive Sheets 4×6 inch to the back of the patterned paper with cameras on it and cut them out for stickers. Add a pocket on a divider and add the camera stickers in. Then when you used the stickers up, you can use the pocket can hold memorabilia.

DIY Travel Journal by Judy Hayes for Scrapbook Adhesives by 3L

More keepsakes can be tucked into another divider with two small pockets!

DIY Travel Journal by Judy Hayes for Scrapbook Adhesives by 3L

A pocket at the back of the journal has Creative Photo Corners Kraft tucked inside. Use them to place a photo or keepsake to a page. When the pocket is empty, it can hold a keepsake!

DIY Travel Journal by Judy Hayes for Scrapbook Adhesives by 3L

I’m looking forward to filling this journal with notes, sketches and stories from my trip.

Thanks for Visiting!
Judy Hayes

Creative Time: 90 minutes
Skill Level: Intermediate/Advanced

Materials Needed
Scrapbook Adhesives by 3L®

HomeHobby™ by 3L

Other
Patterned Papers: Authentique Paper (Durable “Weathered” Paper); Cardstock: Bazzill Basics (Tan) and WorldWin Paper (Cocoa); Tool: Bind-It-All Machine and O-Wire; Inks: Imagine Crafts/Tsukineko (Versafine Clair Fallen Leaves Ink); Stickers: Simple Stories (Graduation – Cameras); Craft Dies: Sizzix (Tim Holtz Traveler Words); Stamps: Stampers Anonymous (Life Quotes by Tim Holtz, Documented, Ledger Script and Nature’s Wonder); Kraft Cardstock; Cream Paper; Mixed Media Paper

DIY Travel Journal by Judy Hayes for Scrapbook Adhesives by 3L

Love It? Save It to Pinterest!

DIY Travel Journal by Judy Hayes for Scrapbook Adhesives by 3L Pinterest

Visit our Website and Blog!
Sign up for our Newsletter so you never miss a contest or giveaway!

instagram purple icon facebook icon purple pinterest purple icon twitter purple icon YouTube icon blog subscription purple icon

Circled Hello Spring Card Tutorial

Welcome back crafty friends, Tracy here, and today I have this quick and easy Circled Hello Spring Card to share. Let’s celebrate the arrival of spring after a long winter with a little sparkle.

Circled Hello Spring Card Tutorial by Tracy McLennon for Scrapbook Adhesives by 3L

Circled Hello Spring Card Panel

Start this Circled Hello Spring Card by cutting your cardstock layers. Cut the yellow cardstock to 4 x 5.25-inches, and the white cardstock to 3.75 x 5-inches.

I was inspired by this sweet die cut circle with its adorable design and foiled Hello Spring sentiment so it became my focal point for the card. You’ll see why when you see my embellishment!

Circled Hello Spring Card Tutorial by Tracy McLennon for Scrapbook Adhesives by 3L

Wear Your Adhesive on the Outside with Circles

On the white cardstock panel with the die cut circle as a guide, I determined the placement of the regular size circles from the 3D Foam Circles White Mix first. Once I’m satisfied with the design, I adhered them down by removing the back liners.

Next, I applied foil onto the foam circles without any special tools. Simply take off the top liner of each 3D Foam Circle, place the silver holographic foil from the Metallic Transfer Foil Sheets Holographic FOIL side UP over the circle and gently rub the foil color to transfer it to the foam circle. See how it tied in with the foiled sentiment?

Circled Hello Spring Card Tutorial by Tracy McLennon for Scrapbook Adhesives by 3L

Now to add the small circles from 3D Foam Circles White Mix around the larger circles and Circled Hello Spring die cut. I switched to the silver glitter foil color from the same Metallic Transfer Foil Sheets Holographic. To apply the foil, repeat the same steps as above. Super Easy!

Circled Hello Spring Card Tutorial by Tracy McLennon for Scrapbook Adhesives by 3L

To lift and support the Hello Spring Circle die cut, use a combination of the 3D Foam Squares White Regular Size and the Thin 3D Foam Squares Black Mix. It also adds more dimension between the 3D Foam Circles White Mix and the die cut.

Circled Hello Spring Card Tutorial by Tracy McLennon for Scrapbook Adhesives by 3L

Finishing the Card

Add the white cardstock card panel to the yellow cardstock panel using Creative Photo Corners White. Then adhere the layered Circled Hello Spring front panel to the white cardstock card base with the E-Z Runner® Petite Permanent Dots Refillable Dispenser.

Circled Hello Spring Card Tutorial by Tracy McLennon for Scrapbook Adhesives by 3L

The sparkly Circled Hello Spring Card is now complete and ready to brighten someone’s day. Are you ready for Spring?

Circled Hello Spring Card Tutorial by Tracy McLennon for Scrapbook Adhesives by 3L

Thanks so much for stopping by!
Tracy McLennon

Creative Time: 30 minutes
Skill Level: Beginner

Materials Needed:
Scrapbook Adhesives by 3L®
Thin 3D Foam Squares Black Mix
3D Foam Squares White Regular Size
Metallic Transfer Foil Sheets Holographic
3D Foam Circles White Mix
Creative Photo Corners White
E-Z Runner® Petite Permanent Dots Refillable Dispenser

Other
Hello Spring Circle Die Cut: Pink Paislee (Bloom Street Die Cut); White and Yellow Cardstock

Save It to Pinterest!

Circled Hello Spring Card Tutorial by Tracy McLennon for Scrapbook Adhesives by 3L

Visit our Website and Blog!
Sign up for our Newsletter so you never miss a contest or giveaway!

instagram purple icon facebook icon purple pinterest purple icon twitter purple icon YouTube icon blog subscription purple icon

Bunny Ephemera Caddy

Greetings, Shellye, here! Spring is in the air and I’m excited to share this sweet springtime Bunny Ephemera Caddy with you. It is packed full of wonderfully layered tags.

Bunny Ephemera Caddy Steps

In my stash, I had a plain, wood bunny kit. I traced the bunny pieces (fronts, sides, and bottom) onto patterned papers. After trimming the shapes out, I attached them with E-Z Runner® Grand Permanent Dots Refillable Dispenser. To clean up the edges, sand the paper with an Emory board.

To assemble the box, I used a bead of the Dual Tip Glue Pen all around the wooden tabs. In the front of the bunny, I added a cute die-cut with Crafty Foam Tape White. The flower pieces were adhered with Adhesive Dots 3D. The tiny circle letters I attached with the 3D Foam Circles White Mix.

Bunny Ephemera Caddy by Shelley McDaniel for Scrapbook Adhesives by 3L

Fun Ephemera Tags and Goodies

For the inside of the Bunny Ephemera Caddy, I crafted all sorts of layered tags! I cut paper strips so that they would fit neatly into the box and then embellished as shown.

Bunny Ephemera Caddy by Shelley McDaniel for Scrapbook Adhesives by 3L

In completing the ensemble, I also used the Dual Tip Glue Pen for attaching the pom chick to the paper straw. Pieces such as bows and buttons were added with Adhesive Dots 3D.

Bunny Ephemera Caddy by Shelley McDaniel for Scrapbook Adhesives by 3L

Whether you’re looking to fill this Bunny Ephemera Caddy with a small plant, greenery, Easter candies, etc., the ideas are limitless!

Thanks for joining me!
Shellye McDaniel

Creative Time: 2 Hours
Skill Level: Intermediate

Materials Needed:
Scrapbook Adhesives by 3L®

E-Z Runner® Grand Permanent Dots Refillable Dispenser
3D Foam Circles White Mix
3D Foam Squares White Mix
Adhesive Dots 3D
Crafty Foam Tape White

HomeHobby™ by 3L
Dual Tip Glue Pen

Other
Oriental Trading Co- wooden box/caddy kit, chenille chick, wooden eggs and paper straw; Carta Bella Paper- scrapbook paper, die-cuts and stickers; American Crafts- Ribbon; Target- wooden carrot stickers; Michael’s- burlap flowers; Paper Mart- bunny ribbon, turquoise ribbon

Love It? Save It to Pinterest!

Bunny Ephemera Caddy by Shelley McDaniel for Scrapbook Adhesives by 3L Pinterest

Visit our Website and Blog!
Sign up for our Newsletter so you never miss a contest or giveaway!

instagram purple icon facebook icon purple pinterest purple icon twitter purple icon YouTube icon blog subscription purple icon

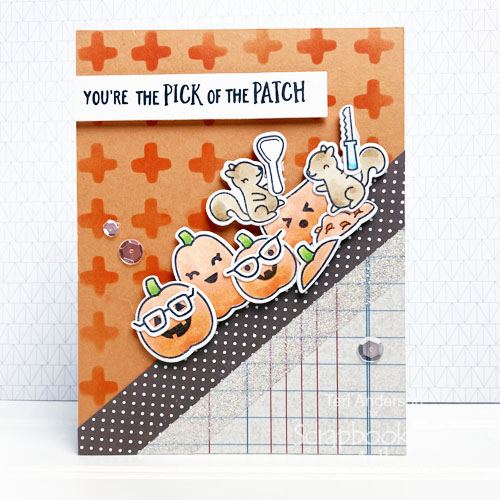
Faux Paper Tape Technique

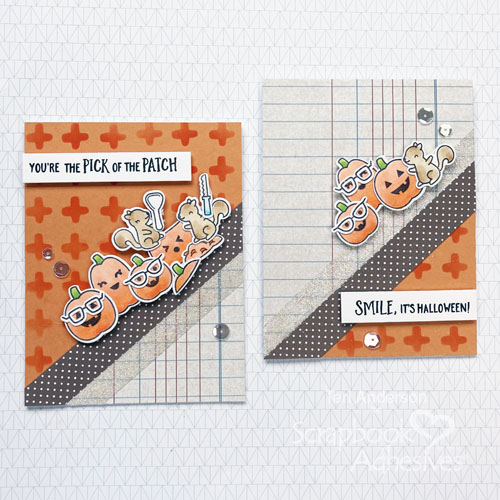
Hi, everyone! Teri here with a fun way to use up your paper scraps: Make faux paper tape! It’s easy to create and looks great on handmade cards and scrapbook pages.

Faux Paper Tape Technique by Teri Anderson for Scrapbook Adhesives by 3L

Faux Paper Tape Step Outs

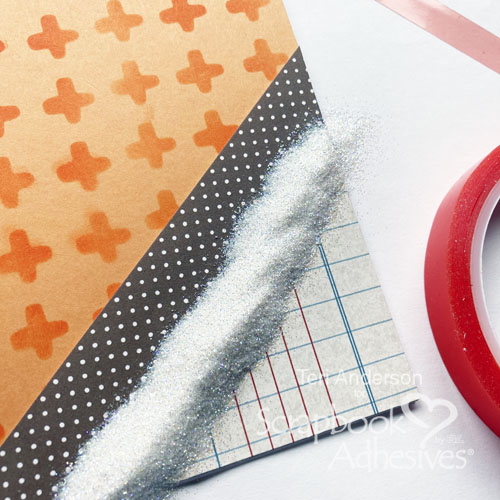
Start by cutting several strips of patterned paper. I generally like my strips to be about a half-inch wide. The length doesn’t really matter.

Faux Paper Tape Technique by Teri Anderson for Scrapbook Adhesives by 3L

Cover the back of each paper strip with tape. You can use Premium Double-Sided Tape or Extreme Double-Sided Tape. It doesn’t really matter which one, although I recommend using the Premium Double-Sided Tape if you think you might want to tear your faux paper tape strips!

Decorate a Card Front

Now it’s time to decorate a card with your strips. Randomly adhere the paper strips onto a panel of cardstock or patterned paper.

Faux Paper Tape Technique by Teri Anderson for Scrapbook Adhesives by 3L

You can use them as they are or you can add visual interest by cutting the bottom of your strips with your scissors at an angle. You can also tear them.

Faux Paper Tape Technique by Teri Anderson for Scrapbook Adhesives by 3L

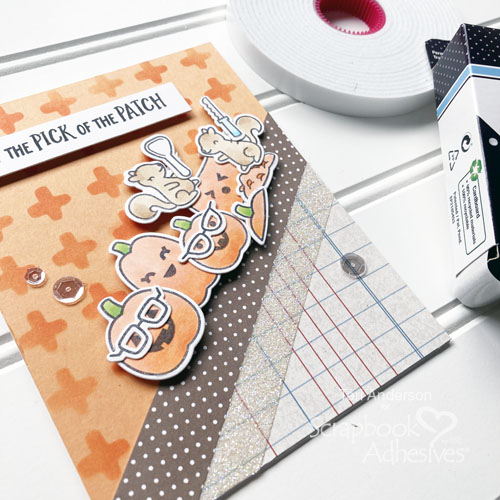
Once you’ve covered your panel with faux paper tape strips, use scissors or a paper trimmer to cut away the excess paper. Adhere the panel onto a standard card and add a sentiment to the card.

Faux Paper Tape Technique by Teri Anderson for Scrapbook Adhesives by 3L

Finishing the Card Design

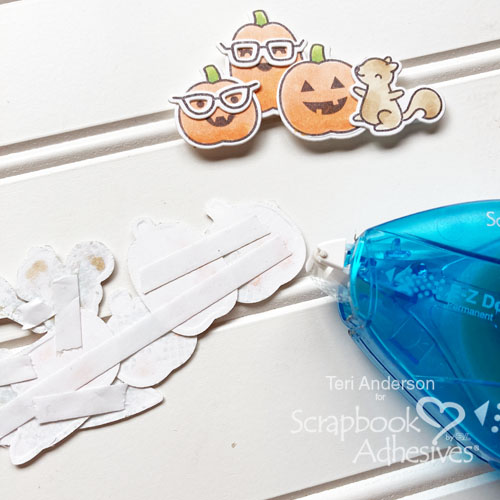
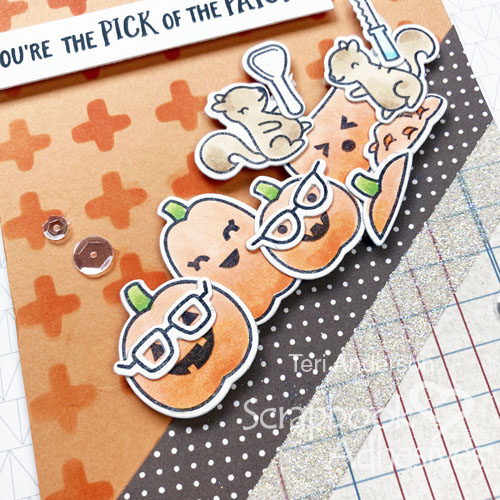
Complete your design by adding some 3D Foam Shapes to it. Embellish them with flock or glitter.

Faux Paper Tape Technique by Teri Anderson for Scrapbook Adhesives by 3L

For a little extra pop, add some sequins or gems! Not a fan of bulk? Use small die-cuts instead.

Faux Paper Tape Technique by Teri Anderson for Scrapbook Adhesives by 3L

Faux Paper Tape Variation

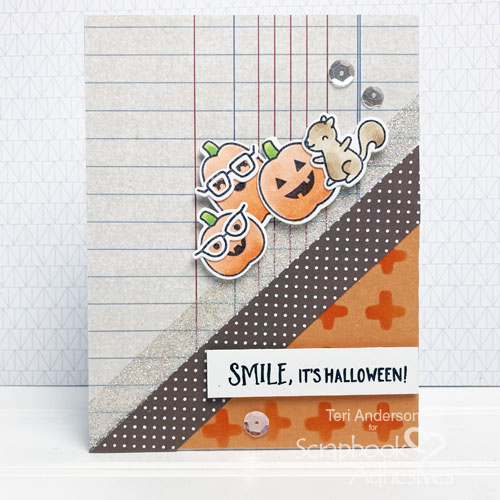
The cool thing about this technique is you can make your faux paper tape strips as big or as little as you want them to be.

Faux Paper Tape Technique by Teri Anderson for Scrapbook Adhesives by 3L

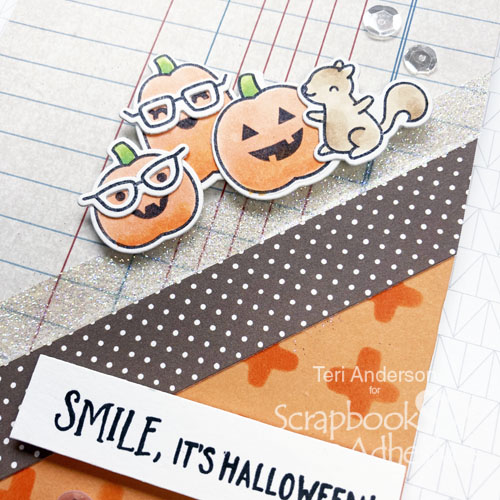
The strips on this card are all 1″ inch wide. I also cut an angle at the bottom of each strip.

Faux Paper Tape Technique by Teri Anderson for Scrapbook Adhesives by 3L

I wanted to make this card even more different than the first on so I decorated it with 3D Foam Hearts rather than stars. The look is just so fun!

Faux Paper Tape Technique by Teri Anderson for Scrapbook Adhesives by 3L

I hope you are inspired to make some faux paper tape of your own with scraps! In fact, I’d love to see what you do. Leave a link for me in comments so I can leave you some love!

Happy creating,
Teri Anderson

Creative Time: 45 Minutes
Skill Level: Beginner

Materials Needed
Scrapbook Adhesives by 3L®

HomeHobby™ by 3L

Other
White Cardstock: Neenah Paper; Patterned Papers: Lawn Fawn and Avery Elle; Stamps: Pretty Pink Posh (Encouraging Greeting Stamp Set); Black Ink Pad: Ranger Ink; Pink Flock: Stampendous!; Sequins: Pretty Pink Posh

Save It to Pinterest!

Faux Paper Tape Technique by Teri Anderson for Scrapbook Adhesives by 3L Pinterest

Visit our Website and Blog!
Sign up for our Newsletter so you never miss a contest or giveaway!

instagram purple icon facebook icon purple pinterest purple icon twitter purple icon YouTube icon blog subscription purple icon

Beautiful Moments Vintage Photo Card

Hi everyone, Yvonne, here with a photo vintage card, Beautiful Moments Vintage Photo Card. I came across this lovely photo I just needed to get crafty right away and make it into a beautiful vintage card. With Scrapbook Adhesives by 3L products, it’s super easy to assemble the card. Come on and let me show you how I made this card.

Beautiful Moments Vintage Photo Card by Yvonne van de Grijp for Scrapbook Adhesives by 3L

Vintage Photo Card Base

Make a white rectangle-shaped card base from creme cardstock. Then I adhered a dark brown panel onto the card base with the E-Z Runner® Petite Permanent Dots Refillable Dispenser.

Beautiful Moments Vintage Photo Card by Yvonne van de Grijp for Scrapbook Adhesives by 3L

For the top panel, I used a piece of patterned paper which I altered with a paper distress tool. Then the edges were inked with brown ink and an ink blending tool for an even older look.

Beautiful Moments Vintage Photo Card by Yvonne van de Grijp for Scrapbook Adhesives by 3L

Add the altered panel onto the card base using the E-Z Runner® Petite Permanent Dots Refillable Dispenser.

The Ribbons and Cardstock Layer

Glue can leave shiny residue through the ribbon when adhering. Therefore, my easy solution is the Premium Double-Sided Tape 1/4in.

Simply adhere the Premium Double-Sided Tape 1/4in to the back of the ribbon, remove the liner and adhere to your card. No stain or residue and instant adhering…so no drying time. Yep…it’s that easy!

For my vintage photo card, I used two pieces of ribbon. I used a combination of Premium Double-Sided Tape 1/4in and Premium Double-Sided Tape 1/8in because of the ribbon design. Next, adhere the ribbons on the card base.

Beautiful Moments Vintage Photo Card by Yvonne van de Grijp for Scrapbook Adhesives by 3L

For the layer beneath the ribbons, I cut a strip from brown cardstock and adhered it with the E-Z Runner® Petite Permanent Dots Refillable Dispenser to the card front. Just tuck the strip under the adhered ribbons.

Beautiful Moments Vintage Photo Card by Yvonne van de Grijp for Scrapbook Adhesives by 3L

Photo Panel

Die-cut and embossed a swirly frame from creme cardstock. Trim the photo to fit the frame. Then I adhered the photo to the frame using 3D Foam Squares White Mix.

Beautiful Moments Vintage Photo Card by Yvonne van de Grijp for Scrapbook Adhesives by 3L

Adhere the stacked frame onto the card base with 3D Foam Squares White Mix for extra dimension.

Embellishing Touches

The bow was adhered with Premium Double-Sided Tape 1/4in to prevent that glue residue. Following up with adhering the flowers, stamens, and leaves to the card using the Dual Tip Glue Pen. Lastly, I added a sentiment sticker. And voila, your vintage photo card is ready.

I hope you enjoyed the tutorial and wish you happy crafting!

Hugs from Holland,
Yvonne van de Grijp

Beautiful Moments Vintage Photo Card by Yvonne van de Grijp for Scrapbook Adhesives by 3L

Creative Time: 50 minutes
Skill Level: Intermediate

Materials needed:
Scrapbook Adhesives by 3L®

3D Foam Squares White Mix
E-Z Runner® Petite Permanent Dots Refillable Dispenser

HomeHobby™ by 3L
Premium Double-Sided Tape 1/8-in
Premium Double-Sided Tape 1/4-in
Dual Tip Glue Pen

Other
Craft Dies and Die Cutting Machine: Spellbinders® Paper Arts (Nestabilities Timeless Rectangles, and Platinum 6 Die-Cutting and Embossing Machine); Creme and Brown Cardstock; Patterned Cardstock: DCWV (Tattered Time); Photo and Stickers: Idea-ology by Tim Holtz (Found Relatives Photo and Citations Sentiment Stickers); Ribbons; Mulberry Flowers, Stamens, and Leaves; Brown Inkpad; Ink Blending Tool; Paper Distresser; Paper Trimmer; Tweezers; Bone Folder

Love It! Save It to Pinterest!

Beautiful Moments Vintage Photo Card by Yvonne van de Grijp for Scrapbook Adhesives by 3L

Visit our Website and Blog!
Sign up for our Newsletter so you never miss a contest or giveaway!
instagram purple icon facebook icon purple pinterest purple icon twitter purple icon YouTube icon blog subscription purple icon

Trash to Treasured Notebook

Hi, Connie here with a recycle project that involves trash – Trash to Treasured Notebook! Think about cake mix boxes, cracker boxes ~ you get the idea! The cardboard fronts can be treated like patterned paper. I’m using these as notebook covers. Let me show you.

Trash to Treasured Notebook by Connie Mercer for Scrapbook Adhesives by 3L

Sizing Up the Treasured Notebook

Trash to Treasured Notebook by Connie Mercer for Scrapbook Adhesives by 3L

I made these books into 4″x 6″ and 4″x 4″ sizes. That size encompasses the focal picture on the box plus it gives it enough space for the binding rings. The front covers and the inside papers were cut using a standard paper cutter.

Inside Cover

Trash to Treasured Notebook by Connie Mercer for Scrapbook Adhesives by 3L

Attach the Adhesive Sheet to the pattern paper. They are easy to apply and the instructions are on the liner. Then adhere to the back of the cardboard cover.

Trash to Treasured Notebook by Connie Mercer for Scrapbook Adhesives by 3L

As a result, the patterned paper on the inside of the cover. So when you open the notebook, you will see the pretty patterns verses a plain cardboard.

Binding

There are several ways that this can be done with or without a machine. I used my Bind-It-All Machine. But you can also use O rings without the machine by using a two-hole punch tool.

Use a few of the 3D Foam Squares White Small to adhere the label to the front of the notebook.

Cover Ideas

Trash to Treasured Notebook by Connie Mercer for Scrapbook Adhesives by 3L

On one of the 4″ X 4″ covers, Creative Photo Corners Black were used to hold a cardboard design and then adhered to the front. By using the corners, the focal picture can be changed out.

Trash to Treasured Notebook by Connie Mercer for Scrapbook Adhesives by 3L

This is a really simple project. Friends love receiving these fun little Trash to Treasured Notebooks. Love turning waste into something useful! Do you have a project like that? Share by linking in the comments below.

Trash to Treasured Notebook by Connie Mercer for Scrapbook Adhesives by 3L

Thanks for stopping by!
Connie Mercer

Creative Time: 40 minutes
Skill Level: Beginner

Materials Needed:
Scrapbook Adhesives by 3L®
Adhesive Sheets 4 x 6in.
Creative Photo Corners Black
3D Foam Squares White Small

Other
Stamps: Darkroom Door, Joy Clair, and Stamper Anonymous; Patterned Paper; Binding Tool and O-Rings; Twine

Save to Pinterest!

Trash to Treasured Notebook by Connie Mercer for Scrapbook Adhesives by 3L Pinterest

Visit our Website and Blog!
Sign up for our Newsletter so you never miss a contest or giveaway!
instagram purple icon facebook icon purple pinterest purple icon twitter purple icon YouTube icon blog subscription purple icon

Birthday Gift Wrap Two Ways

Hi friends! Dana Tatar here today sharing how to use birthday gift wrap two ways. I love giving gifts, but my packaging doesn’t always match the quality of the present inside. These gift packaging options are colorful and fun. The recipient is sure to like the outside as much as what’s inside!
Birthday Gift Wrap Cake Box

Birthday Gift Wrap Two Ways by Dana Tatar for Scrapbook Adhesives by 3L

Assembling this birthday cake gift box was so much fun! I incorporated foil into my design in two different ways to add a touch of sparkle. Decorating the cake was quick and easy using some of my favorite adhesives and festive embellishments like crepe paper, felt flowers and leaves, and faux paper candles. Please stop by my blog for a detailed tutorial.

Best Adhesives for 3D Projects

Photo Collage Showing the Best Adhesives for 3D Projects

Tapes

1. Extreme Double-Sided Tape My go-to when creating 3D projects is the Extreme Double-Sided Tape. This tape is super strong and it adheres immediately to all types of surfaces with no drying time. So I know the finished gift box will be strong enough to hold a gift.

2. Crafty Power Tape This high-tack tape is perfect for mixed media applications, including delicate ribbon and fringe. Crafty Power Tape is translucent, and I choose this tape when the adhesive may not be completely covered by an embellishment because it is less visible on a finished project.

Shapes

3. 3D Foam Creative Shapes There a variety of them so lots to choose from. These pre-cut pieces of foam are a great way to quickly embellish any project. They can be used in many creative ways. The small bow pieces from the 3D Foam Party Shapes worked perfectly for faux candle flames.

4. 3D Foam Strips (NEW!) So happy about the NEW 3D Foam Strips! The strips are only 3mm wide, which makes them perfect for use with die-cuts and other delicate embellishments. I no longer have to cut 3D Foam Squares in half to attach thinner embellishments to my projects.

5. 3D Foam Circles Use them to add dimension to projects, but don’t forget about the empty sheet! Paper straws fit perfectly inside the empty spaces of the Small 3D Foam Circles! I used the circle negatives to hold the paper candles snugly on the top of the cake box.

Dots

6. Adhesive Dots Adhesive Dots have a strong, permanent but also a flexible bond. I like to use Adhesive Dots for Wear Your Adhesive on the Outside techniques with the Metallic Transfer Foil Sheets. The Micro Adhesive Dots were the perfect way to add foiled dots to a curved surface. A gift box with a touch of sparkle is extra special.

Creative Time: 60 minutes
Skill level: Intermediate

Materials Needed:
Scrapbook Adhesives by 3L®
Metallic Transfer Foil Sheets Holographic Colors
3D Foam Party Shapes, 3D Foam Strips, and 3D Foam Circles White Mix
Crafty Power Tape Dispenser 20′

HomeHobby™ by 3L
Extreme Double-Sided Tape 1/4″

Other
Patterned Paper; Felt Flowers and Leaves; Paper Straws; Crepe Paper

Love It? Save It!

Birthday Gift Wrap Two Ways by Dana Tatar for Scrapbook Adhesives by 3L

Happy Birthday Gift Wrap

I have a confession to make. I can’t sing. This Happy Birthday to You music note gift wrap is a great way to say happy birthday without belting out the tune. I used the song and some Holographic Metallic Transfer Foil Sheets to dress up a gift wrapped in plain white wrapping paper.

Birthday Gift Wrap Two Ways by Dana Tatar for Scrapbook Adhesives by 3L

Sheet Music Gift Box Steps

First, enlarge “Happy Birthday” sheet music to a size that looks great on your gift box. Use scissors to cut out the music notes.

Apply 5 pieces of 1/8″ Extreme Double-Sided Tape across the top of the wrapped gift box. Remove the red liner and press a Holographic Metallic Transfer Foil Sheet over the top of the tape. Lift off the foil sheet to reveal the holographic music staff.

Next, use a Dual Tip Glue Pen to adhere the music notes onto the music staff on the top of the gift box.

Finally, apply letter stickers under the music notes to spell out the lyrics to “Happy Birthday.” Use a Medium Adhesive Dot to attach a bow to the top of the gift.

Creative Time: 30 minutes
Skill level: Beginner

Scrapbook Adhesives by 3L®
Metallic Transfer Foil Sheets Holographic Colors
Crafty Power Tape Dispenser 20′
Adhesive Dots Medium

HomeHobby by 3L 
HomeHobby by 3L Extreme Double-Sided Tape 1/8″
Dual Tip Glue Pen

Other
Wrapping Paper; Happy Birthday Sheet Music; Letter Stickers; Ribbon, Bow

Save It to Pinterest!

Birthday Gift Wrap Two Ways by Dana Tatar for Scrapbook Adhesives by 3L