You are in our US store • Switch to Europe store

Creative Bohemian Vibe and Jillibean Soup

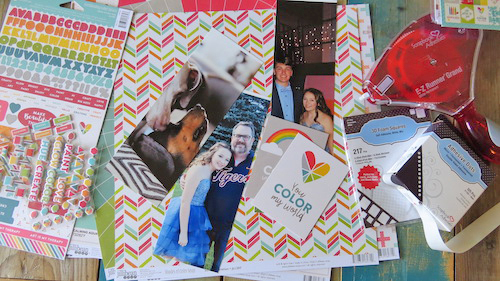
Take a look at this cool vibe going on the canvas project that Linsey Rickett created for Day 2 of our Blog Swap Week with Jillibean Soup. We are visiting both companies’ blogs and Instagram accounts for wonderful giveaways. The designs from the Bohemian Brew Collection Pack inspired her to make this project with our E-Z Runner® Grand Refillable Dispenser and its various E-Z Runner® Grand Refills, and Creative Photo Corners. Don’t forget to read all the way to the end for giveaway details!

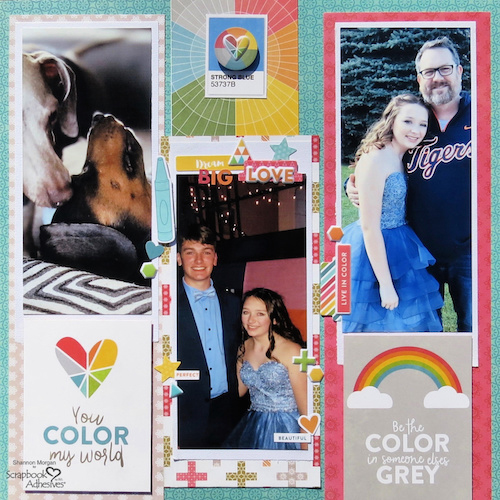
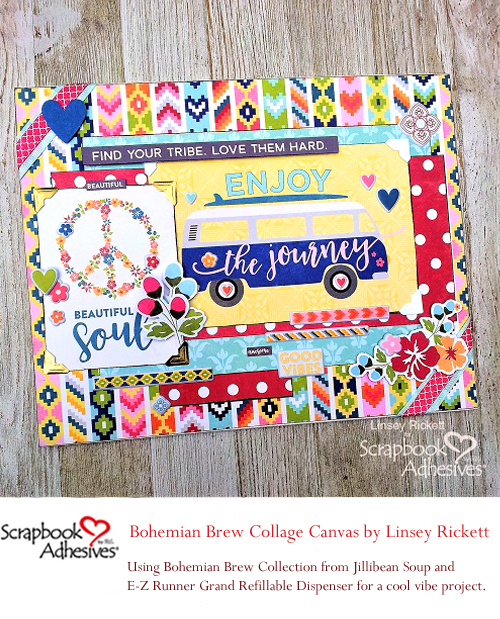
Bohemian Brew Collage Canvas by Linsey Rickett

Creative Bohemian Vibe and Jillibean Soup by Linsey Rickett for Scrapbook Adhesives by 3L

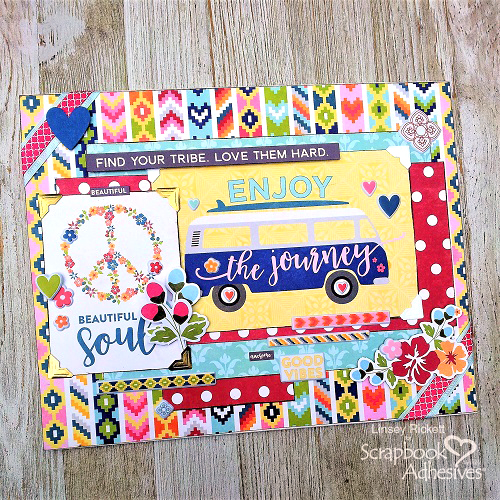
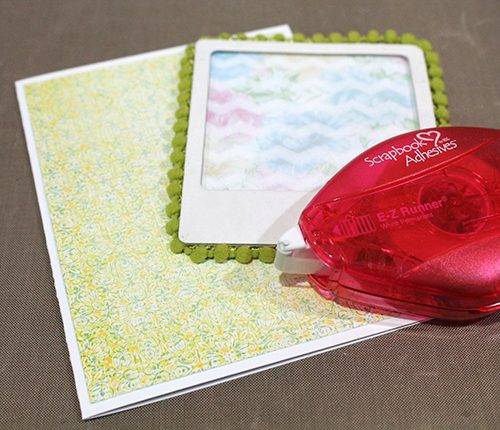
Using an 8.5 x 11″ canvas, I created a collage style with a cool vibe! I started with the 12 x 12″ sheet of Content patterned paper cut to size and adhered to the base of the canvas board with E-Z Runner® Grand Refillable Dispenser and E-Z Runner® Grand Ultra Strong Refill. Changing out the refill was a breeze!

Check out the short video on How to Use and Refill E-Z Runner Grand Dispensers below.

A piece of the blue patterned paper panel from Happiness was adhered down first and on top of it, a piece of the red patterned paper panel from the B side of Content was adhered down. This completes the layered base of the canvas.

Embellishing the Canvas

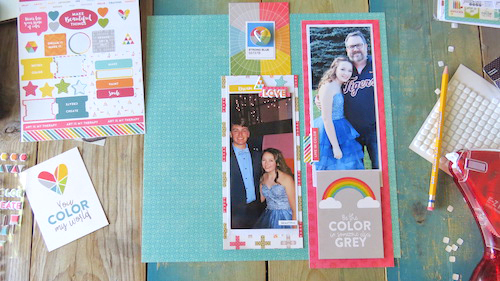
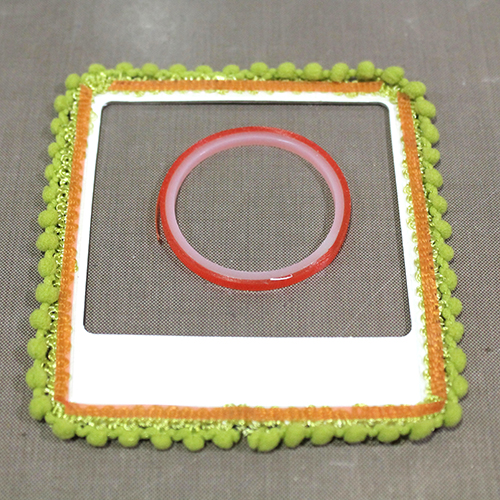
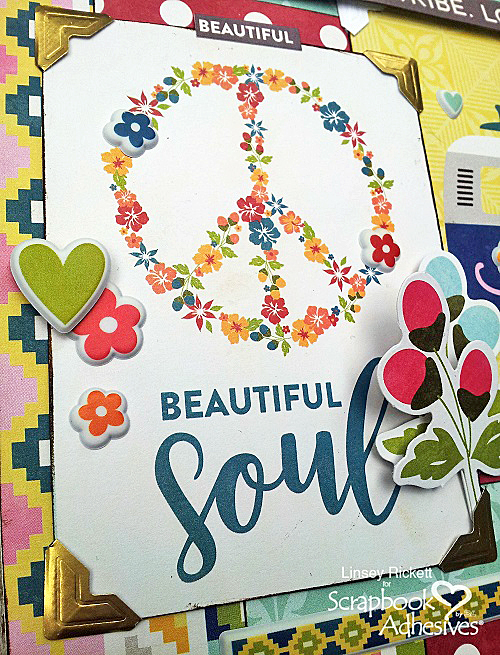
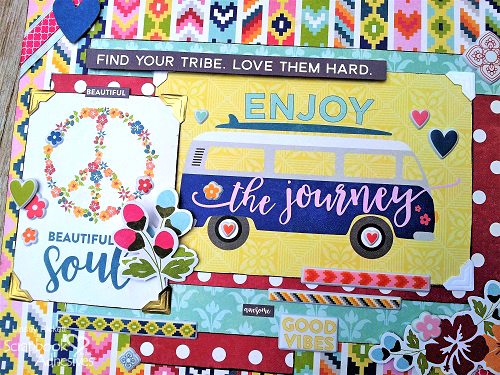
Now for the fun part, embellishing! For the focal images (“Enjoy the Journey” and “Beautiful Soul”), Bohemian Brew Bite Size Bites was used by cutting the two panels and securing them with the Gold and White Corners from the Creative Photo Corners Mix Pack.

Creative Bohemian Vibe and Jillibean Soup by Linsey Rickett for Scrapbook Adhesives by 3L

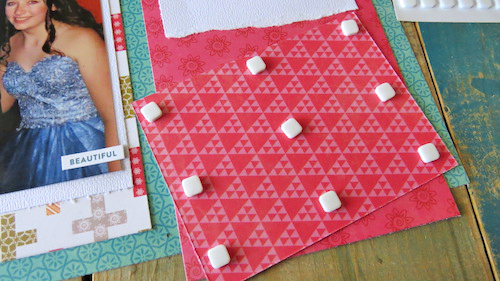
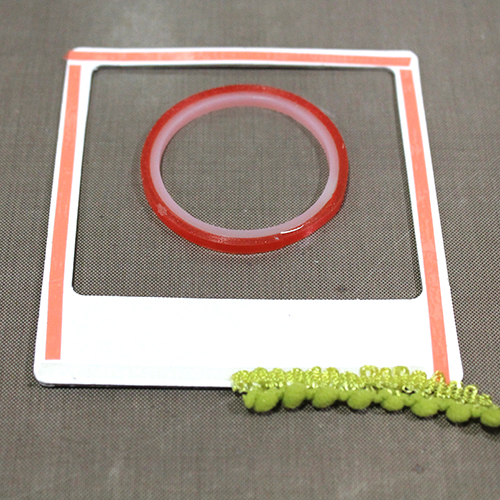
A variety of Bohemian Brew Coordinating Stickers, Bohemian Brew Puffy Stickers, and Bohemian Brew Pea Pods were added to decorate the collage canvas. A few of the stickers were popped up using Premium Double-Sided Tape 1/4in for added dimension and a bit of ribbon wrapped around opposite corners of the canvas board using E-Z Runner® Grand Repositionable Dots Refill to finish. This repositionable adhesive is perfect for easy ribbon placement and is used with the E-Z Runner® Grand Refillable Dispenser.

Creative Bohemian Vibe and Jillibean Soup by Linsey Rickett for Scrapbook Adhesives by 3L


Creative Time: 1 hour
Skill Level: Beginner

Material Needed:
Scrapbook Adhesives by 3L®:
01250-E-Z Runner® Grand Refillable Dispenser
01253-E-Z Runner® Grand Ultra Strong Refill
01252-E-Z Runner® Grand Repositionable Dots Refill
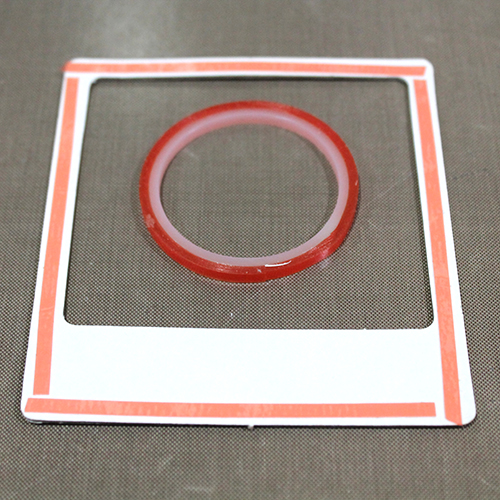
01633-Creative Photo Corners Mix Package 

HomeHobby by 3L®:
67090-Premium Double-Sided Tape 1/4in

Jillibean Soup: 
JB1557-Bohemian Brew Collection Pack

Other: 
Canvas Board; Dark Brown Distress Ink; Ribbon

Did you miss out on the other Blog Swap + Giveaway Days?
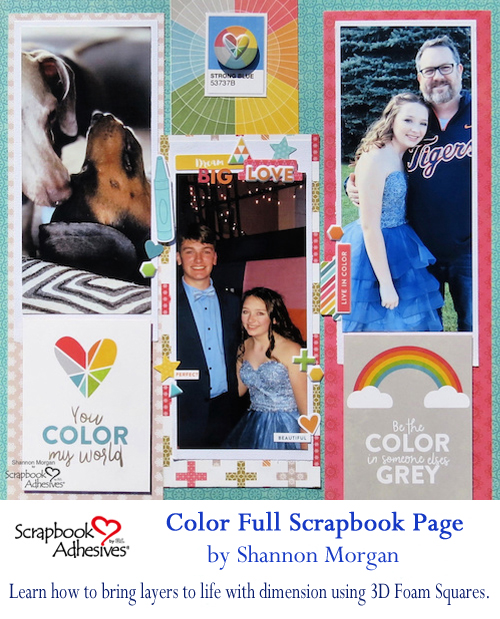
Check out Day 1, click: Color Full Week with Jillibean Soup!
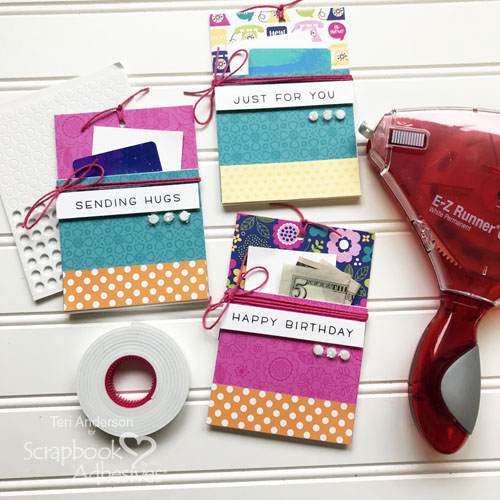
Here’s Day 3, visit: Notepad Gift-ables and Jillibean Soup.

Pin It!

Pinterest Creative Bohemian Vibe and Jillibean Soup by Linsey Rickett for Scrapbook Adhesives by 3L

Visit our friends at Jillibean Soup Designs by clicking:
Blog Swap Week with Jillibean Soup Designs – Day 2.

Blog Swap Week Prize Details

Scrapbook Adhesives by 3L and Jillibean Soup Blog Swap Logo (10/15 - 19/18)

To enter to win our Giveaway visit our Instagram account and follow the prompts, CLICK: Scrapbook Adhesives by 3L Instagram Account (@sbadhesivesby3l)

Winners will be randomly picked. International Entries are welcome.

Per Instagram rules, this promotion is in no way sponsored, administered, or associated with Instagram, Inc. By entering, entrants confirm that they are 13+ years of age, release Instagram of responsibility, and agree to Instagram’s terms of use.

Connect and Stick with 3L!

Visit our Website and Bookmark our Blog!
Sign up for our Newsletter so you never miss a contest or giveaway!

instagram purple facebook purple pinterest purple twitter purple SAby3L YouTube icon blog purple

Color Full Week with Jillibean Soup

Look for COLOR FULL of inspiration this week as we have a Blog Swap and Giveaway with Jillibean Soup! We’re excited to have both design teams partnering up to show off creativity. The celebration starts on both companies’ blogs and ends on both companies’ Instagram pages. See the giveaway details at the end of this post!

Today, Shannon Morgan uses Shades of Color Collection to create a wonderful scrapbook page and assembles it with E-Z Runner® Grand Refillable Dispenser and 3D Foam Squares White Small. Let’s take a look!


Color Full Scrapbook Page by Shannon Morgan

Color Full Week with Jillibean Soup Color Full Scrapbook Page by Shannon Morgan for Scrapbook Adhesives by 3L


This collection is outstanding! It’s full of color and uplifting sentiments. Instantly I knew which photos I wanted to use, they feature my family, who colors my world (mushy sentiment tie-in intended!)

You can see that my photos are odd sizes, I’m not too ashamed to tell you, I ran out of photo paper, and I used “cut offs” from letter-sized photo paper sheets! I love that the photos printed out in a non-traditional size. They worked perfectly for the idea I had for this layout. Don’t be afraid of adding multiple photos to your layouts, that’s what scrapbooking memories is intended for!

Color Full Week with Jillibean Soup Color Full Scrapbook Page by Shannon Morgan for Scrapbook Adhesives by 3L


This collection has so many fun patterns and colors, I wanted to try to incorporate as many as possible on my layout. Let’s look at how I accomplished this by adding layers.


Color Full Week with Jillibean Soup Color Full Scrapbook Page by Shannon Morgan for Scrapbook Adhesives by 3L


I like to add dimension to all of my layouts and cards. It is easily achievable with 3D Foam Squares!


Color Full Week with Jillibean Soup Color Full Scrapbook Page by Shannon Morgan for Scrapbook Adhesives by 3L


Thanks for letting me share this creation with you today! I hope I inspire you to create some great stuff! Make sure you’re checking back all week long!
~Shannon

Creative Time: 45 minutes
Skill Level: Beginner

Material Needed:
Scrapbook Adhesives by 3L®
3D Foam Squares White Small
E-Z Runner® Grand Refillable Dispenser

Jillibean Soup Designs
Shades of Color Collection Pack  JB1403

Looking for Day 2?
For Day 2, click: Creative Bohemian Vibe and Jillibean Soup.
Day 3, visit: Notepad Gift-ables and Jillibean Soup.

Pin It!

Pinterest Color Full Week with Jillibean Soup Color Full Scrapbook Page by Shannon Morgan for Scrapbook Adhesives by 3L


Visit our friends at Jillibean Soup Designs by clicking:
Blog Swap Week with Jillibean Soup Designs – Day 1.

Blog Swap Week Prize Details

Scrapbook Adhesives by 3L and Jillibean Soup Blog Swap Logo (10/15 - 19/18)

To enter to win our Giveaway visit our Instagram account and follow the prompts, CLICK: Scrapbook Adhesives by 3L Instagram Account (@sbadhesivesby3l)

Winners will be randomly picked. International Entries are welcome.

Per Instagram rules, this promotion is in no way sponsored, administered, or associated with Instagram, Inc. By entering, entrants confirm that they are 13+ years of age, release Instagram of responsibility, and agree to Instagram’s terms of use.

Connect and Stick with 3L!

Visit our Website and Bookmark our Blog!
Sign up for our Newsletter so you never miss a contest or giveaway!

instagram purple facebook purple pinterest purple twitter purple SAby3L YouTube icon blog purple

Sweet Wishes Birthday Card with 3D Foam Squares

I have a Sweet Wishes Birthday Card to share today! For me, sometimes need drives my creative energy.  I need a card for a sweet 5-year-old so this is what I made. To vary the height of dimension, I used both  Thin 3D Foam Squares White Mix and 3D Foam Squares – White Mix.

Sweet Wishes Birthday Card with 3D Foam Squares by Judy Hayes for Scrapbook Adhesives by 3L


The fun part of this card is coloring 🙂 It also takes the most time along with fussy cutting but the assembly is quick and easy!

Details of Sweet Wishes Card

  1. Form 4.25 x 5.5-inch card base from white cardstock
  2. Cut turquoise mat and fasten to card base using E-Z Dots® Permanent Refillable Dispenser
  3. Cut dot patterned paper and fasten to card base using  E-Z Dots® Permanent Refillable Dispenser
  4. Using white cardstock, cut a circle shape and cut off about .5 inch. Then fasten to the card using E-Z Dots® Permanent Refillable Dispenser
  5. Stamp images with black ink on white cardstock.  Color with alcohol inks and cut out.
  6. Stamp greeting on white cardstock. Trim to size and fasten to the turquoise mat using E-Z Dots® Permanent Refillable Dispenser
  7. Apply Thin 3D Foam Squares White Mix to back of girl only. Apply 3D Foam Squares – White Mix behind the cake.  (This pops up the cake a bit more and brings it forward.) Fasten to card
  8. Apply 3D Foam Squares – White Mix to the back of the cat.  (3D Foam Squares make the cat pop up more than the girl.) Fasten to card.
  9. Apply Thin 3D Foam Squares White Mix to butterfly and fasten to card
  10. Apply Thin 3D Foam Squares White Mix to greeting and fasten to card.
  11. Add glitter glue to candle flames, cake icing and cat hat.

Sweet Wishes Birthday Card with 3D Foam Squares by Judy Hayes for Scrapbook Adhesives by 3L

This technique of adding a different dimension using both Thin 3D Foam Squares White Mix and 3D Foam Squares – White Mix can easily be adapted to other images for your own cardmaking. Give it a try!

Thanks for visiting!
Judy

Creative Time: 45 minutes
Creative Skill: Intermediate

Materials Needed:
Scrapbook Adhesives by 3L®:
Thin 3D Foam Squares White Mix
3D Foam Squares – White Mix
E-Z Dots® Permanent Refillable Dispenser

Other Supplies Used: Penny Black Stamps; Imagine Crafts/Tsukineko Versafine Ink; Photo Play Paper – Spread Your Wings; Spellbinders Paper Arts Circle Die; Alcohol Markers; Cardstock: White, Turquoise

Pin It!

Pinterest Sweet Birthday Wishes Card by Judy Hayes for Scrapbook Adhesives by 3L

Colorful Gift Card Pocket Tutorial

Hi, friends! Want to give someone a gift card for their birthday, graduation or some other special occasion? Why not make a colorful pocket to give it in! I’ll show how with products from Scrapbook Adhesives by 3L® and a few basic crafting supplies in this quick, easy tutorial.

Colorful Gift Card Pockets Tutorial by Teri Anderson for Scrapbook Adhesives by 3L

Creating the Pocket!

Start by cutting an 8 1/2″ x 3 1/2″ panel of cardstock. Set it on a scoring board horizontally. Score lines at the 5″ and 5 1/4″ marks.

Colorful Gift Card Pockets Tutorial by Teri Anderson for Scrapbook Adhesives by 3L

Add patterned paper to the inside of the pocket, as well as the outside. Be sure to fold the paper along the score lines so you don’t cover the folds with patterned paper.

Colorful Gift Card Pockets Tutorial by Teri Anderson for Scrapbook Adhesives by 3L

Open the pocket up. Use Crafty Foam Tape to make a “U” along the pocket. Make sure you don’t put any at the top or you won’t able to place anything in your pocket. Remove the backing paper from the tape strips and seal the pocket.

Colorful Gift Card Pockets Tutorial by Teri Anderson for Scrapbook Adhesives by 3L

Decorating the Gift Card Pocket!

Now, you that you have the pocket, you get to decorate it! Use a hole punch to poke a hole at the top of your pocket.

Colorful Gift Card Pockets Tutorial by Teri Anderson for Scrapbook Adhesives by 3L

Then add a stamped sentiment. I stamped my sentiment on a strip of cardstock and then adhered it to the pocket with Crafty Foam Tape. I love using the tape rather than a flat adhesive because it adds dimension and really helps draws attention to the words!

Tie some twine around the pocket. Also, add a little twine to the hole at the top of the pocket. Not a fan of twine? Use ribbon instead.

Complete your pocket by adding a little sparkle! Take a couple 3D Foam Circles and dip one side of each one in glitter. Adhere the circles to your pocket.

Colorful Gift Card Pockets Tutorial by Teri Anderson for Scrapbook Adhesives by 3L

Stuff a gift card in your pocket.  For an extra special personal touch, cut a piece of cardstock to fit in it too and write a personal note.

One thing that is super cool about these pockets is you don’t have to use them to give a gift card. You can stuff cash in them too! Simply fold a bill or two and place it in the pocket instead.

Colorful Gift Card Pockets Tutorial by Teri Anderson for Scrapbook Adhesives by 3L

Colorful Gift Card Pockets Tutorial by Teri Anderson for Scrapbook Adhesives by 3L

Creative Time: 1 hour
Skill Level: Beginner

Materials Needed:
Scrapbook Adhesives by 3L®:
E-Z Runner® Grand Refillable Dispenser
3D Foam Circles White Mix
Crafty Foam Tape White

Other:
Patterned papers from Doodlebug Design; Simply Sentiments stamp set from Lawn Fawn; Twinklets Diamond Dust glitter from Floracraft; White cardstock; Black ink pad; Twine; Hole Punch, Scoring Board

Pin It!

DIY Gift Card Holder Ideas and Tutorials

Make gift giving creative again! Find great ideas from our Design Team for a DIY Gift Card Holder right here. Giving someone a gift card to their favorite store or restaurant is just the right size. As my sisters and I call it, ‘the gift of shopping!’ Who doesn’t enjoy a little guilt-free indulgence now and then?

We’ve pulled together some fresh ideas to dress up the gift of shopping, because

  1. We’re crafters and we embellish everything!
  2. You don’t want to just hand over a boring card or cash, do you?
  3. It won’t take long to make a super cute and customized gift card holder for any occasion!


Visit our Pinterest Board for Gift Card Holders!

Find Gift Card Holders on our Blog

Click on an image or the text below. Click here to see all the gift card holders.

Latisha Yoast Gift Card Holder for Scrapbook Adhesives by 3L Easy Gift Card Holder by Latisha Yoast for Scrapbook Adhesives by 3L Tattered Florals Box by Tami Mayberry for Scrapbook Adhesives by 3L
Enjoy Gift Card Holder Tutorial Easy Gift Card Holder Tutorial Tattered Floral Gift Box Tutorial
Colorful Gift Card Pockets Tutorial by Teri Anderson for Scrapbook Adhesives by 3L DIY Christmas Gift Card Holder Tutorial by Judy Hayes for Scrapbook Adhesives by 3L Cap and Gown Graduation Flip Card by Beth Pingry
Colorful Gift Card Pocket Tutorial DIY Christmas Gift Card Holder Tutorial Graduation Cap and Gown Gift Card Holder

Thanks for visiting Scrapbook Adhesives by 3L®!

Tell us how you like to give gift cards in the comment section below. If you can’t see the comments, click here and scroll down.

Connect and Stick with Scrapbook Adhesives by 3L®!

Visit our Website and Bookmark our Blog!
Sign up for our Newsletter so you never miss a contest or giveaway!

instagram purple facebook purple pinterest purple twitter purple SAby3L YouTube icon blog purple

Adding Pom Pom Trim with Extreme Double Sided Tape

Welcome back crafty friends, Tracy here and today I have a fun and quick little tutorial to share on how I created this Get Well – Pom Pom Card. I love to add fun texture and dimension to my projects with pretty ribbon and trim. I want to share a couple of tips on how to do just that.

Adding Pom Pom Trim with Extreme Double Sided Tape by Tracy McLennon for Scrapbook Adhesives by 3L

How to Adhere Pom Pom Trim

I started with a plain white chipboard frame, and the pom pom trim I wanted to use. When it comes to anything trim or ribbon, I turn to Extreme Double Sided Tape. Using this tape will ensure that my textured pieces stay in place.

Adding Pom Pom Trim with Extreme Double Sided Tape by Tracy McLennon for Scrapbook Adhesives by 3L

Using Extreme Double Sided Tape 1/8″, I taped the edges of the chipboard frame.

Adding Pom Pom Trim with Extreme Double Sided Tape by Tracy McLennon for Scrapbook Adhesives by 3L

I started adding the trim at the bottom of the chipboard frame.

Tip: If you ever anticipate imperfection, like the beginning and end of this trim, Place it at the bottom of a project. The eye is less likely to notice it there.

Adding Pom Pom Trim with Extreme Double Sided Tape by Tracy McLennon for Scrapbook Adhesives by 3L

Continue around the entire chipboard frame, one section at a time. Then I added another layer of Extreme Double Sided Tape to adhere the back side of the trim to the patterned paper in the next step.

Adding Pom Pom Trim with Extreme Double Sided Tape by Tracy McLennon for Scrapbook Adhesives by 3L

Assemble the Card

I cut a piece of patterned paper to fit on the back side of the chipboard frame. The Extreme Double Sided Tape keeps it in place. Using the E-Z Runner® Permanent Strips Refillable Dispenser I added the yellow patterned paper to the card base.

Adding Pom Pom Trim with Extreme Double Sided Tape by Tracy McLennon for Scrapbook Adhesives by 3L

Adhere the pom frame to the card using the E-Z Runner® Permanent Strips Refillable Dispenser. The paper flowers were added to the card using Adhesive Dots and the sentiment tag was added to the card using 3D Foam Squares.

Adding Pom Pom Trim with Extreme Double Sided Tape by Tracy McLennon for Scrapbook Adhesives by 3L

I added a burlap string bow to the tag as a finishing touch.

Adding Pom Pom Trim with Extreme Double Sided Tape by Tracy McLennon for Scrapbook Adhesives by 3L

Thanks so much for stopping by!
Tracy McLennon

Creative Time: 30 Minutes
Skill Level: Beginner

Materials Needed:
Scrapbook Adhesives by 3L®
Adhesive Dots Medium Ultra Thin
E-Z Runner® Permanent Strips Refillable Dispenser
3D Foam Squares White Regular Size
Extreme Double Sided Tape 1/8in

Other Products: Heartfelt Creations- Buttons & Blooms Collection (stamps, dies, patterned paper), White Cardstock, May Arts Ribbon (Green Pom Pom Trim, Yellow Burlap String), Chipboard Frame

Pin It!

Adhesives for Unique Shapes

Have you ever looked at all the elements you want to include in a project and realized you have a lot of unique shapes?  That was the case for me today!  I was using this collection with a lot of round shapes, skinny shapes, and just plain obscure shapes.  I knew I had two products in my adhesive arsenal that were about to get a work out: the 3D Foam Circles and E-Z Runner Micro Refillable Dispenser!  Here’s the layout that required special attention!

Adhesives for unique shapes with Scrapbook Adhesives by 3L

I can honestly say this is the first time I have ever used pieces shaped like lipstick, high heels, lips, and makeup brushes!  Additionally they all have pretty unique shapes and many are somewhat skinny!

Adhesives for Unique Shapes Close-ups

For this cluster of elements I used the E-Z Runner Micro on both the lips and the lipstick as I wanted them to lay flat.  I used 3D Foam Circles to pop up my sunglasses!  The E-Z Runner Grand secured my picture, frames, and patterned paper strips.

Here you can see how I pulled my title cluster together.  The E-Z Runner Micro go a workout on “glamour” along with the makeup brush.  While the 3D Foam Circles popped up the lips and perfume bottle.  I love that there are options for adding some great dimension within a cluster as well as keeping things flat!

Adhesives for Unique Shapes Process Video

While a collection like this could have been tricky to assemble, having the BEST and most DIVERSE adhesives around made the task easy!  Now what other unique items can I find to glue down???

Thanks for stopping by today!
-Christine

Creative Time:  45 minutes
Skill Level: Intermediate

Materials Used:
Scrapbook Adhesives by 3L®:
E-Z Runner® Micro Refillable Dispenser
3D Foam Circles White Mix
E-Z Runner Grand Refillable Dispenser

Other Supplies: Flavors of the Month Kit from The ScrapRoom, Letter Stickers from Jillibean Soup

Pin It!

Create Partial Foiled 3D Embellishments

Hello friends, Terri here and I’m popping in to quickly give you some tips for creating partial foiled 3D embellishments.   For my example, I’ve pulled some elements together for this Christmas card.  It’s never too early to get started on those holiday cards, right?

Create Partial Foiled 3D Embellishments by Terri Burson for Scrapbook Adhesives by 3L

The Visual Appeal of 3D Embellishments

For my stamped and colored images, I wanted to add dimension and foil to select parts of my image for added eye candy.  This is easily achieved, thanks to my 3D Foam Creative Embellishment Kit.   Simply mask the part of your stamp that you do not want to be stamped.  As you can see, to the left of my photo below, I’ve stamped the star from the boy image and fussy cut the boys head and hands, further down.  In essence, I removed the star and replaced it with a foiled star as you will see.

Create Partial Foiled 3D Embellishments by Terri Burson for Scrapbook Adhesives by 3L

Let Your Foil Shine With Adhesive Dots

In addition to fussy cutting and foiling the remaining stamped images (snowman’s hat and ornament girl’s metal top), I also wanted foiled embellishments on my last image, the Christmas Tree Girl.  I applied Adhesive Dots Micro to the tiny circle ornaments and rubbed in the gold foil from the 3D Creative Foam Embellishment Kit.  Make sure the foil is shiny side up, then peel.  Beautiful!

Create Partial Foiled 3D Embellishments by Terri Burson for Scrapbook Adhesives by 3L

Foil All The Things!

Since I was in the mood to foil, I went to the extreme.  Literally!  I decided to add foil strips along the edges of my card panel, using the Extreme Double-Sided Tape 1/4in.  In fact, I used so many different adhesives on this project, it’s a veritable smorgasbord!  To round out the foil fest and adhesive buffet (getting hungry yet?  I am!), I used the Adhesive Dots Medium for my twine and button, the 3D Foam Circles Black Mix (to pop up all my stamped images), and my E-Z Runner® Grand Refillable Dispenser.  The finishing touch?  My Dual Tip Glue Pen, to adhere my sequins.  I hope I’ve given you some good ideas on creating partial foiled embellishments!  It’s a great way to “Wear Your Adhesive On The Outside”!

Create Partial Foiled 3D Embellishments by Terri Burson for Scrapbook Adhesives by 3L

If you would like links to the products that I’ve used today, be sure and visit my blog post at Waving My Wand. Thanks and have a great day!

Creative Time: 30 Minutes
Creative Skill: Intermediate

Materials Needed:
Scrapbook Adhesives by 3L®:
3D Foam Creative Embellishment Kit
Adhesive Dots Micro
Adhesive Dots Medium
3D Foam Circles Black Mix
E-Z Runner® Grand Refillable Dispenser

HomeHobby by 3L®:
Extreme Double-Sided Tape 1/4in
Dual Tip Glue Pen

Other:
Stamps, white and black cardstock, mixed media paper, black dye ink, brush markers, homemade alcohol ink, yupo paper, border die, manual and electric die cut machine, white pigment ink, twine, buttons, sequins, stamp positioner

Pin It!

Create Partial Foiled 3D Embellishments by Terri Burson for Scrapbook Adhesives by 3L

Up in the Clouds with Adhesive Sheets

Hi everyone, Yvonne here with a cute card that will have you up in the clouds! I love adding dimensional accents to make my elements pop. Also, I am showing you to Wear Your Adhesive on the Outside with the clouds and glitter, using Adhesive Sheets 4×6 inch.

Up in the Clouds with Adhesive Sheets by Yvonne van de Grijp for Scrapbook Adhesives by 3L

Creating the Card Base Basics

Let’s start with the card panels, die-cut a rectangle shape from soft blue cardstock and then affix to grey card panel using the E-Z Runner® Grand Refillable Dispenser. Next place the layered panel onto a white card base, again using E-Z Runner® Grand Refillable Dispenser.

Adding Watercolors

First, stamp the image onto watercolor paper. Then watercolor the image. Die-cut the image into a rectangle shape and mat on a slightly larger rectangle shaped grey die cut with 3D Foam Squares White Regular Size. Adhere the panel onto the card base using 3D Foam Squares White Regular Size.

Up in the Clouds with Adhesive Sheets by Yvonne van de Grijp for Scrapbook Adhesives by 3L

Making Clouds

Let’s make a background! Take a sheet of Adhesive Sheets 4×6 inch and remove the yellow liner. Place it on a piece of white cardstock and apply the adhesive to the cardstock by rubbing the Adhesive Sheet evenly.

Up in the Clouds with Adhesive Sheets by Yvonne van de Grijp for Scrapbook Adhesives by 3L

Now die-cut the clouds from the cardstock, making sure the white liner facing upwards.

Up in the Clouds with Adhesive Sheets by Yvonne van de Grijp for Scrapbook Adhesives by 3L

To add the glitter to the clouds, sprinkle some white and silver glitter, white flock and micro pearls onto a piece of cardstock or tray.

Wear Your Adhesive on the Outside

Now remove the white liner from the die-cut clouds. Then dab the sticky side onto the mixture of glitter, micro pearls, and flock. Make sure you cover the whole cloud.

Up in the Clouds with Adhesive Sheets by Yvonne van de Grijp for Scrapbook Adhesives by 3L

Cut some of the clouds into half (horizontal and vertical) and add Thin 3D Foam Squares White Mix to the back. Remove the liner from the Thin 3D Foam Squares White Mix and then adhere the clouds to the card.

Up in the Clouds with Adhesive Sheets by Yvonne van de Grijp for Scrapbook Adhesives by 3L

Because the 3D Foam Squares White Regular Size are thicker than the clouds with the Thin 3D Foam Squares White Mix can easily be tucked under the stamped panel. Tip: I like to use tweezers for precise positioning of the clouds.

Up in the Clouds with Adhesive Sheets by Yvonne van de Grijp for Scrapbook Adhesives by 3L

Finish the card by adding a sentiment under the stamped image and…voila, your card is ready. Wishing you happy crafting!

Up in the Clouds with Adhesive Sheets by Yvonne van de Grijp for Scrapbook Adhesives by 3L

Creative Time: 30 minutes (coloring time not included)
Skill Level: Intermediate

Materials needed:
Scrapbook Adhesives by 3L:
E-Z Runner® Grand Refillable Dispenser
Adhesive Sheets 4×6 inch
3D Foam Squares White Regular Size
Thin 3D Foam Squares White Mix

Other supplies:
Etched Dies: Spellbinders Paper Arts (Flight 2, Scored and Pierced Rectangles, 5×7 Matting Basics B, and Platinum 6 Die-cutting and Embossing Machine), Stamp: Katzelkraft (Les Pabos-Aviateur), Distress inks, Black Ink, Glitter, Flock, Micro Pearls, Sentiment (Tim Holtz, Small Talk, stickers), Cardstock (White, Grey, Blue, watercolor), Paper Trimmer, Scissors, Tweezer.

Pin It!

Up in the Clouds with Adhesive Sheets by Yvonne van de Grijp for Scrapbook Adhesives by 3L

World Card Making Day 2018 Giveaway

Handmade cards are both a gift and a luxury! The process of making cards by hand can be comforting as well. Today we celebrate World Card Making Day, and all those that enjoy the hobby. We’re happy to provide you with the adhesives that keep your crafts intact.


World Card Making Day 2018 Giveaway

Join us today for a giveaway of our most popular products, including an E-Z Runner® Grand Dispenser (that’s 150 feet of Permanent Strips of double-sided adhesive in a refillable runner).

Two lucky winners will enjoy a $30 Adhesive Prize Package to keep their addiction, er, hobby stickin’ for a long time!

Check out this quick video showing how E-Z it is to use and refill.

Need extra inspiration for the upcoming holidays? Check out our Pinterest boards:


Halloween with Scrapbook Adhesives by 3L on Pinterest

Halloween with Scrapbook Adhesives by 3L on Pinterest


Christmas with Scrapbook Adhesives by 3L

Christmas with Scrapbook Adhesives by 3L


Gift Giving Ideas with Scrapbook Adhesives by 3L

Gift Giving Ideas with Scrapbook Adhesives by 3L

To enter to win, click through the Rafflecopter App. Winners will be randomly picked.
International Entries are welcome!

a Rafflecopter giveaway


If you cannot see the comment section at the bottom of this post, please CLICK: World Card Making Day 2018 Giveaway and scroll down to the bottom of the post.


Connect and Stick with 3L!

Visit our Website and Bookmark our Blog!
Sign up for our Newsletter so you never miss a contest or giveaway!

instagram purple facebook purple pinterest purple twitter purple SAby3L YouTube icon blog purple