You are in our US store • Switch to Europe store

BOO Treat Bag with 3D Foam Creative Sheets

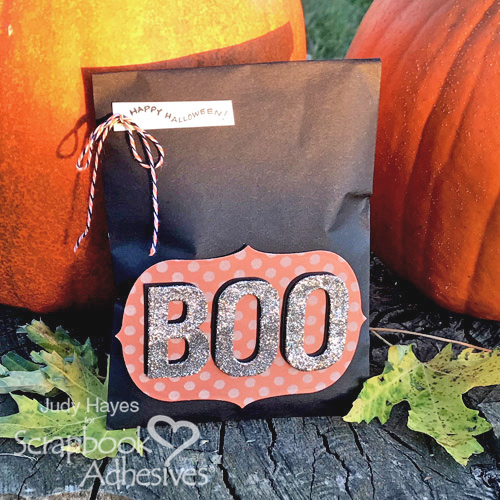
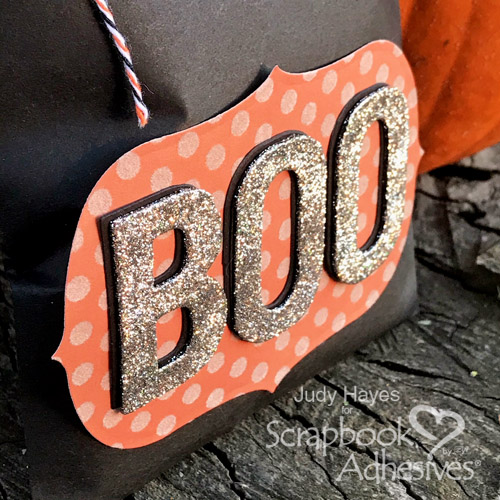
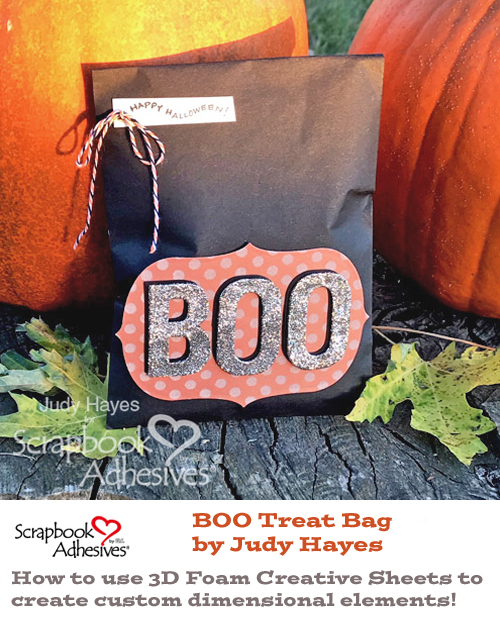
It’s very close to Halloween! Why not make a quick BOO Treat Bag for a friend, neighbor or Trick or Treater! Let’s make several of these easy and quick bags!

BOO Treat Bag with 3D Foam Creative Sheets by Judy Hayes for Scrapbook Adhesives by 3L


To make this BOO Treat Bag:

  1. Die cut “BOO” letters from 3D Foam Creative Sheets in Black.
  2. Peel liner from the front of the letters. Cover with glitter and press into the adhesive.
  3. Die cut “BOO” letters from black cardstock.
  4. Peel liner from 3D Foam Creative letters. Fasten over black cardstock letters with a slight offset to give a shadow effect.
  5. Cut background shape from patterned paper/
  6. Fasten to the black paper bag with E-Z Runner® Ultra Refillable Dispenser. (I used E-Z Runner® Ultra Refillable Dispenser because it is a very strong adhesive and will hold when treat bag is filled.) 
  7. Use E-Z Runner® Micro Refillable Dispenser to apply adhesive to the back of the letters. (E-Z Runner® Micro Refillable Dispenser applies a narrow adhesive strip.  Great for these letters!) Fasten letters to the treat bag.
  8. Stamp a verse with black ink on ivory cardstock, trim and fasten to treat bag with E-Z Runner® Ultra Refillable Dispenser 
  9. Tie a bow of twine.  Fasten near verse with Adhesive Dots Micro(Adhesive Dots Micro are the perfect size for a small twine bow!)

That’s it! The only thing left to do is fill with treats!

BOO Treat Bag with 3D Foam Creative Sheets by Judy Hayes for Scrapbook Adhesives by 3L

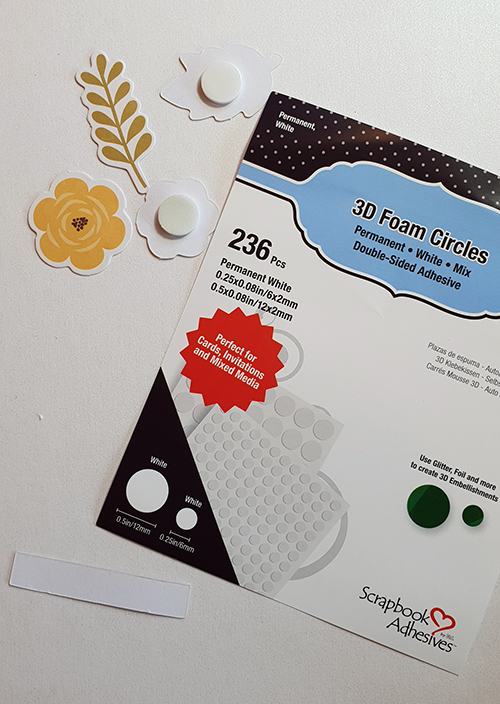
3D Foam Creative Sheets are one of my favorite things to die cut!  They cut easily and give dimension! With adhesive on both sides, it’s so easy to add glitter or paper to one side and fasten them with permanent adhesive on the back.

Thanks for visiting!
Judy

Creative Time: 30 Minutes
Skill Level: Beginner

Materials Needed:
Scrapbook Adhesives by 3L®:

3D Foam Creative Sheets
E-Z Runner® Ultra Refillable Dispenser
E-Z Runner® Micro Refillable Dispenser
Adhesive Dots Micro

Other: KaiserCraft “Tis the Season” 6 x 6 Pad; Spellbinders Paper Arts Contour Die; Imagine Crafts/Tsukineko Onyx Black Ink; Ranger Distress Tim Holtz Glitter; Rubber stamp; Cardstock: Black, Ivory, Black Paper Bag

Pin It!

Pinterest BOO Treat Bag with 3D Foam Creative Sheets by Judy Hayes for Scrapbook Adhesives by 3L

Visit our Website and Blog!
Sign up for our Newsletter so you never miss a contest or giveaway!

instagram purple icon facebook icon purple pinterest purple icon twitter purple icon YouTube icon blog subscription purple icon

Glitter Striped Watercolor Leaves Cards

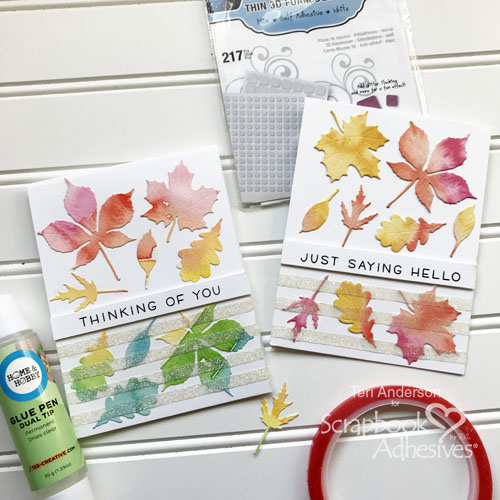
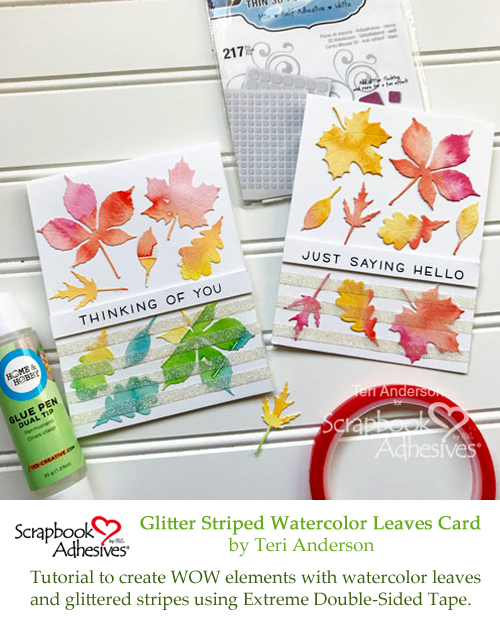
Hi, friends! Like the watercolor look? Like cards with glitter on them? You are going to love learning how to make some paper crafted cards like these! Read on for the quick and easy tutorial!

Glitter Stripes Watercolor Leaf Cards by Teri Anderson for Scrapbook Adhesives by 3L

Make Watercolor Leaves and Background

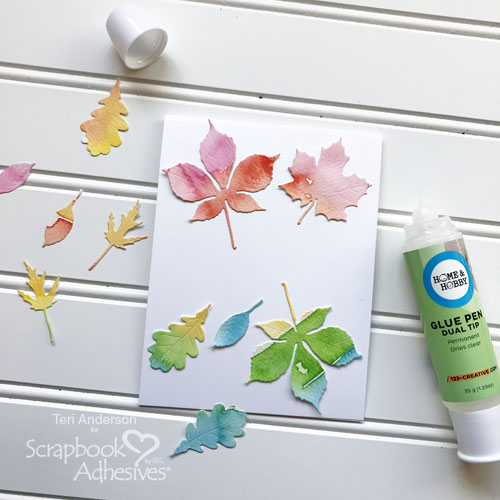
The first thing you are going to do is make the background. Create a standard A2 card from white cardstock. Set it aside.

Take a piece of watercolor paper and brush on several different colors of watercolor paint onto it. Let the paper panel dry.

Then take some leaf dies and cut several leafy die-cuts with them from the panel. Not a fan of leaf dies? Consider using different shapes like hearts, flowers, and stars – all would look lovely on a card too!

Glitter Stripes Watercolor Leaf Cards by Teri Anderson for Scrapbook Adhesives by 3L

Adhere the leaves onto your card with the Dual Tip Glue Pen. Be sure to cover the back of the leaves thoroughly with glue so nothing pops up and off the card.

Glitter Stripes Watercolor Leaf Cards by Teri Anderson for Scrapbook Adhesives by 3L

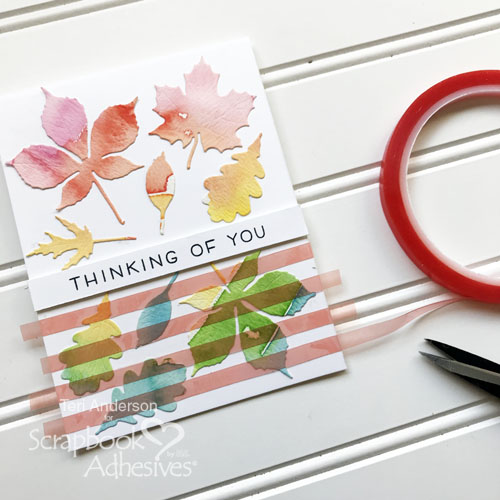
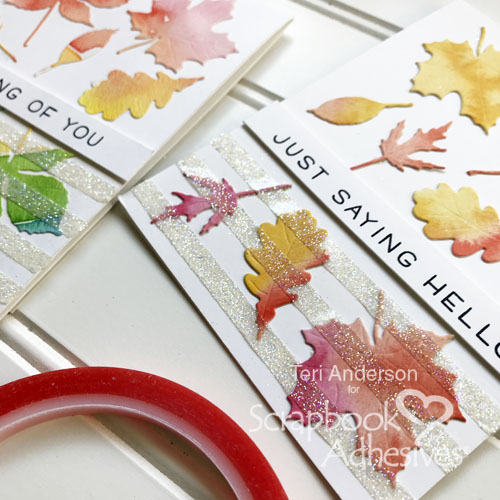
Cut a strip of cardstock and stamp a sentiment onto it. Use Thin 3D Foam Squares White Mix to adhere it the card. I like these thin squares because they make card elements pop but they don’t make them too bulky.

Add the Stripes!

Place several strips of Extreme Double-Sided Tape 1/4in across the bottom of the card.

Glitter Stripes Watercolor Leaf Cards by Teri Anderson for Scrapbook Adhesives by 3L

Let the tape run off the edges of the card. Use your scissors to snip away the excess.

Glitter Stripes Watercolor Leaf Cards by Teri Anderson for Scrapbook Adhesives by 3L

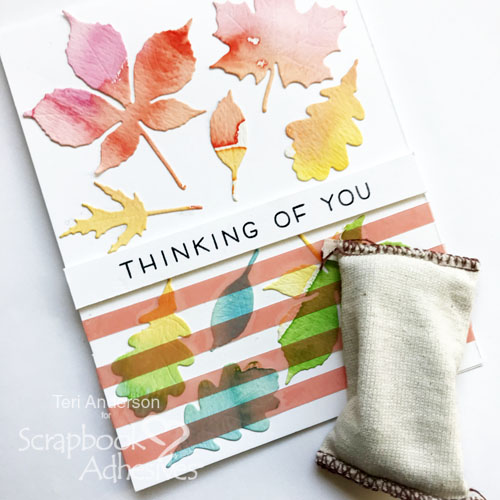
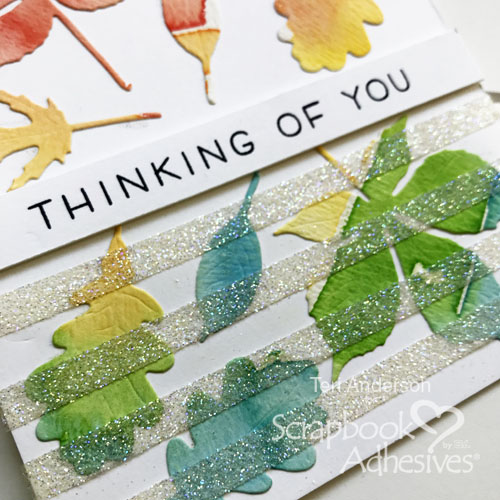
Take an embossing powder bag and rub it over the tape strips and the areas near the tape strips. (Don’t have a powder bag? Try using a dryer sheet instead.) The purpose of this rubbing is to remove static so extra glitter will not stick to the project.

Glitter Stripes Watercolor Leaf Cards by Teri Anderson for Scrapbook Adhesives by 3L

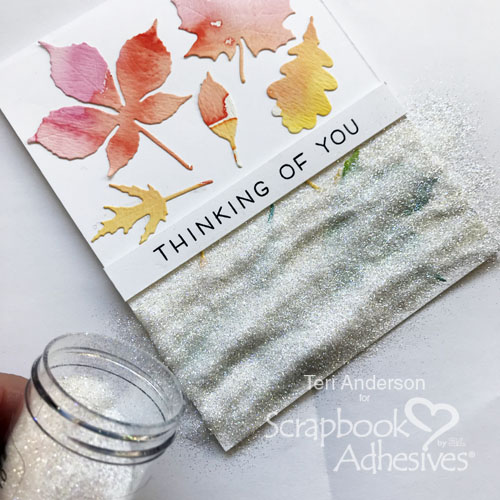
Remove the red liner from the tape. Set the card on scratch paper and dump glitter onto the strips.

Glitter Stripes Watercolor Leaf Cards by Teri Anderson for Scrapbook Adhesives by 3L

Shake the excess glitter off your card, and you’ll be left with some awesome glitter stripes.

Glitter Stripes Watercolor Leaf Cards by Teri Anderson for Scrapbook Adhesives by 3L

Remember, it’s up to you how many stripes you add to your card. You can add three, four or more! The possibilities are endless!

Creative Time: 1 hour
Skill Level: Beginner

Materials Needed:
Scrapbook Adhesives by 3L®:
Thin 3D Foam Squares White Mix

HomeHobby® Adhesives by 3L:
Dual Tip Glue Pen
Extreme Double-Sided Tape 1/4in

Other:
Leaf dies from Impression Obsession Rubber Stamps; Simply Sentiments clear stamps from Lawn Fawn; Pastel Dreams Watercolors from Prima Marketing; Black ink pad; Watercolor paper; White cardstock; Glitter; Embossing Powder Bag

Pin It!

Pinterest Glitter Striped Watercolor Leaves Card by Teri Anderson for Scrapbook Adhesives by 3L

Fall Lantern with Faux Stained Glass Tutorial

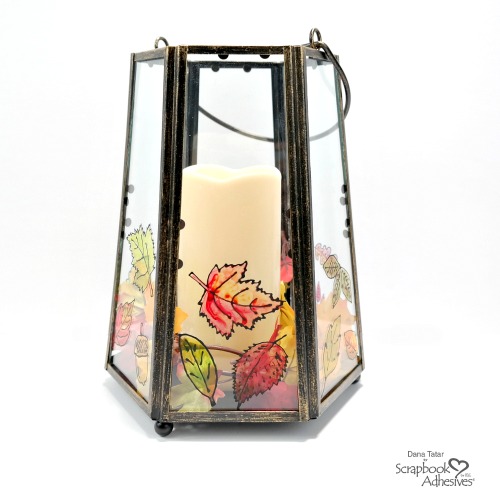
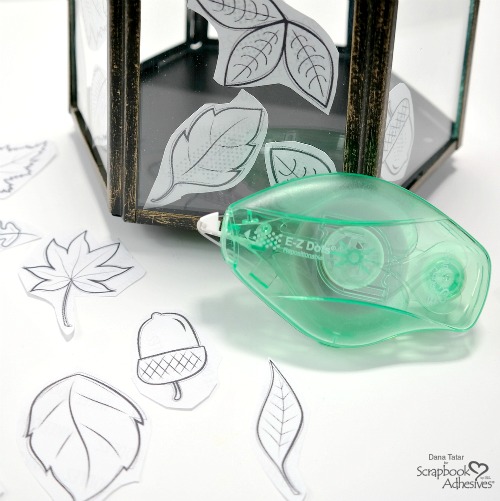
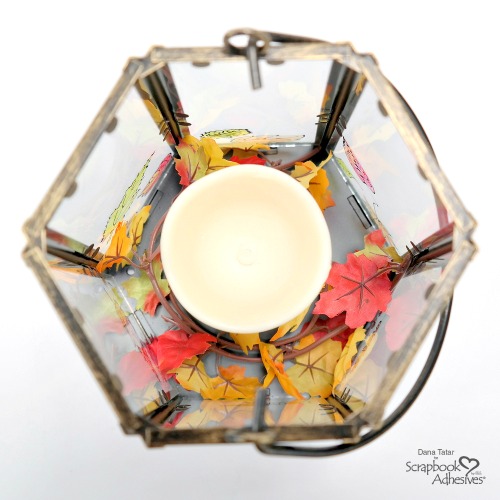
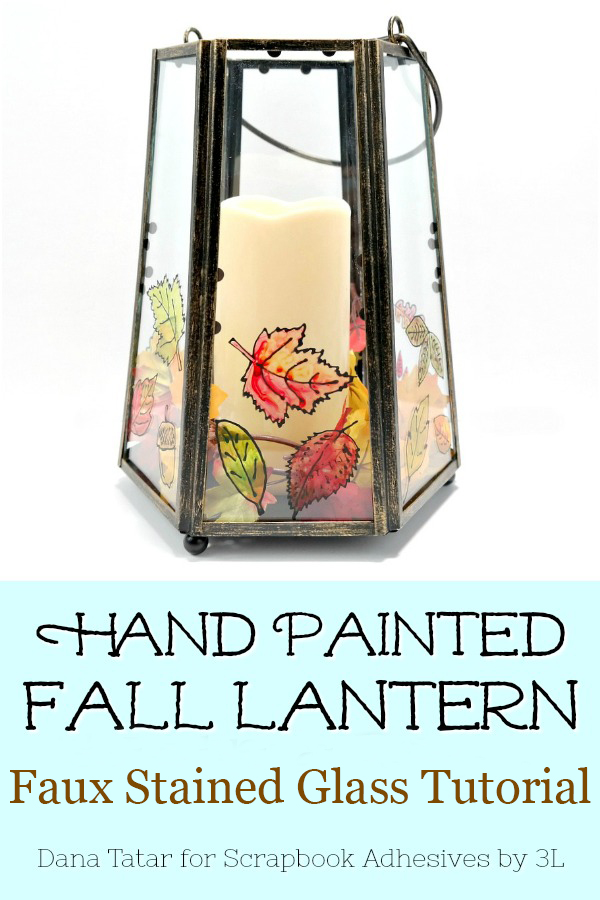
Hi friends! Dana Tatar here today sharing a home decor tutorial. I decorated a plain glass lantern for the season by adding black glue leaves that I then colored with glass paint. This project replicates the look of stained glass and is a great way to dress up a front porch or table centerpiece for Fall.

Hand-Painted Fall Lantern with Black Glue Leaves

How to Decorate Glass with Black Glue Leaves

How to Use E-Z Dots Repositionable

1. Gather a variety of printable leaves and acorns and cut out. Use E-Z Dots® Repositionable to secure the leaves to the inside of a glass lantern.

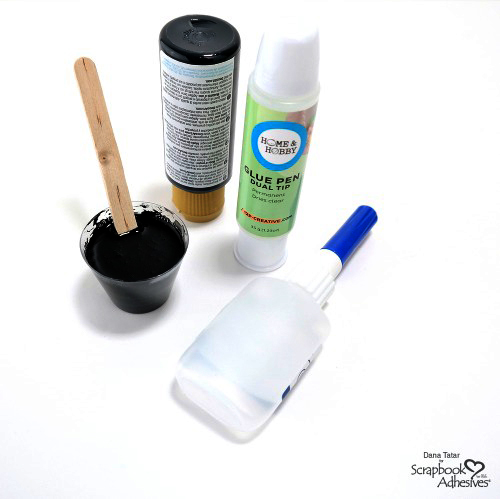
2. Mix 3 parts of liquid glue from the Dual Tip Glue Pen with 1 part of black acrylic paint. Transfer the black glue into a bottle fitted with a fine tip applicator.

How to Draw on Glass with Black Glue

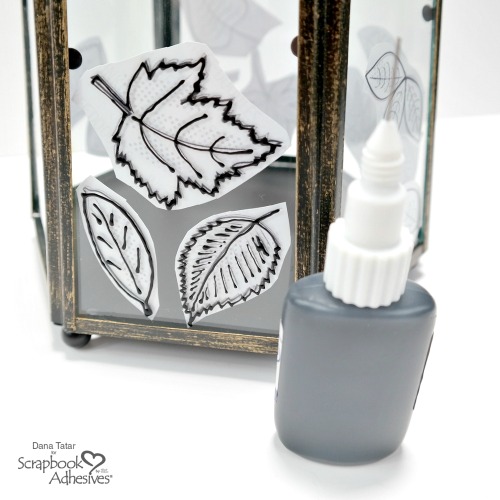
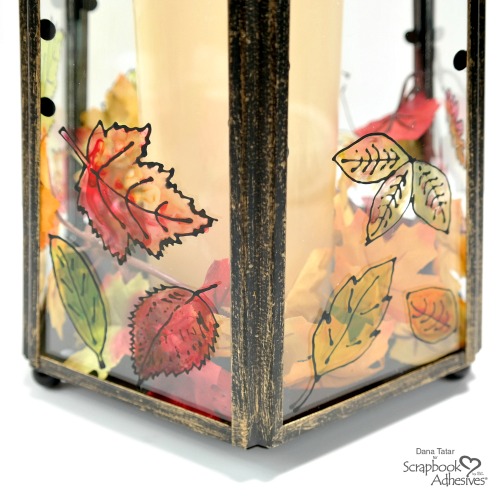
3. Apply the black glue to the outside of the lantern, using the leaf outlines as a guide. Let dry. Remove the paper leaves from the inside of the glass. Rub off any residual adhesives with a finger.

How to Paint Glass with ColorBox Glass Graffiti

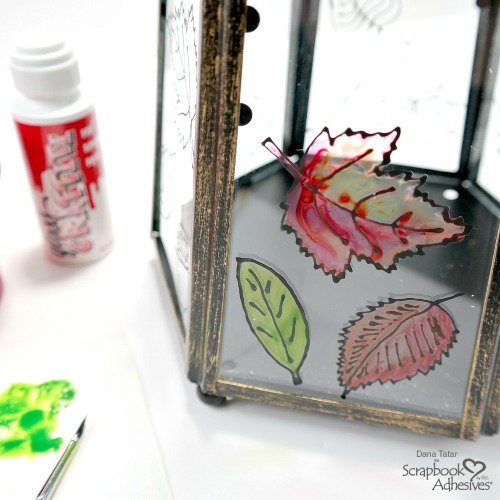
4. Use a paintbrush to add color to the leaves.

Designer Note: I used a specialty ink for glass.

How to Decorate a Glass Lantern for Fall

5. Secure fabric leaves to the inside of the lantern using Large Adhesive Dots. Add a flameless candle to the lantern. Applying a Large Repositionable Adhesive Dot to the bottom of the candle will keep it upright.

Glass Lantern with Black Glue Painted Leaves

The colored glass really catches the light in a beautiful way! Try decorating a lantern for Winter by painting holly leaves and berries, snowflakes, or a festive holiday greeting onto the glass.

Thanks for stopping by today!
~Dana

Creative Time: 90 Minutes
Skill Level: Intermediate

Scrapbook Adhesives by 3L® Supplies:
E-Z Dots® Repositionable Refillable Dispenser
Adhesive Dots Large
Adhesive Dots Large Repositionable
HomeHobby by 3L Dual Tip Glue Pen

Other Supplies: Black Acrylic Paint (DecoArt); Colorbox Glass Graffiti Ink (Clearsnap); Clipart Leaves; Lantern; Fabric Leaves; Flameless Candle

Pin It!


Visit our Website and Blog!
Sign up for our Newsletter so you never miss a contest or giveaway!

instagram purple icon facebook icon purple pinterest purple icon twitter purple icon YouTube icon blog subscription purple icon

Word Scramble Gamer Card

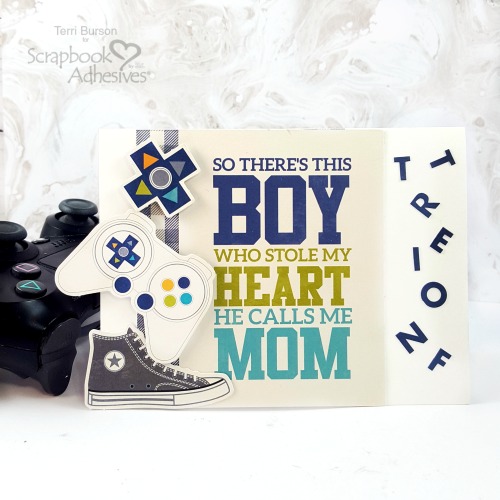
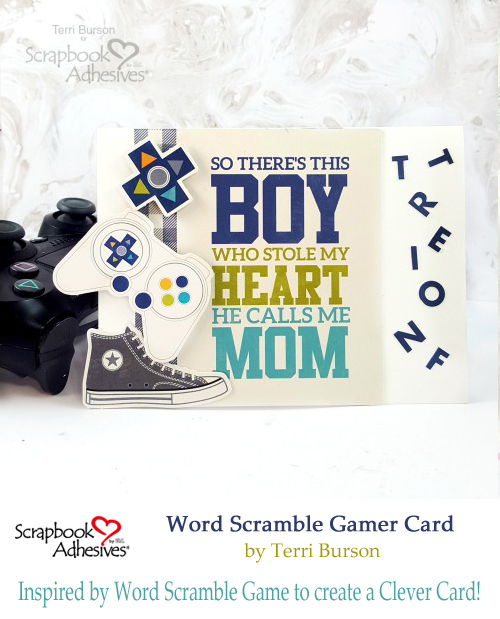
Hello, my crafty friends, Terri here, with a Word Scramble Gamer Card. My son was the inspiration for this card, and Jillibean Soup has the perfect paper collection to pull this off. Stick around for just a few minutes because this word scramble card has secret clues to unscramble the word. The kids are going to love this!

Word Scramble Gamer Card by Terri Burson for Scrapbook Adhesives by 3L

The Perfect Gamer Collection

The Jillibean Soup “2 Cool For School” Paper Collection Kit turned out to be the perfect collection. It’s chock full of boy stuff, puffy stickers, journal frames, die cuts and the most amazing double-sided patterned paper. Deciding which direction to take can sometimes be a challenge, but not this time. Gaming is a big part of many of our kids lives (adults too!) and this was the perfect theme for what I had in mind.

Word Scramble Gamer Card by Terri Burson for Scrapbook Adhesives by 3L

Round Up Your Supplies

For this project, I kept it as minimal as possible. Besides the collection kit, you’ll need a white A2 side-fold card, scissors, a trimmer, and your adhesives. You’ll need just a bit more white cardstock for the clues, but I’ll get to that later.

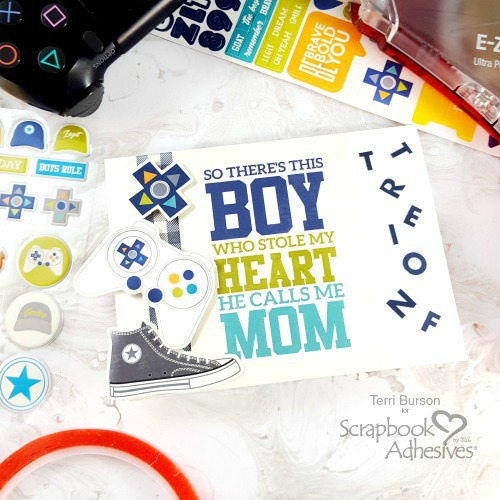
As you can see in the photo above, the 3D Foam Circles Black Mix will be used on all my die cuts, to pop up for added dimension. Adhere the journal frame to your A2 card with some trimmed plaid paper included in the paper kit, using the E-Z Runner® Grand Refillable Dispenser. Add your scrambled word to the right edge, using the alpha stickers also included in the paper kit (as seen in the last photo below), for your gamer card.

Word Scramble Gamer Card by Terri Burson for Scrapbook Adhesives by 3L

Creating Secret Gamer Clues

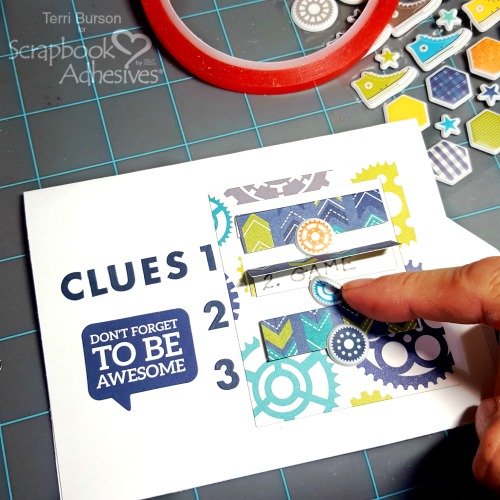
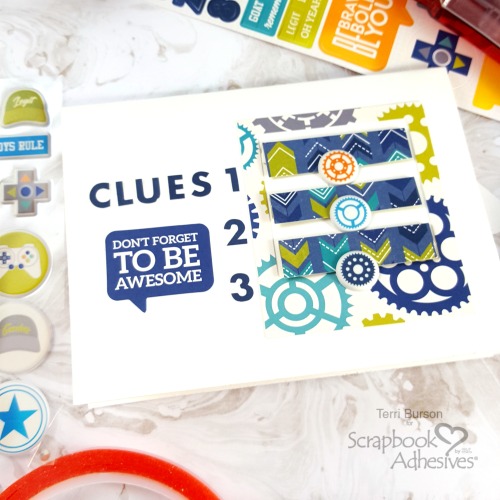
Gaming involves a lot of strategy and problem solving, at times. I thought it would be fun to have the clues on the back of the card. The sticker frame included in the kit was just right to frame my trio of clues. Each tab was scored and folded and has a written secret clue to solve the scrambled word. I trimmed some white cardstock and adhered the inside and backside with my Extreme Double-Sided Tape 1/2in. Those puffy sticker circles serve as the closure for the folded tabs and are so easy to gently peel and reveal!

Word Scramble Gamer Card by Terri Burson for Scrapbook Adhesives by 3L

Simply apply more alpha letters, numbers and stickers to the back to direct your kids.  Shall I reveal my clues? 1. Summer 2. Game 3. PlayStation. Have you figured it out yet?

Word Scramble Gamer Card by Terri Burson for Scrapbook Adhesives by 3L

This was the hottest game this summer, and every kid I know was playing it. You guessed it, Fortnite!  It’s still super hot and all you have to do is ask your kids or grandkids.  Trust me, they’ll know what you’re talking about.

Word Scramble Gamer Card by Terri Burson for Scrapbook Adhesives by 3L

If you’d like product links for the products that I’ve used today on my Word Scramble Gamer Card, stop by my blog at Waving My Wand. Thanks so much for popping in today!

Creative Time: 30 min
Skill Level: Beginner

Material Needed:
Scrapbook Adhesives by 3L®:
3D Foam Circles Black Mix
E-Z Runner® Grand Refillable Dispenser

HomeHobby by 3L®:
Extreme Double-Sided Tape 1/2in

Other:
Jillibean Soup 2 Cool For School Paper Collection Kit, Neenah White Cardstock, We R Memory Keepers Trim & Score Board, Neenah White A2 card

Love It. Pin It!

Pinterest Word Scramble Gamer Card by Terri Burson for Scrapbook Adhesives by 3L

Visit our Website and Blog!
Sign up for our Newsletter so you never miss a contest or giveaway!

instagram purple icon facebook icon purple pinterest purple icon twitter purple icon YouTube icon blog subscription purple icon

Spooky Halloween Card with Adhesive Sheets

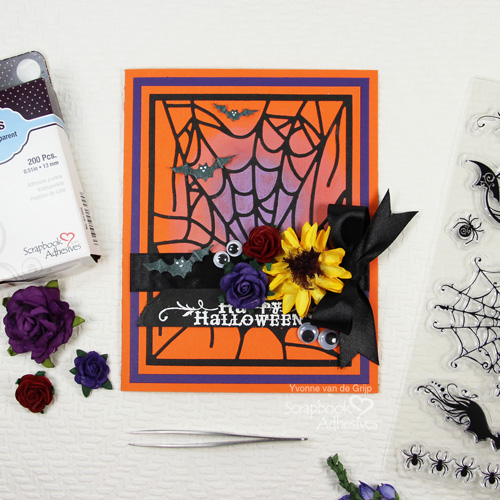
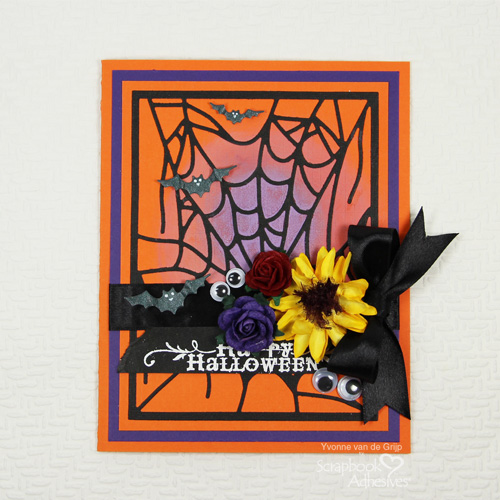
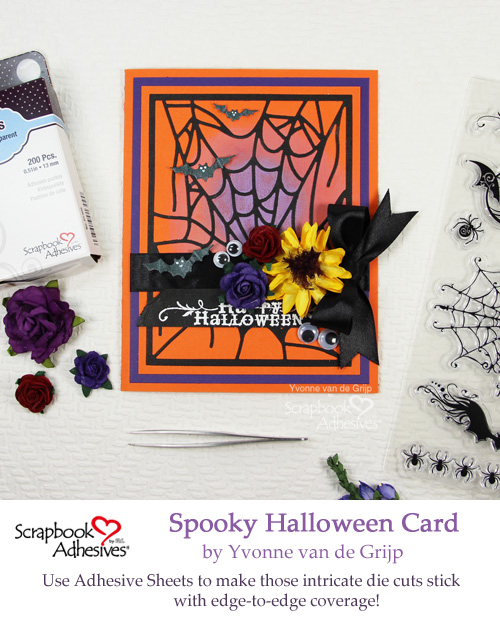
Hello crafty friends, Yvonne here sharing a spooky Halloween card.  This Halloween card is super easy to assemble with Scrapbook Adhesives by 3L® products. Of course, I used the traditional colors of Halloween, and details like a spiderweb die cut. I made it into a sticker using Adhesive Sheets…no stains and perfect coverage on the die-cut! Let me show you how I made the card.

Spooky Halloween Card with Adhesive Sheets by Yvonne van de Grijp for Scrapbook Adhesives by 3L

Making the Spooky Details

Using an ink blending tool, chalk ink a purple circular shape on orange cardstock. Let dry.

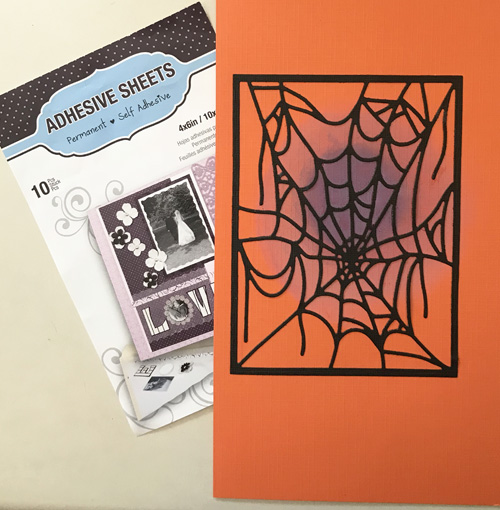
Lift the yellow liner of an Adhesive Sheet 4×6 inch sheet and place a piece of black cardstock on top. Trim the black cardstock to the size of the spiderweb die and die-cut. Remove the liner from the die cut and place onto the orange cardstock over the inked purple circle shape.

Spooky Halloween Card with Adhesive Sheets by Yvonne van de Grijp for Scrapbook Adhesives by 3L

Next, trim the orange cardstock with about 1/8 inch border around the black die-cut.

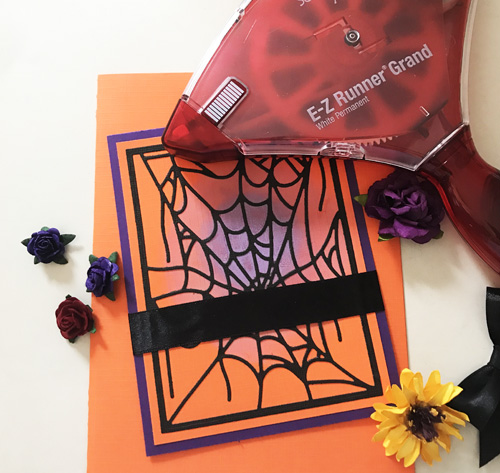
Adhere the layered panel to a purple card panel. Wrap black satin ribbon around the panel and adhere the ends to the back of the card panel with the E-Z Runner® Grand Refillable Dispenser. Then adhere the layered panel to an orange card base.

Spooky Halloween Card with Adhesive Sheets by Yvonne van de Grijp for Scrapbook Adhesives by 3L

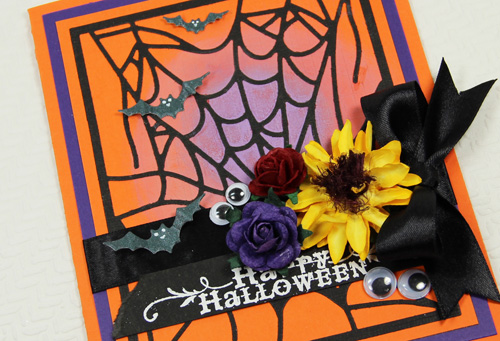
The Finishing Ingredients

Stamp a Halloween sentiment onto black cardstock using an embossing ink pad. Sprinkle white embossing powder over it and use a heat tool to melt.

Trim a banner from the embossed sentiment and tear the left side of the banner. Adhere the sentiment to the card base using the E-Z Runner® Grand Refillable Dispenser.

Next you adhere the mulberry flowers and wiggle eyes to the card using Adhesive Dots Mini and Adhesive Dots Large.

Spooky Halloween Card with Adhesive Sheets by Yvonne van de Grijp for Scrapbook Adhesives by 3L

Die-cut some bats from dark green cardstock, draw eyes and a mouth using a white pen or white ink. Now curl the wings of the bats slightly and finally affix the bats to the card using Adhesive Dots Mini.

And voila…your Halloween card is finished!

Spooky Halloween Card with Adhesive Sheets by Yvonne van de Grijp for Scrapbook Adhesives by 3L

Wishing you happy + spooky crafting,
Yvonne

Creative Time: 60 minutes
Skill Level: Intermediate

Materials needed:
Scrapbook Adhesives by 3L®:

Adhesive Sheets 4×6 inch
E-Z Runner® Grand Refillable Dispenser
Adhesive Dots Mini
Adhesive Dots Large

Other supplies:
Etched Dies: Spellbinders® Paper Arts (Spider Web Card front Holiday 2017, Witch on Broom Holiday 2017, Platinum 6 Die Cutting and Embossing Machine), Stamp: Inkadinkado (Creepy Crawly), Cardstock (black, orange, purple, dark green), Ink Blending tool, Purple Chalk Ink pad, Mulberry Flowers, Wiggle eyes, Black Satin Ribbon, White Pen, Paper Trimmer, Scissors

Pin It!

Pinterest Spooky Halloween Card with Adhesive Sheets by Yvonne van de Grijp for Scrapbook Adhesives by 3L

Visit our Website and Blog!
Sign up for our Newsletter so you never miss a contest or giveaway!

instagram purple icon facebook icon purple pinterest purple icon twitter purple icon YouTube icon blog subscription purple icon

Sparkle & Shine with the Dual Tip Glue Pen

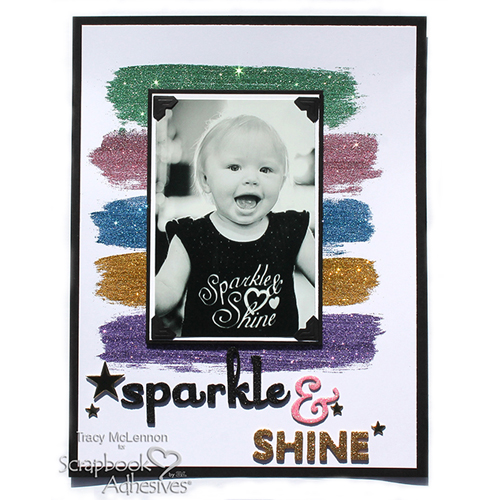
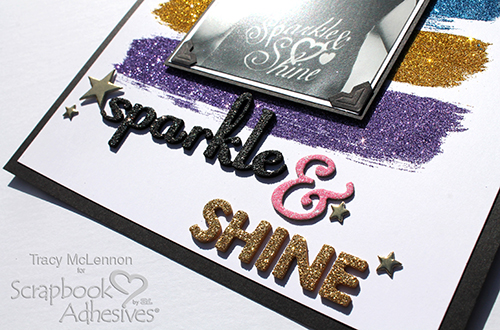
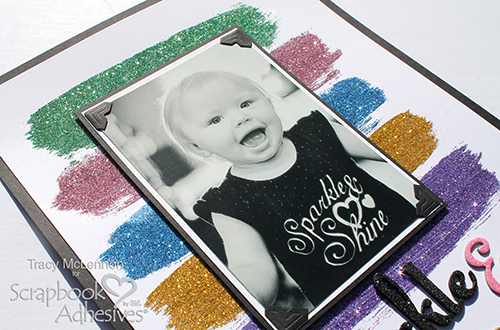
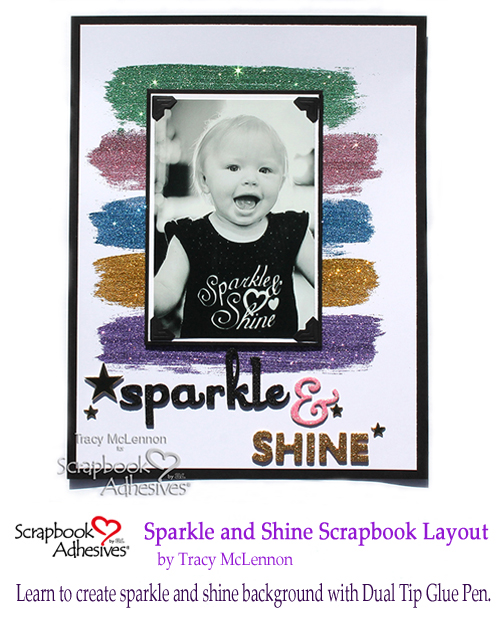
Welcome back, scrappy friends. Tracy McLennon here and today I have a sweet and simple layout tutorial to share that packs a huge punch of SPARKLE! Here is my complete tutorial on how to add Sparkle & Shine with the Dual Tip Glue Pen.

Glitter….do you LOVE it like me? It’s just SO darn pretty. I do have a little tip for you, keep a dusting cloth in your craft area for quick stray glitter clean up. Inevitably a piece of glitter will end up on your face, it’s just science. Let’s Sparkle & Shine with this tutorial.

Sparkle & Shine with the Dual Tip Glue Pen by Tracy McLennon for Scrapbook Adhesives by 3L

Bring on the Sparkle!

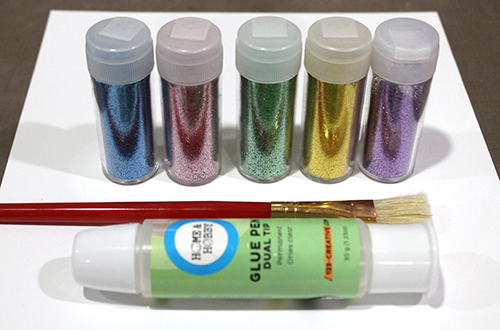
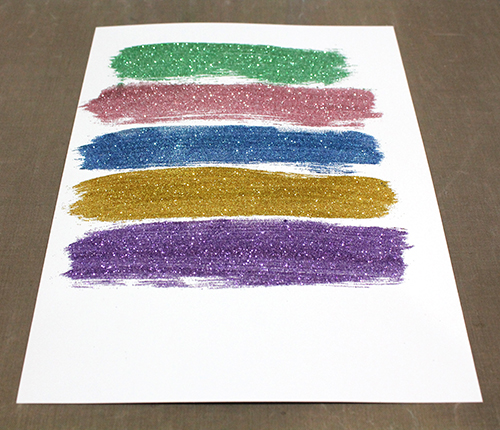
First, grab the glitter you would like to use, your Dual Tip Glue Pen and a thick bristled brush.

Sparkle & Shine with the Dual Tip Glue Pen by Tracy McLennon for Scrapbook Adhesives by 3L

Cut the white cardstock to 8×10.5.

I marked on my background where I wanted my photo to end up, that way I knew where I wanted my glitter strips to reach. I created a small pool of liquid adhesive from the Dual Tip Glue Pen on my craft mat then brushed the adhesive onto the white cardstock, making sure to leave some wispy brush strokes on the ends. Then add the glitter.

Sparkle & Shine with the Dual Tip Glue Pen by Tracy McLennon for Scrapbook Adhesives by 3L

Repeat this with all of the glitter colours. Let dry.

Sparkle & Shine with the Dual Tip Glue Pen by Tracy McLennon for Scrapbook Adhesives by 3L

Finishing Touches!

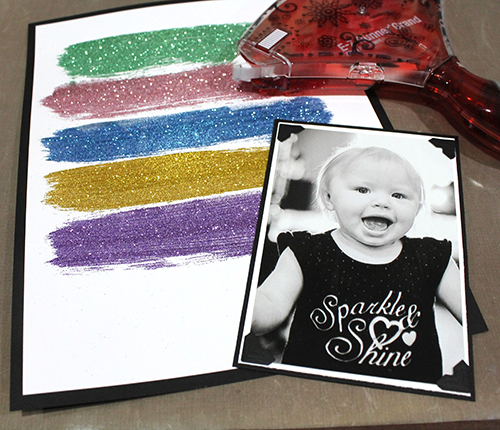
Adhere the white cardstock onto a piece of 8.5 x 11-inch black cardstock.

I matted my 4 x 6-inch black & white photo in white and then black cardstock using the E-Z Runner® Grand Refillable Dispenser. I added Black Creative Photo Corners to the photo for a little extra pizzaz.

Sparkle & Shine with the Dual Tip Glue Pen by Tracy McLennon for Scrapbook Adhesives by 3L

Adhere the matted photo to the layout using 3D Foam Squares White Regular. I then added the title using different letter stickers.

Sparkle & Shine with the Dual Tip Glue Pen by Tracy McLennon for Scrapbook Adhesives by 3L

I added the gold star accents using Adhesive Dots Micro.

Sparkle & Shine with the Dual Tip Glue Pen by Tracy McLennon for Scrapbook Adhesives by 3L

Sparkle & Shine with the Dual Tip Glue Pen by Tracy McLennon for Scrapbook Adhesives by 3L

Thanks so much for stopping by!
Tracy

Creative Time:  45 minutes
Skill Level: Beginner

Materials Used:
Scrapbook Adhesives by 3L®:
3D Foam Squares White Regular Size
Adhesive Dots Micro
Creative Photo Corners Black
E-Z Runner® Grand Refillable Dispenser

HomeHobby by 3L®:
Dual Tip Glue Pen

Other Products Used:
Cardstock (White, Black), Craft Mat, Paint Brush, Fine Glitter, Letter Stickers, Gold Star Embellishments

Pin It!

Merry Flip and Slide Card

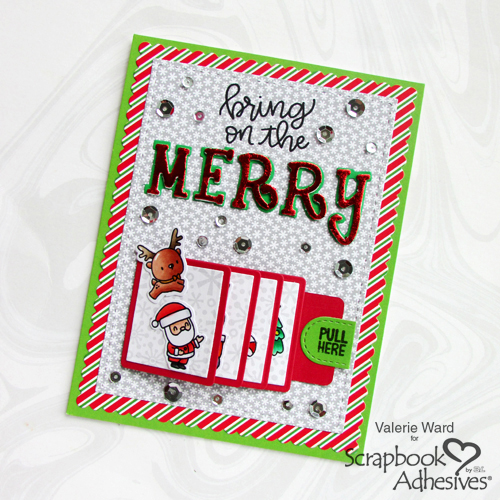
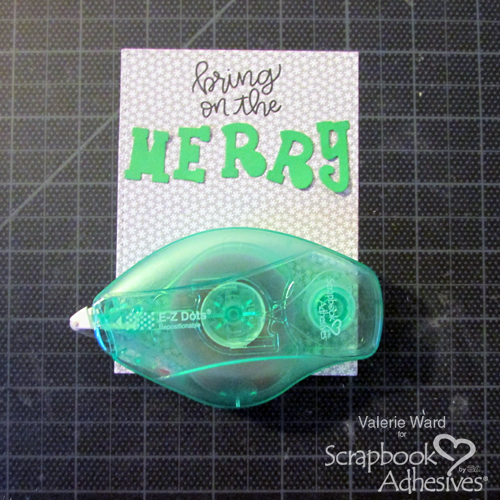
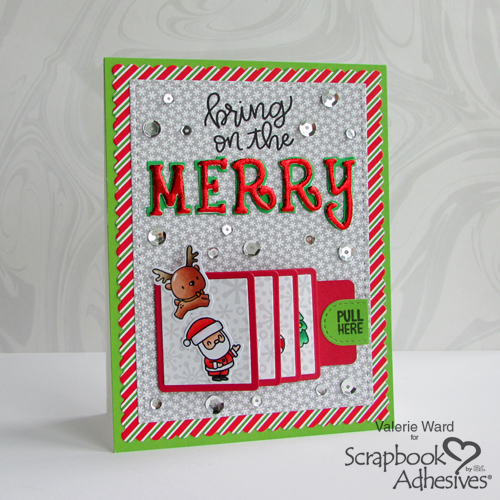
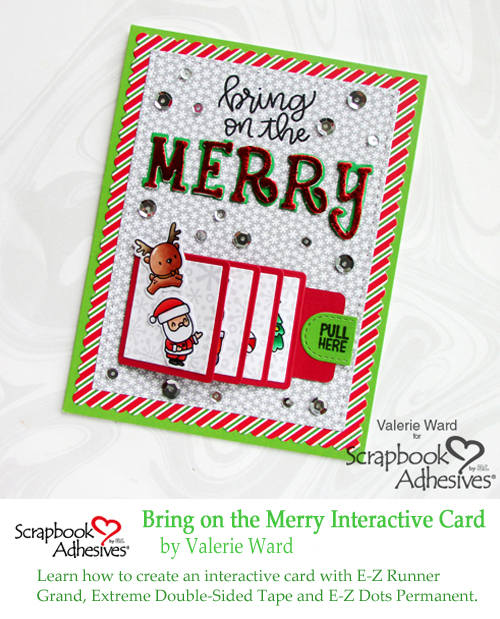
Hello, Crafters! Valerie here today. I have an interactive Christmas card with a flip slider on it! That is just ONE of the cool features on this card. So let’s get right to it and I’ll show you how to create this fun, cute holiday card!

Merry Flip and Slide Card by Valerie Ward for Scrapbook Adhesives by 3L

Merry Flip and Slide Card by Valerie Ward for Scrapbook Adhesives by 3L


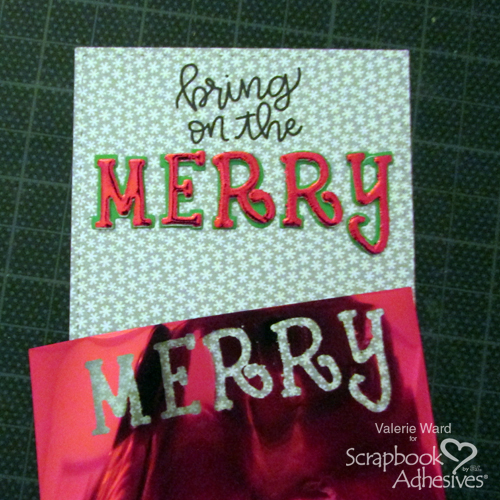
Step 1: Attach the Merry

Stamp the first part of the sentiment onto your patterned paper with your ink, then use a letters die set and die cut the letters to spell “MERRY.” I’m using a set that has a shadow layer behind the letters (see below image).

Merry Flip and Slide Card by Valerie Ward for Scrapbook Adhesives by 3L

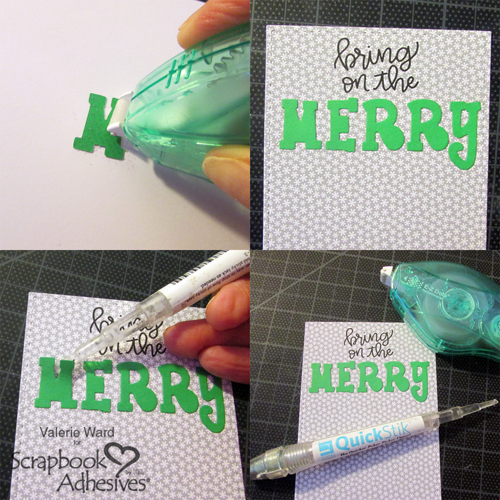
Using my E-Z Dots® Repositionable Refillable Dispenser I adhered the letters to the paper. BUT I didn’t like how they were aligned, so it was SUPER-DUPER nice to have the reflexibility to be able to lift those letters up and shift them a little! Here you’ll see where I start lifting them.

Merry Flip and Slide Card by Valerie Ward for Scrapbook Adhesives by 3L

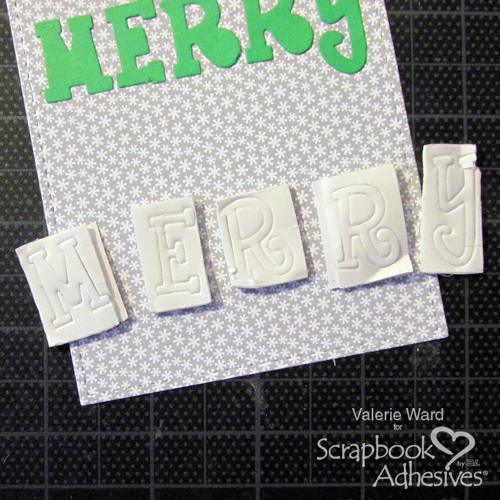
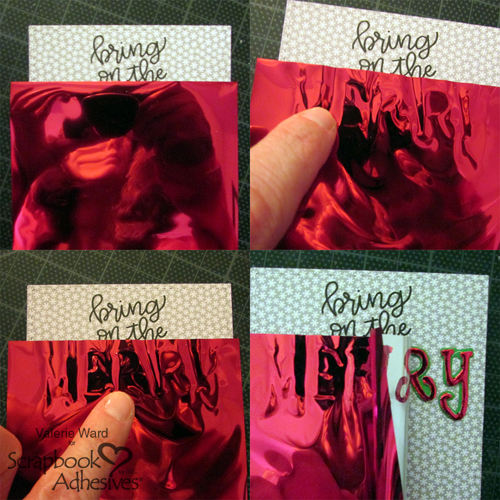
Step 2: Add Foil Letters

Now I need to add the second layer of letters on top of the shadowed letters. Here they are die-cut from a piece of 3D Foam Creative Sheet from the 3D Foam Creative Embellishment Kit.

Merry Flip and Slide Card by Valerie Ward for Scrapbook Adhesives by 3L

Adhere them on top of the green letter shadows, and peel off the top liner to expose the adhesive.

Merry Flip and Slide Card by Valerie Ward for Scrapbook Adhesives by 3L

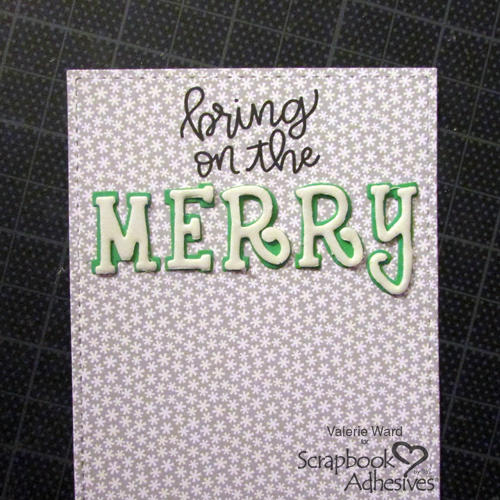
This is the fun part! Take a piece of the red foil from the same 3D Foam Creative Embellishment Kit and lay it over the sticky letters (red color side UP). Gently press it to transfer the foil to the letters. Then slowly peel it off, and you have fun glossy-red letters!

Merry Flip and Slide Card by Valerie Ward for Scrapbook Adhesives by 3L

Aren’t they gorgeous?!

Merry Flip and Slide Card by Valerie Ward for Scrapbook Adhesives by 3L

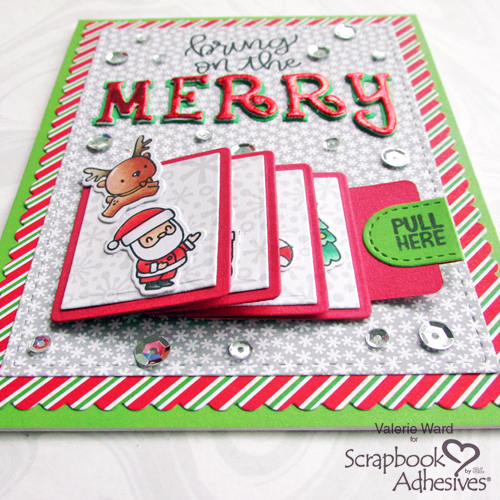
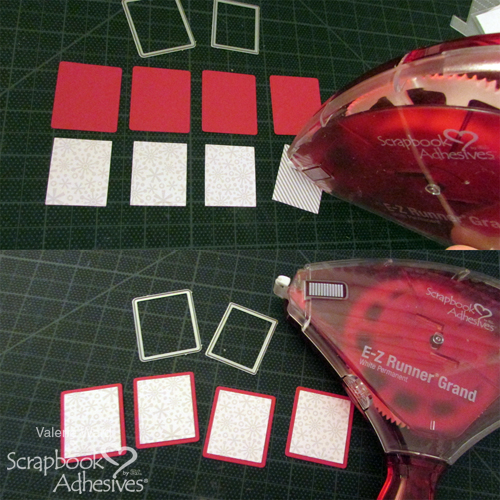
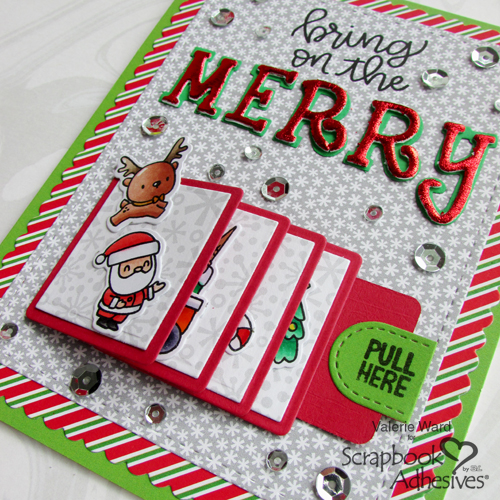
Step 3: The Panels for the Flip Slider

Here I am putting together the panels that will go onto the flip slider. I have a red base and a top layer of patterned paper which I attached together with my E-Z Runner Grand Refillable Dispenser.

Merry Flip and Slide Card by Valerie Ward for Scrapbook Adhesives by 3L

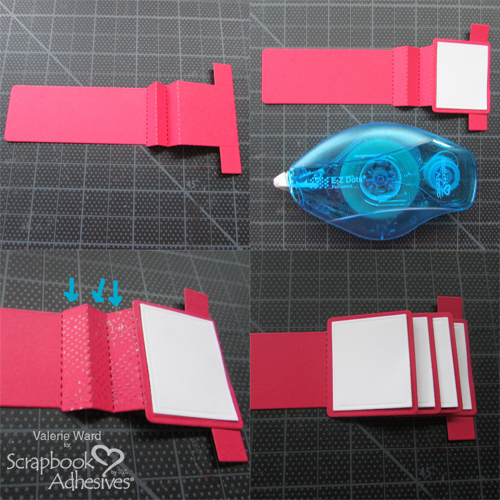
Step 4: Attach Panels to Flip Slider

First you have to fold the slider unit as shown in the image below. Then adhere the panels to the flip slider (and the colored images to the panels) with my E-Z Dots Permanent Refillable Dispenser.

Merry Flip and Slide Card by Valerie Ward for Scrapbook Adhesives by 3L

After everything is attached and folded, the only place you need to add adhesive is on the back of the 2 little tabs; I used Extreme Double-Sided Tape 1/4in. Then just place your unit on top of your card!

Merry Flip and Slide Card by Valerie Ward for Scrapbook Adhesives by 3L

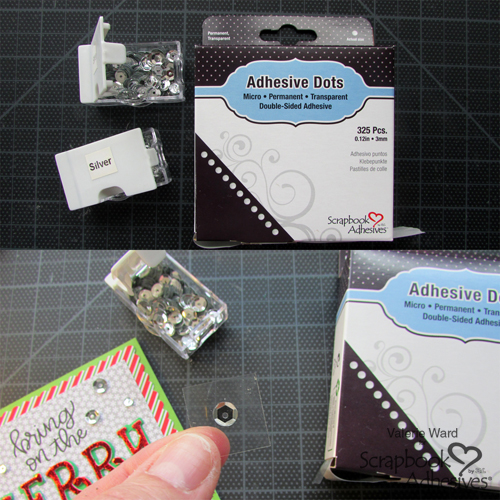
Step 5: Add the Sequins

After I finished the card, it needed “something” and that was to add sequins! To secure them to the card, I used my Adhesive Dots Micro.

Merry Flip and Slide Card by Valerie Ward for Scrapbook Adhesives by 3L

NOW, my card is done!

Merry Flip and Slide Card by Valerie Ward for Scrapbook Adhesives by 3L

Merry Flip and Slide Card by Valerie Ward for Scrapbook Adhesives by 3L

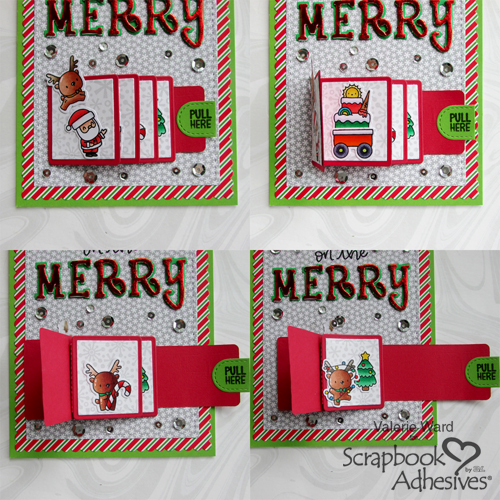
Here is the flip slider in action (so fun!):

Merry Flip and Slide Card by Valerie Ward for Scrapbook Adhesives by 3L

I hope you enjoyed this and thank you very much for stopping by!
Valerie

Creative Time: 60 Minutes
Skill Level: Intermediate

Materials Needed:
Scrapbook Adhesives by 3L®
E-Z Runner Grand Refillable Dispenser
3D Foam Creative Embellishment Kit
E-Z Dots Repositionable Refillable Dispenser
E-Z Dots Permanent Refillable Dispenser
Adhesive Dots Micro

HomeHobby by 3L®:
Extreme Double-Sided Tape 1/4in

Other Products: letters die set, Christmas sentiment stamp set, flip slider die set, Christmas stamp set & coordinating die set, holiday patterned paper, sequins

Pin It!

Pinterest Merry Flip and Slide Card by Valerie Ward for Scrapbook Adhesives by 3L

Farmhouse Gift Wallet and Jillibean Soup

Time flies! We are on the last day of the Blog Swap and Giveaway Week with Jillibean Soup. We have a beautiful gift wallet created by Christine Emberson. She is showcasing the Farmhouse Stew Collection with it and assembled with a combination of E-Z Runner Permanent Strips Refillable Dispenser, 3D Foam Circles White Mix, and Crafty Power Tape. Don’t forget to read all the way to the bottom for giveaway details!

Farmhouse Gift Wallet by Christine Emberson

Farmhouse Gift Wallet by Christine Emberson for Scrapbook Adhesives by 3L

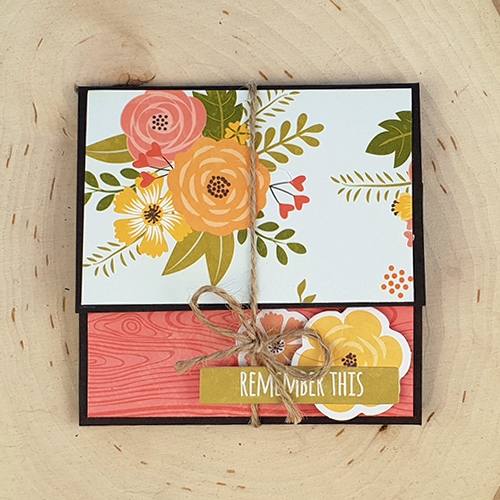
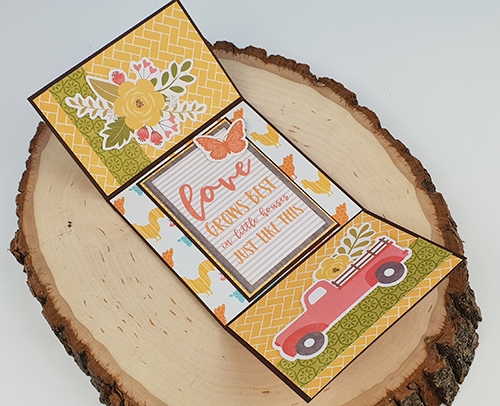
I adore the papers in this collection and the attention to detail of the designs carried across to little Pea Pods, the instant pop out die cuts. I wanted to make an alternative to a regular card so I created a fold out wallet, this enabled me to use lots of the gorgeous designs!

I cut and scored a piece of brown cardstock to make the outer wallet.  Using a trimmer I cut various designs of the patterned paper and also matted one of the wonderful sentiments. All affixed in place with the E-Z Runner Permanent Strips Refillable Dispenser. This works on even the smallest paper pieces and die cuts as it dispenses in little strips, use as little or as much as you need.

Farmhouse Gift Wallet by Christine Emberson for Scrapbook Adhesives by 3L

I switched to 3D Foam Circles White Mix to fix down those little die cuts, they fit so neatly on the reverse and there are two sizes in each pack.

Farmhouse Gift Wallet by Christine Emberson for Scrapbook Adhesives by 3L

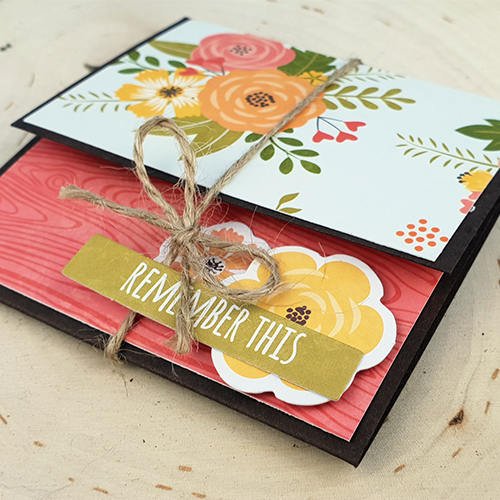
On the outside of the wallet, I opted for Crafty Power Tape to keep the patterned paper in place. This is a super high-tack double sided tape with a liner that is so easy to remove.

Farmhouse Gift Wallet by Christine Emberson for Scrapbook Adhesives by 3L

Farmhouse Gift Wallet by Christine Emberson for Scrapbook Adhesives by 3L

I finished my wallet by wrapping a piece of twine around to keep it closed.  These wallets make a nice alternative to cards and, of course, you could pop inside a store gift card or photo if you wished.  Thank you so much for joining me today.

Farmhouse Gift Wallet by Christine Emberson for Scrapbook Adhesives by 3L

Creative Time: 30 minutes
Skill Level: Beginner

Material Needed: Brown cardstock, twine
Scrapbook Adhesives by 3L
E-Z Runner Permanent Strips Refillable Dispenser
3D Foam Circles White Mix
Crafty Power Tape

Jillibean Soup Designs
JB1415 Farmhouse Stew Collection Pack 

Pin It!

Pinterest Farmhouse Gift Wallet by Christine Emberson for Scrapbook Adhesives by 3L


Make sure you didn’t miss out on the other days:
For Day 1, CLICK: Color Full Week with Jillibean Soup!
For Day 2, HERE: Creative Bohemian Vibe and Jillibean Soup.
Day 3, VISIT: Notepad Gift-ables and Jillibean Soup.
Day 4, SEE: Memories Scrapbook Page with Jillibean Soup.


Visit our friends at Jillibean Soup Designs by clicking:
Blog Swap Week with Jillibean Soup Designs – Day 5.

Blog Swap Week Prize Details


To enter to win our Giveaway visit our Instagram account and follow the prompts, CLICK: Scrapbook Adhesives by 3L Instagram Account (@sbadhesivesby3l)

Winners will be randomly picked. International Entries are welcome.

Per Instagram rules, this promotion is in no way sponsored, administered, or associated with Instagram, Inc. By entering, entrants confirm that they are 13+ years of age, release Instagram of responsibility, and agree to Instagram’s terms of use.


Connect and Stick with 3L!

Visit our Website and Bookmark our Blog!
Sign up for our Newsletter so you never miss a contest or giveaway!

instagram purple facebook purple pinterest purple twitter purple SAby3L YouTube icon blog purple

Memories Scrapbook Page with Jillibean Soup

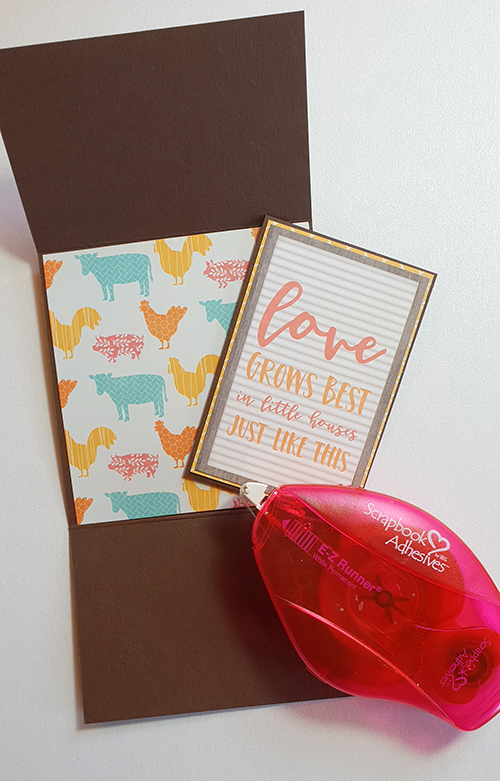
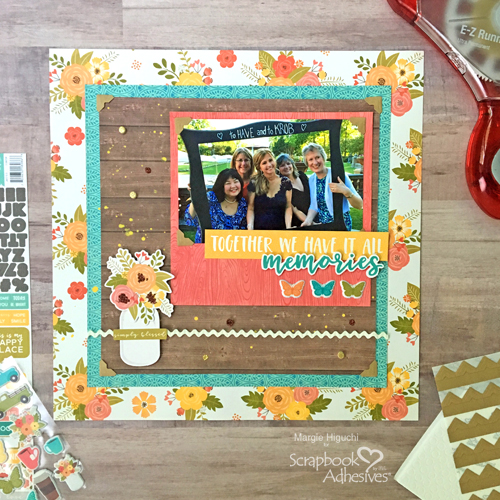
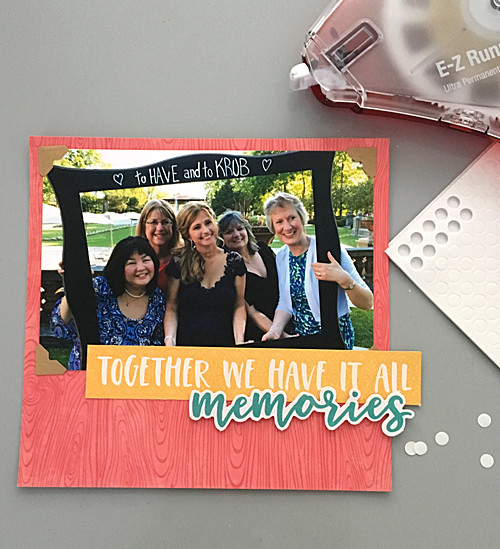
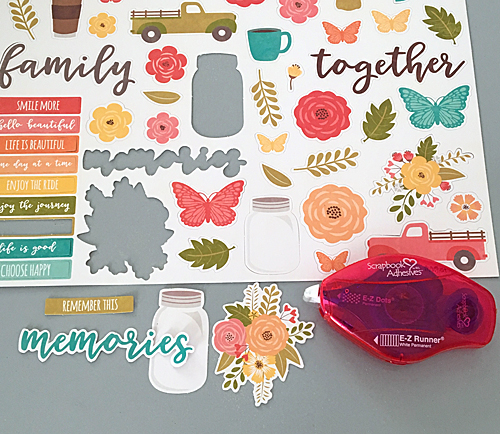
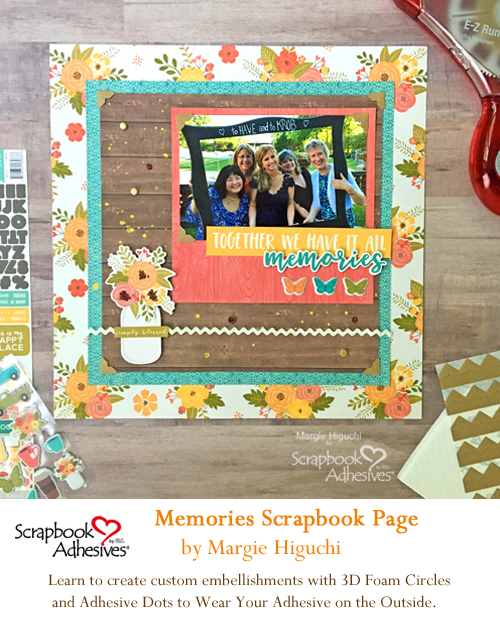
We love the farmhouse style and so does Margie Higuchi as she created her sweet Memories scrapbook page using the Farmhouse Stew Collection. For Day 4 of our Blog Swap Week with Jillibean Soup (JBS), both design teams inspire us all. Take a look at JBS blog and both our Instagram accounts for more and giveaways too! Stay with us till the end for details. Let’s take a look at Margie’s page!

Memories Scrapbook Page by Margie Higuchi

Using the Farmhouse Stew Collection from Jillibean Soup, I have created a sweet scrapbook page of my college friends at a recent gathering. This was so easy to create because the collection pack had everything I needed.

Memories Scrapbook Page with Jillibean Soup by Margie Higuchi for Scrapbook Adhesives by 3L

Creating Layers on my Page

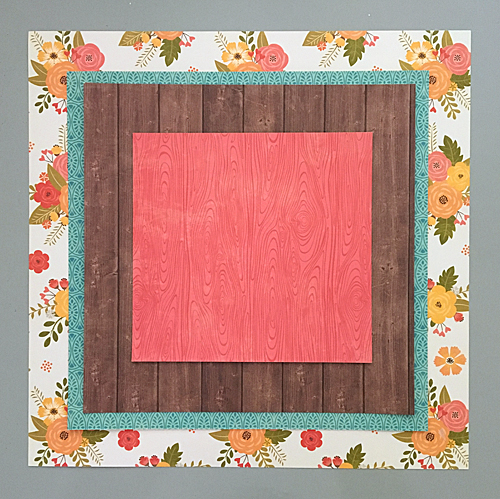
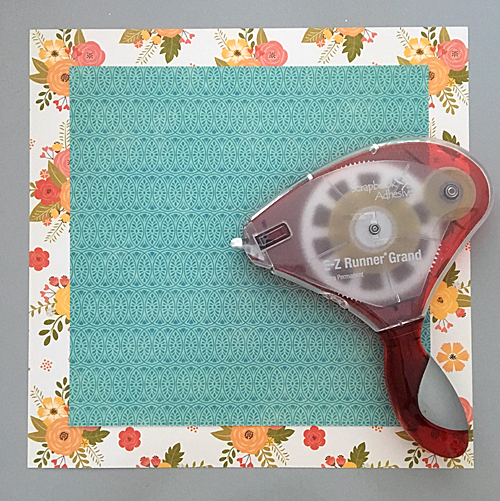
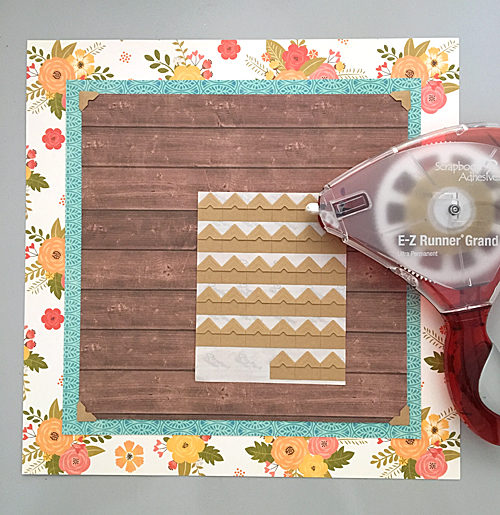
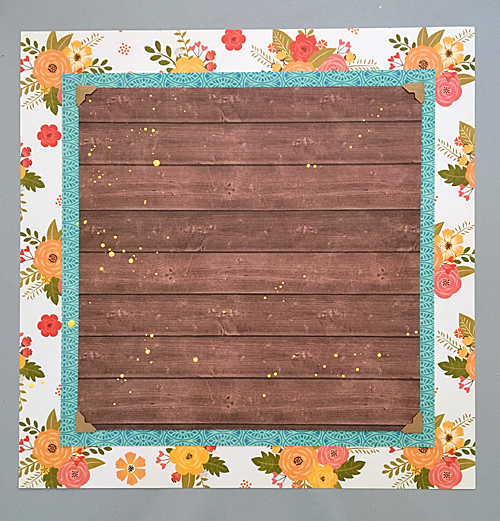
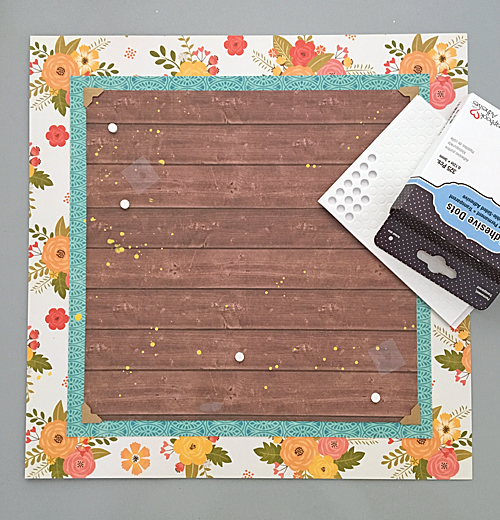
Let’s start with my foundation which is the three different patterned papers I used for my layers. The Gimme Some Sugar patterned paper was my 12 x 12 inch base, cut Hold Your Horses patterned paper (blue) to 9 3/4 x 9 3/4 inches, Bless Your Heart patterned paper (brown) to 9 x 9 inches and lastly, cut Gimme Some Sugar patterned paper (red) to 6 1/2 x 6 1/4 inches.

Memories Scrapbook Page with Jillibean Soup by Margie Higuchi for Scrapbook Adhesives by 3L

Replace my E-Z Runner Grand Refillable Dispenser Cartridge with the E-Z Runner Grand Ultra Strong Refill.

See a quick tutorial on How to Use and Refill E-Z Runner Grand Dispensers video below.

Since there will heavy layers and embellishments, I choose to use the E-Z Runner Grand Refillable Dispenser with the E-Z Runner Grand Ultra Strong Refill to adhere my Hold Your Horses patterned paper (blue). This product is perfect for a strong hold and I use it a lot for other paper construction such as envelopes, bags, boxes, etc.

Memories Scrapbook Page with Jillibean Soup by Margie Higuchi for Scrapbook Adhesives by 3L

For the second layer, I placed a Creative Photo Corner Kraft for each of the corners of the Bless Your Heart patterned paper (brown) before centering and adhering with the E-Z Runner Grand.

Memories Scrapbook Page with Jillibean Soup by Margie Higuchi for Scrapbook Adhesives by 3L

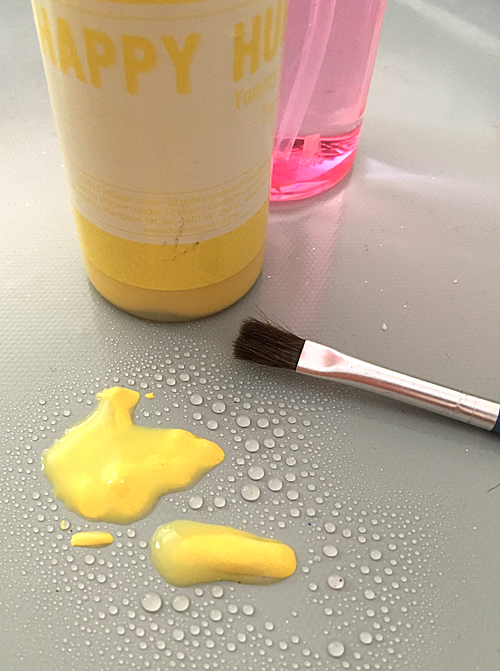
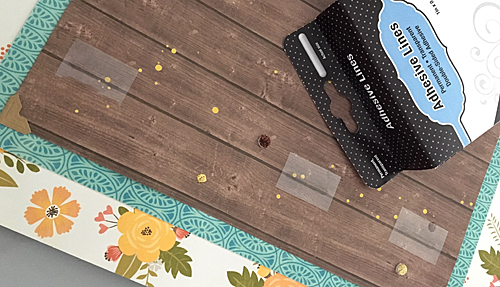
I wanted to create some interest on the page so I added splatters. Using a mix of Happy Hues – Yummy Yellow and water, I lightly flicked with a small brush around the left side and bottom of the Bless Your Heart patterned paper (brown). Set aside to dry.

Memories Scrapbook Page with Jillibean Soup by Margie Higuchi for Scrapbook Adhesives by 3L

Memories Scrapbook Page with Jillibean Soup by Margie Higuchi for Scrapbook Adhesives by 3L

Working on a Photo Mat

While the paint splatters are drying, I added my photo to the Gimme Some Sugar patterned paper (red) with a combination of Creative Photo Corners Kraft and Adhesive Dots Large Repositionable. If I needed to scan or share the original, I can easily remove the photo from the page.

Memories Scrapbook Page with Jillibean Soup by Margie Higuchi for Scrapbook Adhesives by 3L


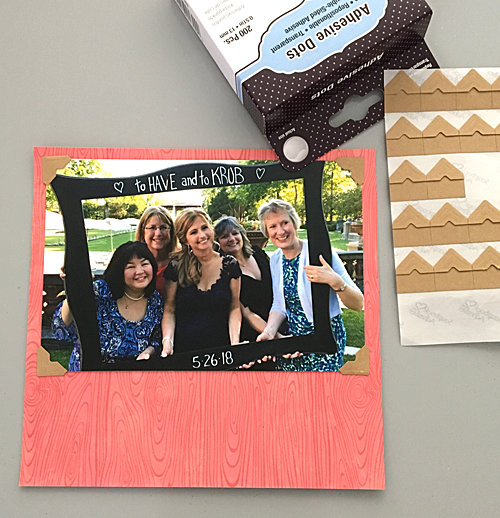
Punch out a sentiment from Farmhouse Pea Pod Parts (die cuts) sheet, apply a strip at the bottom with E-Z Runner Grand Ultra and place below the photo. Punch out “Memories” from the same sheet and give it a pop with 3D Foam Circles White Mix  Small Size. Adhere below the sentiment. Lastly, add three puffy butterfly stickers from the Farmhouse Stew Puffy Stickers set below the Memories die cut. Set aside.

Memories Scrapbook Page with Jillibean Soup by Margie Higuchi for Scrapbook Adhesives by 3L


Memories Scrapbook Page with Jillibean Soup by Margie Higuchi for Scrapbook Adhesives by 3L

Wear Your Adhesive on the Outside

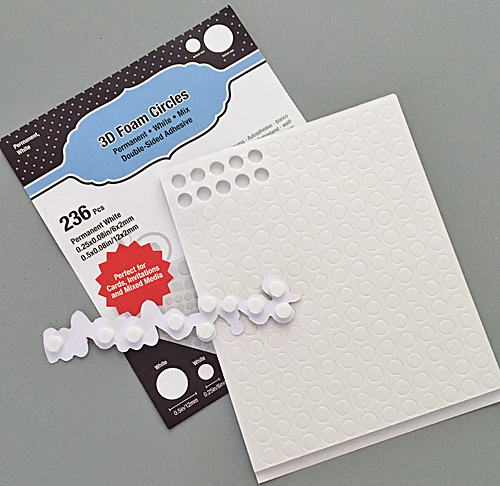
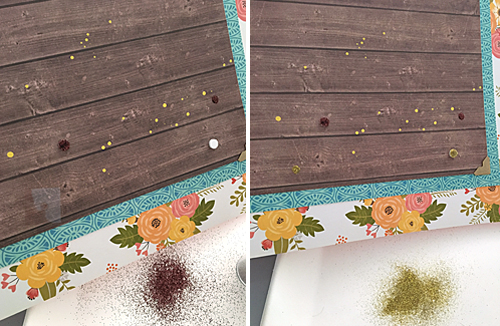
By this time, the paint splatters dried but I wanted a little more interest so I decided to use a combination of 3D Foam Circles White Mix Small Size and Adhesives Dots Micro to “WEAR YOUR ADHESIVE ON THE OUTSIDE” with glitter and glittered embossing powder! Yes, both are heat resistant and are so much fun to create! Let me show you how.

Three 3D Foam Circles White Mix Small Size were placed randomly on the Bless Your Heart patterned paper (brown) and then I added in my four Adhesives Dots Micro. Note: I used my embellished photo mat as a guide…didn’t want any of the dots to be blocked.

Memories Scrapbook Page with Jillibean Soup by Margie Higuchi for Scrapbook Adhesives by 3L


First I started with the glitter – just sprinkle over whichever dot or circle you choose, press it in to secure and tap off the excess. For the glittered embossing powder, repeat the same steps but at the end, melt with the heating tool.

Memories Scrapbook Page with Jillibean Soup by Margie Higuchi for Scrapbook Adhesives by 3L


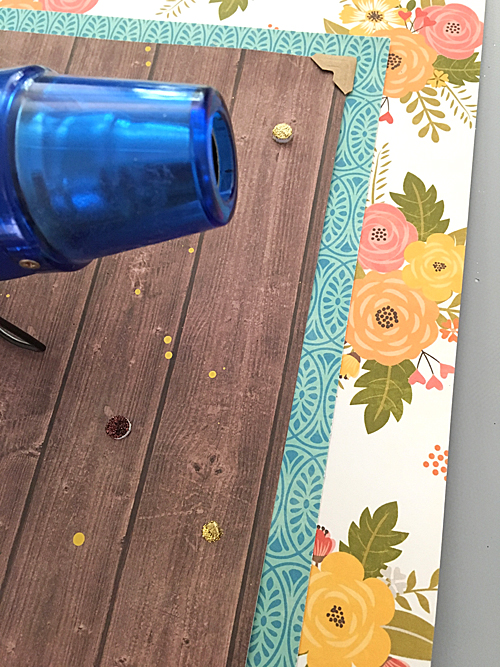
A close up of the brown glittered 3D Foam Circles White Mix Small Size and two of the heat embossed gold dot and circle. Love how they retained their shape under the heat!

Memories Scrapbook Page with Jillibean Soup by Margie Higuchi for Scrapbook Adhesives by 3L


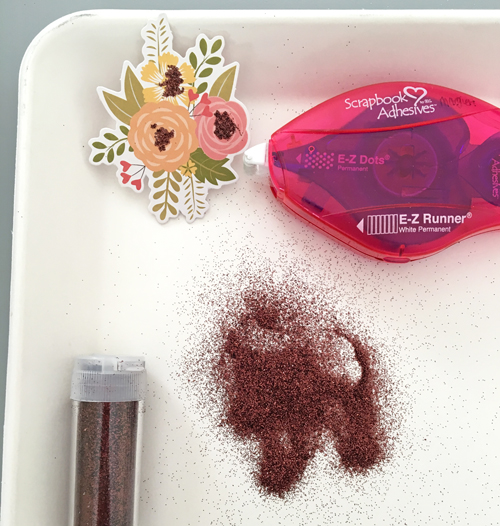
To continue with “WEAR YOUR ADHESIVE ON THE OUTSIDE” I wanted to share an embellishment I enhanced the flower bouquet die cut from Farmhouse Pea Pod Parts (die cuts) sheet. By applying E-Z Dots Permanent to the centers of each flower and sprinkling the same brown glitter.

Memories Scrapbook Page with Jillibean Soup by Margie Higuchi for Scrapbook Adhesives by 3L


Memories Scrapbook Page with Jillibean Soup by Margie Higuchi for Scrapbook Adhesives by 3L


Adding on the Final Touches

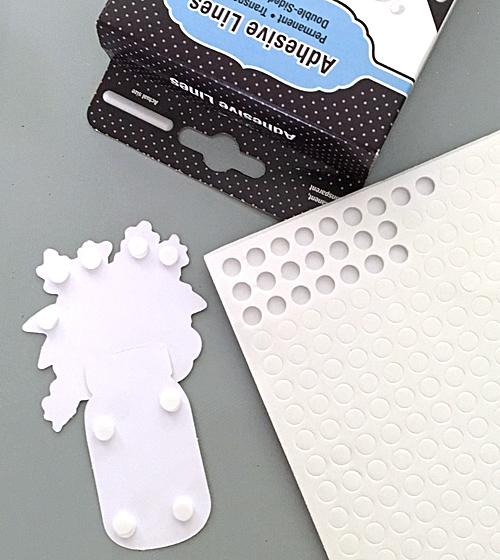
Then I continue to assemble a sweet bouquet in a glass jar. I used the Adhesive Lines to put the jar and bouquet die cuts together and then added 3D Foam Circles White Mix Small Size behind both. They will adhere on top of a 9 3/4 inch piece of rick-rack trim going across the layers of the page, secured with the Adhesive Lines.

Memories Scrapbook Page with Jillibean Soup by Margie Higuchi for Scrapbook Adhesives by 3L


Memories Scrapbook Page with Jillibean Soup by Margie Higuchi for Scrapbook Adhesives by 3L


Lastly, adhere the embellished photo mat with E-Z Runner Grand Ultra Strong and you are done! Here’s another look at the finished Memories Scrapbook Page!

Memories Scrapbook Page with Jillibean Soup by Margie Higuchi for Scrapbook Adhesives by 3L

Creative Time: 45 mins
Skill Level: Intermediate

Materials Needed:
Scrapbook Adhesives by 3L®:
E-Z Runner Grand Refillable Dispenser
E-Z Runner Grand Ultra Strong Refill
Adhesives Dots Large Repositionable
E-Z Dots® Permanent Refillable Dispenser
3D Foam Circles White Mix
Creative Photo Corners Kraft
Adhesive Lines
Adhesives Dots Micro

Jillibean Soup Designs:
Patterned Papers: Farmhouse Stew Collection (Gimme Some SugarHold Your HorsesBless Your Heart, and Gimme Some Sugar)
Embellishments: Farmhouse Pea Pod Parts and Farmhouse Stew Puffy Stickers
Paint: Happy Hues – Yummy Yellow

Others:
Rick-Rack Trim; Brown Glitter; Gold Glitter Embossing Powder; Heating Tool

Missed out on any of the other Blog Swap Days? No worries!
For Day 1, CLICK: Color Full Week with Jillibean Soup.
Day 2: Creative Bohemian Vibe and Jillibean Soup.
Day 3: Notepad Gift-ables and Jillibean Soup.

Pin It!

Pinterest Memories Scrapbook Page by Margie Higuchi for Scrapbook Adhesives by 3L


Visit our friends at Jillibean Soup Designs by clicking:
Blog Swap Week with Jillibean Soup Designs – Day 4.

Blog Swap Week Prize Details

Scrapbook Adhesives by 3L Blog Swap and Giveaway Week with JilliBean Soup (10/15 - 19/18) Logo

To enter to win our Giveaway visit our Instagram account and follow the prompts, CLICK: Scrapbook Adhesives by 3L Instagram Account (@sbadhesivesby3l)

Winners will be randomly picked. International Entries are welcome.

Per Instagram rules, this promotion is in no way sponsored, administered, or associated with Instagram, Inc. By entering, entrants confirm that they are 13+ years of age, release Instagram of responsibility, and agree to Instagram’s terms of use.

Connect and Stick with 3L!

Visit our Website and Bookmark our Blog!
Sign up for our Newsletter so you never miss a contest or giveaway!

instagram purple facebook purple pinterest purple twitter purple SAby3L YouTube icon blog purple

Notepad Gift-ables and Jillibean Soup

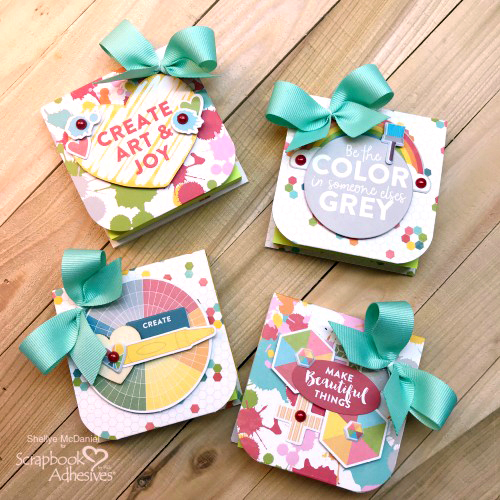
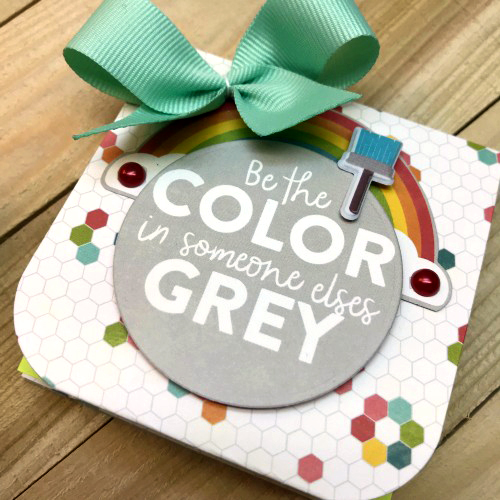
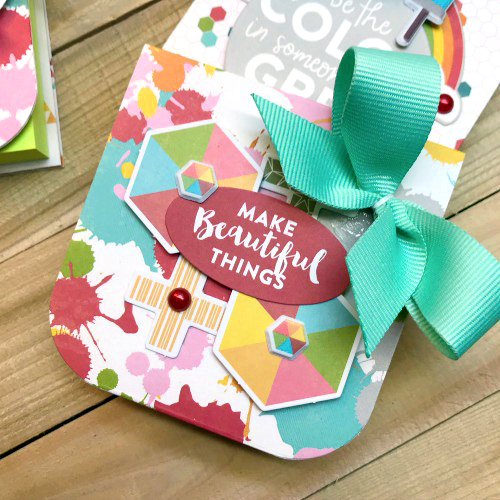
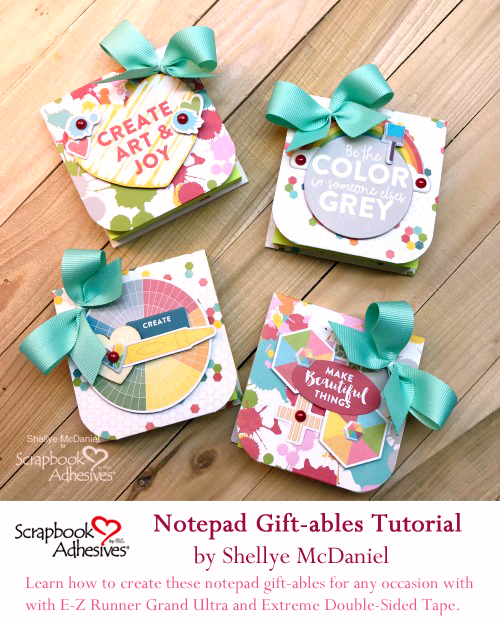
So much to enjoy during this Blog Swap Week with Jillibean Soup! Have you picked a favorite or one to try? Don’t forget to visit Jillibean Soup blog and our Instagram accounts to enter our giveaways. Details at the end of this post. Now about these fabulous Notepad Gift-ables from Shellye McDaniel!

These would be notepads are great for any occasion and perfect with the “Shades of Color” Collection by Jillibean Soup!  Today she shows us how by assembling with our E-Z Runner® Grand Ultra Strong, Extreme Double-Sided Tape 1/4 in, Extreme Double-Sided Tape 1/2 in, and 3D Foam Squares, White, Regular size to create these beautiful gift-ables.

Covered Notepad Gift-ables by Shellye McDaniel

Covered Notepad Gift-ables by Shellye McDaniel for Scrapbook Adhesives by 3L

Notepad Gift-tables Basics

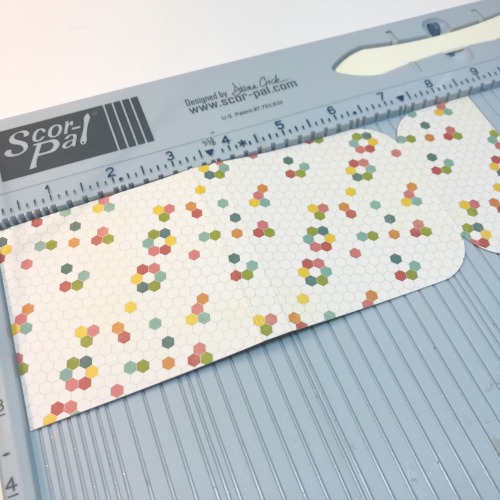
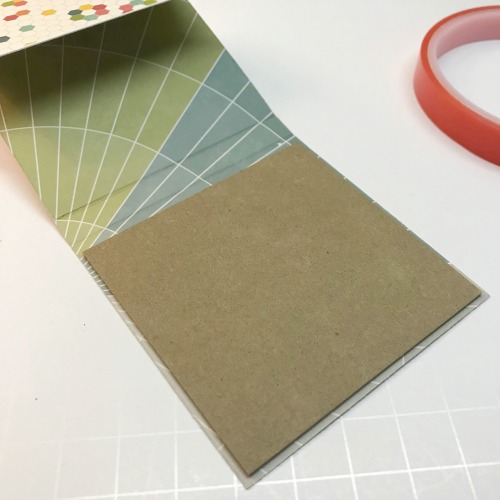
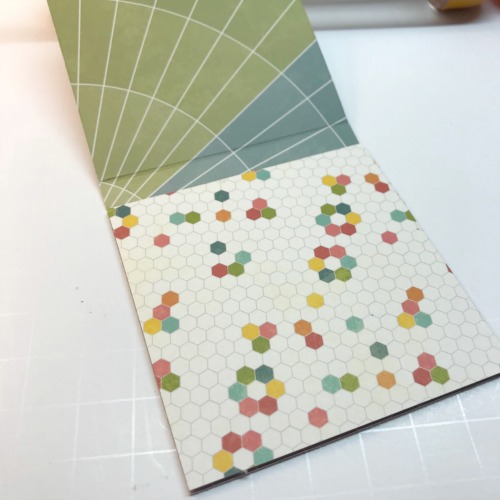
I chose two different double-sided papers from the collection: Bold Brilliance and Flashy Tint for the base.  I cut the papers to 3.25 x 8.25-inch and then scored at: 3.25-inch, 3 5/8-inch and 7-inch.

Covered Notepad Gift-ables by Shellye McDaniel for Scrapbook Adhesives by 3L

Next, I cut a  3 x 3-inch square of chipboard and attached it to the bottom flap with the Extreme Double-Sided Tape 1/2 in.  

Covered Notepad Gift-ables by Shellye McDaniel for Scrapbook Adhesives by 3L

Covered Notepad Gift-ables by Shellye McDaniel for Scrapbook Adhesives by 3L

To the top of the chipboard, I added a 3.25 x 3.25-inch square of paper using the E-Z Runner® Grand Ultra Strong.

Covered Notepad Gift-ables by Shellye McDaniel for Scrapbook Adhesives by 3L

Covered Notepad Gift-ables by Shellye McDaniel for Scrapbook Adhesives by 3L

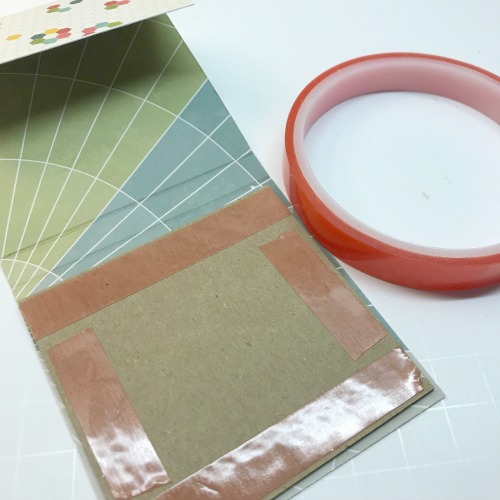
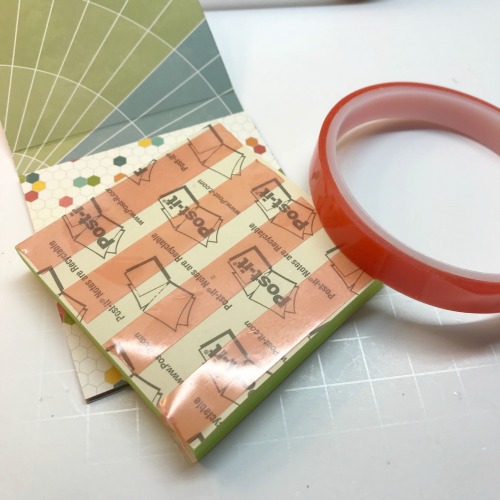
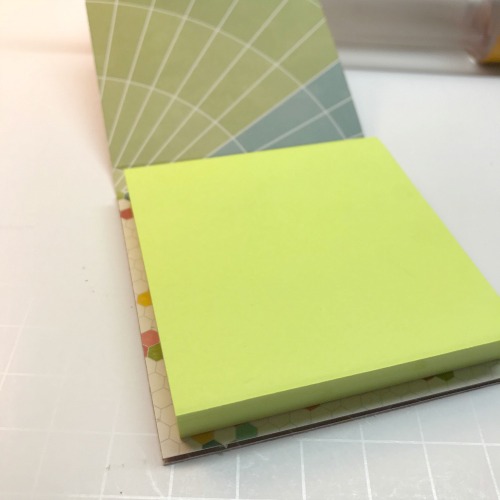
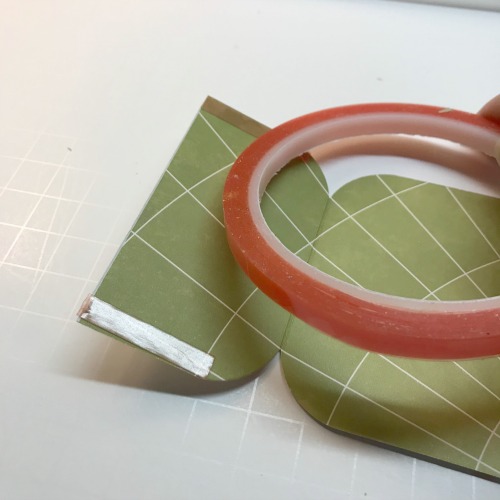
Now it’s time to attach the notepad.  I’ve used the Extreme Double-Sided Tape 1/2 in and applied several strips to the bottom of the pad.  I centered the pad over the covered chipboard square.

Covered Notepad Gift-ables by Shellye McDaniel for Scrapbook Adhesives by 3L

Covered Notepad Gift-ables by Shellye McDaniel for Scrapbook Adhesives by 3L

After folding over the top flap and corner rounding the edges, I applied two strips of the Extreme Double-Sided Tape 1/4 in to each side of the flap as shown.  This will create our little pocket!

Covered Notepad Gift-ables by Shellye McDaniel for Scrapbook Adhesives by 3L

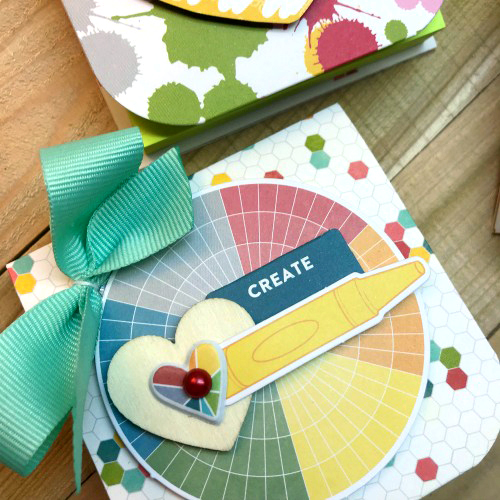
Notepad Gift-ables Details

To the pocket I can add mini paper clips, a book of stamps, coupons, etc.

Covered Notepad Gift-ables by Shellye McDaniel for Scrapbook Adhesives by 3L

Finally for the decorating! I used various components from the Coordinating Stickers, Puffy Stickers, Pea Pod Parts, and the Bite Sized Bits to decorate the front covers as shown. I added layers of the pieces using 3D Foam Squares, White, Regular and the E-Z Runner® Grand Ultra Strong.

Covered Notepad Gift-ables by Shellye McDaniel for Scrapbook Adhesives by 3L

Covered Notepad Gift-ables by Shellye McDaniel for Scrapbook Adhesives by 3L

Covered Notepad Gift-ables by Shellye McDaniel for Scrapbook Adhesives by 3L

Covered Notepad Gift-ables by Shellye McDaniel for Scrapbook Adhesives by 3L


Creative Time: less than 1 Hour
Skill Level: Beginner

Material Needed:
Scrapbook Adhesives by 3L®

E-Z Runner® Grand Ultra Strong
3D Foam Squares, White, Regular size

HomeHobby by 3L®
Extreme Double-Sided Tape 1/4 in
Extreme Double-Sided Tape 1/2 in

Jillibean Soup
Patterned Papers: “Shades of Color” Collection ( Bold Brilliance Patterned Paper and Flashy Tint Patterned Paper)
Stickers and Elements: Puffy StickersPea Pod Parts and Bite Sized Bits

Did you miss the other Blog Swap Days?
For Day 1, CLICK: Color Full Week with Jillibean Soup!
For Day 2, HERE: Creative Bohemian Vibe and Jillibean Soup.
Day 3, VISIT: Notepad Gift-ables and Jillibean Soup.
Day 4, SEE: Memories Scrapbook Page with Jillibean Soup.


Pin It!

Covered Notepad Gift-ables by Shellye McDaniel for Scrapbook Adhesives by 3L


Visit our friends at Jillibean Soup Designs by clicking:
Blog Swap Week with Jillibean Soup Designs – Day 3.

Blog Swap Week Prize Details

Scrapbook Adhesives by 3L and Jillibean Soup Blog Swap Week (10/15 - 19/18) Logo

To enter to win our Giveaway visit our Instagram account and follow the prompts, CLICK: Scrapbook Adhesives by 3L Instagram Account (@sbadhesivesby3l)

Winners will be randomly picked. International Entries are welcome.

Per Instagram rules, this promotion is in no way sponsored, administered, or associated with Instagram, Inc. By entering, entrants confirm that they are 13+ years of age, release Instagram of responsibility, and agree to Instagram’s terms of use.


Connect and Stick with 3L!

Visit our Website and Bookmark our Blog!
Sign up for our Newsletter so you never miss a contest or giveaway!

instagram purple facebook purple pinterest purple twitter purple SAby3L YouTube icon blog purple