You are in our US store • Switch to Europe store

Let it Snow: Glittered 3D Foam Holiday Card

Are you working on your holiday card? It’s only about 8 weeks to go before Christmas! It’s time to start making Christmas holiday and winter cards. Today’s project is a Christmas card using the 3D Foam Holiday Embellishment Kit.

Let it Snow: Glittered 3D Foam Holiday Card by Yvonne van de Grijp for Scrapbook Adhesives by 3L

Making my holiday card.

Let’s start with a white card base and layer with red and dark blue cardstock using the E-Z Runner® Permanent Strips Refillable Dispenser to adhere to the layers.

The snowflake background was made with a template and texture paste.

The snowy hills are die cuts that adhered on the card using the E-Z Runner® Permanent Strips Refillable Dispenser.

Creating the striped glitter effect on the trees:

Affix 3D Tree shapes from the 3D Foam Holiday Embellishment Kit onto the card base.

Next, carefully score lines through the liner on the trees with a craft knife.

Then peel off some of the liner stripes to sprinkle green glitter on the exposed sticky surfaces of the 3D Foam Tree. Gently rub the glitter so it sticks.

Remove several other stripes of the protective liner and rub another shade of green glitter on. Repeat with a third green glitter color. For the stem, use brown glitter to finish off.

Add a 3D Foam Star as a tree topper by rubbing gold craft foil from the 3D Foam Holiday Embellishment Kit after removing the top liner.

To finish, stamp a sentiment and add some rhinestones to the tree with the golden star.

Scrapbook Adhesives by 3L® supplies:
3D Foam Holiday Embellishment Kit
E-Z Runner® Permanent Strips Refillable Dispenser
Other supplies:
Stamp: Quietfire Design (Let it Snow, Let it Snow, Let it Snow Large Stamp)
Template: Elizabeth Craft Design
Die: Lawn Fawn
Texture paste; Cardstock; Glitter; Self-adhesive rhinestones; Black ink; Acrylic stamp block; Paper trimmer; Craft knife; Tweezers

Thanks for stopping by and wishing you happy winter holiday crafting!
Yvonne van de Grijp

Handmade Holidays Gift Journal Tutorial and Blog Hop

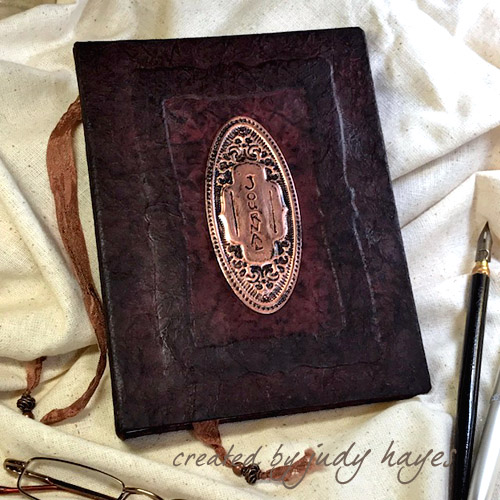
This handsome handmade journal by Judy Hayes is featured today on Day 1 which showcases the gift ideas theme of the Handmade Holidays Blog Hop. Judy teaches you how the technique she uses to make kraft paper look like gorgeous leather with ink. She shows how easy it is to assemble the journal with our Adhesive Sheets 12 x 12in and Premium Double-Sided Tape ½in.

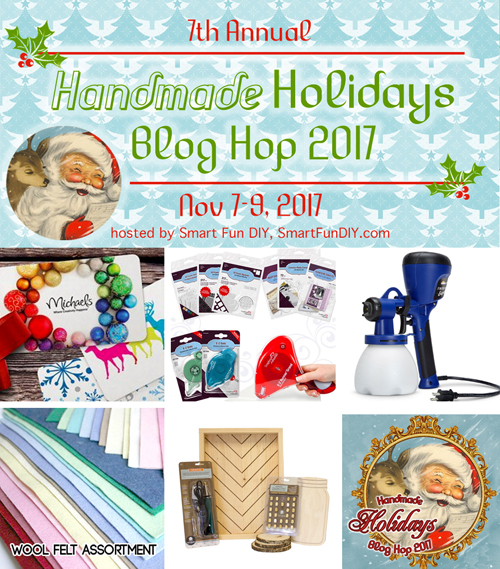
Welcome to the 7th Annual Handmade Holidays Blog Hop!

Not only will you be inspired by 3 days of projects and tutorials, but what’s a blog hop without a giveaway? Read through to the end for each day’s themes (and links to them), plus prizes from sponsors like us!

Handmade Holidays Gift Journal by Judy Hayes for Scrapbook Adhesives by 3L

Creating the Journal Basics

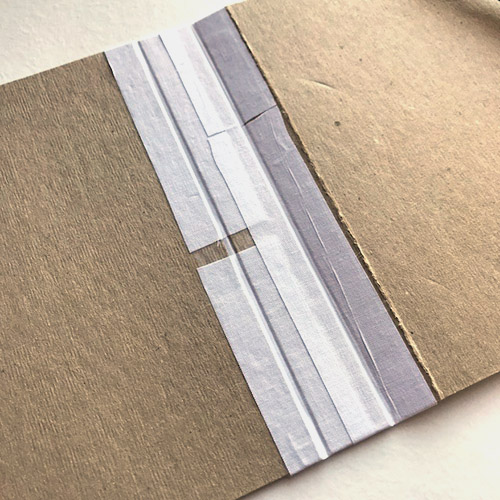
This Handmade Gift Journal is completely handmade starting with the cardboard covers and spine fastened together with linen hinging tape. The back cover is scored and folded ⅝in from long edge near the hinge, add the here. Covers measure 5½ x 7¼in, and the spine, 1 x 7¼in.

Designing the Journal Cover

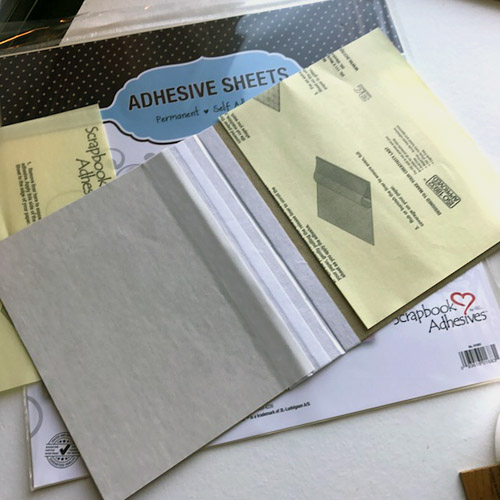
For the front covers, place an Adhesive Sheets 12 x 12in over each cover, remove the bottom liner to apply the adhesive and trim off excess. Keep the top liner on for now.

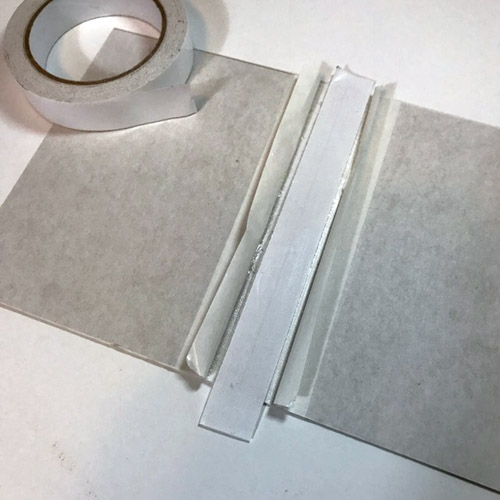
Place a strip of Premium Double-Sided Tape 1in on the spine for added adhesive strength.

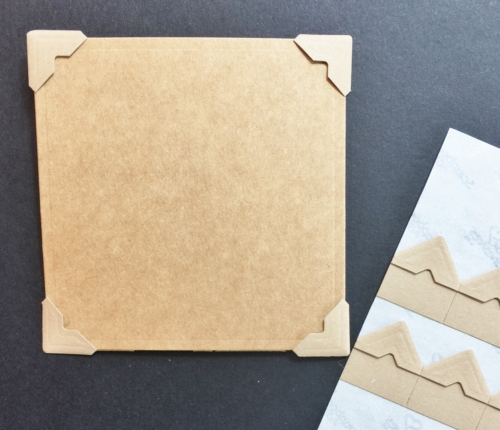
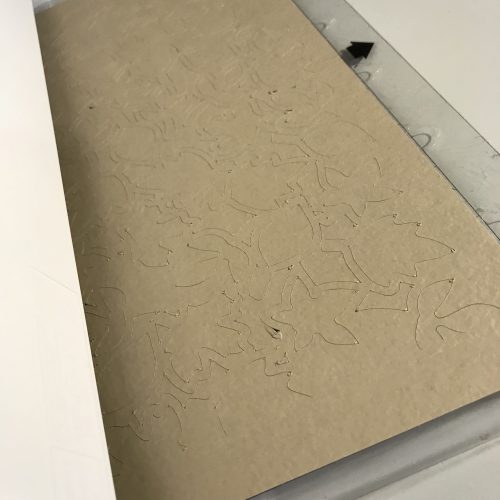
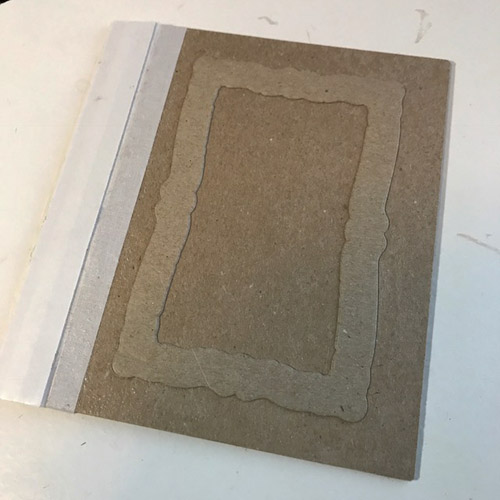
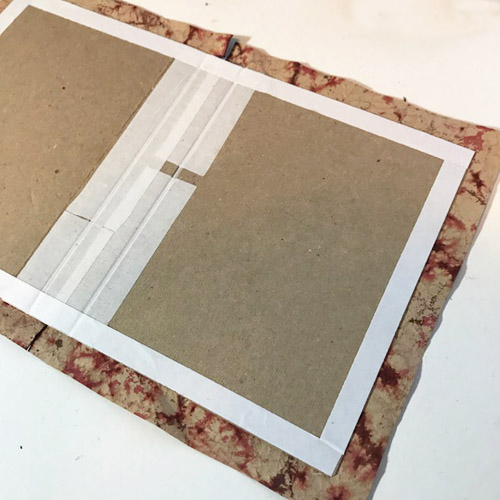
Let’s create the raised frame design on the journal cover. First, apply a sheet of Adhesive Sheets 12 x 12in over a piece of cardboard and die-cut a frame shape. To determine placement on the journal cover, trace the frame with a stylus over the adhesive sheet liner of the front cover. It will show the outline when removing the liner.

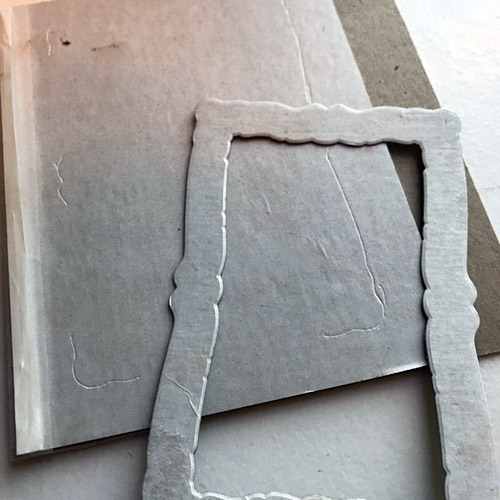
Remove the liner from the front cover and place the frame die cut on the cover. Set aside.

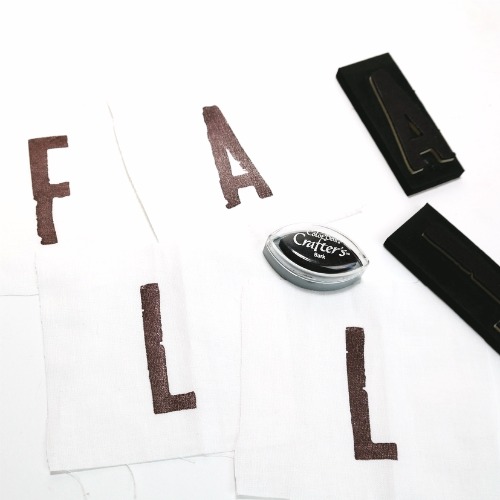
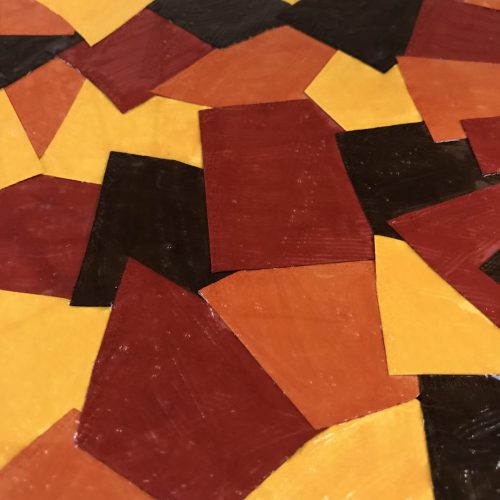
Making Faux Leather Paper

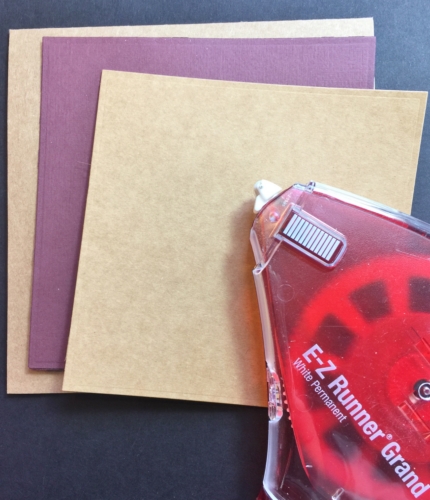
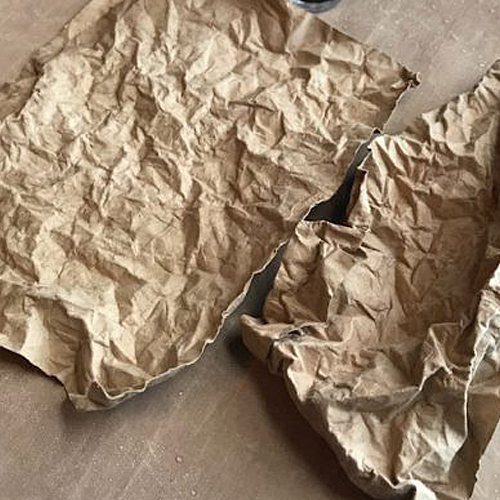
Cut two pieces of kraft cardstock about 2in bigger than each cover on all sides. Next, mist with water and crumple well. Flatten and crumple again for a distressed leather look.

Next, spray with an ink and water mixture for its first layer of color.

This time add more ink by directly using the ink pad to paper for a bolder effect.

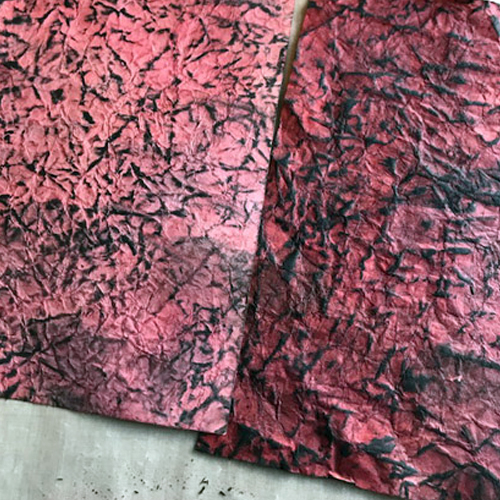
Go back and forth on the water misting and inking until you get your desired coloring and design. Note that the color will be lighter when dry.

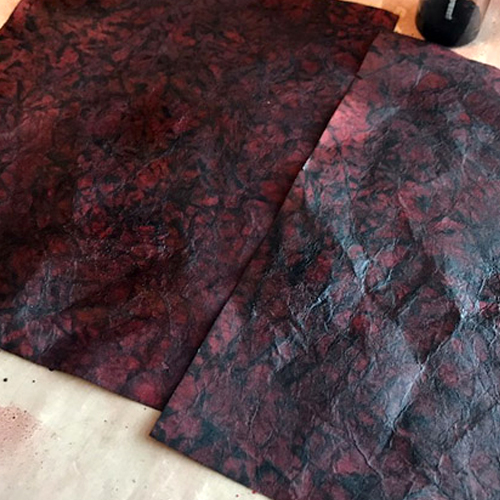
Finally, press paper with a dry iron to flatten and dry faster.

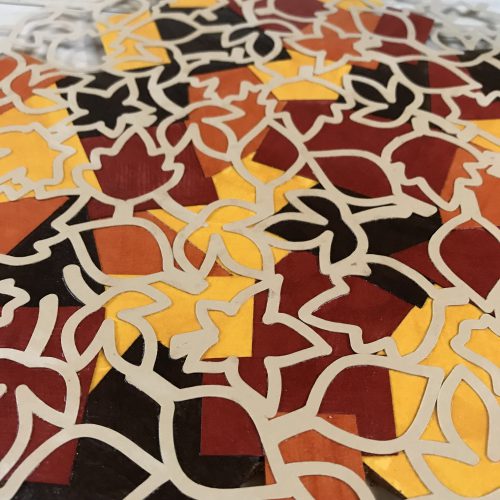
Now it’s ready to apply onto the journal covers. Press each piece of faux leather paper onto covers, with a seam along the spine. Carefully outline the frame on the front with a stylus to bring out its design.

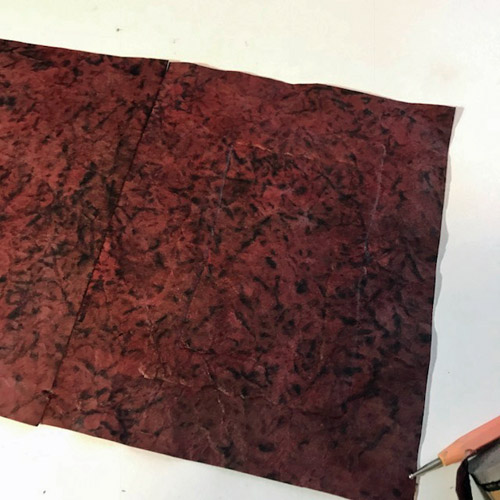
Trim edges about ½in from outside edges of cover. From the excess piece, cut 1 x 8½in. strip and apply Premium Double-Sided Tape 1in to it. Then fasten it over the seam on the spine.

Finishing the Inside Covers

On the inside covers, apply Premium Double-Sided Tape ½in along all of its edges.

Miter cut the paper at its corners. Then start working on one side at a time to remove tape backing and fold paper to the inside, mitering each corner. Repeat on all edges.

Apply Adhesive Sheets 12 x 12in to patterned paper. Cut paper to fit and cover the inside covers.

Use a binding machine to cut holes along the fold of the back cover. Add more ink along edges and over the frame for a finished look. When dry, spray cover with a sealer.

Embellishing the Front Cover

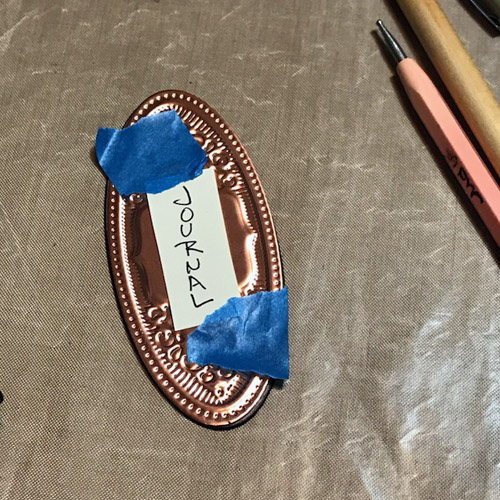
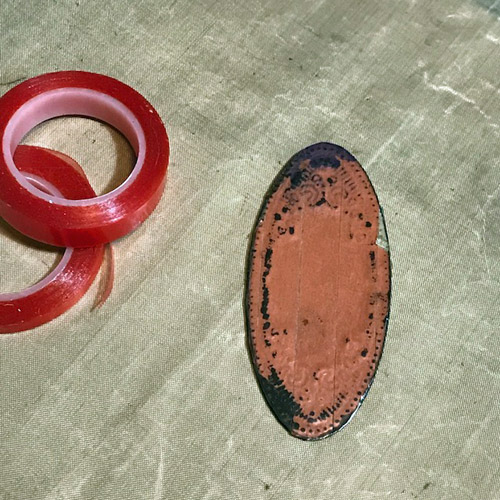
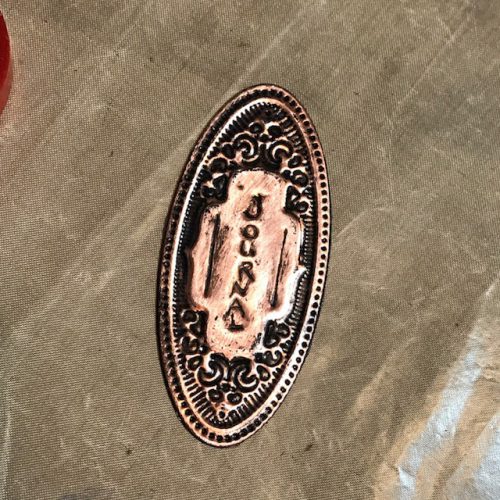
Die cut an etched die with thin copper metal. Also, die cut the same etched die with a thin cardboard that has a piece of  Adhesive Sheets 12 x 12in applied on its front. Fasten to the back of copper and lightly sand the copper.  Hand write “journal” on a piece of paper and tape on top of the copper.  Firmly trace letters with a stylus and add vertical lines.  Flip the copper piece over and trace around letters. Then go over letters again on the front.

Apply Extreme Double-Sided Tape ¼in and Extreme Double-Sided Tape ½in over the back of the copper piece. Trim tape around edges.

Sponge black craft paint over the copper. Allow to dry slightly and then buff off raised areas.  Repeat as needed. Remove tape backing and fasten to journal cover.

Making the Inside Pages

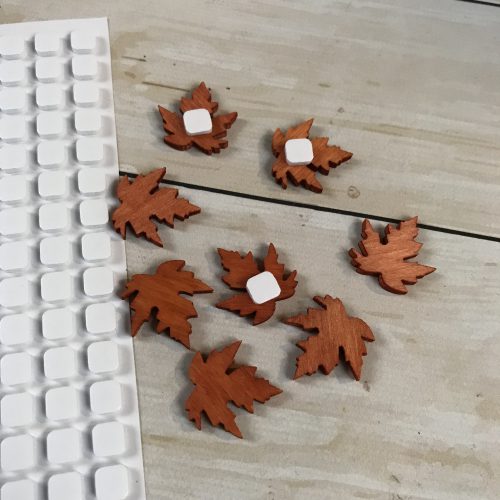
For the inside pages, cut paper to 4½ x 7¼in.  The stack should be about ½in thick. Cut holes with a binding machine and insert wire binding through pages and journal cover. Then close with the machine. Tie seam binding to wire on the back of the journal. Embellish by adding beads to ends of the seam binding and knot to secure.

Handmade Holidays Gift Journal by Judy Hayes for Scrapbook Adhesives by 3L

Now give this handmade journal to someone special! Thanks so much for visiting!

Judy Hayes

Scrapbook Adhesives by 3L®:
Adhesive Sheets 12 x 12in

HomeHobby by 3L®:
Extreme Double-Sided Tape ¼in
Extreme Double-Sided Tape ½in
Premium Double-Sided Tape ½in
Premium Double-Sided Tape 1in

Other Supplies:
Zutter Bind It All and ¾in O-wire; Dark Reds, Dark Browns and Black Inks; Spellbinders® Paper Arts: Radiant Rectangles Dies; Cardboard; Copper Craft Sheet; Kraft Cardstock; Patterned Paper; Text Weight Paper; Seam Binding Tape; Beads; Spray Sealer

HANDMADE HOLIDAYS PRIZE DETAILS

Handmade Holidays Blog Hop 2017

This is a gathering of our favorite companies and blogger friends to share their best handmade gift ideas. These ideas are not only great for the holidays but can be used all year long.

Be sure to leave a comment on the blogs, pin your favorites, and give the gift of handmade!

This giveaway is over, thank you for visiting!

Visit all the Participating Bloggers and Sponsors by clicking the blue icon below.
Day 1 – November 7, 2017


Day 2 – November 8, 2017


Day 3 – November 9, 2017


If you cannot see the comment section (at the bottom of this post), please click: Handmade Holidays Gift Journal and scroll down to the bottom of the post.

Handmade Holidays Blog Hop 2017

Stick with 3L!

Visit our Website and Blog!
Sign up for our Newsletter so you never miss a contest or giveaway!

                                      instagram purple facebook purple pinterest purple twitter purple SAby3L YouTube icon blog purple

Selfie Scrapbooking Layout with Crafty Foam Tape

Hi everyone, Jana here with a new layout for you using my favorite Scrapbook Adhesives by 3L® product, Crafty Foam Tape!

The scrapbook page focuses on a photo that shows my oldest son taking some selfies. I’ve never seen a boy taking so many pictures of himself! But I really enjoy watching him taking different poses and faces, it’s so much fun!

Selfie Star layout by Jana Maiwald-McCarthy

Creating the Layout

On a mint cardstock, I added white acrylic paint and stamped with bubble wrap in coordinating color paints. It needed just a little something so I randomly flicked liquid ink. I wanted just enough to frame my “Super Star” title which I used Crafty Foam Tape to pop it up. Love that it gives the perfect height and dimension!

3D Foam Squares are my “go to” adhesives for tiny elements and details. They come in different sizes and height, just perfect!

Here I’ve added some tangled thread for more texture and interest. I used Dual Tip Glue Pen to adhere the thread and the big star. The E-Z Runner® Permanent Strips is the perfect choice for the paper strips! You can easily apply single strips get the right amount of adhesive you need for a small item.

It was really fun putting this layout together, and am very happy how it turned out. There’s a process video on how I created it, watch below:

Supplies:

thanks for stopping by today

Fall Decor Featuring 3D Foam Leaves

It’s fall and I’m sharing a quick seasonal hanging decor piece that can be done in under 30 minutes! Hello, Dana Tatar here. I’ve combined stamped burlap, mini embroidery hoops, ribbon, and glittered 3D Foam Leaves to Wear Your Adhesive on the Outside!

Fall-Embroidery-Hoop-Decor-by-Dana-Tatar-for-Scrapbook-Adhesives-by-3L

I had a lot of fun using this concept, the colorful glitter on the 3D Foam Leaves really catches the sunlight. The seasonal pop of colors that this quick project added to the front of my home makes me happy!

Fall-Stamped-Muslin-by-Dana-Tatar-for-Scrapbook-Adhesives-by-3L

How to Make A Hanging Embroidery Hoop Fall Décor Piece

Step 1: Cut squares of muslin slightly larger than the embroidery hoops. Next, apply brown fabric ink to letter stamps and press onto the muslin squares. Then, set the ink with a heat tool or an iron.

Embroidery-Hoop-Decor-Assembly-by-Dana-Tatar-for-Scrapbook-Adhesives-by-3L

Step 2: Assemble the piece. First, lay the inner rings of the embroidery hoops on the work surface, leaving about an inch of space between each hoop. Next, center a piece of ribbon over the hoops. Then lay the stamped muslin squares over the hoops.

Fasten the outer rings of the embroidery hoops over the inner hoops. The outer rings secure both the stamped muslin and the ribbon together into one hanging décor piece. Use scissors to trim away any excess muslin from the hoops.

How-to-Add-Glitter-to-3D-Foam-Leaves-by-Dana-Tatar-for-Scrapbook-Adhesives-by-3L

Step 3: Embellish the hoops with glittered 3D Foam Leaves. Each package of 3D Foam Leaves includes two sheets of 14 leaves in a variety of shapes and sizes. Mix and match colors of glitter and leaf shapes on each embroidery hoop.

Fall-Embroidery-Hoop-Decor-Closeup-1-by-Dana-Tatar-for-Scrapbook-Adhesives-by-3L

Fold and tuck the end of the ribbon into the back side of the top embroidery hoop to create a loop for hanging. Thread a second piece of ribbon through this loop and tie into a bow.

Fall-Embroidery-Hoop-Decor-Closeup-2-by-Dana-Tatar-for-Scrapbook-Adhesives-by-3L

Use scissors to make a v-cut into the end the ribbon hanging from the last embroidery hoop.

How to Adapt This Design For Winter Holidays

If you already have your Fall décor finished, try modifying this project for the Winter months.

  • Change the color scheme to blue and white, or red and green, and stamp a festive Winter or Christmas greeting.
  • Alter the round embroidery hoops to look like ornaments.
  • Use this same procedure to link together three hoops to create a snowman.

Be sure to check out the full selection 3D Foam products. Scrapbook Adhesives by 3L® offers trees, stars, snowflakes, Christmas shapes, and a super fun 3D Foam Holiday Embellishment Kit that includes 5 sheets of colorful craft foil!

Thanks for stopping by today!
Dana Tatar

Scrapbook Adhesives by 3L Supplies:
3D Foam Leaves
Other Supplies:
Embroidery Hoops; Foam Alphabet Stamp Set: Making Memories; Bark Ink: ColorBox Crafter’s Ink (Clearsnap); Muslin; Glitter; Ribbon

Celebration Card with 3D Foam Stars and Glitter

I’m sharing a celebration card using 3D Foam Stars and white glitter to Wear Your Adhesives on the Outside! Hello everyone! It’s Marilyn, I’m using the 3D Foam Stars to bring dimension and textures to the background of my card.

Celebration Card with 3D Foam Stars and Glitter by Marilyn Rivera for Scrapbook Adhesives by 3L

Creating the background of my Celebration Card

Starti with a 5 1/2 x 5″ white cardstock as the card panel, paint with distress oxide ink. Then adhere the 3D Foam Stars on the background.

Next, let’s create a design on the card panel. I used different types and sizes of the 3D Foam Stars. Make sure to keep the top liner on for now.

Now for the fun part: Wear Your Adhesives on the Outside! Carefully peel off the top liner from the 3D Foam Stars and sprinkle white glitter over all the stars. Press glitter lightly into foam stars and then tap off excess.

I stamped and embossed the sentiment in black on the card panel.  For the little girl die cut, I first stamped with white cardstock. Then colored the image with a combination of Copic markers and Prismacolor pencils. After I die-cut with its coordinating die, I placed 3D Foam Squares White Mix on the back and adhered it to my card front.

From this angle of the image, you can see all the dimension the 3D Foam adhesives add to the card. The stars look fantastic! Next, adhere the card panel to the black card base with Dual Tip Glue Pen.

It’s easy and fun to create this fantastic background, especially with the 3D Foam Stars! I love how it turned out and hope you find some inspiration from this card.

Thanks for visiting today!
Marilyn Rivera

Scrapbook Adhesives by 3L® Products:
3D Foam Stars
3D Foam Squares White Mix
HomeHobby Dual Tip Glue Pen

Save

Save

CardMaker Magazine Blog Hop and Giveaway

Wear Your Adhesives on the Outside is a way to use different mediums such as foil, glitter, embossing powder, microbeads, and more on your adhesive surfaces to customize your project. We’re looking beyond the usual uses of Scrapbook Adhesives by 3L® products and show you new ideas.

We’ve partnered with CardMaker® Magazine for a one-day blog hop!

A great lineup of designers from both sides will show you FABULOUS projects and share tips and techniques along the way. Find the giveaway details at the end of the post.

View our How to Use 3D Foam Hearts and Other Shapes video below for a quick tutorial to see how it’s done:

Hop over to these designers who will inspire you to
Wear Your Adhesives on the Outside:

Scrapbook Adhesives by 3L® (YOU ARE HERE)
Latrice Murphy
Diana Carr
Dana Tatar
Clare Prezzia
Nicole Coursey
Vicki Chrisman
Savannah O’Gwynn
Jen Shults
Margie Higuchi
Gaylynn Martling
Tracy McLennon
Teresa Kline
CardMaker® Magazine

Now visit Latrice’s blog by clicking: Latrice Murphy

Find more Wear Your Adhesives on the Outside inspiration and tutorials on the Blog and Website!

Blog Hop Prize Details

 Blog Hop CardMaker Magazine - Scrapbook Adhesives by 3L NOV17

Enter to win through the Rafflecopter App.
Comments are monitored and will take time to publish.
A winner will be randomly picked. International entries are welcome.

a Rafflecopter giveaway

Stick with 3L!

Visit our Website and Blog!
Sign up for our Newsletter so you never miss a contest or giveaway!

instagram purple facebook purple pinterest purple twitter purple SAby3L YouTube icon blog purple

Save

Save

Save

Save

Save

Save

Secure Autumn Leaves with Dodz Adhesive Dots Mini

There are barely any leaves left on trees here in the UK…Autumn came so quickly this year! They are in heaps on the ground and have become the inspiration for my seasonal card. Hi everyone, Christine here today to show you how easy it is to secure these leaves on my card panel.

Easily Secured Autumn Leaves with Dodz Adhesive Dots Mini by Christine Emberson for Scrapbook Adhesives by 3L

Making my Autumn Leaves Card

On my kraft card base, I die-cut two mat sizes (one in burgundy and the other in Kraft cardstock) to create my matted card panel and affixed with the E-Z Runner Grand® Refillable Dispenser.

Next, I die-cut MANY leaf shapes from white cardstock, using my manual die-cutting machine.

Then colored and shaded them with distress inks in warm autumn color tones. Now they are very Autumnal, don’t you think?

I die cut a square from kraft cardstock and attached Creative Photo Corners Kraft to each corner as an accent. This gives a nice frame to the square.

Note: you can always color photo corners too.

To easily attach the leaves I used Dodz Adhesive Dots Mini, these work so well, securing them firmly in place, ideal if you are mailing your card.

For a different but subtle element, I added another smaller Kraft square on top of the large square to cover the leaf ends and placed ‘thankful’ die cut sentiment in burgundy cardstock to finish the card.

Thanks for stopping by today. Don’t forget to check out all the great products on the website.Christine

Scrapbook Adhesives by 3L® Products used:
Creative Photo Corners Kraft
E-Z Runner Grand® Refillable Dispenser
Dodz Adhesive Dots Mini
Others:
Dies: Spellbinders Paper Arts (Fall Leaves, Classic Squares SM, 6×6 Matting Basics)
White, Burgundy and Kraft Cardstock; Distress Inks

Save

Fall Leaf Home Decor with Dual Tip Glue Pen

I took a simple $3 wooden leaf and made it something extra special for my front door this fall season. Happy Fall everyone! Today I’m here to share this seasonal project with you.

Fall Leaf Home Decor with Dual Tip Glue Pen by Latrice Murphy for Scrapbook Adhesives by 3L

Setting up the Fall Leaf Home Decor

To begin this project, choose cardstock or embellishments you would like to cover your large wooden leaf with.

Next, decide on a design that will be large enough to cover the entire leaf.

Using an electronic or manual die cutting machine, cut the leaf design. Also, I cut the ribbon off of the large wooden leaf that was attached to it and will replace it later in the tutorial.

Cut up your solid cardstock of fall colors into small pieces. Use the brush end of the HomeHobby Dual Tip Glue Pen and apply glue to cover the entire wooden leaf. Randomly place the cardstock pieces on top and overlapping where you desire.

Then add a second layer of glue to seal the cardstock layer and place the cut leaf design on top. I’m not worried about the glue showing brush marks because there will be embellishments added on top. It does dry clear.

In my pile of embellishments, I have small wooden veneer leaves and vintage buttons to go with my project. I adhered them with the 3D Foam Squares White Small Size.

Trim the leaf design piece around the edges with an Exacto knife. Afterwards add your desired embellishments, word, stickers and etc.

Create a hole with a paper piercing tool for the ribbon. I used a green ribbon and tied a bow. It’s ready to hang!

With Halloween last night, I’ve got my fall totes on standby ready to swap everything out! This will be on our front door this year. It’s something simple and easy to make, and fun at the same time.

I can’t wait to make more decorations, and then on to DIY gift making for the holidays. Stay tuned!

Latrice Murphy

Scrapbook Adhesives by 3L® used:
3D Foam Squares White Small Size
HomeHobby Dual Tip Glue Pen
Other:
Silhouette Digital Design: Paige Taylor Evans for Pink Paislee
Cardstock: American Crafts and Bazzill Basics
Wooden leaves and embellishments: Target
Ribbon: May Arts Ribbon
Vintage buttons

Save

Save

Halloween Invitation Cards with Crafty Foam Tape

Happy Halloween! Jana here with some fun invitation cards for you. We do not celebrate Halloween here in Germany, but we’re having a birthday party! My little one turns eight and he wants to have a spooky Halloween party. Guests will be dressed up and I’m excited to see them!

Happy Halloween Invite Cards with Crafty Foam Tape by Jana Maiwald-McCarthy for Scrapbook Adhesives by 3L

How to Create the Birthday Invitation Cards

First, start with black 4 x 8″ cardstock for the card base, then I paint with black acrylic paint for texture. Stamp with bubble wrap and watermark ink. Sprinkle gold embossing powder and heat it to create a stunning background.

To hold down the paper strips, I use E-Z Runner® Permanent Strips Refillable Dispenser because it is strong enough to hold against the embossed dots.

I adhered the “8” die cut on the circle shape using E-Z Runner® Permanent Strips Refillable Dispenser. Then I added Crafty Foam Tape on the back and placed it by the paper strips.

Next, Halloween shaped sequins were randomly placed on the card front and secured with Adhesive Dots Mini.

Here they are after I put them all together. BUT there was something missing…

I need spider webs! With black thread, I looped them a few times and placed behind the white scallop circles. This gives it more interest and another texture. Looks like a bit of spiderweb, right?

The invitation cards were sent out and the guests (kids) loved the cards so much! I too really love how they turned out! Happy Halloween to all!

Scrapbook Adhesives by 3L® 
E-Z Runner® Permanent Strips Refillable Dispenser
Adhesive Dots Mini
Crafty Foam Tape
Other Supplies:
Echo Park Paper, Ranger Embossing Ink and Powder

Save

Visit our Website and Blog!
Sign up for our Newsletter so you never miss a contest or giveaway!

instagram purple icon facebook icon purple pinterest purple icon twitter purple icon YouTube icon blog subscription purple icon

Embossing with Adhesive Sheets – Happy Halloween

Need a new trick to try on your paper crafts projects? Do you love embossing powder? Well then, I have a treat for you today! Have you ever looked at the background on a patterned paper and felt like it needed a little more punch to go with your picture?

As I looked at my photo and the background paper I also wanted to use, I knew it needed a little more color – specifically color that matched my picture. Therefore once again, I dug into my Adhesive Sheets to turn things around! It’s Christine joining you today with a technique I have shared earlier but just love: heat embossing with Adhesive Sheets.

Embossing with Adhesive Sheets by Christine Meyer for Scrapbook Adhesives by 3L

Using Heat Embossing with Adhesive Sheets

I started things off with a simple background paper from Doodlebug Design and altered it dramatically using several different adhesives: 4 X 6 Adhesive Sheets, Crafty Foam Tape, 3D Foam Squares White Mix, E-Z Runner® Micro Refillable Dispenser, and the E-Z Runner® Grand Dispenser.  These are all some of my favorite go-to adhesives!

Embossing powder with Adhesive Sheets, Christine Meyer

The original base paper didn’t have a lot of the colors that were in my picture, however I had heat embossing powder in both aqua and yellow to coordinate perfectly with my picture. I used star punches to punch out the Adhesive Sheets and adhere them to my layout. Then I created a beautiful and colorful night sky by embossing with Adhesive Sheets. The video below walks you thru the entire process:

I never get thru an entire project without using either 3D Foam Squares or Crafty Foam Tape – both of these products are absolute necessities for me!  I love that they are an easy way to add dimension AND they also hold really well.  As I mentioned in the video – the Crafty Foam Tape speeds things up when you have longer pieces to add dimension to.

Thanks so much for joining me today – Have a Happy and Safe Halloween!
Christine

Scrapbook Adhesives by 3L®:
3D Foam Squares White Mix
E-Z Runner® Grand
E-Z Runner® Micro Refillable Dispenser
Crafty Foam Tape
Adhesive Sheets 4 x 6″
Other Supplies:
Patterned Paper, Stickers, Odds & Ends from Doodlebug Design; Embossing Powder from Wendy Vecchi and Stampendous

Visit our Website and Blog!
Sign up for our Newsletter so you never miss a contest or giveaway!

instagram purple icon facebook icon purple pinterest purple icon twitter purple icon YouTube icon blog subscription purple icon