You are in our US store • Switch to Europe store

How to Create a Personalized DIY Frame

I’m excited to share a fun DIY frame that is personalized for a super sweet little dancer. It’s something a little different from my normal scrapbooking or card making so check it out with me!

How to Create a Personalized DIY Frame by Latrice Murphy for Scrapbook Adhesives by 3L

Gather Supplies for the Frame

Using an available design from my cutting machine, I just love the convenience and it’s perfect for what I had in mind for a younger girl’s gift. I gathered everything needed including a 5 x 7″ frame, two pink tones of cardstock for the ballet slippers, white cardstock for the background, black cardstock for letters. We can’t forget the adhesives: E-Z Dots® Permanent Refillable Dispenser and HomeHobby Dual Tip Glue Pen).

Personalize It

Begin the project using the Dual Tip Glue Pen to adhere the die cut ballet slippers together.

With the white cardstock trimmed to fit the inside of the frame, I position the slippers on top of the white cardstock using the E-Z Dots® Permanent Refillable Dispenser.

Note: I used the cut letters as a guide to place the slippers down and then adhered the letters with the Dual Tip Glue Pen. What a great way to personalize a gift just for her!

To finish off this piece I added some shimmer with some gold spray ink and Platinum ink. Just mist or flick the ink around the slippers to give it some extra subtle sparkle.

Let the inks dry completely before placing the project into the frame. This DIY project has so many possibilities! Try using a shadow box frame and adding little trinkets inside that hold special meaning to the gift recipeint.

I hope you give this frame project a try. Thanks for stopping by.
Latrice

Scrapbook Adhesives by 3L®:
E-Z Dots® Permanent Refillable Dispenser
HomeHobby Dual Tip Glue Pen
Other:
Cardstock: Bazzill; Cutting Machine: Silhouette Cameo; Platinum Ink: Tsukineko; Frame: Hobby Lobby; Gold Ink: Heidi Swapp

Save

Elegant Flower Card with Dimensional Effect

Today’s project is an elegant, layered flower card. Using 3D Foam Squares for layering you will add that extra gorgeous dimensional effect on your card.

Hello everyone, Yvonne from Holland here today and I am super excited to share my very first blog post for Scrapbook Adhesives by 3L® with you all.

Elegant Flower Card with Dimensional Effect by Yvonne van de Grijp for Scrapbook Adhesives by 3L

Making my elegant flower card

Let’s start with the first layer of the card panel. Affix the patterned cardstock to the card front using the E-Z Runner® Permanent Strips Refillable Dispenser.

Then, affix the die cut to the card front using 3D Foam Squares Small. I had to cut some 3D Foam Squares in half to fit the narrow border.

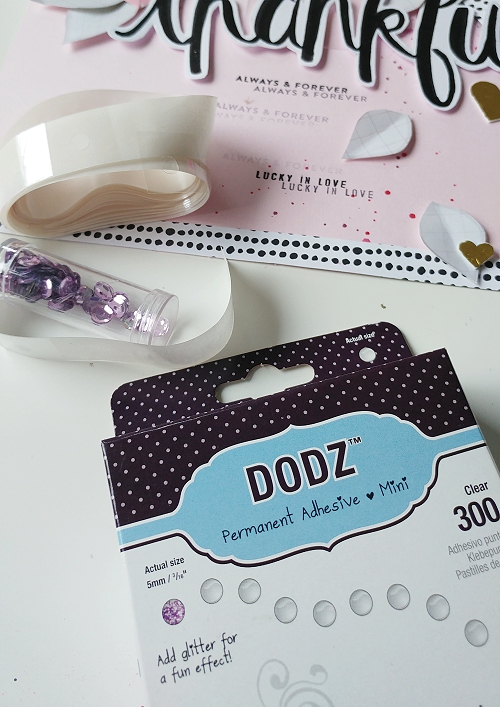
Next, affix the embellishments to the card front using Dodz Adhesive Dots Mini. Because of its size and clear in color, it’s perfect to use!


A 3D Foam Square was used for the flower to create a dimensional effect. Finally, affix a sentiment using another 3D Foam Squares for a finished look.

And voila…your card is ready!

Thanks so much for stopping by and wishing you happy crafting
Yvonne van de Grijp

Scrapbook Adhesives by 3L® Supplies:
3D Foam Squares White Mix
E-Z Runner® Permanent Strips Refillable Dispenser
Dodz Adhesive Dots Mini
Other:
Etched Dies: Card Creator Monstera Leaf Card Front Etched Dies (Spellbinders® Paper Arts); Creme, patterned and gold cardstock; Pearls; Twine; Cheesecloth; Button; Mulberry flower and leaves; Sentiment

Save

Pinecone Embellishments with Creative Photo Corners

Welcome back, crafty friends! Tracy here, and I love the holidays!! Today I have a tutorial on how to create these super cute and EASY Pinecone Embellishments with Creative Photo Corners. I love creating cards for family and friends. My holiday style is definitely classic, so I wanted to create an embellishment to compliment that.

How to Create Pinecone Embellishments with Creative Photo Corners.

Create a Pinecone Frame with Creative Photo Corners by Tracy McLennon for Scrapbook Adhesives by 3L

Create a Pinecone Frame with Creative Photo Corners by Tracy McLennon for Scrapbook Adhesives by 3L

Let’s get started by creating a base from kraft cardstock. Hand cut these shapes in a few different sizes. They do not need to be perfect, as they are going to get covered up.

Create a Pinecone Frame with Creative Photo Corners by Tracy McLennon for Scrapbook Adhesives by 3L
I inked each Creative Photo Corner before adding it to the pinecone base. Start with one point at the bottom, the next layer with 2 points and next, 3 points. Each layer doesn’t add a point, you will just stagger and space them a little differently.

Play with the design and change the angles of the Creative Photo Corners a little bit too. Continue the layers right up to the top.

Create a Pinecone Frame with Creative Photo Corners by Tracy McLennon for Scrapbook Adhesives by 3L
Once I had my pinecone completed, I moved on to the card base.

Create a Pinecone Frame with Creative Photo Corners by Tracy McLennon for Scrapbook Adhesives by 3L

The Card Base

Add just a little bit more shine by placing Creative Photo Corners Gold to the green patterned paper layer.

Create a Pinecone Frame with Creative Photo Corners by Tracy McLennon for Scrapbook Adhesives by 3L

On the back of the 6 x 6″ card background panel, I added Crafty Foam Tape for interest and dimension.

Create a Pinecone Frame with Creative Photo Corners by Tracy McLennon for Scrapbook Adhesives by 3L

Once my background layers were complete, I was ready to embellish. So I added my pinecone, poinsettias and leaves using Adhesive Dots Large.

Create a Pinecone Frame with Creative Photo Corners by Tracy McLennon for Scrapbook Adhesives by 3L

Create a Pinecone Frame with Creative Photo Corners by Tracy McLennon for Scrapbook Adhesives by 3L

Thanks so much for stopping by!

  • Creative Time: 1 Hour
  • Skill Level: Intermediate

Scrapbook Adhesives by 3L® Supplies:
Creative Photo Corners Gold
Adhesive Dots Large
Creative Photo Corners Kraft
Crafty Foam Tape Black

Other Products Used:
Heartfelt Creations- Festive Holly Paper, Sparkling Poinsettia Stamps and Dies, Glass Glitter, Stickles, Cardstock- White and Kraft, Stampin Up Ink- Riding Hood Red, Burlap String

See a collection of Creative Photo Corner Texture Ideas here:

Create Texture with Creative Photo Corners blog post with 10 Unique Projects featuring Photo Corners!

Birthday Girl With No Line Coloring

Good morning! Michele here with another card using the no line coloring technique.  I love that the image looks more like an illustration rather than a stamped image!

Creating the Birthday Girl Card.

First, I stamped my image with a pale grey ink and colored it with Copic markers. To give her hair and dress a bit of shine and glitter, I used a clear Wink of Stella pen.  Next, I adhered the image to a pink tag and blue background with Crafty Foam Tape to give it dimension.

Birthday Girl With No Line Coloring by Michele Kovack for Scrapbook Adhesives by 3L

Because this cute tag needed a little something more, I dressed it up a bit by tying a ribbon through the top opening. Then I secured the flower and sprigs with Dodz Adhesive Dots Medium.  To embellish her dress and hair, I added a couple of teeny flowers using Adhesive Dots Micro. Finally, add the embellished tag on top of a layered tall card base.

I hope you try this technique on your next card! Thank you so much for stopping by today!

Supplies:
Adhesive Dots Micro
Dodz Adhesive Dots Medium
Crafty Foam Tape White
Others: Copic markers, Prima stamp, ribbon, flower punch, Queen and Company-Mini flowers, Wink of Stella

Create Colorful Backgrounds Using Adhesive Sheets

Creating colorful backgrounds are so much fun with our Adhesive Sheets and goes well beyond using them just as a traditional adhesive. We call this Wear Your Adhesive on the Outside.

Christine joining you with a scrapbook layout tutorial that can easily be applied to any paper crafting medium. Today I am going to show you how to create colorful backgrounds using Adhesive Sheets and that it is quick and easy!

Create Colorful Backgrounds Using Adhesive Sheets by Christine Meyer for Scrapbook Adhesives by 3L

This colorful layout combines a bunch of adhesives including Crafty Foam Tape, the E-Z Runner® Grand, and the Adhesive Sheets. By combining the Adhesive Sheets with Embossing Powder I was able to create a very different background.  It started off looking like a big mess. But as you will see in the video, it all came together!

Create Colorful Backgrounds Using Adhesive Sheets Process Video:

Here’s my process video walking you through how to create a colorful background to, therefore, make one to enhance your projects.

Adhesive Sheets are available in a variety of sizes. They are great for using with punches and electronic cutting systems because they won’t gum up your tools. I went a whole different route today, didn’t I??? By tearing and being random I was able to create splotches throughout the layout mimicking the look of paint splatters.  Additionally creating texture on the layout was a definite bonus. Meanwhile, as I was creating I truly didn’t know if it was going to work out. Eventually, it all came together in the end to be a vibrant layout packed with techniques!

Using the bright yellow embossing powder certainly made the background stand out more.  Imagine the possibilities of creating a colorful background using several embossing powders! Consequently, I’m looking forward to playing more with this adhesive and making it work for me! Be sure to tag us if you create colorful backgrounds using Adhesive Sheets so that we can see too!!

Thanks for coming by today!
Christine Meyer

Scrapbook Adhesives by 3L®:
Crafty Foam Tape
E-Z Runner® Grand
Adhesive Sheets 4 x 6″
Other Supplies:
Patterned Papers and Stickers from The ScrapRoom Kit Club, Embossing Powder from Stampendous

Want to see more of this technique? Check out these tags by Birgit Koopsen and Beth Pingry:

Birgit Koopsen Adhesive Sheet texture tagsArtsy Tag Tutorial by Beth Pingry

Save

Memory Keeping with Traveller’s Notebook and Keepsake Envelopes

Hi there, it’s Stephanie today. Because I have so many photos and memories of our summer, I started a Traveller’s Notebook called “Favorite Moments” about a month ago. So now it’s time to fill it up!

Traveller's Notebook by Stephanie Schutze

Starting the Notebook

We had a wonderful time at the Baltic Sea and my girls and I collected stones, sea glass and shells. Therefore, Keepsake Envelopes are perfect to store these treasures.

After scrapping the pages with photos, sticker and notes, I filled up the little Keepsake Envelope with our treasures. With a self-adhesive back, they are quick and easy to add.

The Keepsake Envelopes Mix comes with 10 envelopes in a variety of different sizes. So they’re perfect for all the important things that need protection.

Thank you for visiting me today!
Stephanie 🙂

Supplies from  Scrapbook Adhesives by 3L®:


Visit our Website and Blog!
Sign up for our Newsletter so you never miss a contest or giveaway!

instagram purple icon facebook icon purple pinterest purple icon twitter purple icon YouTube icon blog subscription purple icon

Dresden Quilt Birthday Wishes Card with Adhesive Sheets

Happy World Card Making Day!

Hi it’s Judy and I’m happy to be sharing a handmade Dresden Quilt Birthday Wishes card for World Card Making Day! Find our giveaway details at the bottom of this post!

Dresden Quilt Birthday Card Instructions

Where I live, fall brings a chill to the air that makes me think of warm quilts.  I put together this Dresden Quilt Birthday Wishes card using Adhesive Sheets 4 x 6ʺ to fasten all the little pieces, Thin 3D Foam Squares to add a little dimension, and Dodz Adhesive Dots Small to hold the button in place. The paper layers are fastened with E-Z Dots® Permanent Refillable Dispenser.

Dresden Quilt Birthday Wishes Card tutorial by Judy Hayes

First use the Dresden Quilt die to cut 3 different patterned papers and 1 of cream cardstock from which only the outline piece is used. Next apply Adhesive Sheets 4 x 6ʺ: remove the yellow liner, apply the adhesive to a piece of cream cardstock that is slightly bigger than the die, remove the top liner.

Then place the quilt outline die cut onto the exposed adhesive. Cover it with the release paper and press it firmly in place.

Position the quilt pieces onto the adhesive to form the quilt pattern! Press them firmly in place.

Trim off the excess cardstock around edge of the quilt.

Use E-Z Dots® Permanent Refillable Dispenser to layer it onto pattern and solid mats.

Add Thin 3D Foam Squares Mix White to adhere it to card front.

Stamp a verse on cream cardstock. Fasten to patterned and orange paper mats with E-Z Dots® Permanent Refillable Dispenser. Use Thin 3D Foam Squares Mix White and position it onto card front. Thread pearl cotton through a button and tie a bow. Attach the button to card with Dodz Adhesive Dots Small.

Now you can use leftover die cut pieces to make two more cards!

Enjoy this World Card Making Day!

Judy

click: Find our World Card Making Day Giveaway Here!

World Card Making Day 2017

Scrapbook Adhesives by 3L®:

Other Supplies: Our Daily Bread Dresden Quilt die; Our Daily Bread Sending My Love stamp; Photo Play Falling Leaves Papers; Orange Patterned Paper; Cardstock: Yellow, Cream; Tsukineko/Imagine Crafts Versafine Onyx Black Ink; Button; Pearl Cotton

Save

Save

Save

Save

Save

Save

World Card Making Day Giveaway 2017!

Celebrate World Card Making Day with Us!

The tradition of the greeting card goes back to the Victorian times. Sending a card with a heartfelt message is still one of the best ways to let someone know you care. Sharing your crafting passion by making cards makes it even more special.


World Card Making Day 2017


Learn how to make a card, find new techniques, and ways to make several cards at once. We have tons of card ideas for every crafter, from beginner to advanced, and for every occasion. You’ll find tutorials and inspiration for scrapbooking and mixed media projects too!

We offer the best adhesives for your crafty endeavors! Stick with us and our talented Design Team, from inspiration to completion.

Halloween Pinterest Board

Halloween on Pinterest

Find and Pin Halloween inspiration on Pinterest

Christmas Pinterest Board

Christmas on Pinterest

Find and Pin Christmas inspiration on Pinterest

To help you get your holiday crafts started, we’ve got an awesome prize for one lucky winner!


Enter to win through the Rafflecopter App. Comments are moderated and will publish as they are approved. One winner will be randomly picked. International entries are welcome.


a Rafflecopter giveaway


STICK with 3L!

Visit our Website and Blog!
Sign up for our Newsletter so you never miss a contest or giveaway!

instagram purple facebook purple pinterest purple twitter purple SAby3L YouTube icon blog purple

Save

Save

Save

Save

Save

Halloween Decor: DIY Monster Frames

Hello! It’s Dana here with a fun budget-friendly Halloween décor project. One of my favorite holidays is Halloween. I thought it would be fun to dress up my mantel this year. I found a pair of inexpensive framed pieces of art at the thrift store that was perfect for this project. With a little bit of paint and some festive embellishments, I was able to create a fun set of monster frames.

Halloween Monster Frame by Dana Tatar for Scrapbook Adhesives by 3LUpcycled Dracula Halloween Frame by Dana Tatar for Scrapbook Adhesives by 3LWhat did these framed pieces of art look like before their spooky make-over?

Upcycled Painted Frames for Halloween by Dana Tatar for Scrapbook Adhesives by 3L

This set of coordinating prints was a great find! I liked the size (10×12 inches) and the frames were in great shape.

Directions:

First, remove the images from the frames and set aside. Next, clean the frames and prime with a coat of gesso. Then, apply bright colors of acrylic paint to the frames and set aside to dry.

Designer Tip: Add interest to a frame by applying more than one color of paint.

Painted Halloween Frame Embellishments and Adhesives by Dana Tatar for Scrapbook Adhesives by 3L

Embellish the frames!

  1. Use Adhesive Lines to adhere plastic bones, in a zig-zag pattern, to the purple areas of the first frame.
  2. Apply Adhesive Dots 3D in a zig-zag fashion along the bottom of the first frame. Press Hot Lime Fragments onto the Adhesive Dots.
  3. Stick 3D Foam Stars along the top of the first frame in a straight line. Sprinkle on yellow glittered flock, press down to adhere the flock to the stars, and then gently shake the frame to remove the excess.
  4. Line the inner edge of the second frame with Extreme Double-Sided Tape. Remove the top liner and press the ribbon onto the adhesive.

Thrift Store Painting Cover Up by Dana Tatar for Scrapbook Adhesives by 3L

Replace the original art. Note: I used Halloween wall clings for my frames. I applied the clings directly over the original art. Comic books, movie posters, or photos of loved ones dressed up for Halloween would also work here!

Upcycled Halloween Monster Frames Finishing Embellishments and Scrapbook Adhesvies by 3L Foam by Dana Tatar

Insert the new artwork into the frames and add finishing embellishments.

The range of 3D Foam is a great way to add an additional dimension to projects. The strong permanent adhesive makes a lasting bond, and the high-density foam keeps it’s dimension.

I used two small  3D Foam Squares to attach a glittery spider to the corner of the first picture. I lined the top half of the second frame with Crafty Foam Tape and slipped a monster hat over the frame.

Halloween Mantle with DIY Monster Frames by Dana Tatar for Scrapbook Adhesives by 3L

My monster frames look great on my mantel! Do you decorate for Halloween? I’d love to know what you add to your décor this time of year. Leave me a note in the comments section!

Thanks for stopping by today!
Dana Tatar

Scrapbook Adhesives by 3L®:
Adhesives Lines
Adhesive Dots 3D
3D Foam Stars
3D Foam Squares White Mix
Crafty Foam Tape White
HomeHobby Extreme Double-Sided Tape 1/4″

Other: Thrift Store Paintings; Acrylic Paint (DecoArt); Hot Lime Fragments (Stampendous); Flock (Martha Stewart); Monster Hat; Plastic Bones; Spider; Wall Clings

Save

Save

Save

Visit our Website and Blog!
Sign up for our Newsletter so you never miss a contest or giveaway!

instagram purple icon facebook icon purple pinterest purple icon twitter purple icon YouTube icon blog subscription purple icon

Creating a Mixed Media Canvas

I’m sharing a mixed media canvas with you today. Hello, everyone, Marilyn here and I’d like to show you how I created this canvas with adhesives from wet, Dual Tip Glue Pen, to dry, Premium Double-Sided Tape, that are available at Scrapbook Adhesives by 3L®.

Creating Mixed Media Canvas by Marilyn Rivera for Scrapbook Adhesives by 3L

Creating my Mixed Media Canvas

Start with paper doilies that I adhered onto the canvas with the Dual Tip Glue Pen. This creates instant textures on the background.

Once the doilies were dry I adhered patterned paper to the canvas using Premium Double-Sided Tape 1/4″.

Tip: to avoid air bubbles, I started from the top to the bottom. For more texture, I stenciled with modeling paste.

Adding Details to my Canvas

To pop up the “my love” chipboard, I used Crafty Foam Tape in White.  Then I added some flowers and buttons that I secured with Dodz Adhesives Dots Medium.

With the Dual Tip Glue Pen, I gave the canvas more textures adhering 3D powder randomly. Then I painted with a light blue acrylic paint.

For the final touch, I adhered some gems with the Dual Tip Glue Pen.

I hope you find some inspiration. Thanks for stopping by, until next time!
Marilyn Rivera

Scrapbook Adhesives by 3L® Supplies:
Crafty Foam Tape in White
Dodz Adhesives Dots Medium

Home Hobby by 3L®
Premium Double-Sided Tape 1/4in
Dual Tip Glue Pen

Save

Save