You are in our US store • Switch to Europe store

Heaven Sent Mini Album with E-Z Runner Ultra Refillable Dispenser

Erica’s back today sharing a baby-themed Heaven Sent mini album featuring the E-Z Runner® Ultra Refillable Dispenser, Extreme Double Sided Tape 1/4″, and 3D Foam Creative Sheets.

Heaven Sent Mini Album by Erica Houghton for Scrapbook Adhesives by 3L

I used the E-Z Runner® Ultra Refillable Dispenser to adhere journaling cards together or  embellishments to the journaling cards.

I also used 3D Foam Creative Sheets to add dimension to some of the journaling cards.

Here’s a look at a few more of the pages inside my album:

I also used Extreme Double Sided Tape 1/4″ to adhere my cover to the front of my album.

Heaven Sent Mini Album by Erica Houghton for Scrapbook Adhesives by 3L

Scrapbook Adhesives by 3L®:
E-Z Runner® Ultra Refillable Dispenser
Extreme Double Sided Tape 1/4″
3D Foam Creative Sheets
Other:
Paper & Ephemera: Prima Marketing
Overlays: Becky Higgins

Thanks for joining me today!
Erica Houghton

Save

Save

Shaker Cards and Crafty Foam Tape!

Good morning! Michele here with a fun little shaker card!  I stamped my image and colored it with Copic markers and Prisma Colored Pencils.  I double cut it with a die cut.

I adhered the acetate behind the “window” using E-Z Squares® Refillable. I popped it up using Crafty Foam Tape. (LOVE This stuff!) While it was still upside down, I added my sequins and seed beads and then added my back panel.

The shaker portion was attached to the plaid paper and the orange card using the Crafty Foam Tape again.  (I love dimension on my cards!)  I tied a skinny satin ribbon at the top.  I secured the knot with a Dodz Adhesive Dots Small.  I thought it would be fun to add mini pom poms to the center! I adhered those with Dodz Adhesive Dots Medium to be sure they didn’t budge!

Thank you so much for stopping by today! Have a great week!

Supplies: Dodz Adhesive Dots Small, Dodz Adhesive Dots Medium, Crafty Foam Tape White, E-Z Squares® Refillable, Stamp: Stampin Up!, Sequins: Darice, Copics, Prisma Colored Pencils, Acetate, Ribbon, Pom Poms, Plaid Paper: Lawn Fawn

Save

Save

Wonderful Scrapbook Page Layered in 3D Foam Squares

Hi there, it’s Stephanie here today and I want to show you a scrapbooking page with a fun little part of layering for which I used the 3D Foam Squares Mix – White and the E-Z Dots® Permanent Refillable Dispenser with E-Z Runner® Micro Refill inside.

I also have a little tutorial for you.

1. Collect paper scraps and washi tapes that match my photo.

2. Layer paper scraps under my photo and secure them with E-Z Dots® Permanent Refillable Dispenser with E-Z Runner® Micro Refill inside. I couldn’t find my Micro Dispenser BUT lucky that all my E-Z Runner Refillable Dispensers are interchangeable with other E-Z Runner Refills! Great, isn’t it?! And worth a mention 🙂

3. BTW the E-Z Runner® Micro Refill is perfect to adhere all those small scraps.

4. This is my finished layering part. I layered 8-10 paper scraps behind the photo.

5. Next to prepare my background. I used a watercolor paper with acrylic paints and stamps. I painted the background light blue and made some marks in other colors. Then I stamped the flower stamp (from Hero Arts).

6. I adhered two little stripes of washi tape.

7. Then position the photo and adhered it with the E-Z Runner® Permanent Strips Refillable Dispenser

8. Add finishing touches with other tapes and stickers.

9. Lastly, I adhered a die cut with 3D Foam Squares Mix – White

Thanks for visiting us today! Have a great weekend!
Stephanie

Scrapbook Adhesives by 3L® Supplies:
3D Foam Squares Mix – White
E-Z Dots® Permanent Refillable Dispenser
E-Z Runner® Micro Refill
E-Z Runner® Permanent Strips Refillable Dispenser

Ruffle Border Tutorial with Extreme Double-Sided Tape

Hey crafty friends! Tracy McLennon here with a fun little tutorial using Extreme Double-Sided Tape 1/8″ and my favourite go to embellishment, ribbon. I thought I would create a glitzy layout perfect for fancy prom photos or even a wedding photo. Here is all you need to know.

Here are the basics of what I started with to create my layout, paired with the Yes Please Collection from My Mind’s Eye.

This ruffle ribbon border is SO easy to do, and can be done with all sorts of ribbon, lace and trim. Once I had the base of my layout created, I adhered a strip of my Extreme Double Sided Tape 1/8″ across the entire layout. I also added a small piece of the same adhesive on the back side of my layout on both sides of the strip that you laid down for the border. Remove the adhesive covering from one of the strips on the back side and attach your piece of ribbon.

Flip to the front side and remove the adhesive covering from the long strip across your layout. Then I simply took the ribbon and tapped it onto the adhesive in a tight ruffle pattern. If you see your ruffle is going off kilter…not a problem, just pull the ribbon up and re-ruffle.

I added a second strip of the Extreme Double-Sided Tape on top of the ruffle I just created to add the sequins trim.

My ribbon ruffle is pretty thick, so when it came to attaching my matted photo I used my Crafty Foam Tape. I actually doubled it, 2 layers of the foam tape at the top and bottom on my photo. Another classic looking favourite of mine are Creative Photo Corners.

Thanks so much for stopping by!

Scrapbook Adhesives by 3L®:
E-Z Runner® Permanent Strips
Creative Photo Corners Mix Pack
Crafty Foam Tape Black
Extreme Double-Sided Tape 1/8″
Other:
My Mind’s Eye: Yes Please Collection
May Arts Ribbon: Gold Ribbon and Sequins Trim
American Crafts: Thickers Alpha Stickers Gold
Cream and Black Cardstock

Save

Save

Beach Babe | Self-Laminating Tag on a Scrapbook Layout

Hello everyone, Jana here with a fun new layout using something fun – Self-Laminating Tags with Loops. This project is about my little boy when he was 4 and having a very great time on the beach.

I tried something new so I chose the Self-Laminating Tags with Loops and OH MY, I am totally in love how this turned out! The color from the tag is so perfect for this page!

Sometimes you don’t know what to use and then you have an idea that pops into your mind…I am so happy about this one! I also added some texture with some 3D Foam Party Shapes! I used sand…a nice detail and it’s sticky enough!

I used 3D Foam Squares and my favorite Crafty Foam Tape for dimension. For this Project I also used the E-Z Runner® Ultra Refillable Dispenser

There is also a little Process Video for you to watch

Thanks for stopping by today

Scrapbook Adhesives by 3L®
E-Z Runner® Ultra Refillable Dispenser
Crafty Foam Tape
3D Foam Squares – White Small
3D Foam Party Shapes
Self-Laminating Tags with Loops
Other Supplies:
Pink Paislee, Crate Paper, Dear Lizzy/American Crafts

Christmas in July Made Simple with Extreme Double-Sided Tape

Hi everyone, Christine here today with a Christmas in July project.  Every year I tell myself to start my Christmas ‘makes’ earlier, and this year I may have just listened! I’m making these adorable little bags to fill with gift vouchers/cards.

Christmas in July by Christine Emberson

Let’s Get Started!

The bag is two die cuts.  To ensure they stay affixed I used Extreme Double-Sided Tape 1/2″.  This is permanent and really strong. The red vinyl backing is easy to remove.

The decoration for the front of the bag is layered die cuts. Simply affix them with 3D Foam Squares White Small and 3D Foam Squares White Regular.  These magical squares come in a mixed pack too!

All ready for Christmas with the decoration in place and the little printed sentiment embellishment.

Now I just need to make a dozen more…

Thanks for stopping by today and don’t forget to check out all the great products on the website.

Christine

Products used:
3D Foam Squares White Small
3D Foam Squares White Regular
Extreme Double-Sided Tape 1/2″
Others:
Dies: Spellbinders® Paper Arts (Bag n Tag It, Sapphire Victorian range, Layered Poinsettia)
Kraft, Ivory, Green, Red Cardstock, Gold Foil Cardstock
Gemstone, Sentiment embellishment

Save

Save

Birthday Bag with Premium Double-Sided Tape

Good morning! Michele here with a birthday bag that is perfect to fit a small sized gift or gift card! To WEAR YOUR ADHESIVES ON THE OUTSIDE, I accented the bag with glitter and our Premium Double-Sided Tape in a combination of sizes for that fabulous sparkle! What do you think?

Birthday Box by Michele Kovack for Scrapbook Adhesives by 3L

Let me show you how…

  1. Die-cut bag die from manual die-cutting machine. Adhere sides with Dual Tip Glue Pen.
  2. Use two layers of Premium Double-Sided Tape 1″ (under BIRTHDAY). Sprinkle light blue glitter and attach pink panel to the front.
  3. For extra interest, add Premium Double-Sided Tape 1/4″ and Premium Double-Sided Tape 1/2″ vertically. Sprinkle light blue to the Premium Double-Sided Tape 1/4″ and clear coarse glitter to the Premium Double-Sided Tape 1/2″.
  4. Die-cut leaves and flowers dies from manual die-cutting machine and layer them using Adhesive Dots Medium. Tuck in silk ribbon with silver string under the flower with another  Adhesive Dots Medium.
  5. Add rhinestones and sequins using Adhesive Dots Mini to secure.
  6. Adhere the entire pink panel to the box with the E-Z Runner® Permanent Strips.


Birthday Box by Michele Kovack for Scrapbook Adhesives by 3L

Birthday Box by Michele Kovack for Scrapbook Adhesives by 3L

Birthday Box by Michele Kovack for Scrapbook Adhesives by 3L

This was such a fun birthday box to make!
Thank you so much for stopping by today!

Supplies:

HomeHobby by 3L®
Dual Tip Glue Pen
Premium Double-Sided Tape 1″
Premium Double-Sided Tape 1/4″
Premium Double-Sided Tape 1/2″

Scrapbook Adhesives by 3L®
E-Z Runner® Permanent Strips Refillable Dispenser
Adhesive Dots Medium
Adhesive Dots Mini

Other:
Silver Stickles Glitter Glue; Ribbon; Silver String; Patterned Paper; Tonic Glitter

Embroidery Hoop Wreath Tutorial | Choosing the Best Adhesive for the Job

Hello everyone! Vicki here today to share a fun Summer project using an embroidery hoop for your wall or front door. I’ll show you how I use specific Adhesives that I find work best for the job at hand.

I have been loving all the fun projects I have been seeing using these large wood embroidery hoops.  I have created projects with them before but this one is a big different.  It turned out really cute.

Summer Loving Embroidery Hoop Wreath Tutorial by Vicki Chrisman for Scrapbook Adhesives by 3L

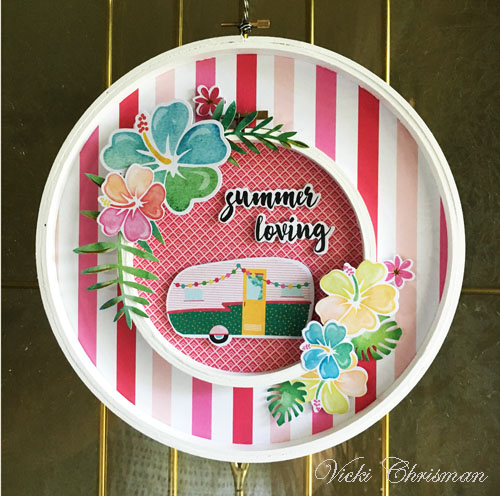
How to Make the Embroidery Hoop Wreath

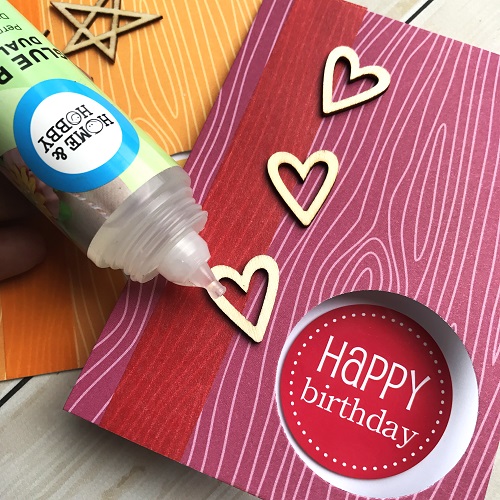
The HomeHobby Dual Tip Glue Pen worked great for this project. The wide tip worked around the back side of the hoops to add the paper backgrounds. For this, I painted my hoops white before I started. Once the glue was dry, all I had to do was trim away any excess paper.

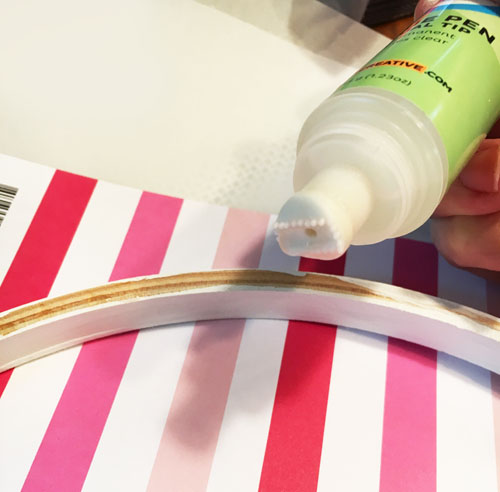
I popped the lid on and flipped it around to use the fine tip on the other end. It worked perfectly for these smaller areas.

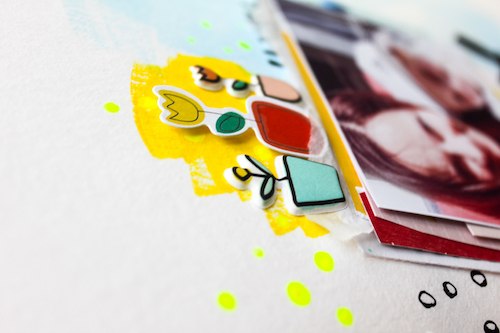
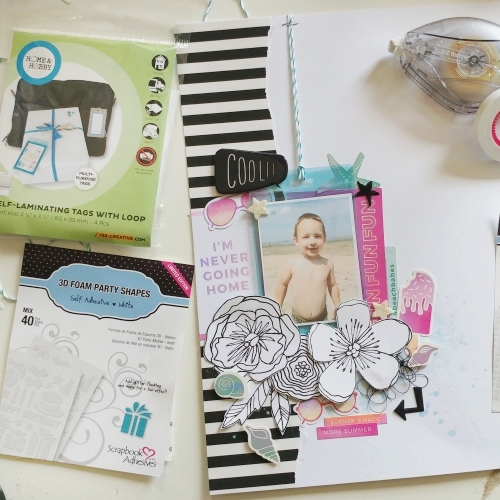
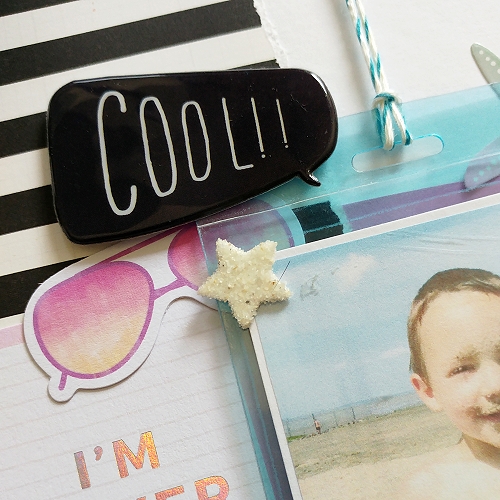
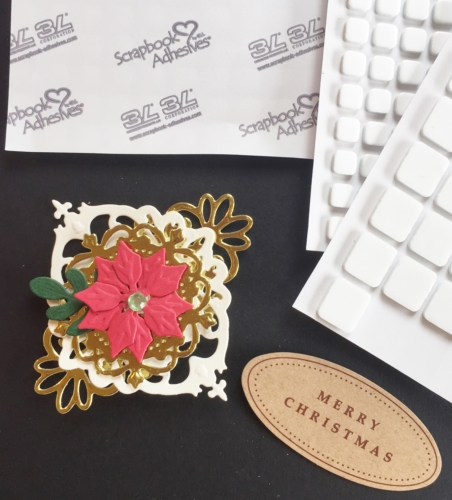
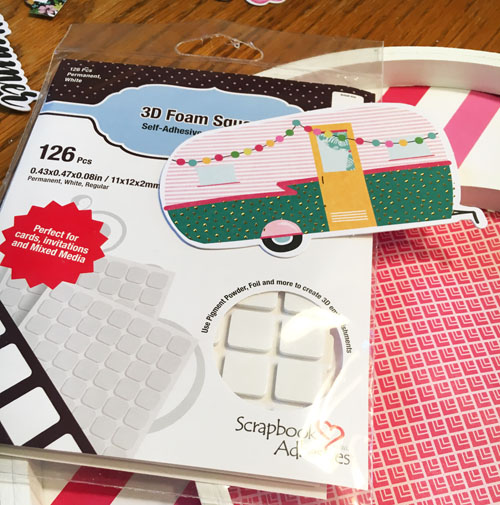
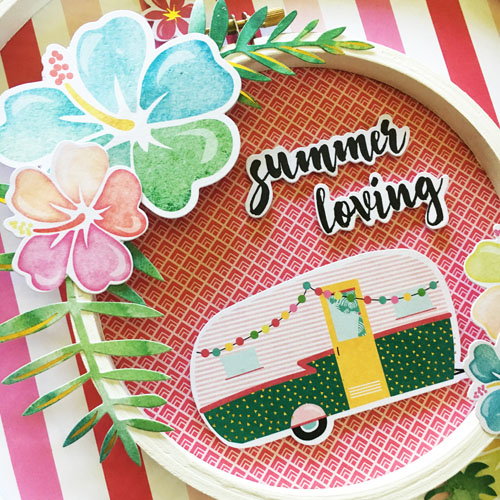
Flower and leaf pieces will be added around the edge of the inside hoop.  To make them look layered and have dimension, I used 3D Foam Squares White Regular.

For the ephemera pieces that I am placing directly down to the background, I used my E-Z Runner® Grand.

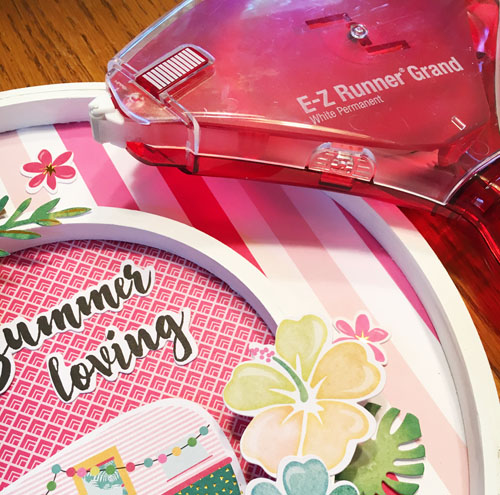
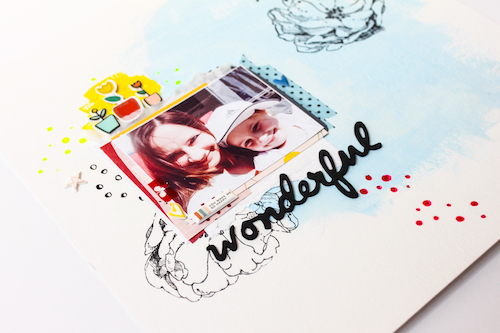
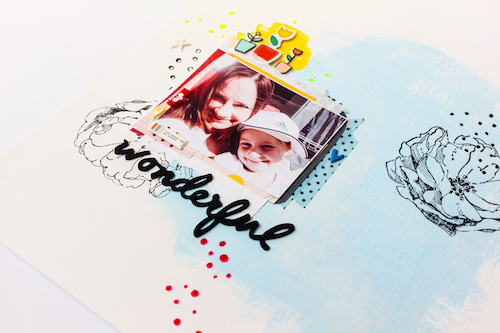
You can see in the photo below, that by layering and adding 3D Foam Squares to some pieces of ephemera, while leaving other pieces flat on the background sheet, really creates a dimensional look.

This project came together fairly quickly. You could create one for every season! I hope you are inspired to make one yourself.

Thank you so much for stopping by!
Vicki Chrisman

Scrapbook Adhesives by 3L® Supplies:
E-Z Runner® Grand Permanent Strips Refillable Dispenser
3D Foam Squares White Regular
Dual Tip Glue Pen
Other:
Fancy Pants Designs: Hello Sunshine Collection

Find more DIY Home Decor ideas on our Pinterest Board!

Visit these blog posts for more creative summer ideas:

Rolled Magazine Cards with 3D Foam Creative Sheets and Frames

Hello friends! I have had an amazing time as a Guest Designer the last 3 months. For my final project, I created a fun and colorful card set using rolled magazine pages and 3D Foam Frames + 3D Foam Creative Sheets.

Rolled Magazine Cards by GDT Dana Tatar for Scrapbook Adhesives by 3L

I took a break from the Summer heat and used up some of my stash to create these funky cards. The selection of dry adhesives is amazing and I used four different types here to create dimension all while keeping my hands clean and avoiding drying time.

I cut, folded, and layered cardstock for two card bases, securing the paper with an E-Z Runner® Permanent Strips Refillable Dispenser. Next, I added a 3D Foam Frame to the front of each card, which I then covered with glitter.

I rolled up magazine pages and secured them with a strip of Premium Double-Sided Tape 1/4″. Then, I die-cut a heart and butterfly from a 3D Foam Creative Sheet. I pressed the rolled magazine pages onto the 3D die cuts, trimmed the excess paper from the edges, and stuck them to the front of the cards. I finished each card with a layered cardstock sticker.

I hope I have inspired you today! If you’ve enjoyed my projects, you can find more of my work on my blog, They Call Me Tatar Salad.

Scrapbook Adhesives by 3L® Supplies:
E-Z Runner® Permanent Strips Refillable Dispenser
3D Foam Frames
3D Foam Creative Sheets
HomeHobby Premium Double-Sided Tape 1/4″
Other Supplies:
Cardstock (American Crafts); Patterned Paper (Quick Quotes); Glitter (Pink Paislee); Chipboard Stickers (Twitter Pop); Magazine Pages

30 Minute Birthday Card Set with HomeHobby Dual Tip Glue Pen

Happy Friday + Summer Break! It seems like we haven’t had time to slow down at all. With three kids always being invited to birthday parties, I needed to refill my stash quickly over the last couple weeks. I have an idea using Dual Tip Glue Pen to create a card set that only took about 30 minutes to complete. Perfect for boys or girls and easily customizable with what you have on hand.

First off I gathered my items. Here are all the adhesives plus the cards I wanted to use and washi tapes to coordinate and stickers. My go to adhesive for wood veneer is always the Home and Hobby Dual Tip Glue Pen. Also when using simple stickers I add 3D Foam Squares – White Regular to raise them up for some dimension.

Tip: When punching multiple items stack them so each one is the same. I did this for all four card bases.

Next I used four 3D Foam Squares – White Regular on the back of each circle “happy birthday” sticker.

After adding a simple strip of coordinating washi tape I then used the fine tip of the Dual Tip Glue Pen to adhere the wood veneer pieces.

I love anything rainbow and really am happy how this set turned out in the end. I’ll be making more to keep my stash full with other sentiments or break out some stamps to really have some fun.

Thanks for checking out my birthday card set in 30 minutes!
Latrice

Scrapbook Adhesives by 3L® Supplies:
3D Foam Squares – White Regular
Home Hobby Dual Tip Glue Pen
Other:
SRM Stickers, Lawn Fawn cards, various washi tape, Wood veneer from (Studio Calico, Lawn Fawn and other various companies)