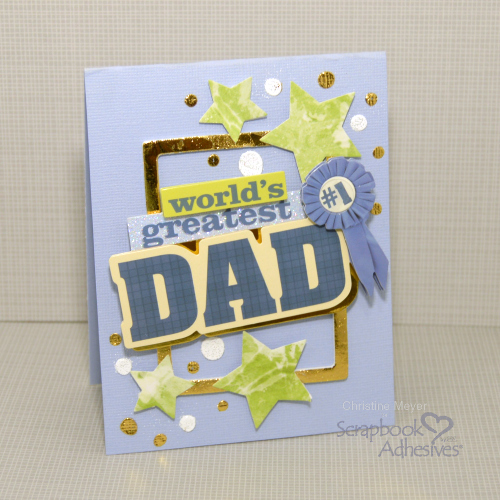
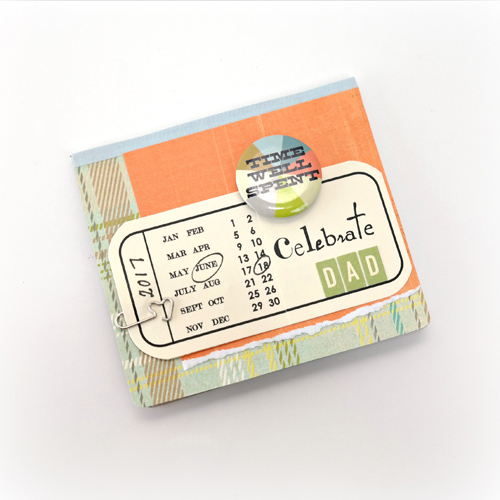
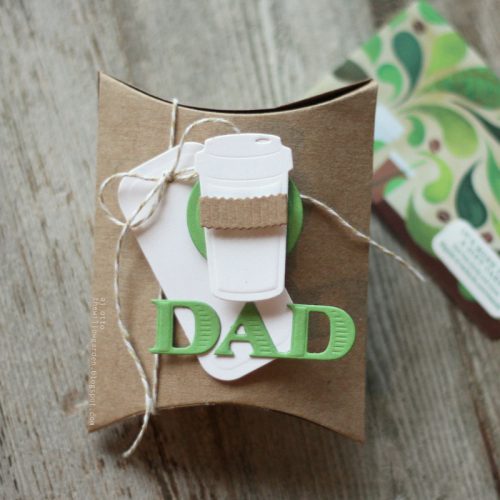
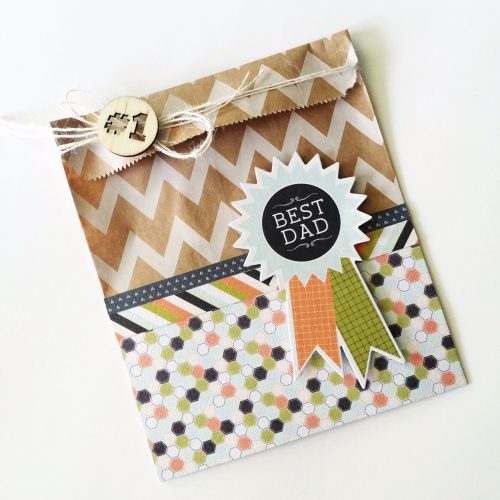
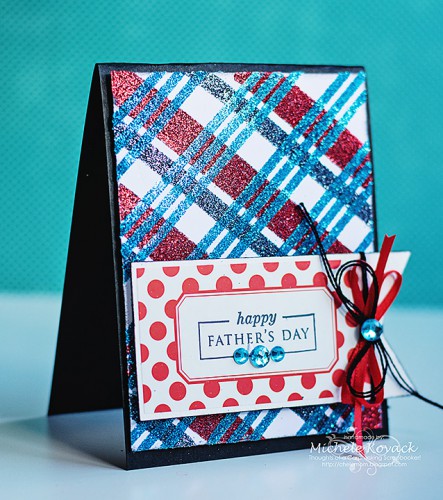
We’ve collected some of our favorite Father’s Day craft ideas right here on the Scrapbook Adhesives by 3L® Blog! Our talented designers have provided you with inspiration and some tutorials to create something masculine for DAD that he’ll love!
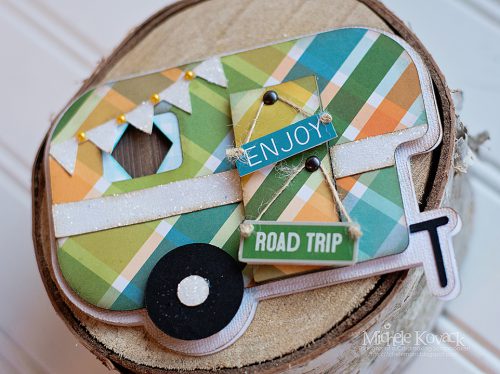
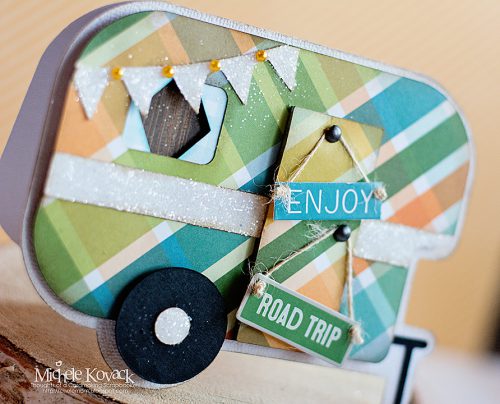
Good morning! Michele here with a fun shaped camper card!
Making the Camper Card
To cut the camper shape, I used my Silhouette. Depth was added to the windows and door using Crafty Foam Tape White. I wanted to add a bit of sparkle, so I placed a thin layer of glue using the Dual Tip Glue Pen and then sprinkled glitter over it.
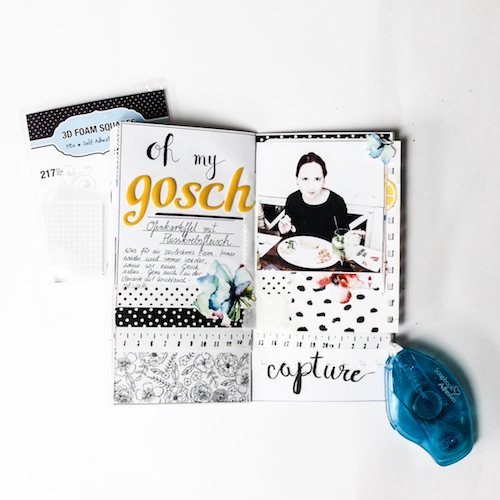
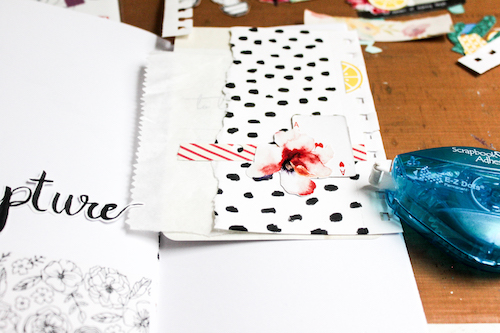
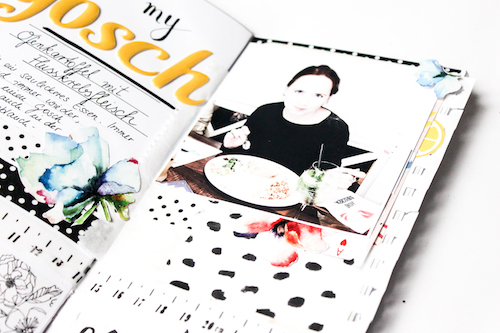
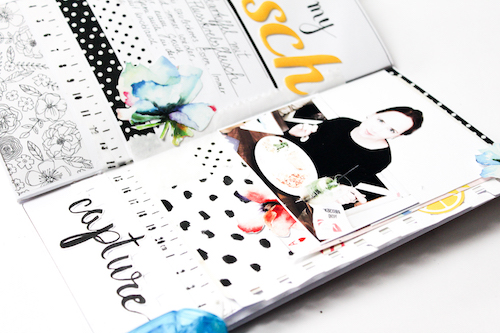
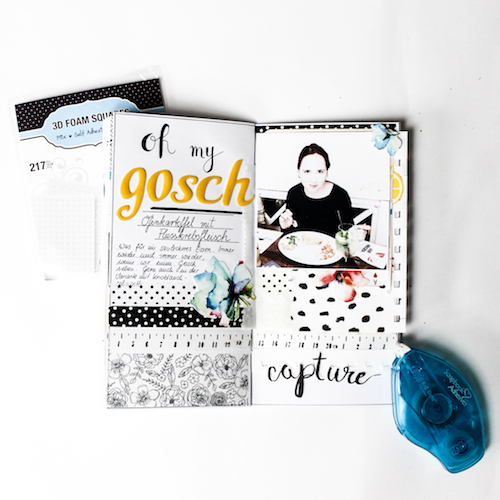
This page is about my love for special sea food from “Gosch” Germany. It’s a native company known for delicious dishes with fish from North Sea.
My first step was to choose some paper scraps, ephemeras and a photo. I adhered a paper base for my photo with the E-Z Runner® Ultra Refillable Dispenser onto my right page of the Traveller’s Notebook. The I added my photo and some paper scraps and washi tapes on the left page. I added some flowers with the 3D Foam Squares Mix White for decoration and of course my title and journaling.
It’s a fun way to remember those moments. You can also use your scraps and it goes very quickly.
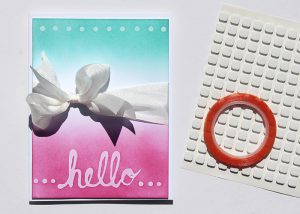
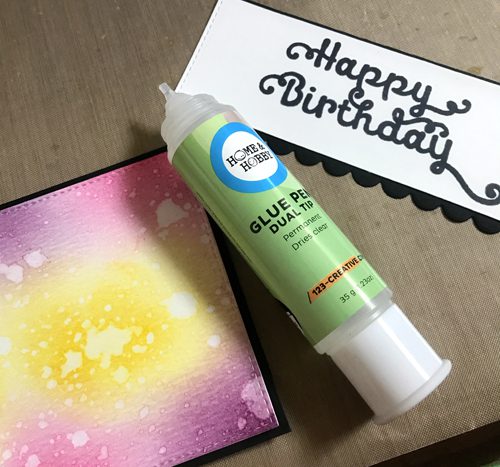
Today I thought I would share a quick and easy resist technique, great for cards or scrapbooking. The good news is, you might even have everything you need for this tutorial is in your craft stash already!
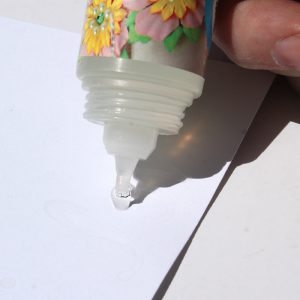
I started with a piece of white cardstock cut to 4 x 5.25 inch. To be honest I had a few of these cut and tried a few different designs. To start, you will want to put a little pressure on the Dual Tip Glue Pen tube to get out any bubbles. Keeping that pressure, you can now start writing or drawing. If you do get any bubbles, you can try popping them with a pin. Now let dry. I let this happen naturally, instead of using a heat gun. You don’t want to move your image.
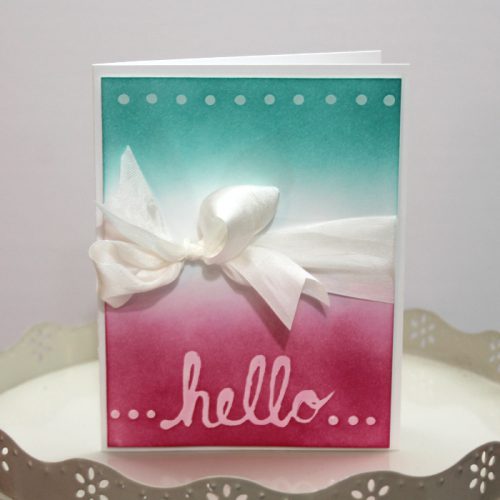
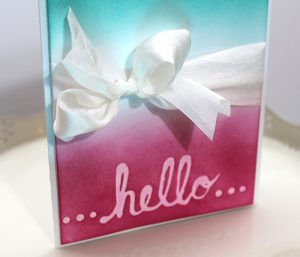
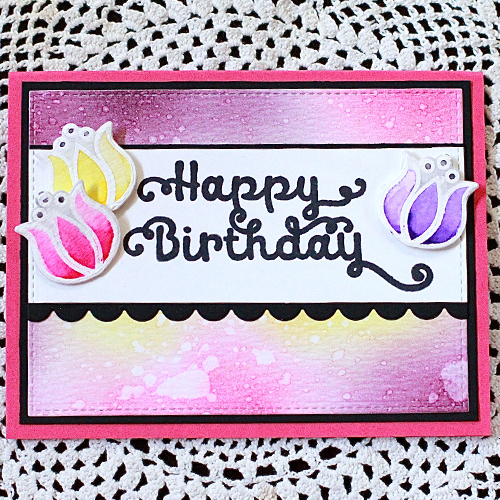
The image below shows my design with colour. I added dots of Dual Tip Glue Pen at the top and bottom of the card, as well as the sentiment.
Once your image is dry, then you can start the blending process. For this card I wanted the colour to emulate the popsicle summer treat we have all tried at least once. With my trusty blending tool I started at the top with the teal, and the bottom with the pink. Starting at the edges a little darker and blending inward getting lighter.
The dried Dual Tip Glue Pen adhesive resists the ink beautifully. You can use a tissue and wipe off any access ink residue left behind.
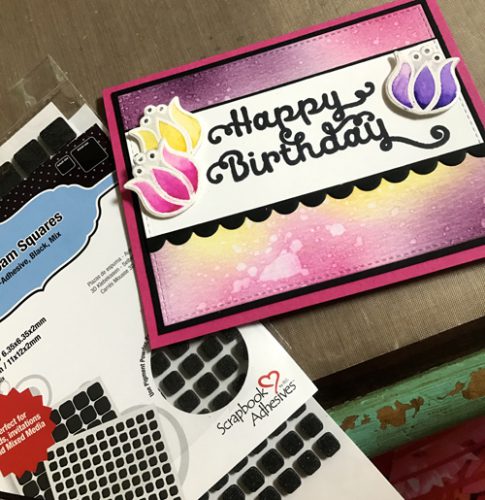
Once I finished blending I then added my large silk ribbon bow. I added a little Extreme Double Sided Tape 1/8″ to the back of the cardstock to keep the ribbon in place. I then added 3D Foam Squares White Small to the back and adhered it to my plain cardstock card base. Then I tied my bow in front.
Voila! A sweet and simple card that is sure to brighten spirits.
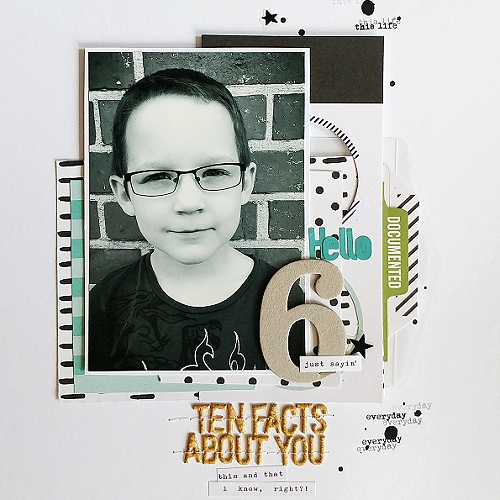
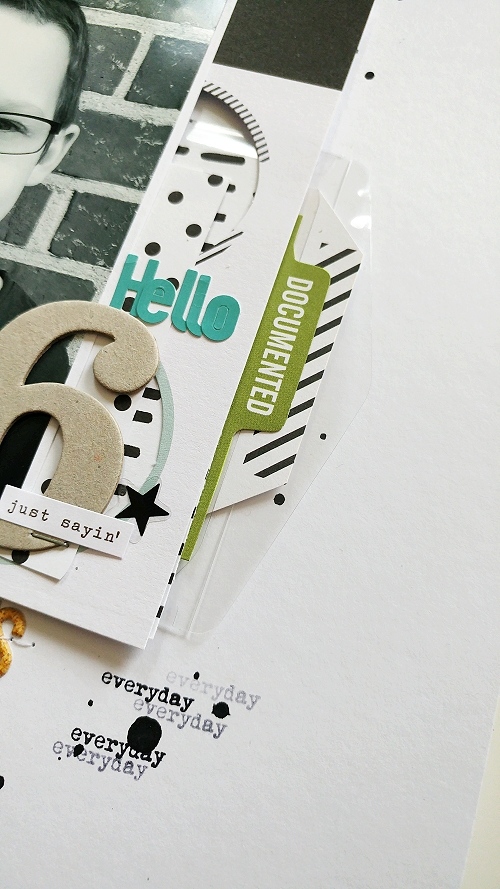
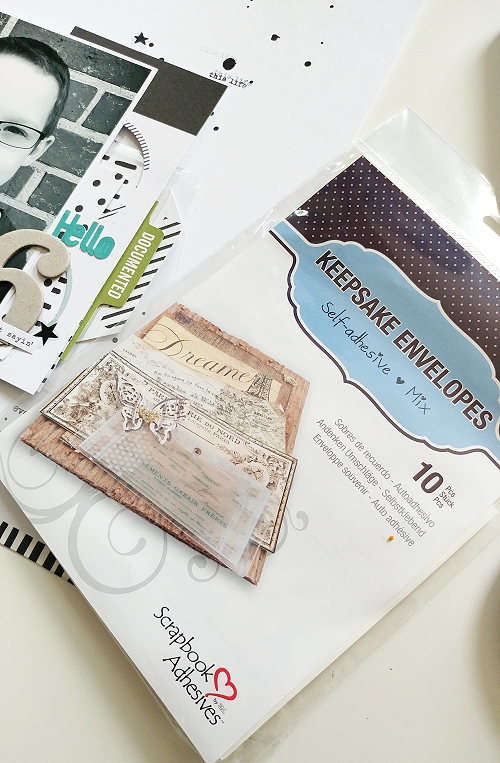
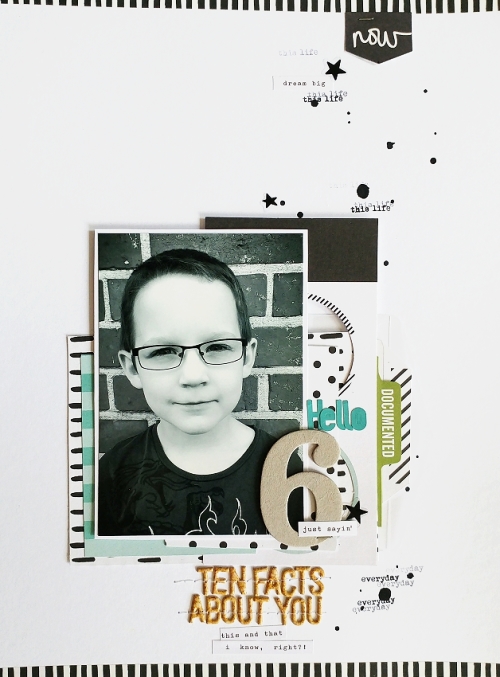
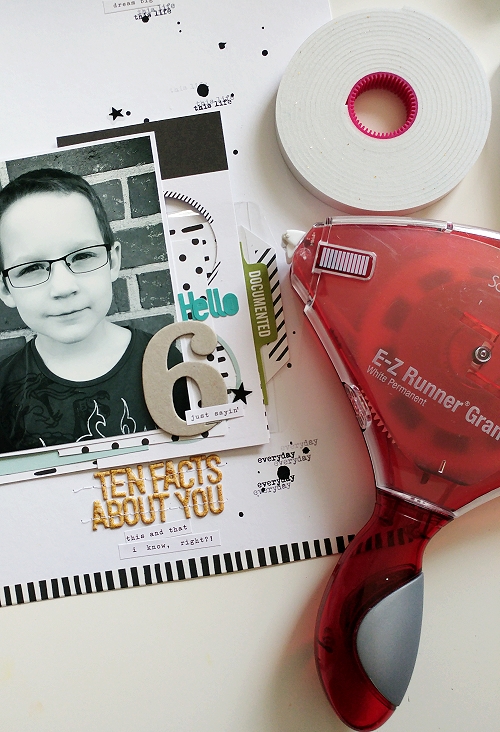
Hi everyone, Jana here with a new project! I had an idea of using one of the Keepsake Envelopes Mix to hide my journaling and to fill it with some random facts about my little one at 6.
I love to use my stash of some stickers and chipboard leftovers. With my E-Z Runner® Grand Dispenser, I layered together pieces and added one of the Keepsake Envelopes Mix as one of my layers – I don’t need to close it (it’s easier to get the cards out)
I also used some Crafty Foam Tape White behind my photo – just for the upper part of it. Because of all the layers of PL cards and the Keepsake Envelope, I needed a bit of dimension behind it!
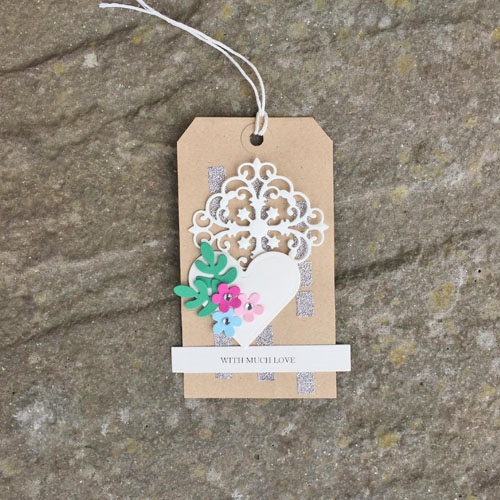
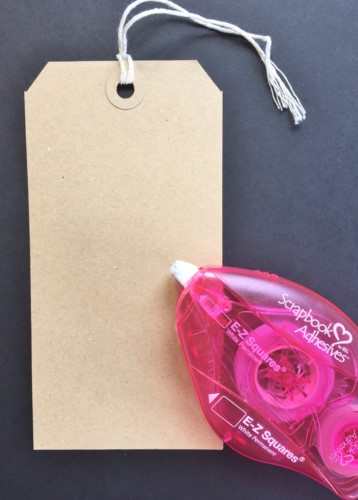
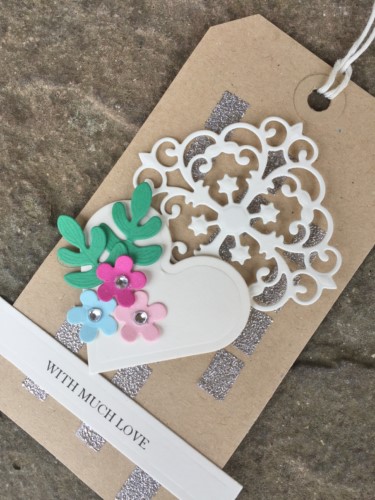
I selected a general purpose luggage tag and E-Z Squares Refillable Dispenser. NOTE: dispenser is refillable to match ANY of the other E-Z adhesive refills – they are all interchangeable.
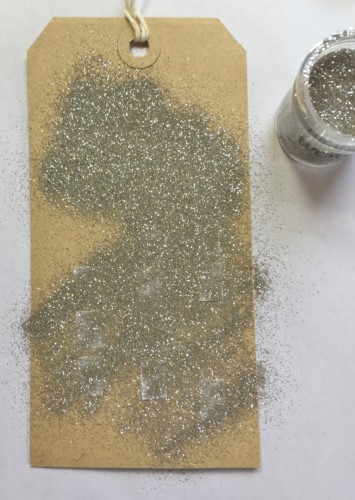
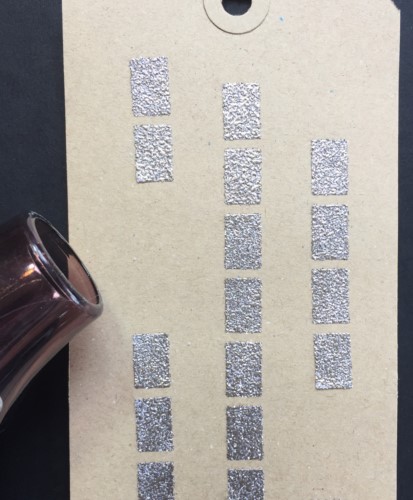
I applied the squares vertically but you could design any pattern you wish.
I then applied embossing powder. Tapped off the excess.
Set with a heat gun. I love the metallic look, like little strips of silver metal in a row!
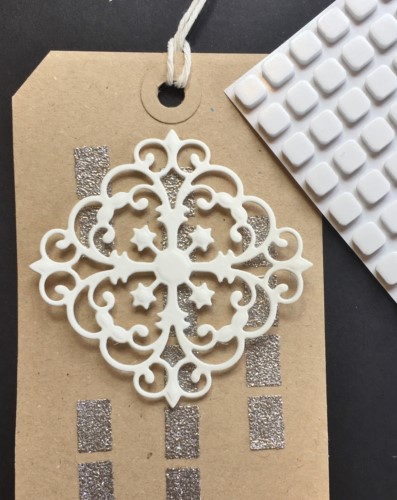
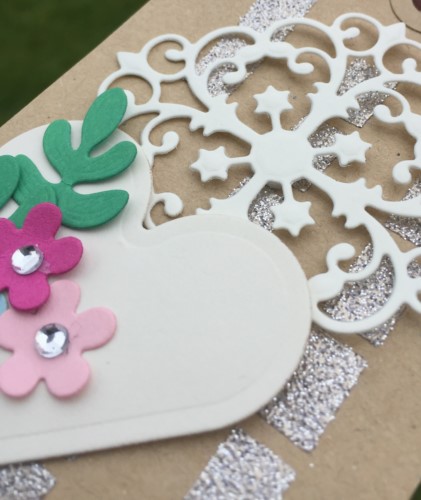
I raided my die cut box, all odd pieces that I cannot throw away!
All the die cuts in place, added a sentiment and gemstones.
Here you can see a little more of that sparkly background.
Always a good idea to have supply of tags to hand, whether you are attaching them to a gift, flowers or a special bottle of something!
Thank you for joining me today and don’t forget to check out the superb products used via the links.
Products used: Scrapbook Adhesives by 3L®: E-Z Squares Refillable 3D Foam Squares – White Mix Other:
Spellbinders® Paper Arts: Classic Hearts, Sapphire Victorian, Flowers and Foliage Etched Dies
Luggage Tag; Ivory and Various Colored Card; Gemstones
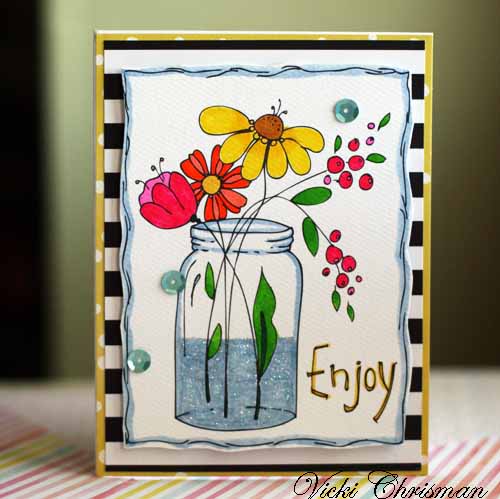
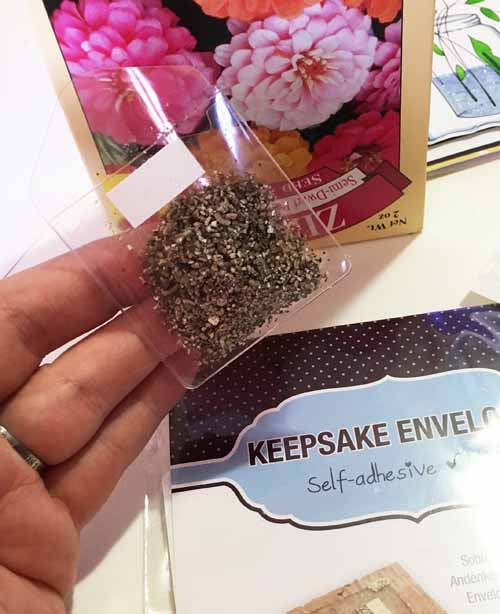
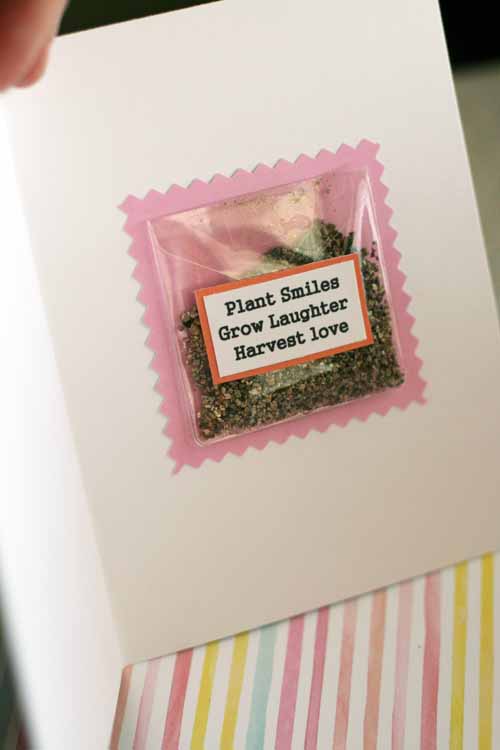
Hello friends! Vicki here today to share with you a fun Enjoy card with a little surprise inside. Who doesn’t love flowers?! Even if you don’t have a green thumb, anyone can toss some seeds in the ground and get a beautiful bounty in return. Since Spring is here, what better time to send a little card. One with a little bit of fun inside.
I used a smaller Keepsake Envelope to add some flower seeds to the inside of the card. I love that there is a variety of sizes to choose from. This one was the perfect size for my card.
It’s sticky backed, so all I had to do after adding the seeds, is peel of the back and add it to the pink paper I planned to add to the inside of the card.
After I had colored the image for the front of my card and matted it, I added it to the card with Crafty Foam Tape.
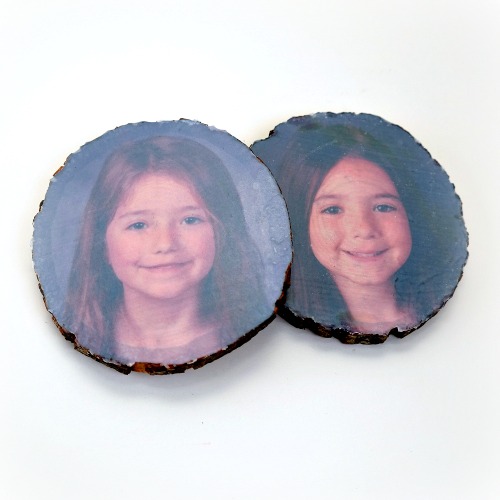
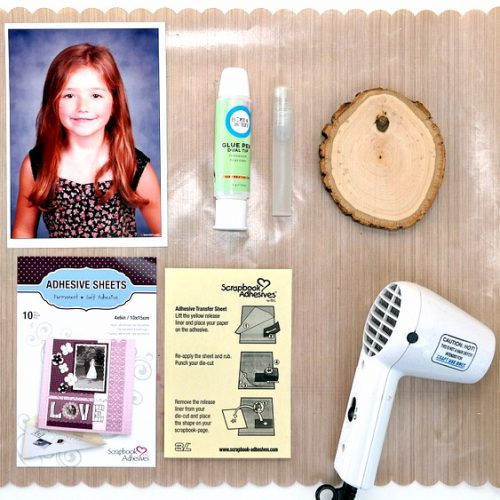
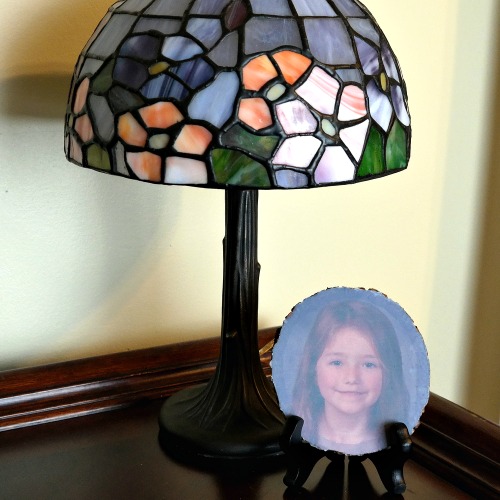
Hi friends! Dana Tatar here with you today sharing my tutorial for how to transfer photos onto a wood slice. I’m always looking for creative ways to display photos in my home. These wood slice photo plaques are such a fun way to add a rustic accent, with a bit of a modern twist, to any decor. I used 4 x 6″ Adhesive Sheets and a Dual Tip Glue Pen for this project.
Step 2: Remove the yellow liner from the Adhesive Sheet. Place the Adhesive Sheet onto the wood slice, adhesive side down, and press to seal.
Step 3 (Optional): Warm the Adhesive Sheet with a heat tool. Note: I found that a little heat helps transfer the adhesive more completely onto the uneven and rough surface of the wood.
Step 4: Rub and lift the Adhesive Sheet backing liner to transfer the adhesive to the wood slice.
Step 5: Press the wood slice onto the 5 x 7″ Ink Jet Photo. Press down to seal.
Step 6: Flip the wood slice over so that the photo paper is facing up. Distress the photo paper with sand paper. Note: This distressing technique helps the water soak into the photo paper which is necessary for removal. Scoring the photo paper with scissors also works, but may damage the photo.
Step 7: Spray the photo with water and let soak. Carefully peel off the top layer of photo paper.
Step 8: Again, spray the photo with water and let soak. Carefully rub the wet paper from the photo. Repeat this process until the photo is visible.
Step 9: Tear away the excess photo paper from the wood slice. Note: The wet photo paper is easy to remove with the edge of a fingernail and downward pressure.
Step 10: Apply Dual Tip Glue Pen to the photo and smooth with a finger. Let dry.
I’m displaying my photo plaques on small stands. Try attaching mounting hardware to the back of the wood slice to create a wall hanging or glue on a magnet and stick it to the fridge.
These adhesives, are easy to use, non-toxic, acid free, and wash from hands and clothes with warm water, which makes this a safe project for school-aged children with adult supervision. Photo plaques make a great gift for family, friends, or a special teacher or coach.
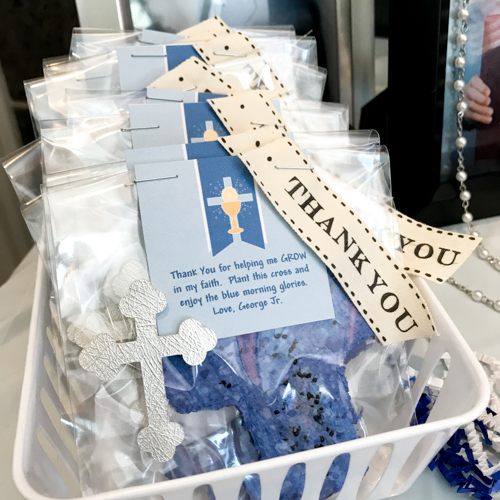
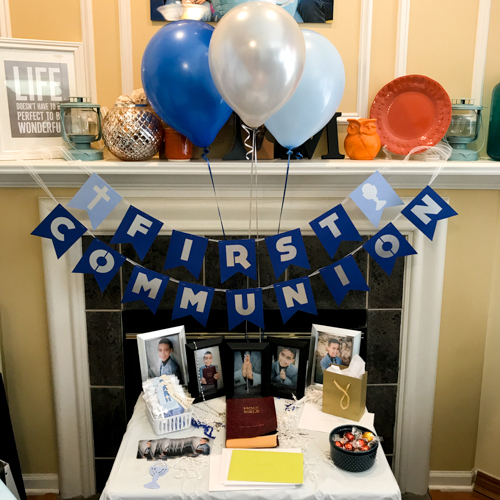
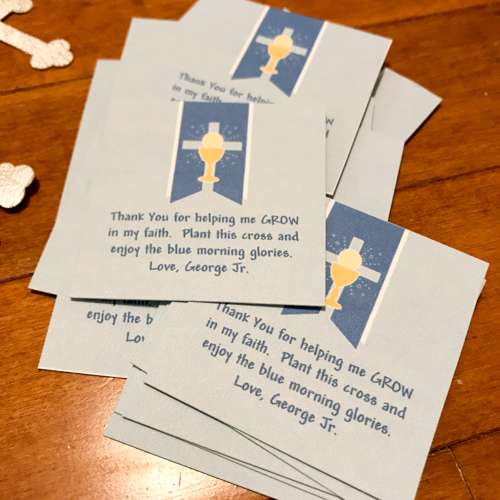
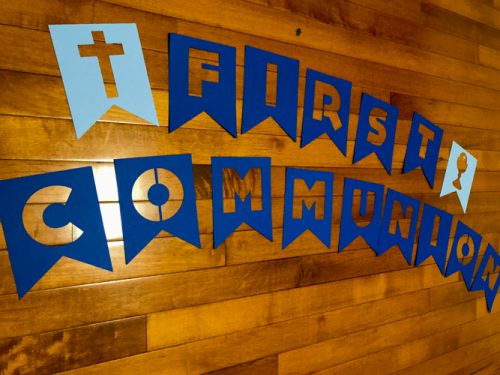
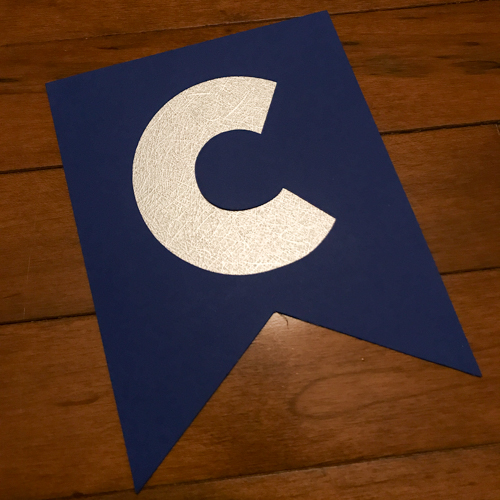
Hey there crafters! Latrice here with a fun and fast idea for party favors along with a banner idea. I love party planning especially when creating custom pieces for the decor and for the guests. Last weekend my son took a big step and had his first communion. I found myself preparing last minute details for the party, but came up with two projects that really made it special.
I had been on Pinterest to see how to make seeded paper for a favor. After making the fun seeded paper crosses I needed a cute way to package them up. I also needed a statement piece and created a simple banner design to hang above the table area. Here is what I came up with.
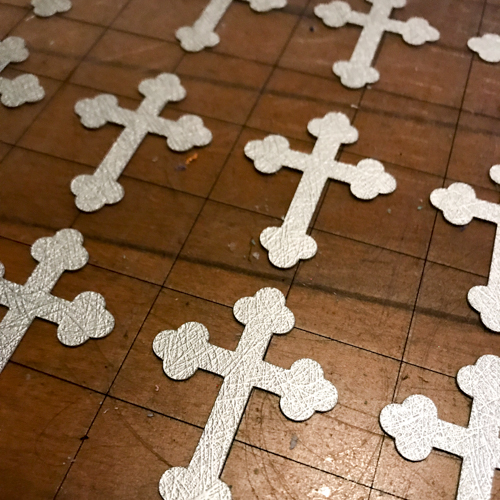
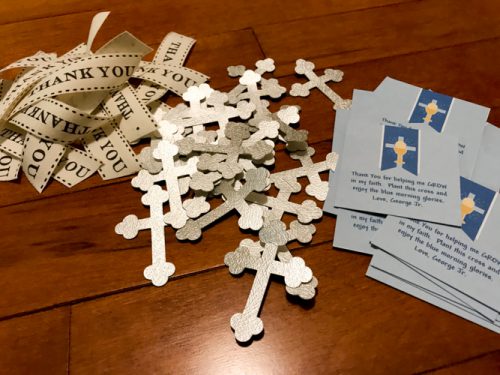
My first step was the cut out small crosses using the same silver paper I used on the banner. I cut a bunch out at once using my Silhouette.
Next I created a small thank you message and printed it onto some white cardstock. The message reads “Thank you for helping me GROW in my faith. Plant this cross and enjoy the blue morning glories. Love George Jr.” Let me tell you our family was in love with these. I chose this flower to keep with the blue and silver colors of the party.
The ribbon I chose is from May Arts and was the perfect finishing touch to this favor. Time to assemble.
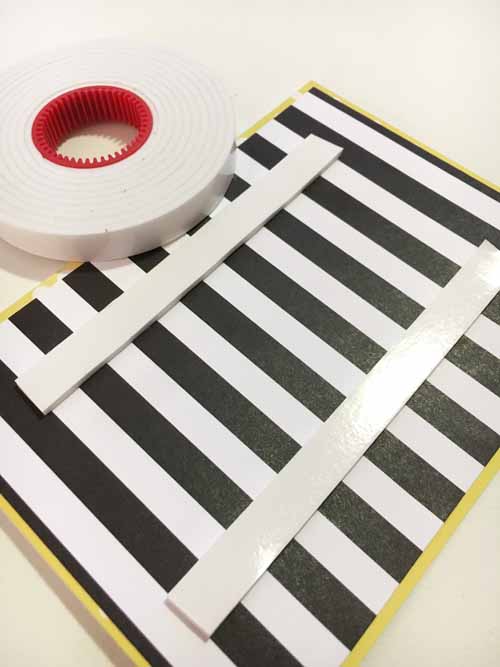
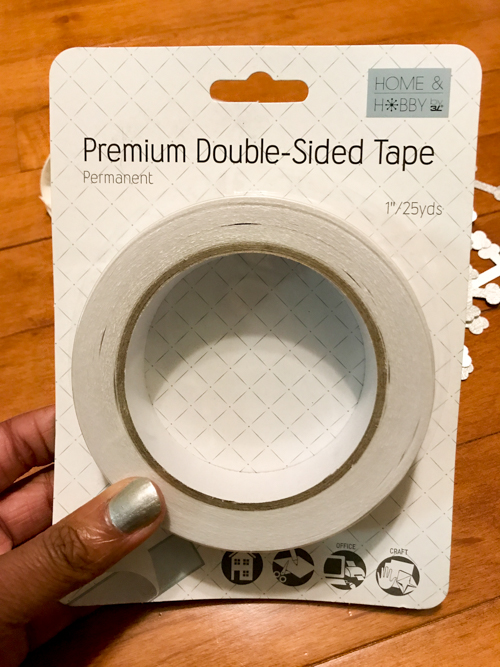
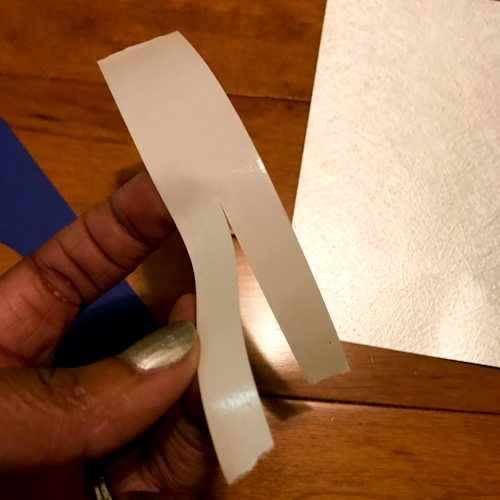
I lay all the pieces out for both projects and got to work like an assembly line. The banner pieces were backed with silver cardstock using strips of Premium Double-Sided Tape 1″. I love how easily this tape tears or cuts. It made adhering the pieces a breeze. I use the 1″ and just cut it to the size I need.
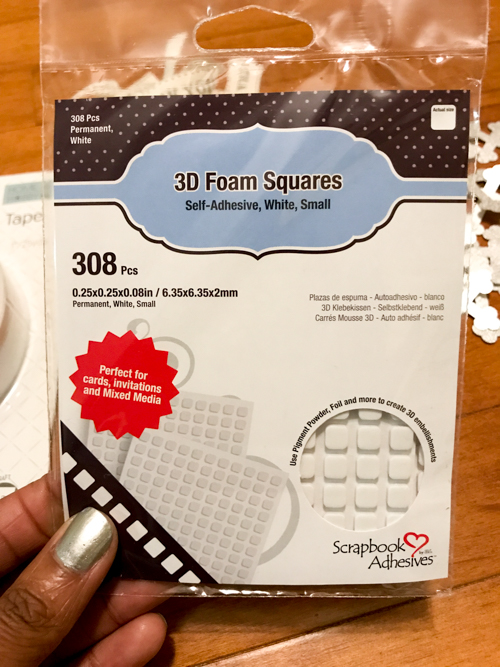
For the mini crosses the 3D Foam Squares- White, Small were the perfect size! I placed one on each end of the small cross to add to the favor packaging.
I finished the favor and banner off with ribbon. The favor pieces were stapled and placed in a small basket for guests to take.
I can’t wait until the boys birthday next month. I haven’t decided on what type of party, but I will for sure be crafting something fun. Thanks for stopping by today! I hope you all have an amazing Mother’s Day and weekend.
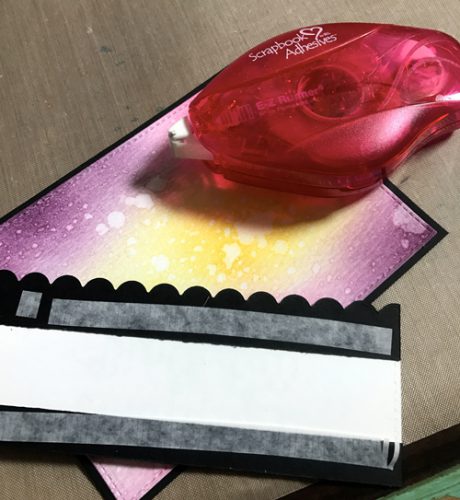
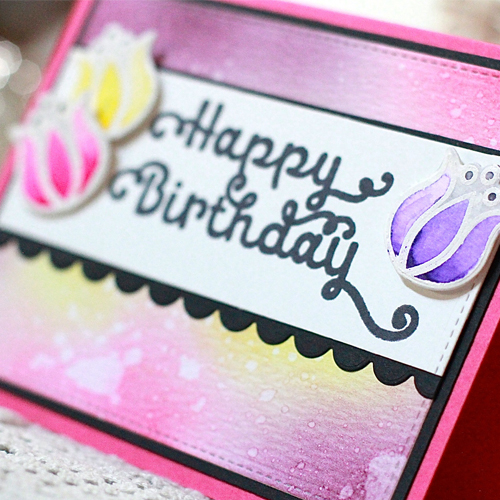
I used Dual Tip Glue Pen (a favorite of mine, if you couldn’t tell! It dries CLEAR! ) to adhere the black card stock strips behind the sentiment.
I used another favorite of mine, 3D Foam Squares to adhere the flowers around the sentiment. I double them up on the pink flower so it stood out a bit more and wasn’t laying flat on the yellow one.
Products Used:
Scrapbook Adhesives by 3L: Dual Tip Glue Pen 3D Foam Squares Black Mix E-Z Runner® Permanent Strips Refillable Dispenser Others:
Stamps and Dies: CAS-ual Fridays (flowers and sentiment) and My Favorite Things (scallop border die and rectangle stitched layer); Cardstock and Inks: My Favorite Things; Zig Clean Color Real Brush Pens; White Embossing Powder; Sponge; Spray Bottle