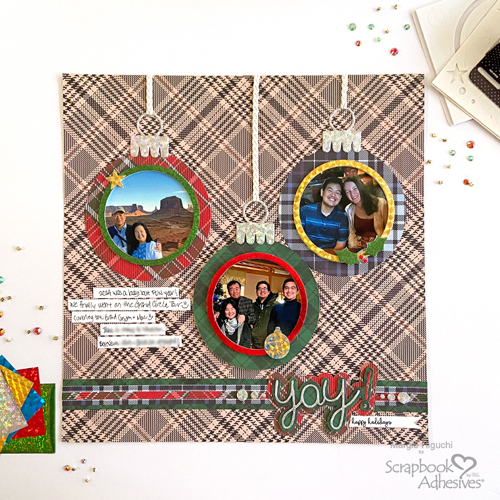
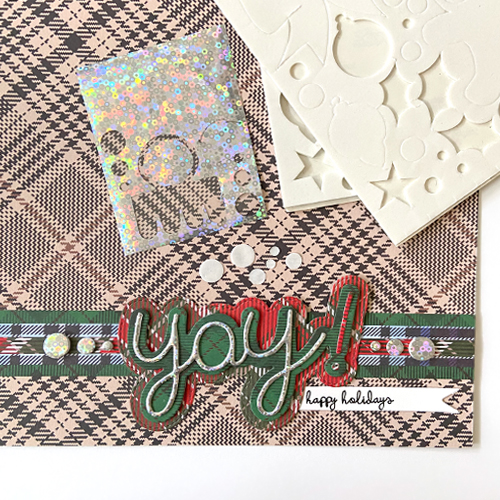
Have you been documenting your holiday events? Since we don’t do a formal gathering, I’ve added photos of things we did during the year. I had an ornament die set that I wanted to create with and featured the 3D Foam Circle Frames to highlight each event. Hi, Margie here today to share my YaY for Happy Holidays Ornament Layout.
Create the Ornament
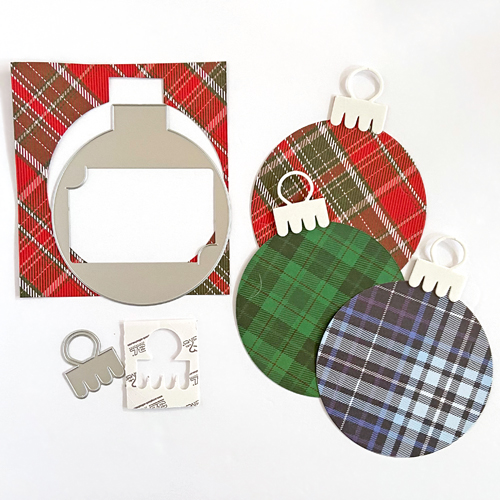
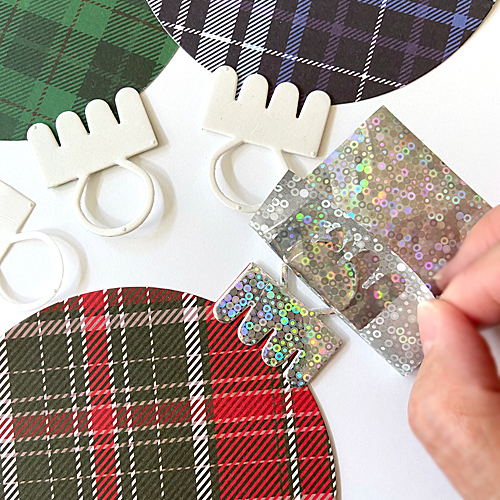
Die-cut three ornaments with patterned papers. For the topper, I used 3D Foam Creative Sheets Small White for dimension and interest. After placing the topper on each ornament shape, leave the bottom liner on the back of each hoop.
Apply foil to the topper for the shine! Remove the top liner and place a piece of silver foil from the Metallic Transfer Foil Sheets Celebrate Colors set. Make sure the foil color is facing you. Gently rub to transfer the color to the topper. Remove to reveal the shine! This is what the Wear Your Adhesive on the Outside technique is all about! Set the ornaments aside. Let’s work on the border.
Make the Border
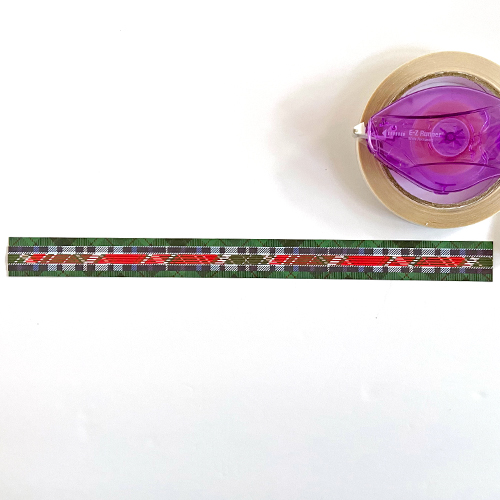
Using the E-Z Runner® Micro Refillable Dispenser, I placed the narrow 0.25 in. border on top of the 0.75 in. border…it’s a perfect size! Mat the layered border on top of the 1.0 in. border with the Crafty Power Tape Polybag 81ft. Lastly, place the finished border about 1.0 in. from the bottom edge of the layout.
Assemble the Sentiment
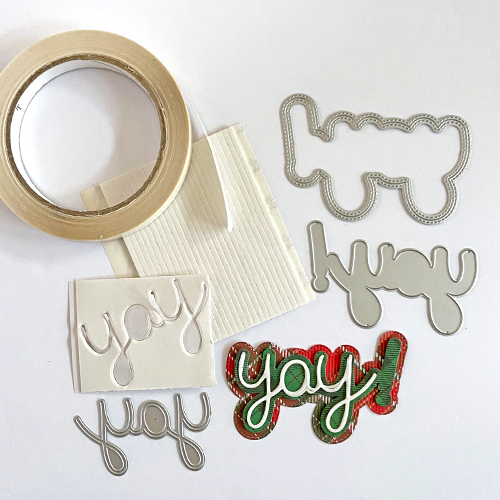
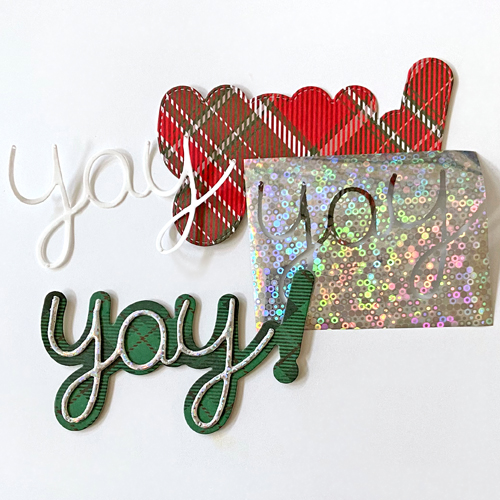
Die-cut the thin “yay” word with the 3D Foam Creative Sheets Small White, the “yay” outline with green patterned paper, and the “yay” shadow (and thin exclamation point) with red patterned paper. Adhere the thin “yay” word onto its outline.
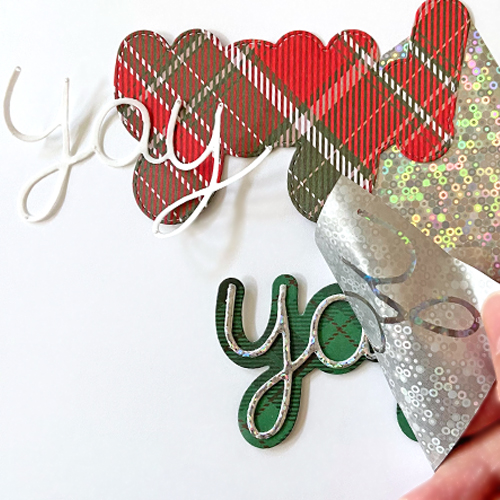
Use the Wear Your Adhesive on the Outside technique, by removing the top liner from the “yay” word and placing a piece of silver foil from the Metallic Transfer Foil Sheets Celebrate Colors with the color side facing you on top of the exposed adhesive. Gently rub/tap to transfer the color to the word. Peel off the foil to reveal the finished look. Reapply the foil in missed areas.
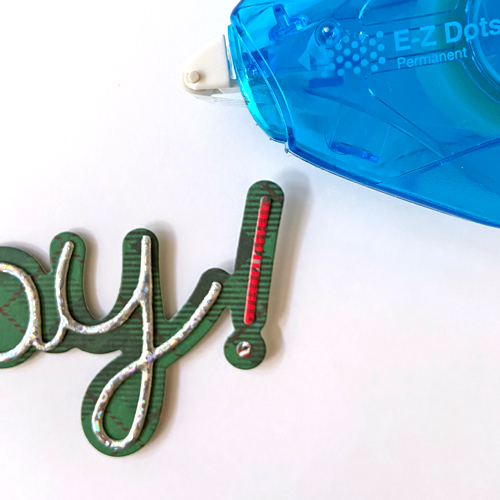
Attach the shadow shape with the Crafty Power Tape Polybag 81ft. and use the E-Z Dots® Permanent Refillable Dispenser to add the exclamation point to finish the word. The latter adhesive is perfect for intricate die-cut shapes as it covers areas that need adhesive.
Assemble the Sentiment – Part 2
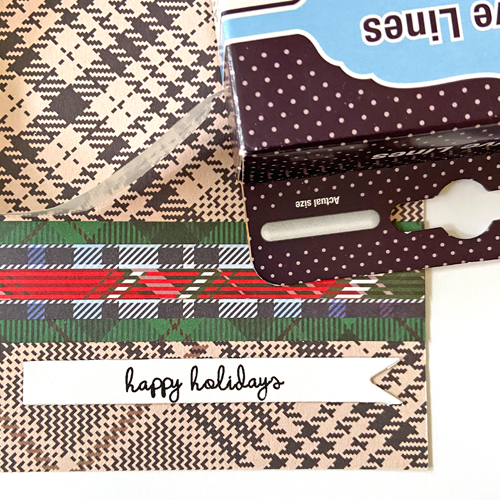
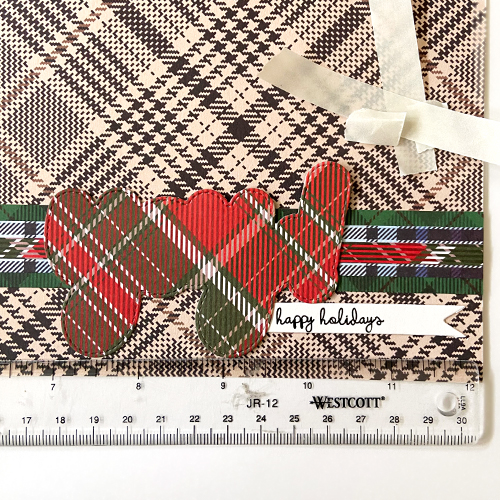
From my sentiment strip stash, I pulled out “happy holidays” strip and secured it with the Adhesive Lines. Use the “yay” sentiment as a guide. Then apply the Crafty Power Tape Polybag 81ft. to adhere the “yay” sentiment. Lastly, add three 3D Foam Circles White on each side of the sentiment and repeat the foiling steps with the silver foil from the Metallic Transfer Foil Sheets Celebrate Colors.
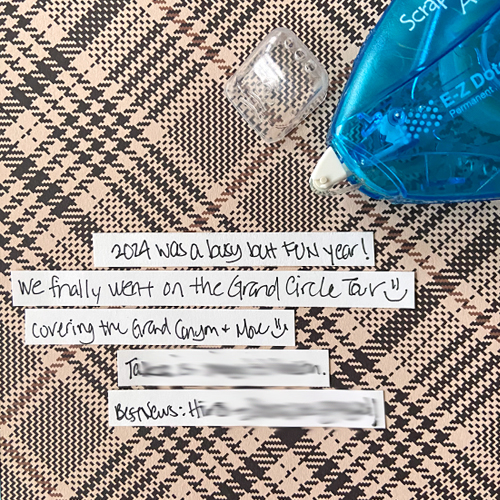
Securing the Journaling Strips
Cut 6 to 10 strips of white cardstock to journal on and adhere them with the E-Z Dots® Permanent Refillable Dispenser. Designer’s Note: I used the ornaments to use guides to determine the strips’ placement.
Finish Embellishing the Ornament
Die-cut photos with a 3-inch diameter circle and center them to the ornaments with the E-Z Runner® Grand Ultra Strong Refillable Dispenser. Frame them with the second largest ring from the 3D Foam Circle Frames White set.

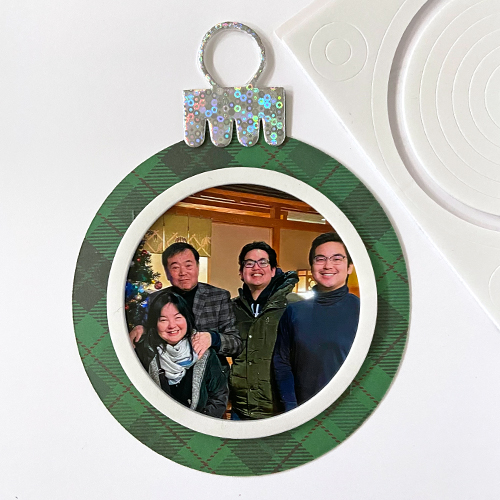
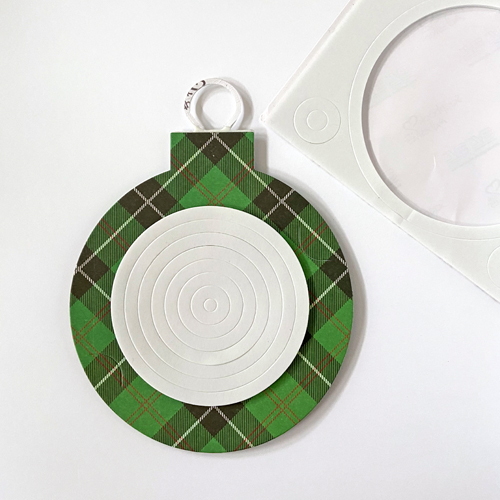
The green ornament will be the only one that will be popped up from the page so I used the rest of the smaller nested foam rings.
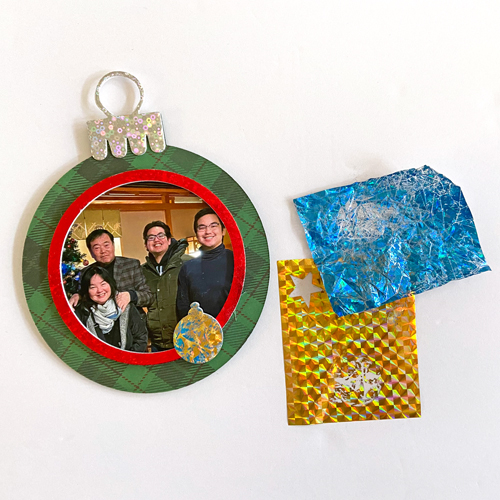
After foiling the frame with red foil from the Metallic Transfer Foil Sheets Celebrate Colors, I added a small ornament from the 3D Foam Christmas Shapes. I used the Wear Your Adhesive on the Outside technique with a twist…I wrinkled the blue foil to create a distressed look and placed it on the shape. Then I placed a solid gold foil on top to color the exposed adhesive for an interesting look. Both foil colors are from the Metallic Transfer Foil Sheets Celebrate Colors.
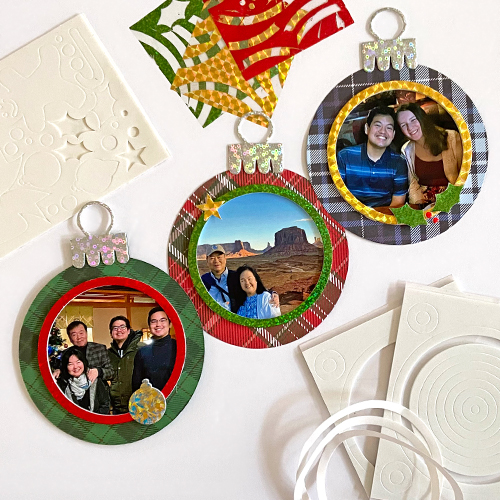
Repeat the embellishing and foiling steps for the other two ornaments using shapes from the 3D Foam Christmas Shapes set. Then adhere them with them to the layout.
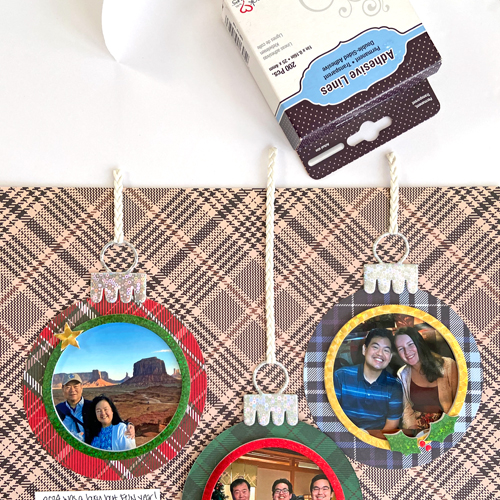
Adding Strings
The final touch…I added some flat rope trim to the ornaments with Adhesive Lines and cut the excess. Now it’s ready to be added to the album.
I hope you enjoyed my YaY for Happy Holidays Ornament Layout. So what will you document first? Share with us!
Thanks for visiting and Happy Holidays!
Margie Higuchi
Creative Time: 50 mins
Skill Level: Intermediate
Materials Needed:
Scrapbook Adhesives by 3L®
E-Z Dots® Permanent Refillable Dispenser and E-Z Runner® Micro Refillable Dispenser
E-Z Runner® Grand Ultra Strong Refillable Dispenser
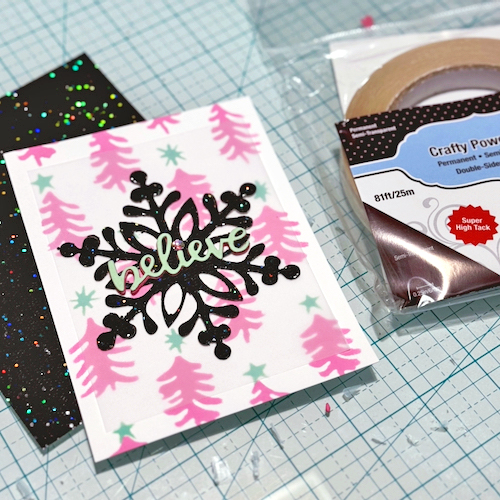
Crafty Power Tape Polybag 81ft.
3D Foam Creative Sheets Small White
3D Foam Christmas Shapes, 3D Foam Circles White, and 3D Foam Circle Frames White
Metallic Transfer Foil Sheets Celebrate Colors,
Other: Patterned Paper: Craft Consortium (Tartan Collection); Craft Dies: Emily Moore Designs (Gift Card Holder Die – The Ornament, yay! Layered Word Die and Card Sentiment Dies); Sentiment: Emily Moore Designs (Digital Happy Holidays Sentiment); Ruler: Wescott T-Ruler; Black Marker; Twine; White Cardstock
Click Preferred Retailers List
Save to Pinterest!

Visit our Website and Blog!
Sign up for our Newsletter so you never miss a contest or giveaway!