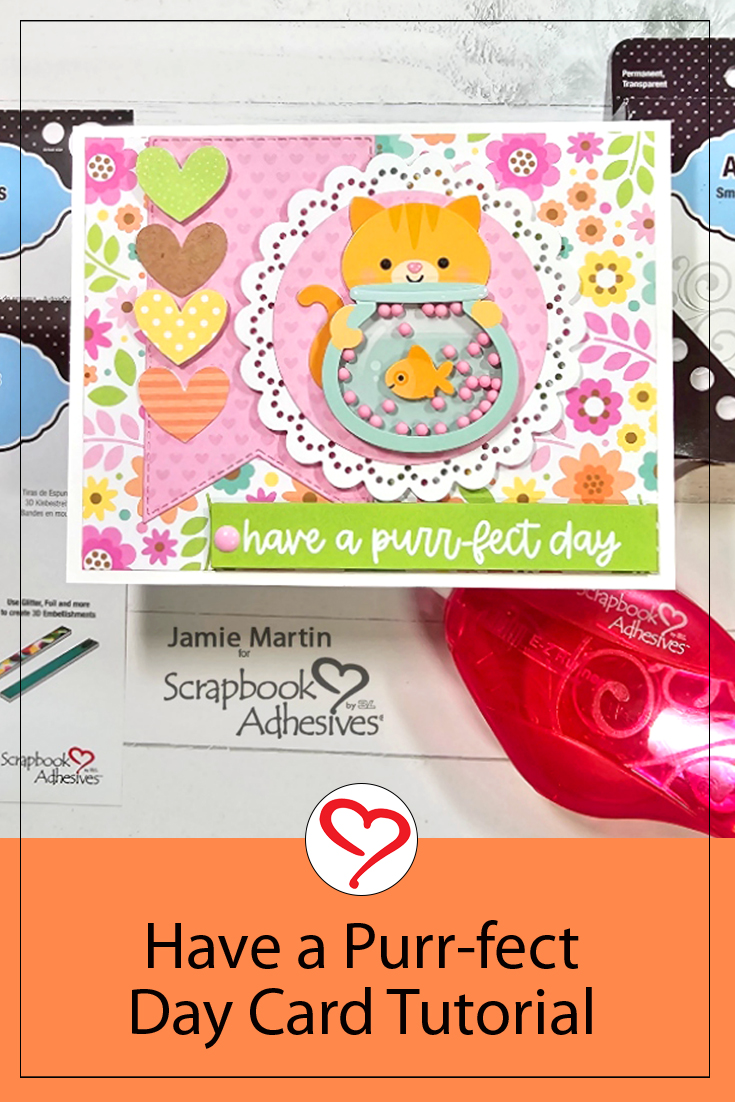
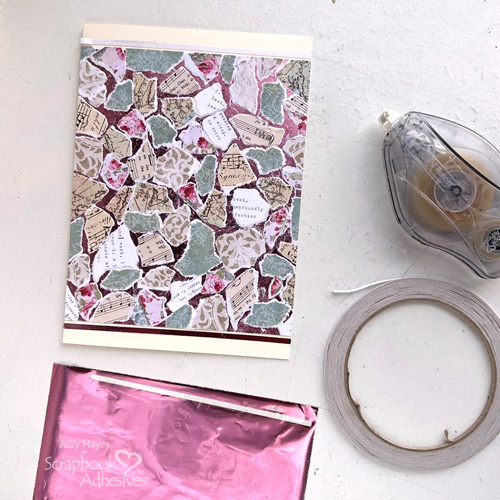
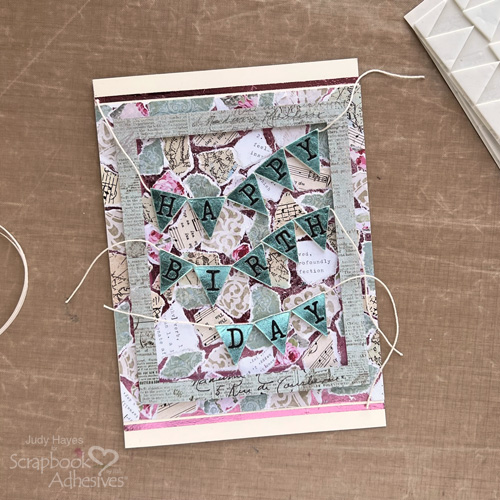
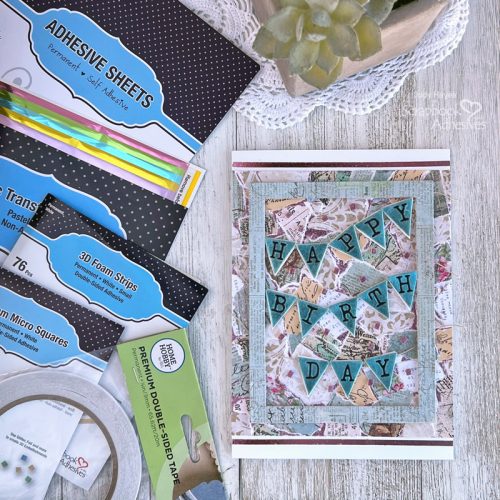
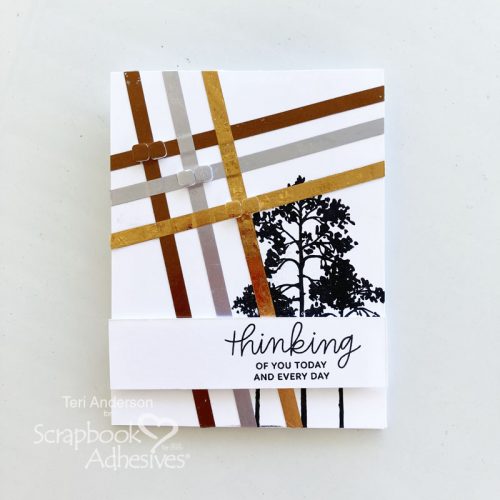
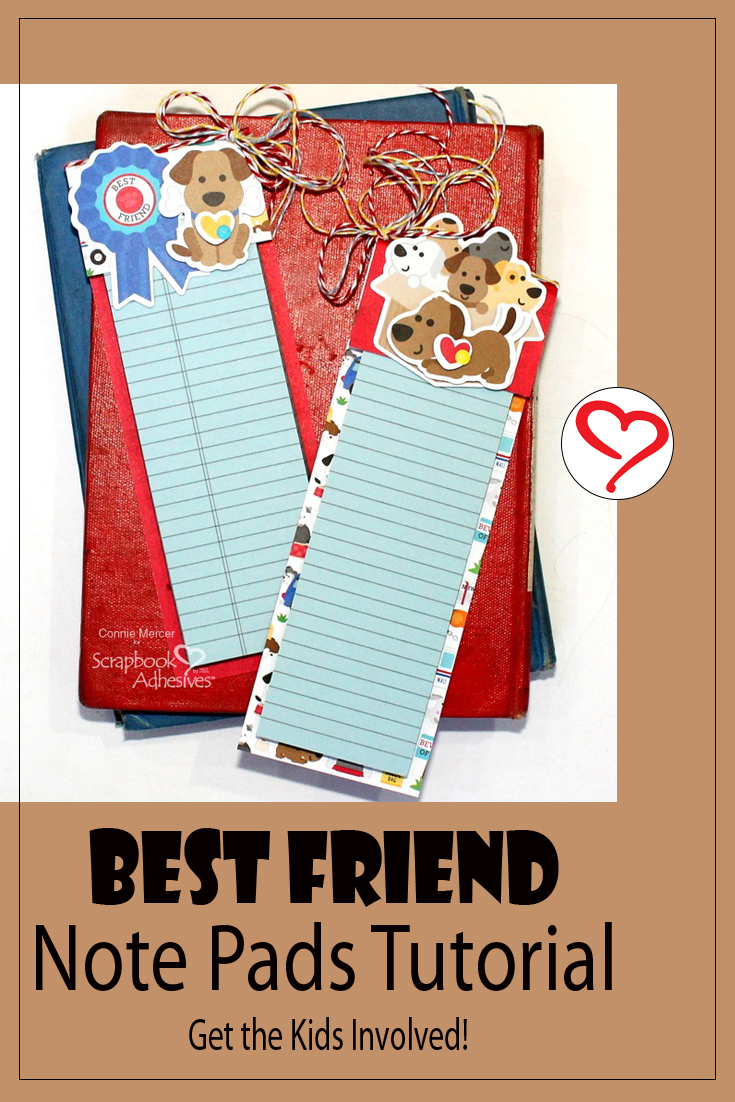
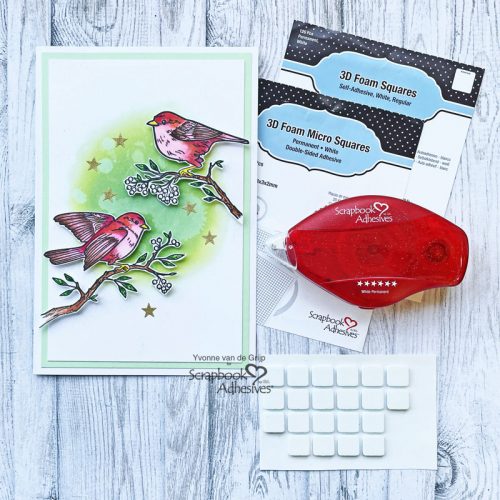
Hi, Judy here today! I’ve put together a birthday card with Happy Birthday foiled banners over a collage background with metallic foil accents. Making the collage background is simple and can be used for several projects.
Make Collage
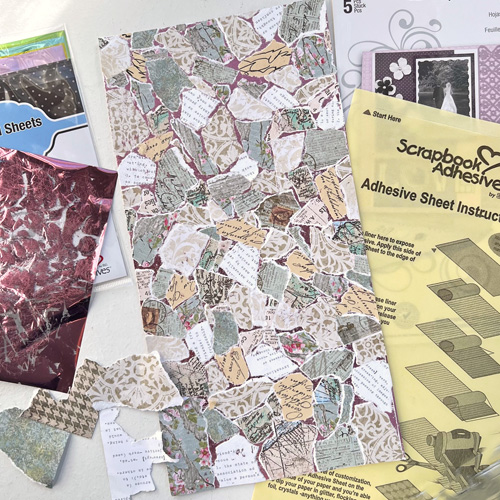
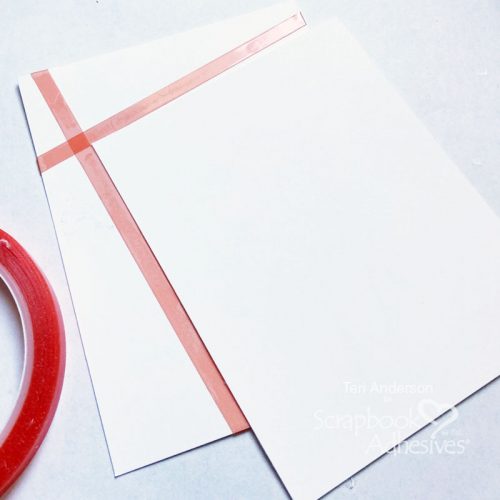
Cut a piece of white cardstock 6 x 12 inches. This will make a collaged sheet large enough for several projects. Apply Adhesive Sheets 6 x 12 in. to cardstock and rub well to transfer adhesive. Partially peel back the liner at one end and place assorted torn pieces of patterned paper on the adhesive. Allow space between papers. Continue to peel back the liner and fasten the paper pieces over the entire cardstock. Cut off any pieces that extend beyond the edge.
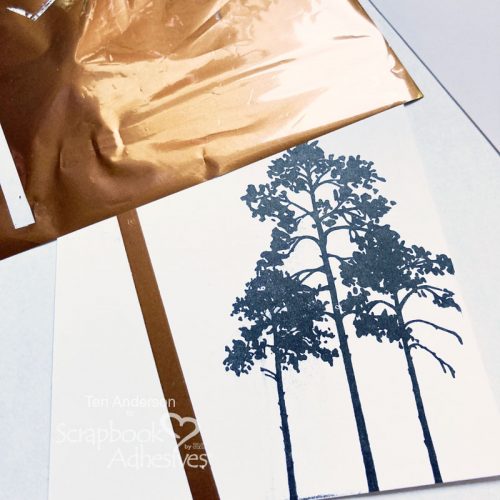
Place a piece of pink foil from the Metallic Transfer Foil Sheets Pastel Colors over the collaged paper (color side facing you). Press/rub firmly to transfer foil to spaces between papers. Lift the foil away and repeat until all spaces are covered with the foil.
Card Base
With a piece of 10 x 7-inch off-white cardstock, fold it to form a 5 x 7-inch card. I had a collage background from my previous projects. So I cut a 5 x 6-inch piece and used the E-Z Runner® Ultra Strong Refillable Dispenser to the back to center it on a card.
Apply a piece of Premium Double-Sided Tape 1/8in. along the top and bottom edge of the collage, peel off the liners, and place pink foil from Metallic Transfer Foil Sheets Pastel Colors over the tape, press in place and peel away the foil.
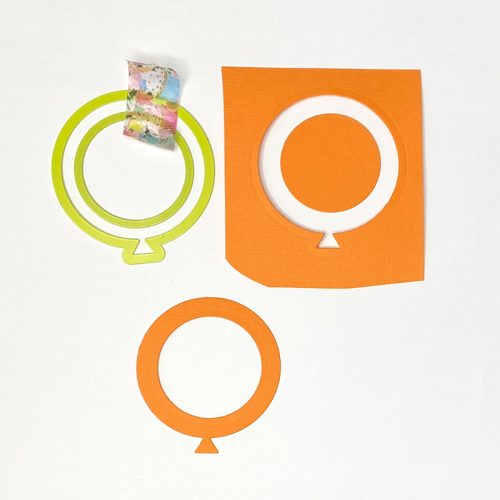
Make the Frame
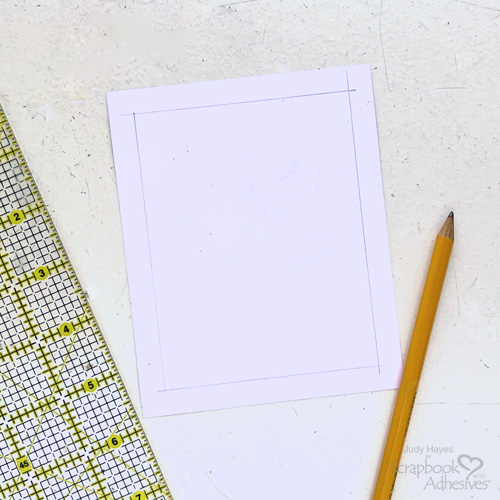
Cut a 4.25 x 5.25-inch piece of text pattern paper. On the back side, draw lines 0.375 inches from each edge to form a rectangle. Use a craft knife or scissors to cut out the inner rectangle to create a frame.
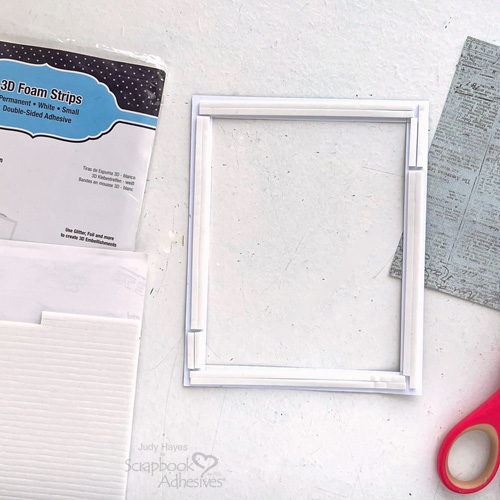
On the back of the frame, apply two strips of 3D Foam Strips along all edges cutting pieces to fit the frame. Set aside.
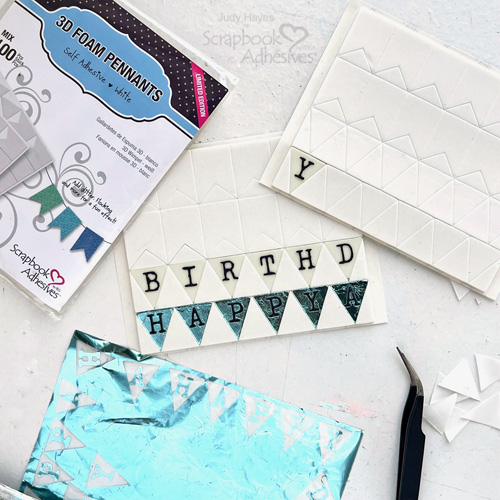
Wear Your Adhesive on the Outside with Banners
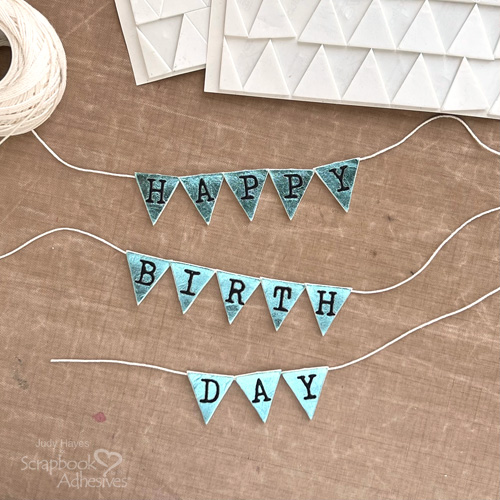
Die-cut letters from black cardstock to spell “Happy Birthday.” Peel the top liner from a triangle pennant from the 3D Foam Pennants sheet. Use a pair of tweezers to center the letter on it. Repeat this step to spell out the sentiment.
Once done, cover them with blue foil from the Metallic Transfer Foil Sheets Pastel Colors. Simply place the foil color side up, rub with your fingertips to transfer the color, and peel off the foil. Foil over all the letters. Reapply foil in missed areas.
Lay a piece of string on the non-stick craft mat. Starting with the “H” pennant piece, place it about 2 inches from the end of the string. Make sure the top edge of the pennant is on the string. Repeat to spell out “HAPPY.” Repeat the process with a couple of string pieces to spell out “BIRTH” and “DAY.”
Add Banners and Frame
Peel the top edge of the liner on the frame and place it on the card front centered over the collage background.
Remove the “HAPPY” banner from the craft sheet, and press the adhesive side of the pennant against pants or cloth to reduce some stickiness. Then lightly place it on the card. Repeat with the other two banners (“BIRTH” and “DAY”). Once they are in the desired area, press into place to commit.
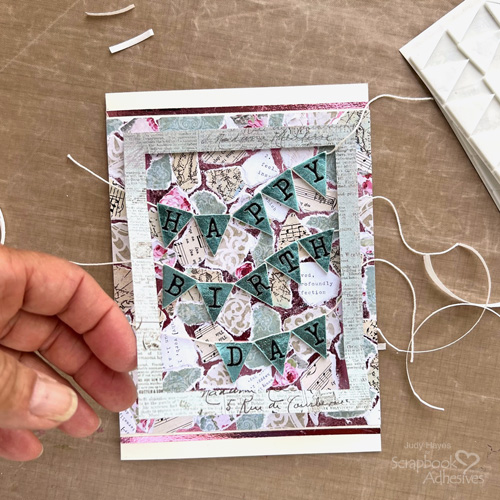
Lift the frame and put strings behind the frame. Hold the frame up to peel the remaining liners from 3D Foam Strips on the back and press in place over banner strings. Trim string excess that extends beyond the frame.
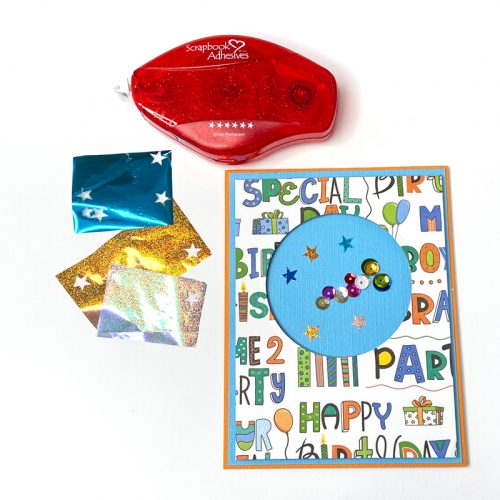
Accent with 3D Squares Micro & Foil
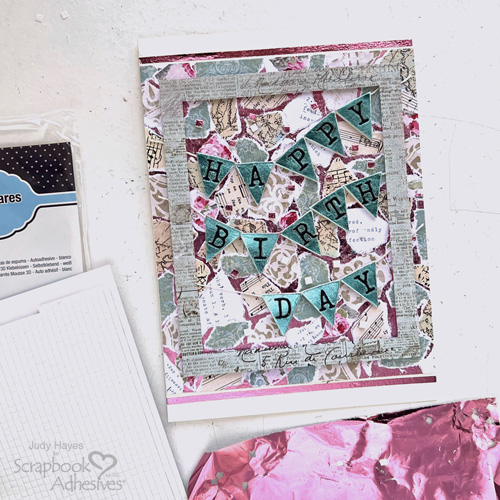
Randomly place 3D Foam Squares Micro White near banners within the frame, peel the liners, cover with pink foil from Metallic Transfer Foil Sheets Pastel Colors, rub to transfer foil, and peel it away.
And the card is complete! Here are more projects made with the same collage sheet: Collage Tag with Metallic Transfer Foil and Joy Collage Frame Canvas
Thanks for Visiting!
Judy Hayes
Creative Time: 35 mins
Skill Level: Intermediate
Materials Needed:
Scrapbook Adhesives by 3L®
E-Z Runner® Ultra Strong Refillable Dispenser
3D Foam Squares Micro White, 3D Foam Strips and 3D Foam Pennants
Adhesives Sheets 6 x 12in.
Metallic Transfer Foil Sheets Pastel Colors
Home Hobby by 3L®
Premium Double-Sided Tape 1/8in.
Other: Assorted Patterned Papers for Collage; Craft Dies: Sizzix (Tim Holtz Alphanumeric Tiny Type Upper); White, Off White & Black Cardstock; String or Crochet Thread
Save to Pinterest!
Visit our Website and Blog!
Sign up for our Newsletter so you never miss a contest or giveaway!