You are in our US store • Switch to Europe store

Gnome Thank You Card Tutorial

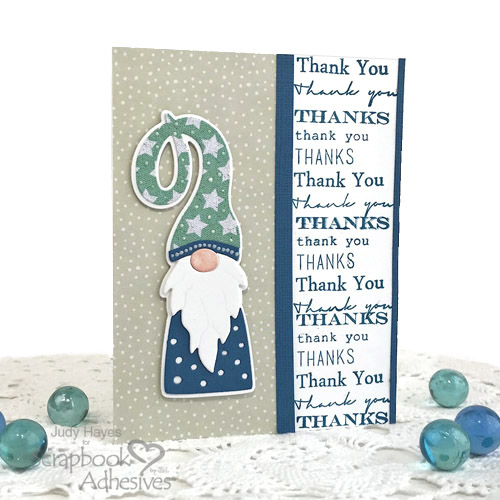
Hello everyone! Judy here today with a quick Gnome Thank You card. I never got a chance to use this cute gnome die before the holidays, so I decided to use it to make a cute thank you card!

Gnome Thank Card Instructions

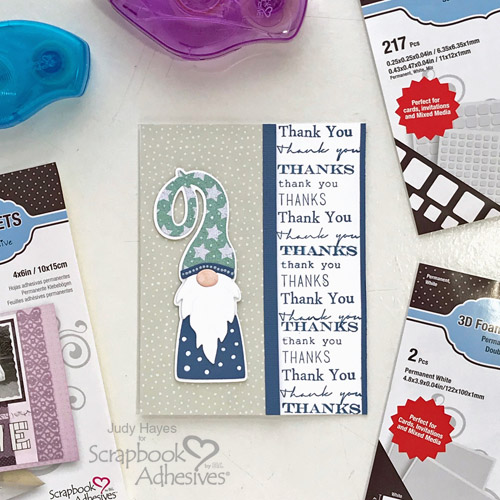
Using Adhesive Sheets 4 x 6 inch applied to the back of papers before die cutting makes assembling the gnome so easy! Just peel the adhesive liner and put the pieces in place!

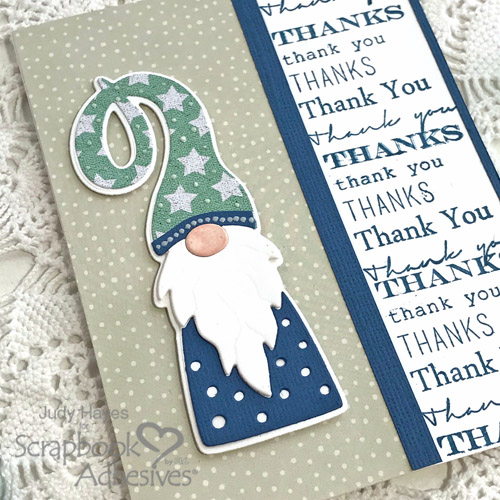
The hat and blue body pieces are cut from papers with Adhesive Sheets 4 x 6 inch on the back. For the beard and nose, I die cut white card stock on white 3D Foam Creative Sheets. The 3D Foam Creative Sheet gives added dimension plus it’s permanent adhesive on both sides. The nose piece is colored with pink ink before putting it in place.

To add a band of blue to the hat, I use a scrap of blue paper with Adhesive Sheets on the back and die cut at the bottom of the hat die. Next trim it to the desired height and place over the patterned hat. I added tiny dots of white glitter accents to it and the hat.

Gnome Thank You Card Tutorial by Judy Hayes for Scrapbook Adhesives by 3L

For the “thank you” band, stamp several different thank you stamps with blue ink. I’m using E-Z Runner® Petite Permanent Dots Refillable Dispenser to adhere the band and green paper to the card front. To attach the narrow blue strips, I use E-Z Runner® Micro Refillable Dispenser, it’s perfect for narrow pieces like this!

Gnome Thank You Card Tutorial by Judy Hayes for Scrapbook Adhesives by 3L

Thanks for Visiting!
Judy

Creative Time: 20 minutes
Skill Level: Beginner

Materials Needed
Scrapbook Adhesives by 3L®

Other:
Etched Dies: Simon Says Gnome; Cardstock White & Blue, Patterned Paper: Polkadoodles Gnome for Christmas Pad, Echo Park A Cozy Christmas Paper Pad; Nuvo Crystal Drops Simply White; Stamps: Altenew Many Thanks Set; Ink: Tsukineko Memento Nautical Blue, Ranger Ink Distress Tattered Rose

Save it to Pinterest!

Gnome Thank You Card Tutorial by Judy Hayes for Scrapbook Adhesives by 3L

Visit our Website and Blog!
Sign up for our Newsletter so you never miss a contest or giveaway!

instagram purple icon facebook icon purple pinterest purple icon twitter purple icon YouTube icon blog subscription purple icon

Winter Wishes Hot Cocoa Gift Set

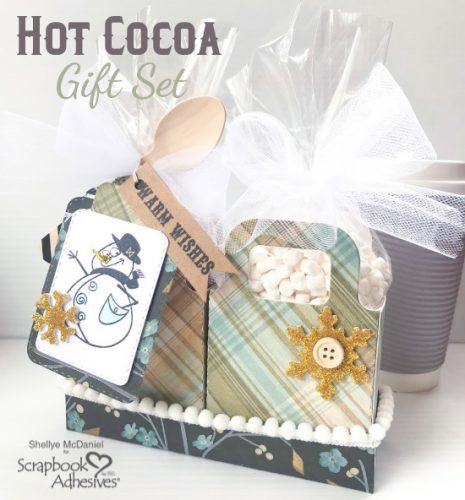
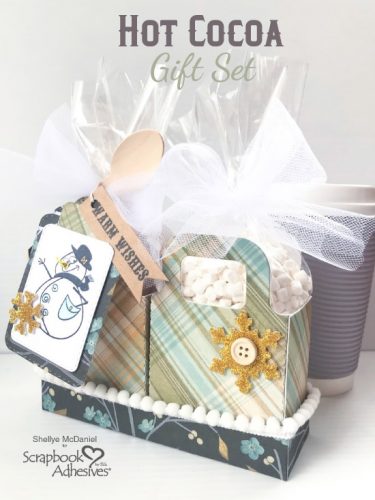
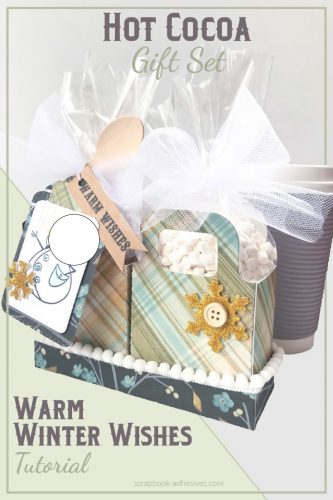
Wintertime Greetings! Although Christmas is over, I still find the need for an occasional last-minute or forgotten gift. So today, I’m sharing this cute Warm Wishes Hot Cocoa Gift Set as a winter warm-up. What do you think?

Hot Cocoa Gift Set Tutorial by Shellye McDaniel for Scrapbook Adhesives by 3L

Hot Cocoa Gift Set Up

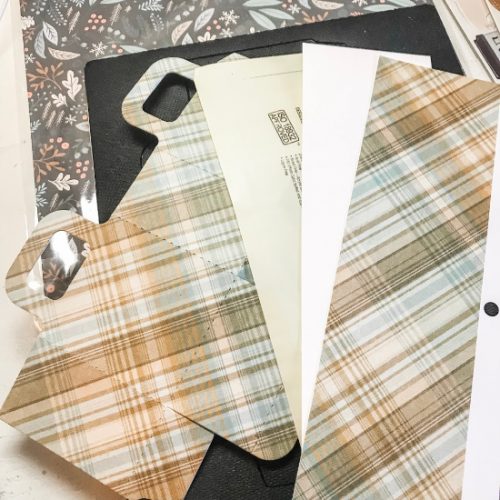
I’m using a tote bag die, thin chipboard and scrapbook paper. You can buy ready-made versions in the craft stores if you don’t happen to own a similar die.

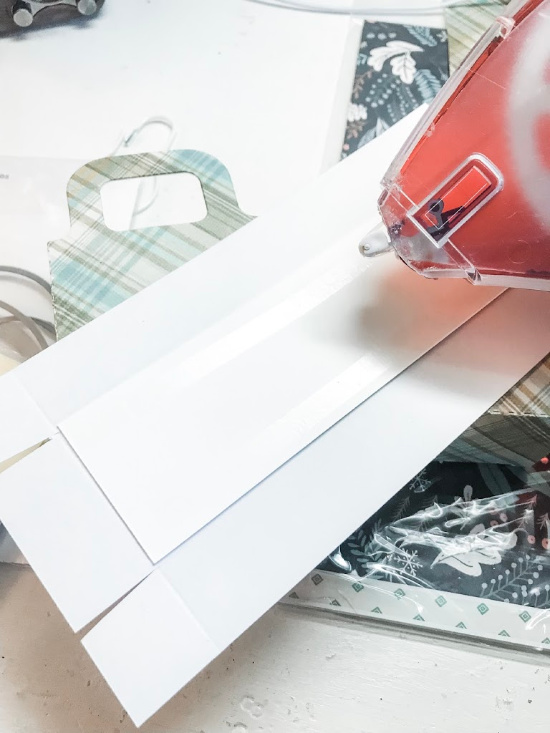
I cut the paper, Adhesive Sheets 12×12 inch and chipboard to the same size. Adhere them together before die-cutting. If you’re using a pre-made box, try disassembling, tracing and adhering as done above.

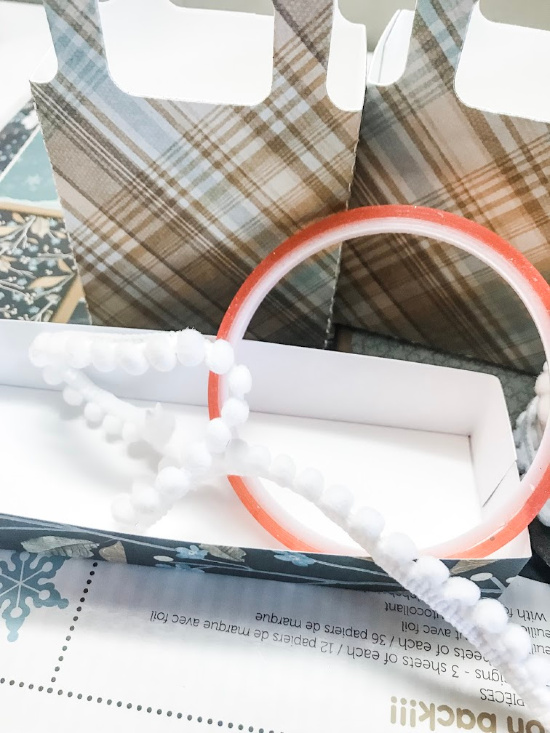
After die-cutting and assembling the boxes, I wanted to make a larger box for them to nest inside. Measure the width and depth of the two boxes together and then cut a strip of paper, adding 1-inch on all sides. The 1-inch addition creates the sides of the box.

Next, I cut a strip from the leftover chipboard and adhered it to the bottom with the E-Z Runner® Grand Refillable Dispenser and the E-Z Runner® Grand Ultra Strong Refill. The sides are attached using Extreme Double-Sided Tape ½ inch.

Embellishing Details

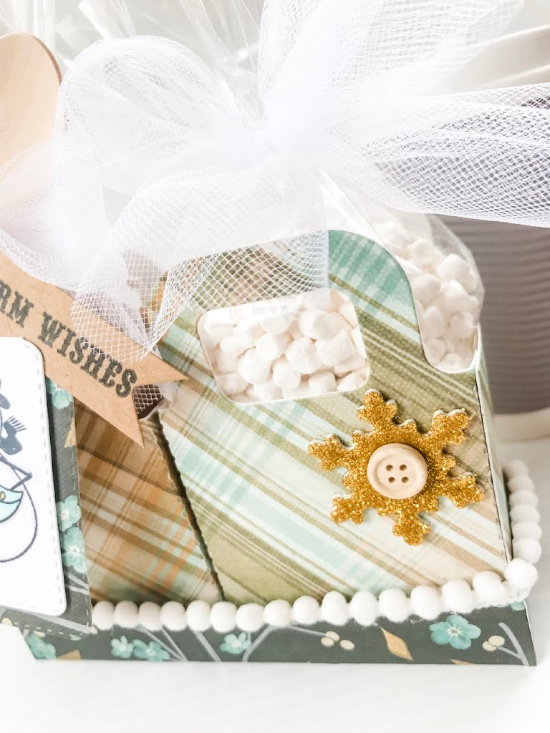
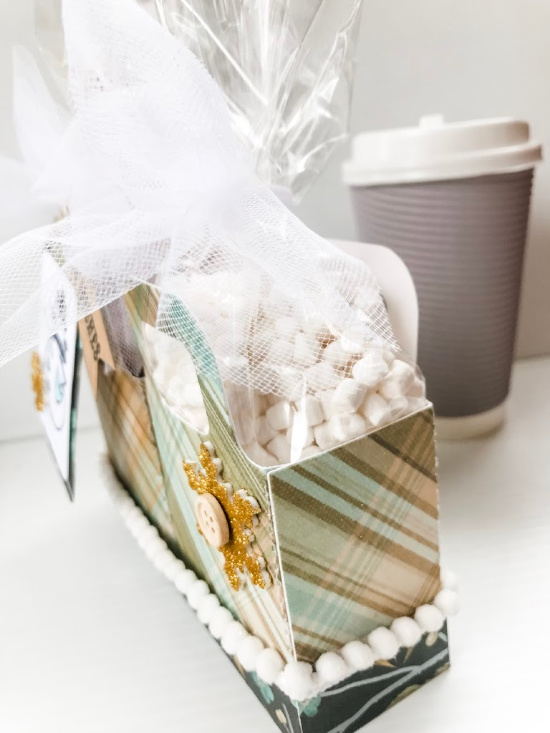
For the edge of the box, I’m using Extreme Double-Sided Tape ⅛ inch to hold the pom trim in place. The strong bond of this tape works beautifully with ribbon and fabric.

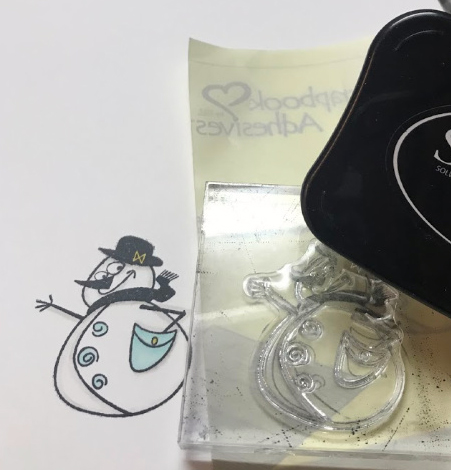
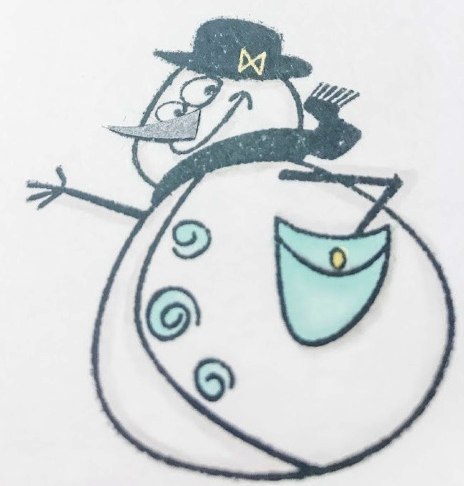
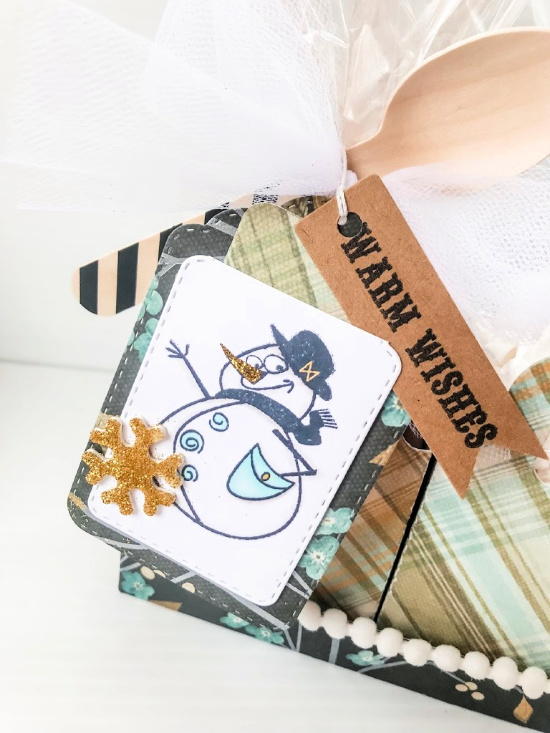
Next craft the tag using a matching stamp from the same collection. Stamped the image using black ink onto white cardstock and color with markers. To color the nose, stamp the face onto a piece of an Adhesive Sheet.

Carefully trim out the and then add it over the original stamped image.

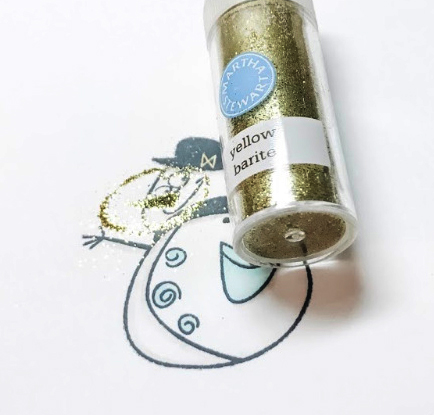
After removing the white liner from the Adhesive Sheet, sprinkle on some pretty yellow barite glitter.

In keeping with the yellowy-gold glitter theme, I’m also using it on a couple of the snowflakes from the 3D Foam Holiday Embellishment Kit.

Hot Cocoa Gift Set Tutorial by Shellye McDaniel for Scrapbook Adhesives by 3L

To complete the Hot Cocoa Gift Set, tuck in a bag of mini marshmallows and cocoa mix and tie on a cute little wooden spoon!

Thanks for joining me and Happy New Year!
Shellye McDaniel

Creative Time: 45 Minutes
Skill Level: Intermediate

Materials Needed
Scrapbook Adhesives by 3L®

Home Hobby by 3L®

Other
Patterned Paper and Stamp: WRMK; Bag Craft Die: Ellison; Pom Pom Trim and Glitter: Martha Stewart Crafts; Ink: Stazon Jet Black; Markers; Wooden Spoon and Button: Oriental Trading; Mini Marshmallow; Hot Cocoa Mix

Love It! Save It on Pinterest!

Hot Cocoa Gift Set Tutorial by Shellye McDaniel for Scrapbook Adhesives by 3L

Visit our Website and Blog!
Sign up for our Newsletter so you never miss a contest or giveaway!

instagram purple icon facebook icon purple pinterest purple icon twitter purple icon YouTube icon blog subscription purple icon

New Year’s Goals Mini Tag Book

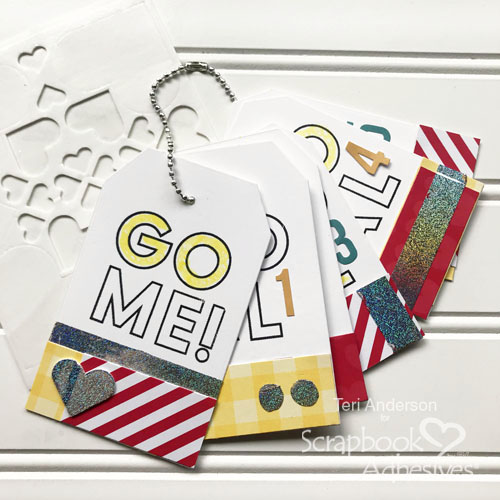
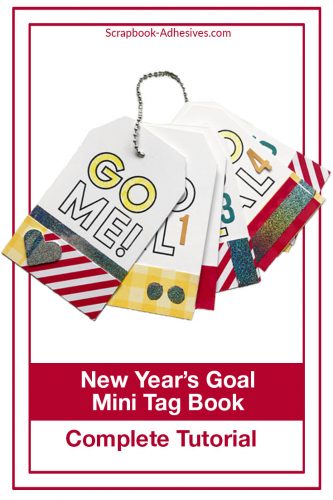
Hi, friends! Can you believe we are just a week away from 2020? Teri here, and I’ve got a fun way for you to head into the New Year with your goals in mind. I’m going to show you how to put together a New Year’s Goals Mini Tag Book to document those goals!

New Year's Goals Mini Tag Book Tutorial by Teri Anderson for Scrapbook Adhesives by 3L

This book is easy to put together with a little creativity and is a fun way to remind yourself throughout the year of what you want to achieve!

Creating a Goals Mini Tag Book

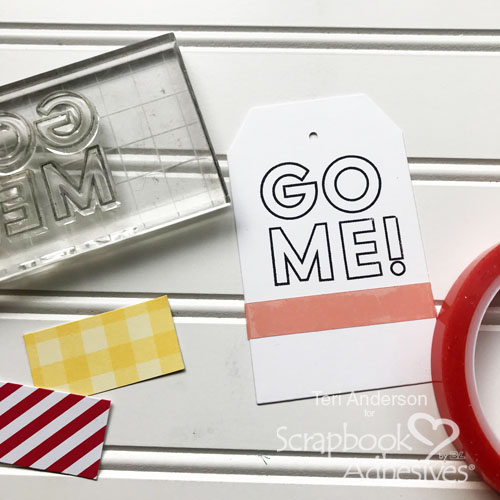
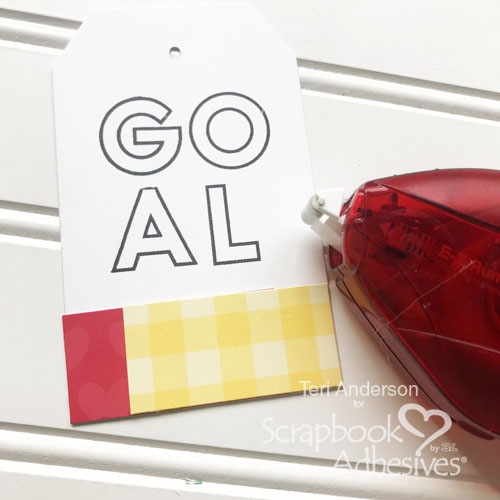
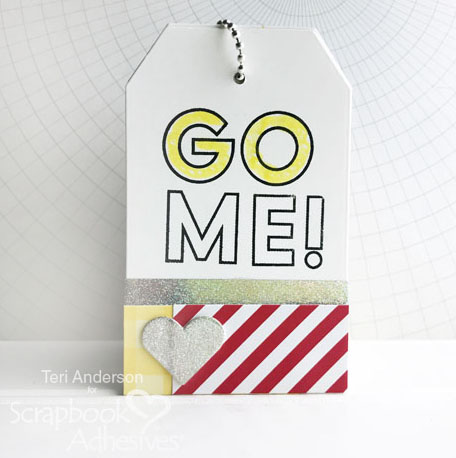
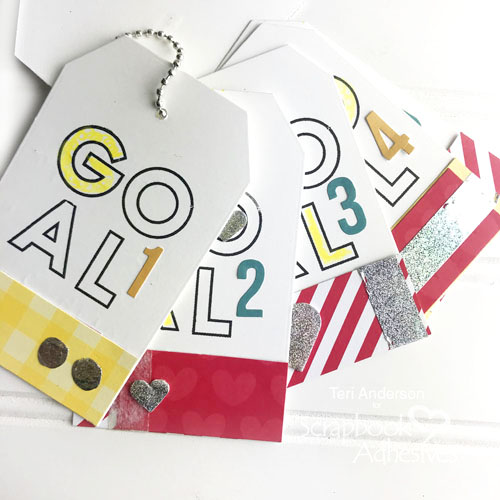
For the mini tag book base, start by cutting several tags from white cardstock. Designate one tag as your title tag. Use stamps or letter stickers to spell out, “Go Me!”, on it.

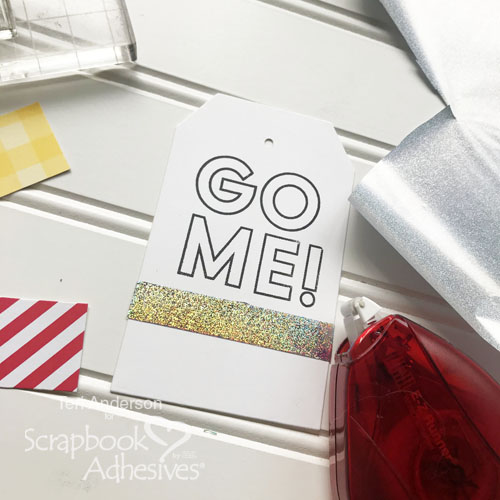
Apply a strip of Extreme Double-Sided Tape 1/2-inch below the words. Remove the top liner and add the silver glitter foil from the Metallic Transfer Foil in Holographic onto it. Make sure the color is facing you and then rub with your fingertips to transfer the color to the tape. You can also use a bone folder to do this.

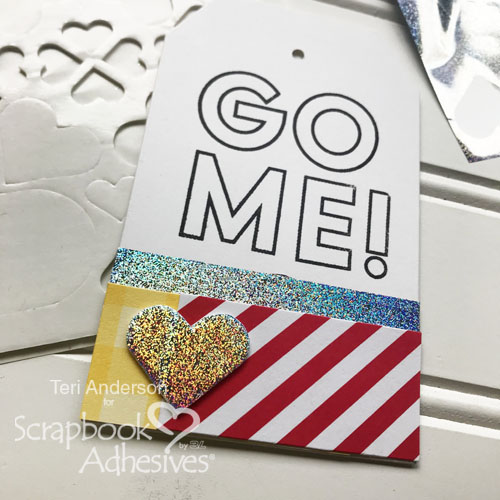
Affix two scraps of patterned paper at the bottom of the tag using your E-Z Runner® Permanent Strips Refillable Dispenser. Apply a 3D Foam Heart onto them and then add foil on it as well.

New Year's Goals Mini Tag Book Tutorial by Teri Anderson for Scrapbook Adhesives by 3L

Setting Goals and Making Tags to Document Them

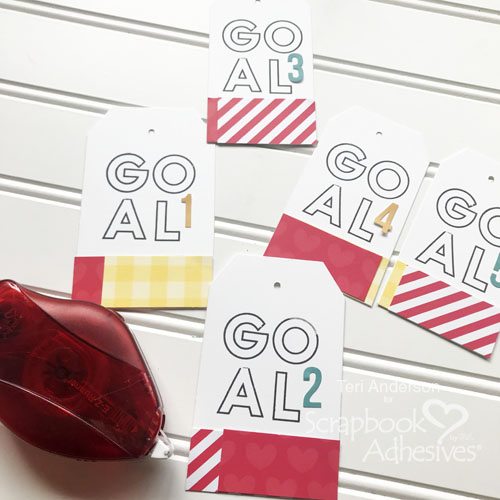
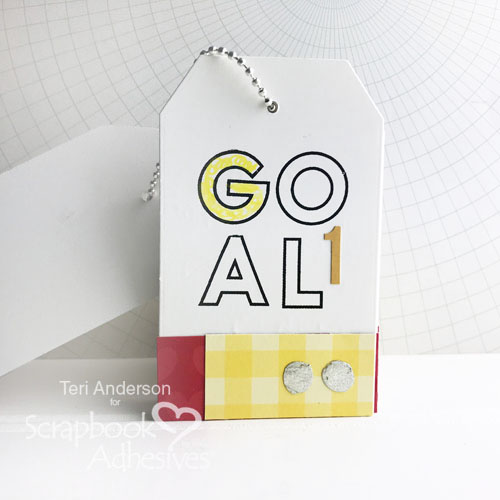
Now let’s create the goal tags! Use letter stickers or stamps to spell “Goal” on several tags. Make sure you have a tag for every goal you want to achieve in the New Year.

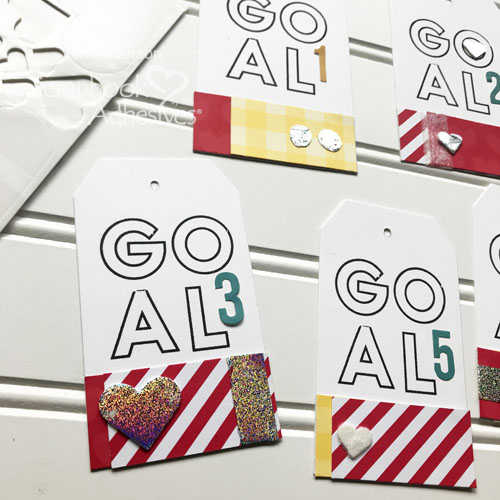
Adhere two strips of patterned paper to the bottom of each tag with the E-Z Runner® Permanent Strips Refillable Dispenser. Add the number stickers to the tags for each goal.

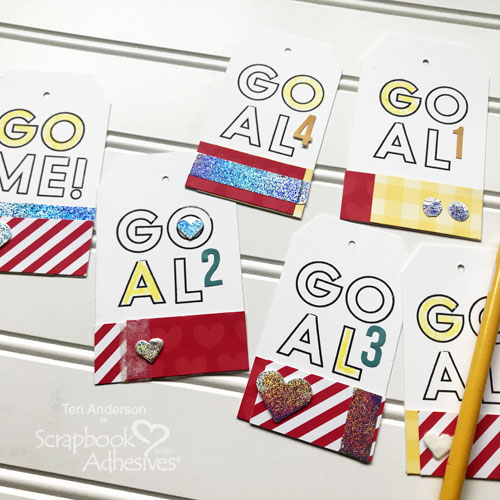
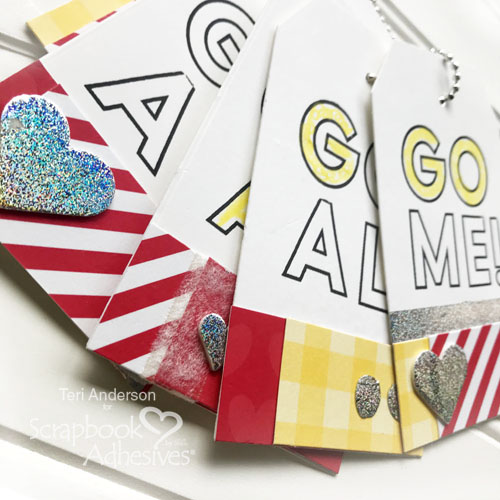
Complete the tags by decorating them. This is where you get to have a little extra fun and mix things up. Create foil circles by applying Adhesive Dots Ultra Thin and adding foil or flock to them. Randomly apply strips of Extreme Double-Sided Tape 1/2-inch and add foil or flock to them. You’ll also want to do the same thing with additional 3D Foam Hearts.

New Year's Goals Mini Tag Book Tutorial by Teri Anderson for Scrapbook Adhesives by 3L

Kick your goal tags (and title tag) up a notch by adding a little additional color to the letters with a pencil or marker.

Finishing and Binding the Tag Book

New Year's Goals Mini Tag Book Tutorial by Teri Anderson for Scrapbook Adhesives by 3L

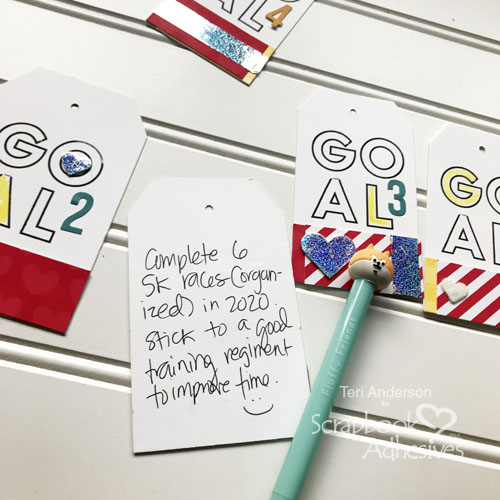
Finish the tag book by flipping your goal tags over and writing down your goals.

New Year's Goals Mini Tag Book Tutorial by Teri Anderson for Scrapbook Adhesives by 3L

You’ll also want to bind the book together with a ball chain. Mine came from an old key chain. Don’t have any ball chain of your own? Use twine instead.

New Year's Goals Mini Tag Book Tutorial by Teri Anderson for Scrapbook Adhesives by 3L

When you are finished with this Goals Mini Tag Book, tuck it in your purse so you can open it and be reminded of your goals daily. Another fun idea? Hang it on the wall near your desk.

New Year's Goals Mini Tag Book Tutorial by Teri Anderson for Scrapbook Adhesives by 3L

Wishing you the best New Year!
Teri Anderson

Creative Time: 60 Minutes
Skill Level: Beginner

Materials Needed
Scrapbook Adhesives by 3L®

HomeHobby by 3L®

Other
Patterned Papers: Doodlebug Design; White Cardstock: Neenah Paper; Number Stickers: Simple Stories; Stamp: Kelly Purkey (Greenpoint Stamp Set); Dies: Taylored Expression (Tags); Black Ink Pad: Ranger Ink; Flock: Stampendous!; Yellow Pencil; Ball Chain and Clasp

Save It on Pinterest!

New Year's Goals Mini Tag Book Tutorial by Teri Anderson for Scrapbook Adhesives by 3L

Visit our Website and Blog!
Sign up for our Newsletter so you never miss a contest or giveaway!

instagram purple icon facebook icon purple pinterest purple icon twitter purple icon YouTube icon blog subscription purple icon

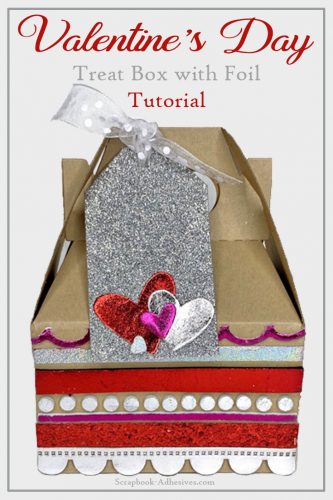
Foiled Valentine’s Day Treat Box

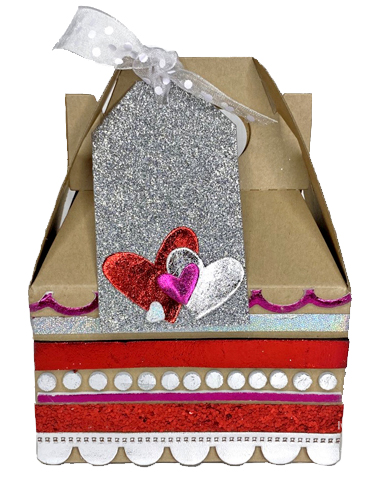
Hi everyone, Ivy Pe here with a very easy treat box using a variety of Scrapbook Adhesives by 3L® tapes and 3D Foam products! 😊 Lovin’ the different colors of red, magenta and silver in foil, it really makes this treat box shine without much effort. So why not make a Valentine’s Day Treat Box?!

Valentine’s Day Treat Box

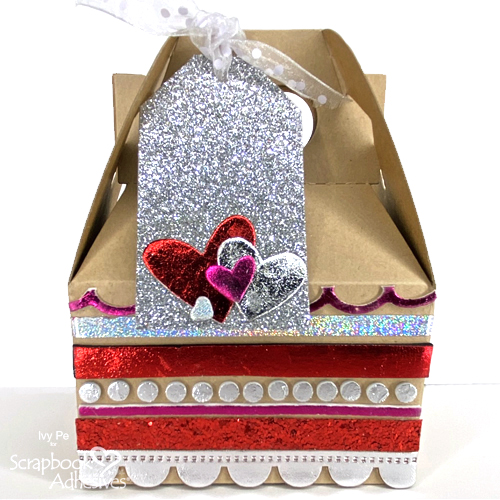
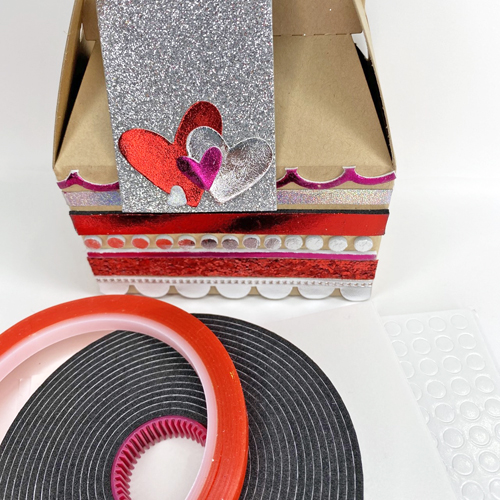
I’m going to embellish the front surface of a ready-made gable box using a combination of Extreme Double-Sided Tape 1/4-inch, Crafty Foam Tape, 3D Foam Circles and 3D Foam Creative Sheets.

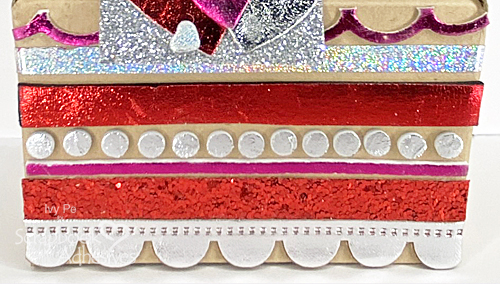
For the top row die-cut a thin scalloped border with 3D Foam Creative Sheets. In the next row, apply a strip of Extreme Double-Sided Tape 1/4-inch. Below it, place a strip of Crafty Foam Tape Black and a row of 3D Foam Circles White in small size underneath. Cut a thin strip of 3D Foam Creative Sheet using my paper trimmer. Then die-cut a different scalloped border with 3D Foam Creative Sheets and placed it at the very bottom. Finally, add a strip of Premium Double-Sided Tape ½-inch above the border.

Foiling Fun

Now the fun part: foiling! I’m using a combination of the red and silver foil from the 3D Foam Creative Embellishment Kit, magenta foil from the Metallic Transfer Foil Variety, and the silver foil from the Metallic Transfer Foil Holographic.

Taking one row at a time, remove the top liner and apply the foil color side UP, rub the foil with my fingertip to transfer the color and peel off. Simple! Repeat with the rest of the rows, using the desired foil color.

Designer Tip: Reapply the foil if you missed a spot.

Adding the Glitter Tag

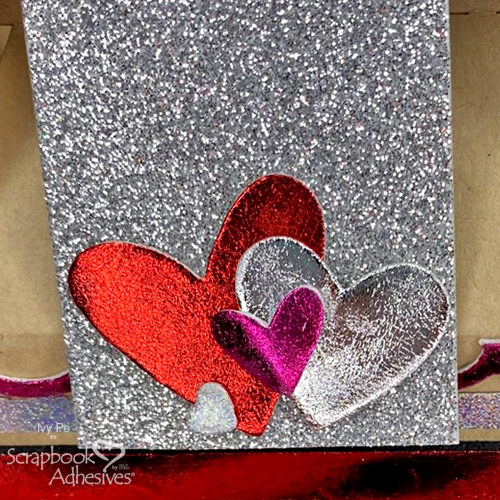
Let’s make a silver glitter tag ties in with the box. Start by die-cutting four different sized hearts with 3D Foam Creative Sheets Small White. It is so easy to cut and leaves no residue on my dies.

Using the same combination of foils on the treat box, place a heart die cut on the bottom of a silver glitter tag and remove the top liner. Apply the foil as mentioned above. Repeat with the other hearts.

Thread the ribbon through the top of the tag and tie around the handle of the box. Secure it even more by adding the Premium Double-Sided Tape 1/2-inch in the ribbon before tying it onto the box.

I love using the Metallic Transfer Foils, they add such an impact to a project and make it look much more complicated than it really is. Without much time and effort, you have a wonderful Valentine’s Day Treat Box!

Have a crafty day!
Ivy Pe

Creative Time: 30 minutes
Skill Level: Beginner

Materials Needed:
Scrapbook Adhesives by 3L®

3D Foam Circles
Crafty Foam Tape Black
3D Foam Creative Sheets Small White
Metallic Transfer Foil Sheets in Variety
Metallic Transfer Foil Sheets in Holographic
3D Foam Creative Embellishment Kit

Home Hobby by 3L®
Extreme Double-Sided Tape 1/4-inch
Premium Double-Sided Tape 1/2-inch

Other
Gable Box: Stampin’ Up; Craft Dies: Sizzix, PaperTrey Ink and Simon Says Stamp; Ribbons: American Crafts and Target; Glitter Tag

Save It to Pinterest!

Visit our Website and Blog!
Sign up for our Newsletter so you never miss a contest or giveaway!

instagram purple icon facebook icon purple pinterest purple icon twitter purple icon YouTube icon blog subscription purple icon

Christmas Photo Cube

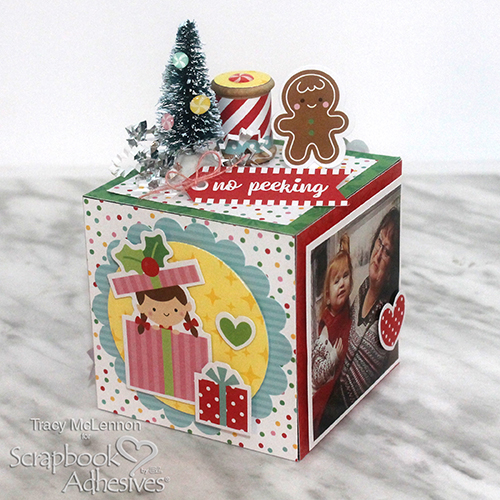
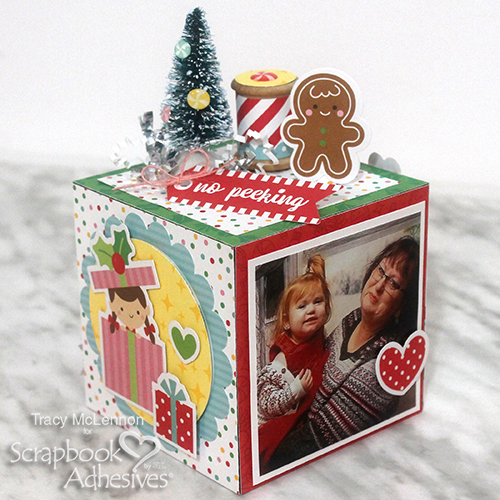
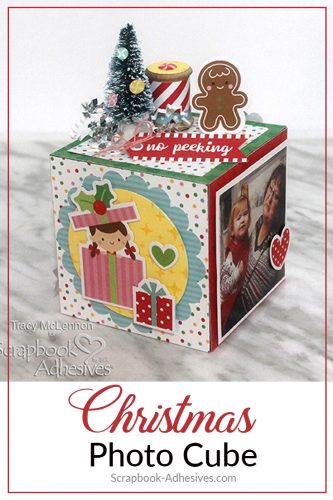
Welcome back, festive friends! Tracy here, and today I have a fun and festive little gift idea to share. What a sweet piece to display for the holidays! Here are all the details on my Christmas Photo Cube.

Christmas Photo Cube

Let’s Get Crafty!

Start with a plain plastic photo cube, I picked mine up at my local dollar store. The first step is to measure your cube, and then cut pieces of patterned paper or cardstock to cover the 4 sides and top of the Christmas Photo Cube. Adhere these base pieces of patterned paper and cardstock using the E-Z Runner® Ultra Strong Refillable Dispenser.

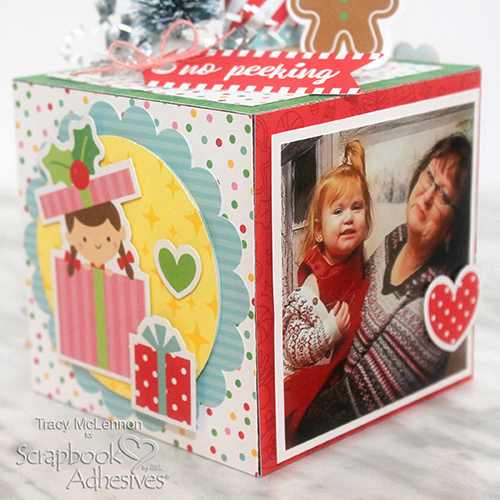
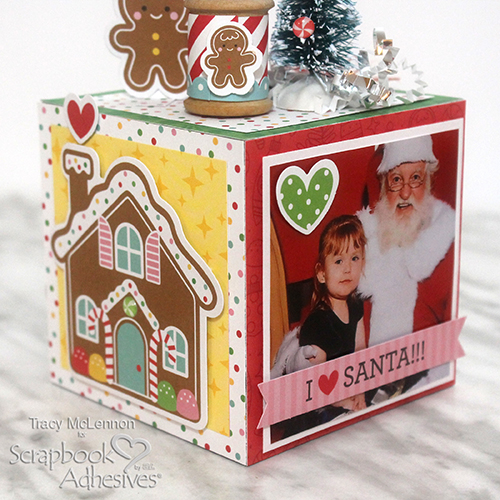
Mat the cropped photos in white cardstock and then adhere to the sides of the cube using Crafty Foam Tape White.

Embellishing the Photo Cube

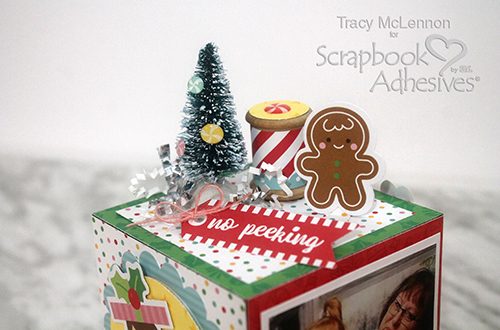
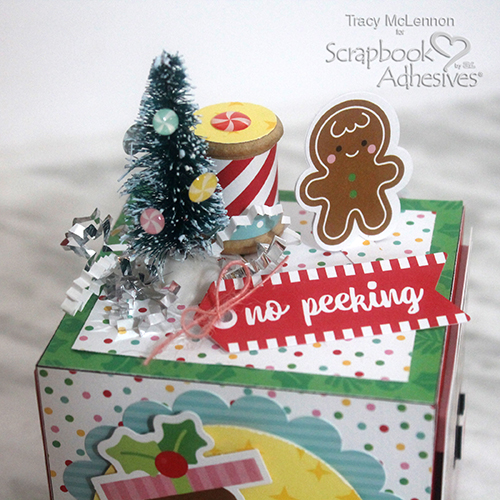
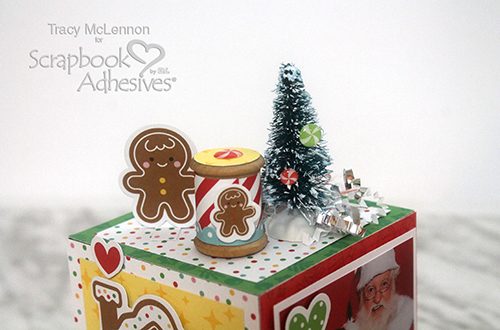
Using a circle punch, I cut a piece of patterned paper to go on top of the wooden spool and adhered it using an Adhesive Dot Medium. Then measure and cut a piece of patterned paper to fit around the spool, and adhere using Extreme Double-Sided Tape 1/4in. The mini tree and spool are attached to the top of the Christmas Photo Cube using Adhesive Dots Medium.

Embellishments are added to the sides of the Christmas Photo Cube and top using a combination of 3D Foam Squares White Mix and Thin 3D Foam Squares White Mix.

Christmas Photo Cube

Candy stickers are adhered to the mini tree using Adhesive Dots Micro.

Add the mini tag with a string bow using layered 3D Foam Squares White Mix to the top of the Christmas Photo Cube.

Christmas Photo Cube

Thanks so much for stopping by!
Tracy McLennon

Creative Time: 60 minutes
Skill Level: Intermediate

Materials Needed:
Scrapbook Adhesives by 3L®

E-Z Runner® Ultra Strong Refillable Dispenser
Crafty Foam Tape White
Thin 3D Foam Squares White Mix
3D Foam Squares White Mix
Adhesive Dots Micro
Adhesive Dots Medium

HomeHobby by 3L®
Extreme Double-Sided Tape 1/4in

Other
Doodlebug Designs- Christmas Magic Collection (Patterned Paper, Chit Chat, Odds & Ends, Shape Sprinkles, Cardstock Stickers), Dollar Store Plastic Photo Cube, Mini Tree, White Cardstock, Circle Punches (2.75″, 3/4″), Pink Burlap String, Wooden Spool

Save it on Pinterest!

Visit our Website and Blog!
Sign up for our Newsletter so you never miss a contest or giveaway!

instagram purple icon facebook icon purple pinterest purple icon twitter purple icon YouTube icon blog subscription purple icon

Merry Card Set Tutorial

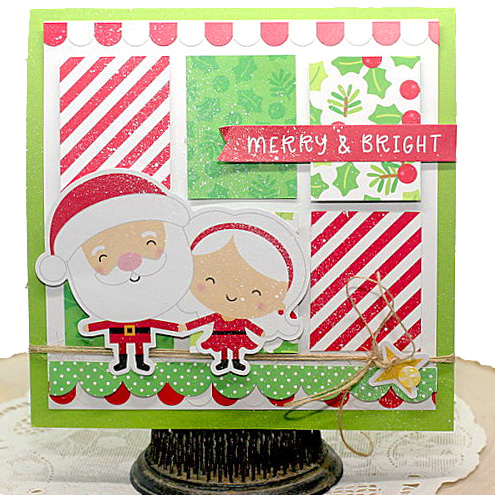
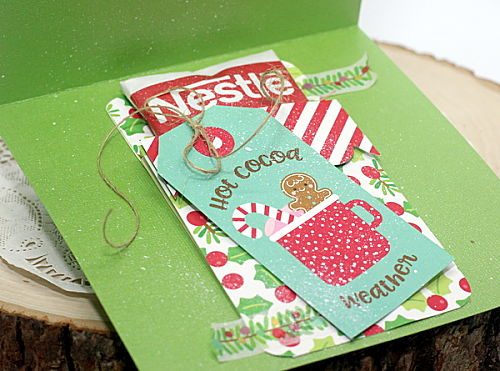
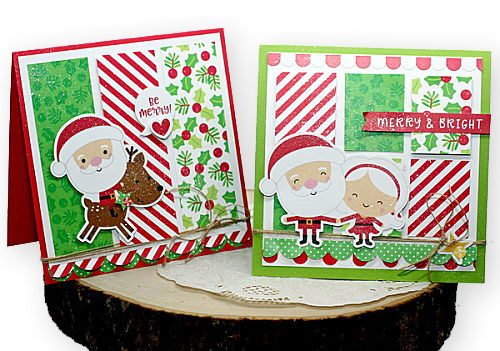
Hi, Connie Mercer here with these Merry Card Set with a little extra special surprise when you open the card.  I’m using adorable holiday papers along with Scrapbook Adhesives by 3L products to make sure these cards assemble with ease!

Merry Card Set Tutorial by Connie Mercer for Scrapbook Adhesives by 3L

Merry Card Set Instructions

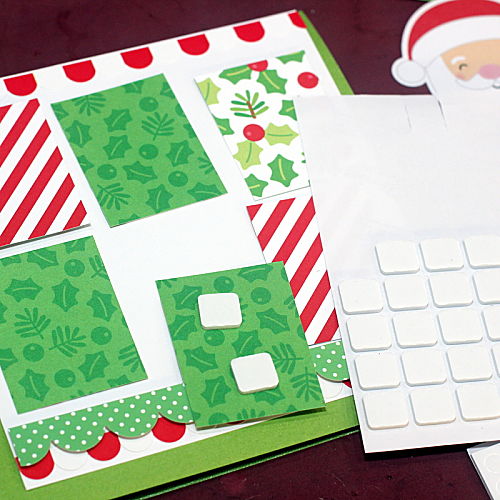
Create a grid design using various holiday patterned papers.  Adhere to every other rectangle with 3D Foam Squares Mix White creating dimension. 

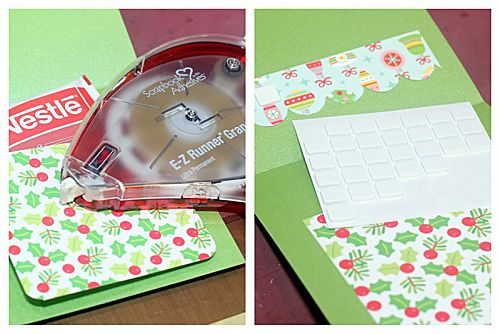
Create a pocket to hold the chocolate mix.  Adhere the pattern paper, to the pocket, using the E-Z Runner® Grand Refillable Dispenser with the E-Z Runner® Grand Ultra Strong Refill inside. An easy way to create the pocket is, fold over a piece of heavy cardstock, adhere both sides together.

Here’s a quick video on How to Use and Refill the E-Z Runner Grand below.

Adhere the pocket to the inside of the card, using the E-Z Runner® Grand Ultra Strong Refill. The inside of the cards can hold a gift card also or both!

Merry Card Set Tutorial by Connie Mercer for Scrapbook Adhesives by 3L

The sky is the limit on creating gift cards! These cards are 6 x 6-inch in size and are big enough to add the gift inside the card. They will also look festive on a package or on a Christmas tree!

Merry Card Set Tutorial by Connie Mercer for Scrapbook Adhesives by 3L

Be Merry Card Instructions

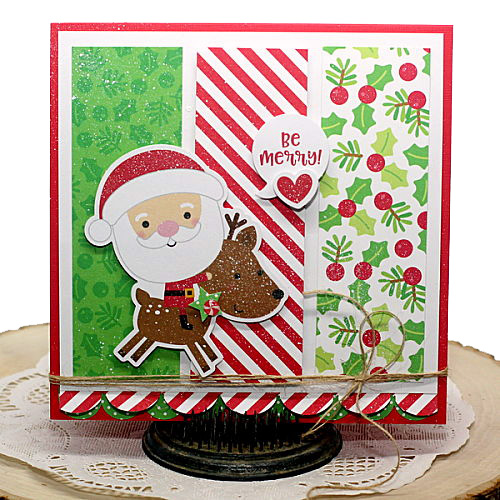
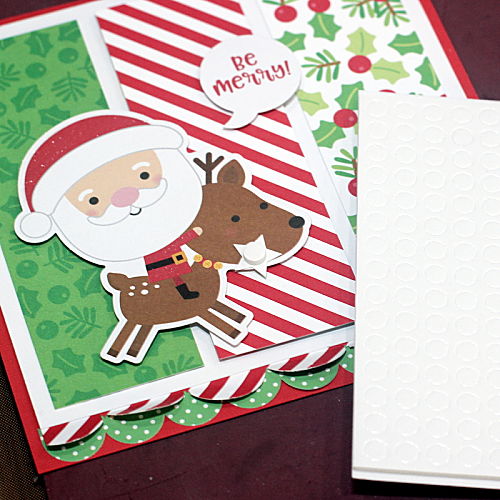
The second card is themed using a grid to create the card design. Instead of rectangles, use strips of pattern paper and adhere them to the card front with the E-Z Runner® Grand Ultra Strong Refill. Use white 3D Foam Squares to adhere to the paper and the die cuts to make easy dimension!

Merry Card Set Tutorial by Connie Mercer for Scrapbook Adhesives by 3L

Adhere the small star to the Reindeer with 3D Foam Circles White.  It is the perfect size for small embellishments.

Isn’t this Merry Card Set adorable? Thanks for stopping by and have a wonderful Holiday! 
Connie Mercer

Creative Time: 30 minutes
Skill Level: Beginner

Materials Needed:
Scrapbook Adhesives by 3L®

3D Foam Squares Mix White
3D Foam Circles Mix White
E-Z Runner® Grand Refillable Dispenser
E-Z Runner® Grand Ultra Strong Refill

Other 
Patterned Papers, Stickers, and Embellishments: Doodlebug Design (Christmas Magic Collection); Glitter Pen; Border Punch; Cardstock; Twine

Save It to Pinterest!

Merry Card Set Tutorial by Connie Mercer for Scrapbook Adhesives by 3L

Visit our Website and Blog!
Sign up for our Newsletter so you never miss a contest or giveaway!

instagram purple icon facebook icon purple pinterest purple icon twitter purple icon YouTube icon blog subscription purple icon

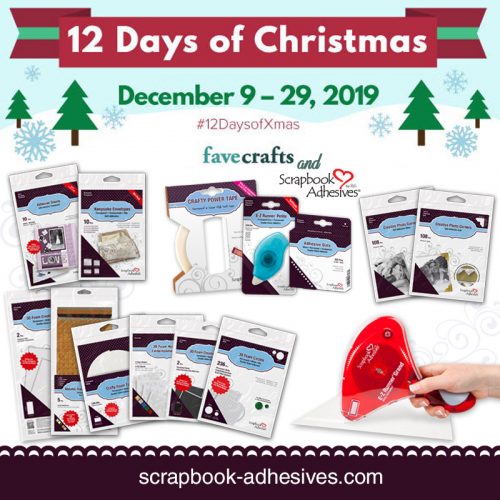
12 Days of Christmas Giveaway with Favecrafts

It’s time to celebrate the 12 Days of Christmas Giveaway with FaveCrafts! You can enter to win a $77 value prize package of Scrapbook Adhesives by 3L adhesives! Plus, Favecrafts is offering a huge GRAND PRIZE worth over $700!

This giveaway Ends 12/29/19 at 11:59PM Eastern. Enter here:

Favecrafts will send an email to the winner, make sure your email address is entered correctly. You can enter 5 times a day, so return often to improve your chances of winning. The deadline to enter is December 29th, 2019 at 11:59:59 p.m. Eastern Time. US and Canada only, excluding Quebec and Puerto Rico.

Don’t miss this Giveaway from last week, click:

Visit our Website and Blog!
Sign up for our Newsletter so you never miss a contest or giveaway!

instagram purple icon facebook icon purple pinterest purple icon twitter purple icon YouTube icon blog subscription purple icon

Christmas Candy Bar Wrappers Tutorial

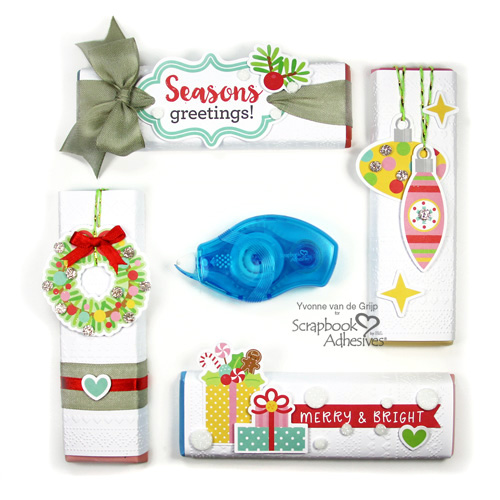
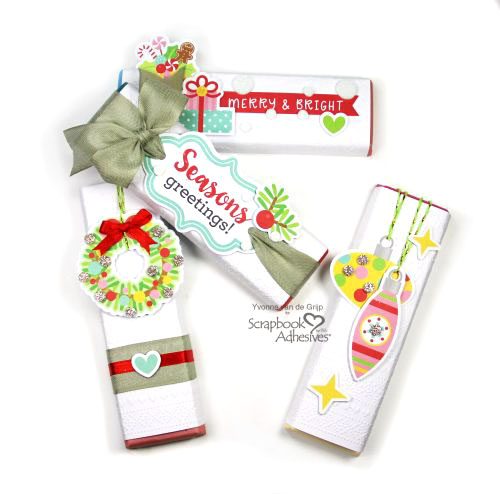
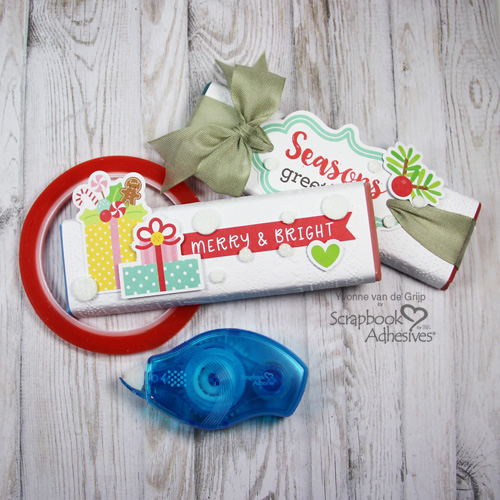
Hi everyone, Yvonne here with some fun ideas to dress up chocolate bars with Christmas Candy Bar Wrappers. Festive chocolate makes great stocking stuffers, and they’re perfect gifts for friends, co-workers and neighbors! Plus, they’re fun to decorate in holiday style!

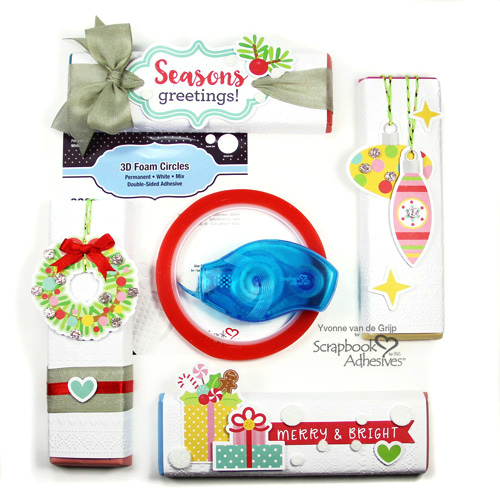
With glittered 3D Foam Circles, I am using the technique that is known as Wearing Your Adhesive on the Outside. Come on and let me show you how to make the fun festive wrappers!

Candy Bar Wrapper Instructions

First, emboss a piece of white cardstock: put some white cardstock between an embossing folder and then run through your die-cutting and embossing machine.

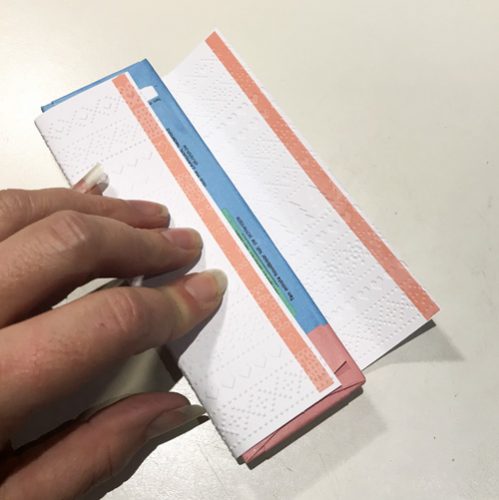
Now trim the embossed cardstock to the right size to fit the chocolate bar. Make sure you have enough overlap to adhere to the wrapper!

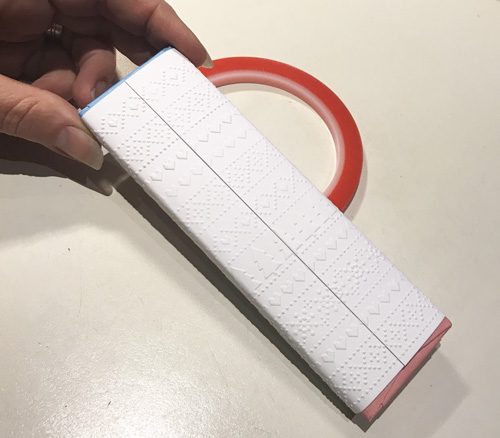
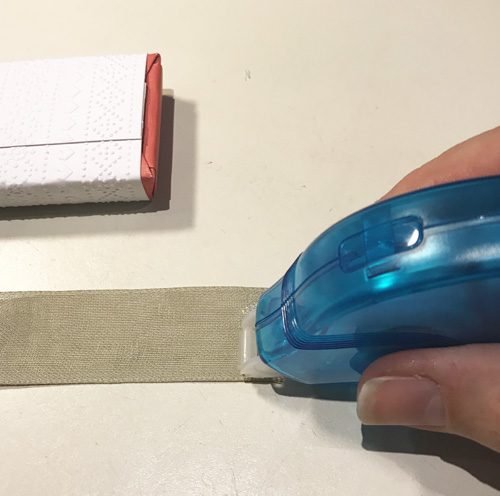
I have used Extreme Double-Sided Tape 1/4in to make sure the wrapper adheres extra secure.

Apply a line of Extreme Double-Sided Tape 1/4in to the front side of one side of the wrapper and then turn over the cardstock around and add a line of Extreme Double-Sided Tape 1/4in to the back side of the other end. This way you will have a double and extra secure adhering.

Now remove
both red liners and wrap and adhere the wrapper around the chocolate bar.

Festive Embellishing

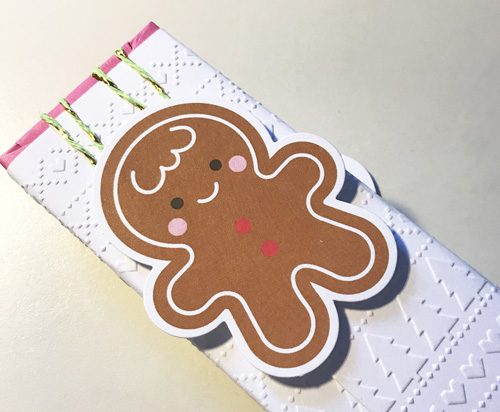
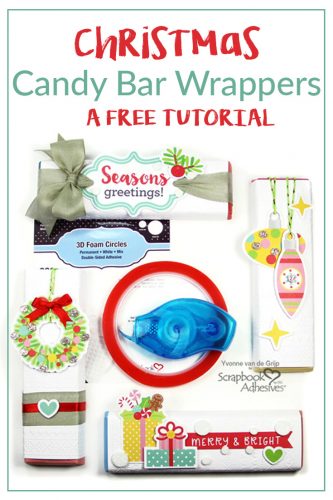
Now let’s embellish to make them Festive Chocolate Bar Wrappers! It’s very easy with die-cut pieces and the Scrapbook Adhesives by 3L® adhesives. I made four wrappers in total.

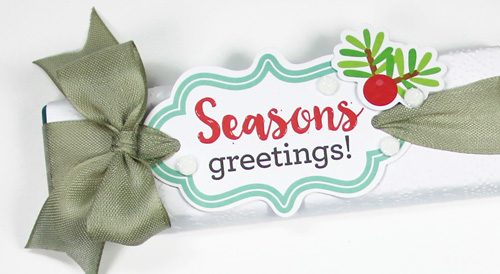
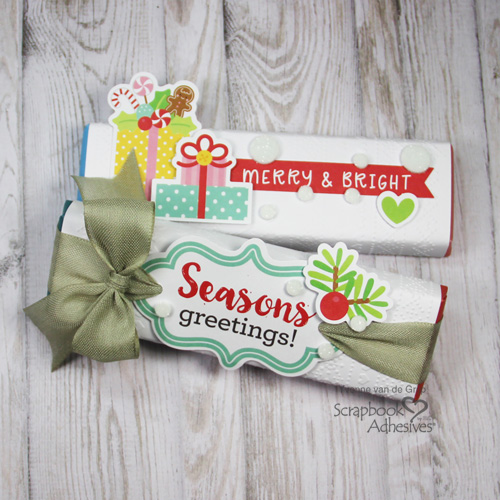
Wrapper 1: Season’s Greetings

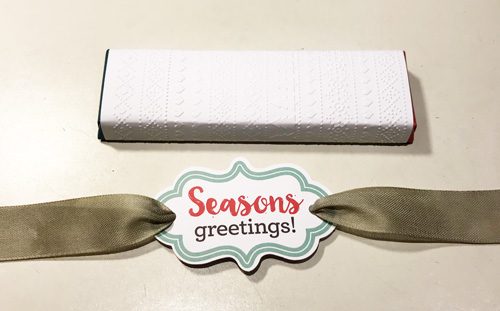
First I
punched two small holes in the Season’s Greetings label and then thread some
ribbon through.

Then adhere the ribbon to the back of the chocolate bar using the E-Z Runner® Petite Permanent Dots Refillable Dispenser.

A bow was secured to the front using Adhesive Dots Large. Then adhere a small holly die-cut using  3D Foam Circles White Mix.

Finally, add some glittered 3D Foam Circles White Mix to represent snowflakes. To Wear Your Adhesive on the Outside, remove the top liner of a 3D Foam Circles White Mix, sprinkle glitter on top and press with your finger to make sure they stay. Tap off the excess and done!

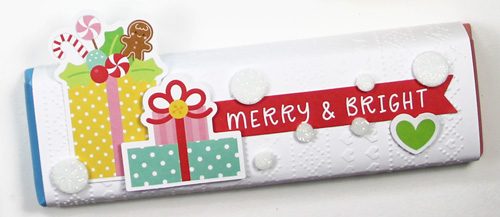
Wrapper 2: Merry and Bright

Adhere the large gift box die-cut and sentiment to the wrapper using the E-Z Runner® Petite Permanent Dots Refillable Dispenser. The heart and smaller box die-cuts adhered with 3D Foam Circles White Mix. This way you create some extra dimension. Next, add glittered 3D Foam Circles White Mix to the wrapper as mentioned in the previous step.

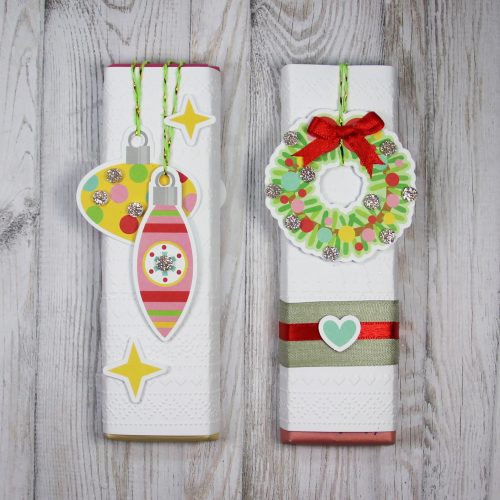
Wrapper 3: Baubles

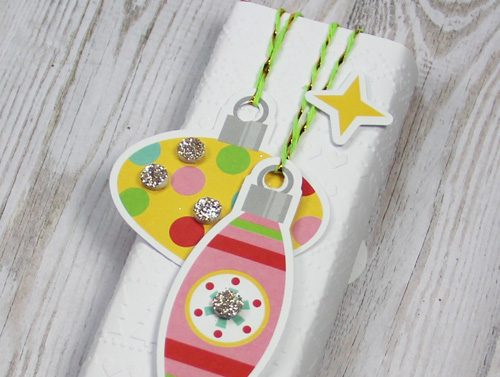
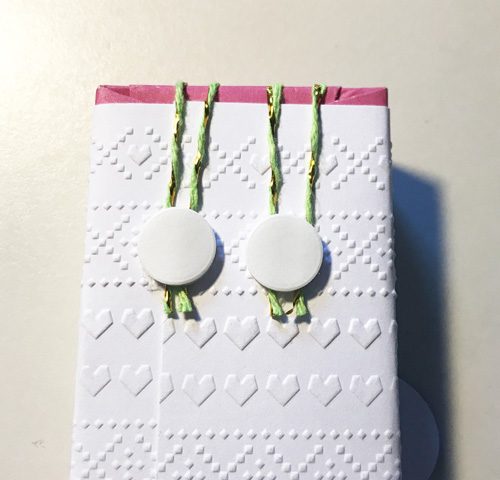
Start by punching a hole in the bauble and thread some green twine through. Then adhere the yellow bauble using the E-Z Runner® Petite Permanent Dots Refillable Dispenser and then the pink bauble and stars using 3D Foam Circles White Mix for dimension.

Adhere the twine to the back of the wrapper using 3D Foam Circles White Mix and cut off the excess twine using scissors.  Next, remove the liner and embellish with a die-cut so no twine ends are showing.

Finally, adhere some gold glittered 3D Foam Circles White Mix to the wrapper to Wear Your Adhesive on the Outside.

Wrapper 4: Holly Wreath

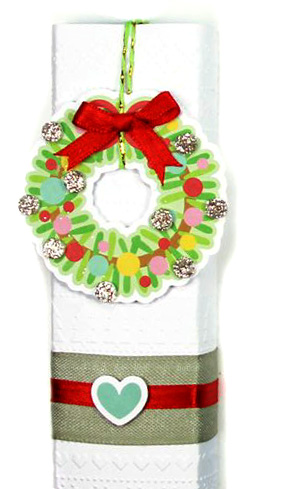
Wrap twine around the wreath die-cut and adhere to the front of the wrapper using 3D Foam Circles White Mix. Then adhere the ends of the twine to the back also using 3D Foam Circles White Mix. To make the twine ends invisible, remove the liner of the 3D Foam Circles White Mix and adhere a tiny die-cut upon.

Then wrap
around some ribbon and adhere to the back of the wrapper using the E-Z
Runner®
Petite Permanent Dots Refillable Dispenser
.

Now adhere a small hear die-cut to the wrapper using 3D Foam Circles White Mix. Then adhere a satin bow adhered using Adhesive Dots Large. Finish by adding glittered 3D Foam Circles White Mix.

I hope you enjoyed the tutorial and wish you lots of fun decorating your own chocolate bars into your own Christmas Candy Bar Wrappers!

Happy crafting!
Yvonne van de Grijp

Creative Time: 60 minutes
Skill
Level:
Intermediate

Materials Needed:
Scrapbook Adhesives by 3L®
3D Foam Circles White Mix
E-Z Runner® Petite Permanent Dots Refillable Dispenser
Adhesive Dots Large

HomeHobby™ by 3L
Extreme Double-Sided Tape 1/4in

Other
Die-cuts (Doodlebug Design inc.™ – Christmas Collection); Cardstock (White), Glitter (Gold, White), Ribbon (Red, Beige), Twine (Green), Scissors, Paper Trimmer, Embossing Folder (Marianne Design), Die-Cutting and Embossing Machine (Spellbinders® Paper Arts: Platinum 6); Chocolate bars.

Save it on Pinterest

Visit our Website and Blog!
Sign up for our Newsletter so you never miss a contest or giveaway!

instagram purple icon facebook icon purple pinterest purple icon twitter purple icon YouTube icon blog subscription purple icon

Christmas Layout with 3D Foam Circles

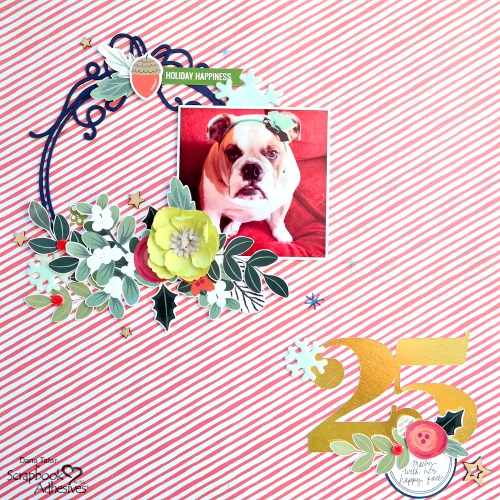
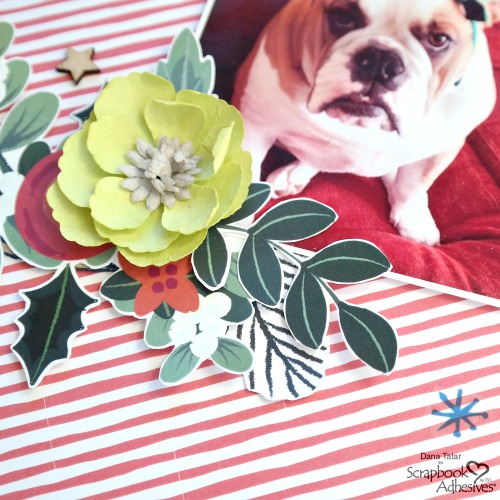
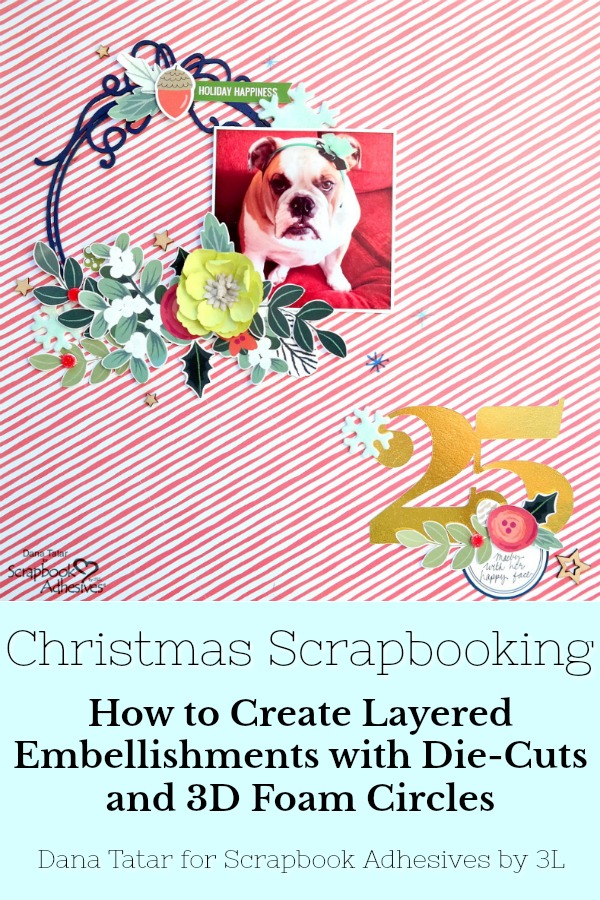
Hi friends! Dana Tatar here sharing a Christmas scrapbook layout that features dimensional embellishments created with 3D Foam Circles and die-cuts. The simple process of applying 3D Foam between layers of paper is a quick and easy way to create an eye-catching design.

Festive Christmas Scrapbook Layout with Dimensional Die-Cut Embellishments and Pet Photo by Dana Tatar for Scrapbook Adhesives by 3L

I mixed shades of green with pops of bright red, navy blue, and gold for a fun twist on the traditional Christmas color palette. I like to include family pets in my holiday festivities. Spending time with my brother’s sweet bulldog, Maeby, is super fun!

Christmas Scrapbook Layers with 3D Foam

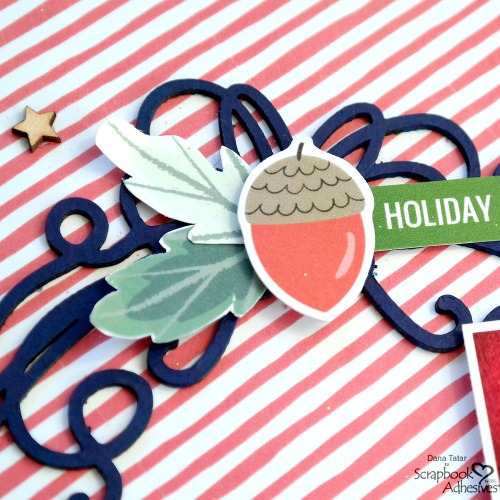
Dimensional Die-Cut Pinecone Embellishment with 3D Foam Circles

I used a regular size 3D Foam Circle to secure the pine cone die-cut to the top of the chipboard frame.

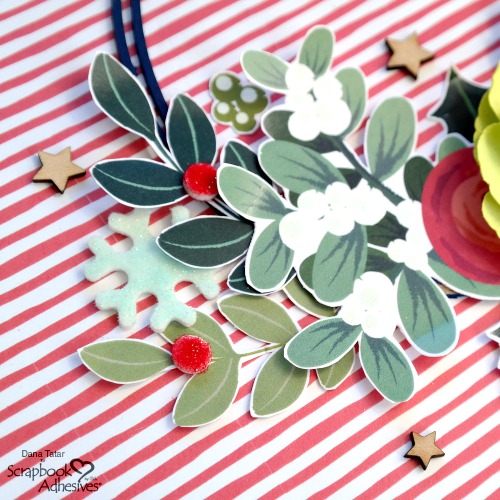
Dimensional Holiday Greenery Embellishment with 3D Foam Circles

3D Foam Circles in small size are perfect for adhering smaller curved die-cuts to the page.

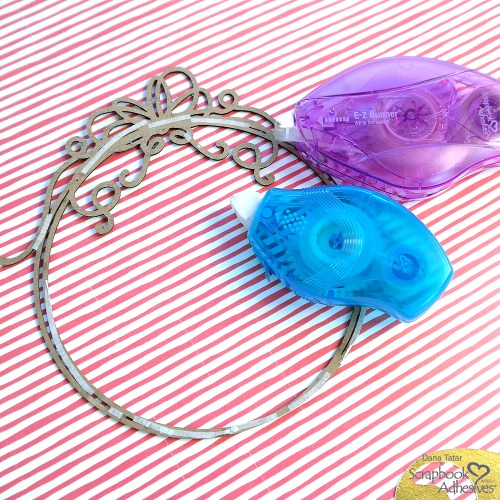
The Best Adhesives to Use on Laser Cut Chipboard

I built dimensional greenery embellishments on top of a chipboard frame. I want to share my favorite adhesives for laser-cut chipboard. The E-Z Runner® Micro Refillable Dispenser is 0.8-inch pre-cut strips of permanent, double-sided adhesive that is the perfect narrow width for most chipboard designs. This adhesive is easy to apply around curves, circles, and lines.

The E-Z Runner® Petite Permanent Dots Refillable Dispenser is a favorite to use for intricate designs. Simply run the dispenser over the chipboard to apply petite dots. These petite dots may be small, but they are strong!

Festive Flocked Shapes

Holly Berry Embellishment Cluster with Flocked 3D Foam Shapes

The 3D Foam Snowflakes include several snowflake designs as well as small circles. First, I applied a pale blue glittered flock to several snowflakes and sprinkled them around the page. Next, I transformed the small circles into holly berries on the leaves with some red glittered flock.

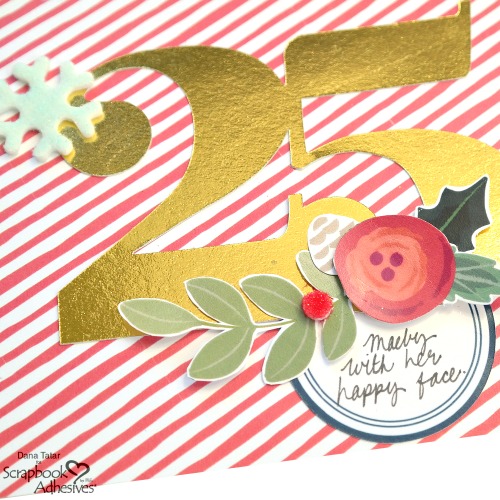
Festive Journal Spot with Flocked 3D Foam Snowflake

I used the same 3D Foam shapes to decorate my journal spot. I hope you use this idea on your Christmas scrapbook layouts!

Have a Happy Christmas! I’ll be back before the new year sharing a fun technique using 3D Foam Circles on a card design.
~Dana

Creative Time: 45 minutes
Skill Level: Beginner

Materials Needed:
Scrapbook Adhesives by 3L®

Adhesive Dots Micro
3D Foam Circles White Mix
3D Foam Snowflakes
E-Z Runner® Petite Permanent Dots Refillable Dispenser
E-Z Runner® Micro Refillable Dispenser

Other
Patterned Paper, Die-Cuts, and Stickers: Pretty Little Studio; Glittered Flock (Martha Stewart); Chipboard (Creative Embellishments); Wood Veneer Stars (Creative Embellishments); Flower (Prima); Acrylic Paint (DecoArt); Pen (American Crafts)

Love It! Save It!

Festive Christmas Scrapbook Layout with Dimensional Die-Cut Embellishments and Pet Photo by Dana Tatar for Scrapbook Adhesives by 3L

Visit our Website and Blog!
Sign up for our Newsletter so you never miss a contest or giveaway!

instagram purple icon facebook icon purple pinterest purple icon twitter purple icon YouTube icon blog subscription purple icon

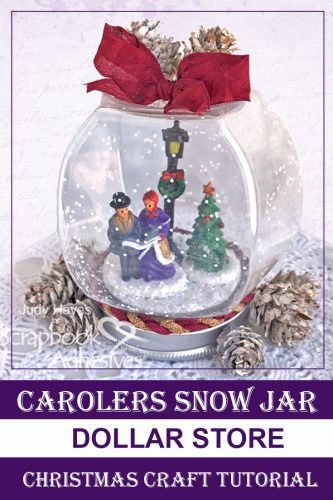
Carolers Snow Jar Tutorial

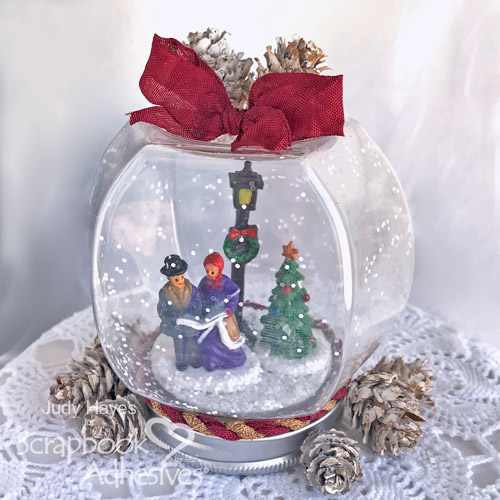
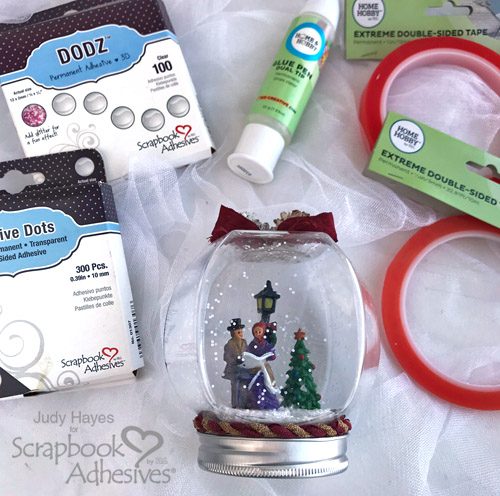
Hello everyone! The holidays are fast approaching! I’m always scurrying around at this time of year to make little gifts or decor items that are quick yet classy. Yes, I’m a last-minute person…is there any other way!?! Today, I’m sharing a Carolers Snow Jar made mostly from things I found at my local dollar store.

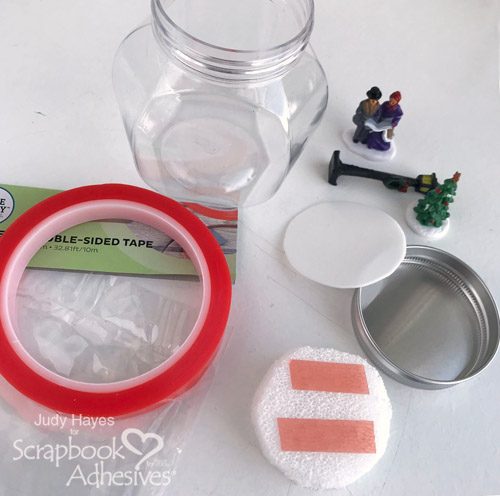
I bought the plastic jar, miniature carolers, tree, lamppost, pine cones, all accessories for a Christmas village, along with Styrofoam. The seam binding and cord are from my stash.

Carolers Snow Jar Instructions

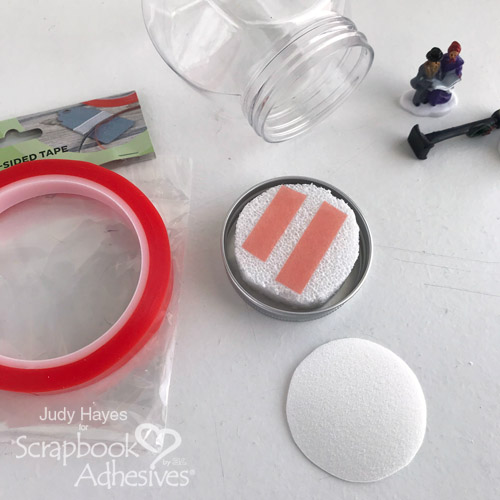
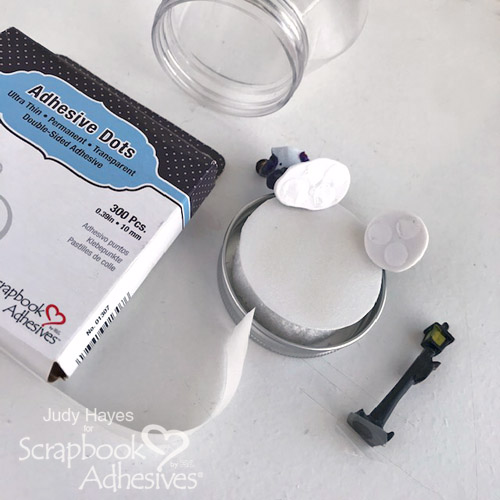
The first step is to cut a piece of Styrofoam to fit inside jar opening so the jar can fit over it. A craft knife should work for this. Then remove the white liner that was inside the jar lid. I used Extreme Double-Sided Tape ½ in to attach the Styrofoam inside the lid.

Trim the liner piece from jar lid to fit inside the jar opening and use it on top of the Styrofoam. It’s also adhered with Extreme Double-Sided Tape ½ in.

Making a Snowy Scene

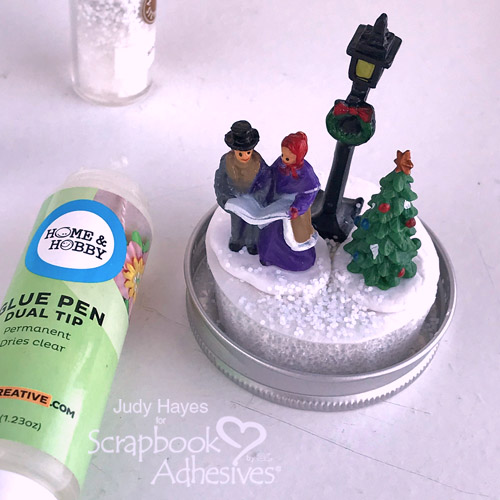
Before adding two carolers, a tree and a lamp post on the lid, I screwed the jar to the lid to determine where jar front aligned with lid. It helped me determine where to place the carolers. Adhesive Dots Ultra Thin secure them in place.

Next, I used Dual Tip Glue Pen to spread the glue around the figures, then sprinkled snow glitter over it. I added more glue and glitter as needed. The glitter on the insides of the jar was not exactly intentional. I screwed the lid to the jar with the lid on top. Some of the glitter fell into the jar and stuck to the sides…static cling! It’s a happy accident and I like it! LOL!

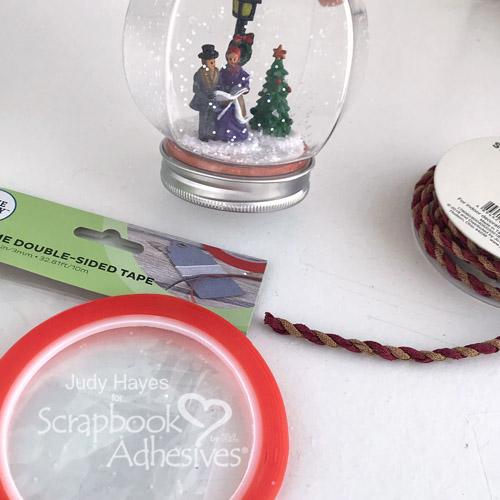
To hide the edges of the Styrofoam, wrap a cord around the jar just above the lid. Add Extreme Double-Sided Tape ⅛ in around the jar, then adhere the cord to it with ends butted together in the back.

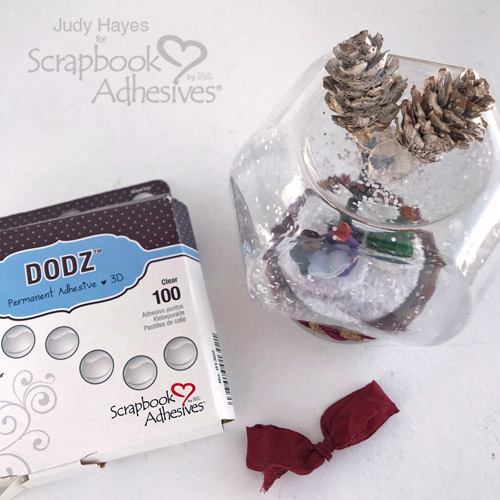
Add two pine cones and a seam binding bow to top of the jar (original bottom). These are held in place with Adhesive Dots 3D. That completes this little Carolers Snow Jar project!

Thanks for Visiting! Happy Holidays!
Judy

Creative Time: 30 Minutes
Skill Level: Beginner

Materials Needed
Scrapbook Adhesives by 3L®

Home Hobby by 3L®

Other
Plastic Jar; Miniature Carolers, Tree, Lamppost; Styrofoam; Martha Stewart Snow Glitter; Seam Binding; Decorative Cord; Pine Cones

Love It! Save It to Pinterest!

Visit our Website and Blog!
Sign up for our Newsletter so you never miss a contest or giveaway!

instagram purple icon facebook icon purple pinterest purple icon twitter purple icon YouTube icon blog subscription purple icon