You are in our US store • Switch to Europe store

Hello Card with Ink Resist Technique

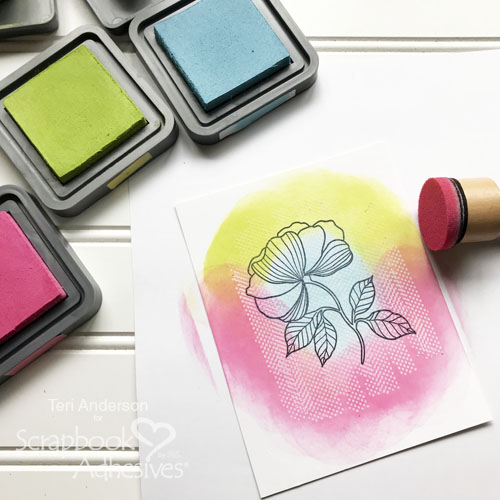
Do you like to get inky when you make cards and scrapbook pages? Teri here to show you a card using a fun ink resist technique!
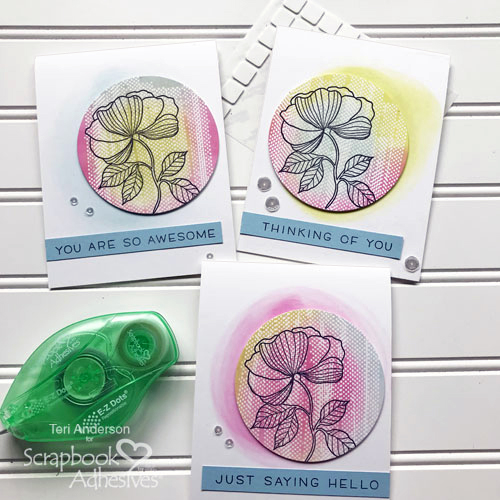
Hello Card with Ink Resist Technique by Teri Anderson for Scrapbook Adhesives by 3L

This ink masking technique is easy to pull off with the E-Z Dots ® Repositionable Refillable Dispenser! Let’s get started.

Trying Out the Ink Resist Technique

Start by stamping an image with black ink onto a panel of white cardstock.
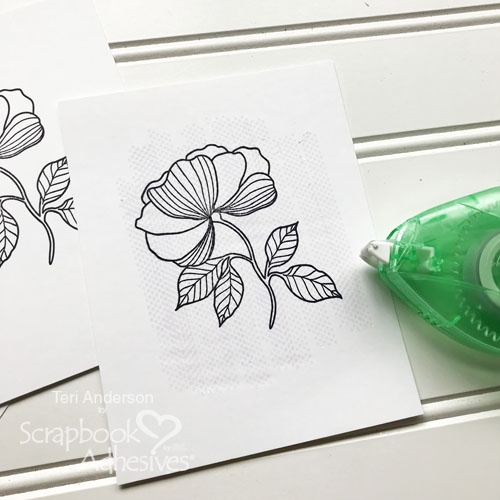
Hello Card with Ink Resist Technique by Teri Anderson for Scrapbook Adhesives by 3L

Use the E-Z Dots ® Repositionable Refillable Dispenser to roll several lines of adhesive dots over your stamped image. You can add as many lines as your heart desires.

Set your panel on a piece of scratch paper. Take one ink color and slowly apply it onto the panel with a sponge. Be gentle and not apply too much pressure as you ink.
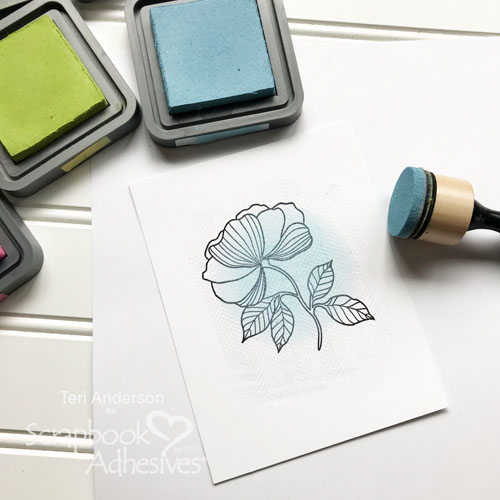
Hello Card with Ink Resist Technique by Teri Anderson for Scrapbook Adhesives by 3L

Now, you are going to add two more colors of ink to the panel.
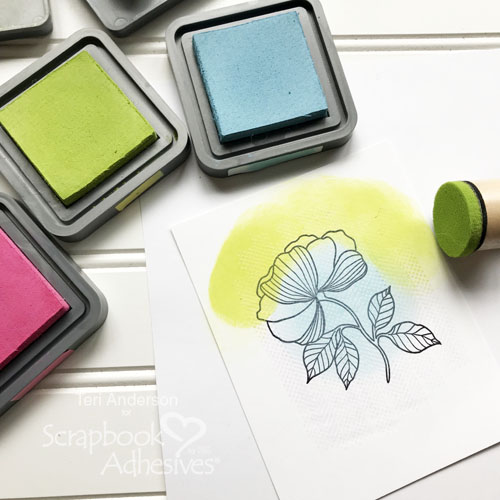
Hello Card with Ink Resist Technique by Teri Anderson for Scrapbook Adhesives by 3L

Hello Card with Ink Resist Technique by Teri Anderson for Scrapbook Adhesives by 3L

Continuing adding ink until your image is completely covered. Once are happy with the inking, and the ink is dry, you can use your fingers to rub off the adhesive. Go gently in a circular motion and the dots come right up!
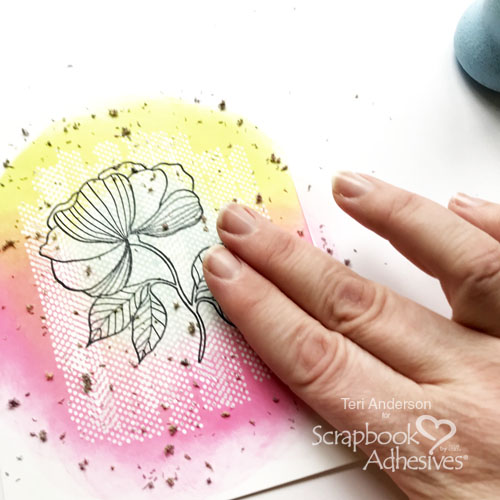
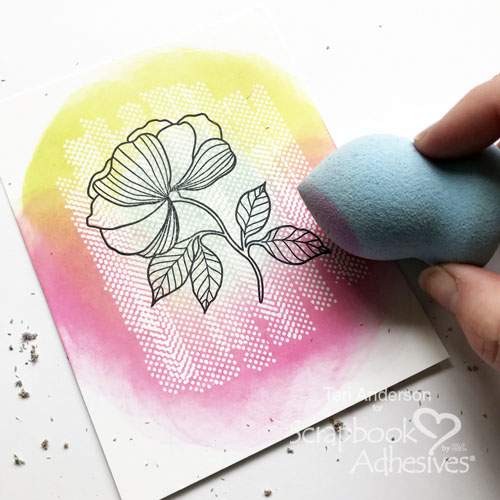
Hello Card with Ink Resist Technique by Teri Anderson for Scrapbook Adhesives by 3L

Hello Card with Ink Resist Technique by Teri Anderson for Scrapbook Adhesives by 3L

I recommend rubbing the panel with a sponge once you’ve removed the adhesive, just in case you’ve missed any flecks. By the way, the sponge I used is a cosmetic sponge I found at the dollar store!

Create the Card

Now, you are going to use the panel on a card. Cut it into a circle.
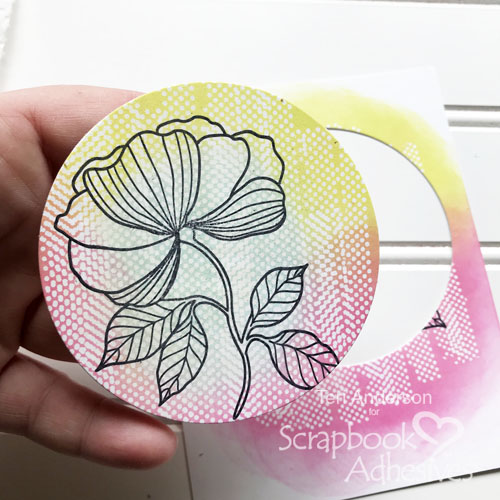
Hello Card with Ink Resist Technique by Teri Anderson for Scrapbook Adhesives by 3L

Create a card from a piece of cardstock. Sponge some ink onto it and then adhere the circle to the card with Thin 3D Foam Squares. I like to use the squares because they give elements on cards ‘pop’ but not too much. That way my cards aren’t too bulky and cost-prohibitive to mail.
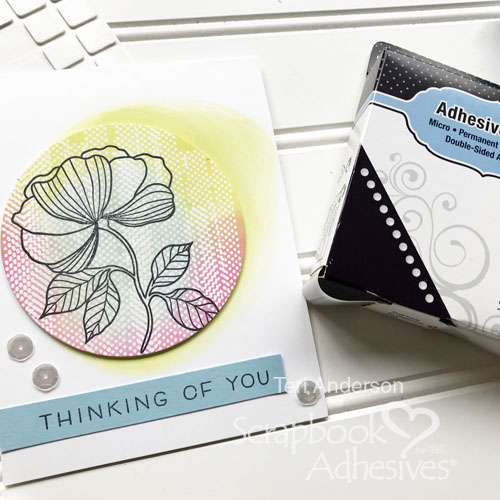
Hello Card with Ink Resist Technique by Teri Anderson for Scrapbook Adhesives by 3L

Stamp a sentiment on a strip of cardstock. Adhere it below the circle.

Finish the card with a few sequins or gems! The micro-sized Adhesive Dots work great for small embellishments.
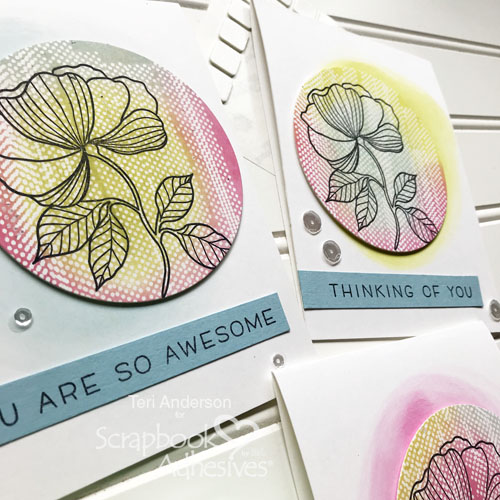
Hello Card with Ink Resist Technique by Teri Anderson for Scrapbook Adhesives by 3L

The thing I really love about this technique is you can create a lot of cards by using the same design. I also love that you can make each of your cards unique by using different ink colors.
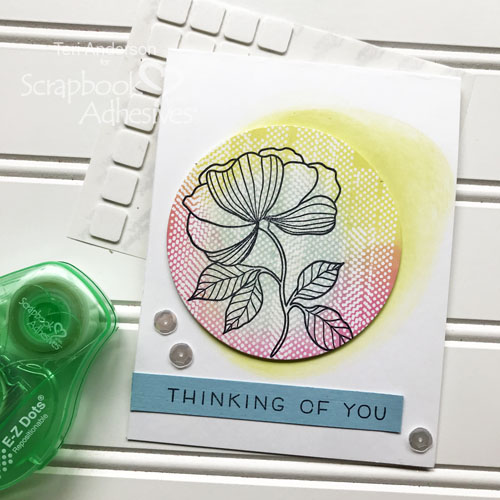
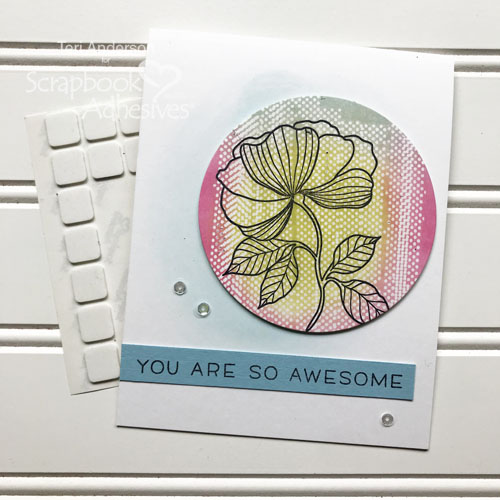
Hello Card with Ink Resist Technique by Teri Anderson for Scrapbook Adhesives by 3L

Hello Card with Ink Resist Technique by Teri Anderson for Scrapbook Adhesives by 3L

The possibilities really are endless!

Thanks for stopping by today. If you give this technique a try, I’d love to see your results! Share a link with me on this post.

Creative Time: 1 hour
Skill Level: Beginner

Materials Needed
Scrapbook Adhesives by 3L®

E-Z Dots ® Permanent Refillable Dispenser
E-Z Dots ® Repositionable Refillable Dispenser
Thin 3D Foam Squares White Mix
Adhesive Dots Micro

Other
Simply Sentiments stamp set from Lawn Fawn; Bouquet Builder stamp set from Waffle Flower; Circle die from Spellbinders; Pink, Green Blue, Black inks from Ranger Ink; White cardstock from Neenah Paper; Make-up sponge; Paper towel

Pin It!
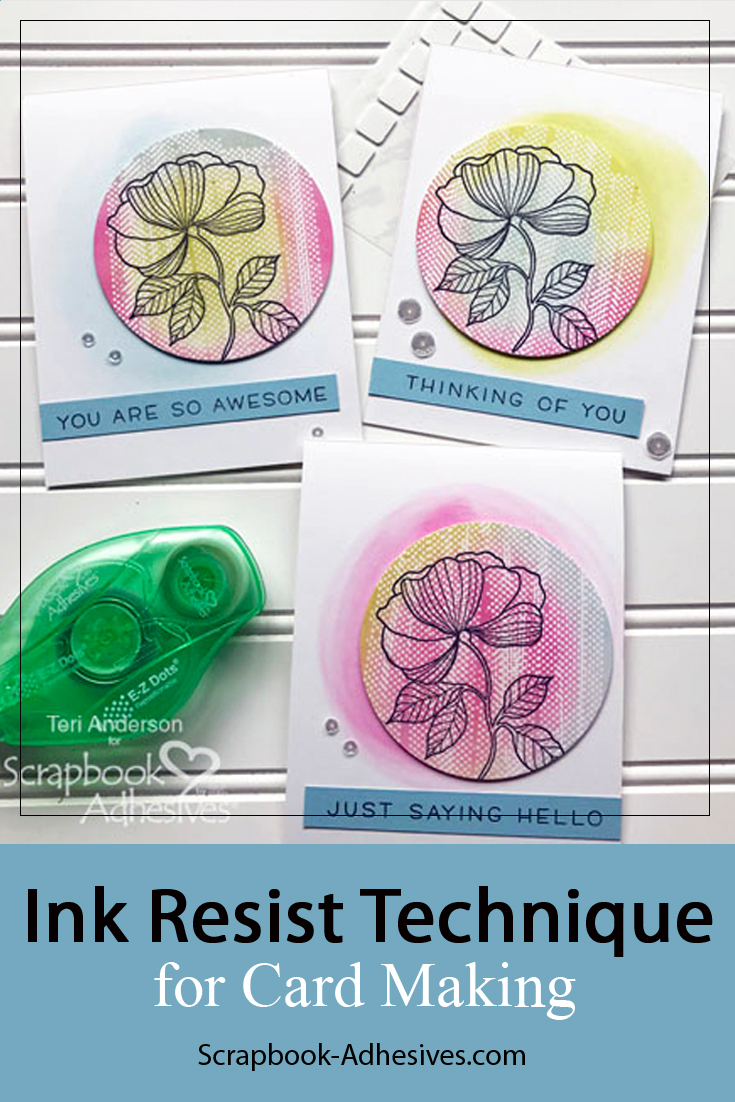
Hello Card with Ink Resist Technique by Teri Anderson for Scrapbook Adhesives by 3L Pinterest

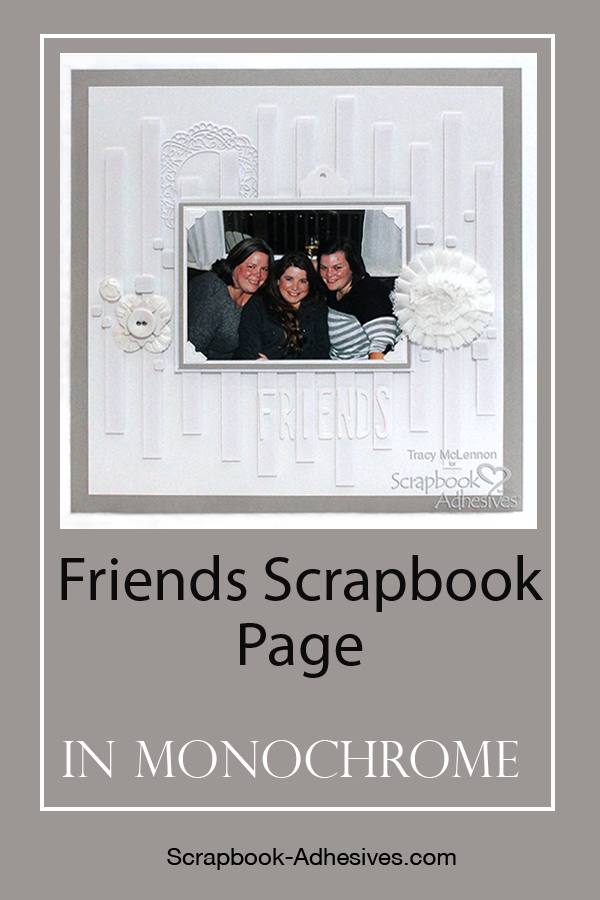
Friends Scrapbook Page in Monochrome

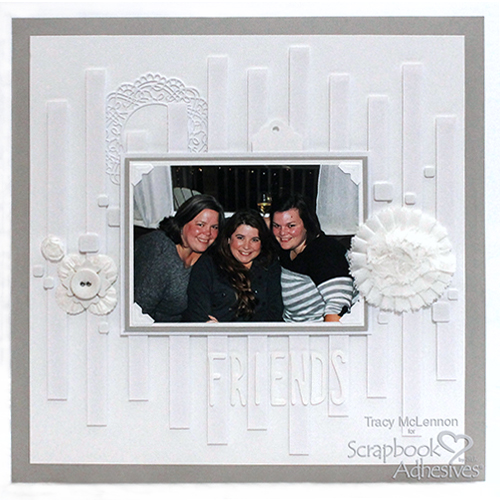
Welcome back, scrappy friends! Tracy here, and today I have a layout honoring my close friends in a simple yet striking monochromatic color scheme to share.

Sometimes you just don’t need a bunch of patterns and embellishments to create a beautiful scrapbook layout. Here are all of the details on how I created this layout using all white products.

Friends Scrapbook Page in Monochromatic Design by Tracy McLennon for Scrapbook Adhesives by 3L

Monochromatic Background

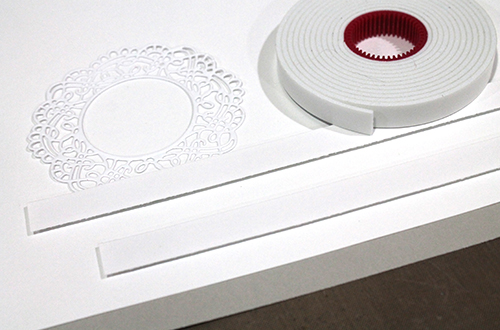
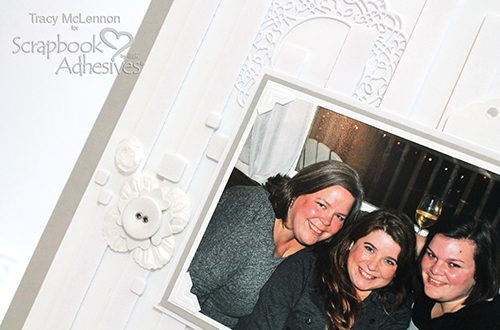
The layered background is a piece of 12×12-inch grey cardstock and a piece of white cardstock cut to 11 x 11-inches. Adhere these pieces together using the E-Z Runner® Permanent Strips Refillable Dispenser. Add the white cardstock die cut using Adhesive Dots Micro.

Cut strips of white cardstock that are 0.5″ wide, and a length of between 9-11″. Adhere these strips all across the layout using Crafty Foam Tape White, spacing them about a half inch apart.

Friends Scrapbook Page in Monochromatic Design by Tracy McLennon for Scrapbook Adhesives by 3L

The Small Details

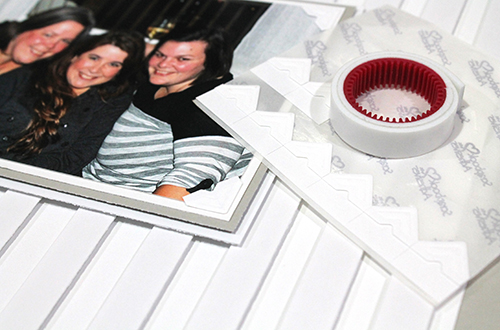
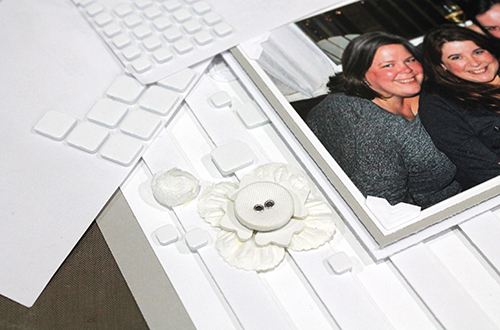
Mat the photo in white and grey cardstock. Add Creative Photo Corners White to the corners of the photo. Adhere these layers together using E-Z Runner® Permanent Strips Refillable Dispenser, then add another white cardstock mat, but adhere to the others using Crafty Foam Tape White. Adhere the matted photo to the middle of the layout using Crafty Foam Tape White.

Friends Scrapbook Page in Monochromatic Design by Tracy McLennon for Scrapbook Adhesives by 3L

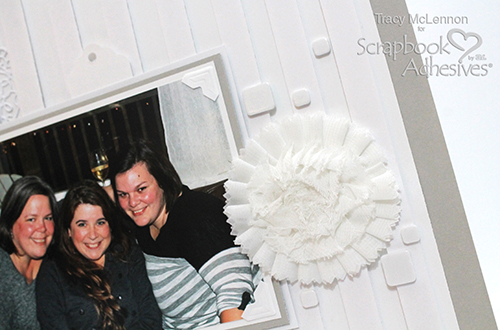
Add the white flowers using Adhesive Dots Medium. Next, add 3D Foam Squares White Mix as embellishments themselves. They adhere to different levels of the layout for lots of monochromatic dimension.

Friends Scrapbook Page in Monochromatic Design by Tracy McLennon for Scrapbook Adhesives by 3L

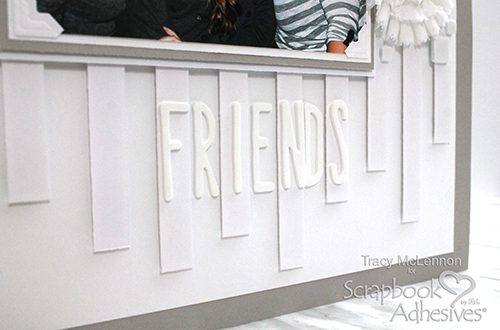
These thin letter stickers were perfect for the layout. I added the first letter onto one of the raised strips, then the next in between the strips and so on.

Friends Scrapbook Page in Monochromatic Design by Tracy McLennon for Scrapbook Adhesives by 3L

Friends Scrapbook Page in Monochromatic Design by Tracy McLennon for Scrapbook Adhesives by 3L

Friends Scrapbook Page in Monochromatic Design by Tracy McLennon for Scrapbook Adhesives by 3L

Creative Time: 60 Minutes
Skill Level: Beginner

Materials Needed
Scrapbook Adhesives by 3L®
3D Foam Squares White Mix
Creative Photo Corners White
Adhesive Dots Medium
Crafty Foam Tape White
Adhesive Dots Micro
E-Z Runner® Permanent Strips Refillable Dispenser

Other
Cardstock (White, Grey), Flowers, Tag, Heartfelt Creations Die, Thickers- White Foam Letter Stickers


Pin It!
Friends Scrapbook Page in Monochromatic Design by Tracy McLennon for Scrapbook Adhesives by 3L Pinterest

Floral Mini Tags Tutorial

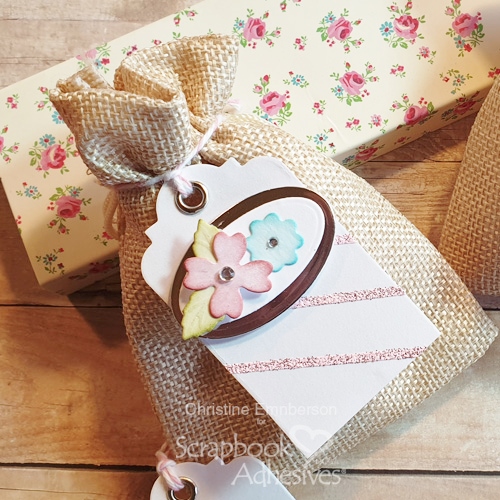
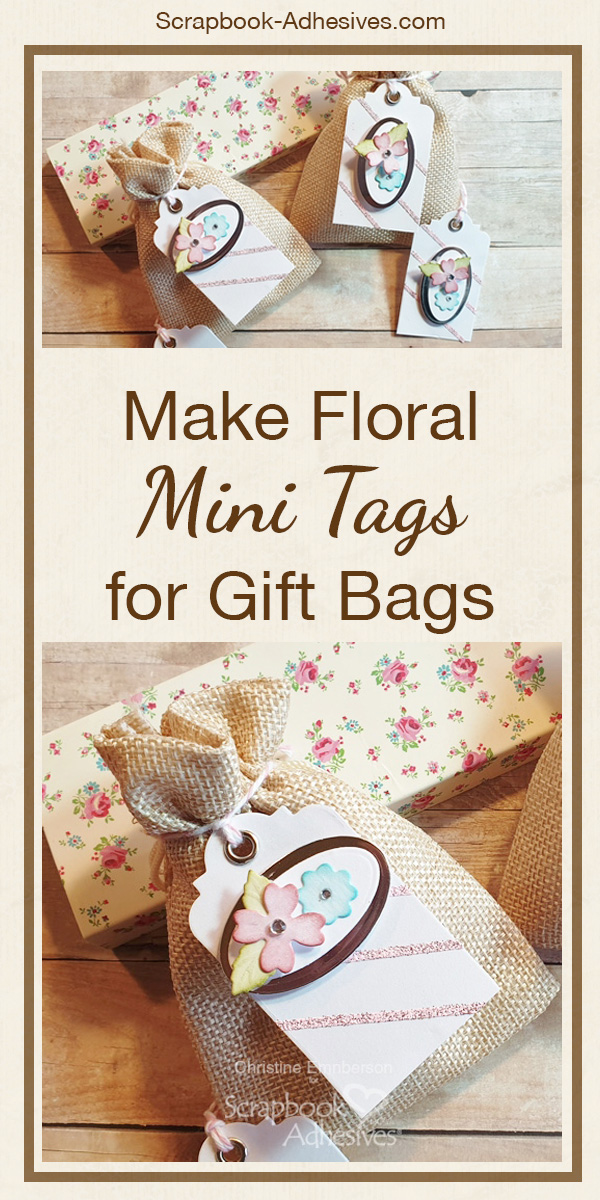
Hi everyone, Christine here today sharing with you some Floral Mini Tags, perfect to adorn little gift bags or boxes, and easily made with Scrapbook Adhesives by 3L® adhesives.

Floral Mini Tags Tutorial by Christine Emberson for Scrapbook Adhesives by 3L

Mini Tags Step Outs

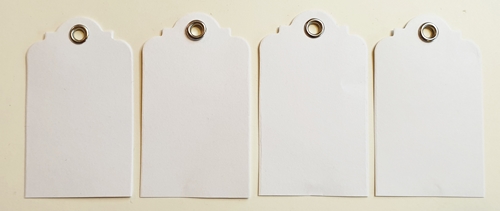
To start, I  selected four white mini tags.  These were purchased but you can die-cut them too.

Floral Mini Tags Tutorial by Christine Emberson for Scrapbook Adhesives by 3L

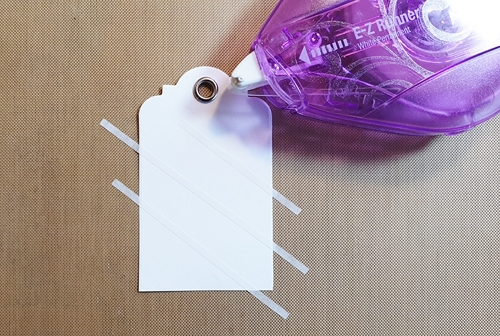
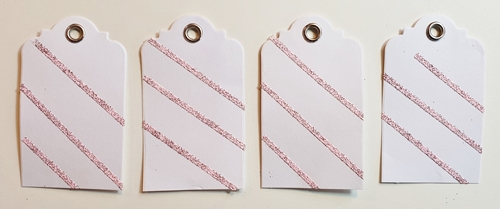
Using the E-Z Runner Micro Refillable Dispenser, apply diagonal strips. This clever dispenser applies strips that are only 1/8″ wide and it is centered on the liner for easy application.

Floral Mini Tags Tutorial by Christine Emberson for Scrapbook Adhesives by 3L

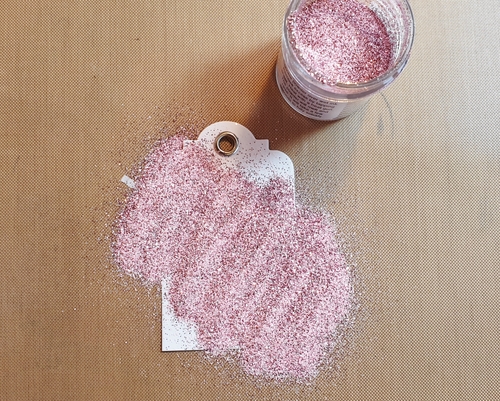
Cover the mini tags with embossing powder, tap off excess and set with heat tool.

Floral Mini Tags Tutorial by Christine Emberson for Scrapbook Adhesives by 3L

Four Striped Mini Tags

The narrowness of the tape makes the stripe design look light and delicate.

Floral Mini Tags Tutorial by Christine Emberson for Scrapbook Adhesives by 3L

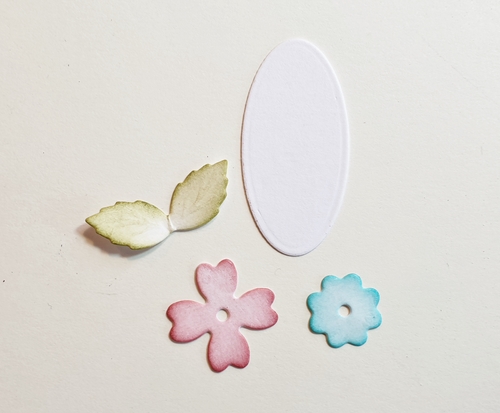
Next, I selected some die cuts, small oval, leaves, and flowers. I colored them with various distress inks.

Floral Mini Tags Tutorial by Christine Emberson for Scrapbook Adhesives by 3L

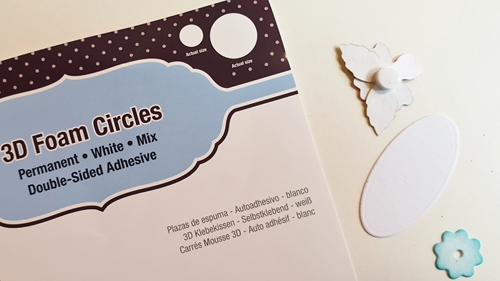
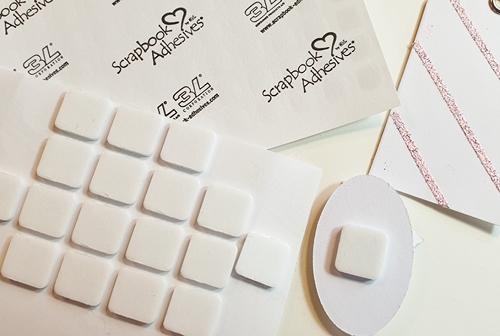
Assemble the flowers and apply 3D Foam Circles White to the reverse. Available in two sizes in each pack, the smaller circles hold tiny embellishments securely in place.

Floral Mini Tags Tutorial by Christine Emberson for Scrapbook Adhesives by 3L

Switching to 3D Foam Squares Regular for the reverse of the larger embellishments.

Floral Mini Tags Tutorial by Christine Emberson for Scrapbook Adhesives by 3L

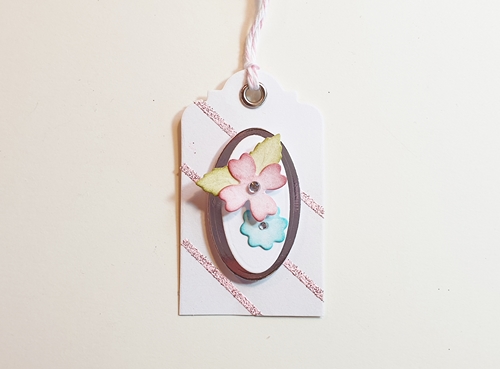
I finished with an additional touch of twine and little gemstones to the flower centers.

Floral Mini Tags Tutorial by Christine Emberson for Scrapbook Adhesives by 3L

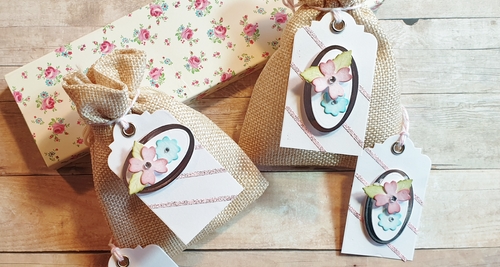
Here is another look at the mini tags! By varying where the ovals are placed, the tags are different but still have a coordinating look.

Floral Mini Tags Tutorial by Christine Emberson for Scrapbook Adhesives by 3L

Thanks for stopping by and don’t forget to check out the great products on the website.
Christine

Creative Time: 25 Minutes
Skill Level: Intermediate

Materials Needed
Scrapbook Adhesives by 3L®

3D Foam Circles, White
3D Foam Squares White Regular
E-Z Runner Micro Refillable Dispenser

Other
Craft Dies: Spellbinders® Paper Arts (Swallow and Heart (flowers)); White Mini Tags; WOW Embossing Powder; Watercolor Card; Silver Foil Card; Pink Twine, Distress Inks; Gemstones

Save It to Pinterest!

Floral Mini Tags Tutorial by Christine Emberson for Scrapbook Adhesives by 3L Pinterest 2020
Floral Mini Tags Tutorial by Christine Emberson for Scrapbook Adhesives by 3L Pinterest

Visit our Website and Blog!
Sign up for our Newsletter so you never miss a contest or giveaway!

instagram purple icon facebook icon purple pinterest purple icon twitter purple icon YouTube icon blog subscription purple icon

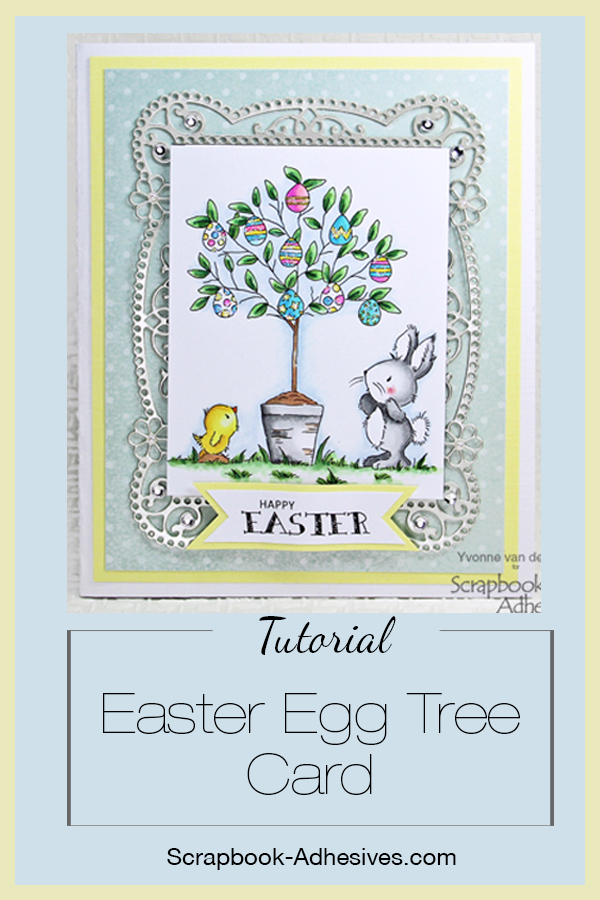
Easter Egg Tree Card with E-Z Runner Petite

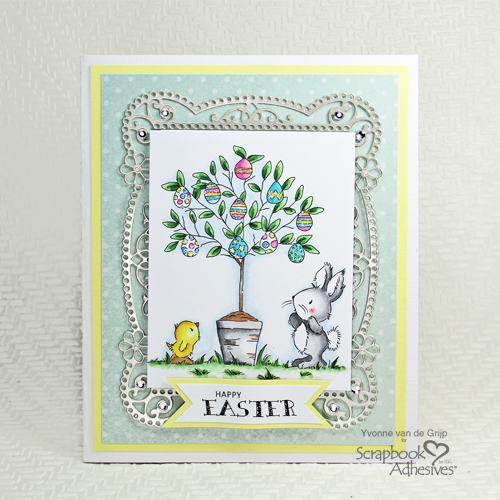
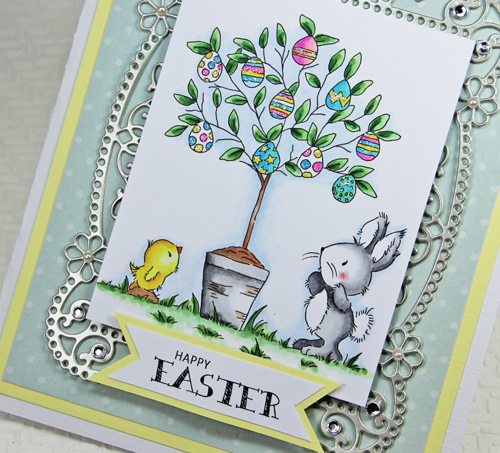
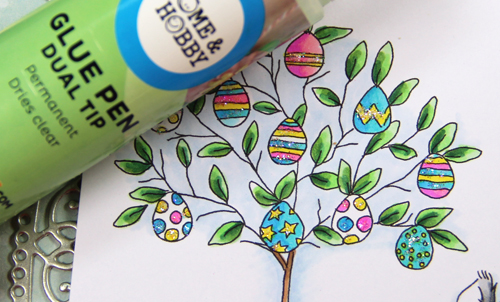
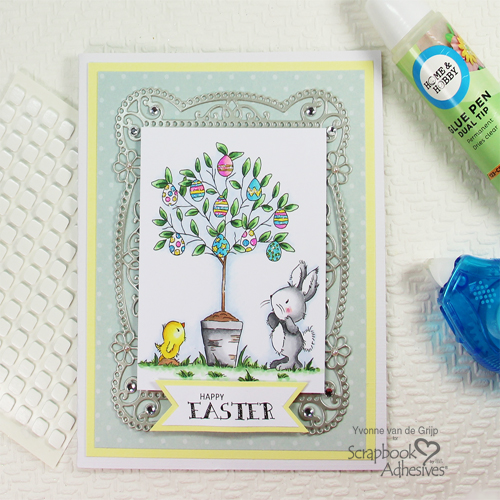
Hi everyone, Yvonne here with a cute Easter Egg Tree card. For the background, I used an intricate die-cut. The E-Z Runner® Petite Permanent Dots Refillable Dispenser is a great way to glue intricate designs onto a card without leaving glue residue. And the HomeHobby Dual Tip Glue Pen is a great tool to add tiny glittered details to your card. Let me show you how I made the card!

Easter Egg Tree Card with E-Z Runner Petite by Yvonne van de Grijp for Scrapbook Adhesives by 3L

Making the Easter Egg Tree Card

Start by mounting a piece of dotted cardstock to a yellow panel and then onto a white card base, using the E-Z Runner® Ultra Strong Refillable Dispenser to adhere all the layers.

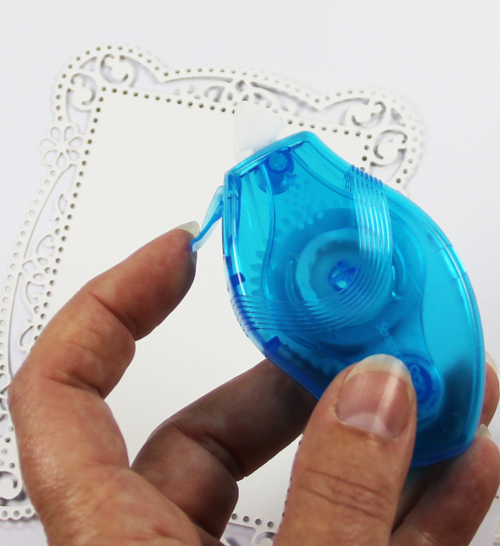
Did you know that E-Z Runner® Petite Permanent Dots Refillable Dispenser is a great way to adhere intricate die-cuts to a card…why?  Well, because this adhesive consists of tiny dots!

Take a piece of copy paper and on top, place the silver die-cut with the backside facing up.

Simply push the lid open towards the casing and click to lock. Now you’re ready to use the E-Z Runner® Petite Permanent Dots Refillable Dispenser.

Easter Egg Tree Card with E-Z Runner Petite by Yvonne van de Grijp for Scrapbook Adhesives by 3L

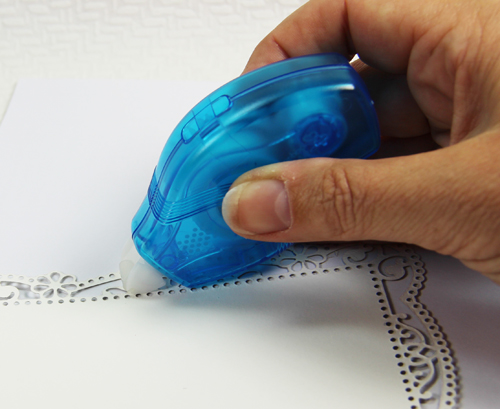
Run the E-Z Runner® Petite Permanent Dots Refillable Dispenser over the back of the die-cut. When you lift up your die-cut you will see that the excess adhesive sticks to the copy paper and leaves no residue!

Easter Egg Tree Card with E-Z Runner Petite by Yvonne van de Grijp for Scrapbook Adhesives by 3L

Next, place the die-cut onto the card base and adhere. Yep…it’s that simple!

Assemble the Card

Color the stamped Easter Egg Tree image and trim with a paper trimmer to fit on top of the silver die-cut. To adhere the panel to the card base with 3D Foam Squares

Cut a banner with an Easter sentiment, using scissors, and adhere to a slightly larger banner using the E-Z Runner® Ultra Strong Refillable Dispenser

Gently bend the edges of the banner with your fingers and adhere to the card. I stacked two 3D Foam Squares White Small Size on each side. In the middle, I used three to lift it up a little extra.

Easter Egg Tree Card with E-Z Runner Petite by Yvonne van de Grijp for Scrapbook Adhesives by 3L

Final Glitter Touch with the Dual Tip Glue Pen

The Dual Tip Glue Pen has two ends: a brush tip for larger applications and a very fine tip for precise application. Using the fine tip, I add my glitter to the details of the Easter Egg Tree. Simply add glue to the detailed designs and immediately after sprinkle clear glitter on top. Tap off the excess and let dry. Lastly, adhere rhinestones to the silver die cut.

Easter Egg Tree Card with E-Z Runner Petite by Yvonne van de Grijp for Scrapbook Adhesives by 3L

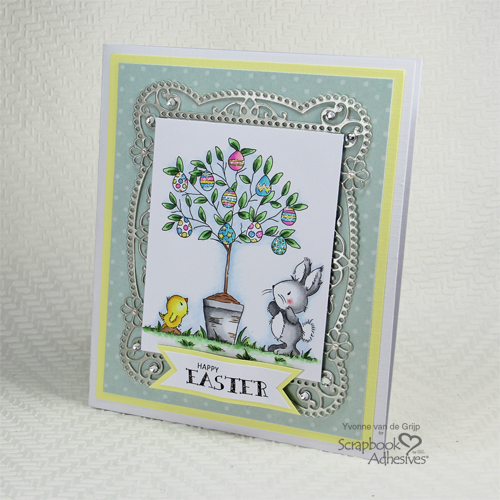
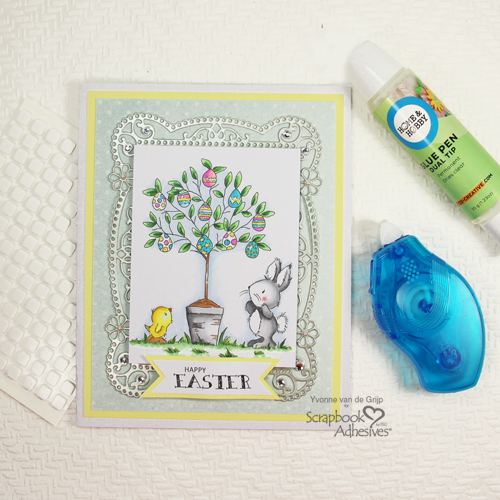
Your Easter Tree Card is finished! Wishing you happy crafting and of course a happy Easter, Yvonne.

Easter Egg Tree Card with E-Z Runner Petite by Yvonne van de Grijp for Scrapbook Adhesives by 3L

Easter Egg Tree Card with E-Z Runner Petite by Yvonne van de Grijp for Scrapbook Adhesives by 3L

Easter Egg Tree Card with E-Z Runner Petite by Yvonne van de Grijp for Scrapbook Adhesives by 3L

Creative Time: 60 minutes (includes coloring time)
Skill Level: Intermediate

Materials needed
Scrapbook Adhesives by 3L®

E-Z Runner® Ultra Strong Refillable Dispenser
E-Z Runner® Petite Permanent Dots Refillable Dispenser
3D Foam Squares White Small Size

HomeHobby by 3L®
Dual Tip Glue Pen

Other
Etched Dies: Spellbinders® Paper Arts (Tallulah Frill Layering Frame and Platinum 6 Die Cutting and Embossing Machine), Cardstock (White, Yellow, Patterned, Silver), Stamp – Lili of the Valley (Easter Cuties), Black ink pad, Copic Markers Copic, Glitter, Rhinestones


Pin It!
Easter Egg Tree Card with E-Z Runner Petite by Yvonne van de Grijp for Scrapbook Adhesives by 3L Pinterest

DIY Farmhouse Planter Box

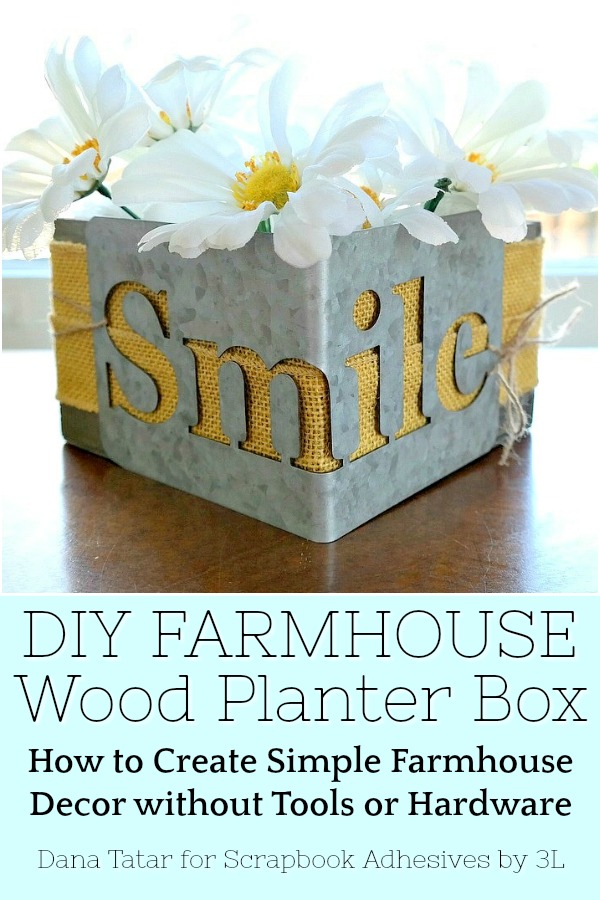
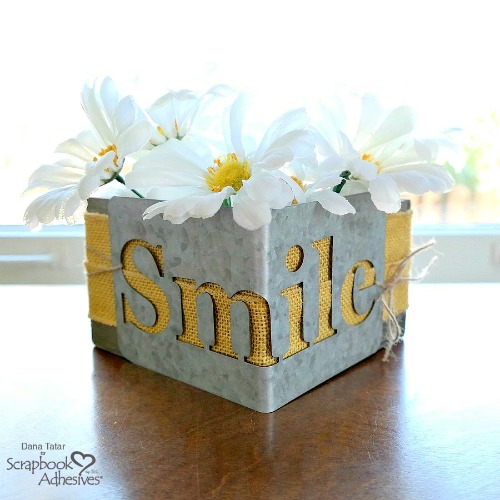
Hi friends! Dana Tatar here today sharing how to embellish a store-bought wood planter into a piece of Springtime farmhouse décor. Spring is slowly making its way to my neighborhood. The weather is not warm enough to start planting my garden, but the sun is shining through my windows. To bring a little Spring into my indoor space I embellished a plain planter box. I added a galvanized steel word, bright yellow ribbon, and fabric daisies. If you think you need power tools and expensive hardware to create farmhouse décor, I’m here to show you a much easier option!

DIY Farmhouse Planter Box by Dana Tatar for Scrapbook Adhesives by 3L

Planter Box Basics


DIY Farmhouse Planter Box by Dana Tatar for Scrapbook Adhesives by 3L

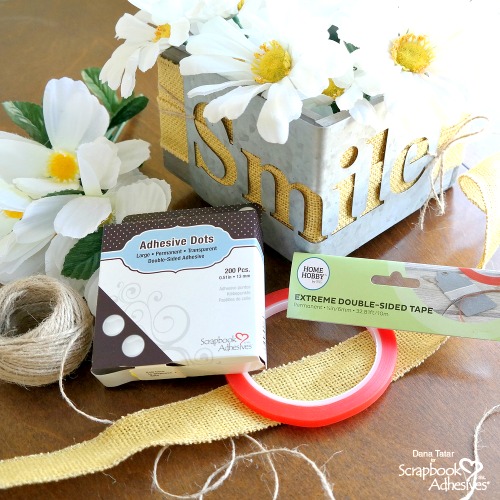
I started this project with a 6×6 inch wood planter box. I chose a bright yellow burlap ribbon, to match the daisy flower centers, and secured it to the box with Extreme Double-Sided Tape 1/2 inch. Any color and type of ribbon will work for this step.

Farmhouse Details


DIY Farmhouse Planter Box by Dana Tatar for Scrapbook Adhesives by 3L

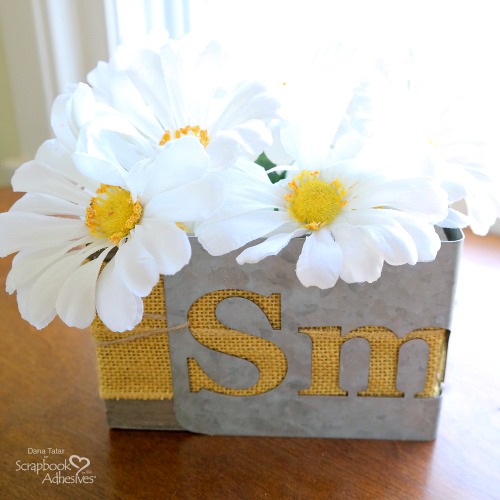
Once the ribbon was secured to the planter, I bent a galvanized smile stencil by hand to fit over one corner of the box.

DIY Farmhouse Planter Box by Dana Tatar for Scrapbook Adhesives by 3L

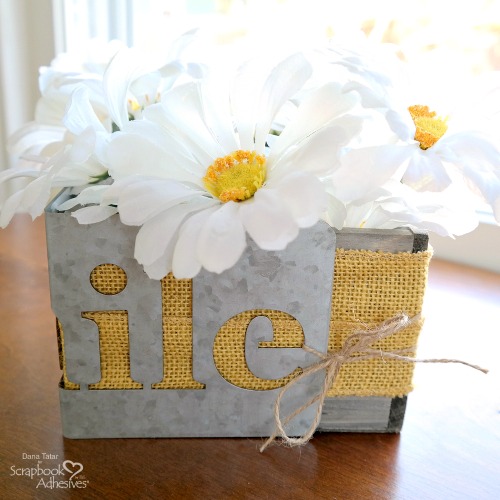
I placed Large Adhesives Dots along the top and bottom edge of the galvanized word and pressed it onto the planter. Next, I cut a piece of twine, looped it through the die-cut S, around the back of the box, and tied it into a bow, securing the end to the die-cut E. Finally, I filled the box with daisies.

DIY Farmhouse Planter Box by Dana Tatar for Scrapbook Adhesives by 3L


The box included a zinc liner, and I plan to add live plants once the weather is a bit warmer. I hope I’ve inspired you to use your adhesives for home décor projects.
~Dana

Creative Time: 20 minutes
Skill Level: Beginner

Materials Needed
Scrapbook Adhesives by 3L®
Adhesive Dots Large

HomeHobby by 3L®
Extreme Double-Sided Tape 1/2-in

Other
Wood Planter Box; Galvanized Smile Stencil (Jillibean Soup); Fabric Flowers; Ribbon; Twine

Pin It!
DIY Farmhouse Planter Box by Dana Tatar for Scrapbook Adhesives by 3L Pinterest

Twinkle Stars on a Galaxy Layout

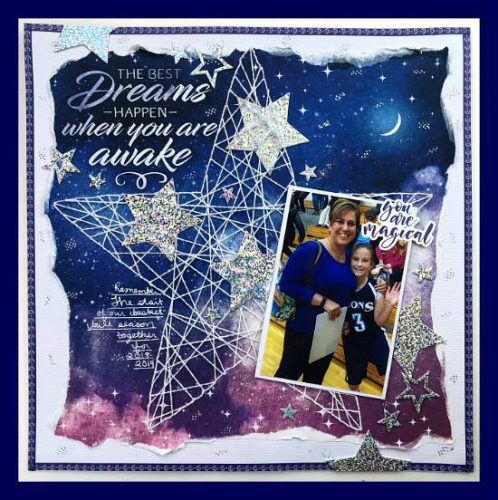
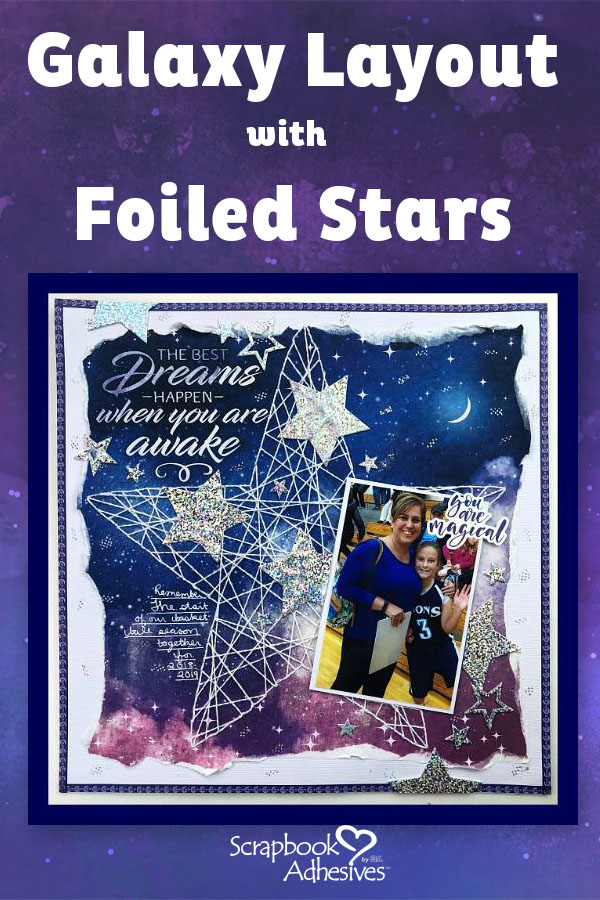
Have you jumped in on the galaxy trend? The more I dabble in it, the more I want to do with it. Knowing that my adhesives can enhance that trend even further makes it even more appealing. Hi, it’s Christine joining you today with ideas on how to make those stars twinkle on your galaxy style projects!

Twinkle Stars on a Galaxy Layout by Christine Meyer for Scrapbook Adhesives by 3L

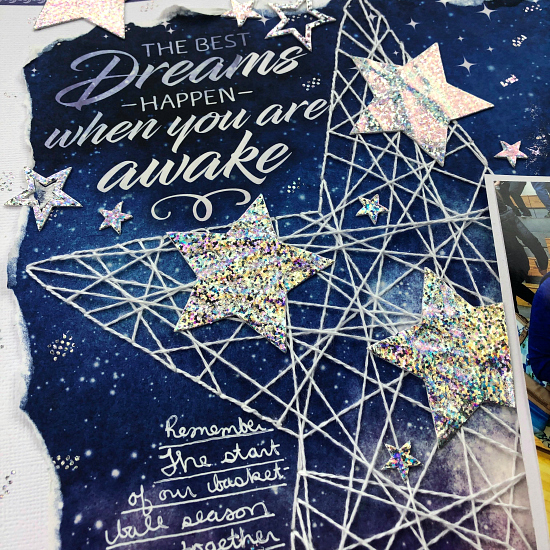
This layout showcases A LOT of stars! The patterned paper in the background has stars printed on it. Then I added a string art star. Next, we have “stars” created with the E-Z Runner Grand Permanent Dots.  Finally, we have stars using the 3D Foam Stars and 3D Foam Creative Sheets!  Let’s take a closer look at how I added all these!

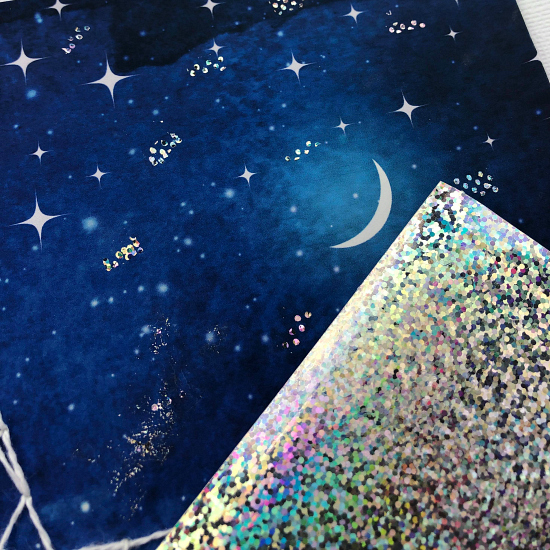
Permanent Dots Twinkle Stars

This was a really easy look to achieve.  I just ran my E-Z Runner® Grand with the Permanent Dots Refill really quickly over the paper – it was almost more of a dab than an actual run.  Sometimes that resulted in a chunk of dots and sometimes very little. Then I took my Metallic Transfer Foil Holographic Silver and rubbed it over the areas.  I did this along the inside and outside borders of the layout.

Because I knew this layout was going to be more “messy” than precise, I knew this technique could work. Additionally, I continued that approach by adding my washi tape border without concern for straightness and tearing my patterned paper edges.

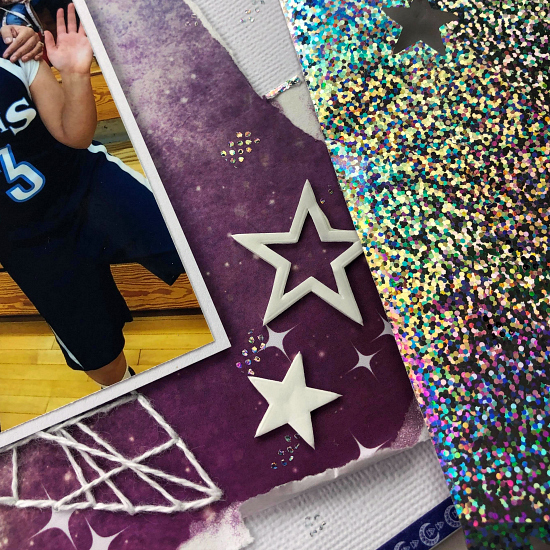
3D Foil Twinkle Stars

Twinkle Stars on a Galaxy Layout by Christine Meyer for Scrapbook Adhesives by 3L

3D Foam products are a standby embellishment for me! They allow you to personalize the embellishment and “Wear Your Adhesive on the Outside.” I added stars from the 3D Foam Stars in both the top and bottom corners.

Twinkle Stars on a Galaxy Layout by Christine Meyer for Scrapbook Adhesives by 3L

Once you remove the top liner, they are exceptionally easy to add foil!  Just a quick rub with the foil side UP and it’s on there!

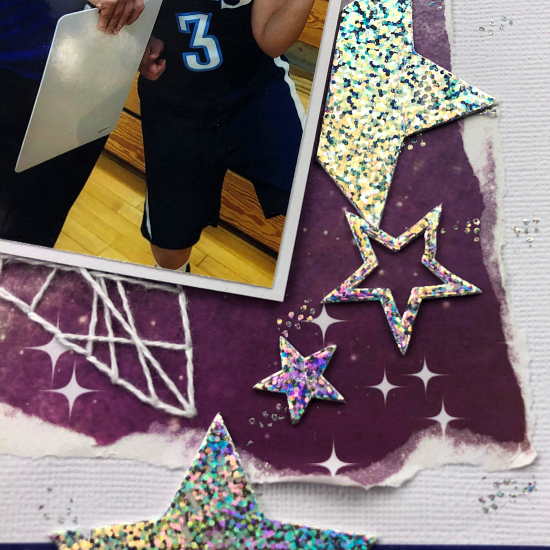
3D Foam Creative Sheets Stars

Twinkle Stars on a Galaxy Layout by Christine Meyer for Scrapbook Adhesives by 3L

As I finished off my layout I knew I wanted a few more big stars. But I didn’t have quite what I needed.  In light of that, I pulled out the 3D Foam Creative Sheets and a star punch. I punched a few out and applied foil in the exact same way as above. I wasn’t sure if the 3D Foam Creative Sheet was going to be too thick for my punch but it wasn’t!

Thanks so much for joining me today!
-Christine Meyer

Creative Time: 90 Minutes
Skill Level: Advanced

Materials Needed
Scrapbook Adhesives by 3L®

E-Z Runner® Grand Refillable Dispenser
E-Z Runner Grand Permanent Dots Refill
3D Foam Creative Sheets Small White
3D Foam Stars
Metallic Transfer Foil Sheets Holographic Colors

Other
Patterned Paper & Stickers from Paper House Productions

Pin It!
Twinkle Stars on a Galaxy Layout by Christine Meyer for Scrapbook Adhesives by 3L Pinterest

Glittered Bunny Easter Card Tutorial

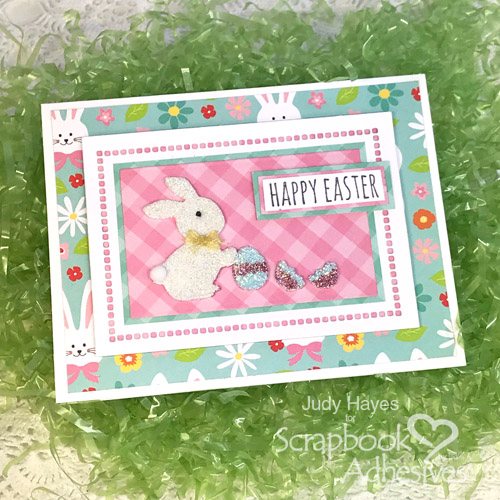
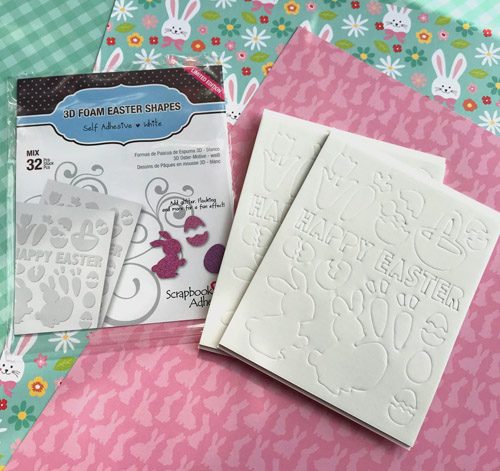
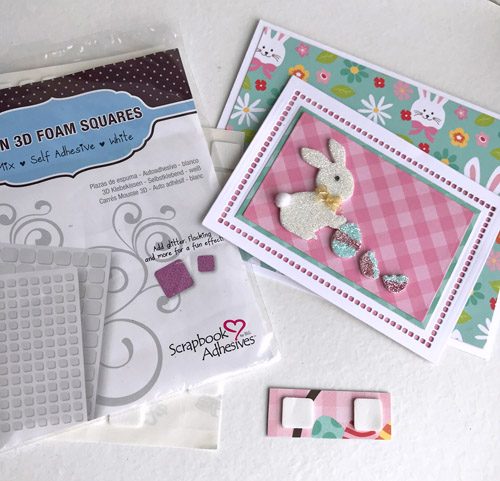
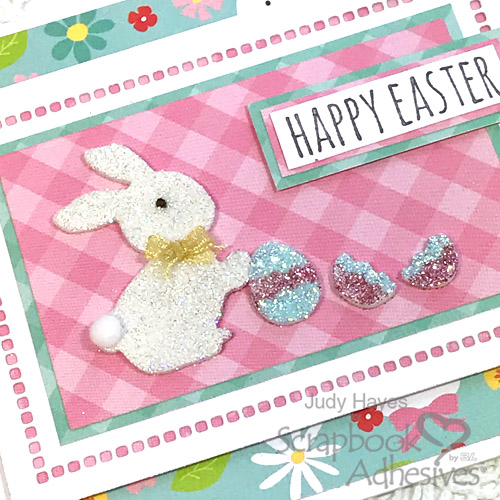
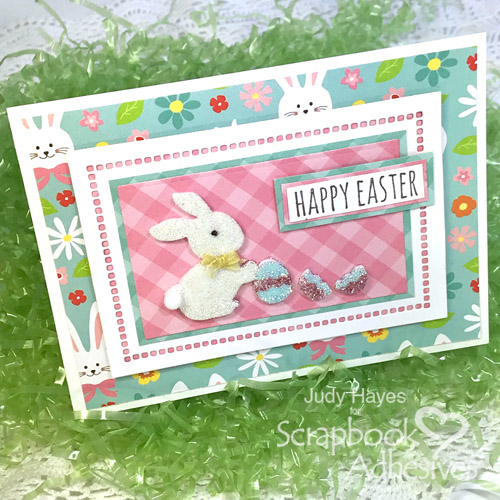
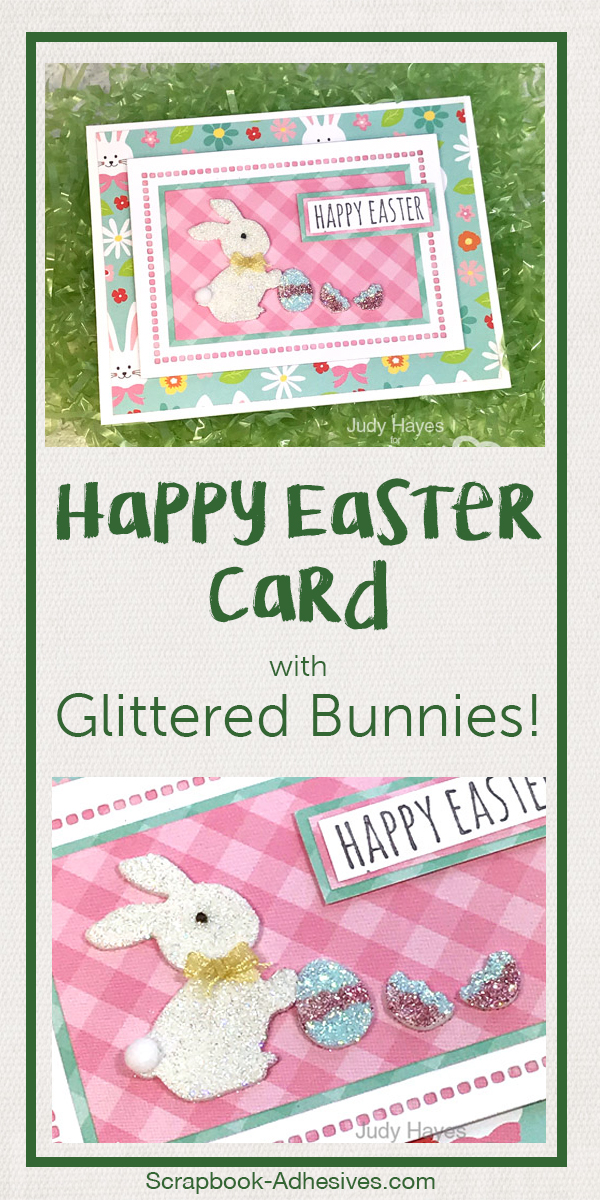
Hello friends!  It’s Judy here today with a glittery Bunny Easter Card. I used the bunny and eggs shape from 3D Foam Easter Shapes and dressed them up with glitter! It’s an easy and fun way to make a card, keep reading to see how!

Glittered Bunny Easter Card Tutorial by Judy Hayes for Scrapbook Adhesives by 3L

Embellish the Bunny Easter Card Panel

Glittered Bunny Easter Card Tutorial by Judy Hayes for Scrapbook Adhesives by 3L

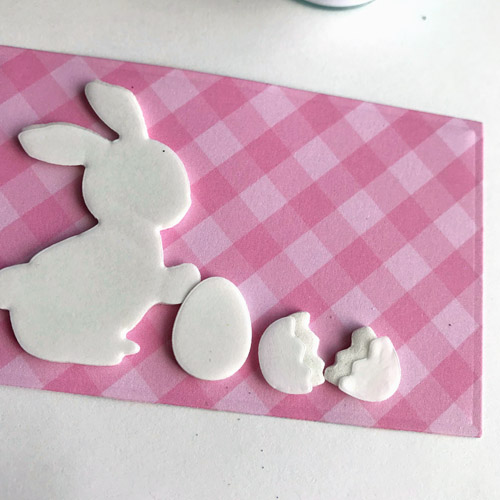
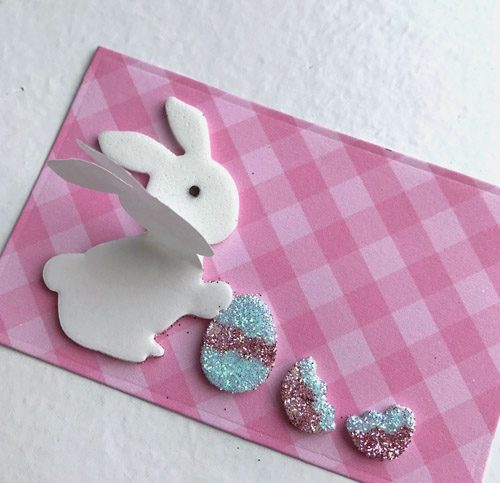
Let’s embellish the rectangle card panel of the Easter Bunny Card. Die-cut a rectangle from pink patterned paper. Remove the bunny and two eggs (solid shape and the broken set) from 3D Foam Easter Shapes and arrange on the rectangle.

Remove the liners from the broken egg and reposition it to leave a sticky edge of the egg exposed.

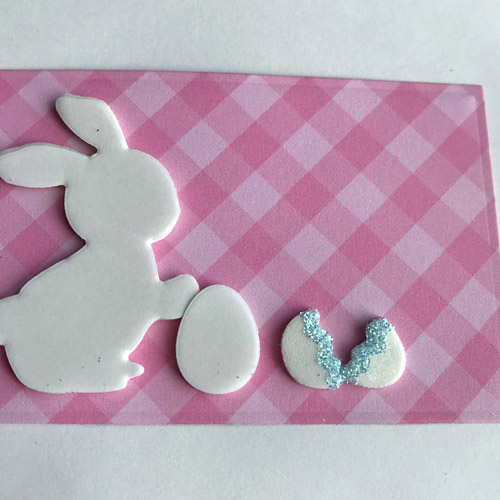
Glittered Bunny Easter Card Tutorial by Judy Hayes for Scrapbook Adhesives by 3L

Sprinkle the edge with turquoise glitter and remove excess. Remove those liners and set them aside to use on the other egg.

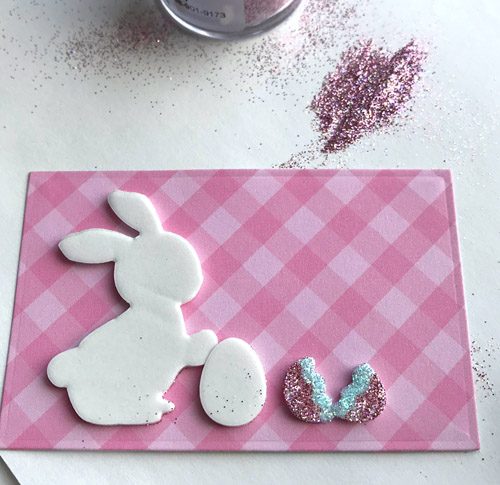
Glittered Bunny Easter Card Tutorial by Judy Hayes for Scrapbook Adhesives by 3L

Sprinkle the remaining exposed adhesive on the egg with pink glitter and remove excess.

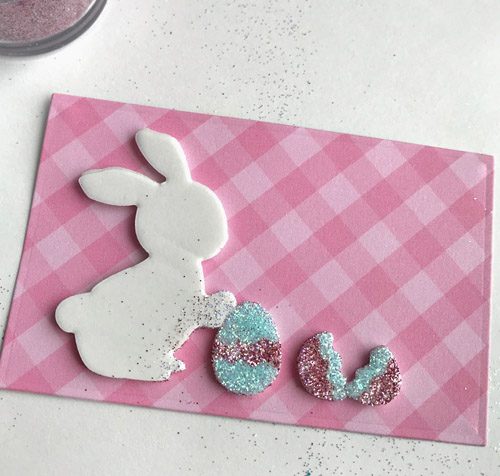
Remove the liner from the solid egg. Take the pieces from broken egg and place on the solid egg to leave a band of adhesive exposed at center. Sprinkle with pink glitter and remove excess.  Remove liners. Sprinkle the rest of the solid egg with turquoise glitter and remove excess.

Glittered Bunny Easter Card Tutorial by Judy Hayes for Scrapbook Adhesives by 3L

Use a 1/16 inch punch to cut an eye for the bunny from brown cardstock.  Remove the liner from the bunny and adhere the brown dot for the eye.

Glittered Bunny Easter Card Tutorial by Judy Hayes for Scrapbook Adhesives by 3L

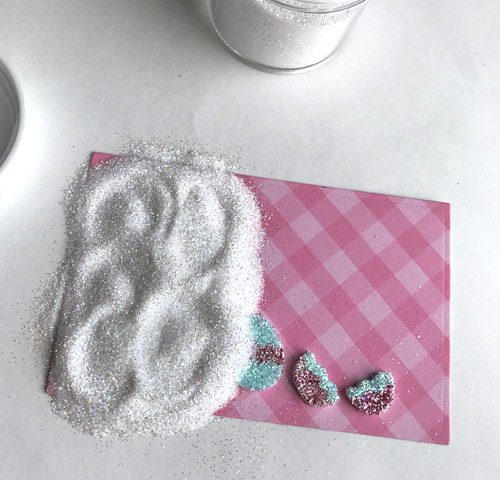
Sprinkle the bunny with white glitter and remove excess.

Glittered Bunny Easter Card Tutorial by Judy Hayes for Scrapbook Adhesives by 3L

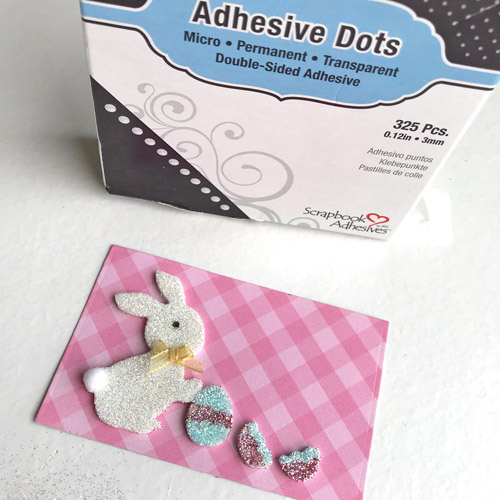
Tie tiny ribbon bow and fasten it to the bunny with Adhesive Dots Micro. Then fasten a pompom to the bunny as a tail with Adhesive Dots Micro.

Glittered Bunny Easter Card Tutorial by Judy Hayes for Scrapbook Adhesives by 3L

Making the Bunny Easter Card Layers

Cut a slightly larger green mat and attach it using E-Z Runner® Petite Permanent Dots Refillable Dispenser.

Die cut a  white rectangle and fasten pink paper behind it to show through holes using E-Z Runner® Petite Permanent Dots Refillable Dispenser. Use the same adhesive to fasten the pink rectangle to the white mat.

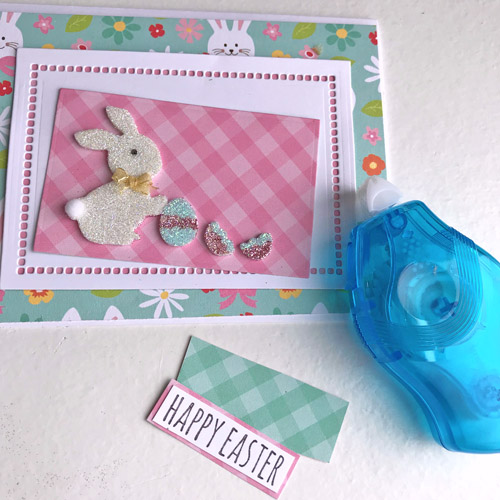
Form a 4.25 x 5.5-inch white card base.  Cut pattern paper to 4 x 5.25-inch. Fasten to card front with E-Z Runner® Petite Permanent Dots Refillable Dispenser. Next stamp “Happy Easter” on a strip of white cardstock. Use E-Z Runner® Petite Permanent Dots Refillable Dispenser to fasten it to pink and green mats.

Glittered Bunny Easter Card Tutorial by Judy Hayes for Scrapbook Adhesives by 3L

Fasten the bunny layer to the card with Thin 3D Foam Squares White Mix.

Glittered Bunny Easter Card Tutorial by Judy Hayes for Scrapbook Adhesives by 3L

Fasten “Happy Easter” piece to card with Thin 3D Foam Squares White Mix.

Glittered Bunny Easter Card Tutorial by Judy Hayes for Scrapbook Adhesives by 3L

Enjoy a cute Bunny Easter Card!

Glittered Bunny Easter Card Tutorial by Judy Hayes for Scrapbook Adhesives by 3L

Happy Crafting!
Judy

Creative Time: 45 Minutes
Skill Level: Intermediate

Materials Needed
Scrapbook Adhesives by 3L®

3D Foam Easter Shapes
Adhesive Dots Micro
Thin 3D Foam Squares White Mix
E-Z Runner® Petite Permanent Dots Refillable Dispenser

Other
Echo Park Hello Easter Paper Collection; Imagine Crafts/Tsukineko Versafine Clair Pinecone Ink; Sparkle N Sprinkle Glitters; Hero Arts Prisma Glitter; Spellbinders Hemstitch Rectangles; Stampers Anonymous Tim Holtz Crazy Talk Stamp; May Arts Ribbon; White Cardstock; Scrap Brown Cardstock; Tiny Pompom (chalk applicator)

Pin This!

Glittered Bunny Easter Card Tutorial by Judy Hayes for Scrapbook Adhesives by 3L Pinterest

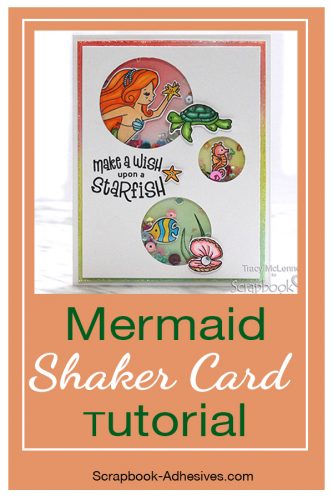
Mermaid Shaker Card Tutorial

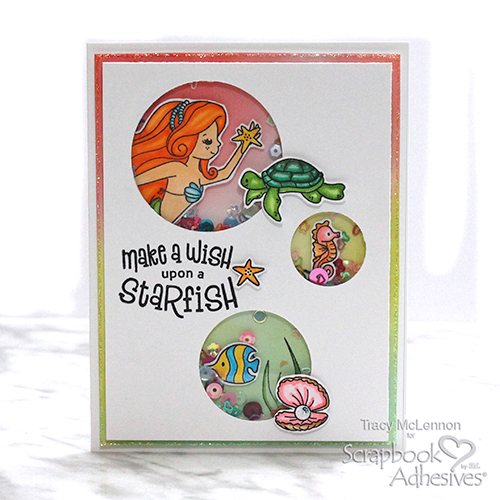
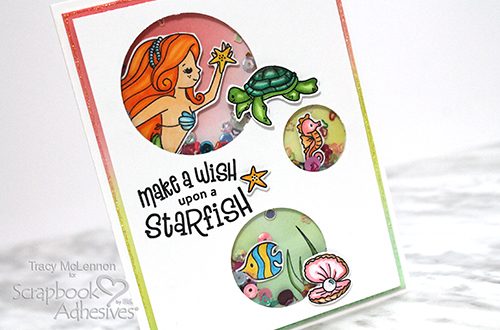
Hello card making friends! Tracy here, and today I have a fun and sparkly Mermaid shaker card to share. Everyone has a person in their life that would love to be a mermaid.

Mermaid Shaker Card Tutorial by Tracy McLennon for Scrapbook Adhesives by 3L


Make the Mermaid Sparkle!

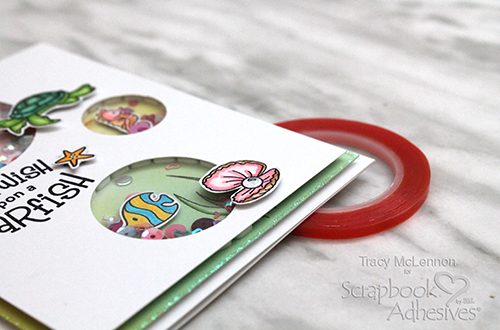
Once the white card front is created using white cardstock and circle punches, I adhered a piece of acetate in behind with Extreme Double-Sided Tape 1/8in.

Next, I created a blended background using ink and blending tools on white cardstock. Use the holes in the top as a guide where you would like the colours to fall. Now I can stamp my images in black ink so that I am able to colour using markers and a water brush.

Mermaid Shaker Card Tutorial by Tracy McLennon for Scrapbook Adhesives by 3L

Making the Mermaid Float

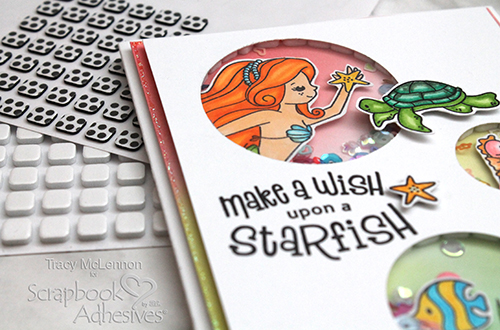
Use 3D Foam Squares White Mix to surround the holes and pop up the other negative space too. In the case of my mermaid image, I wanted to create space between her and the acetate. I used Thin 3D Foam Squares Black Mix above and below the mermaid image.

Note: In my craft space, I have all of my 3D Foam Squares close at hand. I will often have my Thin 3D Foam in black, and my regular 3D Foam in white. That way in the heat of the crafting moment I know what I’m grabbing easily.

The stamped and coloured images on the top of the card are added using Thin 3D Foam Squares Black Mix.

Mermaid Shaker Card Tutorial by Tracy McLennon for Scrapbook Adhesives by 3L

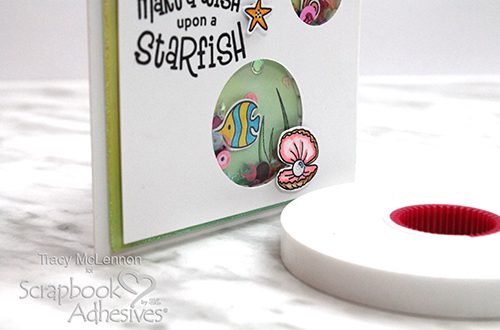
Once that tricky part of adding the blended background to the sequins filled shaker piece is complete. Then I added it to the white cardstock card base using Crafty Foam Tape White to assemble.

Mermaid Shaker Card Tutorial by Tracy McLennon for Scrapbook Adhesives by 3L

As a result, the next step will be is to add glitter glue for some sparkle. I added it around the edge of the inked layer, as well as to some of the sections of the stamped and coloured images.

Mermaid Shaker Card Tutorial by Tracy McLennon for Scrapbook Adhesives by 3L

Thanks for stopping by!
Tracy

Creative Time: 45 Minutes
Skill Level: Intermediate

Materials Needed
Scrapbook Adhesives by 3L®
Thin 3D Foam Squares Black Mix
Crafty Foam Tape White
3D Foam Squares White Mix

HomeHobby by 3L®
Extreme Double-Sided Tape 1/8in

Other
Distress Oxide Ink (Worn Lipstick, Cracked Pistachio, Twisted Citron), Archival Ink (Jet Black), White Cardstock, Spiegelmom Scraps Sequins (I Love You More), Stickles (Diamond), Zig Clean Color Markers, Acetate, Blending Tool, Circle Punches (1″, 1.5″, 2″)

Pin It!
Mermaid Shaker Card Tutorial by Tracy McLennon for Scrapbook Adhesives by 3L Pinterest

How to Make Easter Bunny Treat Bags

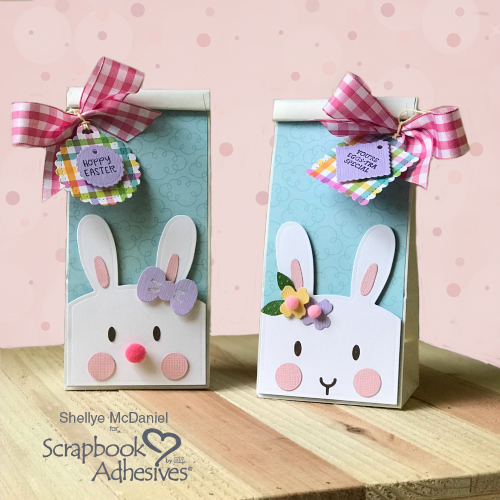
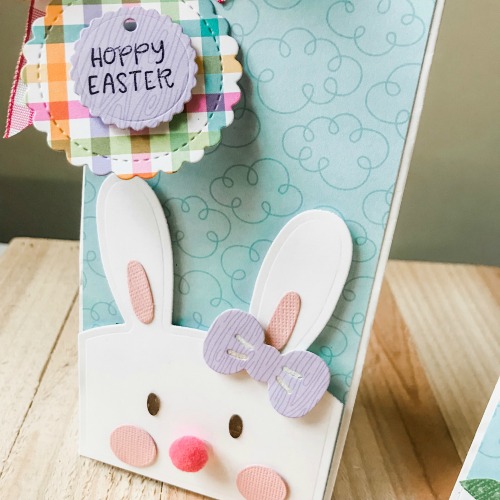
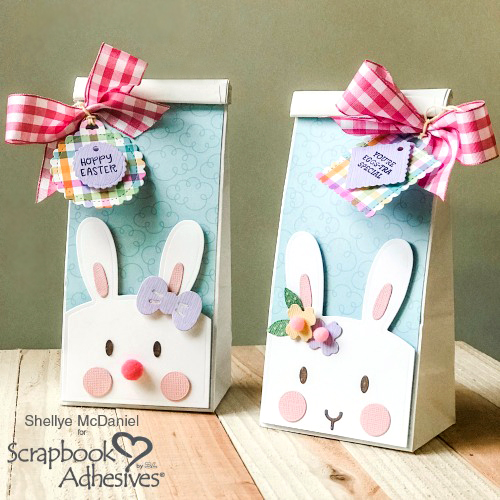
Greetings!  Shellye McDaniel here to share an adorable set of transformed bakery bags just in time for Easter. Enjoy this fabulous idea for creating Easter Bunny Treat Bags!

Easter Treat Bags by Shellye McDaniel for Scrapbook Adhesives by 3L

Easter Bunny Treat Bags Detail

To begin, I cut a background paper to cover the front of each bag and then used the Adhesive Sheets 4×6 inch to adhere the bag to the paper.

Easter Treat Bags by Shellye McDaniel for Scrapbook Adhesives by 3L

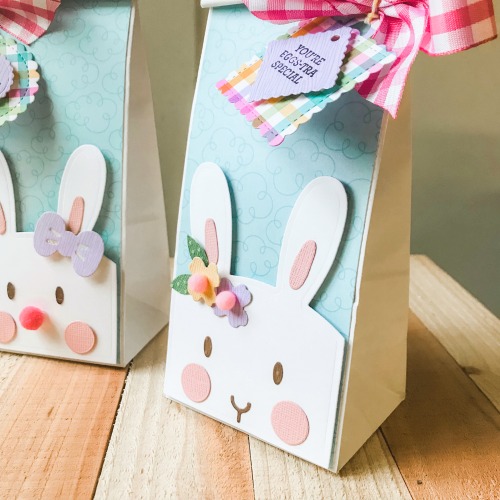
Next, I used a treat bag bunny die and its accessories to create the faces; the faces were attached to the bag with Crafty Foam Tape White. I chose the Adhesive Dots Large for attaching the cheeks and the Dual Tip Glue Pen for adhering the smaller pieces.

Easter Treat Bags by Shellye McDaniel for Scrapbook Adhesives by 3L

Wanting to offer some different textures on the Easter Bunny treat bags, I added a pom pom nose using the Adhesive Dots Small. I attached the die cut bow with 3D Foam Circles White Mix and the openings glittered.

Easter Treat Bags by Shellye McDaniel for Scrapbook Adhesives by 3L

Finally I die-cut a few tags and layered them using 3D Foam Circles White Mix and then adhered to the top of the bag with Adhesive Dots Large.

Thank you for stopping by today!

Creative Time: 30 minutes
Skill Level: Beginner

Materials Needed
Scrapbook Adhesives by 3L®

Adhesive Sheets 4×6 inch
Crafty Foam Tape
Adhesive Dots Large
Adhesive Dots Small
3D Foam Circles White Mix

HomeHobby by 3L®
Dual Tip Glue Pen

Other
Patterned Papers: Doodlebug Design; Ribbon: Offray; White Cardstock; Twine; Textured Cardstock; Bakery Bags; Pom Poms

Pin It!
Easter Treat Bags by Shellye McDaniel for Scrapbook Adhesives by 3L

Visit our Website and Blog!
Sign up for our Newsletter so you never miss a contest or giveaway!

instagram purple icon facebook icon purple pinterest purple icon twitter purple icon YouTube icon blog subscription purple icon

Foiled Wedding Card Tutorial

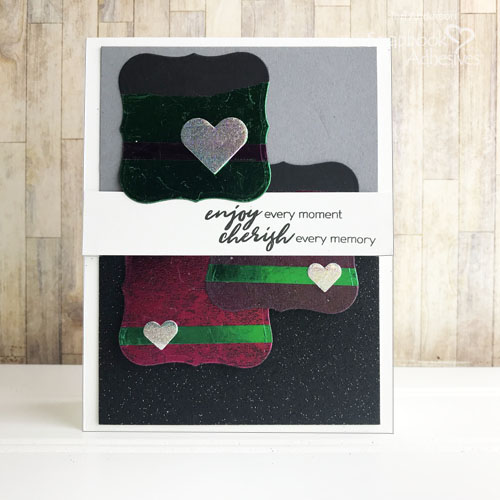
Hi, everyone! Need to make a wedding card? Looking for a special anniversary card for your favorite couple? I’m going to show you how to put together a glitzy card with Metallic Transfer Foil Sheets!

Foiled Wedding Card Tutorial by Teri Anderson for Scrapbook Adhesives by 3L


Create the Foiled Labels

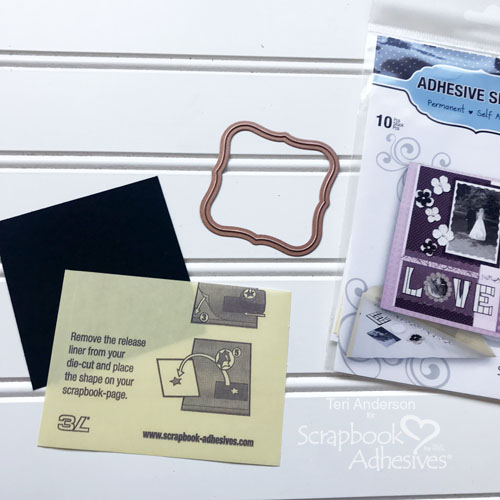
Start by cutting several squares from black cardstock. Take some of the Adhesive Sheets from Scrapbook Adhesives by 3L and cut them down to fit across the squares.

Foiled Wedding Card Tutorial by Teri Anderson for Scrapbook Adhesives by 3L

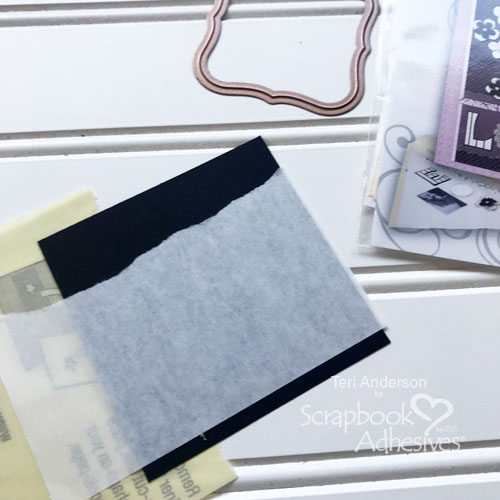
Take your Adhesive Sheets and tear off the top of each one. Transfer the adhesive onto each of the squares. For a really finished look, firmly rub the adhesive onto the cardstock panels. You might even consider using a bone folder or a stamping block to help you. For a more shabby look, lightly rub the adhesive onto the squares. Don’t worry if the adhesive doesn’t completely transfer.

Foiled Wedding Card Tutorial by Teri Anderson for Scrapbook Adhesives by 3L

Foiled Wedding Card Tutorial by Teri Anderson for Scrapbook Adhesives by 3L

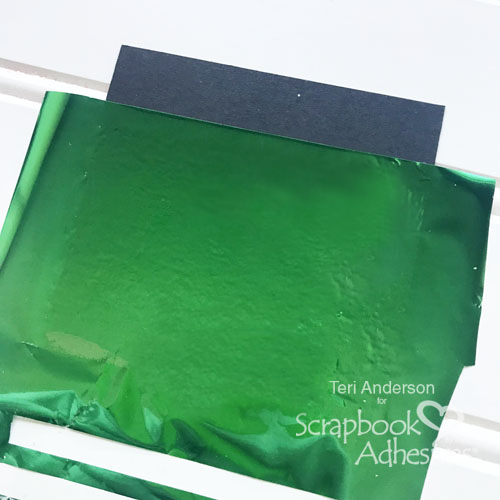
Set a piece of Metallic Transfer Foil over each of the panels and transfer the foil. I find it is helpful to make a fist and keep rubbing in a circle until the foil is fully burnished onto the squares.

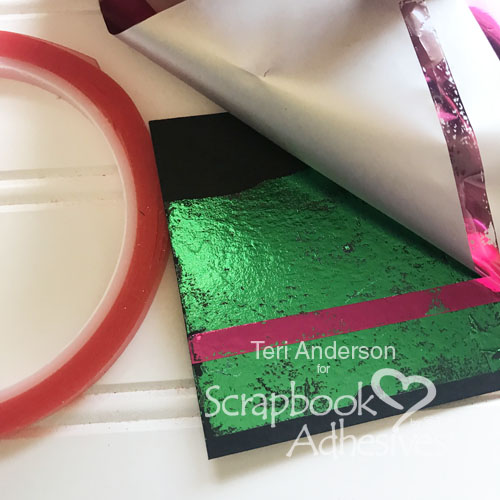
Now, apply a strip of Extreme Double-Sided Tape 1/4in  across each of the squares. Remove the liners and apply another color of foil onto each square.

Foiled Wedding Card Tutorial by Teri Anderson for Scrapbook Adhesives by 3L

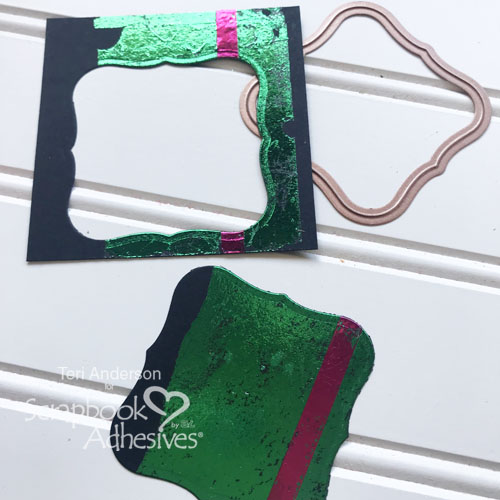
You should have several squares with foil on them. Now, you simply want to take a label die and cut a label from each square.

Foiled Wedding Card Tutorial by Teri Anderson for Scrapbook Adhesives by 3L

Set the labels aside so you can make the card.

Finish the Card

Create a standard A2 card from white cardstock. Apply panels of gray cardstock and black glitter paper to it.

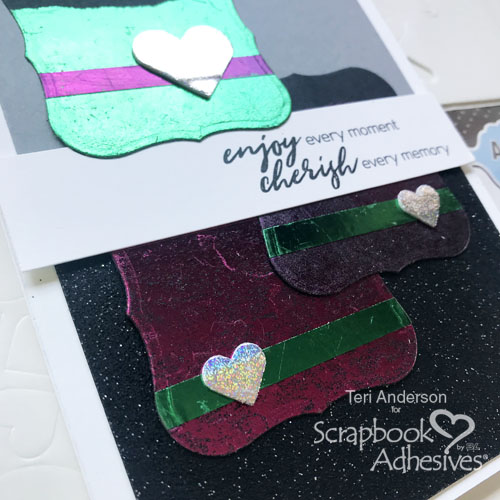
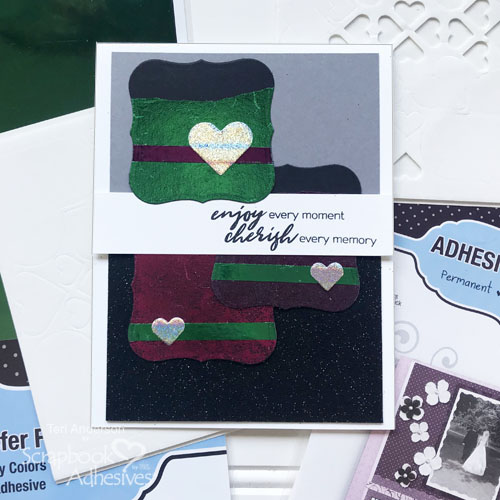
Adhere three of your foiled labels onto the card. I recommend arranging them so the foiled stripes all go the same direction, but you may like them going different directions. It is entirely up to you.

Foiled Wedding Card Tutorial by Teri Anderson for Scrapbook Adhesives by 3L

Foiled Wedding Card Tutorial by Teri Anderson for Scrapbook Adhesives by 3L

Stamp a sentiment onto a strip of cardstock. Adhere it across the card.

Complete the card by adding 3D Foam Hearts to each of the labels. Finish them by applying foil onto them.

Creative Time: 1 hour
Skill Level: Beginner

Materials Needed
Scrapbook Adhesives by 3L®

E-Z Runner® Grand Refillable Dispenser
Metallic Transfer Foil Sheets Variety Colors
Metallic Transfer Foil Sheets Holographic Colors
Adhesive Sheets 4×6 inch
3D Foam Hearts

HomeHobby by 3L®
Extreme Double-Sided Tape 1/4in

Other
Cherished Memories stamp set from Altenew; Label die by Spellbinders; Black glitter cardstock from American Crafts; Gray cardstock from Recollections; White cardstock from Neenah Paper; Black ink pad

Pin It!
Foiled Wedding Card Tutorial by Teri Anderson for Scrapbook Adhesives by 3L Pinterest