You are in our US store • Switch to Europe store

Autumn Card with Dimensional Ivy Tutorial

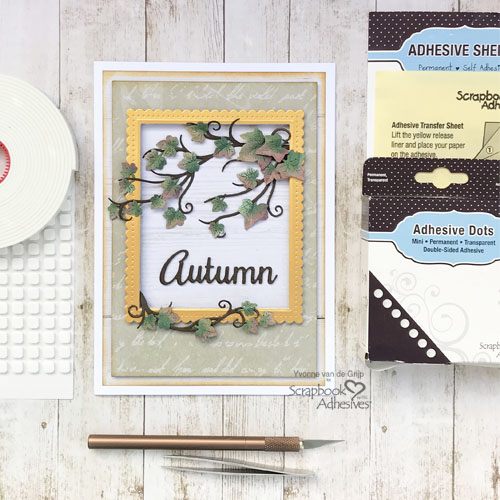
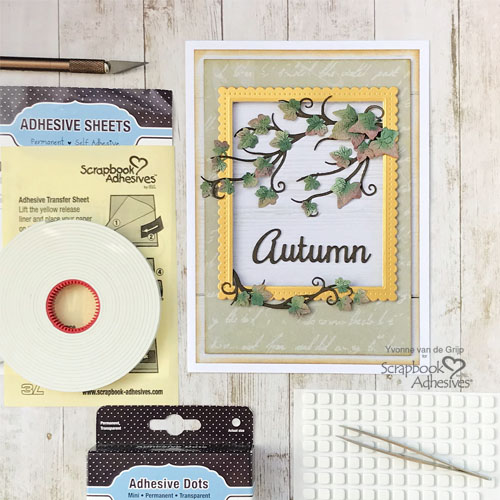
Hi everyone, Yvonne here with an autumn-themed ivy card that is all about adding dimension to your card! Crafty Foam Tape White and 3D Foam Squares White Regular make it so easy to add lightweight dimension to a card which also means low postage costs! We all love that, don’t we! LOL!

To finish the Autumn Card I added some layers of branches and leaves to make them more realistic. Let’s get started.
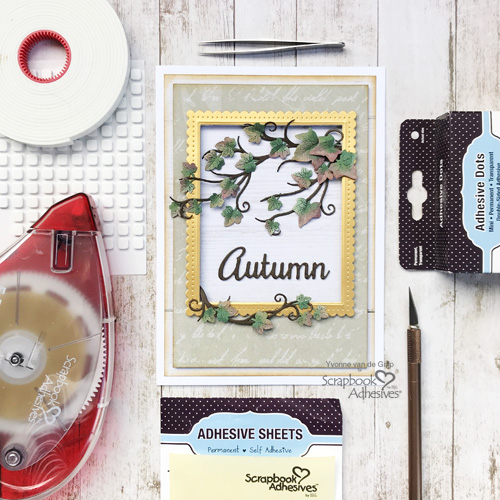
Autumn Card with Dimensional Ivy Tutorial by Yvonne van de Grijp for Scrapbook Adhesives by 3L

Make a Multi-Layered Card Base

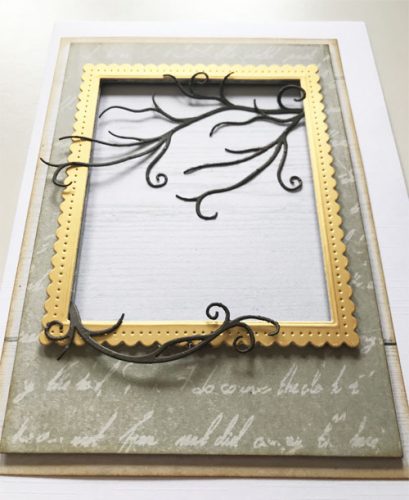
Start by die-cutting a window from green patterned cardstock. Die-cut and emboss a golden scalloped frame shape that matches the size of the opening in the cardstock.
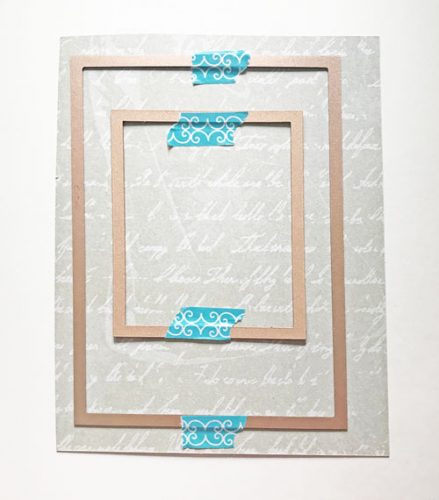
Use Crafty Foam Tape White for the big green patterned frame and 3D Foam Squares White Regular Size to fit the golden frame. Trim some 3D Foam Squares into strips to fit the golden frame so nothing will stick out from under the die-cut.
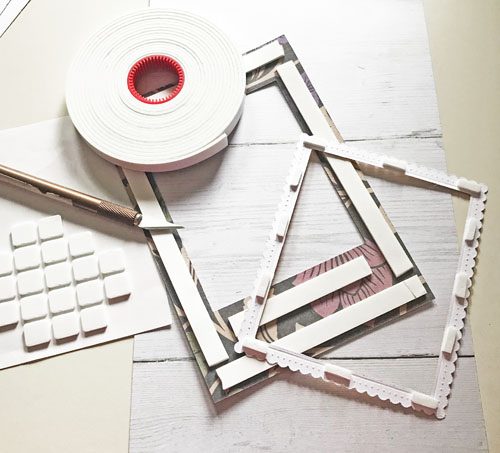
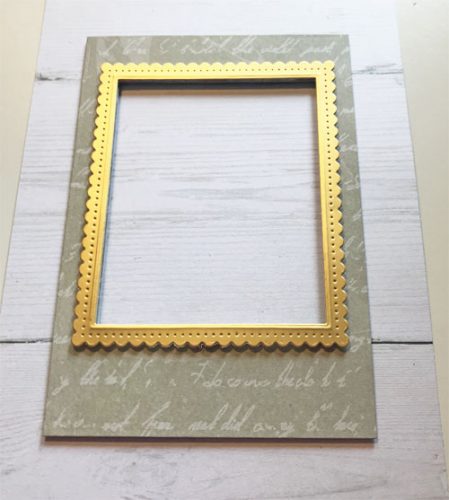
Now adhere both layers onto a larger white, patterned, rectangle piece of cardstock. Trim that back layer to the desired card size.
Next ink the edges of the green and white layer using an ink pad and an ink blending tool.
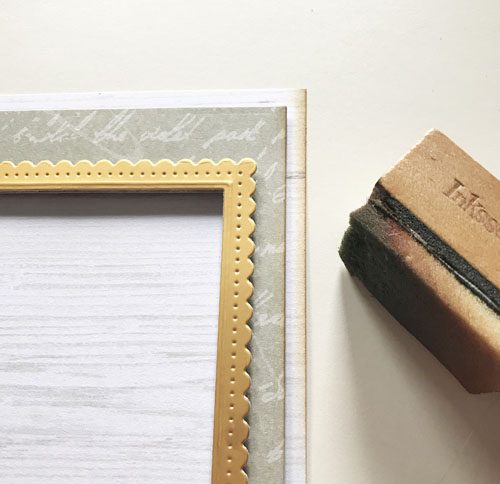
Now adhere the stacked panels onto a white card base, adhere it using the E-Z Runner® Grand Refillable Dispenser.

Adhesive Sheets and Ivy Vines

For the vines, I turned a piece of brown cardstock into a sticker, simply by using Adhesive Sheets 4×6 inch.

To make the sticker, first remove the yellow liner of from an Adhesive Sheet and adhere it with the sticky side onto the back of a piece of dark brown cardstock.
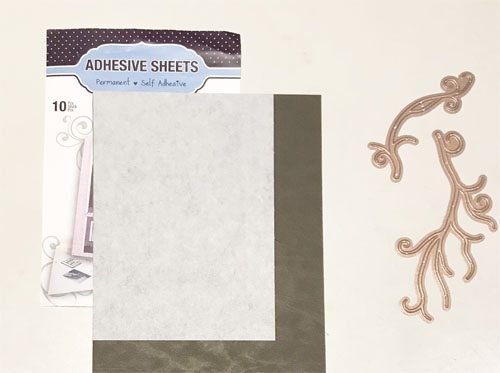
Now die-cut the brown cardstock, do this by placing the die with the cut side down onto the front of the cardstock. Die-cut several pieces with the vine dies.

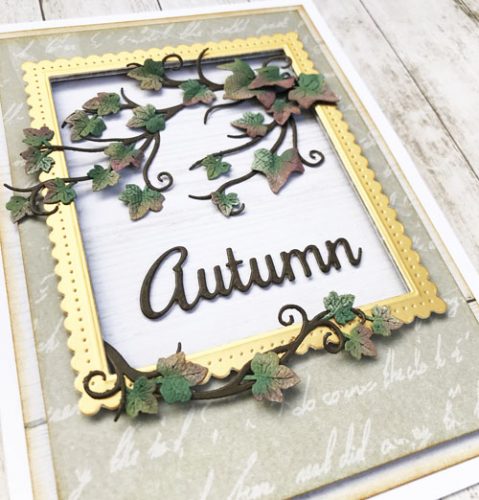
Now it’s time to remove the white liner from the die-cuts and then adhere them to the dimensional card base.
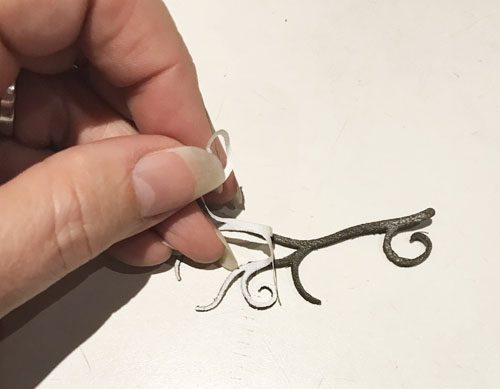
By adhering them not only over, but also between the layers, you create depth and a realistic look.
Ink the Ivy Leaves

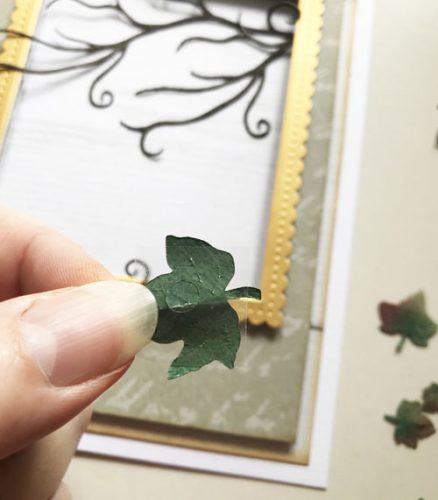
Start by die-cutting some ivy leaves from dark green cardstock. Then add the autumn colors to the leaves with chalky ink pads and an ink blending tool. Simply add some red, orange, pale green and yellow ink to the leaves and let dry.
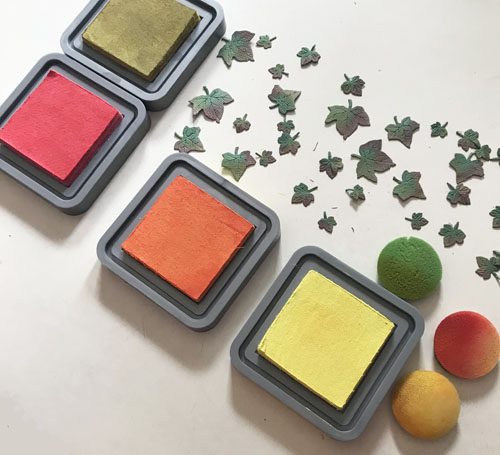
After drying, slightly curl the edges of the ivy leaves. I used my fingers to curl, but you might find it easier to wrap them around a pencil, for example.

Adhere the ivy leaves to the vines with Adhesive Dots Mini.
Die Cut the Autumn Card Sentiment

Die-cut the sentiment from dark brown cardstock and use Thin 3D Foam Squares White Mix, cut into small strips, to adhere it to the card base.
Autumn Card with Dimensional Ivy Tutorial by Yvonne van de Grijp for Scrapbook Adhesives by 3L

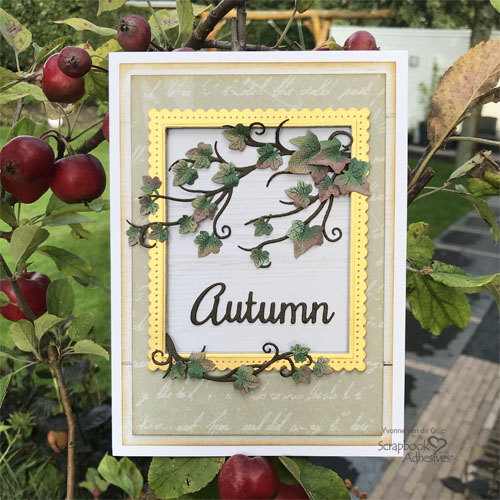
Voila…your Autumn Card with Dimensional Ivy is ready!
Autumn Card with Dimensional Ivy Tutorial by Yvonne van de Grijp for Scrapbook Adhesives by 3L

I hope you
enjoyed the tutorial and wish you happy crafting.

Yvonne van de Grijp

Creative Time: 60 minutes
Skill Level: Advanced

Material Needed
Scrapbook Adhesives by 3L®

Adhesive Sheets 4×6 inch
Adhesive Dots Mini
Crafty Foam Tape White
3D Foam Squares White Regular Size
Thin 3D Foam Squares White Mix
E-Z Runner® Grand Refillable Dispenser

Other
Etched Dies: Spellbinders® Paper Arts ( Ivy, Seasonal Words by Lene Lok, Fancy Edged Rectangles, 5×7 Matting Basics B Card Creator, Platinum 6 Die-cutting and Embossing Machine); Cardstock (White, Dark Brown, Dark Green, Gold, Patterned White and Green); Ink pads (brown, Chalk: Green, Orange, Yellow, Red); Ink Blending Tool, Paper Trimmer, Bone Folder

Love It! Save It!
Autumn Card with Dimensional Ivy Tutorial by Yvonne van de Grijp for Scrapbook Adhesives by 3L - Long

Visit our Website and Blog!
Sign up for our Newsletter so you never miss a contest or giveaway!

instagram purple icon facebook icon purple pinterest purple icon twitter purple icon YouTube icon blog subscription purple icon

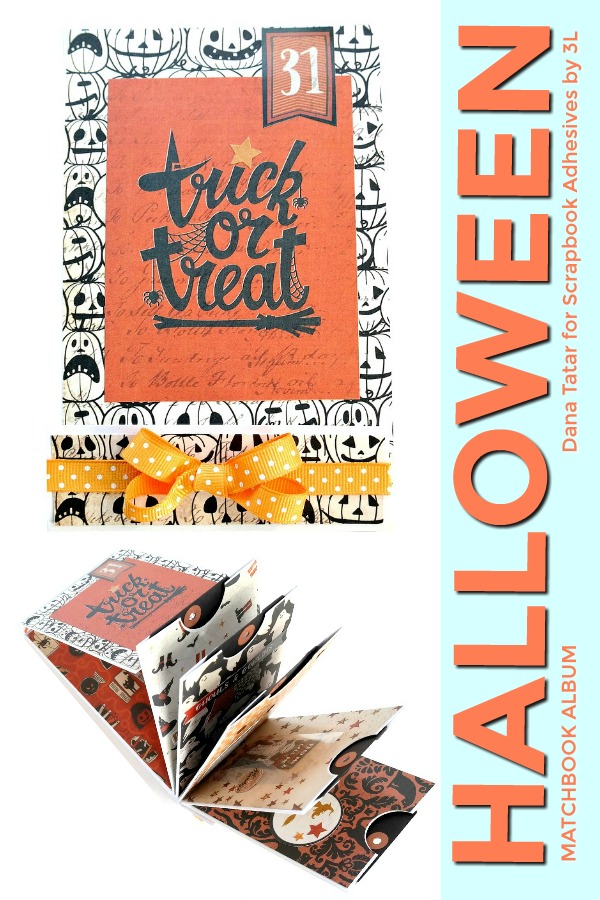
Halloween Matchbook Album Tutorial

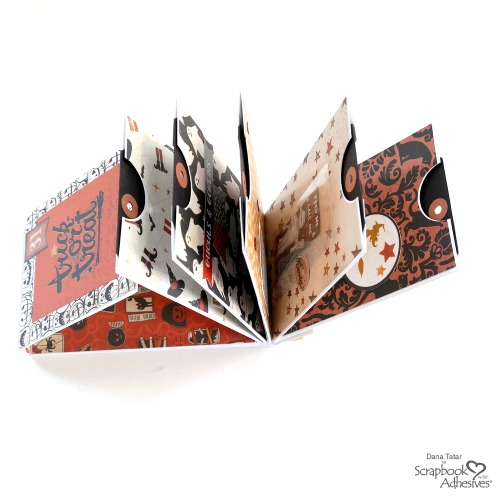
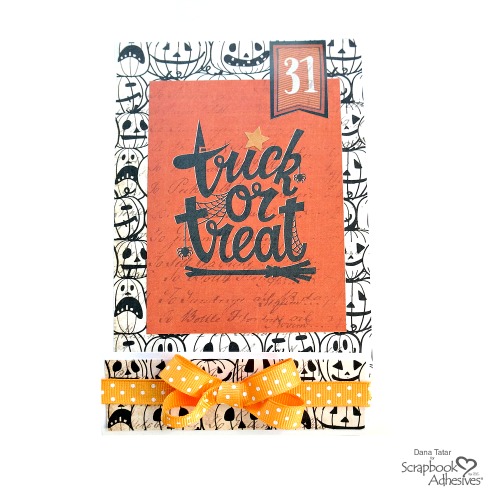
Hi friends! Dana Tatar here today sharing an embellished matchbook album that I created to document Halloween. I’ve found that I have a much higher success rate of actually completing a mini album when I have the majority of the work done before the event. This album was super fun to assemble and decorate.

Halloween Matchbook Album by Dana Tatar for Scrapbook Adhesives by 3L

In addition to detailing how to assemble and embellish this album, I’m also sharing my tricks for how to add texture and dimension to projects when space is limited.

Halloween Matchbook Album Assembly

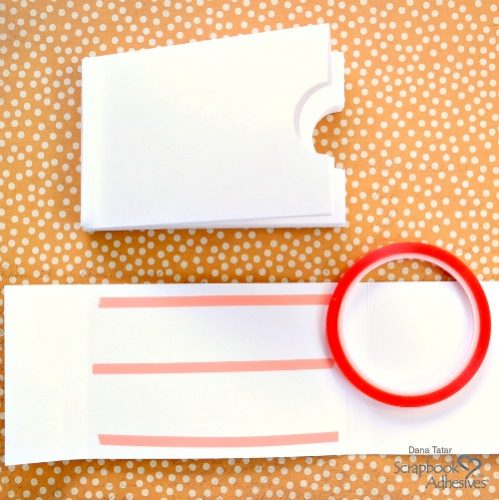
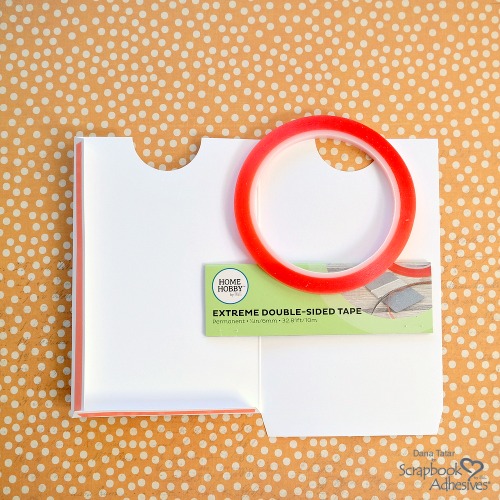
On each of the six pockets, fold the left side tabs in and apply HomeHobby by 3L® Extreme Double-Sided Tape 1/4-in . Next remove the top liner from the tape and fold the right panel over on top of the left. Press firmly along the adhesive tabs to seal.

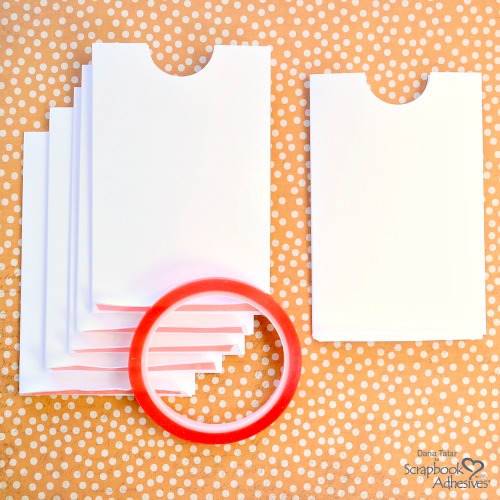
Fold up the bottom tab on all six pockets. Apply Extreme Double-Sided Tape 1/4-in to 5 of the pocket tabs. Leave one pocket tab adhesive free. One at a time, remove the liners from the tape and stack the pockets on top of each other. The pocket without adhesive on the tab should be on the top of the stack.

Fold all the score lines on the Matchbook base. Apply Extreme Double-Sided Tape 1/4-in to the center panel as shown. Remove the liner from the tape and adhere the stacked pockets to the center panel. Press firmly to secure the back pocket to the adhesive.

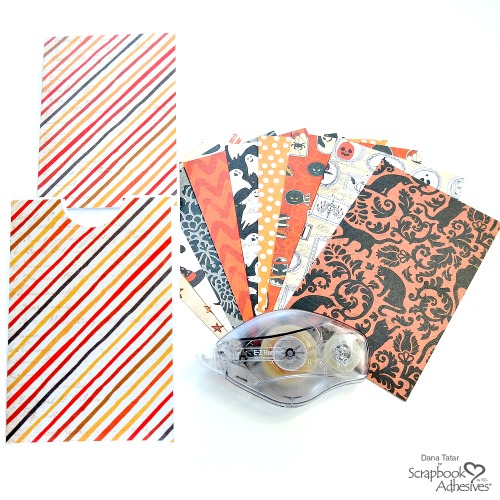
Use the E-Z Runner® Ultra Strong Refillable to adhere patterned paper to both sides of each pocket page, as well as the inside and outside covers of the album. To secure the bottom portion of the cover to the album, apply Extreme Double-Sided Tape 1/4-in to the top tab on the top pocket of the stack. Remove the liner and fold the bottom flap of the matchbook cover up and press to secure. The top flap of the cover folds down and tucks underneath the bottom flap to close the album. Slide six cards or tags into the pockets of the album.

Embellishing with Texture and Dimension

How to Use Creative Photo Corners with Die-Cuts  by Dana Tatar for Scrapbook Adhesives by 3L

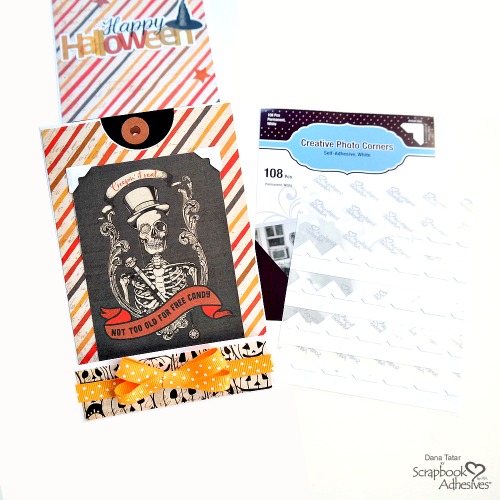
Use White Creative Photo Corners to dress up the edges of square or rectangle shaped die-cuts to add a decorative element without adding extra bulk. The variety of matte, metallic, and clear photo corners, easily complements or blends with any paper collection.

How to Use Small Adhesive Dots with Sequins  by Dana Tatar for Scrapbook Adhesives by 3L

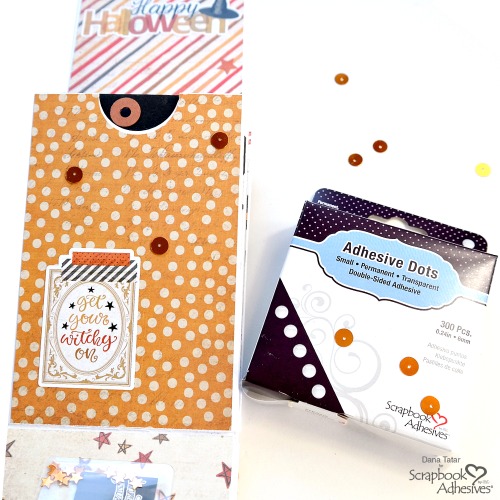
Sequins are a fun way to add a thin layer of color and shine to patterned papers. Adhesive Dots are the perfect choice for attaching intricate embellishments to projects. Just press, peel, and stick!

How to Use Keepsake Envelopes for Shaker Pockets by Dana Tatar for Scrapbook Adhesives by 3L

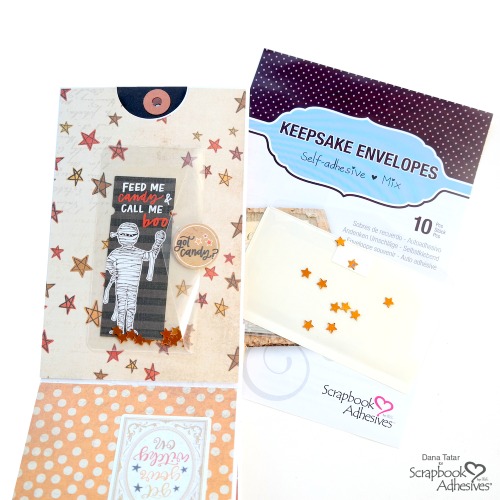
Tuck die-cuts and sequins inside Keepsake Envelopes to create a fast and tidy shaker pocket. Simply insert items into the envelope and affix with the resealable flap. Your embellishments are secure yet accessible in a see-through envelope with clear, permanent adhesive on the back side.

How to Secure Textured Embellishments Like Canvas and Felt with Adhesive Dots by Dana Tatar for Scrapbook Adhesives by 3L

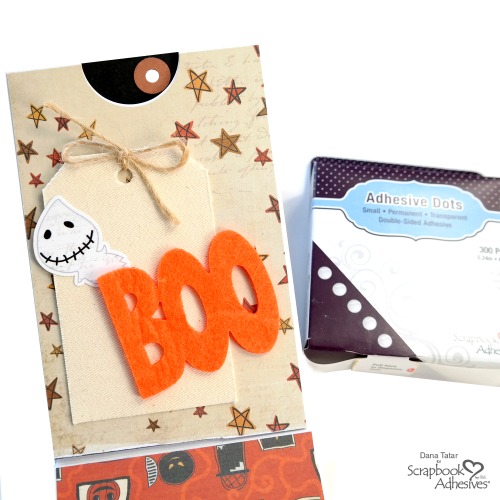
The strong bond of Adhesive Dots makes adding canvas and felt pieces to projects quick and easy. Adding thin layers of different fabrics is a great way to add a fun texture to paper pages to make the album interesting to flip through and fun to touch.

Halloween Matchbook Album  by Dana Tatar for Scrapbook Adhesives by 3L

Here’s a peek inside the embellished Halloween Matchbook Album. Each tag pulls out of the pocket with a place to add photos and journaling.

Do you dress up for Halloween? My daughters are going out dressed as an anime character and a banana. I’d love to know what your loved ones are wearing. Let me know in the comments section!

Thanks for stopping by today!
~Dana

Creative Time: 90 Minutes
Skill Level: Intermediate

Materials Needed
Scrapbook Adhesives by 3L®

E-Z Runner® Ultra Strong Refillable Dispenser
Adhesive Dots Small
Creative Photo Corners White
Keepsake Envelopes Mix

HomeHobby by 3L®
Extreme Double-Sided Tape 1/4″

Other
Matchbook Album (Photo Play Paper); Patterned Paper (Paper Play Paper); Stickers (Paper Play Paper); Die-Cuts (Paper Play Paper); Black Tags (Ranger); Felt Word; Canvas Tag; Ribbon; Twine; Sequins

Love It! Pin It!

Halloween Matchbook Album  by Dana Tatar for Scrapbook Adhesives by 3L

Visit our Website and Blog!
Sign up for our Newsletter so you never miss a contest or giveaway!

instagram purple icon facebook icon purple pinterest purple icon twitter purple icon YouTube icon blog subscription purple icon

Happy Harvest Treat Box Tutorial

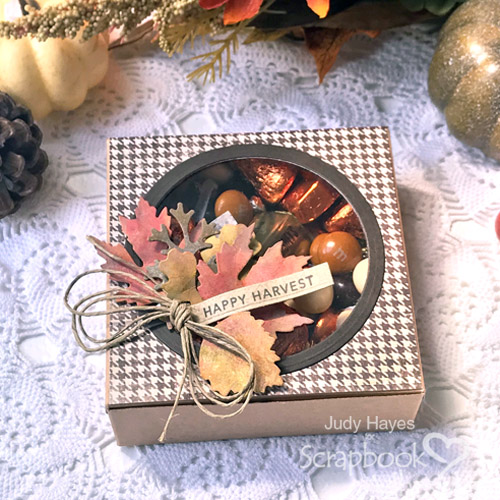
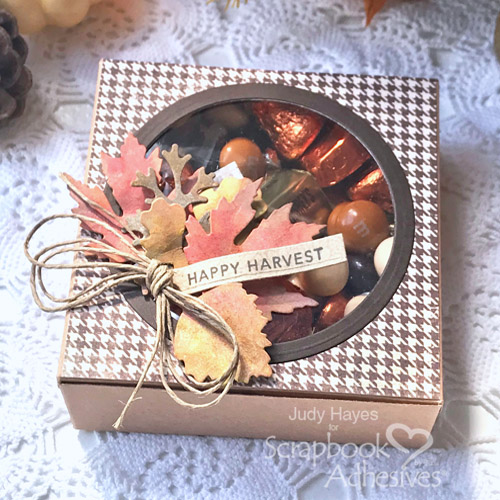
Hello everyone! It’s Judy here today with a Happy Harvest Treat Box tutorial. It makes a great gift for Thanksgiving, filled with seasonal colored chocolates, nuts, or baked goods. Where I live with farmland all around, cool days and dry winds have turned the fields to shades of brown and gold. The fall harvest is underway. Leaves are changing colors and fluttering to the ground. It’s time to celebrate harvest time!

Happy Harvest Treat Box by Judy Hayes for Scrapbook Adhesives by 3L

Happy Harvest Treat Box Instructions

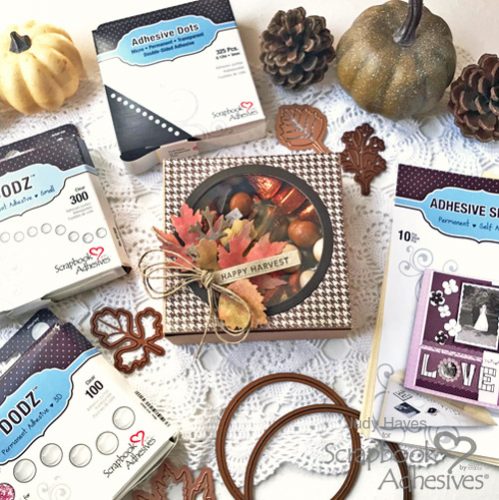
This Happy Harvest Treat Box is an easy project! The box base is a cookie box with a window. Start cutting patterned paper to fit the box top. Apply an Adhesive Sheets 4 x 6 inch to the back of the paper, then die-cut an opening in the paper, I use a circle here.

Next, add Adhesive Sheets 4 x 6 inch to the back of brown cardstock. To create the border around the window opening, nest two circle dies together and place onto brown cardstock. TIP: Secure the dies to the cardstock with washi tape so they don’t shift during die-cutting.

It’s simple to fasten each piece to the box by removing the Adhesive Sheet liner and pressing them in place!

Happy Harvest Treat Box by Judy Hayes for Scrapbook Adhesives by 3L

The Finishing Touches

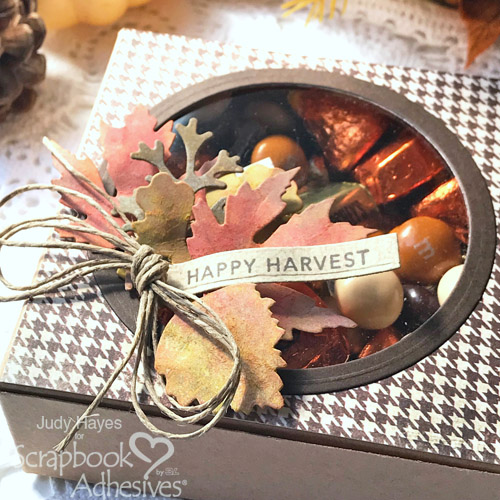
There are many ways to color the die cut leaves. I like to use various colors of water-reactive inks. For a quick and easy way, use different shades of paper. The leaves are held in place using a combination of Adhesive Dots 3D, Adhesive Dots Micro, and Adhesive Dots Small, depending on the width of the die cut stems I’m working with.

To finish the top, tie a bow with hemp twine and hold it in place with Adhesive Dots Small. The stamped greeting is tucked in by the bow and fastened with Adhesive Dots Small.

Happy Harvest Treat Box by Judy Hayes for Scrapbook Adhesives by 3L

Now fill the box with sweet treats! It’s a fun gift to share with coworkers, neighbors, friends or family! It would look great on a table setting! Happy Harvest!

Happy Harvest Treat Box by Judy Hayes for Scrapbook Adhesives by 3L

Thanks for Visiting!
Judy

Creative Time: 30 Minutes
Skill Level: Beginner

Materials Needed
Scrapbook Adhesives by 3L®

Other:
Etched Dies: Spellbinders® Paper Arts (Assorted Leaf Dies) and Taylored Expressions (Mini Strips); Stamp and Die Set: Taylored Expressions (Harvest Stamp and Mini Strips Die); Patterned Paper: Farmhouse Paper Company Paper; Inks: Ranger Inks (Distress Oxide Inks) and Imagine Crafts (Versafine Clair Fallen Leaves); Brown and Kraft Cardstock; Hemp Twine; Cookie Box

Save it on Pinterest!

Happy Harvest Treat Box by Judy Hayes for Scrapbook Adhesives by 3L Pinterest

Visit our Website and Blog!
Sign up for our Newsletter so you never miss a contest or giveaway!

instagram purple icon facebook icon purple pinterest purple icon twitter purple icon YouTube icon blog subscription purple icon

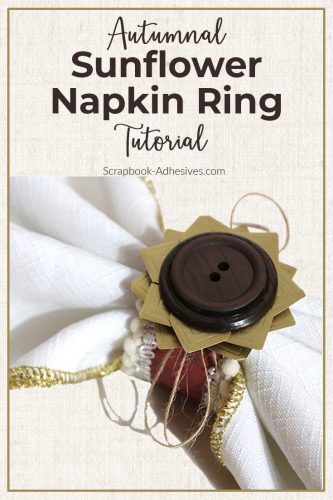
Autumnal Sunflower Napkin Ring Tutorial

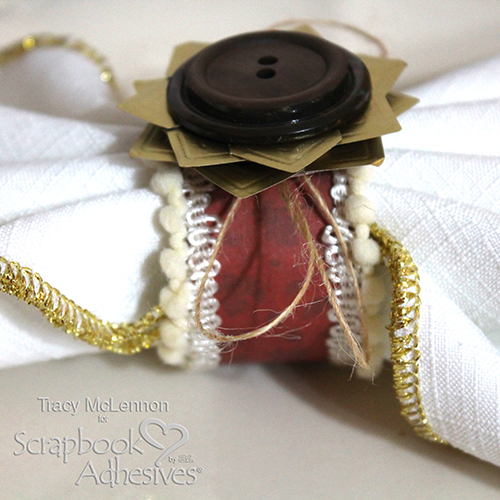
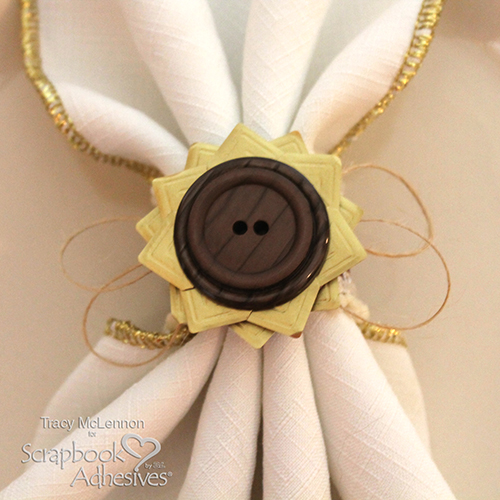
Hello crafty friends, Tracy here and today I have a festive autumn project to share. This sunflower napkin ring is so cute and easy to create. It’s a perfect addition to your autumn tablescape this fall and Thanksgiving.

Here are the details on how I created the Autumnal Sunflower Napkin Ring.

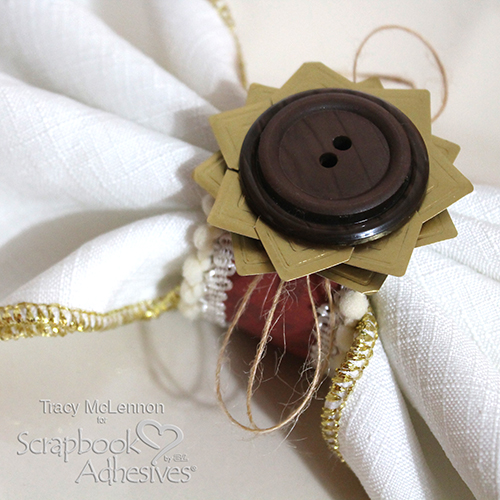
Autumnal Sunflower Napkin Ring Tutorial by Tracy McLennon for Scrapbook Adhesives by 3L

Create the Napkin Ring

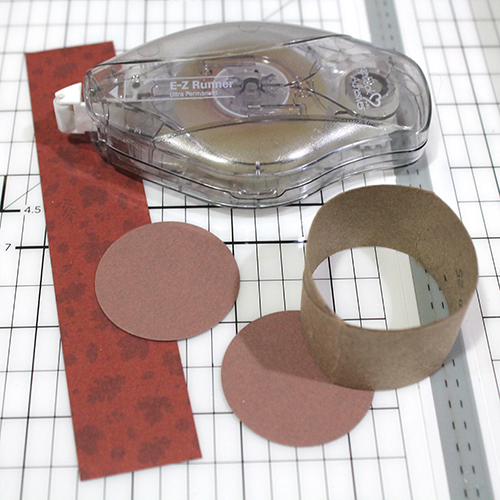
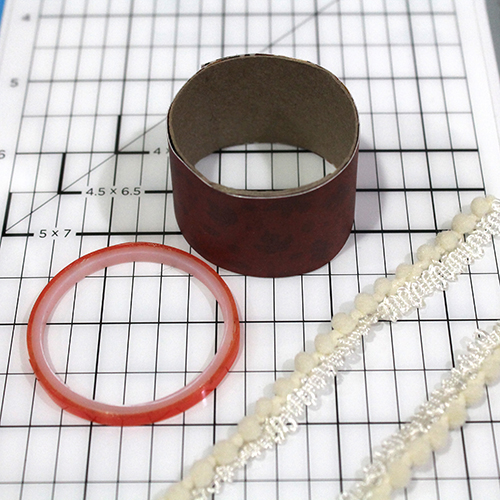
Cut a piece of paper towel roll that is about 1-inch wide, then using the E-Z Runner® Ultra Strong Refillable Dispenser, cover it with a strip of patterned paper. This is the base for the napkin ring.

Take Extreme Double-Sided Tape 1/8in and attach the pom pom trim around the top and bottom of the paper napkin ring.

Make the Sunflower Topper

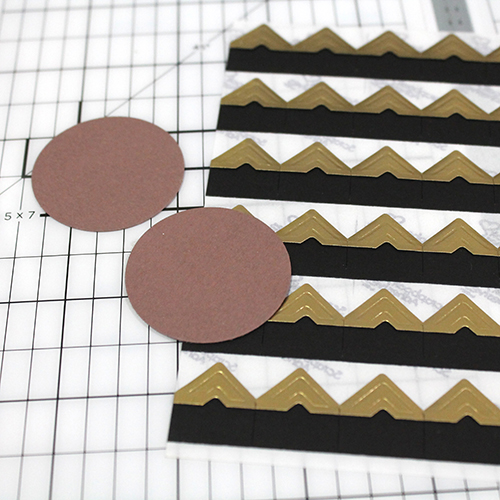
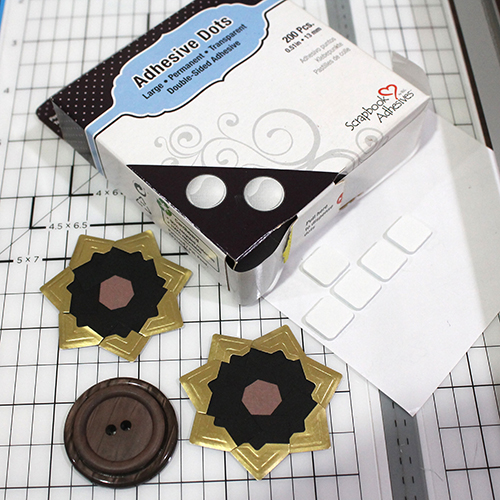
Now punch two cardstock circles with a 1.5″ circle punch. These are the bases for the sunflower.

Adhere Creative Photo Corners Gold around the edge of each of the cardstock circles.

Stack the sunflower layers together and adhere them with 3D Foam Squares White Regular. I added a very large brown button to the middle of the flower using Adhesive Dots Large.

Now add simple loops of burlap string to the paper on the napkin ring using Adhesive Dots Large. The sunflower is also added to the ring using Adhesive Dots Large, completing the autumnal sunflower napkin ring. It’s ready for your fall or Thanksgiving table.

Autumnal Sunflower Napkin Ring Tutorial by Tracy McLennon for Scrapbook Adhesives by 3L

Thanks so much for stopping by! Have a wonderful Thanksgiving!

Tracy

Creative Time: 30 minutes
Skill Level: Intermediate

Materials Needed
Scrapbook Adhesives by 3L®
Adhesive Dots Large
Creative Photo Corners Gold
3D Foam Squares White Regular Size
E-Z Runner® Ultra Strong Refillable Dispenser

HomeHobby by 3L®
Extreme Double-Sided Tape 1/8in

Other
Patterned Papers: PhotoPlay Papers (Mad 4 Plaid Collection); Paper Towel Roll; Pom Pom Ribbon Trim; Button; Natural Burlap String; 1.5-inch Circle Punch; Cardstock

Love it! Pin it!

Autumnal Sunflower Napkin Ring Tutorial by Tracy McLennon for Scrapbook Adhesives by 3L- long

Visit our Website and Blog!
Sign up for our Newsletter so you never miss a contest or giveaway!

instagram purple icon facebook icon purple pinterest purple icon twitter purple icon YouTube icon blog subscription purple icon

How to Make a Mrs. Frank Detergent Pail

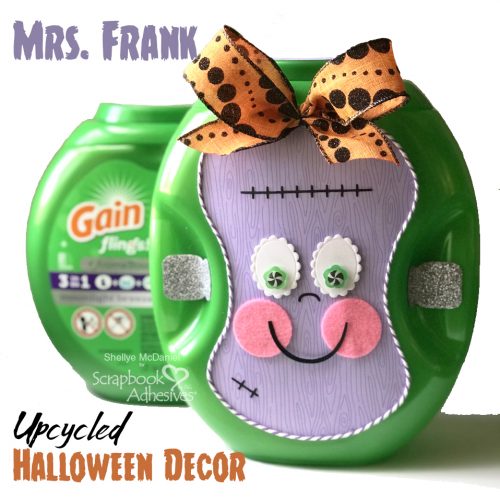
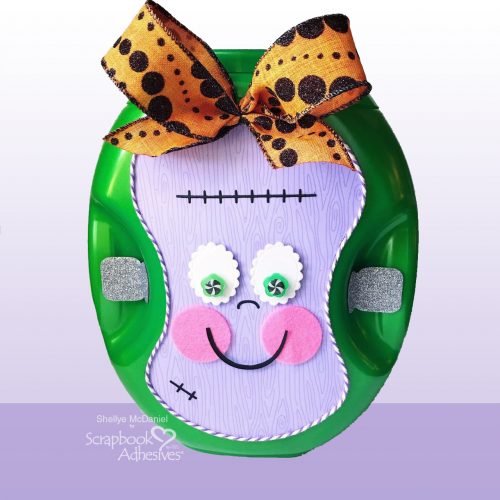
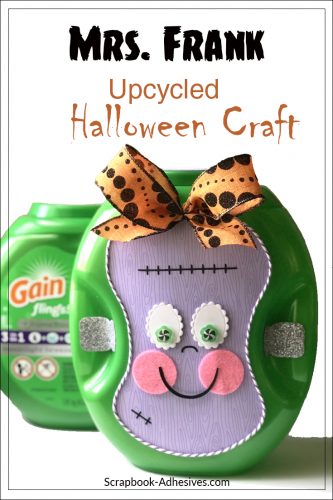
October Greetings! My favorite month is finally here and I’ve been holding off on creating this cutie for my Halloween display, meet Mrs. Frank! She’s just like her hubby, upcycled from a few pieces from my home and craft stash.

Creating a Monster: Mrs. Frank

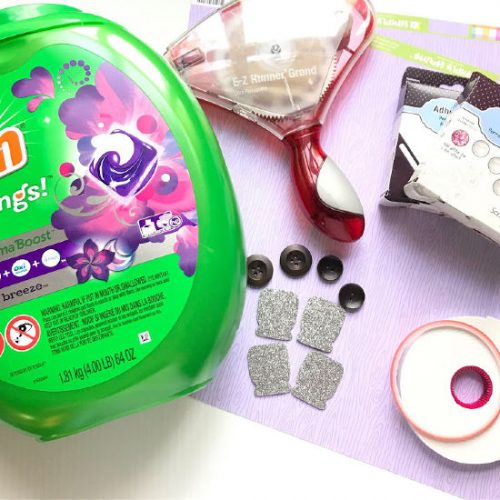
I start with an empty detergent pail, that I would have normally tossed in the recycle bin, and removed as many of the decals as possible.

My supplies include scrapbook paper, buttons, twine and various adhesives from Scrapbook Adhesives by 3L.

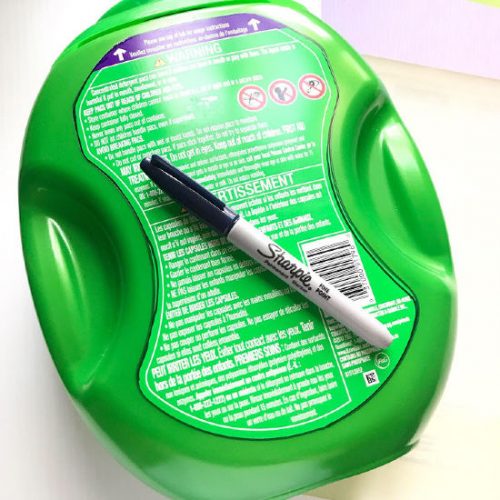
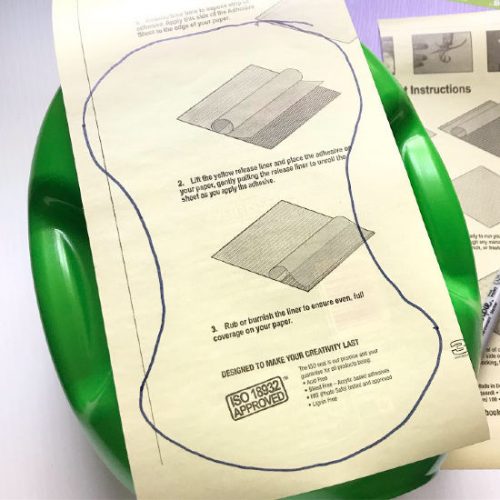
Start by tracing around the label on the back of the container with a permanent marker. By tracing around this area I am able to see it to trace the shape onto Adhesive Sheets 12×12 inch and patterned paper.

Adhere the Adhesive Sheet to the patterned paper an then to the pail. Outline around the edge with pieces of Adhesive Lines. By stretching the adhesive lines as I apply, I am able to make the Adhesive Line thinner. Next, apply twine to the Adhesive Lines and press into place. I’ve also found that it helps to slightly heat the Adhesive Lines with a heat tool; this creates a nice bond with the twine.

Embellishing Mrs. Frank

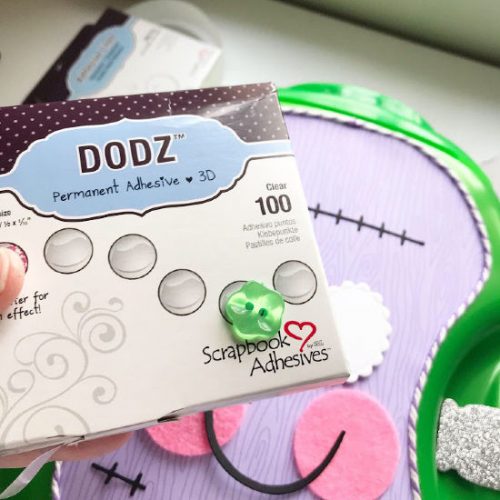
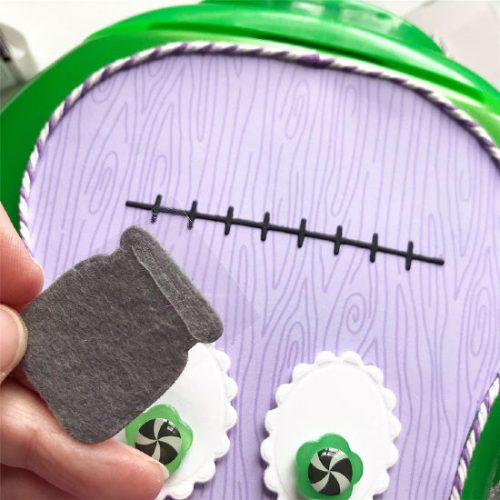
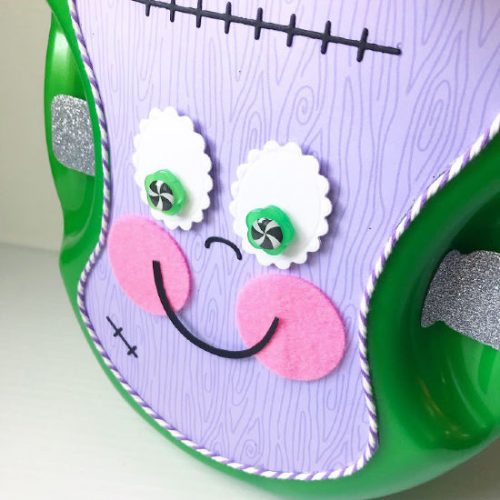
Now onto the embellishing! Attach the stitch marks die cut, smile die cut and felt circle shapes with the Dual Tip Glue Pen. Then attach the white part of the eyes with 3D Foam Squares, White, Regular. The buttons are added with Adhesive Dots 3D.

Once again, use Adhesive Lines to attach the felt “bolts” to the side of the pail. The bolts are actually felt cut with a mini jar die, clever, right?

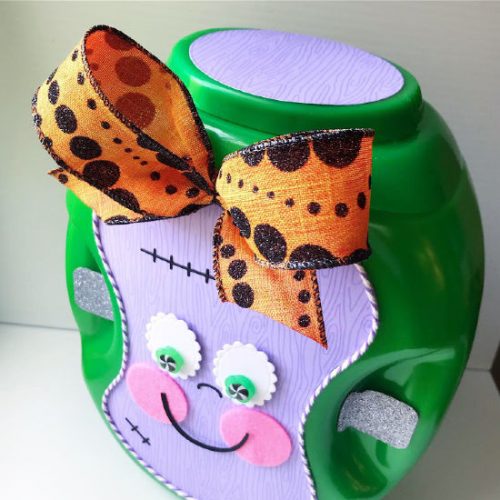
How to make a Mrs. Frank Detergent Pail for Halloween by Shellye McDaniel for Scrapbook Adhesives by 3L

Finally, dress up the top with a disc of matching paper and attach the cute bow with Adhesive Dots 3D.

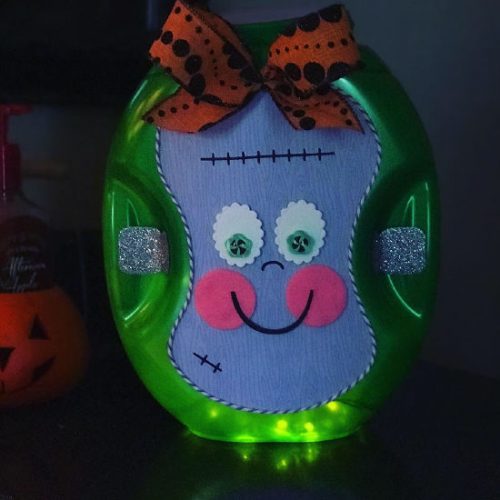
How to make a Mrs. Frank Luminary for Halloween by Shellye McDaniel for Scrapbook Adhesives by 3L

There are so many ways to decorate with your cute pail! I added battery-operated mini lights to my Mrs. Frank to make a luminary and look at how she shines in the dark!

How to make a Mrs. Frank Detergent Pail for Halloween by Shellye McDaniel for Scrapbook Adhesives by 3L

Thank you for joining me today!
Shellye

Creative Time: 45 Minutes
Skill Level: Intermediate

Materials Needed
Scrapbook Adhesives by 3L®

Adhesive Sheets 12×12 inch
Adhesive Lines
3D Foam Squares, White, Regular
Adhesive Dots 3D

HomeHobby by 3L®
Dual Tip Glue Pen

Other: Patterned Papers, Twine and Buttons: Doodlebug Designs; Stitched Shape Craft Dies: Mama Elephant; Ribbon

Love it! Pin it!

How to make a Mrs. Frank Detergent Pail for Halloween by Shellye McDaniel for Scrapbook Adhesives by 3L - Long Pin

Visit our Website and Blog!
Sign up for our Newsletter so you never miss a contest or giveaway!

instagram purple icon facebook icon purple pinterest purple icon twitter purple icon YouTube icon blog subscription purple icon

Big Hello – Easy Shaker Card Tutorial

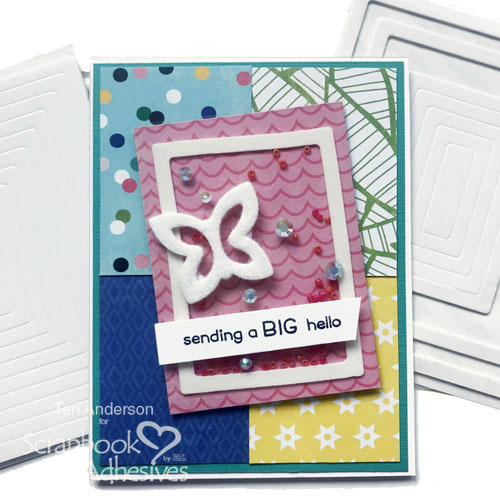
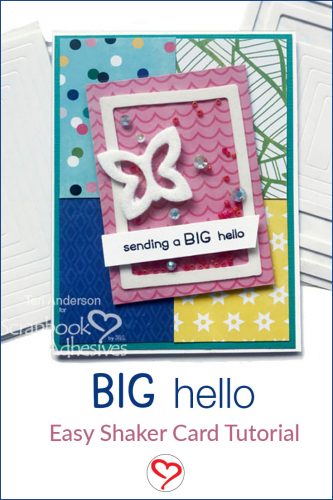
Hi, everyone! Do you like to make interactive cards? It’s Teri here today with an easy way to make an easy shaker card with 3D Foam Frames, a piece of transparency and a few basic supplies.

Big Hello Easy Shaker Card Tutorial by Teri Anderson for Scrapbook Adhesives by 3L

Creating the Easy Shaker

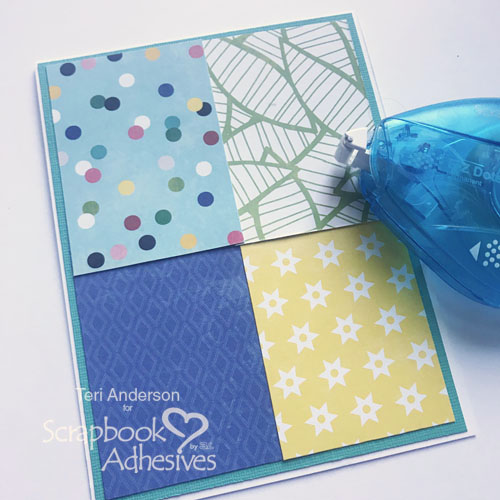
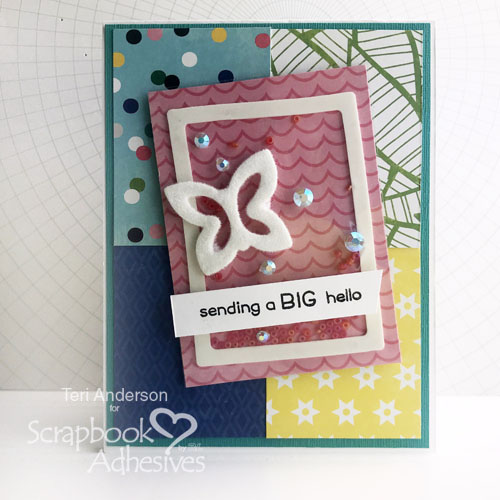
Start by creating a card from white cardstock. Decorate the card with panels of cardstock and patterned paper. This is a great time to use up some smaller pieces of designer paper! Adhere them to the card front with the E-Z Dots® Permanent Refillable Dispenser.

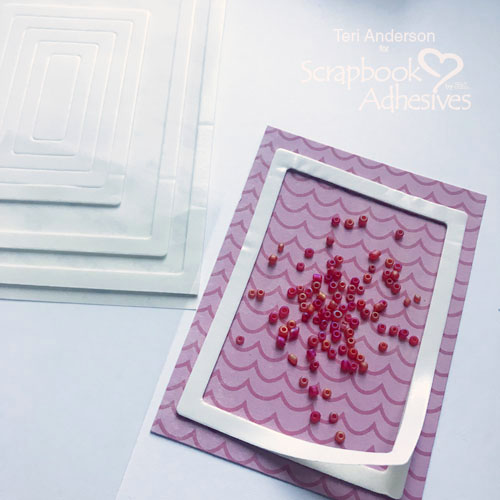
Cut a piece of patterned paper slightly larger than a 3D Foam Frame. You’ll also want to cut a transparency panel. It should be the same size as the patterned paper.

Adding beads to the Big Hello Easy Shaker Card Tutorial by Teri Anderson for Scrapbook Adhesives by 3L

Place the frame onto the piece of patterned paper. Set some seed beads or sequins inside the 3D Foam Frame, onto the patterned paper panel. Mount the transparency on top of the frame.

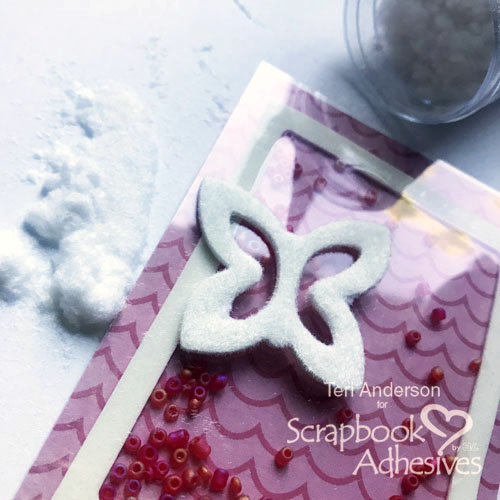
Next, add a 3D Foam Shape to the shaker. I used a 3D Foam Butterfly but any shape will do. Remove the liner paper and cover the shape with flock or glitter. Place the shaker on your card.

Adding Flock to 3D Foam Butterfly on the Big Hello Easy Shaker Card Tutorial by Teri Anderson for Scrapbook Adhesives by 3L

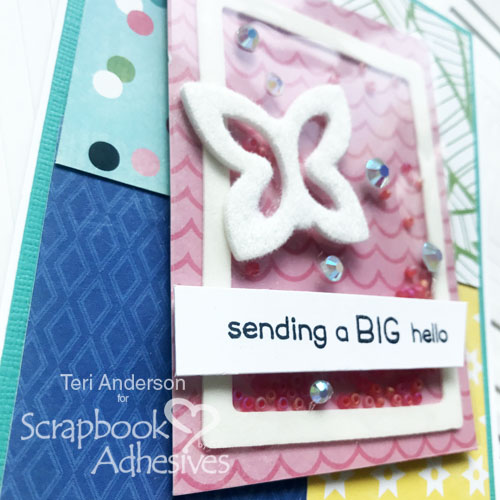
Stamp a sentiment onto a strip of cardstock. Adhere it to the shaker with Crafty Foam Tape.

Big Hello Easy Shaker Card Tutorial by Teri Anderson for Scrapbook Adhesives by 3L

Complete your card by adding some gems or sequins to the shaker with Adhesive Dots Micro. Use a few to add a little pop or use a lot to create a whole bunch of glitz!

Big Hello Easy Shaker Card Tutorial by Teri Anderson for Scrapbook Adhesives by 3L

Are you inspired to make your own shaker card with a frame?

I’d love to see! Share your projects by leaving a link for me in the comments section so I can leave you a little love!

Happy crafting!
Teri Anderson

Creative Time: 60 Minutes
Skill Level: Intermediate

Materials Needed
Scrapbook Adhesives by 3L®

Other
Elphie Selfie Stamp Set by Lawn Fawn; White Card by Neenah Paper; You Make MISO Happy Patterned Paper by Bella BLVD; Black Ink Pad by Ranger Ink; Transparency Sheet by Staples; Seed Beads by Jillibean; Gems by Pretty Pink Posh; White Flock by Stampendous!

Love it! Pin it!

Big Hello Easy Shaker Card Tutorial by Teri Anderson for Scrapbook Adhesives by 3L

Visit our Website and Blog!
Sign up for our Newsletter so you never miss a contest or giveaway!

instagram purple icon facebook icon purple pinterest purple icon twitter purple icon YouTube icon blog subscription purple icon

Thanks Card + World Cardmaking Day Giveaway!

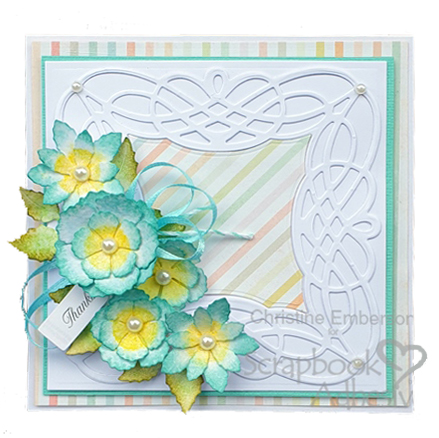
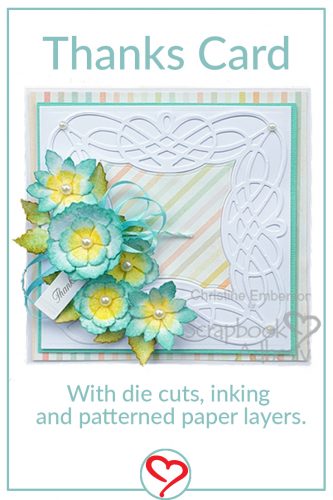
Hi everyone, Christine here today a Thanks card in celebration of World Cardmaking Day. It’s very easy to do with Scrapbook Adhesives by 3L®! Take a closer look at the card details, then scroll to the bottom of this post and enter to win some adhesives in our GIVEAWAY!!

Thanks Card by Christine Emberson for Scrapbook Adhesives by 3L

Thanks Card Details

I’ve used a variety of die cuts and paper to piece this Thanks card together for interest and texture.

I start with square layers for my card base. The intricate die cut frame is the last piece, and it’s secured with my E-Z Runner® Grand Refillable Dispenser.

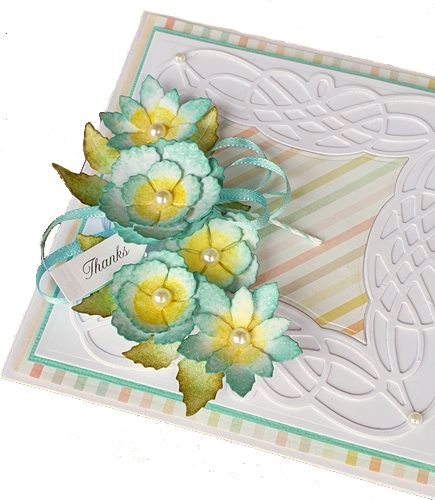
Now to work on my flower clusters. The flowers and leaves are die-cut from watercolor paper, which is inked in different ink colors. Bend the flower petals and leaves before layering them on the Thanks card.

Then add ribbons and pearls. The final piece is “Thanks” stamped in black ink on a white tag die cut. Secure it tucked into the flower cluster with 3D Foam Squares .

Thanks Card by Christine Emberson for Scrapbook Adhesives by 3L

Thanks for stopping by and keep scrolling for the World Cardmaking Day GIVEAWAY!

Christine

Creative Time: 30 Minutes
Skill Level: Intermediate

Materials Needed
Scrapbook Adhesives by 3L®

Home Hobby by 3L®

Other
White Card Base; Watercolour Card; Scrap Patterned Paper; Etched Dies (Spellbinders Paper Arts: Textured Flowers, Braided Grace Square); Ribbon; Twine; Ranger Ink Distress Inks; Pearls

Love it! Pin it!

Thanks Card by Christine Emberson for Scrapbook Adhesives by 3L - Pinterest

Happy World Cardmaking Day!

World Cardmaking Day Logo for Scrapbook Adhesives by 3L

We can’t pass up a chance to reward you, our loyal fans, on this fun and hopefully productive cardmaking day!

World Card Making Day 2019 Giveaway image

Enter to Win in the GIVEAWAY of TWO +$30 Prize Packages of Adhesives!

Enter NOW, this giveaway is live October 4-7, 2019 only!

Can’t find the comment section at the bottom of this post? Click below and scroll to the bottom of the post. We moderate comments several times a day, if yours doesn’t appear right away, it will be approved before the contest is closed.

a Rafflecopter giveaway

Visit our Website and Blog!
Sign up for our Newsletter so you never miss a contest or giveaway!
instagram purple icon facebook icon purple pinterest purple icon twitter purple icon YouTube icon blog subscription purple icon

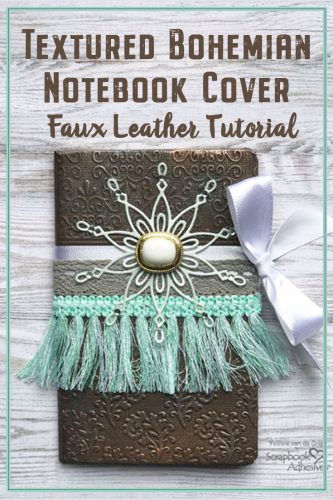
DIY Textured Bohemian Notebook Cover

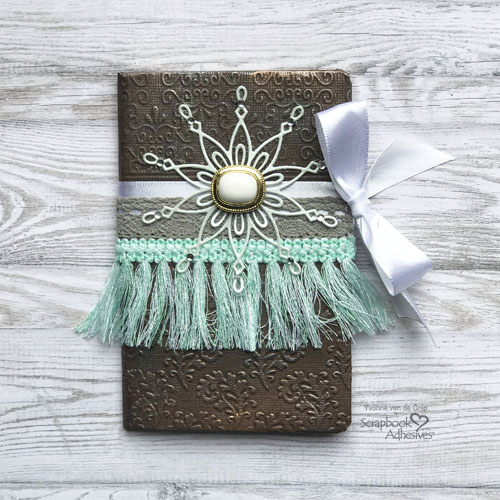
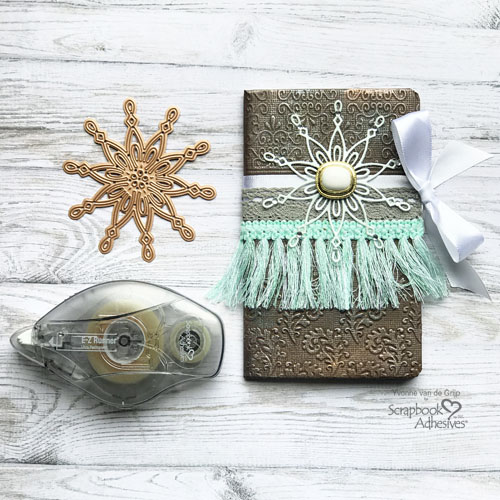
Hi everyone, Yvonne here with a hip textured bohemian notebook. With Scrapbook Adhesives by 3L Adhesives, it’s so easy to give a plain notebook a gorgeous textured faux leather cover.

DIY Textured Bohemian Notebook Cover by Yvonne van de Grijp for Scrapbook Adhesives by 3L

The E-Z Runner® Ultra Strong Refillable Dispenser is a great tool for an extra strong bond that a cover needs. Let me show you how!

Starting the Textured Bohemian Notebook Cover

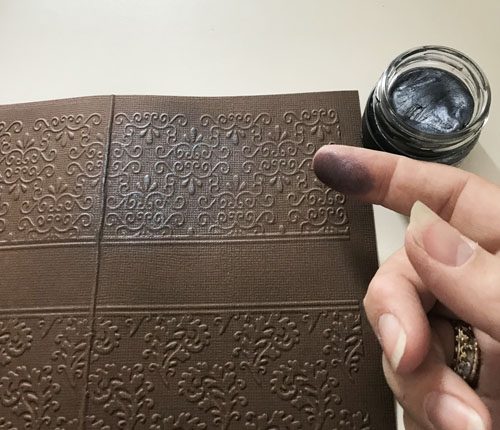
Put a piece of chocolate brown cardstock inside a large embossing folder and run through your die-cutting and embossing machine.

Fold the cardstock to establish front and back covers. Then put some dark grey gilding wax on your finger and rub over the textured paper. Repeat with copper, silver and gold gilding wax until you get your desired worn, faux leather look.

DIY Textured Bohemian Notebook Cover by Yvonne van de Grijp for Scrapbook Adhesives by 3L

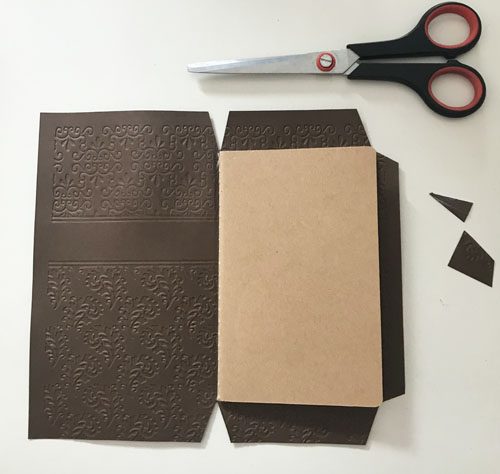
Flip your embossed/ textured cardstock with the waxed side down and lay your open notebook on top.

With a pair of scissors, cut out the tabs as shown in the photo. Start with the back of the notebook and repeat for the front.

DIY Textured Bohemian Notebook Cover by Yvonne van de Grijp for Scrapbook Adhesives by 3L

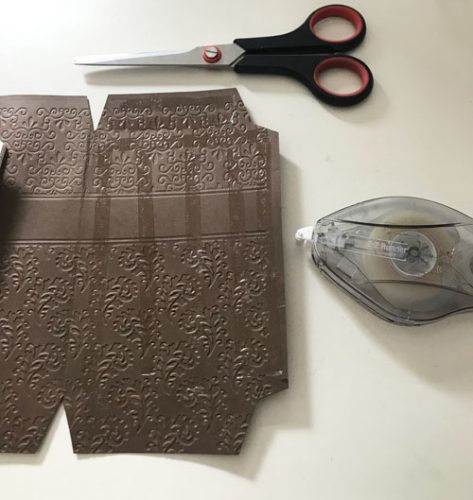
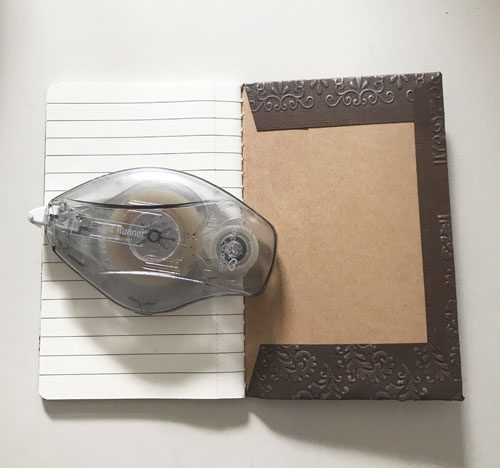
Next, apply the E-Z Runner® Ultra Strong to cover the backside of the cut cardstock piece. Start adhering the back of the notebook to the textured cardstock and fold the tabs to the inside of the cover, as shown below. Repeat for the front of the notebook.

DIY Textured Bohemian Notebook Cover by Yvonne van de Grijp for Scrapbook Adhesives by 3L

Add Ribbon and Trim

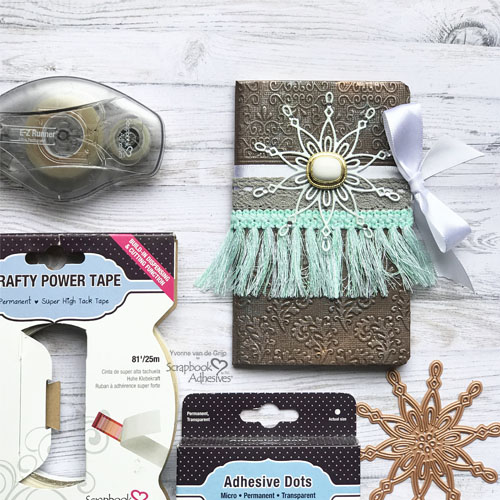
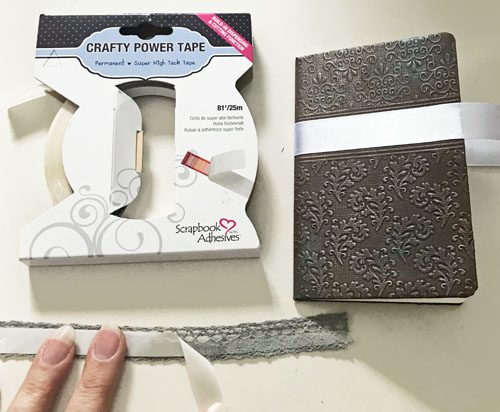
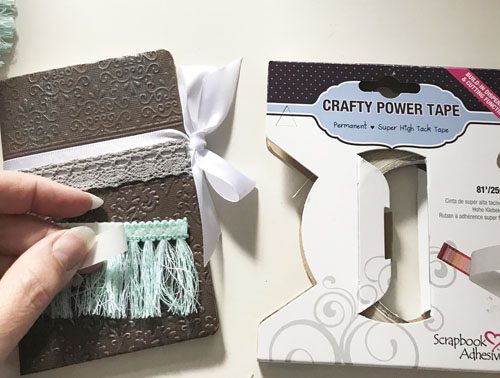
Use Crafty Power Tape to adhere white satin ribbon to the front and back of the notebook. Make sure the ends are long enough to make a bow, which will be tied later on.

Adhere a piece of grey lace below the white satin ribbon. Next, a piece of fringed trim under the grey lace. All are secured with the Crafty Power Tape.

DIY Textured Bohemian Notebook Cover by Yvonne van de Grijp for Scrapbook Adhesives by 3L

Finishing Touches

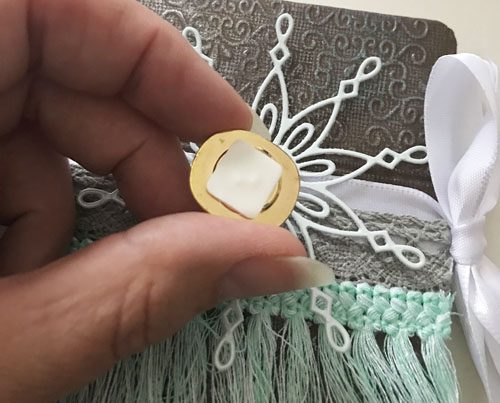
Die-cut a star-shape from soft green metallic cardstock and adhere it to the notebook using Thin 3D Foam Squares White Mix.

Then adhere a button to the star’s center with Thin 3D Foam Squares White Mix and tie a bow with the satin ribbon.

DIY Textured Bohemian Notebook Cover by Yvonne van de Grijp for Scrapbook Adhesives by 3L

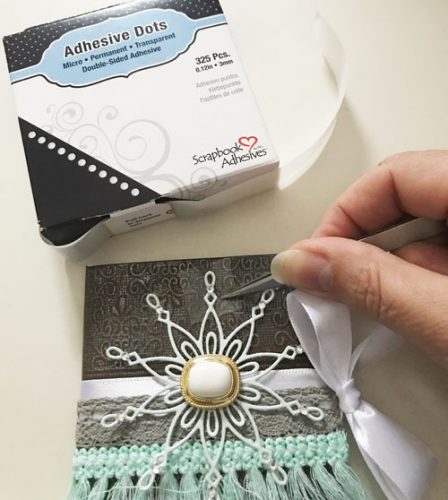
Finally, adhere rhinestones to the star’s ends with Adhesive Dots Micro.

DIY Textured Bohemian Notebook Cover by Yvonne van de Grijp for Scrapbook Adhesives by 3L

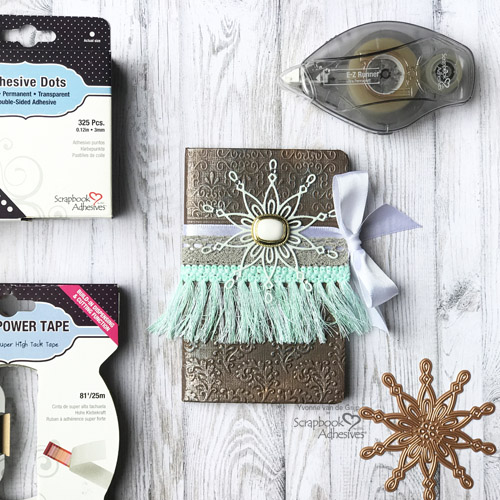
And voila…your DIY Textured Bohemian Notebook Cover is ready!

Wishing you happy crafting,
Yvonne

DIY Textured Bohemian Notebook Cover by Yvonne van de Grijp for Scrapbook Adhesives by 3L

Creative Time: 40 minutes
Skill Level: Intermediate

Materials Needed
Scrapbook Adhesives by 3L®

E-Z Runner® Ultra Strong Refillable Dispenser
Crafty Power Tape Dispenser 81ft
Thin 3D Foam Squares White Mix
Adhesive Dots Micro

Other
Embossing Folder (Crafter’s Companion: Die’sire 8”x8”Embossalicious Elegance); Die-cutting and Embossing Machine (Spellbinders® Paper Arts: Platinum Die Cutting and Embossing Machine 8.5”Platform); cardstock (Chocolate Brown, soft green metallic); Gilding Wax (Coosa Creative); Ribbon (White Satin, grey lace, green fringed); self-adhesive Rhinestones; Button; Scissors

Love It. Pin It!

DIY Textured Bohemian Notebook Cover by Yvonne van de Grijp for Scrapbook Adhesives by 3L Pinterest

Visit our Website and Blog!
Sign up for our Newsletter so you never miss a contest or giveaway!
instagram purple icon facebook icon purple pinterest purple icon twitter purple icon YouTube icon blog subscription purple icon

3D Foam Star Constellation Layout

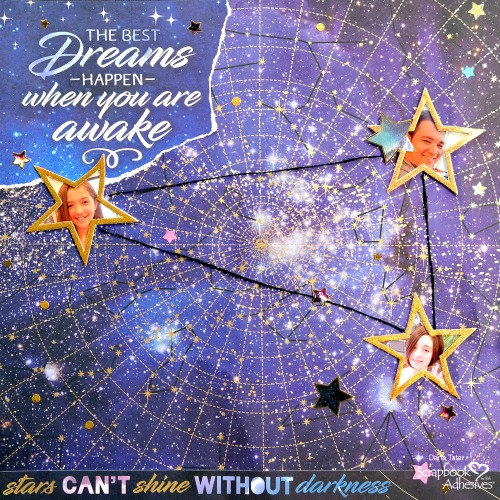
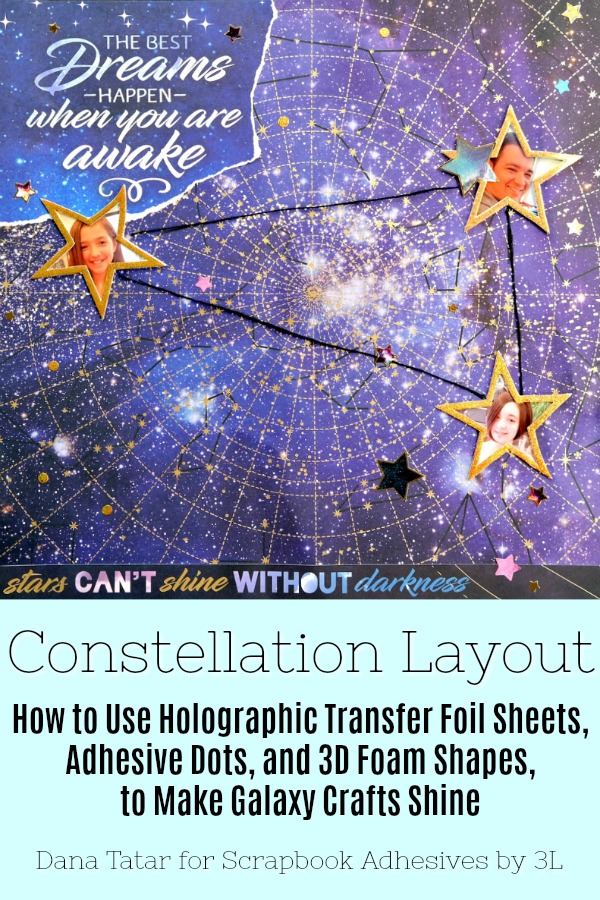
Hi friends! Dana Tatar here today sharing a scrapbook layout that was inspired by the night sky. My husband and two daughters are the shining stars in my life. I created my own constellation for a scrapbook layout using their photos, 3D Foam Stars, and Holographic Metallic Transfer Foil Sheets.

Constellation Scrapbook Layout by Dana Tatar for Scrapbook Adhesives by 3L

Making Frames with Foiled 3D Foam Stars

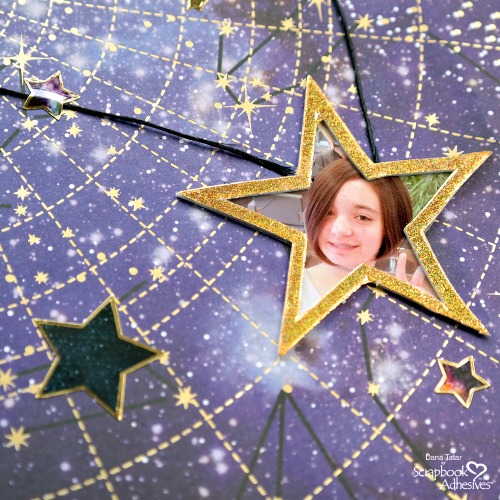
Metallic Transfer Foil + 3D Foam Star Photo Frames by Dana Tatar for Scrapbook Adhesives by 3L

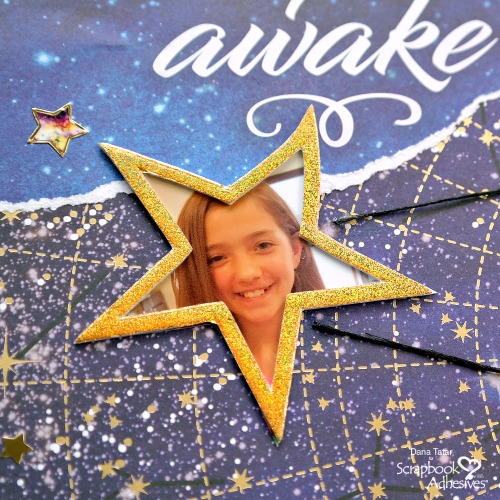
Start by printing wallet size photos and place 3D Foam Stars onto them. Next, cut around the outer edge of the shape, creating a star-shaped photo frame. Secure them to the layout using the E-Z Runner Ultra Strong Refillable Dispenser. To add gold sparkle, I peeled off the top paper liner, pressed the gold Holographic Transfer Foil onto the adhesive, and then gently lifted the foil away from the foam.

The three star photos are connected with black twine and secured to the page using the Dual Tip Glue Pen. I created my own constellation to mimic the print of the patterned paper.

Adding Texture and Dimension with Layers

Metallic Transfer Foil + 3D Foam Star Photo Frames by Dana Tatar for Scrapbook Adhesives by 3L

Stickers are a great way to add a second layer to a design without adding extra bulk. I applied several sizes of gold-edged stickers to help add depth to the galaxy background.

Metallic Transfer Foil + 3D Foam Star Photo Frames by Dana Tatar for Scrapbook Adhesives by 3L

Tearing, instead of cutting patterned paper adds contrast to the page. The raw edge of the paper helps to balance the sparkly foil accents on the scrapbook page.

An Adhesive Dot Galaxy

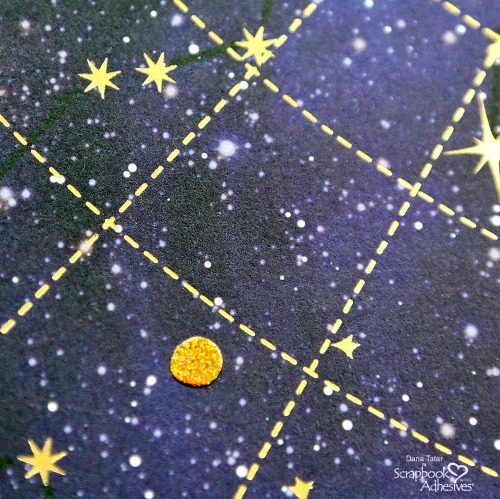
Twinkle Stars using Adhesive Dots, by Dana Tatar for Scrapbook Adhesives by 3L

Mini Adhesive Dots make great twinkle stars! They have a strong bond that makes them perfect for intricate surfaces and small objects such as sequins and foil. I applied gold Holographic Transfer Foil (using the same method as above) to Mini Adhesive Dots placed randomly around the page.

Thanks so much for joining me today!
~Dana Tatar

Creative Time: 45 Minutes
Skill Level: Intermediate

Materials Needed
Scrapbook Adhesives by 3L®

E-Z Runner® Ultra Strong Refillable Dispenser
Adhesive Dots Mini
3D Foam Stars
Metallic Transfer Foil Sheets Holographic Colors

HomeHobby by 3L®
Dual Tip Glue Pen

Other
Patterned Paper (Paper House Productions); Stickers (Paper House Productions); Black Twine (American Crafts)

Love It! Pin It!

Constellation Scrapbook Layout with Holographic Foiled Star Photo Frames and Twinkle Adhesive Dots Galaxies by Dana Tatar for Scrapbook Adhesives by 3L

National Coffee Day Blog Hop and I Love Coffee Card Tutorial

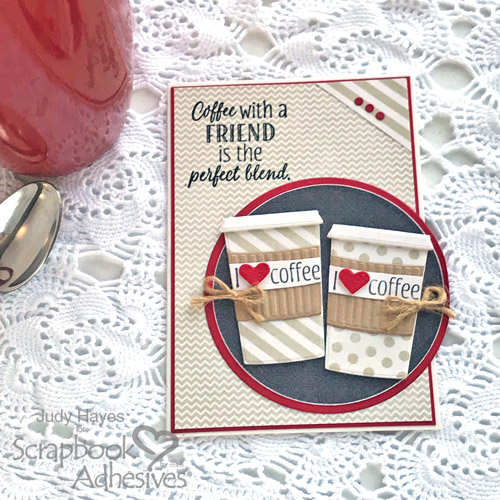
Hello coffee, tea or cocoa lovers! It’s Judy here today to celebrate National Coffee Day with the Coffee Lovers Community and you! I have an I Love Coffee card for you..and a friend! Grab a cuppa and see how I put it together!

It’s National Coffee Day and we’re excited to be part of the National Coffee Day Blog Hop with the Coffee Lovers Community! The Coffee Lover’s Blog brews up inspirational coffee-related posts. Read to the end for a chance to win our ADHESIVE GIVEAWAY!! Who are the Coffee Lovers? We’re a coffee-loving (or tea or cocoa) group of card makers that’s open to everyone.

I Love Coffee Card

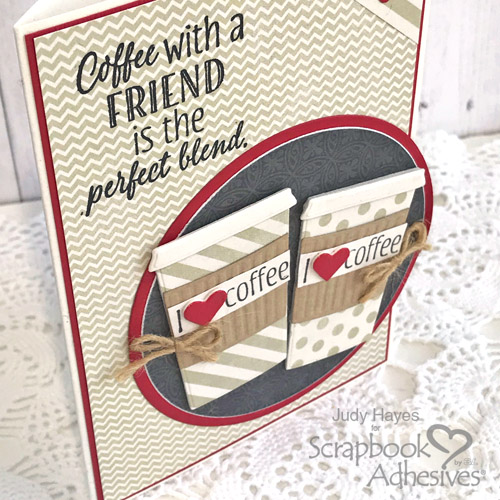
I Love Coffee Card by Judy Hayes for Scrapbook Adhesives by 3L

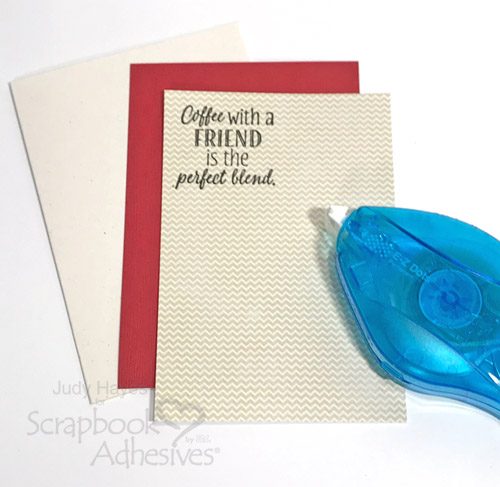
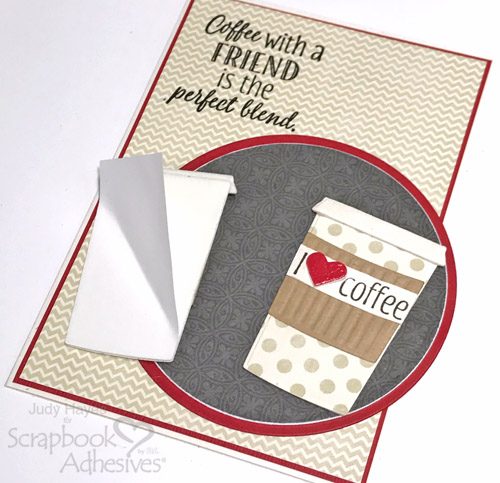
To make this I Love Coffee card, first start with an off-white card base that’s 3.75 x 5.5 inches. Cut patterned paper and red cardstock mat to fit the card base. Stamp a verse in the corner of your patterned paper with black ink and then heat emboss with clear embossing powder. Use E-Z Dots® Permanent Refillable Dispenser to fasten the pieces to card front.

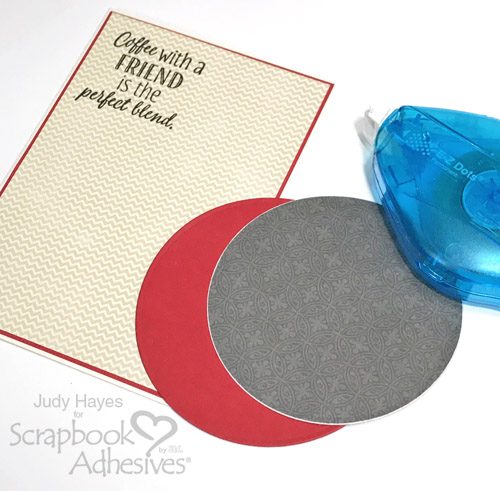
Next cut a circle of gray patterned paper and a slightly larger circle from red cardstock. Sand the edge of the gray paper to expose the white edge. Adhere them with E-Z Dots® Permanent Refillable Dispenser, then to the card front, with the circles extending about .25-inch beyond card edge.

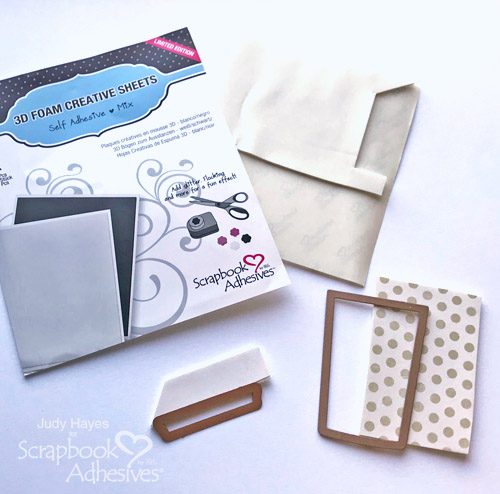
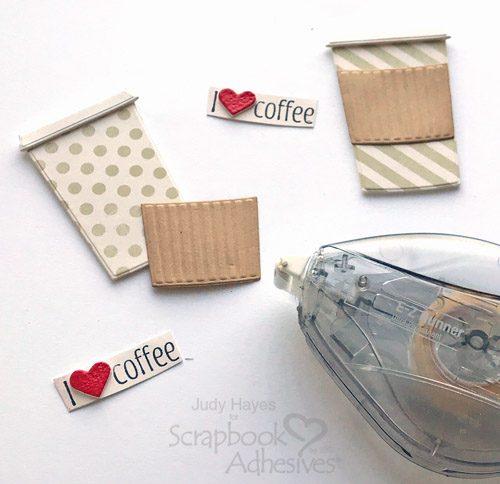
For the coffee cups, cut dotted and striped paper large enough to fit your die. Attach each piece to 3D Foam Creative Sheets White Small. Cut off-white paper large enough for each cup top attach to 3D Foam Creative Sheets.

Die cut the cup from dotted and striped pieces, and then two tops from off-white pieces. Remove the liner from the tops and adhere to each cup. Die cut and emboss two cup wraps from kraft cardstock.

Heat Embossing with 3D Foam Hearts

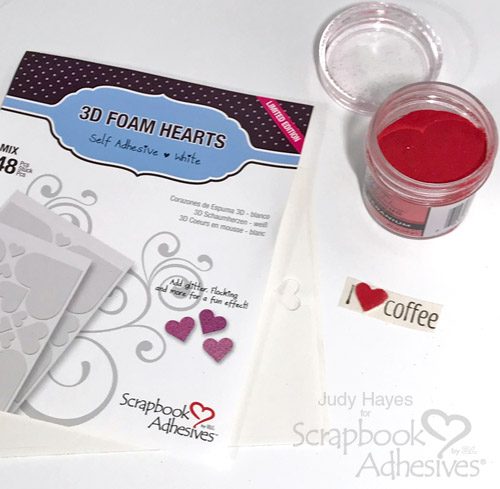
Stamp two “I Coffee” on off-white paper with black ink. Trim each to fit across the cup. Place a small 3D Foam Heart on each stamped piece. To emboss, remove the liner from each heart, apply red embossing powder and heat emboss.

Attach one verse to each cup wrap, and then a cup wrap to each cup using the E-Z Runner® Ultra Refillable Dispenser.

Remove the liners from the back of each cup and adhere to the circle on the card front.

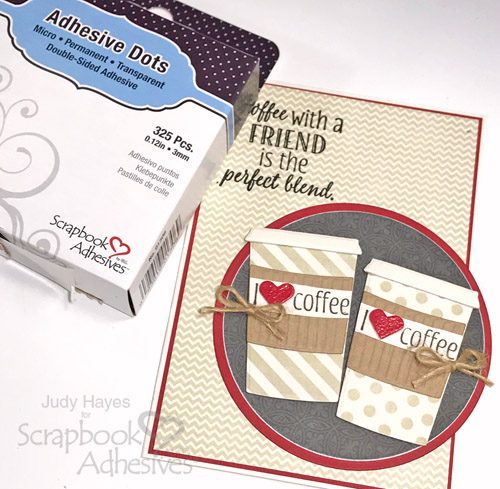
Now tie two small bows of twine and attach them to the cups with Adhesive Dots Micro.

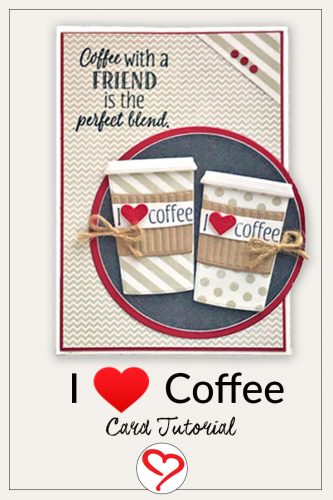
I Love Coffee Card by Judy Hayes for Scrapbook Adhesives by 3L

To finish the cups, cut a corner piece of striped paper and add that across the top corner using E-Z Dots® Permanent Refillable Dispenser. Use a hole punch to make three red dots. Press each dot against adhesive on E-Z Dots® Permanent Refillable Dispenser and then place on the striped corner.

I Love Coffee Card by Judy Hayes for Scrapbook Adhesives by 3L

I hope you love my I Love Coffee card! Keep reading for the Blog Hop prize entry details below! Thanks for Visiting!

Judy Hayes

  • Creative Time: 45 Minutes
  • Skill Level: Intermediate

Materials Needed
Scrapbook Adhesives by 3L®

Other:
Etched Dies: Spellbinders® Paper Arts Circle Dies; Fancy Pants Patterned Paper; Gray Patterned Paper; Our Daily Bread Stamps and Dies; Ranger® Embossing Powder; Imagine Crafts/Tsukineko Versafine Onyx Black Ink; Cardstock (Off-White, Kraft, Red)

Love It. Pin It!

I Love Coffee Card by Judy Hayes for Scrapbook Adhesives by 3L - Pinterest

Coffee Lovers Blog Hop Details

Coffee Lovers Blog Hop Sept 29-Oct 5, 2019 Logo

Enter to win our GIVEAWAY of +$30 Prize Package of Adhesives!

Can’t find the comment section at the bottom of this post? Click below and scroll to the bottom of the post.

Keep on Hopping! Find the list of National Coffee Day Blog Hoppers HERE!

You are invited to the Inlinkz link party!

Click here to enter

Visit our Website and Blog!
Sign up for our Newsletter so you never miss a contest or giveaway!
instagram purple icon facebook icon purple pinterest purple icon twitter purple icon YouTube icon blog subscription purple icon