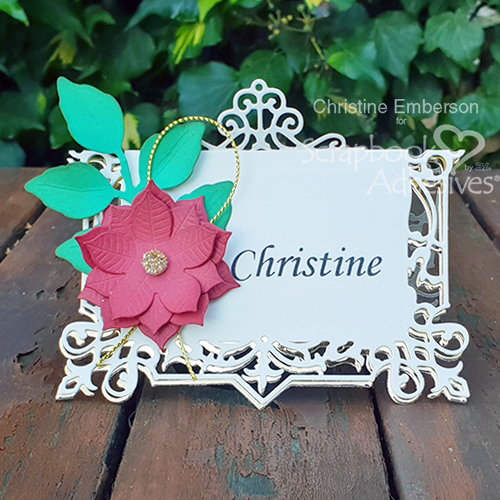
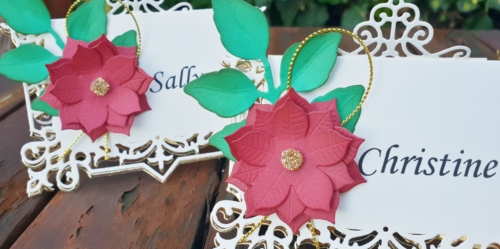
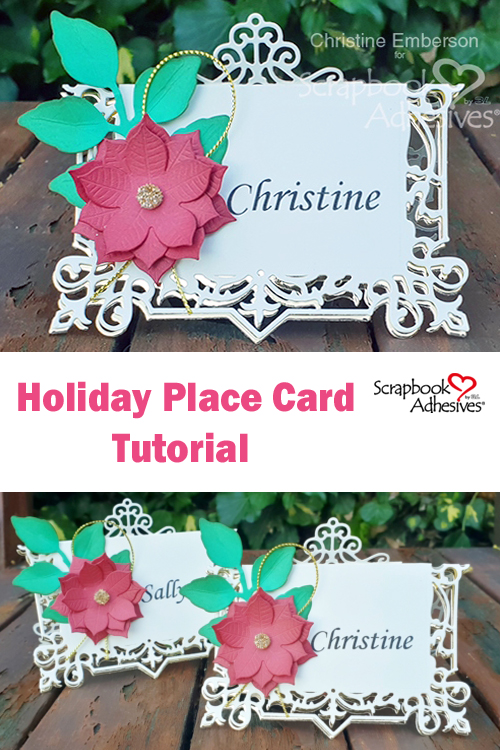
Hi everyone, Christine here today with a festive place card tutorial. Adding a personalized touch to your holiday table is always nice but do you have time? These are speedy makes so yes! Just what we want to hear.
Creating the Place Card Basics
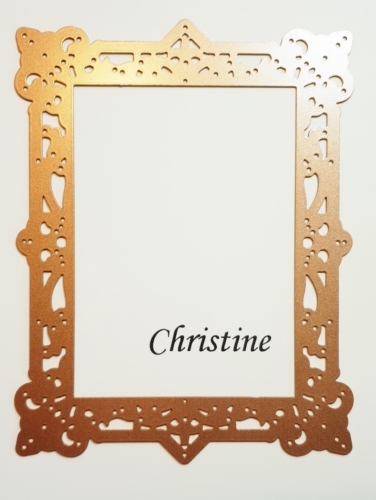
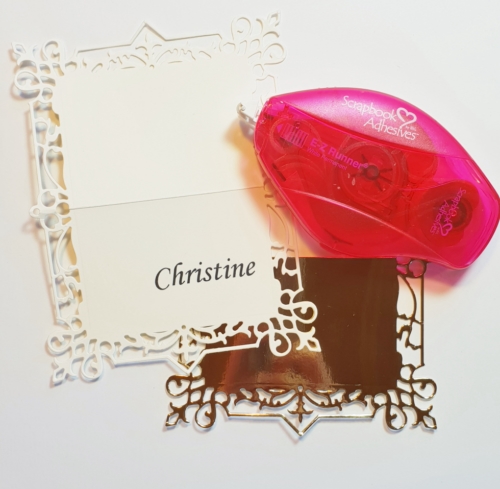
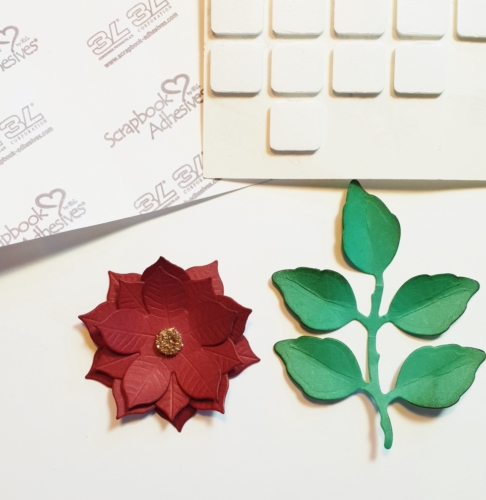
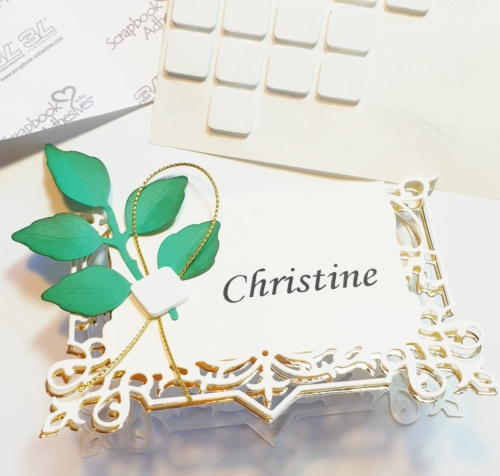
Print name onto an ivory card using a printer. Align your chosen die and run through a die cutting machine.
Score across the middle of the die cut, this will create your folded place card. Using the die again, cut with gold mirror card. Slice in half and affix this behind with E-Z Runner® Permanent Strips Refillable Dispenser to create a small drop shadow.
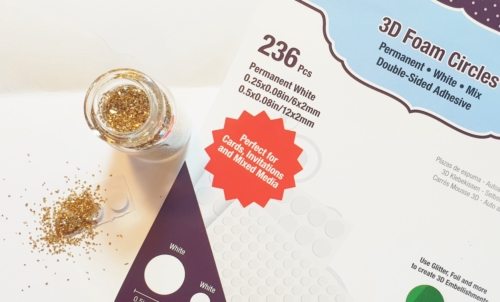
Remove the top layer from 3D Foam Circles White Mix and sprinkle glitter, these make the perfect glitzy flower centers.
Others:
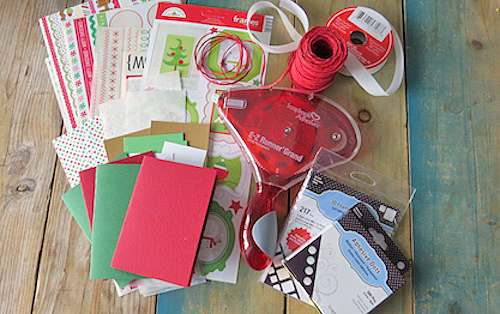
Craft Dies: Spellbinders® Paper Arts (Callista Rectangle, Cinch and Go Poinsettia, and Foliage); Gold mirror cardstock; Ivory, red and green cardstock; Gold glitter; Gold twine; Computer Font or stamp for name
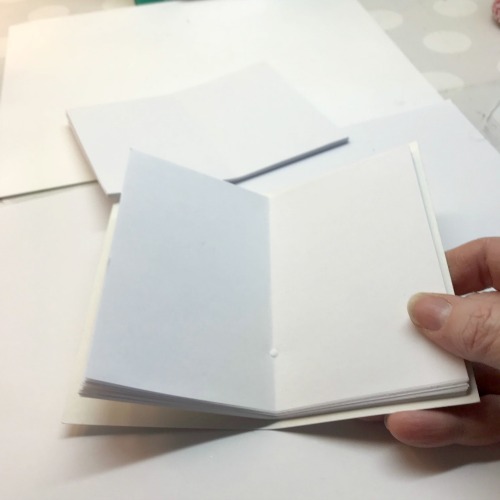
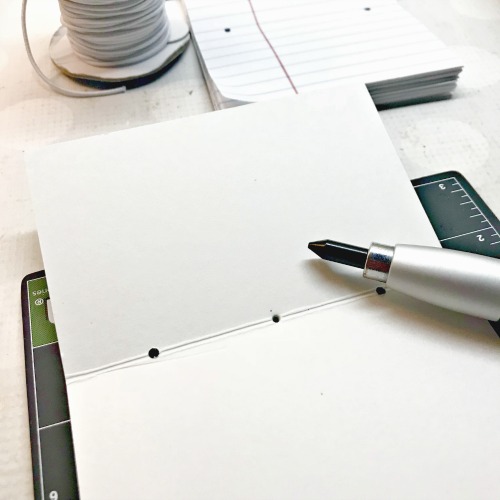
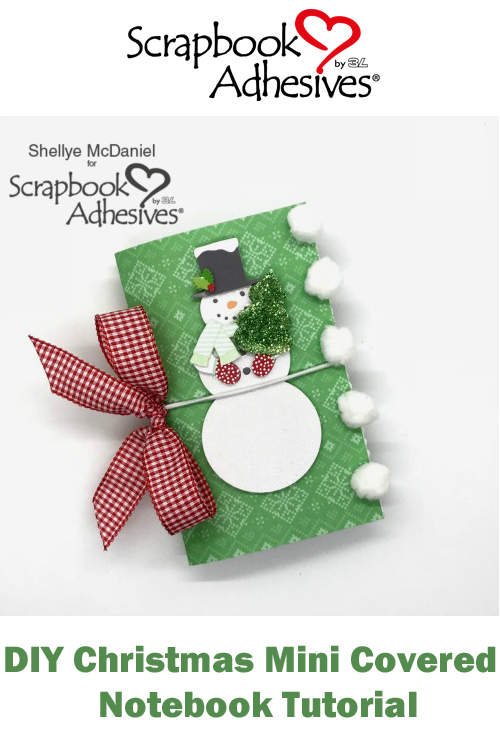
Started by taking several sheets of plain copy paper or notebook paper; roughly 15-20 sheets. Cut them in half to measure 8.5 x 5.5″. Now cut the sheets in half again so that they measure 4.25 x 5.5″. Gather all of the papers into a stack and then fold in half to measure 4.25 x 3.75″.
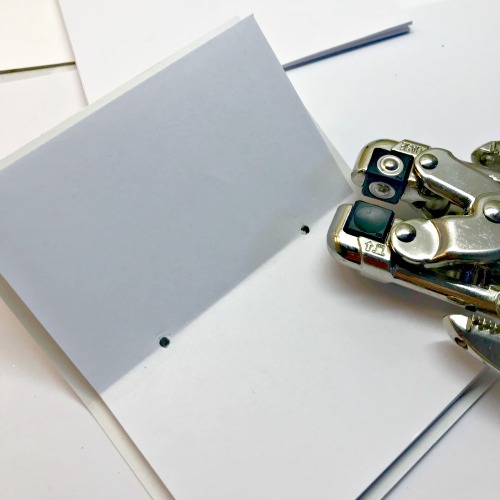
With a 4.75″ X 6″ piece of lightweight white chipboard, fold it in half to find the center. Next, place the paper stack on top of the chipboard and punch two holes along the center as shown above.
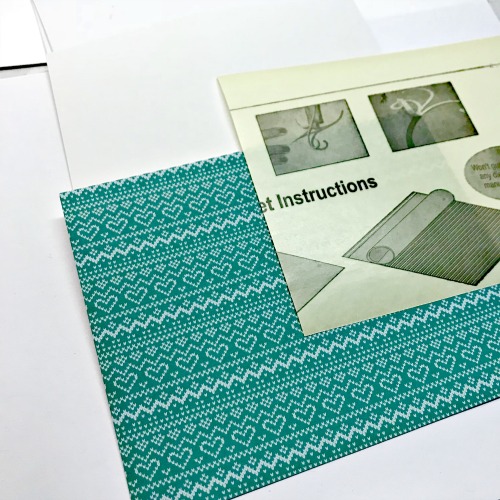
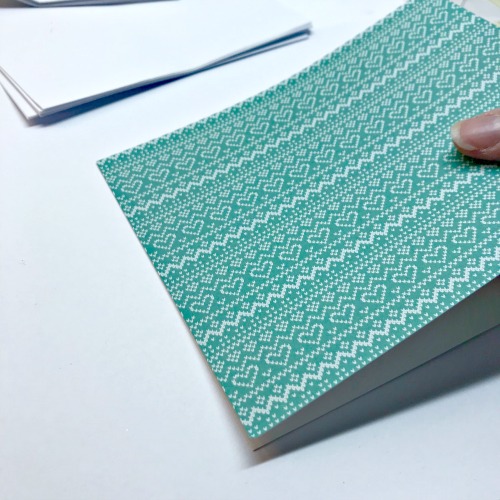
Time to dress the cover of the chipboard. 6 x 6″ paper pads come in very handy for this! Cut the paper and Adhesive Sheet down to match the size of the chipboard. Adhere the Adhesive Sheet to the chipboard, remove the yellow liner and then attach the paper to the adhesive.
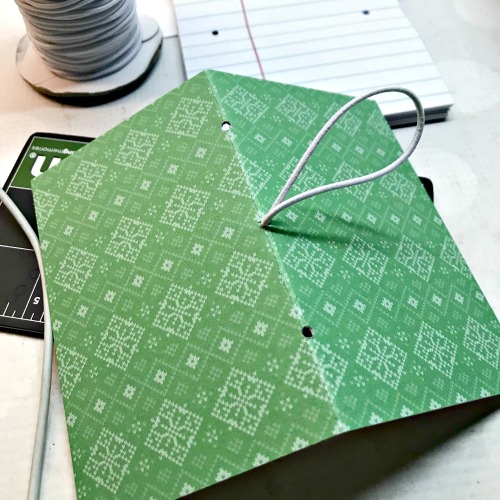
After punching the first two holes, I decided that I wanted an elastic closure. Use an eyelet punch to create a hole in the middle spine of the cover. Thread through both ends of a piece of elastic and knot off before adding the pages to the book.
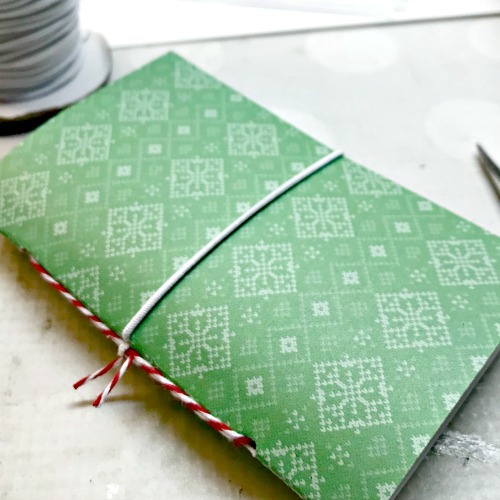
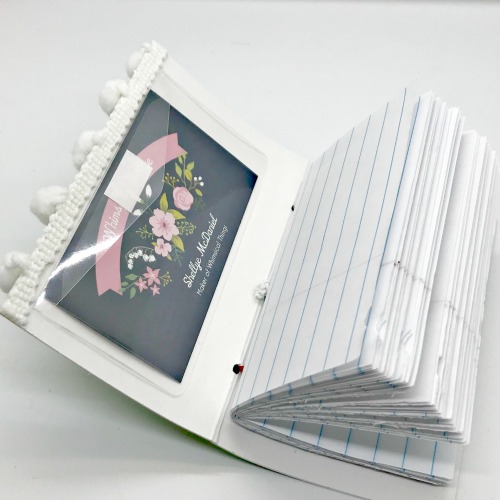
Add the pages to the inside of the cover using twine inserted through all of the holes.
Embellishing the Notebook
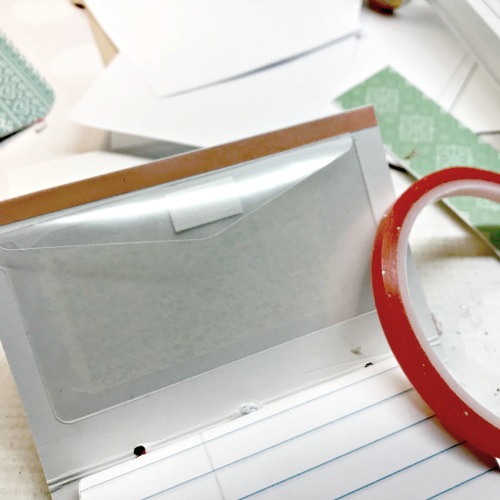
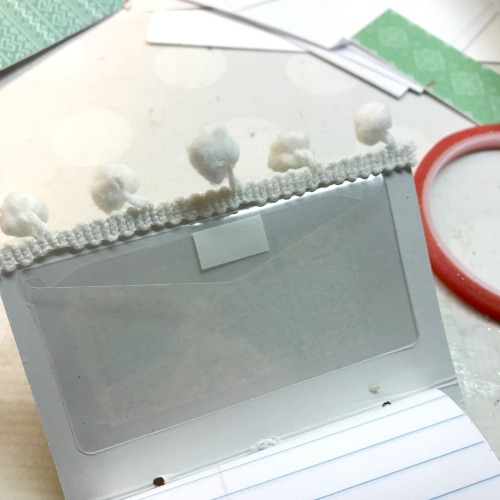
To the inside cover add one of the 2.5 x 4″ Keepsake Envelopes. This is a perfect spot to store stamps, business cards, gift cards, etc.
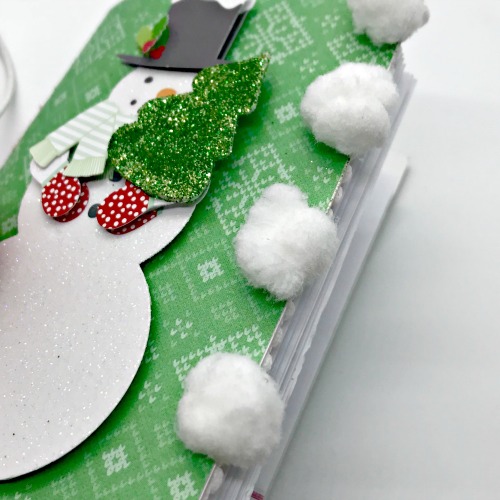
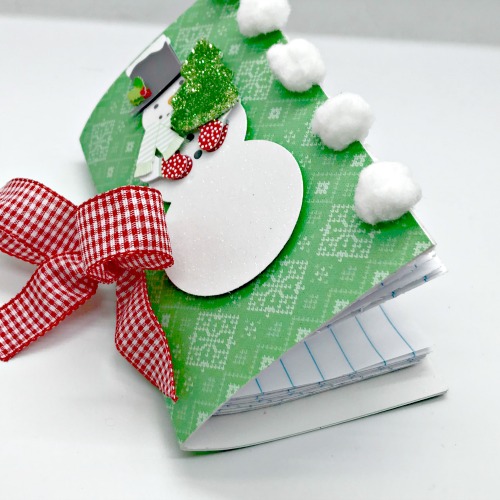
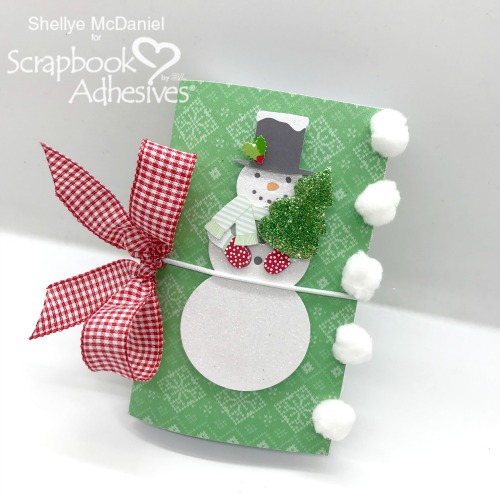
A add a strip of the 1/4″ Extreme Double-Sided Tape to the edge of the cover, just above the Keepsake Envelope. You can add cute pom pom trim as I did.
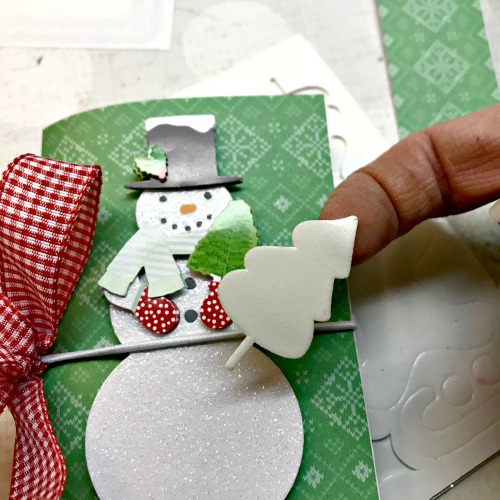
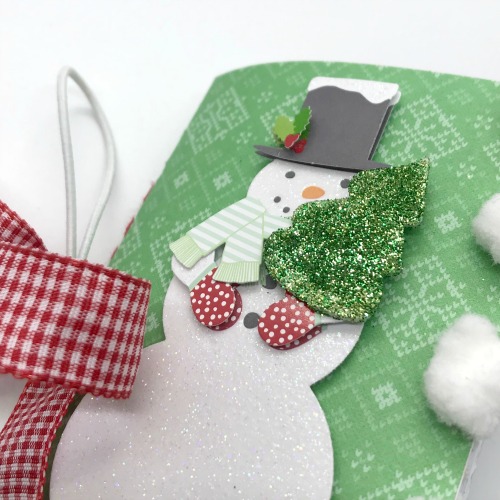
This adorable 3D snowman has been in my stash for some time and I thought he would be great on the cover. I embellished him further with a 3D Foam Tree (also available in the 3D Foam Holiday Embellishment Kit) and then glittered it with green.
Finally, I tie some pretty check ribbon and it’s all ready for gifting! I made up several of these in different patterns and types of paper on the inside. You can also find inexpensive premade notebooks that you can give the same treatment.
Other Supplies: Lawn Fawn Knit Picky 6X6 Paper Pad, Paper Mart Ribbon, May Arts Pom Pom Trim, Elastic, Notebook Paper, Green Glitter, and Snowman Sticker: Martha Stewart Crafts
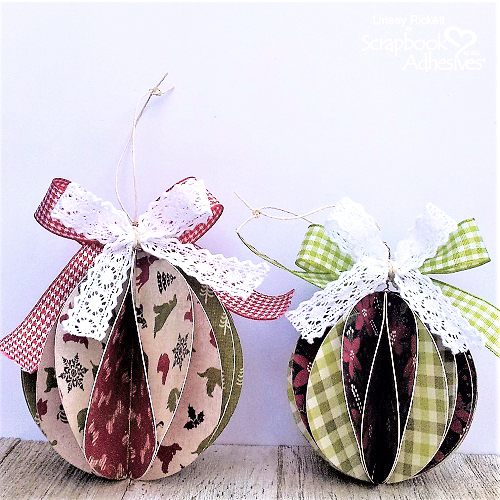
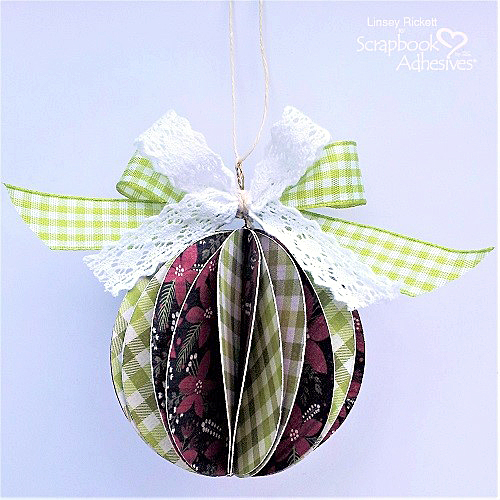
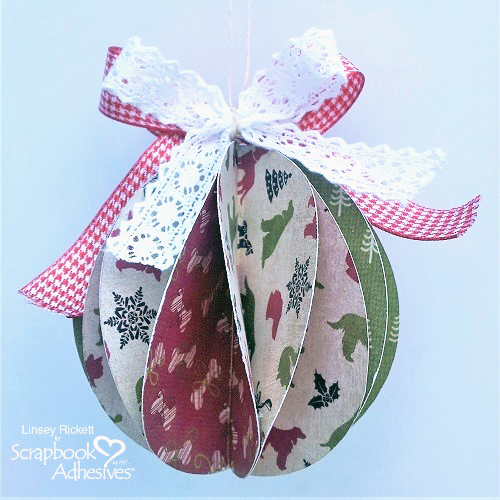
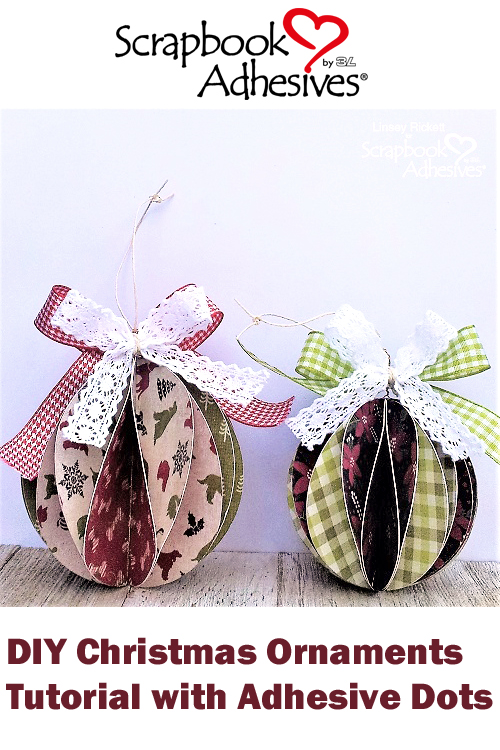
DIY Christmas ornaments are easy and fun to make! With the holiday season just about upon us, it’s that time of year for making handmade gifts! These ornaments will bring a bounty of cheer and joy to all!
Hello friends, Linsey here today sharing this simple DIY craft that is fun for the whole family! I was inspired by ornaments I’ve seen online. So grab the kids and let’s get to making!
Let’s Make Christmas Ornaments
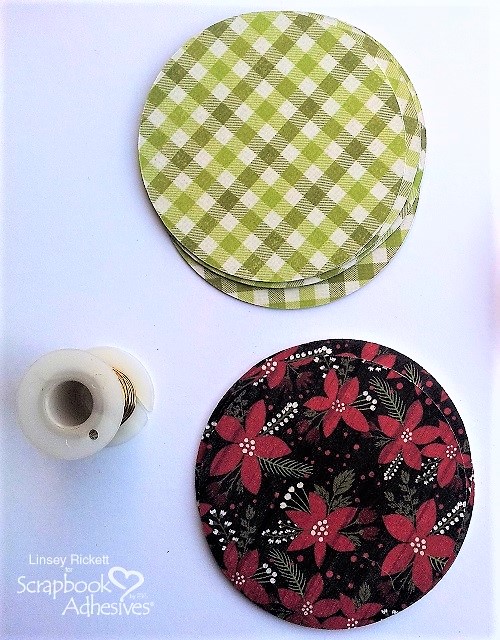
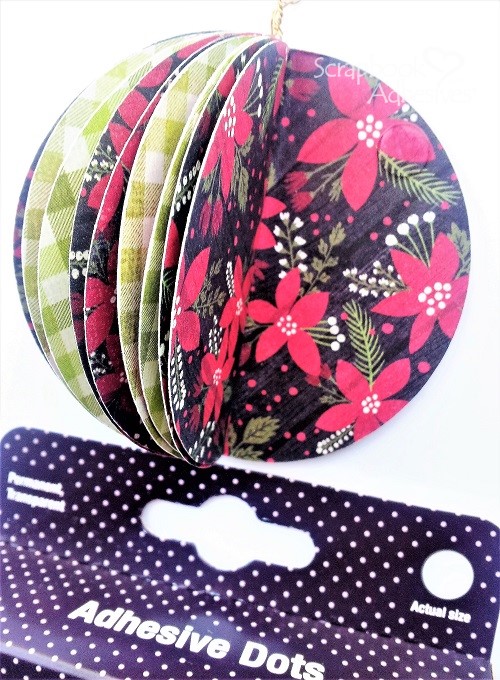
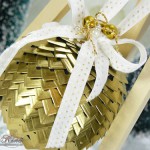
Cut 12 circles out of cardstock/patterned paper in whatever size you want your ornaments to be. I made a 3″ bauble and a 2 1/2″ bauble, thus 12 3″ circles and 12 2 1/2″ circles were cut. This can be done with a cutting machine, punches or by simply tracing and cutting circles by hand.
2. Fold all the circles in half and stack them on top of each other. Here are some tips for getting a symmetric-looking color distribution on the final bauble:
If using 3 colors A B C, then stack them in the order of ABBCCAABBCCA.
With 2 colors A B, then stack them in the order ABBAABBAABBA.
If using a single type of card, but double-sided, then alternate “heads up” and “tails up”.
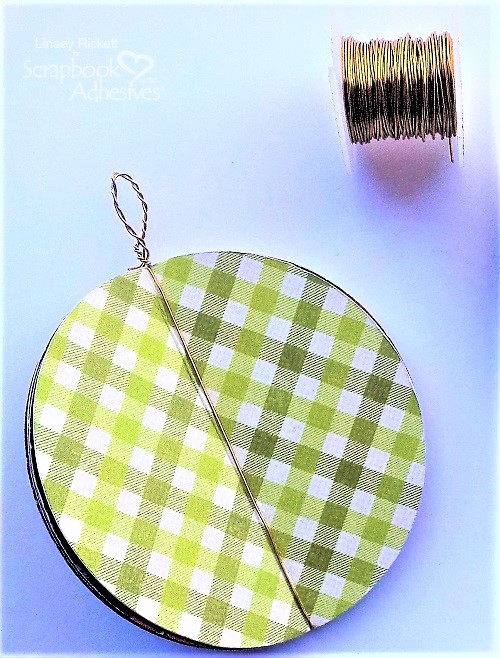
3. Wrap a length of wire all the way around the stack so that it runs along the fold. Twist the ends together to secure. If you don’t have wire, you can also just staple the stack together, once at the top and once at the bottom, so that the staple sits right on the fold.
Forming the DIY Christmas Ornaments
4. Stick a Medium Adhesive Dot onto a circle, about 1/4 of the way from the bottom. Fold the facing flaps together and press to secure the bond.
5. On the next circle along, stick a Medium Adhesive Dot about 1/4 of the way from the top. Continue like this all the way around, alternating high and low adhesive dots.
6. Once you’ve glued all the adjacent flaps together, this is what the finished bauble looks like.
Attach a pretty ribbon and loop for hanging on your tree or give as a gift!
Thanks so much for visiting today! I’ve enjoyed sharing my DIY Christmas ornaments and hope that you feel inspired to make a few of your own this holiday season!
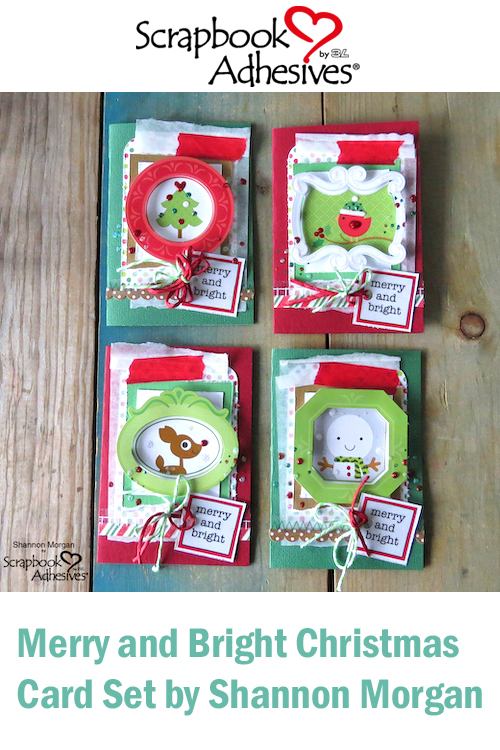
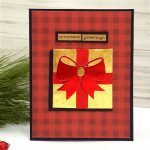
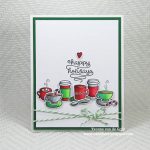
Make Merry and Bright themed holiday cards in a snap! Wait, what? That’s right, holiday cards in a snap! I am going to show you how to create a quick set of 4 cards here. I think by following this simple step by step, you can kick out a bunch of cards, just in time for mailing!
A Merry and Bright Start to Cardmaking!
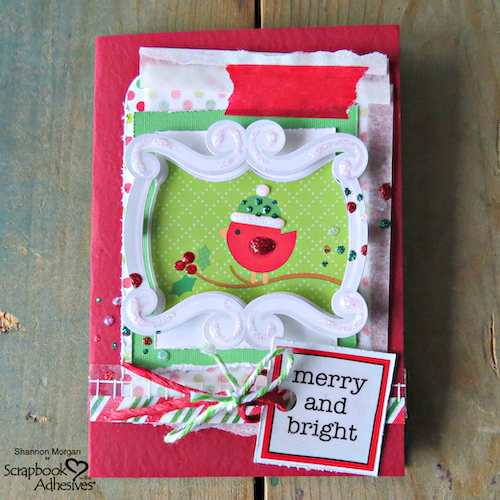
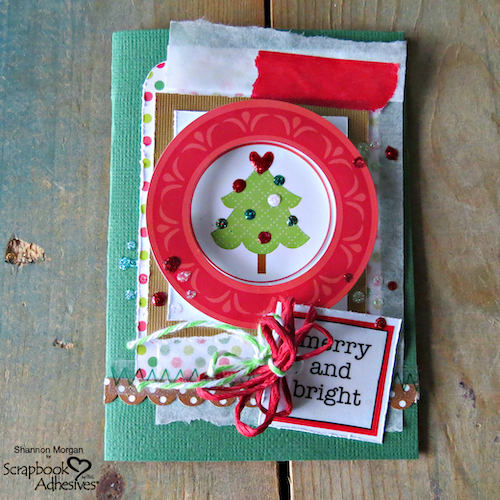
I began with gathering supplies. I gathered cardstock, some patterned paper, stickers, twine, and adhesives. The cardstock bases measure 3.5″X5″. The key with most of my cards is they build off layers. The cardstock base is the beginning layer. I created a step by step photo for you to help with easy assembly.
Step by Step Instructions:
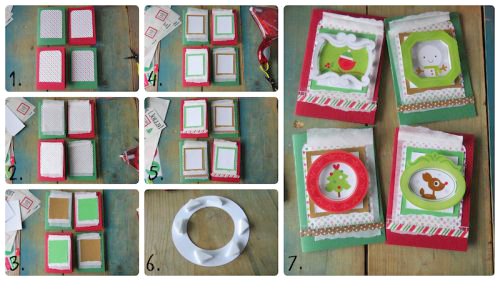
Begin with adding the patterned paper to the cardstock base. I cut mine to roughly 2.75 x 4.5″ and distressed the edges. (To do this, I used an open pair of scissors and scraped the edges of the patterned paper.)
The next layer that I added, is tracing paper, clearly, it adds such a delicate touch. It can be perfectly imperfect and lend a layer that becomes ethereal.
By adding another layer of cardstock I am helping in the visual interest of these cards, certainly lending to the fun feel of the card set.
I added a cute little border to the card. I did this with some coordinating stickers with an adhesive dot at both ends. Adhesive Dots Medium were the size I used to accomplish this step. After adding the border, I added an additional cardstock layer (white smooth cardstock).
I’m adding an extra little “oomph” with a stitch layer. (This is actually a sticker, but..no one needs to know this.)
Using 3D Foam Squares, I am creating some much-needed height to the frames pictured above. Not only did I use foam squares but I stacked them just to make sure those frames jumped off the card.
Almost done, my cards are almost done! I will be adding a few little things, like the “merry and bright” sticker at the bottom, using Adhesive Dots Medium to do so.
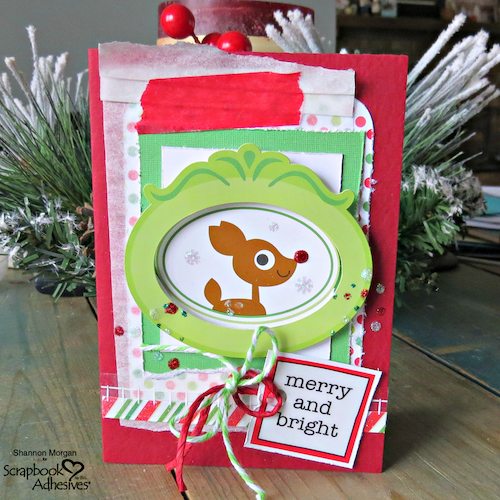
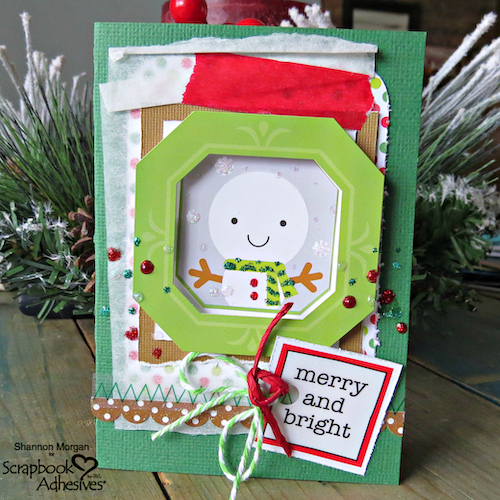
Holiday Card Up Close!
Thank you for letting me share them with you and hope that these will inspire you to start holiday cardmaking if you haven’t already! Shannon
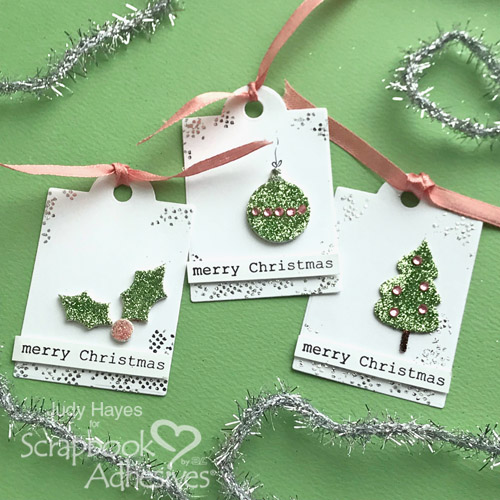
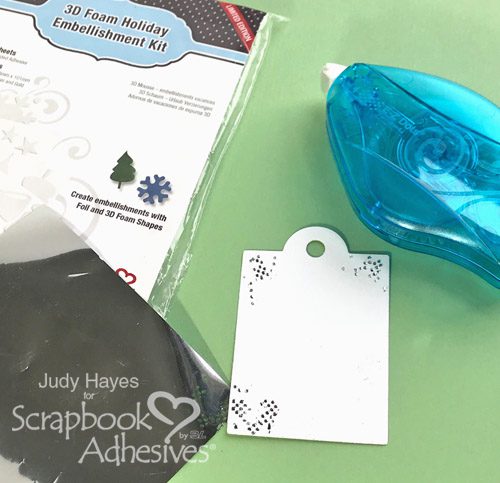
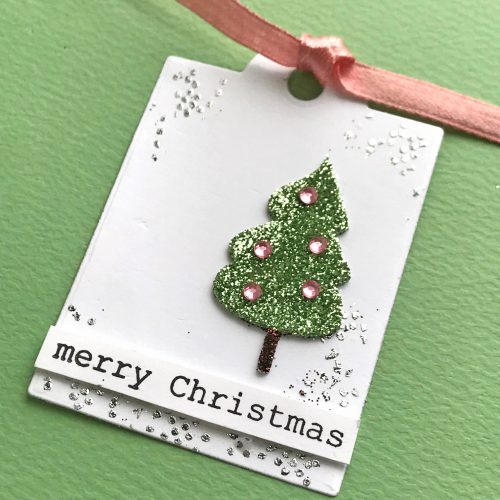
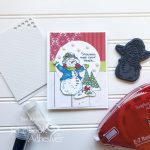
1. Start with some white tag as the base. I die cut mine, but you could hand trim or use store bought tags.
2. Apply random dots of adhesive with E-Z Dots® Permanent Refillable Dispenser along the bottom and a bit at the top corners. I added bits of adhesive rather than a solid line of dots by touching the runner to the paper and applying just a little.
3. Apply the silver foil sheet from 3D Foam Holiday Embellishment Kit over the dots with the shiny silver side up. Rub to transfer the foil to the dots and repeat as needed.
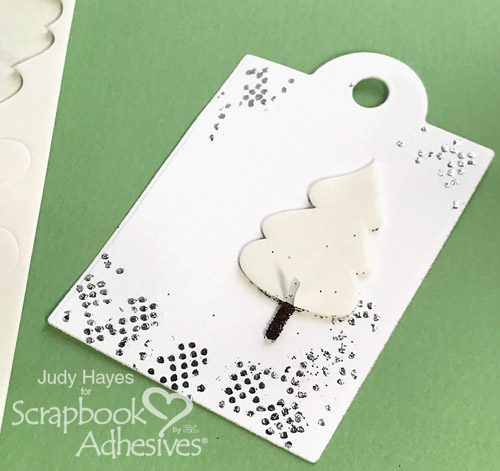
5. Carefully lift the top liner from tree trunk only and sprinkle with brown glitter. Make sure to push the glitter into the exposed adhesive and then tap off the excess.
6. Remove the rest of the top liner and sprinkle tree portion with green glitter. Again, push the glitter into the tree before tapping off the excess.
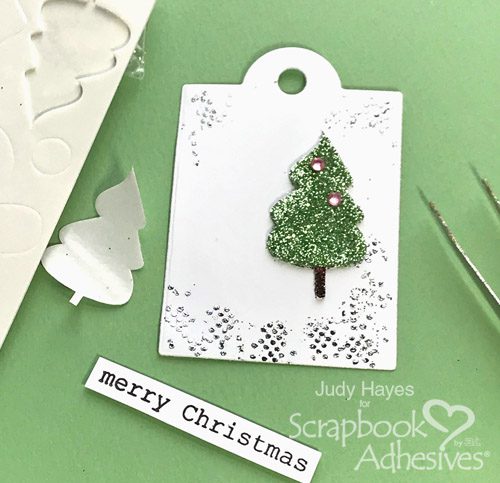
7. Add tiny pink rhinestones in the tree for extra sparkle 🙂
8. Stamp the sentiment with black ink on white cardstock and trim to size.
10. Fasten the sentiment to the tag below the embellished tree shape.
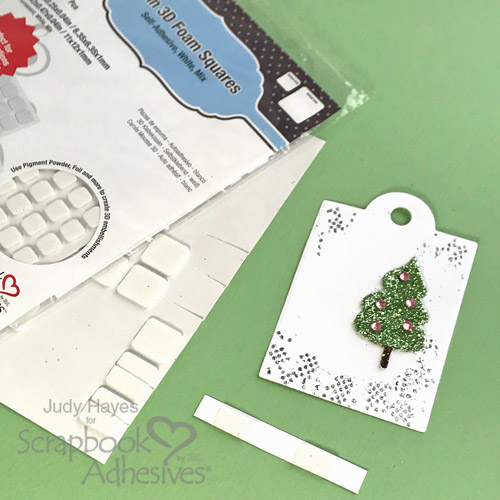
11. Thread a piece of ribbon through the top and tie a single knot.
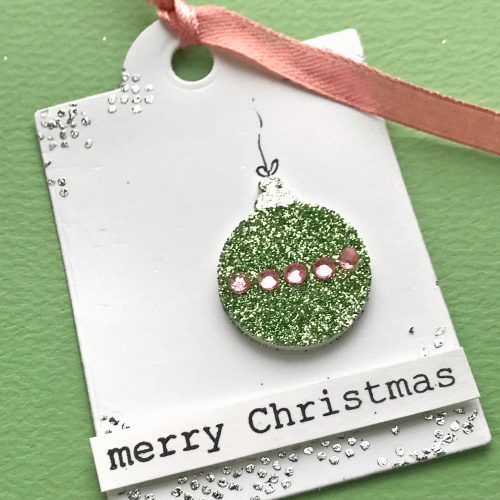
Creating the Ornament Tag
Repeat steps from the above tag but the shape will be the 3D Foam Ornament Shape.
After placing the ornament shape on the tag, carefully lift the liner on the top part of the ornament and apply the silver foil to create the ornament topper.
Next, remove the rest of the top liner and cover the body of the ornament with green glitter. Place the pink rhinestones in a line across the shape.
Draw a black line to mimic a string and bow with a fine tip marker. Add sentiment and thread a piece of ribbon.
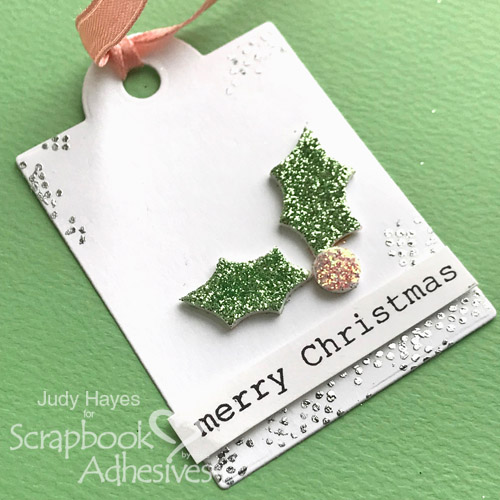
Creating the Holly Tag
Add green glitter to leaves and pink glitter on berry.
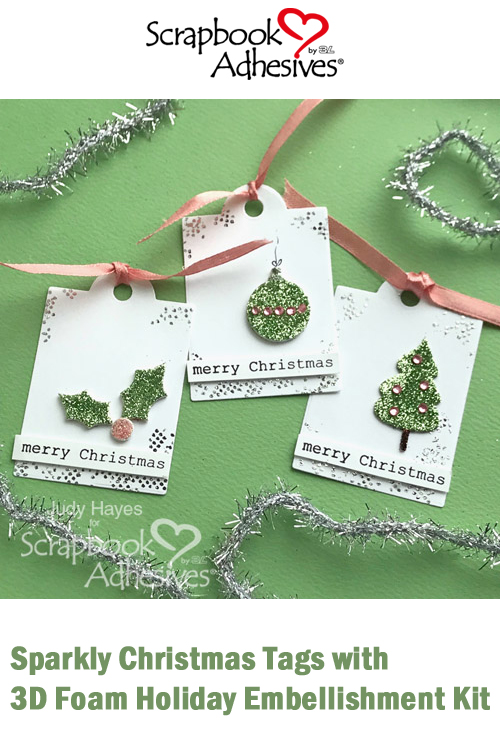
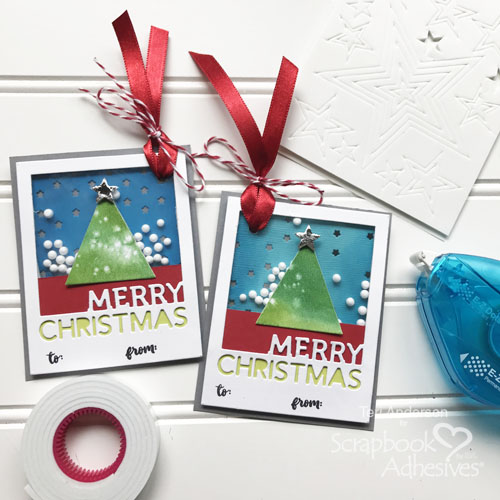
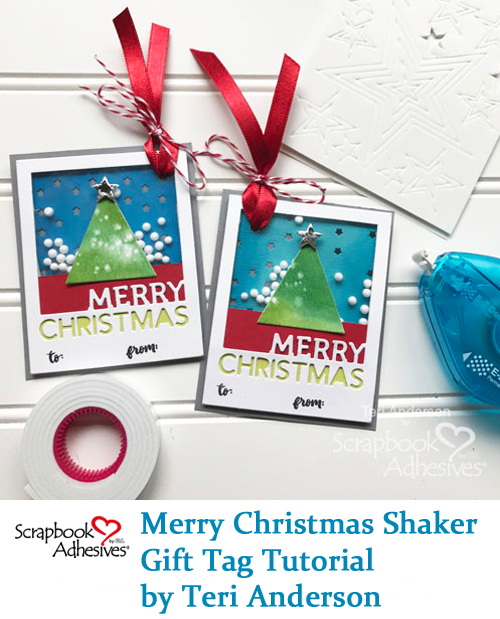
Hi, everyone! Looking for a neat way to add a personalized touch to this year’s Christmas gifts? Here’s an idea for you: make them interactive with shaker gift tags on your packages! It’s a snap with Scrapbook Adhesives by 3L® products.
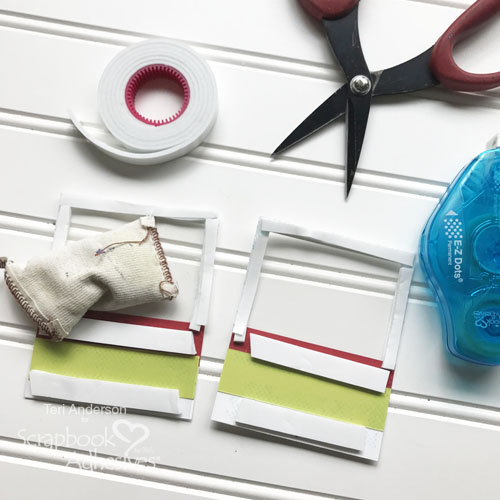
Start the Shaker Gift Tags
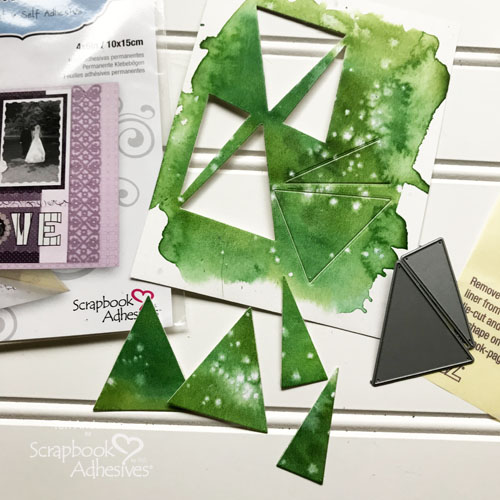
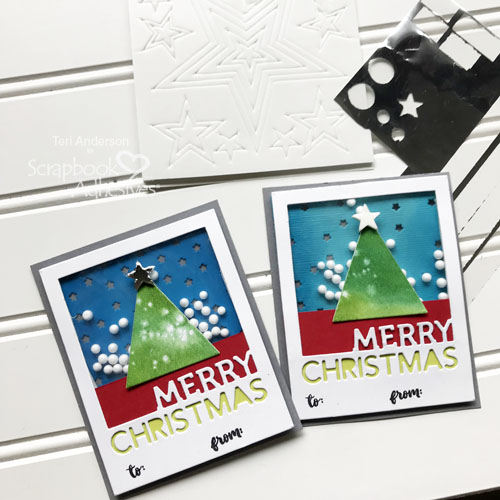
Start by die-cutting a couple of trees from cardstock or patterned paper. If you want to kick things up a notch, paint watercolors on watercolor paper and die cut it to make your trees.
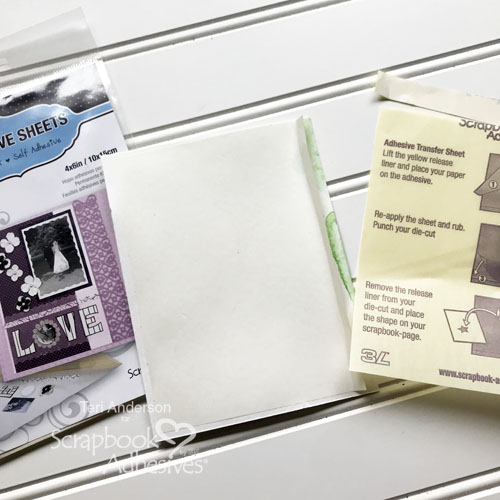
Before you die-cut the trees, add an Adhesive Sheet 4×6 inch to the backside of your paper panel. This will give the trees edge-to-edge permanent adhesive coverage, essentially turning them into a sticker. This way you’ll be able to assemble your tags quickly.
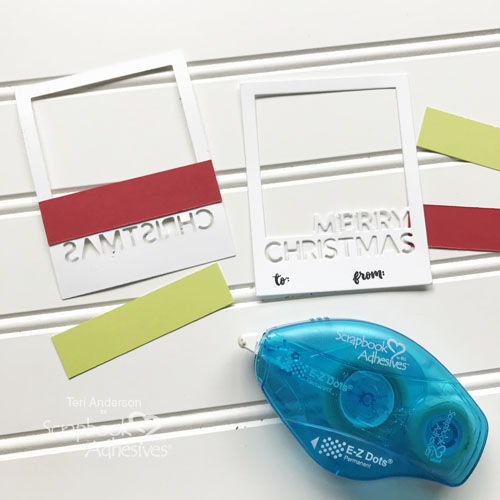
Cut a “Merry Christmas” frame from white cardstock for each tag, and then cut strips of green and red cardstock to fit across the frames.
Stamp the words “to” and “from” onto the frames. Flip the frames over and adhere the green and red cardstock strips so they appear behind the “Merry Christmas” sentiment. The E-Z Dots® Permanent dispenser is perfect for this.
Cover the openings of the frames with transparencies, cut the pieces larger than the opening and adhere to the back side of the frame.
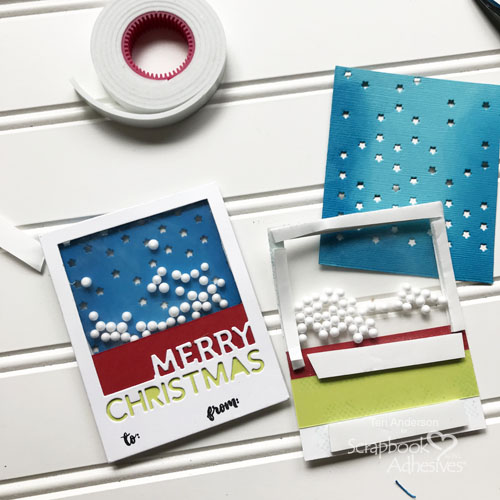
Creating the Shaker Windows
Cover the back of your frames with strips of Crafty Foam Tape White. Now the tape will be too wide for some spots on the frames so you’ll need to cut in half with your scissors. Don’t worry if your cuts are not perfectly even. No one is going to see this when your shaker tags are complete.
Brush the transparency windows with a non-static embossing powder bag.
TIP: A fabric softener sheet or dryer sheet works to remove static too!
Drop some small foam balls or sequins on the windows. Remove the Crafty Foam Tape liners and adhere a starry die-cut background to them. If you don’t have a starry background die, you can use patterned paper instead.
Next you’ll need to cut mats that are slightly larger than the Merry Christmas frame. These serve as the base of your tags. Once you have the mats, adhere them to your frames!
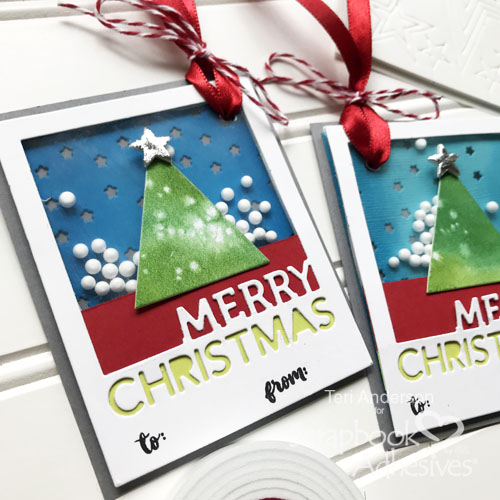
Complete your tags by poking a hole in the corner of each one and bringing some ribbon through the holes. Kick things up a notch by tying some red and white baker’s twine around the ribbon.
I hope you enjoyed today’s tutorial. Pin it, and be sure to check out our blog for even more great ideas!
Other: Merry Christmas Frame, Christmas Trees and Stars Background dies from Simon Says Stamp!; Mug Hugs stamp set from Sunny Studio Stamps; Kuretake Gansai Tambi Watercolors; White foam balls from Dollar Tree; Clear transparency; Blue, White, Green, Red, Gray cardstocks; Watercolor paper; Black and blue ink pads; Ribbon and baker’s twine; Embossing Powder Bag
We’re so excited to share our E-Book with you! It’s a collection of 20 exclusive and never before seen paper craft project tutorials. Each project is geared to the beginner crafter and takes less than an hour to create. We’ve covered all the seasons and occasions you may need, it’s your one stop E-Book for card making and scrapbooking tutorials. The best part? Free!
Click the link in the caption below the E-Book image to download your copy now!
Our designers have worked hard to bring you this book, we’d love to hear what you think, leave us a comment! Click on any of the images or text to go to the download page.
Should we do another E-Book? What topics do you want to see?
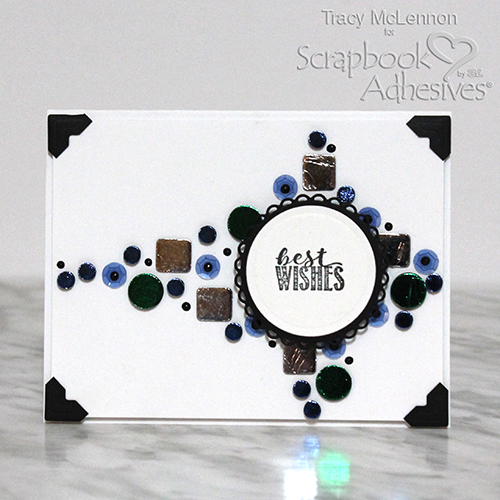
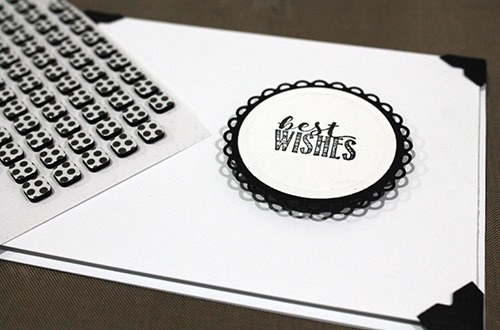
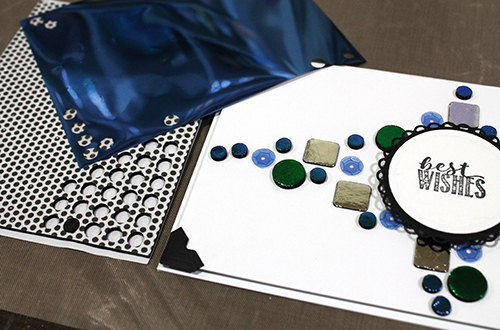
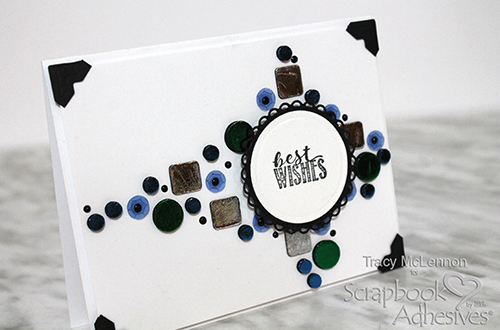
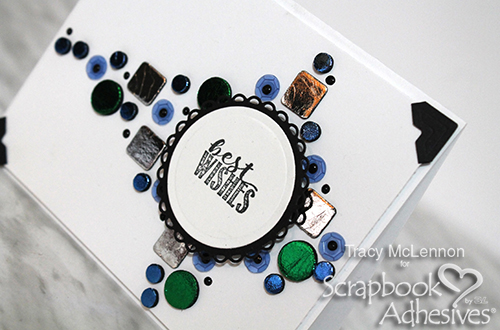
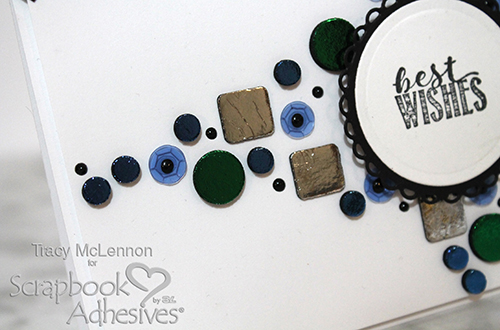
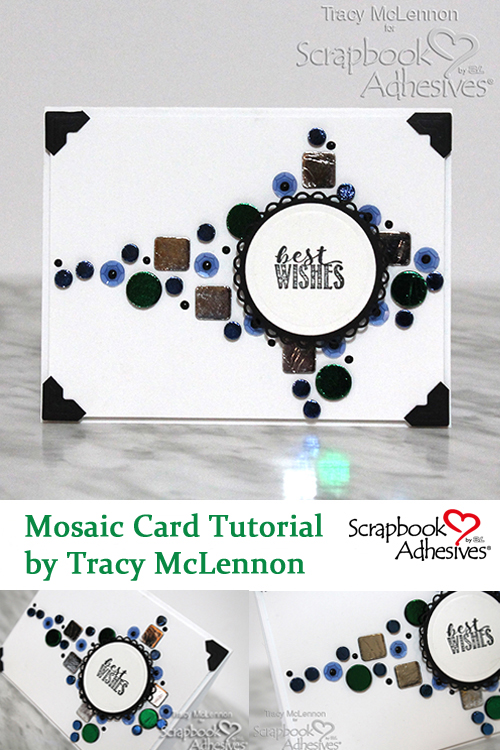
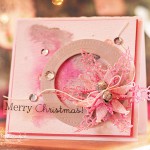
Welcome back, crafty friends! Tracy here, and today I have a fun Best Wishes card to share. This card is a great way to Wear Your Adhesives on the Outside with Metallic Transfer Foil, by making a mosaic using 3D Foam Squares and 3D Foam Circles.
This card lets you play with texture, dimension and sparkly fun all in one project. Here are all the details:
Making the Mosaic Card
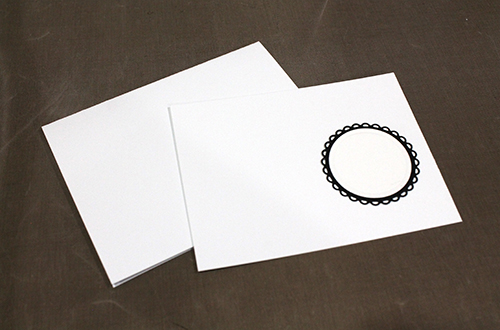
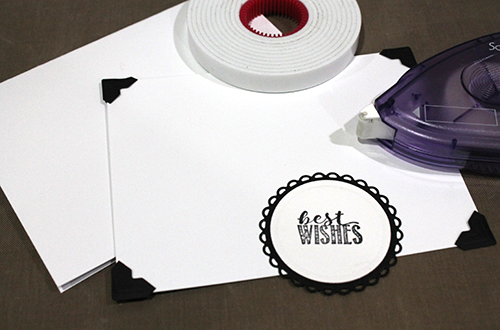
First I create my cardstock layers. The card base is 8.5 x 5.5-inch and folded in half. Then the next white cardstock layer is 4 x 5.25-inch. I use dies to cut the white cardstock circle and the black cardstock scalloped circle.
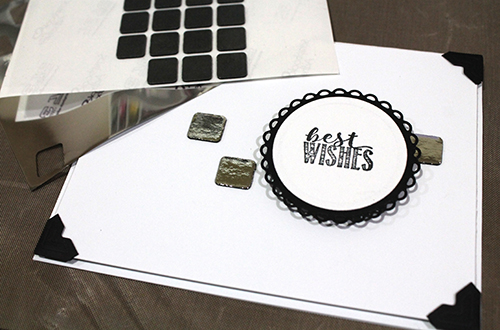
Next, start the card design with Thin 3D Foam Squares Black by placing them around the circle on the card panel. Add Silver Metallic Transfer Foil from the 3D Foam Creative Embellishment Kit. Simply remove the top liner from the foam, place the foil with the colored side up, gently rub and remove the foil. No machine or heat needed!
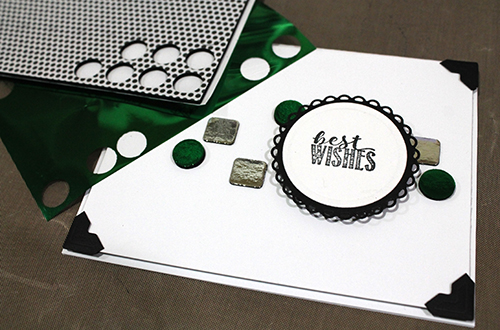
Add large 3D Foam Circles Black to the design and add green foil in the same process as above.
When adding sequins to any project, my go-to adhesive is the Adhesive Dots Micro.
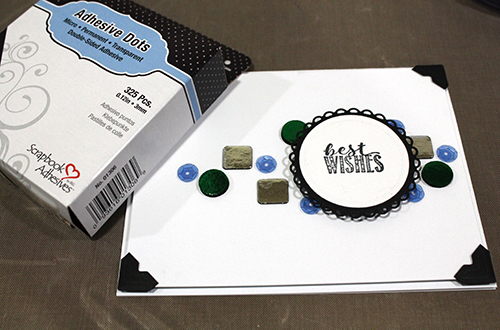
Then add the final elements, small size 3D Foam Circles, and apply the blue foil.
The final accents are enamel dots, placed in and around the foiled 3D Foam and sequins.
The different adhesive shapes and sizes along with the sparkle of foil create a stunning background pattern. This is an easy and fun way to Wear Your Adhesives on the Outside.
‘Tis the season for Holiday Greetings! Making and giving handmade holiday cards enables you to spread holiday spirit, reconnect with friends and family. DIY cards let everyone know you care! Spend a little time making the holidays meaningful by sharing you own unique and special works of art with others. We offer you a creative collection of inspiring tutorials and ideas for Christmas and Holiday cards, gift ideas, ornaments and more, check out all the options below!
Handmade Holiday Cards and Crafts
We have a vast and diverse collection of holiday cards and crafts on our blog. Our talented design team members have tutorials and inspiration for Christmas and Holiday cards, along with scrapbook pages, gift ideas and home decor to share with you.
We hope you enjoy them, and be sure to Pin your favorites so you can come back to them later.
From simple to advanced, we offer a huge selection of holiday card making ideas, techniques and tutorials. Grab a snack and spend some time reviewing all the card inspiration. Be sure to tag us on social media when you use our tutorials or products, we’d love to see your crafts!
Boring ole gift tags just won’t do when you can whip up a set to make a package sparkle. Hint: handmade tags make a great hostess gift for a holiday party, a little something for a friend, or a even a special teacher!
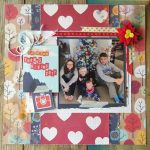
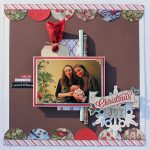
It was merry, but did you take pictures? Be sure to scrap them so you have a record of the festivities, traditions, family, friends and the fun you had. You won’t believe how much the kids have grown since last year!
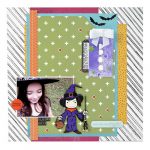
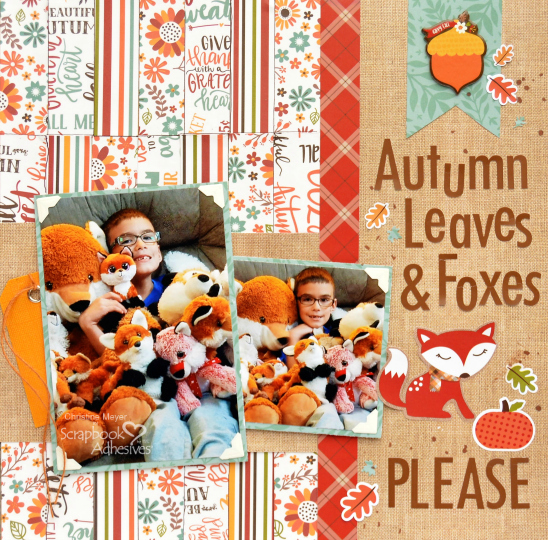
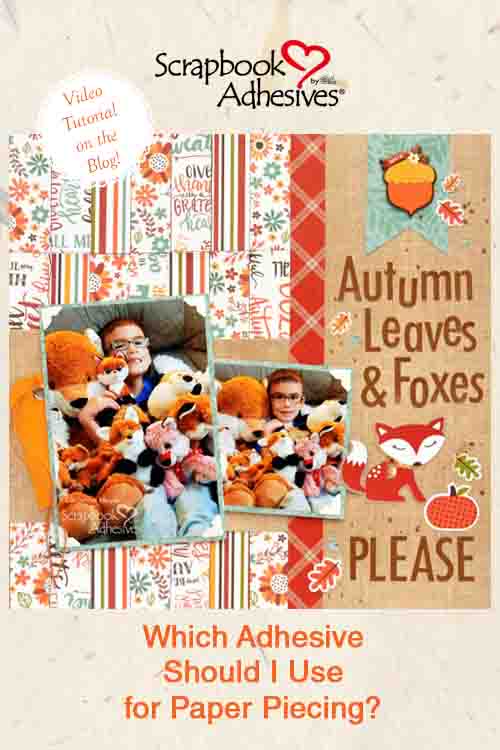
Which adhesive and how much should you use? When scrapbooking, we don’t always need to cover each element completely with adhesive, but there are times when getting thorough coverage is important! If you use small and detailed die cuts or create a background that needs to lay flat, you want complete coverage. Today I’m creating a paper pieced background and I’ll show you how I use Adhesive Sheets to attain that necessary edge-to-edge adhesive coverage.
As you can see I have a pretty complicated background with planks of patterned papers in all varieties! To achieve this look and make sure all the corners stayed tucked in I used the 6 X 12 inch Adhesive Sheets. The process is easier to show than explain with words so let’s take a look at my process video:
Coverage with Adhesive Sheets – Process Video
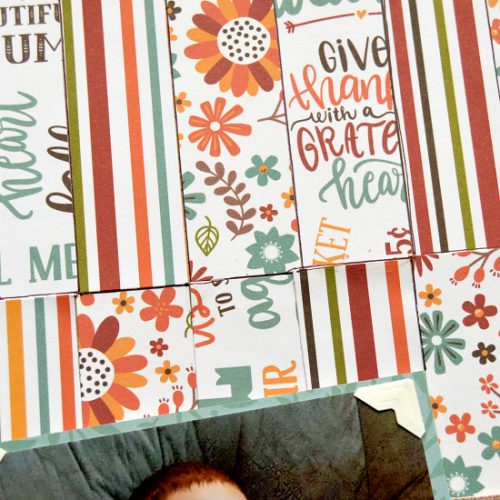
Autumn Layout Close-ups
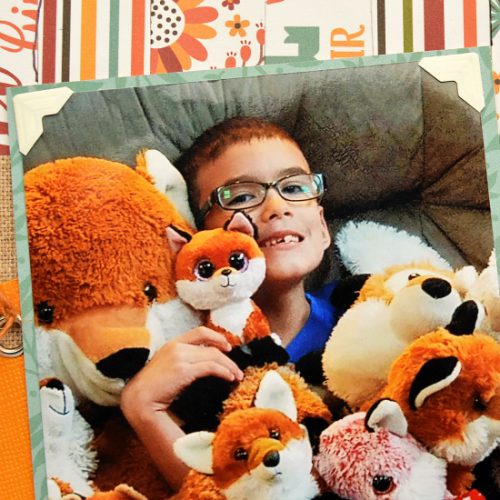
This close-up picture showcases the coverage well – you can see i don’t have any corners peeling up or poking out – just a nice flat surface! Now if I could just get perfectly straight cuts every time 😉
An additional product I used and that is the Ivory Creative Photo Corners. I don’t always use Creative Photo Corners on my layouts but there are times when they really add something extra. This layout was definitely one of those times! My background was very busy and the pictures are pretty busy too! By adding the photo corners I was able to frame and direct the eyes in to the focal point of the layout – the picture! We carry a variety of colors in Creative Photo Corners – be sure to check them all out!
Thanks for joining me today as we dove into getting thorough coverage using Adhesive Sheets – Happy Crafting!