You are in our US store • Switch to Europe store

Intricate Die Cut Sticker made with Adhesive Sheets

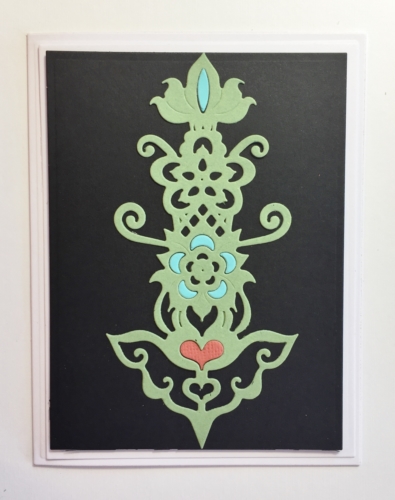
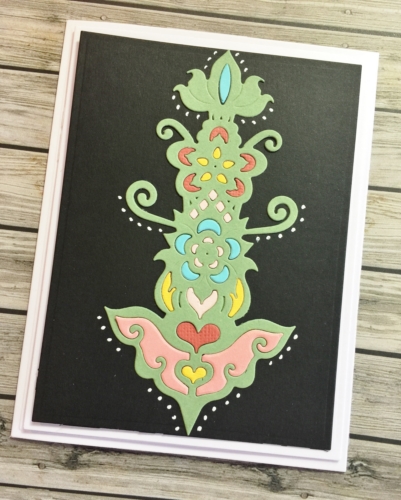
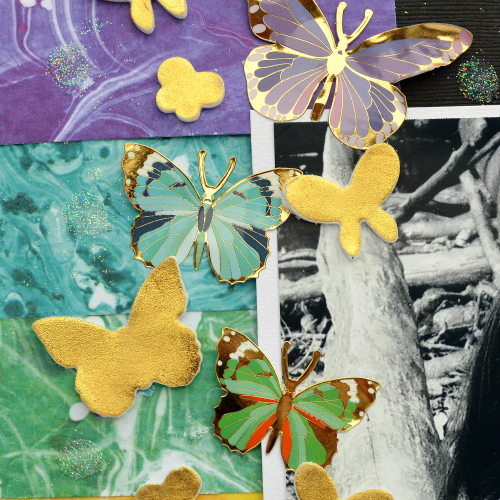
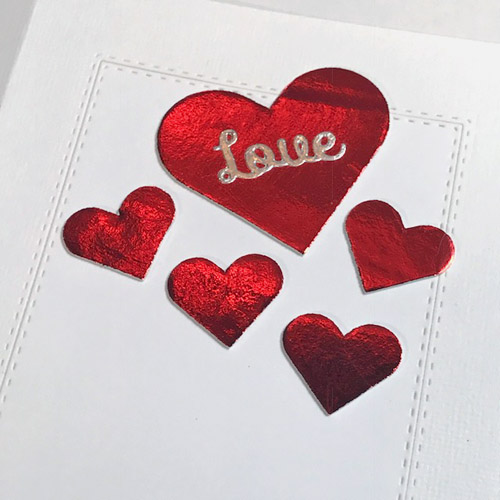
Do you love intricate die cuts for your cards? They are so hard to cover with adhesives and sometimes so messy, especially with liquid forms. Hello everyone, Yvonne here! I’m sharing how to adhere those detailed die cuts in a QUICK AND EASY WAY by simply using our Adhesive Sheets!

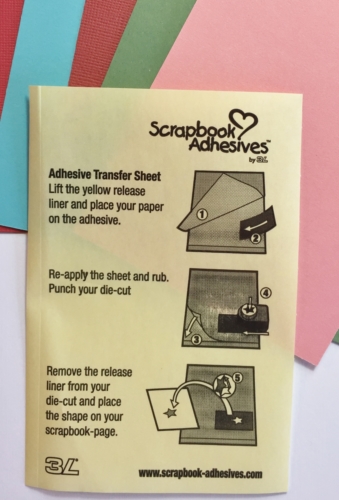
Adhesive Sheets give you incredibly strong, clear, edge-to-edge coverage without stringy application! Specifically created for die-cutting machines and punches and will not gum up the cutting elements. Perfect for intricate die cuts like mine!

Create an Intricate Die Cut Sticker with Adhesive Sheets by Yvonne van de Grijp for Scrapbook Adhesives by 3L

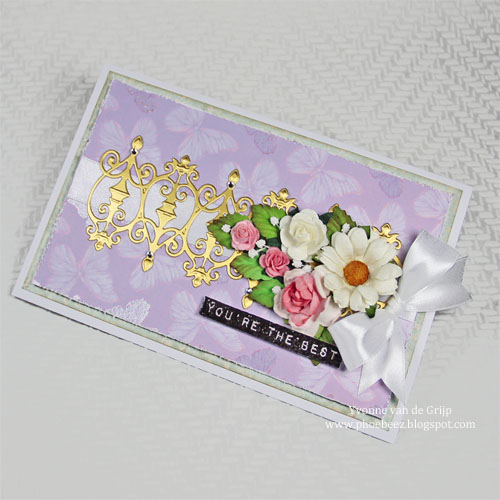
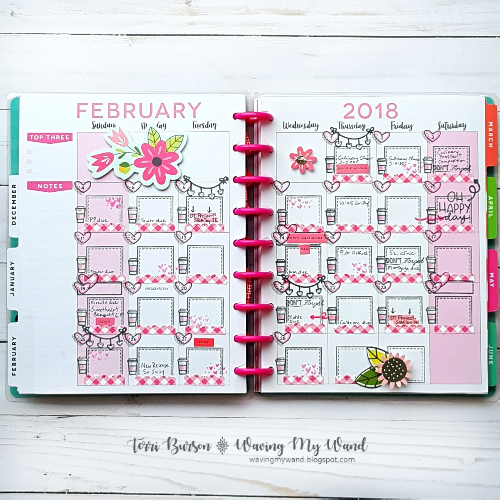
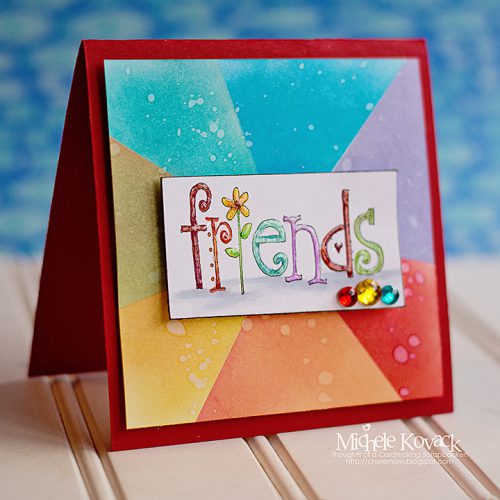
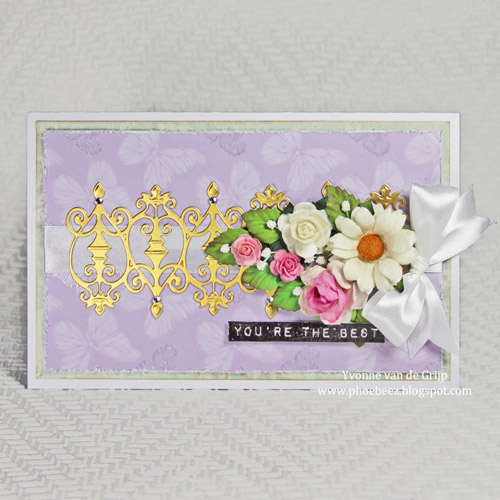
It’s always handy to have some cards in your stash to send someone you want to show your appreciation for something. Accent card by using mulberry flowers, it’s like sending a sweet bouquet!

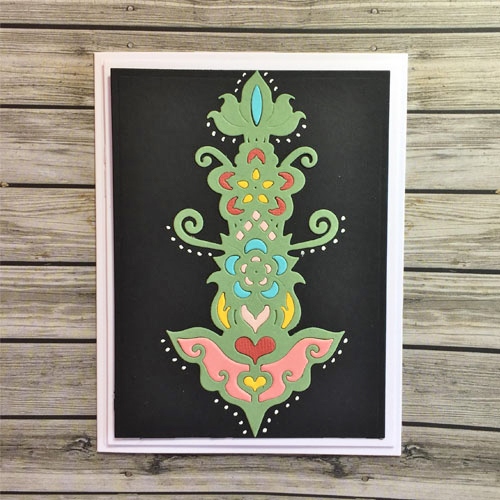
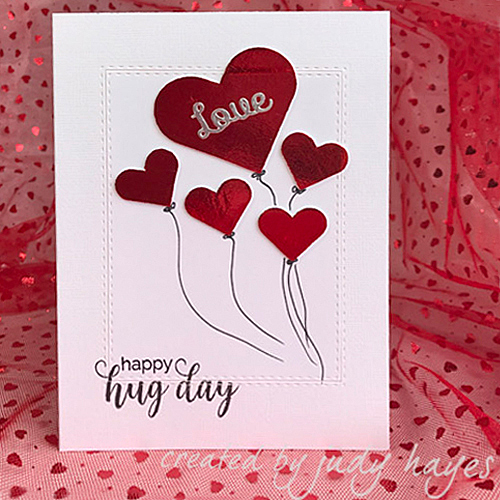
The Intricate Details

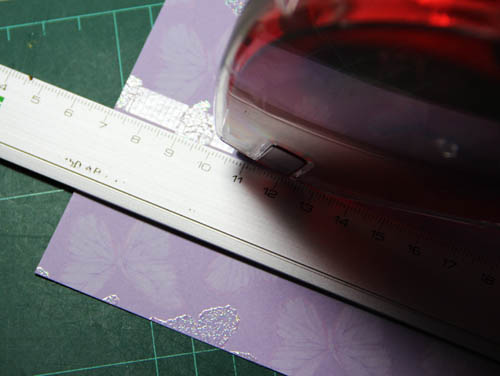
Run the E-Z Runner® Grand Refillable Dispenser horizontally over a rectangular size patterned cardstock. Tip: I like to use a ruler to run it along to make sure to get a straight line.

Simply press a piece of white ribbon upon and fold the ends around the card.

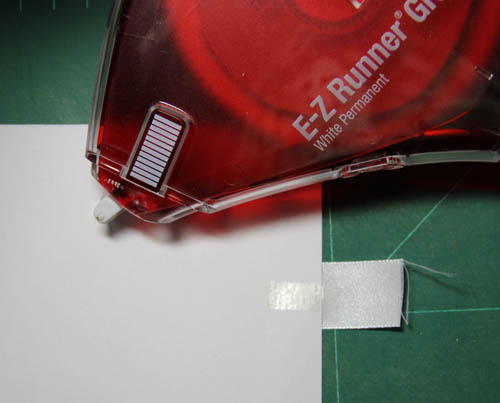
Adhere the ends to the back using the E-Z Runner® Grand Refillable Dispenser.

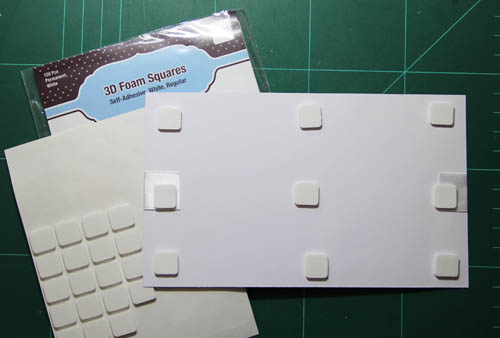
Next, adhere to a slightly larger rectangle shaped piece of green (patterned) cardstock using 3D Foam Squares for dimension. Then adhere to a white card base using the E-Z Runner® Grand Refillable Dispenser.

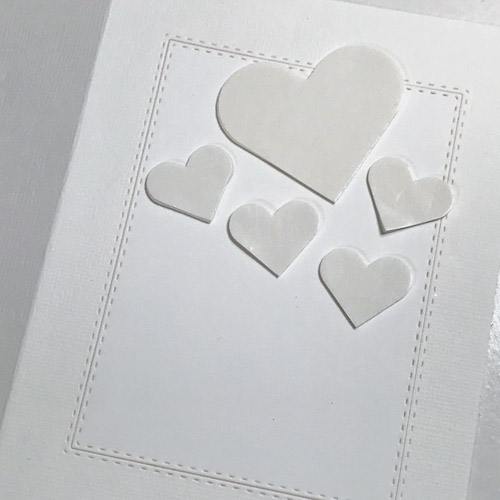
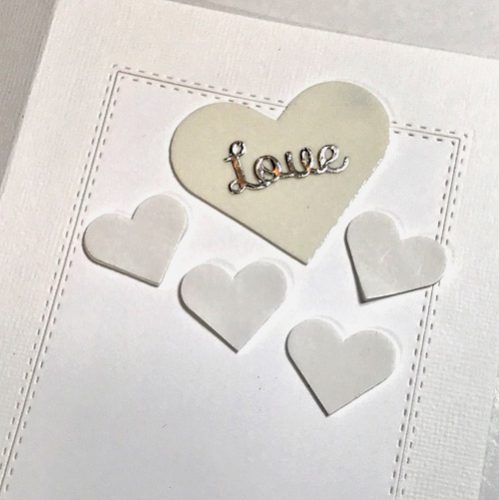
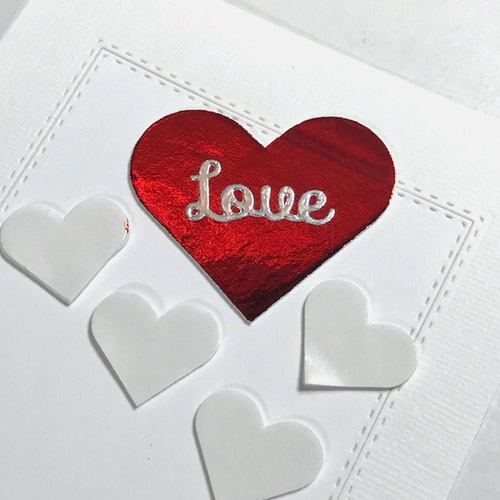
Making an Intricate Die Cut Sticker:

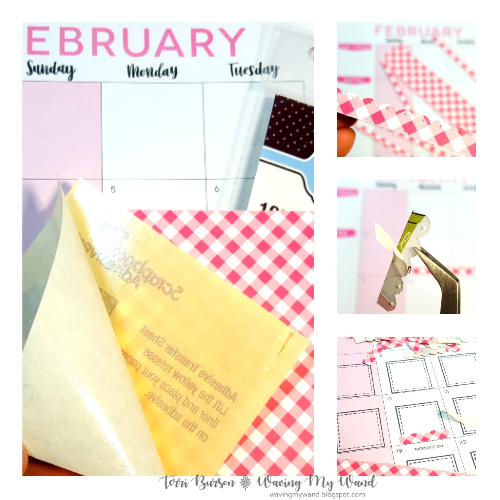
Lift the yellow release of a sheet Adhesive Sheets 4×6″ and place a piece of gold cardstock on top. Trim the gold cardstock to the size of the die-template you are going to use. Then die-cut and emboss the etched die from the gold cardstock.

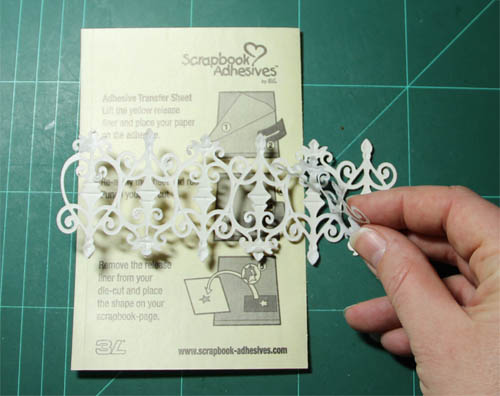
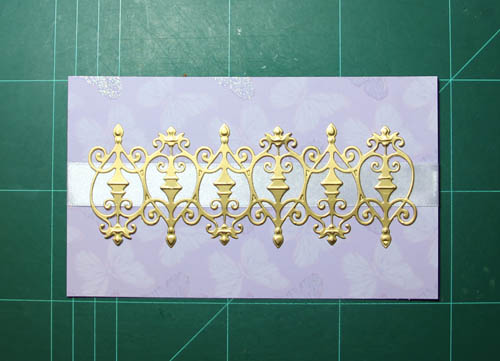
Remove the release liner and place the golden strip on the card.

Embellishing the Card:

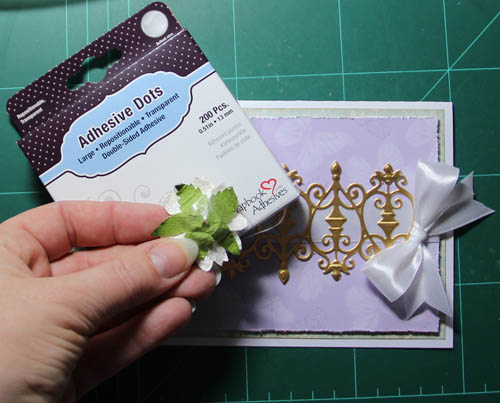
Use Adhesive Dots to adhere the flowers, leaves, and bow to the card. I used Adhesive Dots Large for the flowers and Dodz Adhesive Dots Medium for the leaves and the bow. For the stamens, I used the Dual Tip Glue Pen to place on the card.

The sentiment was popped up with 3D Foam Squares White in a small size on the card front. Finally, add some rhinestones. Tip: if you have rhinestones that are not self-adhesive: use Adhesive Dots Mini or Adhesive Dots Micro.

Scrapbook Adhesives by 3L®:
Adhesive Sheets 4×6″
E-Z Runner® Grand Refillable Dispenser
3D Foam Squares White Mix
Adhesive Dots Large
Dodz Adhesive Dots Medium

HomeHobby by 3L®:
Dual Tip Glue Pen

Other:
Cardstock (white, patterned, gold), mulberry flowers, leaves, stamens, rhinestones, satin ribbon, Spellbinders Paper Arts® (Fabulous Fretwork), Mama Elephant (labeled Messages), scissors, paper trimmer, ruler.

I hope you enjoyed the tutorial and wishing you happy crafting!

Hugs from Holland,
Yvonne

Making Planner Borders with Scrap Paper

Most of us are over-run with scrap papers, right? Hello, Terri here, to show you a fun and easy way to make use of your scrap paper pile and decorate your planner at the same time, using tools you probably already have.

Making Planner Borders with Scrap Paper by Terri Burson for Scrapbook Adhesives by 3L

BEGIN WITH THE SCRAP PAPERS:

Large open spaces can be intimidating when working in your planner.  Selecting a few choice colors can be an easy way to get started.  February is the month of love, so I’ve chosen a pink and grey theme for my pages.  My selected piece of scrap paper just so happens to be the perfect size to match the Adhesive Sheets 4×6″.

MAKING THE BORDERS:

Creating these 1.25″ by 1/4″ borders were so easy.  Simply peel the backing from your Adhesive Sheets 4×6″ and apply to the backside of your cardstock.  Place a decorative edged die on your paper and run through a manual die cutting machine.  Decorative scissors or a decorative border punch are alternative options.

GLITTER AND GLUE:

Since we’re already decorating our planner, let’s add some sparkle and shine!  Dab a few drops of glue, using the Dual Tip Glue Pen, as I’ve done on the heart banner below, then sprinkle with extra fine glitter.  Now, you’re “Wearing Your Adhesive On The Outside”!

POP IT UP:

My 3D Foam Squares White Mix make an appearance as well, by adding interest and added dimension to my cardstock stickers by popping them out.  Simply add a bit of paper backing to your stickers, then place your foam squares.  This prevents the sticker from adhering to your planner pages when closed.  It’s also another fabulous way of stretching your sticker stash!

Thanks so much for stopping in.  Be sure and check out my process video below!  See you next time – Terri

Scrapbook Adhesives by 3L®:
3D Foam Creative Embellishment Kit
3D Foam Squares White Mix
Dodz Adhesive Dots Medium
Adhesive Sheets 4×6″

HomeHobby by 3L®:
Dual Tip Glue Pen

Other:
Paper; Ephemera; Stickers; Die-cutting Machine; Scalloped Die; Glitter; Scissors; Trimmer

Paper Cactus Trio Tutorial with Premium Double-Sided Tape

Hi friends! Dana Tatar here today sharing a fun paper craft tutorial. I have purchased several different types of succulents  and cactus for my home. Sadly, they all eventually meet the same fate. My house plants suffer from either too much or too little attention. Despite my best efforts I really struggle to keep my houseplants alive. I’ve solved my problems by folding up a super cute paper cactus trio!

Paper Cactus Trio tutorial by Dana Tatar for Scrapbook Adhesives by 3L

I found the templates for these succulents on the Oxygami Facebook page. They are offering 6 wonderful designs for free! I selected three of my favorite cactus designs to brighten up my décor. After assembling each cactus I added embellishments to help bring these designs to life.

How to Fold and Embellish a Paper Cactus Trio

Oxygami Paper Cactus Assembly by Dana Tatar

1: Download the patterns and instructions. Print the patterns onto colorful paper and carefully cut out. Score and fold each piece of the pattern according to the instructions.

2: Apply Double-Sided Tape to the flaps on each pattern.

3: Remove the paper liner from the Double-Sided Tape and assemble each cactus as directed.

Oxygami Paper Cactus Embellishment by Dana Tatar

4: Embellish! I mimicked the look of spines by adding a length of white fringe ribbon to the first design. To replicate the look of potting soil, I applied brown floral ribbon to the top of the planter on the second design. Finally, I used a Large Adhesive Dot to add a pink flower to the top of the third design. The Large Adhesive Dots offered both transparency and a strong, flexible hold that was perfect for this project.

I hope I have inspired you to create some dimensional art for your home!
Thanks for stopping by!
~Dana Tatar

Scrapbook Adhesives by 3L Supplies:
Adhesive Dots Large

HomeHobby by 3L®:
Premium Double-Sided Tape 1/8″

Other:
English Cactus Patterns (Oxygami); Colored Copy Paper (Astro Brights); Ribbon

Paper Piecing Made Easy with Adhesive Sheets

Have you ever paper pieced before? Christine here today to share with you a great shortcut for paper piecing with our adhesive sheets.  This will really save some crafty time and who doesn’t appreciate that?!

Paper Piecing Made Easy with Adhesive Sheets by Christine Emberson for Scrapbook Adhesives by 3L

Creating my Paper Piecing Card

Firstly I created my card base and mats, affixed in place MyStik® Permanent Strips.

Paper Piecing Made Easy with Adhesive Sheets by Christine Emberson for Scrapbook Adhesives by 3L

Next, I gathered together various colors of cardstock and Adhesive Sheets.  Here I’m using the 4″ x 6″ sheets, they are also available in 6 x 12″ and 12 x 12″.

Paper Piecing Made Easy with Adhesive Sheets by Christine Emberson for Scrapbook Adhesives by 3L

Lift the edge of the transfer sheet, pop your card inside, smooth down and run through your die cutting machine. I used a green card for the main die cut piece. The Adhesive Sheet  gives a perfect layer of glue on the back of the die cut and those little fall out pieces.  Keep running through with the various colors of cardstock with the sheets.  Affix main die cut onto card front and then begin to insert those sticky fall out pieces. Here I’m just beginning to insert blue and red if you enjoy puzzles you’ll love this!

Paper Piecing Made Easy with Adhesive Sheets by Christine Emberson for Scrapbook Adhesives by 3L

Keep going until you are happy with your design.  I chose to fill the entire die cut! I finished with some white dots around the edge for that folk art look, simply added with a gel pen.

Paper Piecing Made Easy with Adhesive Sheets by Christine Emberson for Scrapbook Adhesives by 3L

Thanks for stopping by today and don’t forget to check out all the great products on the website.

Creative Time: 45 minutes
Skill Level: Intermediate

Material Needed
Scrapbook Adhesives by 3L®

MyStik® Permanent Strips
Adhesive Sheets 4 x 6″

Other
Dies: Spellbinders® Paper Arts (A2 Matting Basics, Rosemal Flower)
Green, Peach, Red, Yellow, Blue, Black and White Cardstock, Gel Pen


Pin It!

Paper Piecing Made Easy with Adhesive Sheets by Christine Emberson for Scrapbook Adhesives by 3L Pinterest

Colorful Gift and Card Trio

Looking for some colorful inspiration? Well, take a look at this colorful gift and card trio. Hey there! Latrice here to share with you my ensemble that was displayed at the recent Creativation Trade Show held by AFCI (Assoc. For Creative Industries), formerly Craft & Hobby Assoc.

Colorful Gift and Cards Trio by Latrice Murphy for Scrapbook Adhesives by 3L

Colorful Gift and Cards Trio by Latrice Murphy for Scrapbook Adhesives by 3L

Down to the Colorful Details

Because spring reminds me of light and colorful images, it was my inspiration for my projects! First of all, let’s start with the monogrammed gift. With a blank “M” letter shape, I used a sheet of Adhesive Sheets 12×12″ to cover the front and trim off the excess with scissors. For the lower half of the letter, layer strips of solid color cardstock, coordinating with the chosen patterned papers – it creates a kind of pinata effect. Cover the top with a piece of patterned paper.

Next, choose some favorite embellishments and layer them in a cluster. I mixed chipboard, die cuts and buttons from my stash. Also, for more dimension, use 3D Foam Squares White Mix to lift a few of the embellishment pieces. To cover untouched areas of the letter, the paint was used in a coordinating color with a foam brush.

Colorful Gift and Cards Trio by Latrice Murphy for Scrapbook Adhesives by 3L

Making the Card and Tag Duo

Finally, for the matching card and tag duo, I began by creating the card using the Self-Laminating Self-Laminating Pouches – Cards Wallet to create a fun shaker card.

Colorful Gift and Cards Trio by Latrice Murphy for Scrapbook Adhesives by 3L

Colorful Gift and Cards Trio by Latrice Murphy for Scrapbook Adhesives by 3LCover the back with patterned paper and line the pouch with Crafty Foam Tape White. Just add fun sequins inside and closed it up. Tuck some embellishments around the edges and finish off with some chipboard flowers and buttons with Dodz Adhesive Dots Medium.

Colorful Gift and Cards Trio by Latrice Murphy for Scrapbook Adhesives by 3L

For the small tag, the front was embellished using the same materials as the card. I had scored the top of a second tag shape and put it behind the embellished tag so the two tags together make one small tag shape. Thread and tie twine on top to create a tag card.

Colorful Gift and Cards Trio by Latrice Murphy for Scrapbook Adhesives by 3L

So grab some spring inspired supplies and get crafting!
Latrice

Skill Level: Intermediate
Creative Time: 60 minutes

Materials Needed
Scrapbook Adhesives by 3L®
Crafty Foam Tape White
Adhesive Sheets 12×12
3D Foam Squares White Mix
Dodz Adhesive Dots Medium

HomeHobby by 3L®
Self-Laminating Pouches – Cards Wallet

Other
Patterned Papers; Cardstock; Embellishments: Pink Paislee; Twine: May Arts Ribbon; Buttons


Pin It!

Colorful Gift and Cards Trio by Latrice Murphy for Scrapbook Adhesives by 3L Pinterest

Rainbow Ensemble Showcasing Gold Foil

Do you love rainbows? How about gold foil?  Marbled papers?  If you raised your hand for any of those then you are in luck because today I am going to share how I combined all three of those beauties to make this colorful ensemble!

Gold foil on a three piece rainbow ensemble using adhesives from Scrapbook Adhesives by 3L

I wanted a trio that was eye-catching and bold so inevitably I went for that with my colors! Rainbow papers in a variety of marbled designs combined perfectly with the gold foil I was going to use to do a “Wear Your Adhesive on the Outside” Technique!

Scrapbook Layout

Gold foil on a three-piece rainbow ensemble using adhesives from Scrapbook Adhesives by 3L

This bottom layer of this layout came together quickly thanks to the help of my E-Z Runner® Grand and Crafty Foam Tape.  Next came the fun part – adding gold foil to the 3D Foam Butterflies!

I used foil from the 3D Foam Creative Embellishment Kit. This was the EASIEST technique in addition to being so satisfying!  Have a look at my video below to see just how simple it is!

Card

Gold foil on a three piece rainbow ensemble using adhesives from Scrapbook Adhesives by 3L

Considering I was now on a bit of a foiling kick, I decided I would carry on and see what other things I could foil.  How about Adhesive Dots and Adhesive Lines?  Believe it or not, the answer to both questions is YES, either of these products will work!  Consequently, I foiled both of those and then added them to my butterfly for this simple card.

Flower Bouquet Embroidery Hoop

Gold foil on a three-piece rainbow ensemble using adhesives from Scrapbook Adhesives by 3L

Lastly, to round out my ensemble, I wanted to create a decor piece that had some pretty colors in addition to dimension.  Unfortunately, there was no room for foil on this! Instead, it required gold glitter! After coloring my embroidery hoop black I secured black cardstock to it using a combination of Adhesive Lines and Extreme Double-Sided Tape 1/8in.

I cut out layers of flowers and due to my desire to make them really tall, I used 3D Foam Squares in between each layer.  I also pulled up the individual petals and curled them back under to give them another level of dimension.

Finally to the center I added various sizes of Adhesive Dots and gold glitter to create the center of my flower. Foil probably would have worked here, but I didn’t want to mess with the delicate centers!  Seems like doing this ensemble may have just turned me into a foiling machine….until next time I’ll be covered in foil :)!

Thanks for stopping by today!
-Christine

Scrapbook Adhesives by 3L Supplies
E-Z Runner® Grand Refillable Dispenser
Adhesive Dots Large
Dodz Adhesive Dots Mini
Crafty Foam Tape
3D Foam Creative Embellishment Kit
3D Foam Squares White Mix
Extreme Double-Sided Tape 1/8in
Adhesive Lines
3D Foam Butterflies

Other:
Patterned Paper & Stickers: Paper House Productions

Love Balloons Card in Foiled 3D Hearts

Who doesn’t love balloons, especially if they are heart-shaped! Hello everyone!  It’s Judy here today with a Love Balloons Card created with 3D Foam Hearts and red foil from 3D Foam Holiday Embellishment Kit. It is so easy to make these foil heart balloons!

Love Balloons Card in Foiled 3D Hearts by Judy Hayes for Scrapbook Adhesives by 3L


Love Balloons Card Tutorial

First I prepared a white card panel with stitched rectangle and then used E-Z Dots® Permanent Refillable Dispenser to assemble the layers. With a pack of 3D Foam Hearts, I placed one large heart and three medium heart shapes onto the card front.

Next, I die cut the word “Love” from silver metallic paper (not cardstock).  After I peeled the liner from the large heart and centered “Love” on top of the large heart but don’t press it down yet.

Take the red foil out from the 3D Foam Holiday Embellishment Kit and place over heart and word (red foil up). Press firmly to get foil into small areas in and around the word. When the foil is removed, you will see a beautiful red “Love Balloon!”

Make sure to peel one liner at a time with the medium hearts to make best use out of the foil application.

See how easy it is to apply different mediums, including foil, onto the 3D Foam shapes. View below…

To finish the card, I drew strings from the hearts with a black permanent pen. I stamped the verse with black ink.

I love how bright and shiny the hearts are with foil on them!  Fast, easy and so FUN! Give it a try 🙂

Happy Valentines’ Day (a little early)!
Judy

Scrapbook Adhesives by 3L®:
3D Foam Hearts
3D Foam Holiday Embellishment Kit
E-Z Dots® Permanent Refillable Dispenser

Other:
Bazzill White Cardstock; Imagine Crafts/Tsukineko Versafine Onyx Black Ink; Our Daily Bread Die Stitched Rectangle Die; Penny Black Verse; Spellbinders Celebration Two Die; Silver Metallic Paper; White cardstock; Black Pen

Child’s Party Decor Ensemble using 3D Foam Shapes and Adhesive Dots

This ensemble is child’s play when it comes to a party and who doesn’t like a party?! Hello friends, Vicki here. Today I thought I would share with you some fun party decor ideas for a child’s party.  Who’s game?!

Child's Party Decor Ensemble using 3D Foam Shapes and Adhesive Dots by Vicki Chrisman for Scrapbook Adhesives by 3L

Child’s Party Cards

Below is my card, but you could easily add it to a really inexpensive frame and put it on the table for added decor. I really realize when I’m putting a number of things like this together, how much easier it comes together when you have the right adhesive for each specific job.

My basic card papers come together using E-Z Runner® Grand Refillable Dispenser. This is also what I used as my general adhesive putting the banner together. I love how it holds great to even corrugated paper.  I added some glittery stripes to the already striped paper by adding Crafty Power Tape Dispenser 20’ and sprinkling fine glitter over it.  It’s a fun and easy way to dress things up. I also love using Crafty Power Tape for thin pieces like the Birthday sentiment.  Dodz Adhesive Dots Mini hold my button accents in place.

When I’m in the craft stores, I enjoy looking for fun little wood pieces.  With those pieces, I add them as part of my decor such as by my “Birthday Girl” paper and dressed it up with  3D Foam Stars shapes and glitter. The dowel pieces are used as a base to hold the paper piece in place. Pieces of Crafty Power Tape Dispenser 20’ were added to the two dowels’ bottom to be placed them side by side and the paper piece slides in between. Buttons were secured with Adhesive Dots Large to embellish the wheels.

Child’s Party Cupcake

How about some fun little flags for your cupcakes? They are easy and fun to make.  After painting my dowel and adding a little wood bead piece to finish off the top, I wrapped Crafty Power Tape Dispenser 20’ around the pole and sprinkled glitter on it. Adhesive Dots Large worked great for adding the paper flags to the wood dowel.

Well, are you in the mood to have a party now?  Well, at least to have a cupcake? lol

Vicki Chrisman

Scrapbook Adhesives by 3L Supplies
Dodz Adhesive Dots Mini
E-Z Runner® Grand Refillable Dispenser
Crafty Power Tape Dispenser 20’
Adhesive Dots Large
3D Foam Stars

Other Supplies
Simple Stories (Lets Party Collection)


Heart Mini Book Necklace

Hi friends! Dana Tatar here today sharing a piece of wearable art. One of my resolutions for the year is to try new forms of art. Book making and leather work are two art forms that I would love to delve into. I decided to start my explorations with a craft kit rather than purchase a bunch of new supplies for techniques that may not be a good fit for me.

3D Foam Heart Mini Necklace by Dana Tatar

The Craft Crush Book Necklaces Kit was a wonderful starting point for me. I spent some time personalizing this project for my tastes.

Mini Book Necklace Details

Heart Mini Book Necklace by Dana Tatar

I had a lot of fun stitching this mini book together! To be sure that the Velcro closure would hold up over time and multiple fastenings, I swapped out the adhesive in the kit for Extreme Double-Sided Tape. This strong, permanent adhesives worked great on leather!

I embellished the cover of the mini book with a 3D Foam Heart. The 3DFoam Hearts vary in size from small to large. The small size was perfect for this project! This book needed a fun pop of color, so I applied a finishing coat of bright pink embossing powder to the heart.

Mini Book Neckalce Inside Pages by Dana Tatar

The kit contained Kraft paper for use as book pages. I decided to stitch in a folded set of white cardstock pages. The blank pages allow the recipient the freedom to add their own inspiring words to this piece of wearable art.

I think this necklace would make a fantastic gift for any book lover. A piece like this could also help make someone feel special on Valentine’s Day!

I’d love to know if you have set any crafty resolutions this year. Leave me a note in the comments section. Thanks for visiting!
~Dana Tatar

Scrapbook Adhesives by 3L Supplies:
3D Foam Hearts

HomeHobby by 3L®:
Extreme Double-Sided Tape 1/4″

Other:
Craft Crush Book Necklaces Kit (Ann Williams Group); White Cardstock; Embossing Powder (Ranger)


Reminder: time is running out to apply for our 2018 Design Team!
Entries accepted through January 26, 2018

Rainbow Friends with Crafty Foam Tape

I think a rainbow colored card is in order during this dreary winter season. It’s a wonderful way to cheer a friend up and hope to bring a smile 🙂

Good morning Friends! Michele here with  a fun, easy card to share with you today!  With low tack paper to mask off each section of the background, I inked in a rainbow pattern.  For added interest, I splattered water to create the droplets.  For layers, I adhered the rainbow panel to the red card base by using Crafty Foam Tape.

Rainbow Friends with Crafty Foam Tape by Michele Kovack for Scrapbook Adhesives by 3L

I am in the middle of packing and found this old SU! stamp. So why not resurrect it? After stamping it on white cardstock, I colored it with Copic markers in the same rainbow colors. For the edges, I used black ink for a subtle effect and adhered it to the card with Crafty Foam Tape.

I kept the card fairly simple and just added three coordinating rhinestones securing with Dodz Adhesive Dots in Medium for each one.

Adhesive Dots

Are you familiar with our Adhesive Dots? These round double-sided clear adhesives come in an easy, touch-free application from our unique patented single dot dispenser box, which doubles as storage. They also come in many different sizes and purposes. See how to apply in the video below.

Now it’s ready to be sent to a special friend!

Thank you for stopping by today!
Michele

Scrapbook Adhesives by 3L®:
Crafty Foam Tape
Dodz Adhesive Dots Medium
Other:
Copics Marker; Distress Inks; Masking Paper; Rhinestones; Stamp Set; Black Ink


Remember! We’ve got our 2018 Design Team call going on!
Entries accepted through January 26, 2018