You are in our US store • Switch to Europe store

A Trio of Christmas Card Creations

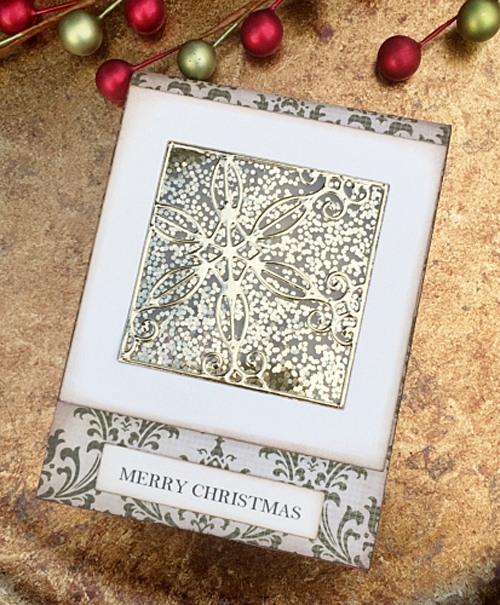
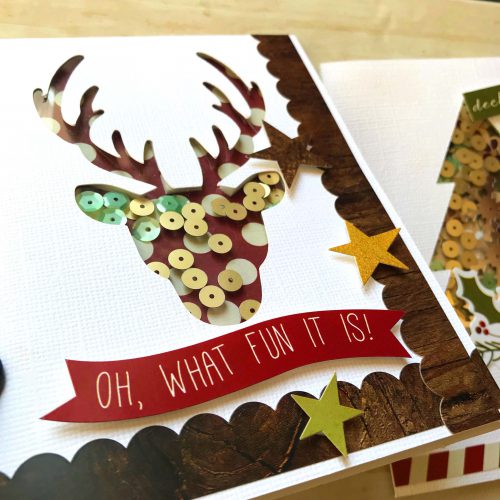
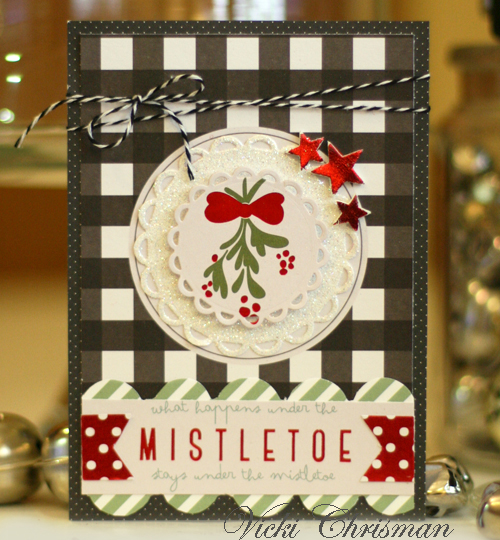
Showing off my trio of Christmas card creations with Adhesive Sheets and glitter to WEAR YOUR ADHESIVES ON THE OUTSIDE to get you motivated! Hello everyone, Jana here with some simple Christmas cards for you.

I am always late with sending out Christmas cards, so I really love to create simple cards – just add a few stamps and elements. These came out great and I can’t wait to send them out to some friends.

Trio of Christmas Card Creations & Tutorial by Jana Maiwald McCarthy

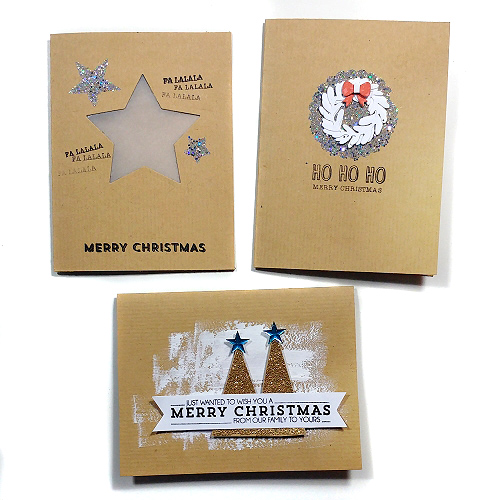
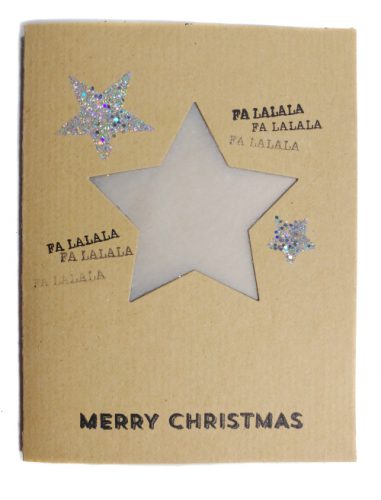
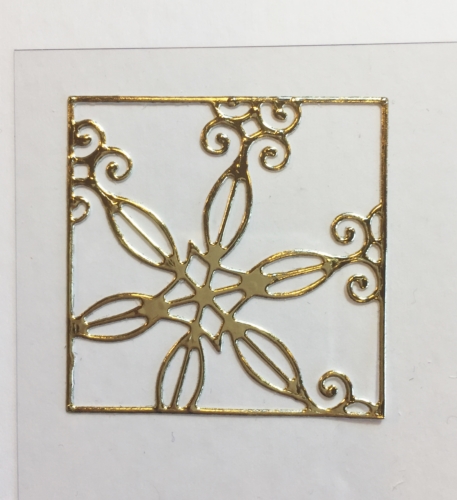
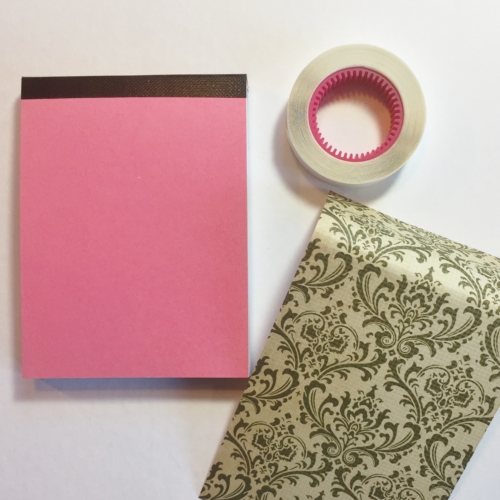
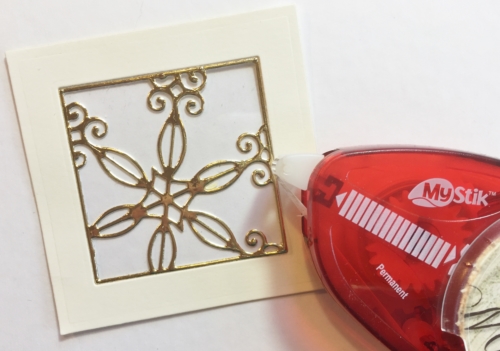
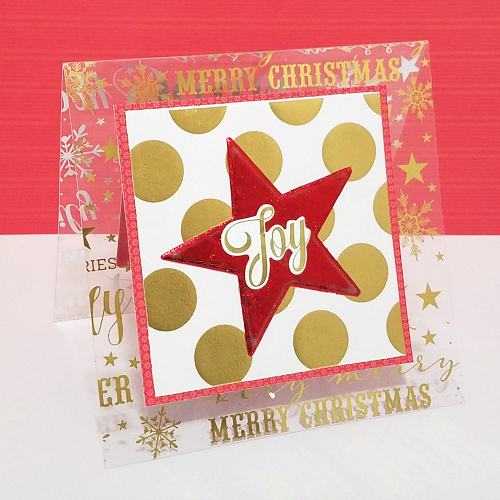
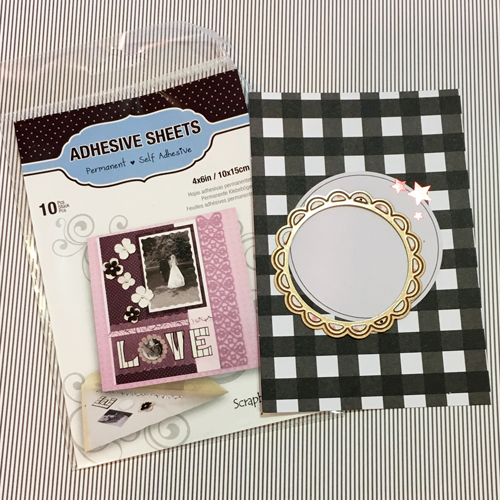
The Adhesive Sheets are so easy to use, you just need to cut out your shapes or use a die cutting machine to get some shapes you want.I started with some craft paper cards and my star punches.

Christmas Card Creations with Stars Tutorial

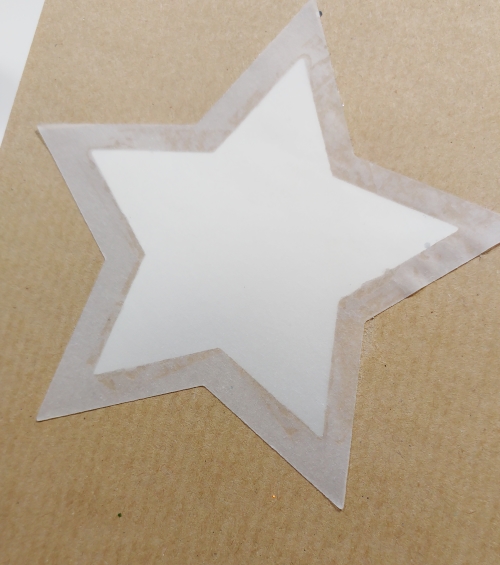
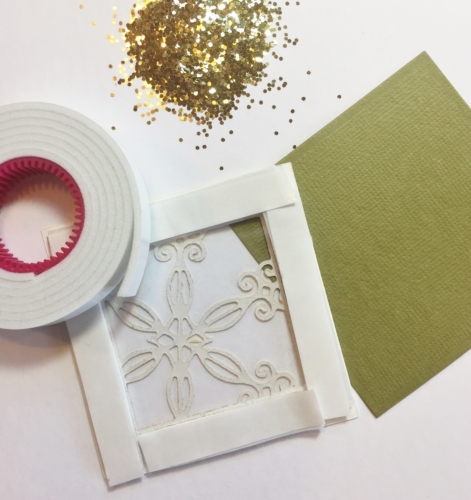
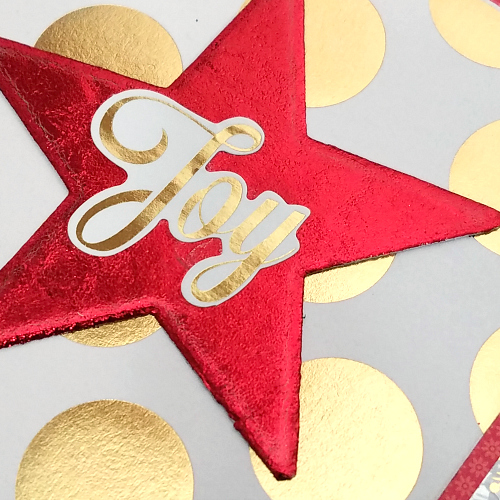
On the front of my card base, I placed my star die in the center and used my die-cutting machine to cut the shape out. With the E-Z Runner® Ultra Refillable Dispenser, I covered the open space with vellum. The permanent adhesive is awesome for vellum, you can’t really see it.

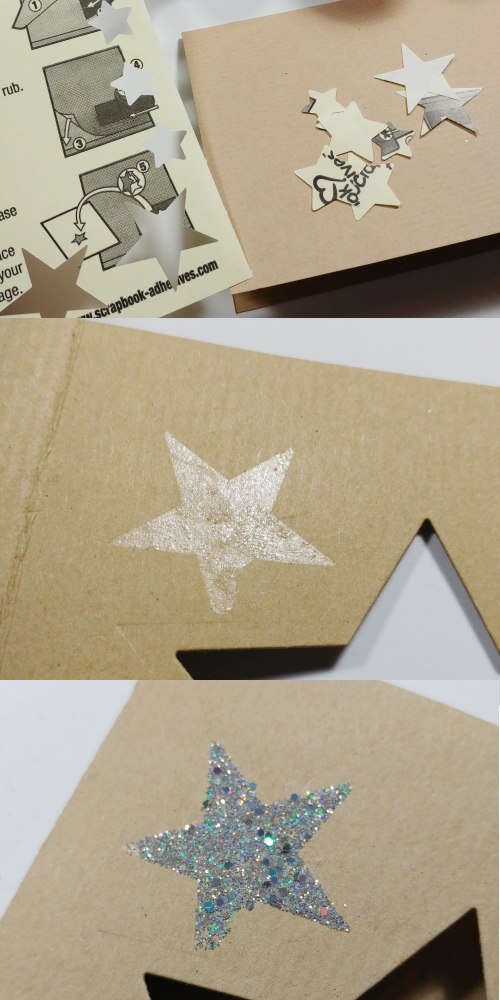
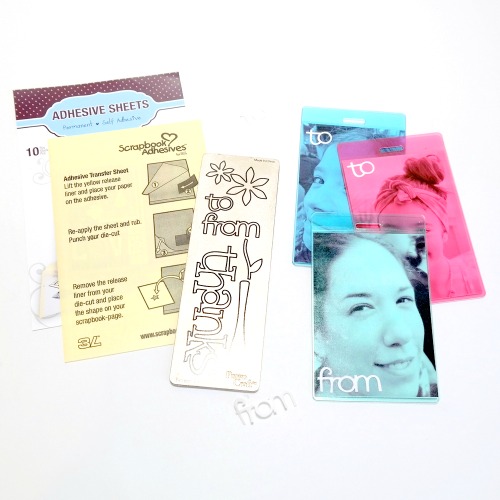
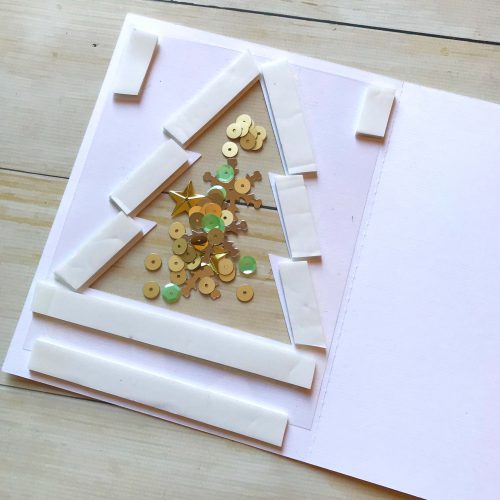
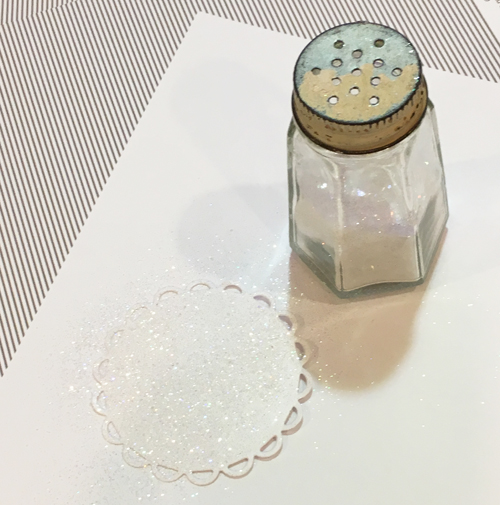
Looking at the above image, I did the following:
1. Punch out my star shape on the Adhesive Sheets 4×6″.
2. Peel off the yellow liner paper and press it on the card base (white liner side up).
3. Take the white liner paper off and sprinkle glitter over the star.
4. Press the glitter down with my finger to make sure it’s secured and stays in place!

I added some stamps and this card is done!

Trio of Christmas Card Creations by Jana McCarthy


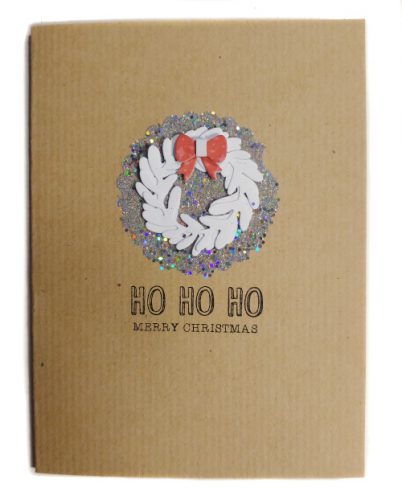
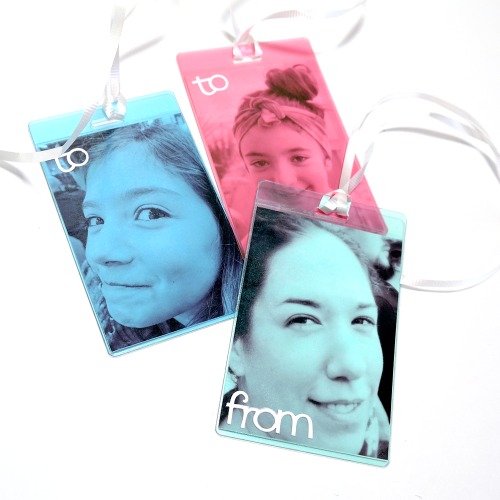
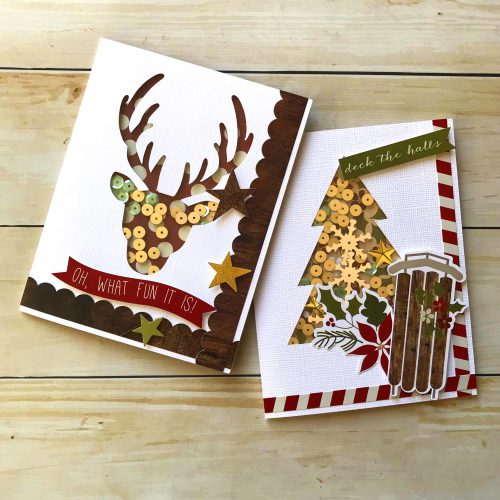
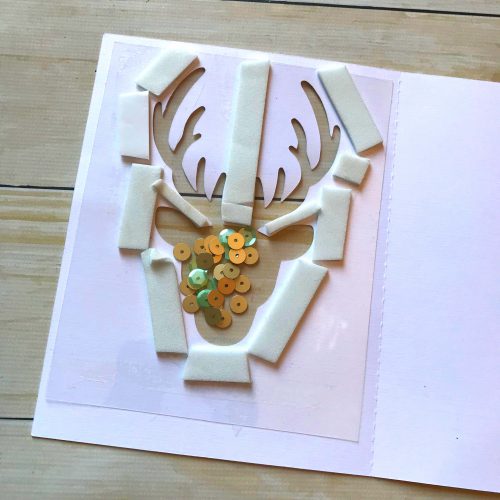
The second card was made like the first one. The difference is instead of a cut out in the center, you place your adhesive shape in the center and add a wreath embellishment on top.

Trio of Christmas Card Creations by Jana McCarthy


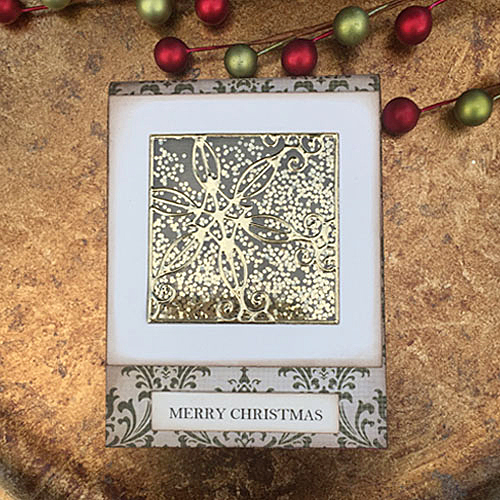
Christmas Card Creations with Heat Emboss Tutorial

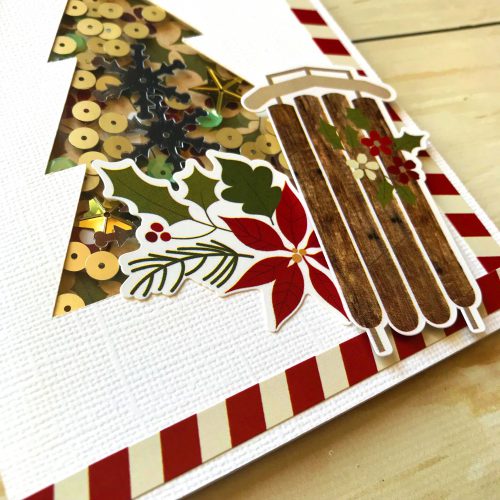
Now the last card was a big surprise to me! A “new to me” technique, heat emboss adhesive sheets, was quite exciting to discover! I heat emboss glitter on the Adhesive Sheet and guess what, it works well!! Like with all heating tools, make sure you don’t overheat your embellishment.

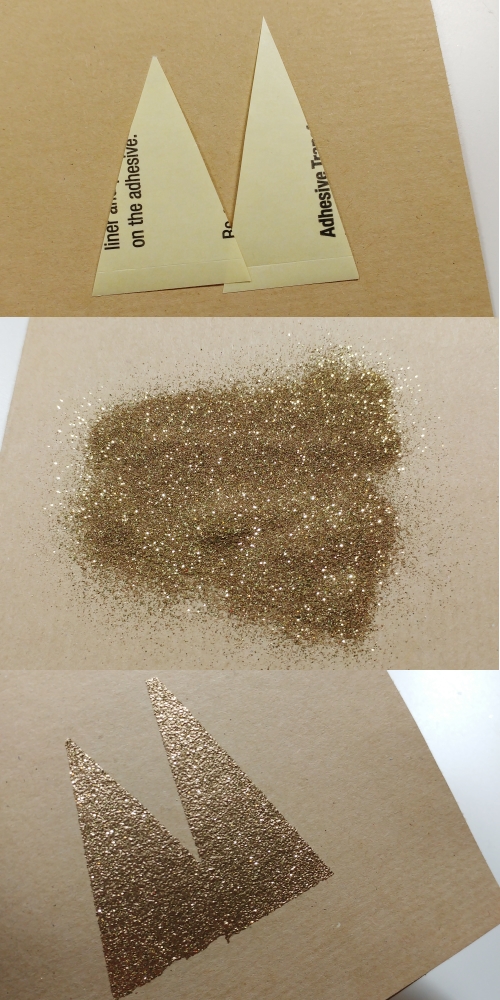
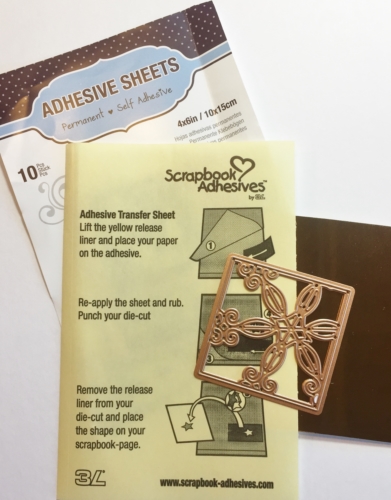
Referring to the above image, I did the following steps:
1. Scissor cut out of an Adhesive Sheet, simple Christmas tree shapes.
2. Peel off the yellow liner paper and press it on to cardstock (white liner side up).
3. Take the white liner paper off and sprinkle glitter embossing powder over the shapes.
4. Using a heating tool, melt the powder.

5. Fussy cut the embossed trees.
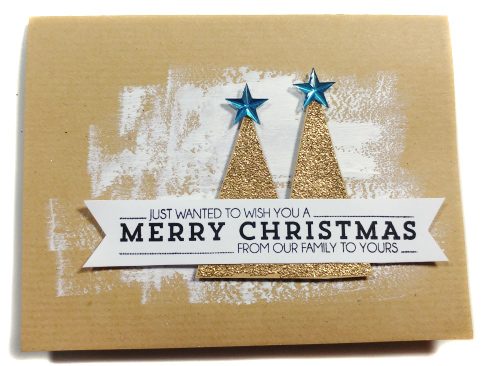
6. Add white acrylic paint over my card front so the trees will stand out more.
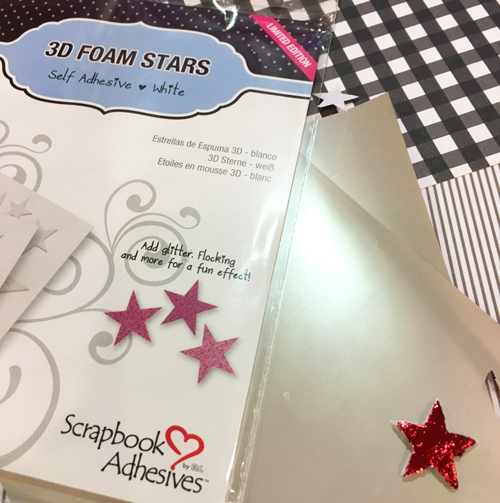
7. Place 3D Foam Squares White Small in back of trees for dimension and place on card front.
8. Stamp sentiment on white cardstock, cut into a ribbon banner and add to card front.
9. Finally, add two blue star shape rhinestones to the tops of trees.

Trio of Christmas Card Creations -Jana McCarthy


Have you sent out your cards already? Tell me I am not the only one who is always late! LOL!

Thanks for stopping by here today

Scrapbook Adhesives by 3L®:
Adhesive Sheets 4×6″
3D Foam Squares White Small
E-Z Runner® Ultra Refillable Dispenser
Dual Tip Glue Pen

Other:
LawnFawn, Crate Paper, Kelly Stamps, Stampendous

Self Laminating Photo Tags for Gifts

Hi! Dana Tatar here today sharing a 5-minute craft tutorial. I love shopping for gifts, so the holiday season is a really fun time for me. After purchasing and wrapping my gifts this year, I was looking for a way to add an extra special touch. Instead of using store-bought to and from labels, which I can never seem to find, I decided to create my own personalized photo gift tags with Self Laminating Tags with Loops.

Self Laminating Photo Gift Tag Tutorial by Dana Tatar for Scrapbook Adhesives by 3L

Self Laminating Tags with Loops are easy to use and eliminate the need for expensive machines. The pre-punched hole in the top of each tag is ready for ribbon to tie to any gift or bag.

How-to-Create-Photo-Gift-Tags-by-Dana-Tatar

Using Self Laminating Tags with Loops as Gift Tags

Step 1: Print photos and cut to fit inside the tags.

How-to-Layer-Photos-for-DIY-Gift-Tags-by-Dana-Tatar

Step 2: Use the E-Z Runner® Grand Refillable Dispenser to apply adhesive onto the back of one photo. Next, carefully line up a second photo and press onto the adhesive. The result is a double-sided photo with the gift-giver on one side and the gift-recipient on the other.

How-to-Use-Self-Laminating-Tags-for-Gifts-by-Dana-Tatar

Step 3: Align the double-sided photo inside the tags. Then, remove the liner and press to seal.

How-to-Use-Adhesive-Sheets-to-Create-Word-Stickers-by-Dana-Tatar

Step 4: Create “to” and “from” word stickers with Adhesive Sheets. First, lift the yellow release liner and place cardstock onto the adhesive. Next, die-cut the cardstock. Then, remove the release liner from the die-cuts and place the words onto the tags.

DIY-Photo-Gift-Tags-by-Dana-Tatar

Step 5: Insert ribbon through the pre-punched hole in the top of each tag and tie to a gift.

Thanks so much for stopping by today!
~Dana Tatar

Scrapbook Adhesives by 3L Supplies:
Adhesive Sheets- 4×6″
E-Z Runner® Grand Refillable Dispenser
E-Z Runner® Grand Permanent Strips Refill
HomeHobby by 3L®:
Self Laminating Tags with Loops
Other:
Metal Die: ProvoCraft; Manual Die-Cutting Machine; White Cardstock; Ribbon; Black and White Photos

Easy Festive Shaker Notepad Tutorial

Christine here today with an easy festive shaker notepad project. This would make a cute Christmas stocking gift or ideal to write down all those jobs to do before Christmas! I rarely make shaker projects but when I do, I realize how easy it is with my Scrapbook Adhesives by 3L® products at hand.

Easy Festive Shaker Notepad Tutorial by Christine Emberson for Scrapbook Adhesives by 3L

Creating my Festive Shaker Notepad

Firstly I gathered together Adhesive Sheets, gold foil card and a snowflake die.  Here I’m using the 4″ x 6″ sheets, they are also available in 6 x 12″ and 12 x 12″.  You could make huge shaker projects! LOL!

The Adhesive Sheet will give me a perfect layer of glue on the back of my die cut and this is amazing for acetate!  Have you struggled to find the correct adhesive to affix die cuts to acetate?  Look no further, Adhesive Sheets are the answer.

I purchased a regular mini notepad from my supermarket and attached a pretty patterened paper to the cover with Crafty Power Tape.

From cream cardstock, I die cut a frame and attached this to my acetate snowflake with MyStik® Permanent Strips.

Next, attach Crafty Foam Tape to the reverse of the frame. Pop some glitter inside and seal closed with a square die cut.

Voila! A glittery Christmassy shaker notepad!  Fantastic for teacher gifts or for work colleagues. Also, fun to make with children.


Thanks for stopping by today and don’t forget to check out all the great products on the website.

Christine

Products used:
MyStik® Permanent Strips
Crafty Foam Tape White
Crafty Power Tape
Adhesive Sheets 4 x 6″ 
Others:
Dies: Spellbinders® Paper Arts (Classic Squares, Snowflake Snippets)
Notepad, Scrap Patterned Paper, Gold Foil Card, Cream and Green Cardstock, Glitter, Typed Sentiment Label

Fun Holiday Shaker Card Duo with Crafty Foam Tape

Let’s get moving with some fun holiday shaker cards! Hey lovelies! I’m creating fun things for Christmas. Today’s card design can be used for any holiday or season. Just change up your cut out shapes and colors inside the shaker area. Check it out…let me show you how.

Fun Holiday Shaker Card Duo with Crafty Foam Tape by Latrice Murphy for Scrapbook Adhesives by 3L

The Deets for your Holiday Shaker Card

Start by choosing shapes you love. I went with a Christmas tree and a reindeer. Find some holiday scrapbooking paper for the background and matching colors of sequins to get started. I found a great holiday collection from Simple Stories that was perfect!

The four images below show how the shaker feature is created.

After I cut my shapes on my card bases with the Silhouette Cameo, cover over the cut shapes acetate using my E-Z Runner® Ultra Refillable Dispenser to secure it in place.

Add Crafty Foam Tape around the shape but make sure that there are no gaps because those sequins will escape! You don’t want that 🙂 Also, don’t forget to add Crafty Foam Tape on the bottom and corners for balance.

Don’t forget to add those sequins in the middle area of your shape.

Trim your patterned paper size – enough to cover the back side of the card front. Finally, remove the liner from your Crafty Foam Tape pieces and cover with the cut paper. This should cover your shaker feature. Give it a shake – isn’t that fun?

Now we embellish the card front with cardstock stickers that came with this holiday collection to tie it all together. To bring more interest to the stickers, use 3D Foam Squares to pop up a few. See the close-up image below for some ideas.

Have fun with the shapes you choose and the embellishments too.

Happy holiday crafting!
Latrice

Scrapbook Adhesives by 3L® Used:
Crafty Foam Tape White
E-Z Runner® Ultra Refillable Dispenser 
3D Foam Squares White Mix
Other:
Electronic Cuts: Silhouette Cameo
Patterned Papers: Simple Stories
Cardstock: Bazzill


Visit our Website and Blog!
Sign up for our Newsletter so you never miss a contest or giveaway!

instagram purple icon facebook icon purple pinterest purple icon twitter purple icon YouTube icon blog subscription purple icon

Christmas Card with 3D Foam Creative Embellishment Kit

Glamour, dimension, and creativity; three things that can make a Christmas beautiful card. They are also three things that can be achieved by using our 3D Foam Creative Embellishment Kit!

With Christmas rapidly approaching, beautiful details are just what you need to create your cards.  Join me as I walk you through a Christmas Card with the 3D Foam Creative Embellishment Kit and I showcase how to Wear Your Adhesive on the Outside!

Christmas Card with 3D Foam Creative Embellishment Kit by Christine Meyer for Scrapbook Adhesives by 3L

First of all, I wanted to make a unique Christmas card and decided to go with an acetate base.  It’s a fun challenge to make an acetate card using creative twists to cover up the adhesive on the back sides!  Keeping things simple, I decided to adhere my cardstock to the acetate using my E-Z  Runner® Permanent Strips.

Due to the fact that I wanted some glamour for this card, I used the 3D Foam Creative Embellishment Kit to create my star.  First I ran the 3D Foam Creative sheet thru my cutting machine and cut a big star.  Then I peeled off the top to reveal the adhesive on one side and set the foil on top.

The kit comes with silver, red, gold, green, and blue foil!  Since I was making a Christmas Card, I opted for red. I ran it thru the machine again and just like that, I had a beautiful, big, foiled star. In addition to the foiled acetate and foiled patterned paper, a foiled star made for a nice trio!

Video Tutorial for Christmas Card with 3D Foam Creative Embellishment Kit

To coordinate the inside of the card I added a square on the top part and just added a few simple stickers.  Additionally, for the bottom part, I wanted to add a gift card.  Due to the fact that I wanted to make it easy to remove, I used an Adhesive Dot Large Repositionable.  These are perfect for times like this when you want it to be easily removed but held in place in the meantime.

Thanks so much for joining me today!
-Christine

Scrapbook Adhesives by 3L® Supplies:
E-Z  Runner® Permanent Strips Refillable
Adhesive Dots Large Repositionable
3D Foam Creative Embellishment Kit
Other Supplies: Acetate Paper, Stickers, Patterned Paper: Paper House Productions; Patterned Paper: Doodlebug Design

Merry Christmas Banner with Adhesive Sheets

I’m making a Merry Christmas Banner today! With December just TWO DAYS AWAY, many of you are decorating for Christmas. I try to make a few new things each year to add to my decorations.

It’s Judy here to show you this Merry Christmas Banner which I hope to hang it on a wreath or tree once I actually get those out of storage! HA! Using a combination of Adhesive Sheets 4 x 6ʺ and E-Z Runner® Ultra Refillable Dispenser, it will make this really easy to put together.

Merry Christmas Banner with Adhesive Sheets by Judy Hayes for Scrapbook Adhesives by 3L

Start with the Banner Basics

To make the banner, I cut 14 small pennants from patterned paper.  The pennant top folds to the front to show the red pattern from the back side.  I’ve added a strip of green patterned paper under the fold for a contrast border. Applied them with the E-Z Runner® Ultra Refillable Dispenser to hold in place.

Adding the Letters

Next, I applied Adhesive Sheets 4 x 6ʺ to the back of red cardstock. Then I die cut the letters from the red cardstock and you end up with each letter having edge-to-edge adhesive on the back – so easy to fasten to the pennants.

After each letter is applied to a pennant, punch holes at the top and thread the twine through to connect my banner.

Happy decorating!
Judy

Scrapbook Adhesives by 3L®:
Adhesive Sheets 4 x 6ʺ
E-Z Runner® Ultra Refillable Dispenser

Other Supplies:
Patterned Papers: Authentique Paper (Vintage Christmas and Vintage Christmas Two); Red Cardstock; Twine; Tags Etched Dies: Little B; Alpha Etched Dies: Spellbinders® Paper Arts (Simply Said Alphabet Etched Dies)

Visit our Website and Blog!
Sign up for our Newsletter so you never miss a contest or giveaway!

instagram purple icon facebook icon purple pinterest purple icon twitter purple icon YouTube icon blog subscription purple icon

Die-Cutting with Adhesive Sheets

It’s almost time for all things Christmas! I spent time this past weekend in my craft room working on Christmas themed projects. I don’t like to rush past fall holidays when it comes to home decor, but as far as Christmas themed projects… bring ’em on! Let me show you what I’ve been die-cutting!

I love using Adhesive Sheets for die-cutting. They’re great for dies that have a lot of details. You don’t have to worry about getting your adhesive into small areas, because when you die cut with the Adhesive Sheet applied, all you have to do is peel away the top liner sheet and you have edge-to-edge adhesive coverage.

Die-cutting with Adhesive Sheets by Vicki Chrisman

Die-Cutting with Adhesive Sheets

I’m layering these two graduated sizes of scalloped circles, with the large one covered with glitter.

I added my Adhesive Sheet to the top a piece of white cardstock and then die cut it. Now simply peel away the Adhesive Sheet liner to expose the adhesive and sprinkle with glitter.

If you look back at the original base piece I choose to use, it had some foil stars printed on the paper. I love that detail and I realize I will cover it those up as I add the scalloped squares. No problem, I broke out my 3D Foam Stars and the red Foil sheets in the 3D Foam Creative Embellishment Kit (the star shape and foils are in the 3D Foam Holiday Embellishment Kit which I didn’t have). Now I have dimensional stars to add to my card design.

Using the best adhesive for the job really makes the process even more enjoyable. I keep a basket of Scrapbook Adhesives by 3L® adhesives on my desk, to have them at my fingertips. It’s easy to grab just what I need for each specific job.

Thank you so much for stopping by!
Vicki

Scrapbook Adhesives by 3L®:
Adhesive Sheets 4 x 6″
3D Foam Holiday Embellishment Kit
3D Foam Creative Embellishment Kit
E-Z Runner® Grand
3D Foam Stars
3D Foam Squares White Mix
Other Supplies:
Papers: Fancy Pants Designs; Etched Dies: Spellbinders® Paper Arts; Fine Glitter

Visit our Website and Blog!
Sign up for our Newsletter so you never miss a contest or giveaway!

instagram purple icon facebook icon purple pinterest purple icon twitter purple icon YouTube icon blog subscription purple icon

Mixed Media Journal Cover

I’m working with leftovers today, both in the kitchen and in my studio! It’s Dana Tatar today sharing the mixed media journal cover I created.

Now I’m turning my focus to Christmas crafts and gifts. Instead of using the images and symbols normally associated with the season, I am working with a festive color palette. I am able to design with confidence knowing that Scrapbook Adhesives by 3L products give a strong and immediate bond on multiple surfaces.

Mixed Media Journal Cover by Dana Tatar for Scrapbook Adhesives by 3L
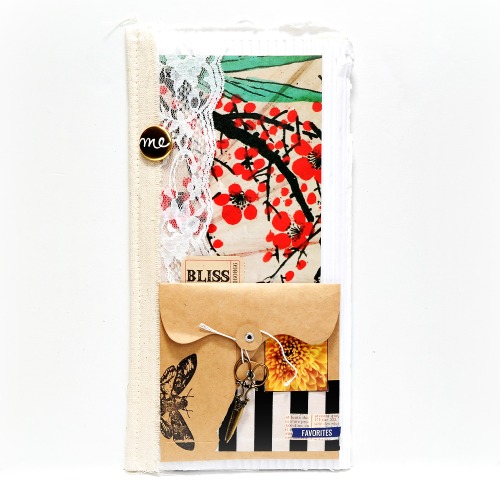
This project starts with a store-bought journal.

Designer Tip: Select a journal made from a variety of textured paper, lace, canvas, and corrugated cardboard for added interest.

How to Construct a Mixed Media Journal Cover

How-to-Adhere-Embellishments-to-Canvas-and-Lace-by-Dana-Tatar

First, gather patterned paper scraps, embellishments, and ephemera. Next, use Crafty Power Tape to secure the patterned paper to the journal cover. This super-high tack tape makes it easy to apply any paper crafting item to surfaces.

Then, use Dodz Adhesive Dots 3D to secure heavier items to the journal. Dodz are double-sided, clear adhesive dots of glue with dimension. The strong, flexible bond of this adhesive makes it perfect for sticking heavier embellishments to soft textiles.

How-to-Add-Interactive-Embellishments-to-a-Journal-Cover-by-Dana-Tatar

Finally, attach heavier elements, such as envelopes, to the album cover with Extreme Double-Sided Tape. Then use the E-Z Runner Grand Dispenser to attach photographs and ephemera to the envelope. You can further personalize the envelope with decorative washi tape, stamping, and charms.

Mixed Media Journal Cover by Dana Tatar
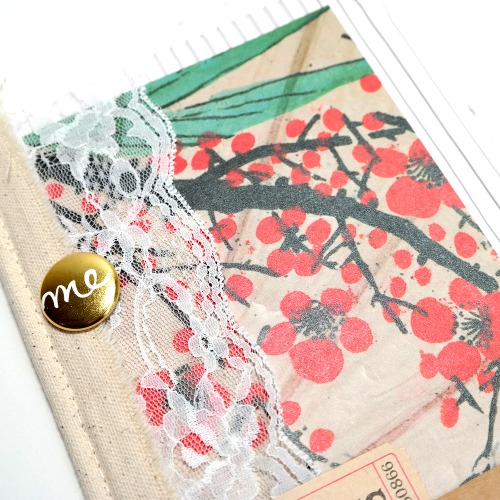
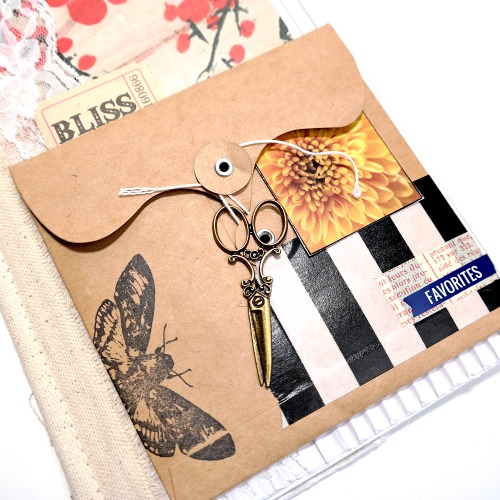
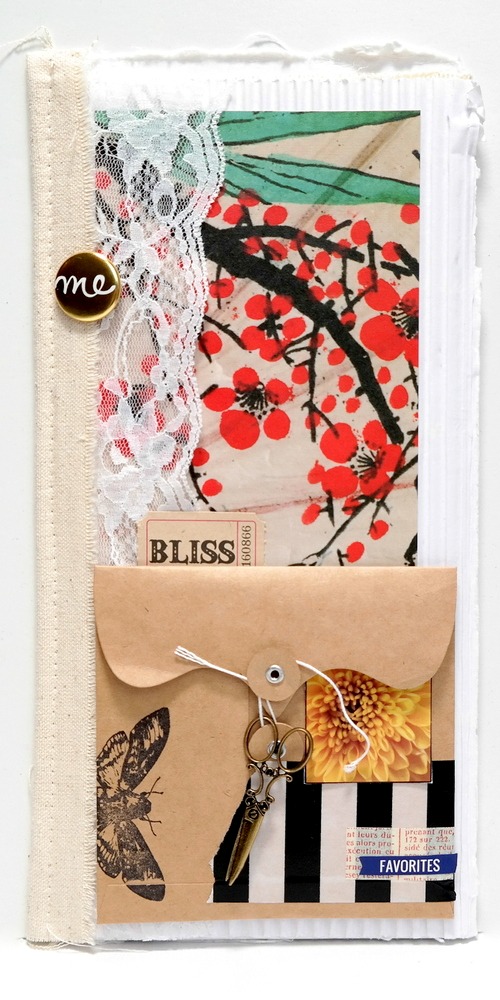
I hope I have inspired you to use your adhesives on textiles and dimensional surfaces! Journals like this make a great stocking stuffer, or gift for any occasion year-round.

Thanks for stopping by today!
~Dana Tatar

Scrapbook Adhesives by 3L Supplies:
Dodz Adhesives Dots 3D
E-Z Runner® Grand Refillable Dispenser
E-Z Runner® Grand Permanent Strips Refill
Crafty Power Tape Dispenser 81′
Home and Hobby Extreme Double-Sided Tape 1/4″

Other Supplies: Journal (Recollections); Patterned Paper (Colorbok); Ticket (Tim Holtz); Washi Tape (Heidi Swapp); Sticker (Pretty Little Studio); Scissors Charm (7gypsies); Paper Tape (7gypsies); Film Strip (Darkroom Door); Stamp (VivaLasVegasStamps); Ink (Ranger); Metal Pink (American Crafts); Envelope

Visit our Website and Blog!
Sign up for our Newsletter so you never miss a contest or giveaway!

instagram purple icon facebook icon purple pinterest purple icon twitter purple icon YouTube icon blog subscription purple icon

Winter Time Card with No Line Coloring Technique

Sharing a Winter Time Card using the no line coloring technique today. Good morning friends! Michele here with a card that I like to refer to as “take two!” Not too long ago, I made a card using this same stamp set and no line coloring. You can see it by clicking: Birthday Girl with No Line Coloring.

I enjoyed that stamp set so much that I used it again for a winter themed card. The image was stamped in a very pale brown ink. I used Copics and a white gel pen for the buttons and color. I also stamped a few snowflakes to really amp up the winter feel!

Winter Time Card with No Line Coloring Technique by Michele Kovack for Scrapbook Adhesives by 3L

With the Adhesive Dots Micro, I adhered the teeny posey embellishments to the card panel. These adhesive dots are clear dots of adhesive. Easy, touch-free application from our unique patented single dot dispenser box, which doubles as storage. They come in several different sizes.

Next, I layered coordinating card stock using the E-Z Runner® Permanent Strips. Then I tied a vertical bow and jingle bells for a bit of fun. I didn’t want it jiggling around so I used the Adhesive Dots Medium underneath to keep it secure.

Thank you so much for stopping by today!  I am off to do some Black Friday shopping! 🙂
Michele

Scrapbook Adhesives by 3L® Supplies:
Adhesive Dots Micro
Adhesive Dots Medium
E-Z  Runner® Permanent Strips
Other:
Stamp: Prima Marketing; Alcohol Markers: Copics; Posies: Queen & Co.; Ribbon and Jingle Bells: Michael’s

Visit our Website and Blog!
Sign up for our Newsletter so you never miss a contest or giveaway!

instagram purple icon facebook icon purple pinterest purple icon twitter purple icon YouTube icon blog subscription purple icon

Christmas Reindeer Card with Easy Adhesive Layering

Good morning! Yvonne here, to show you how to create this layered Christmas Reindeer card. Adhesive layering is so easy with my E-Z Runner® Grand Refillable Dispenser and 3D Foam Squares White Mix at hand.

Christmas Card using Adhesive Layering with Scrapbook Adhesives™ by 3L, byYvonne van de Grijp

Layered Card Making

Die cut the elements of the scene with a variety of papers. For the snow drifts use a combination of glittered, plain and textured white papers. Punch the snowflakes from glittered paper. Die cut and color the reindeer image.

Simply apply Permanent Strips from the the E-Z Runner® Grand over the back of the snow die cuts. Arrange them to create the scene and adhere the die cuts to the card base.

It’s so easy and quick to layer this way.

For the stamped and colored reindeer image and the sentiment, use 3D Foam Squares for an extra 3-Dimensional effect.

Affix the snowflakes using Dodz Adhesive Dots Mini, and lift the edges to make it look like they are falling.

Scrapbook Adhesives™ by 3L products used:

Other products used:

Lawn Fawn hillside borders die-template, Stampendous reindeer stamp, Martha Stewart Crafts Snowflake punch, printed sentiment, self-adhesive pearls, cardstock.

Thanks for stopping by and wishing you happy holiday crafting.

Yvonne  van de Grijp