Welcome to Creative Scrapbooker Magazine’s 12 Days of Giving!
Scrapbook Adhesives by 3L® is featured on Day 7, that’s today!
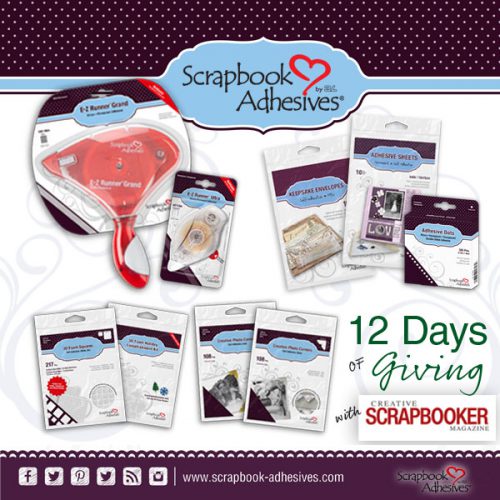
Enter to win the giveaway and get all the details click here: 12 Days of Giving Day 7
Thanks for visiting!
Scrapbook Adhesives by 3L® is featured on Day 7, that’s today!
Enter to win the giveaway and get all the details click here: 12 Days of Giving Day 7
Thanks for visiting!
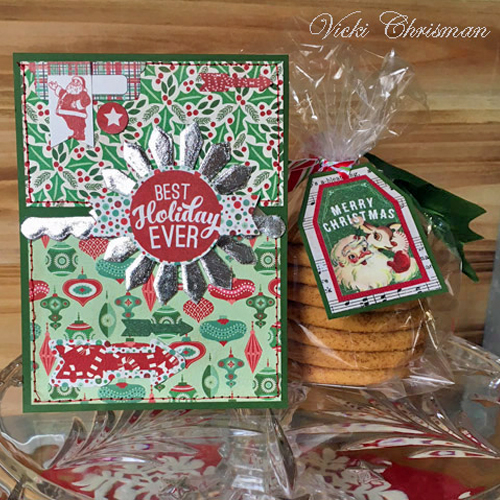
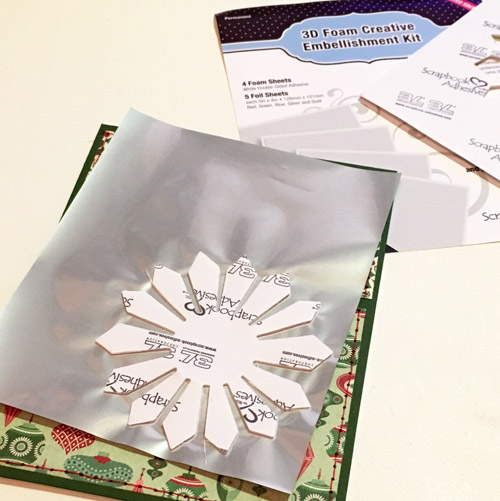
Bring on some holiday cheer with a little extra sparkle and shine in projects like my Christmas card and cookie bag ensemble! The 3D Foam Creative Embellishment Kit has everything to achieve that: four 3D Foam Creative Sheets and five colors of foil.
Custom create your own festive embellishments when you combine the two – just die-cuts punch or scissor cut on the 3D Foam Creative Sheets, adhere the shapes, and add foil for that WOW! effect. Let me show you more about how to use these.
These sheets are so easy to use for die-cutting. All you do it die cut them just as you would any other piece of paper. You can see in the photo below what it looks like after I’m die cut the Foam Adhesive sheet.
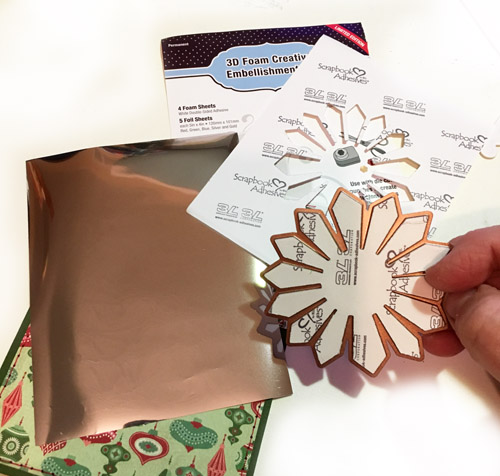
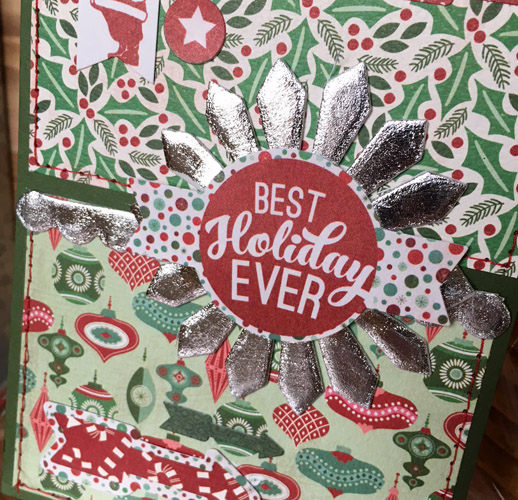
Take the silver foil from the 3D Foam Creative Embellishment Kit, I placed the dull side of the foil facing up. Next, remove the top liner of the die cut and place the shape sticky side down over the foil. Transfer the foil to your die-cut (you can rub the foil gently) and remove the sheet. Viola!
See the close up below. Doesn’t it make quite a statement? It adds something extra special to any card or project. For this card, I also added a little silver scalloped border using the steps for the flower die cut.
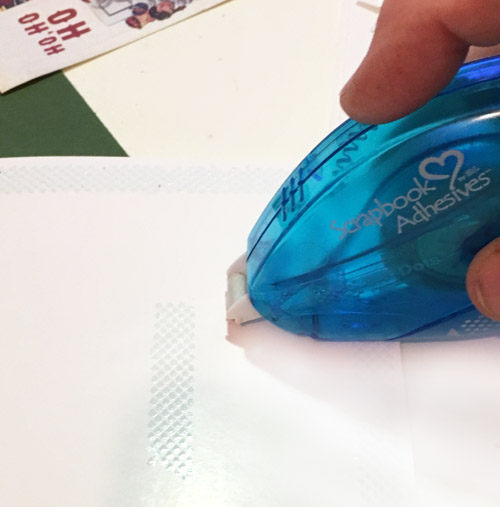
To assemble my card and cookie bag tag, I used E-Z Dots® Permanent Refillable Dispenser.
Even a simple tag can add so much to a little bag of treats.

It is the time of the year for giving, so why not make your card or gift stand out and shine with 3D Foam Creative Embellishment Kit? It’s sure to make someone smile!
Thanks so much for stopping by!
Vicki
Scrapbook Adhesives by 3L®:
3D Foam Creative Embellishment Kit
E-Z Dots® Permanent Refillable Dispenser
Other:
Patterned Papers: Authentique Paper (Retro Christmas Collection)
Cardstock: Bazzill Basics Paper
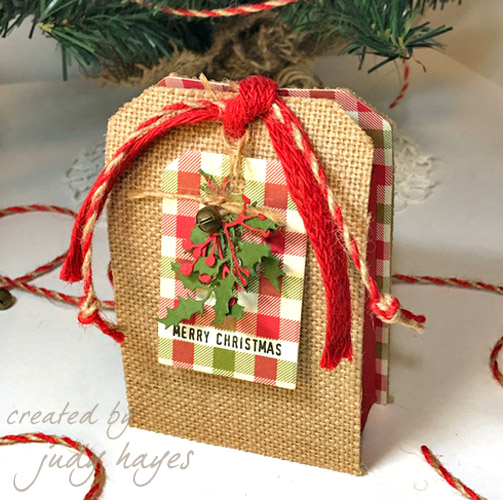
Create this DIY Christmas gift card holder using tag dies, put together with Adhesive Sheets 4 x 6ʺ and Extreme Double-Sided Tape ¼ʺ for a farmhouse rustic holiday package!
Hi everyone! Judy here today with this fun gift card holder idea that is easy to make. I always like to wrap a gift card as a package rather than tucked in an envelope. It can be adapted to other occasions, too! I’ve added a festive tag, along with holly and berries die cuts and the back will have space to personalize it.
First, die-cut two 3¼ x 5ʺ tags from burlap paper. On check patterned paper, apply Adhesive Sheets 4 x 6ʺ on the back and die-cut another set of tags. Attach the patterned check tags to the back of each burlap tag. By doing this, it gives the burlap texture a great festive look against the check paper!
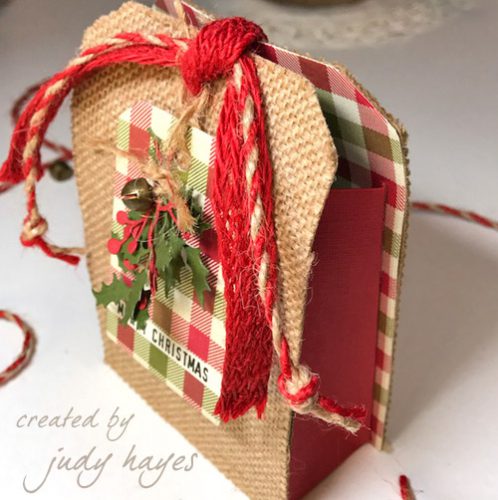
Next, we will adhere the tags together with a piece of red cardstock which forms the sides and bottom. To achieve this, cut 2 x 11ʺ piece of red cardstock and score/fold at ¼, 4, 7, and 10¾ʺ as well as ¼ʺ along both long sides. Use Extreme Double-Sided Tape ¼ʺ on all edges. Fold down the short ends to make a finished edge. The long sides adhere to the tags to form the holder.
Use the same patterned check paper and adhere a light color paper with Adhesive Sheets 4 x 6ʺ to create a two-sided patterned paper. Then die-cut with the tag etched die. Next, die-cut holly and berries shapes. Along with a jingle bell, adhere all to tag with Adhesive Dots Small. The stamped greeting strip is fastened with E-Z Runner® Micro Refillable Dispenser which is the perfect adhesive for narrow strip of paper! Tie the tag with twine that closes the gift card holder.
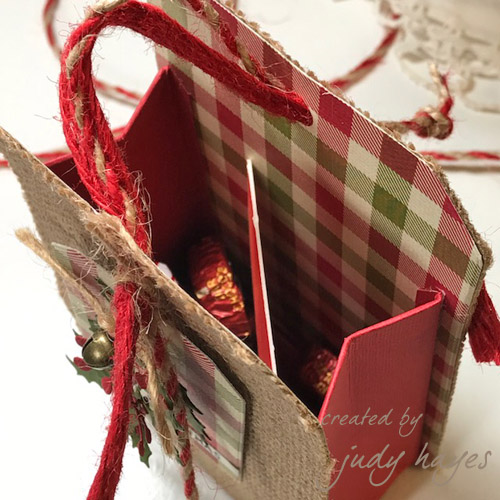
There’s even room for a few candies along with a gift card!
Thanks for visiting! Wishing you all a joyous holiday season!
Judy
Scrapbook Adhesives by 3L® Used:
Adhesive Sheets 4 x 6ʺ
Dodz Adhesive Dots Small
E-Z Runner® Micro Refillable Dispenser
HomeHobby by 3L®
Extreme Double-Sided Tape ¼ʺ
Other:
Authentique Paper: Vintage Christmas Collection; Little B: Tags Dies; DCWV: Burlap Paper; Tim Holtz: Tiny Bells, Holiday Greens Mini Dies; Cardstock: Red, Green and Balsa; Tsukineko/Imagine Crafts: Versafine Ink; Twine
Visit our Website and Blog!
Sign up for our Newsletter so you never miss a contest or giveaway!
Our Holiday Trio Ensemble is featured on FaveCrafts’ 12 Days of Christmas – Day 10 and we’re overjoyed to be a part of the celebration!
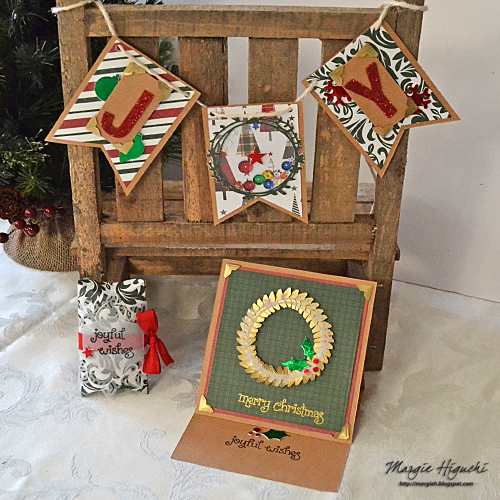
To commemorate this occasion, we are sharing this ensemble tutorial! Get the step-by-step instructions, enter to win a $50 Prize Package of Adhesives! For all the details visit Favecraft by clicking: Handmade JOY Holiday Trio Ensemble.
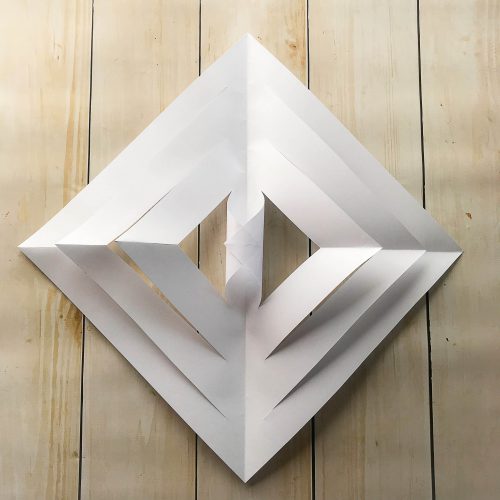
Aren’t these giant paper snowflakes fun?! They make an impact on your holiday decor and they don’t cost a fortune to make. Even the kids can get in on the fun!
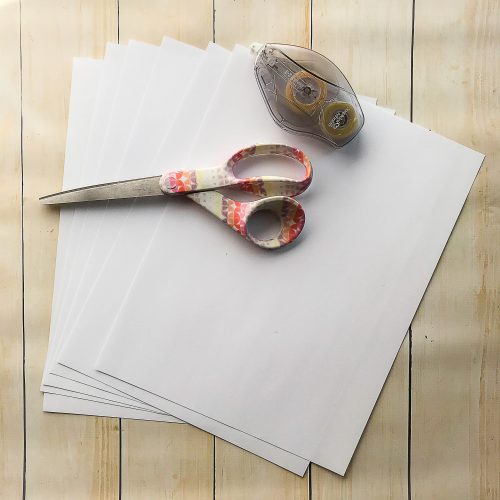
First, step away from the stapler and the clear tape! Grab yourself an E-Z Runner® Grand Ultra Strong Refill and let’s get started. My kids love when I actually let them use tape runners 🙂 This holiday season I wanted to make some of those HUGE paper twisted snowflakes. I’ve seen them done before, but always with clear tape or staples and I thought… “Hmmm, I’ve got the best adhesive made right here and it would be much faster too.” I was right! So check out my fun paper snowflakes.
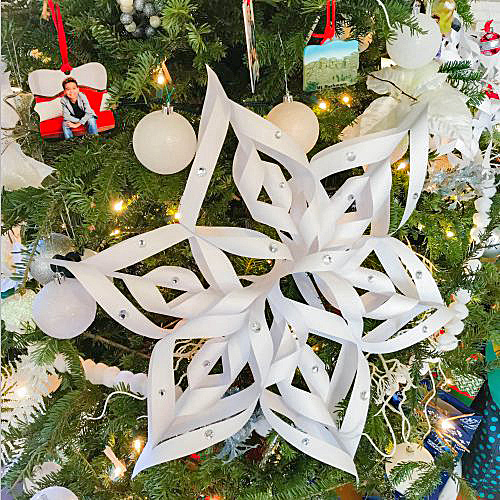
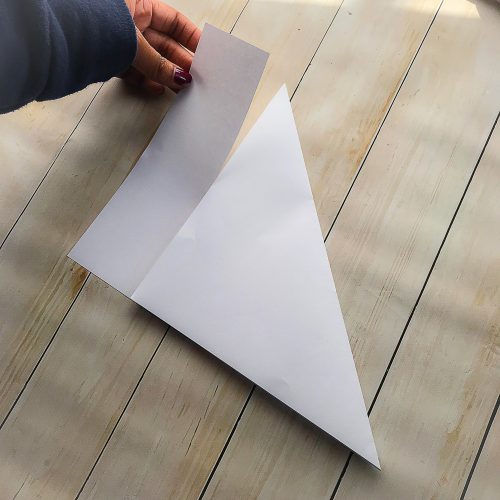
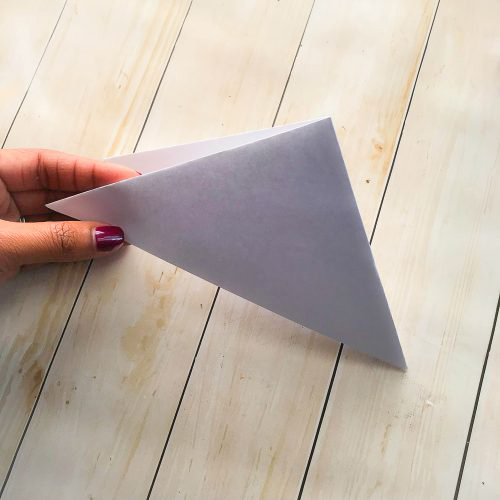
Let me show you how with a photo tutorial to make your own. My daughter and I plan on making a bunch more and hanging them everywhere…a winter wonderland indoors! LOL!

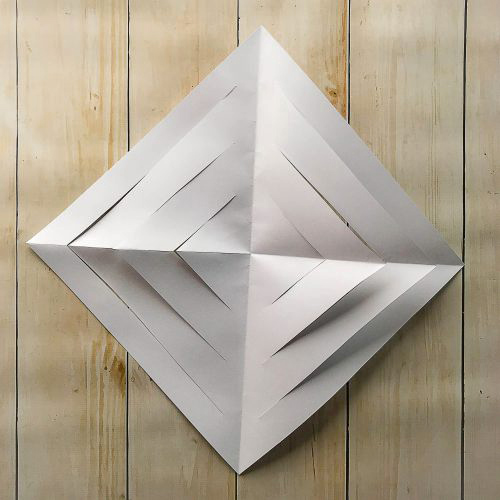

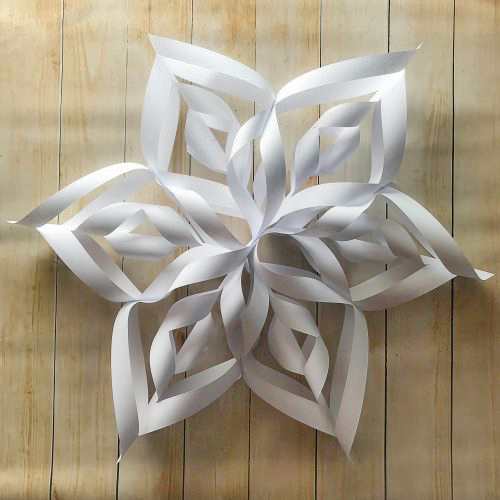
They make a big impact in an easy way and will add more to the tree.
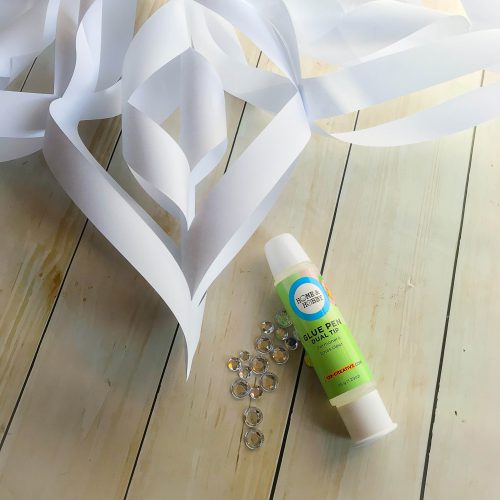
Scrapbook Adhesives by 3L® Used:
E-Z Runner® Grand Ultra Strong Refill
HomeHobby by 3L®:
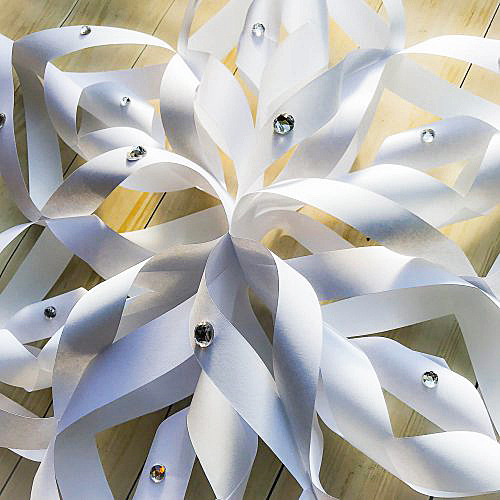
HomeHobby Dual Tip Glue Pen
Other:
Gemstones; Copy paper
Have fun creating!
Latrice
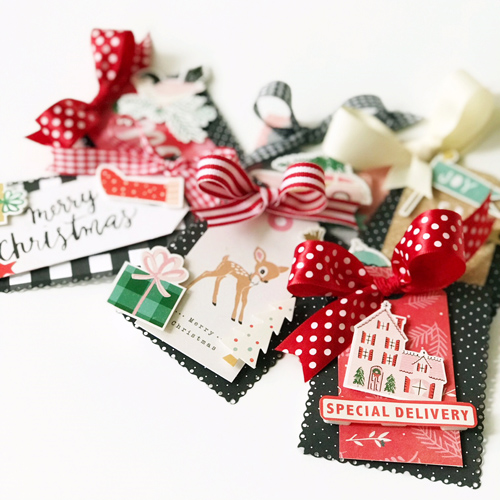
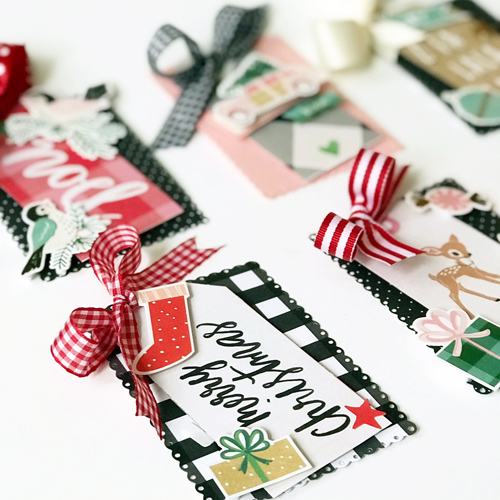
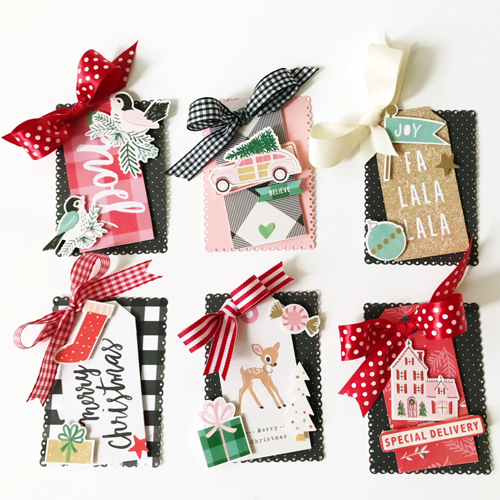
Bring interest and fun to your holiday gift wrapping with layered Christmas tags! Today I’m sharing a way to use up your holiday patterned papers, especially collections that have a full sheet of fun tags.
Hello friends, Latisha here with you! With just a few supplies like patterned papers, stickers, ribbons and adhesive, you will have beautiful tags to put on your gifts this holiday season.
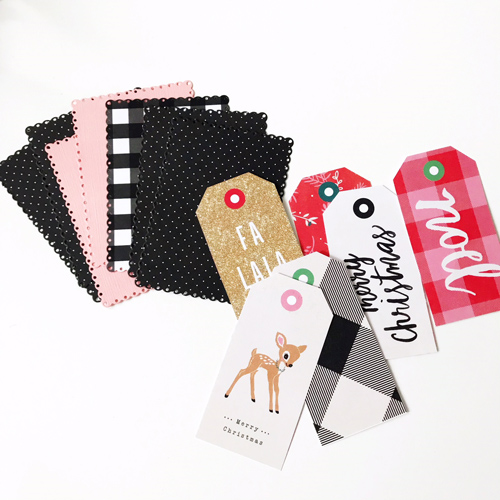
Scissor cut the tag shapes out of the patterned papers.
Choose coordinating patterned papers and cardstock to die-cut scalloped rectangles with a manual die-cutting machine. If you do not have a die-cutting machine, cut rectangles using a paper trimmer.
Use coordinating stickers, paper tags and embellishments to adhere and layer with a combination of Crafty Foam Tape White and 3D Foam Squares White Small Size. This will bring your tags to the next level with dimension and interest!
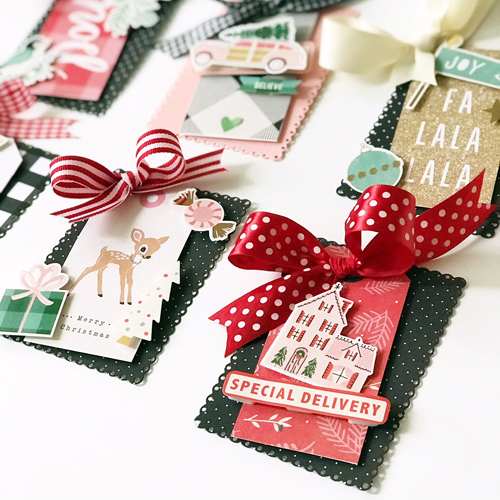
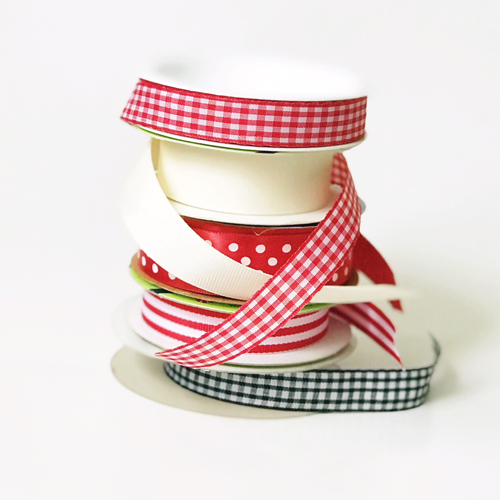
Use assorted ribbons to tie large bows ready to adhere to each tag with Adhesive Dots Small. They are double-sided, extremely strong and clear circle shaped adhesive, and perfect for adhering embellishments.
Now you have a set of beautiful layered Christmas tags ready to be placed on presents! Who knows, they may end up on the tree as ornaments!
Here are more looks at the finished tags…
Share your handmade tags by putting your links in the comments! Thanks for stopping by!
Latisha
Scrapbook Adhesives by 3L® Used:
3D Foam Squares White Small Size
Crafty Foam Tape
Adhesive Dots Small
Other:
Patterned Papers: Fancy Pants Designs and Crate Paper
Stickers: Crate Paper
Cardstock: Bazzill Basics Paper
Ribbon; Scissors
Visit our Website and Blog!
Sign up for our Newsletter so you never miss a contest or giveaway!
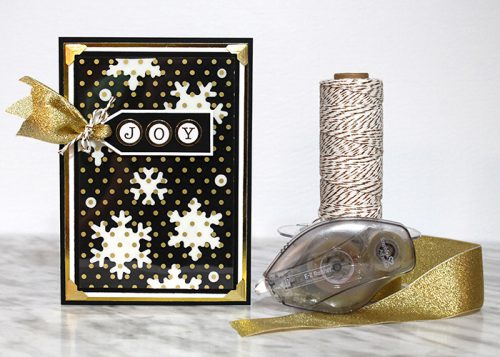
If you haven’t started holiday cardmaking, maybe my Joy card tutorial will help because it’s the Season to be Crafting! So let’s get started! Hey crafty friends, Tracy here to share a striking but quick and easy design using 3D Foam Snowflakes with acetate. When adhesive looks this good, why cover it up?
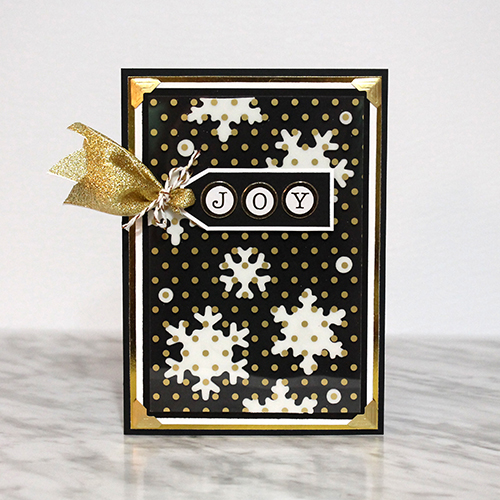
This card was created using some of my go-to favourite adhesives, includes E-Z Runner Ultra, Gold Creative Photo Corners and 3D Foam Squares.
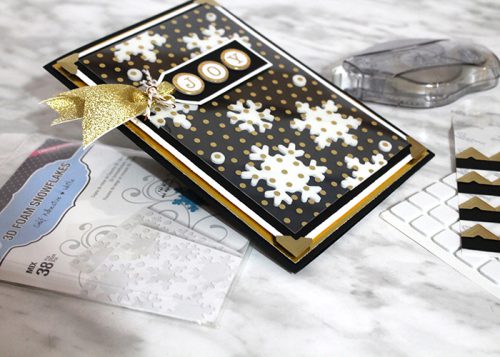
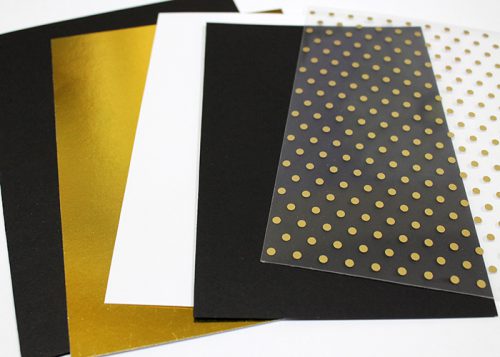
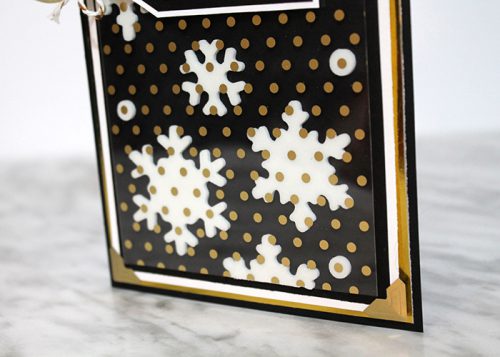
1. Let’s start with creating my card layers. The card base is black cardstock and 5 x 7″ in size (just fold a 10 x 7″ piece in half). The gold cardstock is 4.75 x 6.75″, the white cardstock is 4.5 x 6.5″, the black cardstock is 4.25 x 6.25″ and the acetate is 4 x 6″.
2. I adhered the gold cardstock to the black card base using the E-Z Runner Ultra, as well as the black cardstock to white cardstock layer.
Then I added the Gold Creative Photo Corners to the top layers, and then adhered this layer to the base using 3D Foam Squares.
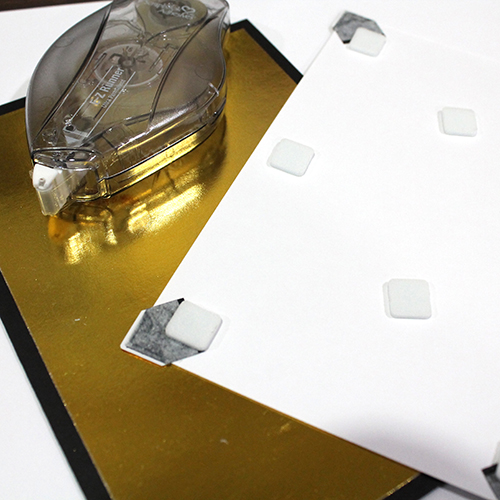
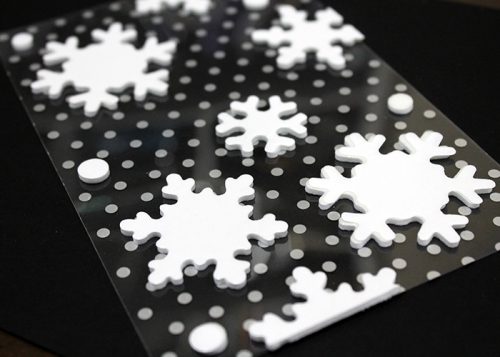
3. On the back side of the acetate I added the 3D Foam Snowflakes, and some of the larger foam circles also included in the 3D Foam Snowflake package. Adhere this acetate layer to the card.
4. Create a small layered tag white black and white cardstock, and add the letter stickers. Add ribbon as well as baker’s twine to the tag and adhere to the card using 3D Foam Squares.
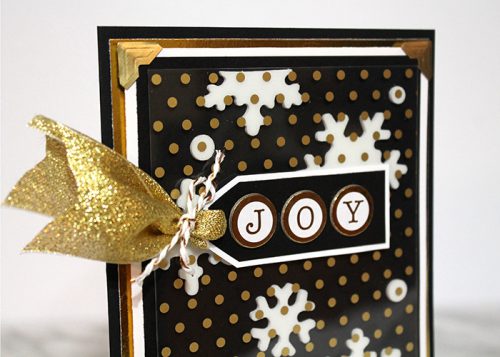
These beautiful 3D Foam Snowflakes shine centre stage on this card. Pair these with a patterned acetate results in a striking card.
A card like this can be created quickly and replicated easily making your holiday card making just THAT much simpler. This leaves more time for things like opening gifts, eating Christmas cookies or having another glass of eggnog.
Thanks so much for stopping by!
Tracy
Scrapbook Adhesives by 3L® Used:
3D Foam Squares White Mix
3D Foam Snowflakes
Creative Photo Corners Gold
E-Z Runner® Ultra Refillable Dispenser
Other:
Cardstock- White, Gold and Black, Letter Stickers (American Crafts), Gold Polka Dot Acetate, Gold Ribbon, Gold & White Baker’s Twine
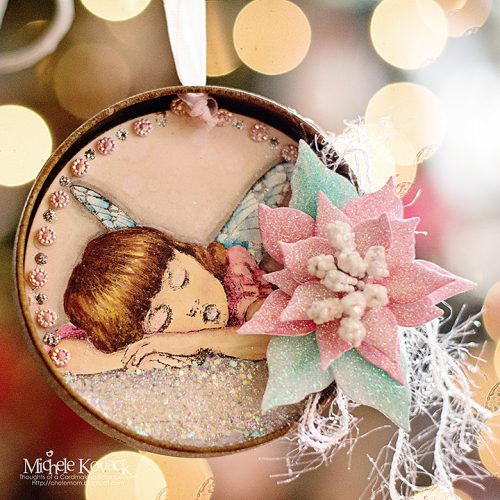
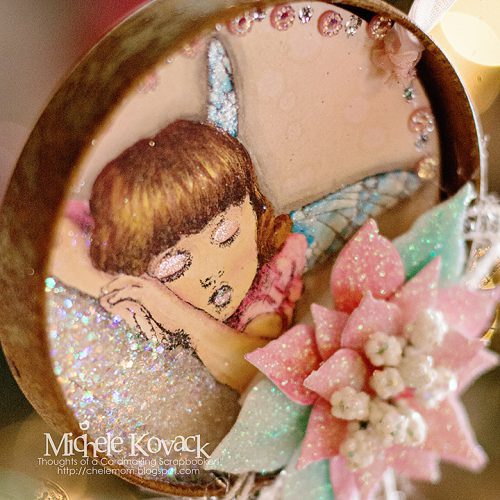
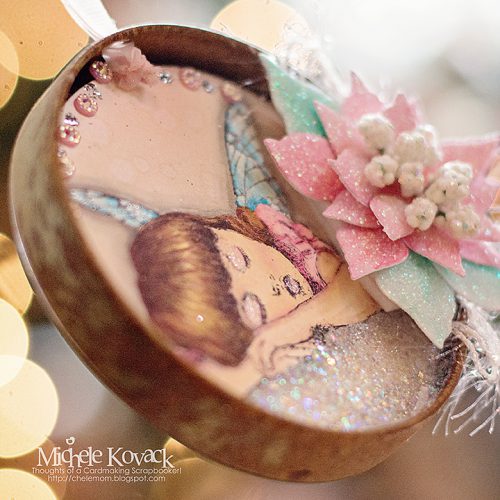
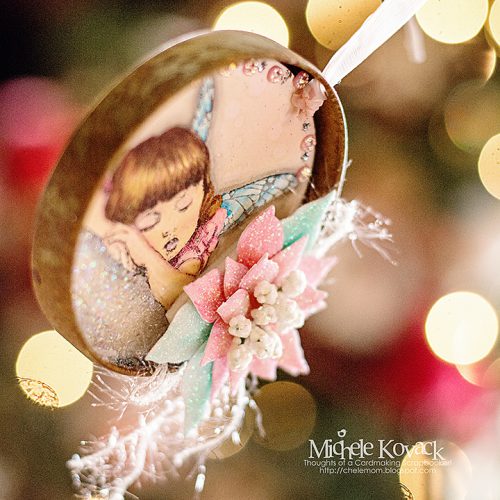
This vintage ornament is something I wanted to share with you today. Over the summer, I have been distressing old lids by soaking them in a vinegar and water mixture.
Hi there! Michele here and I did a bunch of them to save for vintage-inspired projects like this one. Let me show you how I created this ornament!
Thanks for stopping by!
Michele
Scrapbook Adhesives by 3L®:
Crafty Foam Tape
Dodz Adhesive Dots Medium
HomeHobby by 3L®:
Dual Tip Glue Pen
Other:
Rusty Lid, Stamp (Crafty Secrets), Glitter (Martha Stewart), Wink of Stella pen, Etched Dies (Spellbinders), Copic Markers, Gems (Queen & Co.), string, flower centers, black ink
Do you love the look of Shaker Cards but find them a little intimidating to make? I always thought they would be really challenging. BUT once I discovered the Keepsake Envelopes, the creation of Shaker Cards got a lot easier. Today I am going to show you how I created a simple Buffalo Plaid Shaker Card featuring Keepsake Envelopes.
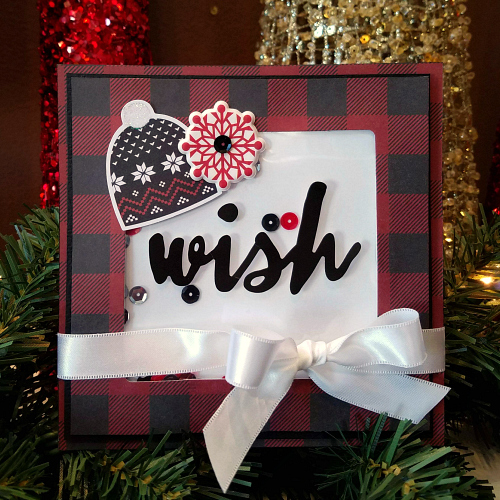
I knew I wanted to keep things simple with a white background because I wated to be able to incorporate the trendy Buffalo Plaid patterned paper I had on hand.
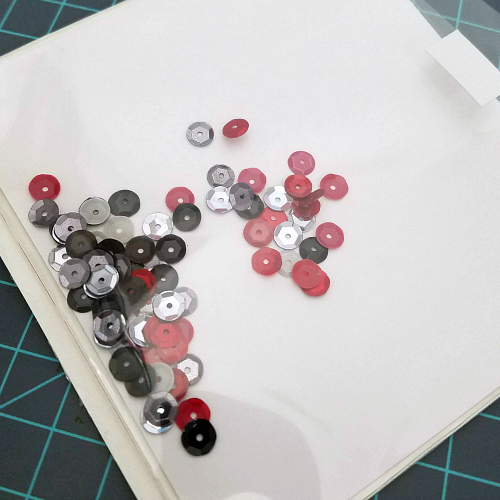
I started things off by adding white cardstock into this envelope. It’s the biggest envelope in the pack measuring 5 inches X 4.6 inches. I then added sequins into it. I did spend some time debating whether to use a patterned paper in lieu of white. Ultimately I thought that would make things too busy so I stuck with white.
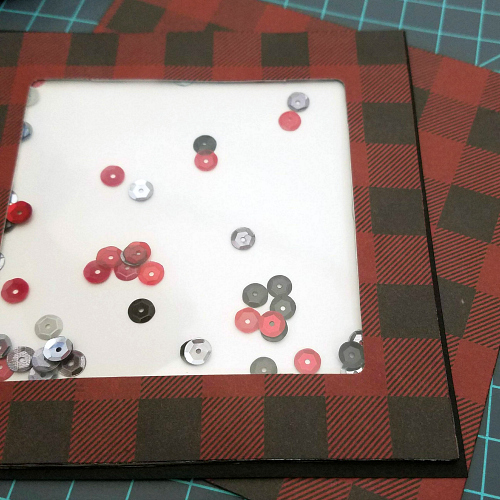
I cut out a 5 inch by 5 inch frame and used my E-Z Runner® to secure that to the front of the Keepsake Envelope. Next I peeled the adhesive backing off of the Keepsake Envelope and adhered it to black cardstock. I cut the black cardstock to be a 5 1/4 inch square so it would act as a mat for the shaker.
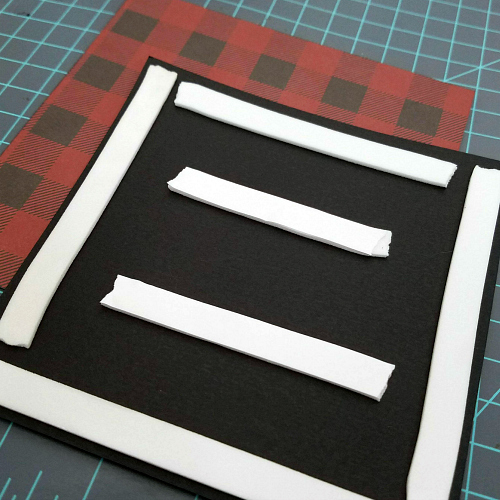
Following that I pulled out my Crafty Foam Tape and used it on the perimeter and center of my black cardstock. I attached that to the base of my card which was already covered in the same Buffalo Plaid patterned paper. Although I thought it might not work to have them up against each other, I actually like how unique it looks!

Lastly I added embellishments – a sticker sentiment and a couple stickers along with a ribbon bow. I secured the ribbon with a couple of Dodz Adhesive Dots Mini to make sure it would stay in place.
Thanks so much for joining me today.
Scrapbook Adhesives by 3L® Used:
E-Z Runner® Permanent Strips Refillable Dispenser
Crafty Foam Tape White
Keepsake Envelopes
Dodz Adhesive Dots Mini
Other Supplies: Patterned Paper & Stickers from Photo Play Paper, Stickers from Carta Bella, Ephemera from My Mind’s Eye
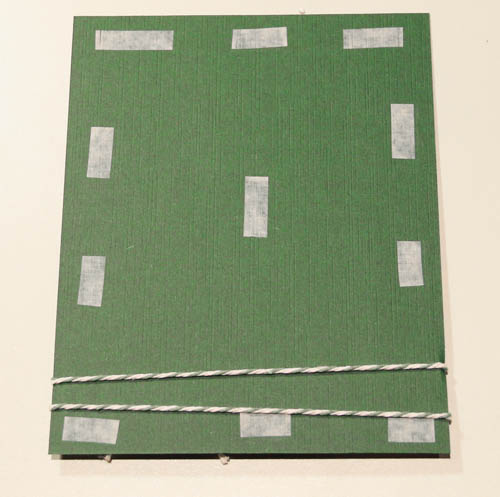
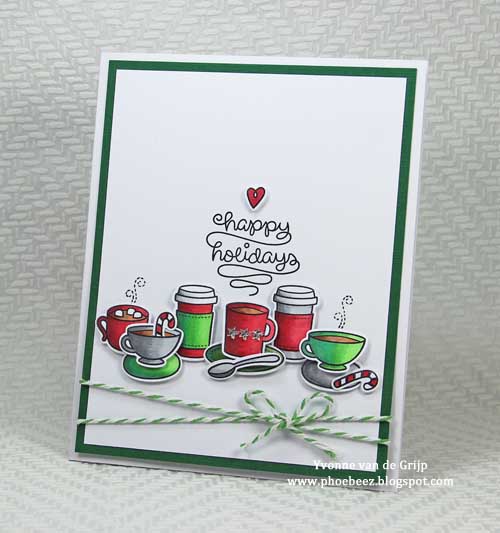
A sweet and warm Coffee Christmas Card greets you for the Coffee Lovers Winter 2017 Blog Hop! Yvonne van de Grijp created this card using a combination of E-Z Runner® Permanent Strips Refillable Dispenser and 3D Foam Squares White Mix to share with you today.
We are excited to be a participant and a SUPER SPONSOR too! The Coffee Lovers community is a coffee-loving (or tea or cocoa) group of card makers open to everyone. Their blog serves up inspirational coffee-related posts and seasonal coffee blog hops that anyone can join! Blogging participants get a chance to win giveaways!
How I love the smell of a freshly brewed cup of coffee in the early morning! Especially in winter when it’s still a bit chilly and overlooking the cold (and in Holland often wet) weather outside. So for all you coffee lovers, I made a coffee themed Christmas card – perfect for the season and friends!
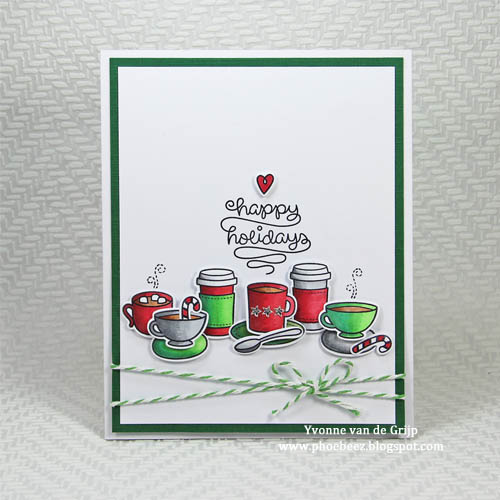
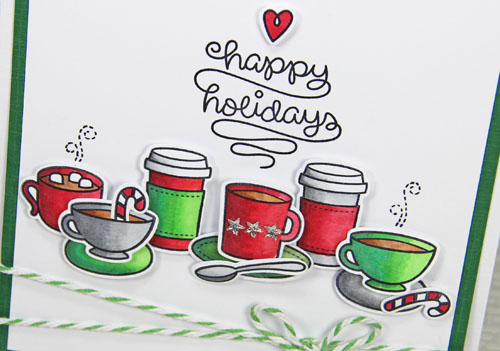
Here’s a second look at the card.
Scrapbook Adhesives by 3L® Used:
E-Z Runner® Permanent Strips Refillable Dispenser
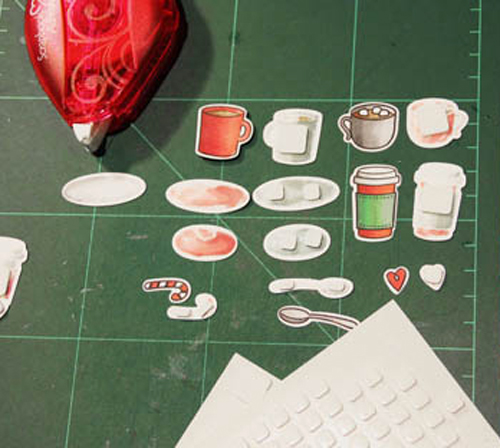
3D Foam Squares White Mix
Other supplies used:
Stamps and Etched Dies: Lawn Fawn (Love You Latte Stamp and Dies Set); Black Ink; Acrylic Stamp Block; Copic Markers; Star-shaped Rhinestones; Paper Trimmer
For more inspiration and to link up, click: Coffee Lovers Winter 2017 Blog Hop

If you cannot see the comment section (at the bottom of this post), please CLICK: Coffee Christmas Card with Coffee Lovers and scroll down to the bottom of the post.
Connect and Stick with 3L!
Visit our Website and Bookmark our Blog!
Sign up for our Newsletter so you never miss a contest or giveaway!


