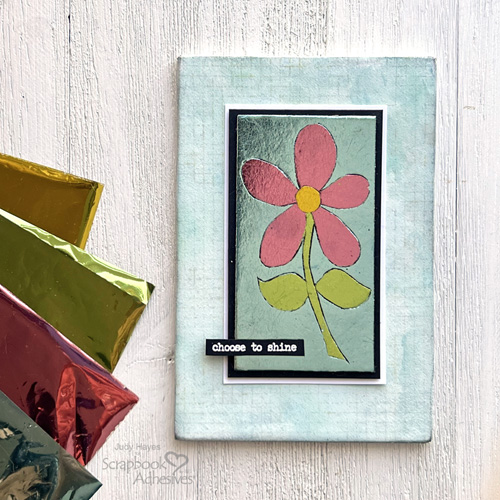
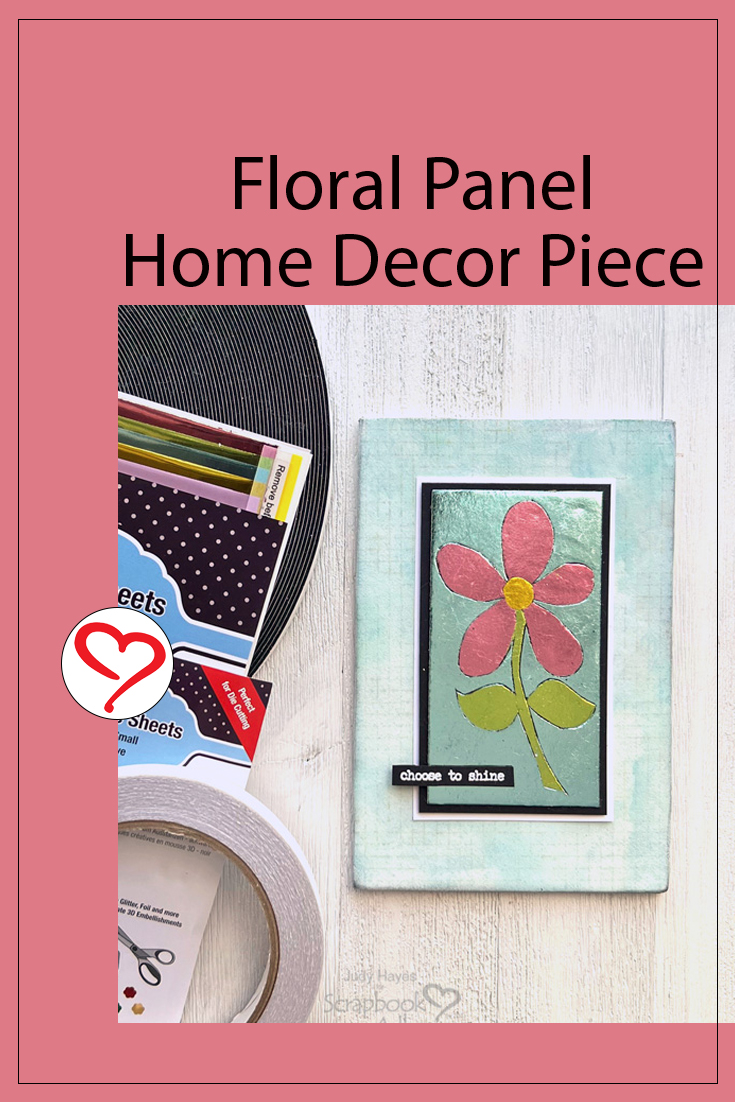
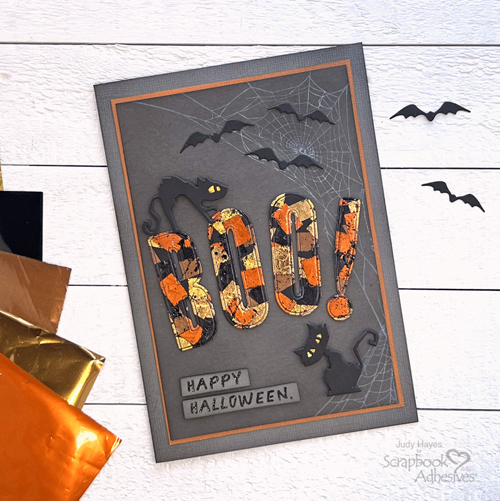
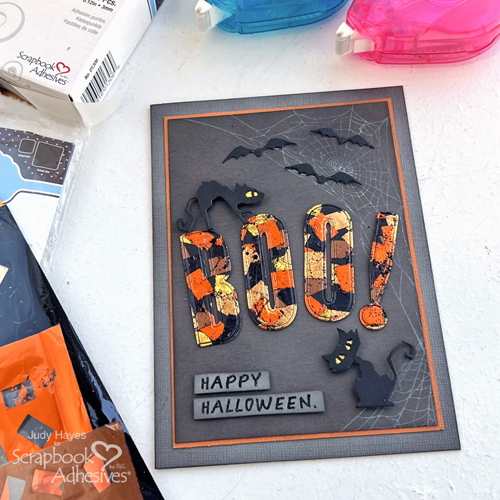
Hi, Judy here today to share a BOO! Halloween card. I had fun using Metallic Transfer Foil Sheets Nature Colors and Metallic Transfer Foil Sheets Celebrate Colors with E-Z Squares® Refillable Dispenser to make a collage of foil from which to cut letters for BOO!. And look at those cat’s eyes with some holographic foil to make them glow!
BOO! Card Base Layers
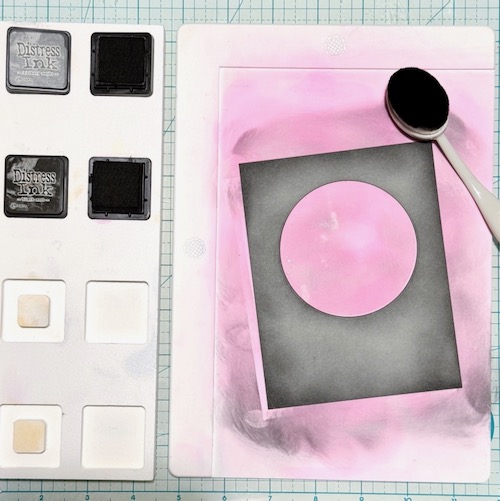
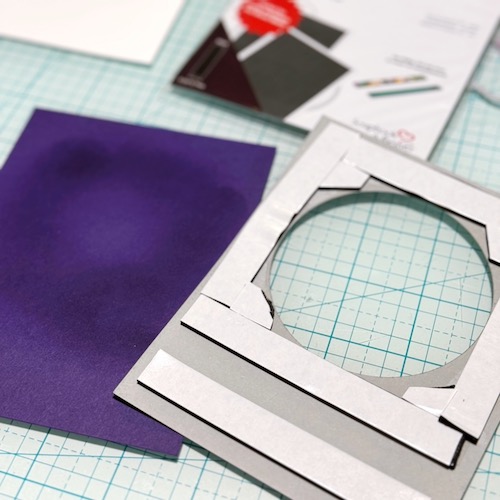
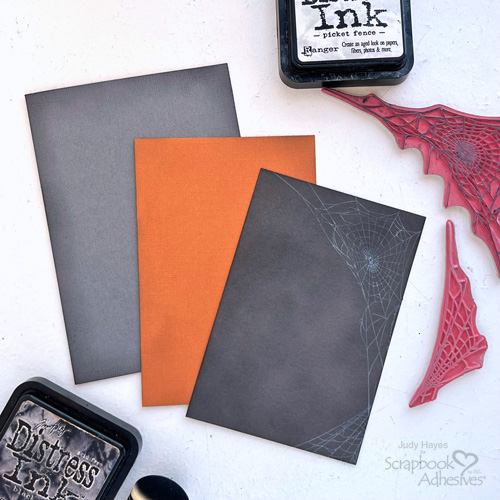
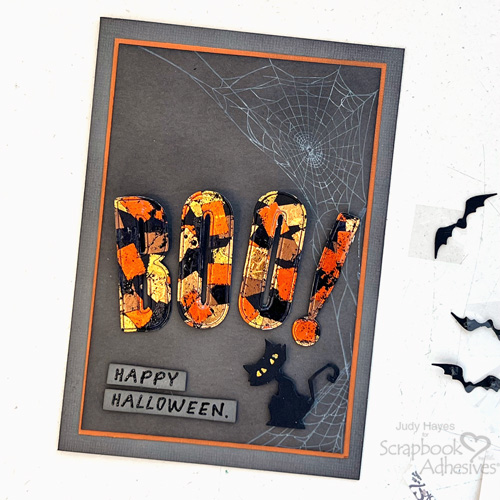
For the card, cut gray cardstock 9 x 6.5 inches, score, and fold to form a 4.5 x 6.5 inch card. Lightly rub Distress Black Soot Ink around the edges.
Cut orange cardstock 4 x 5.875 inches and lightly rub Distress Black Soot around the edges.
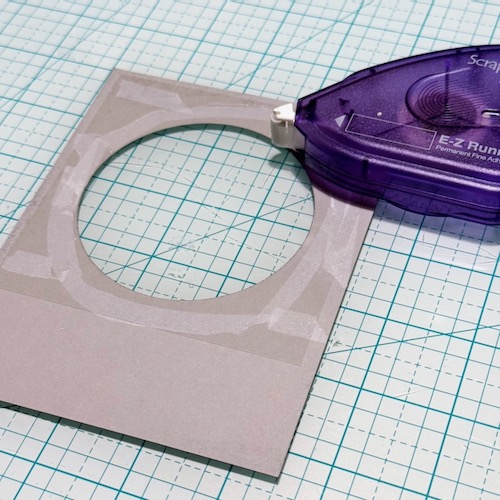
From gray cardstock, cut a 3.875 x 5.75-inch rectangle.
Background
Apply Distress Black Soot ink with a foam applicator to rub darker ink around the edges of the gray cardstock layer. Then blend the ink across the entire piece. Use a heat gun to dry the ink.
Ink web stamp with Distress Picket Fence ink and stamp on the top right corner. Also, stamp a small web at the bottom right corner.
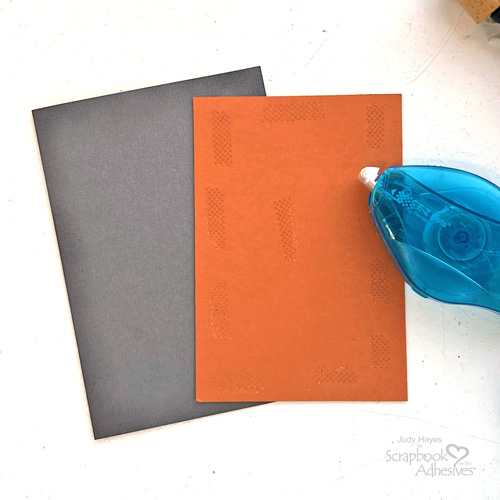
Adhere the gray piece to the orange mat using the E-Z Dots® Permanent Refillable Dispenser. Then attach it to the card front with the same adhesive.
Die Cut Pieces
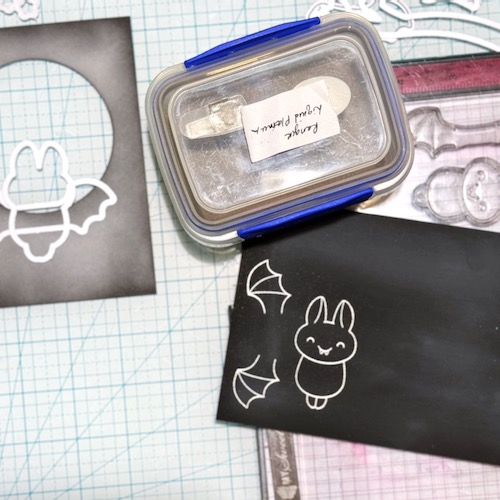
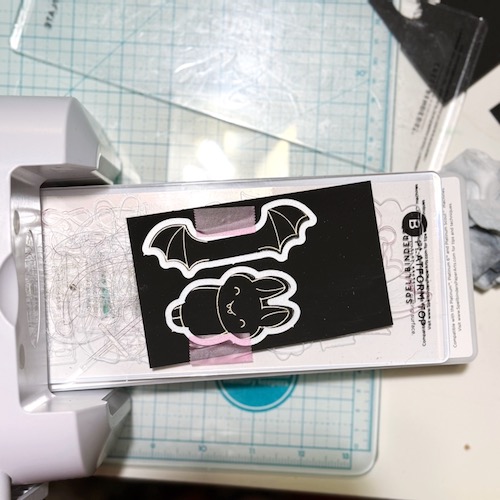
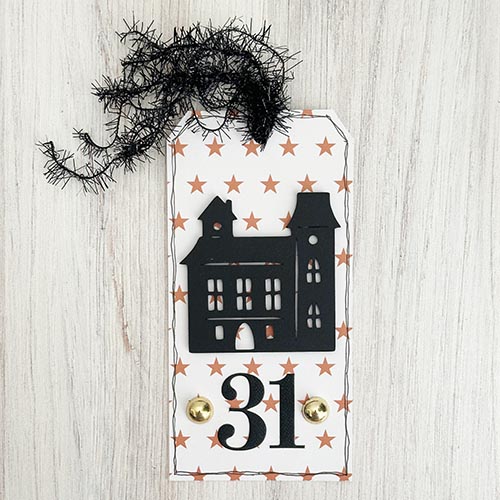
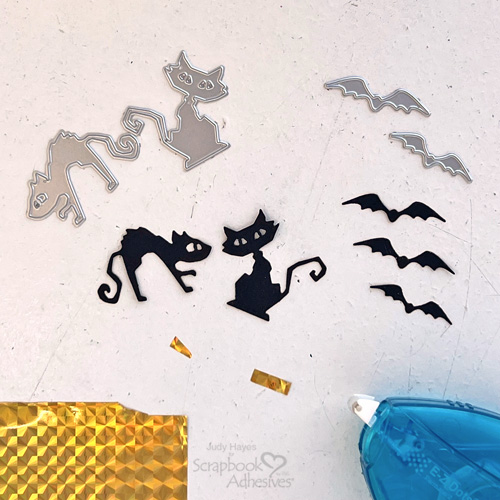
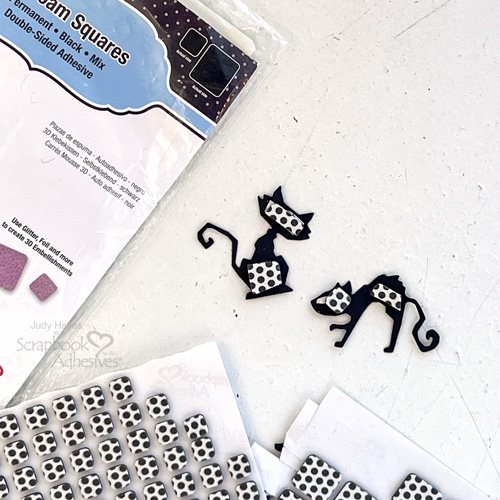
Die-cut two cats and three bats from a piece of black cardstock. I used dies and a die-cutting machine.
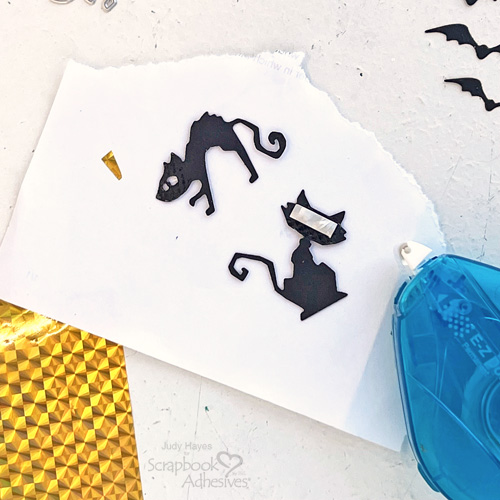
Place the cats facing down on scrap paper and apply the E-Z Dots® Permanent Refillable Dispenser over the heads and eyes. Excess adhesive dots will stick to scrap paper. Cut tiny pieces of gold foil from Metallic Transfer Foil Sheets Celebrate Colors to fit over each cat. Secure the foil to the back of each cat’s head with the gold side down to show through the eyes.
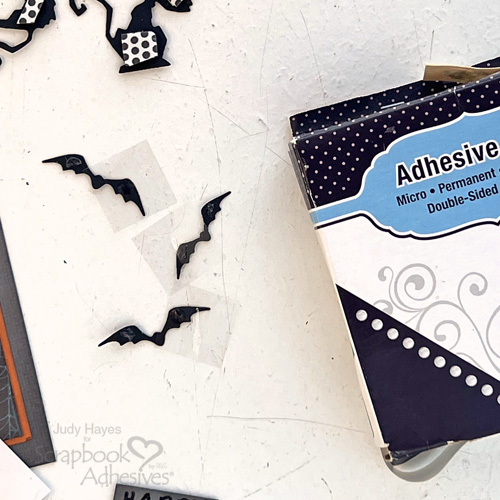
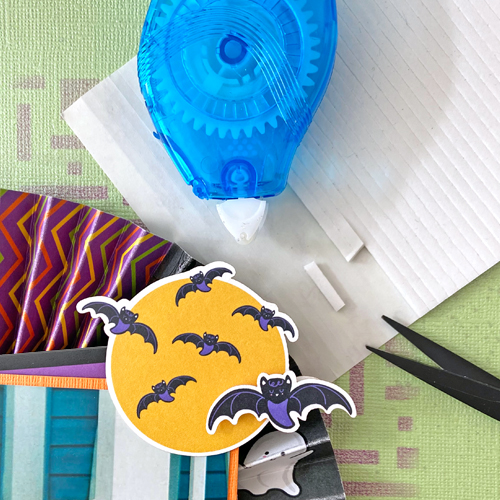
Cut 3D Foam Squares Black Mix to fit on the back of each cat’s head and body. Apply Adhesive Dots Micro to the back of the bats’ wings.
Stamp Greeting
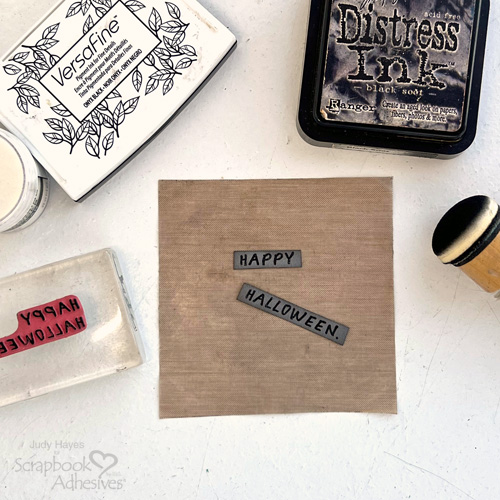
On a scrap of gray cardstock, stamp the greeting using Versafine Black Onyx ink, cover with clear embossing powder and heat emboss with a heat tool. Cut the greeting apart into two strips.
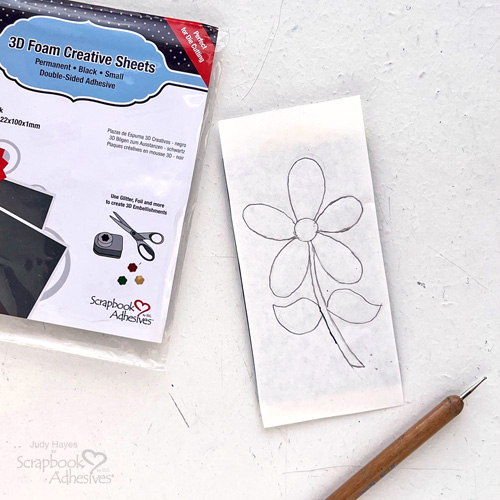
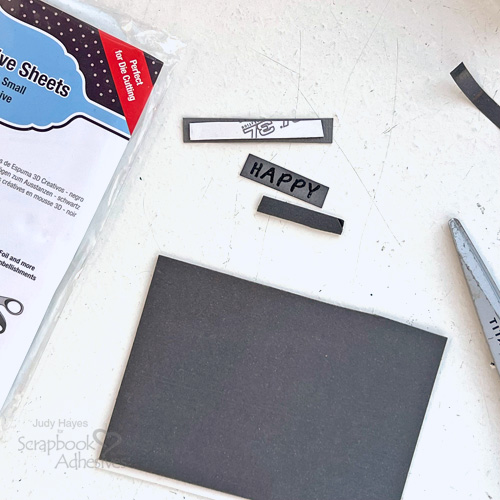
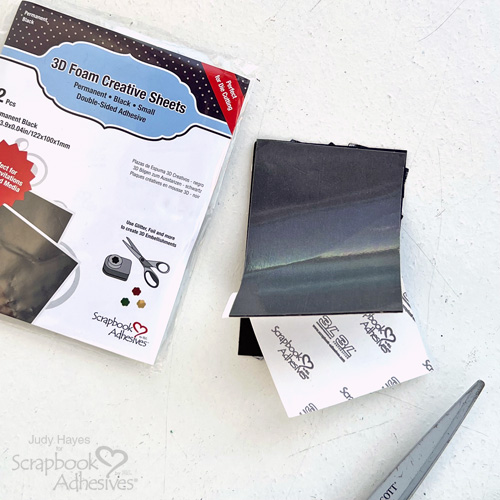
Cut pieces of 3D Foam Creative Sheets Small Black to fit the back of each verse strip, peel the liner, and attach them to the back.
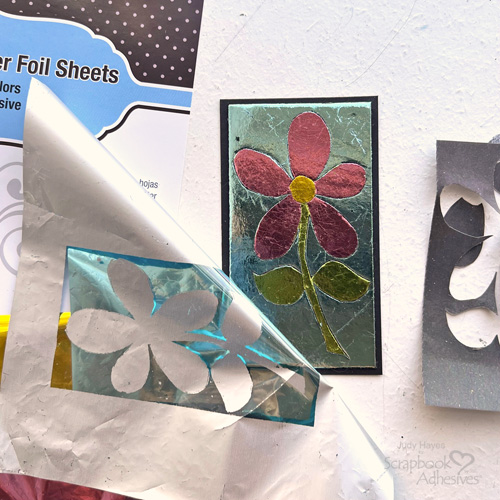
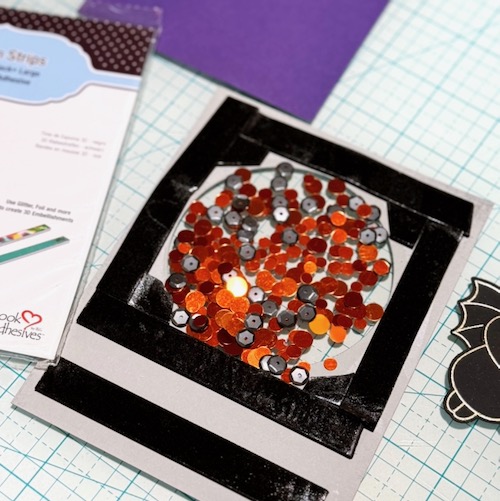
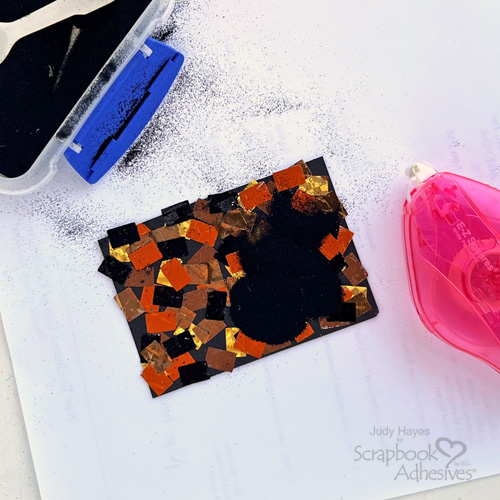
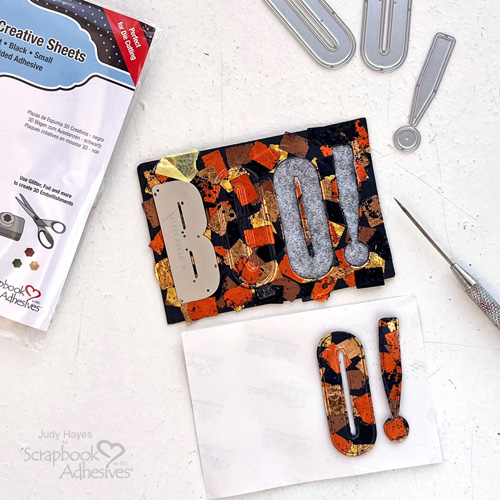
Cut a piece of black cardstock large enough to fit all letter dies for the word “BOO!” Randomly apply the E-Z Squares® Refillable Dispenser across it. Press gold foil from Metallic Transfer Foil Sheets Celebrate Colors over each square. Then add more adhesive squares and press orange, brown, gold, and black foils from Metallic Transfer Foil Sheets Nature Colors. Overlap some colors and repeat colors to fill in spaces as desired.
Cover the entire foiled piece with black embossing powder, remove excess but allow some powder to cling to the foils, and heat emboss with a heat tool. The heat tool will melt the embossing powder and create a texture in the foils.
Cut a piece of 3D Foam Creative Sheets Small Black the same size as the foiled piece, peel the liner, and apply to the back.
Cut Foil Letters
Place the letter dies “B, O O !” on the foiled piece, tape it in place, and run it through a die-cutting machine. Designer Tip: If you want to use the negative space for another project, place them in a line or allow space to cut them apart.
Carefully peel each letter off and place them on a scrap of release paper or a nonstick craft mat. Carefully remove the centers of “B” and “O” and put them back in place in cut-out (if you want to use them for another project).
Attaching the Pieces to the Card
Arrange pieces on the card to determine spacing.
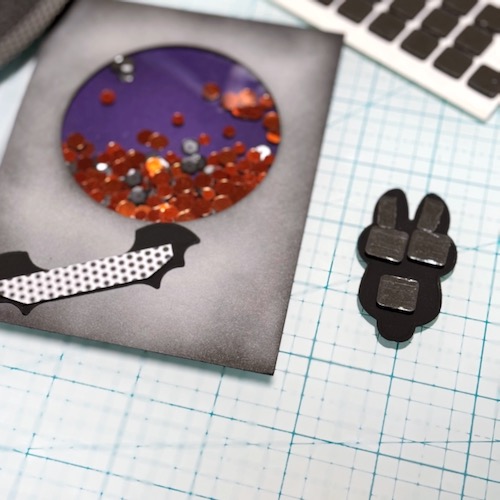
Peel liners from verse strips and place them near the bottom left corner of the card. Lightly place BOO! across card. If lightly placed, letters can be moved as needed. Press firmly in place once letters are placed as desired. Remove liners from the back of the sitting cat and secure it in the bottom right corner.
Remove liners from the standing cat and position it at the top of the “BOO!” Next, peel the liners from the bats and place them at the top of the card…and it’s finished!
BOO! Happy Halloween!
Thanks for visiting!
Judy Hayes
Creative Time: 45 mins
Skill Level: Advanced
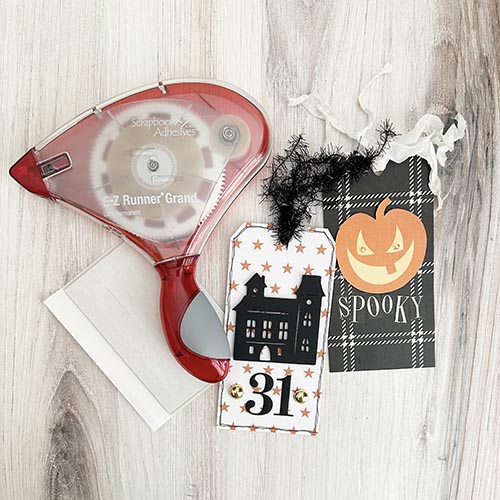
Materials Needed:
Scrapbook Adhesives by 3L®
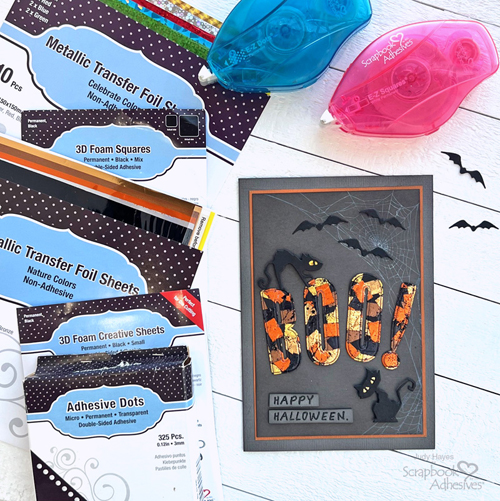
E-Z Squares® Refillable Dispenser and E-Z Dots® Permanent Refillable Dispenser
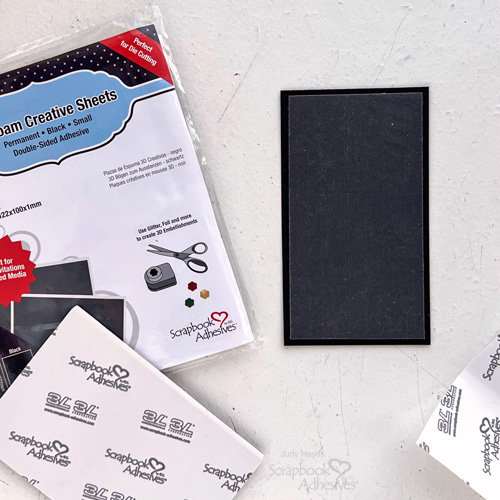
3D Foam Squares Black Mix and 3D Foam Creative Sheets Small Black
Adhesive Dots Micro
Metallic Transfer Foil Sheets Nature Colors and Metallic Transfer Foil Sheets Celebrate Colors
Other: Stamp: Stampers Anonymous (Tim Holtz Unraveled); Ink: Imagine Crafts/Tsukineko (Versafine Onyx Black), Ranger Ink (Distress Black Soot, Distress Picket Fence); Embossing Powder: Ranger Ink (Clear, Black); Craft Dies: Sizzix (Tim Holtz Toil & Trouble, Alphanumeric Bulletin); Medium Gray, Orange + Black Cardstock
Save to Pinterest!
Visit our Website and Blog!
Sign up for our Newsletter so you never miss a contest or giveaway!