You are in our US store • Switch to Europe store

Always Remember Card with Tissue Tape Background

Happy Saturday! Today is my turn on Scrapbook Adhesives by 3L® Blog 🙂
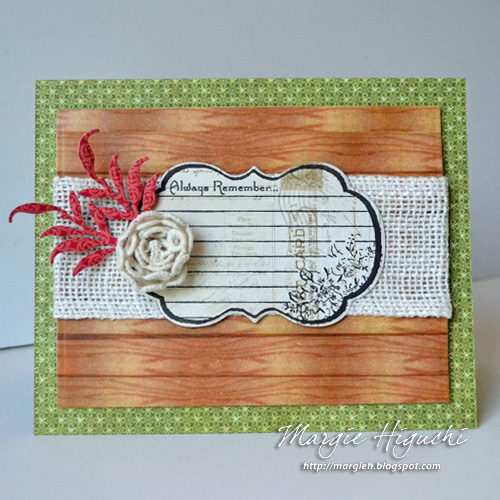
Always Remember Card by Margie Higuchi for Scrapbook Adhesives by 3L

Using Tissue Tape Ash and Oak set, I covered a piece of white cardstock with Oak tape. Then die cut it to create a card panel.
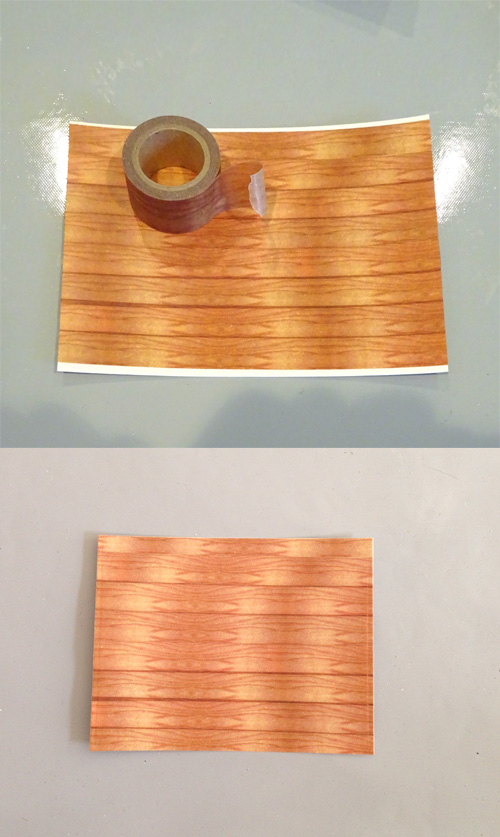
MargieHiguchi AlwaysRememberCd Jul1716 Step1n2

To adhere my piece of 5.25″ White Burlap, I used Premium Double-Sided Tape 1″ Permanent and placed it horizontally across the card panel.
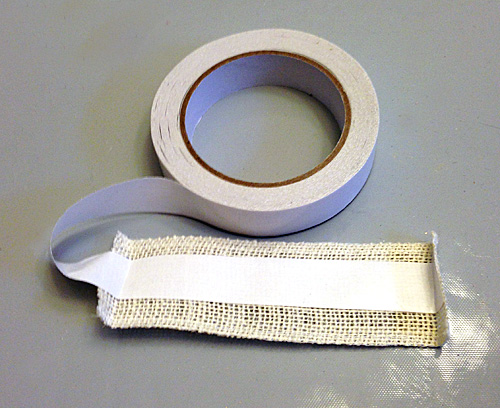
MargieHiguchi AlwaysRememberCd Jul1716 Step3

Next I stamped an image over a light patterned paper. To die cut, I placed the coordinating die from the same set and went through my machine. Adhere on top of the ribbon on the card panel with E-Z Runner® Ultra Refillable Dispenser.
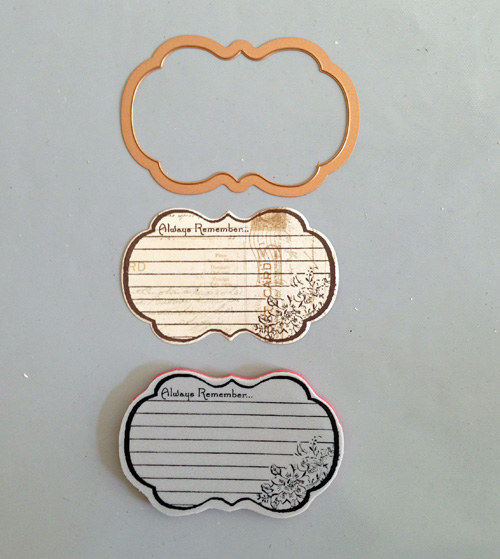
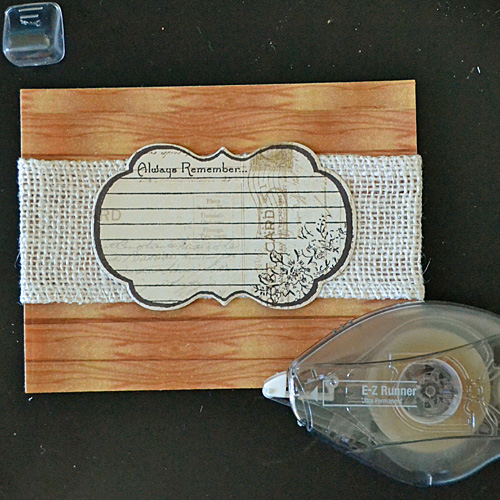
MargieHiguchi AlwaysRememberCd Jul1716 Step4MargieHiguchi AlwaysRememberCard Jul1716 Step5

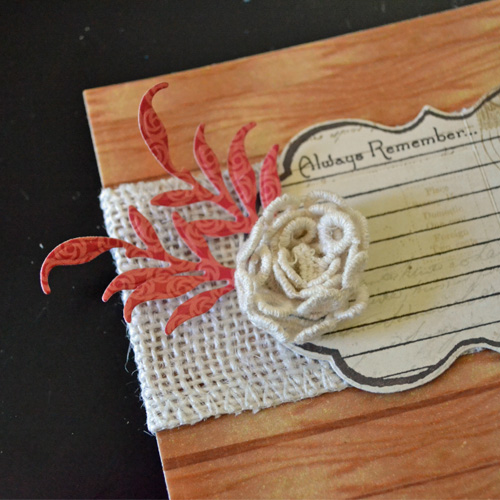
With the leaf die templates, I cut with patterned paper to use as accents. Place them on the left side of the stamped die cut on the card panel with a Dodz Adhesive Dots Medium.
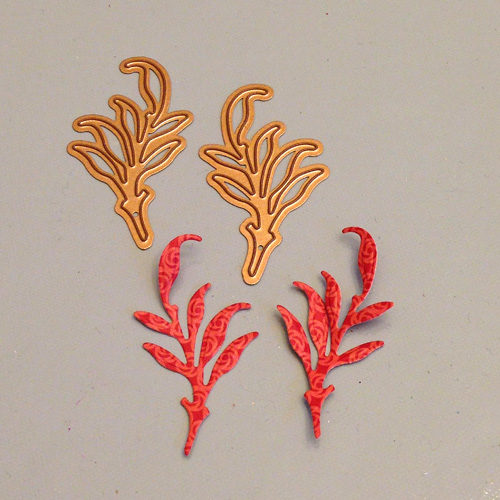
MargieHiguchi AlwaysRememberCd Jul1716 Step6

Using Dodz Adhesive Dots, I rolled Crocheted Scalloped Eyelet Trim from the Lace Ribbons round and round until I got the desired look. Just place on top of the leaf accent die cuts on the card panel.
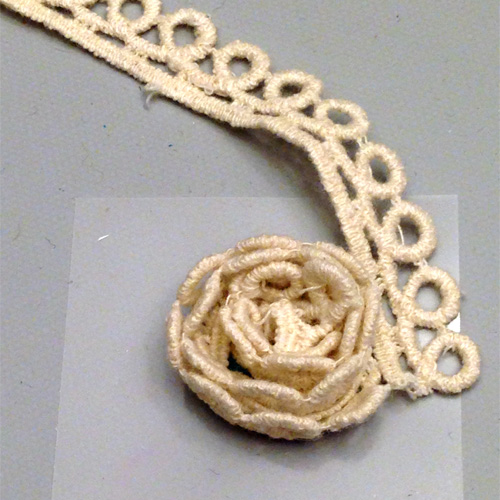
MargieHiguchi AlwaysRememberCd Jul1716 Step6A

MargieHiguchi AlwaysRememberCd Jul1716 Step7

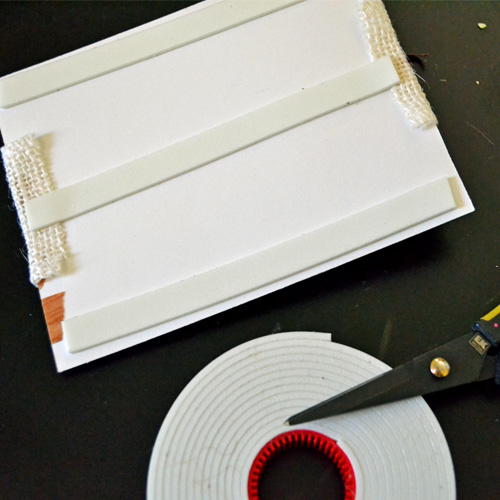
With the Crafty Foam Tape White, adhere the card panel on top of a 6 x 5″ card base.
MargieHiguchi AlwaysRememberCd Jul1716 Step8

Now it’s ready to be sent to someone special!
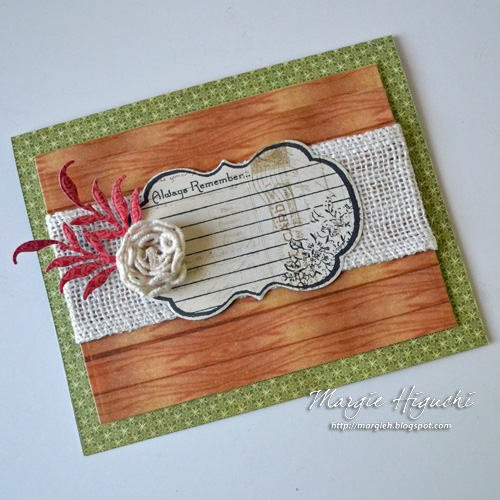
Always Remember Card (angled) by Margie Higuchi for Scrapbook Adhesives by 3L


Always Remember Card by Margie Higuchi for Scrapbook Adhesives by 3L

I hope you enjoyed my tutorial!

Thanks for stopping by 🙂
Margie Higuchi

Supplies:

Scrapbook Adhesives by 3L®:
Crafty Foam Tape White
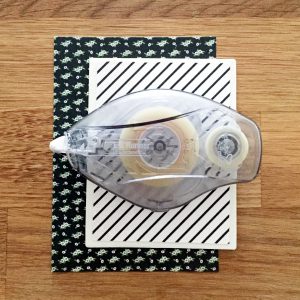
E-Z Runner® Ultra Refillable Dispenser
Dodz Adhesive Dots Medium

Home Hobby:
Premium Double-Sided Tape 1″ Permanent

Tissue Tape Ash and Oak
Texture Ribbons
Lace Ribbons

Dies/Stamps (Spellbinders® Creative Arts); Score Tool (Scor-Pal); White Cardstock; Patterned Papers
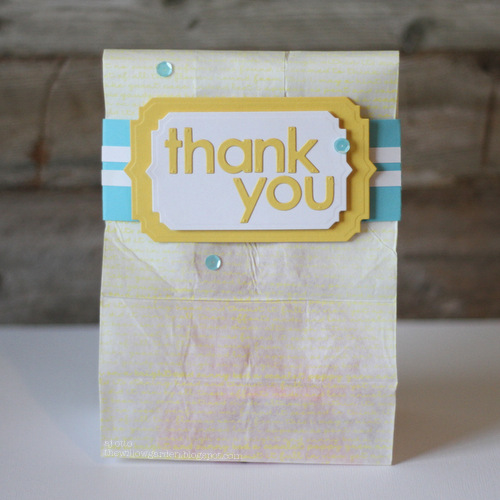
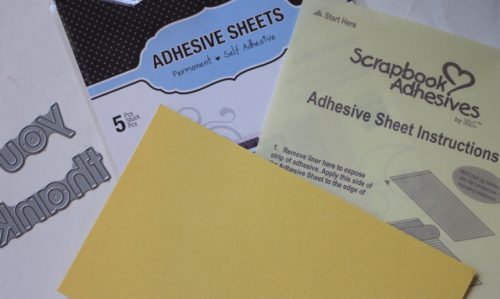
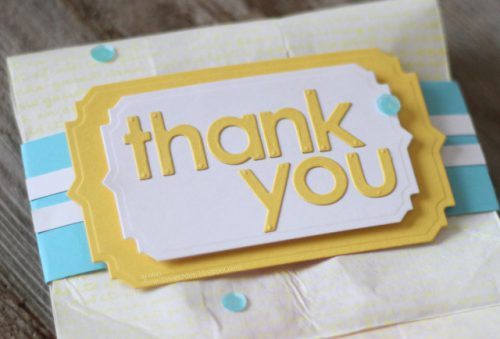
Thank You Gift Bag Tutorial using Adhesive Sheets and Die Cuts

Happy FRIDAY! AJ here to share a tip on how to use our Adhesive Sheets and Tissue Tape to perfectly align your letter die cuts!


AJOtto-TYBag-1

I love the idea of personalizing any sort of gift bag, party favor, etc. but I know (especially with kids) they just git ripped open and ruined and thrown in the trash.  So, I thought maybe a reusable gift bag belly band wrap might work…worth a try, right? 😉

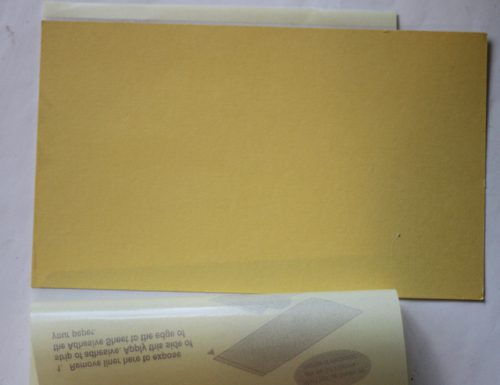
AJOtto-TYBag-2To get started, you will need your favorite die cuts, card stock, and our Adhesive Sheets, I use the 6 X 12 size because it perfectly fits in my die cut machine.
AJOtto-TYBag-3

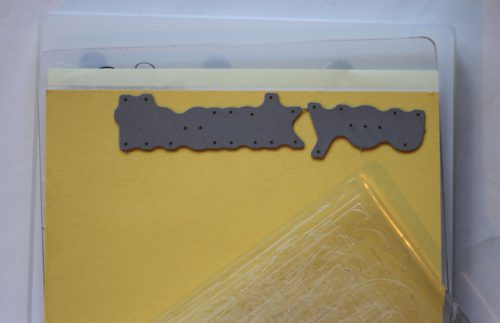
Pull back the liner of the Adhesive Sheet, and place the card stock against the sticky part.  (Mine extends beyond, so I just trim it off) You can lay the liner back over the card stock and lightly burnish with a scoring tool to make sure it’s all adhered to the adhesive.

AJOtto-TYBag-4
Now, because I am using this to adhere my letters to my project, I want the back side of my letters to have the adhesive.  (You can add the adhesive to the front if you are interested in adding glitters, or foil, or other materials as seen here) Lay your dies cutting side down as shown to achieve this.  You would simply flip the Adhesive Sheet over and place the dies on the other side for the fronts to be covered in adhesive.
AJOtto-TYBag-5

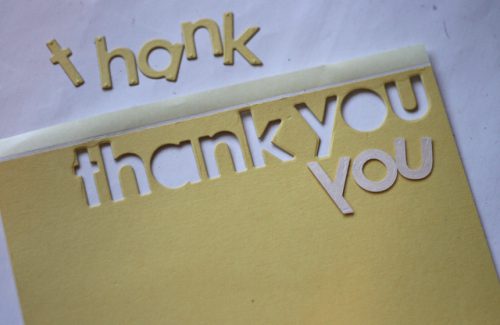
The end result is this, your letters perfectly cut out with adhesive backing to add to your project!

AJOtto-TYBag-6

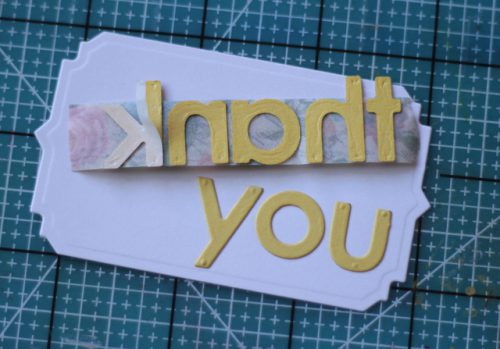
When you have individual letters like shown above, lining them up one by one is painful.  I often use the Tissue Tape to solve this.

AJOtto-TYBag-7

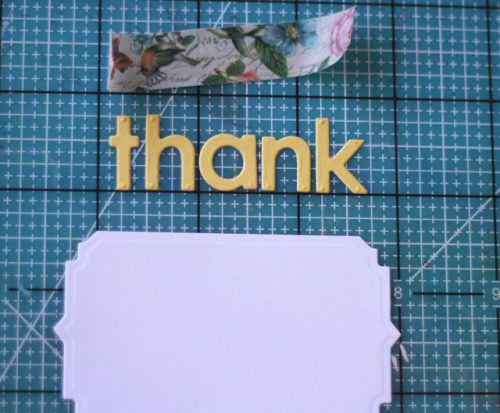
Lay your letters as you would like them spaced on your mat, and place a piece of  Tissue Tape over them to hold them in place. (Die cut is used for spacing template)

AJOtto-TYBag-8

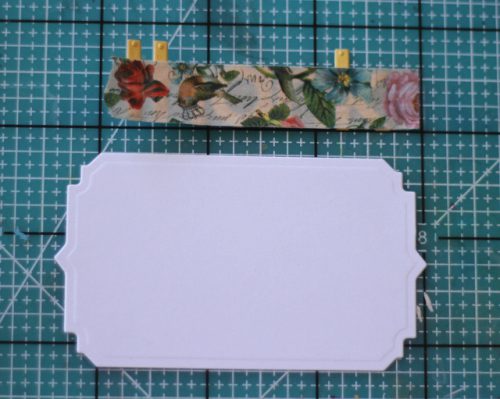
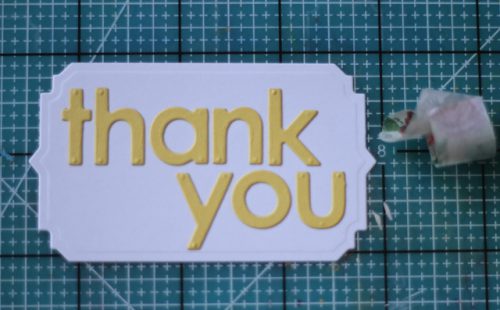
Now, remove backing off each one and you can place down in one perfectly spaced word as opposed to individual letters.

AJOtto-TYBag-9

The end result in two simple steps.
AJOtto-TYBag-10
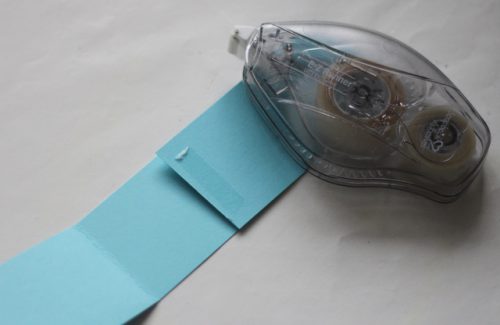
Next, I have created a belly band to wrap around my bag, and love to use the E-Z Runner® Ultra to hold anything that will be fidgeted with upon opening and reusing. AJOtto-TYBag-11

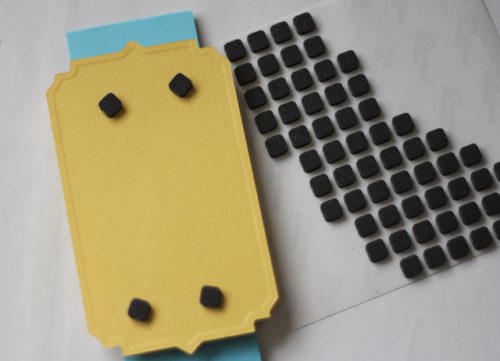
Next, to add some dimension, pop up varying die cuts to each other using 3D Foam Squares.
AJOtto-TYBag-12Lastly, adhere a few fun sequins using our perfectly sized Dodz Mini Adhesive Dots.  To assemble, I folded the bag over and slid the belly band over and then pulled out a bit on the upper half that I wanted to extend beyond the label.  You can slide it up and down to your desired placement.
enjoy! AJ

Scrapbook Adhesives by 3L® Products used: Adhesive Sheets, E-Z Runner® Ultra, E-Z Runner® Micro Refillable3D Foam SquaresDodz Mini Adhesive Dots

Other products used: Stamps &  Letter Dies- My Favorite Things; Sequins & Ink-Avery Elle; card stock, label dies- Spellbinders

Shaking Things Up with Crafty Foam Tape

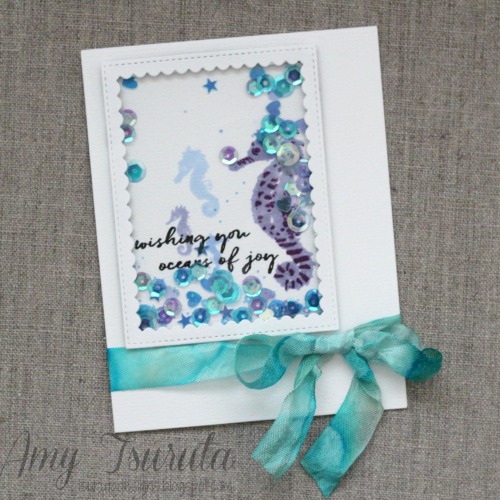
Hello!  It’s Amy here with a Shaker Card.  I know that the shaker rage has been around for awhile but I still get comments from people that they want to try making them.  I think that I’ve made more in the last year than I ever have.

AmyTsuruta-Oceans of Joy-1

Would you be able to guess what I used for the shaker adhesive?

AmyTsuruta-Oceans of Joy-2

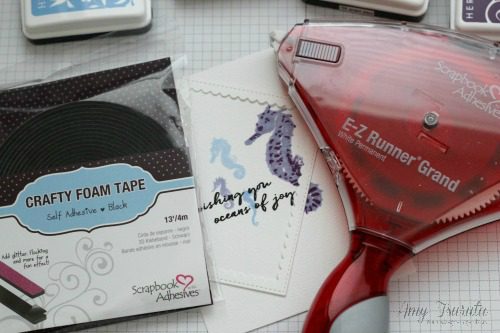
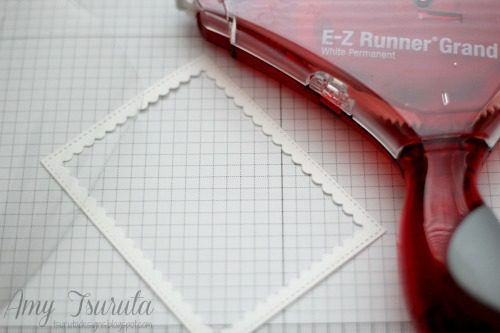
Crafty Foam Tape in black!  I love a good challenge and wanted to see if I could actually use the black on a white card.  Let’s get to the basics of how I put my card together.  I started off with the scalloped die cut frame.I used the E-Z Runner® Grand Dispenser to adhere the acetate panel to the die cut frame.

AmyTsuruta-Oceans of Joy-3

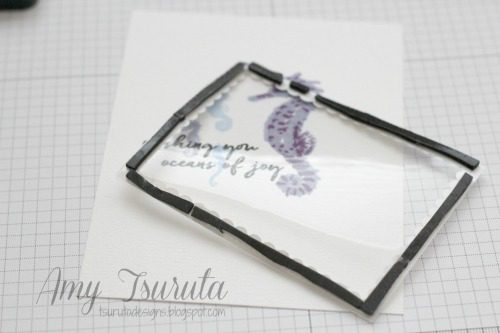
Next up is the Crafty Foam Tape:

AmyTsuruta-Oceans of Joy-4

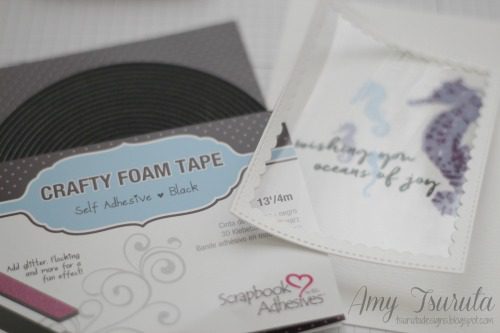
I’m a frugal adhesive user.  What does that mean?  Well, I literally snip the Crafty Foam Tape to the length that I want it and then divide that strip into thirds.

AmyTsuruta-Oceans of Joy-5

Cutting it that way makes so that it doesn’t show up in my project.  The beauty of the Crafty Foam Tape is that it HOLDS the shape.  I’ve used a bunch of different adhesive and not many can stand up to being cut that narrow and not becoming deformed.

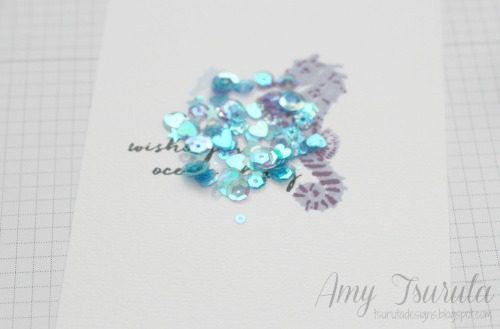
The next step is the shaker contents.  I pile them onto the base panel.

AmyTsuruta-Oceans of Joy-6

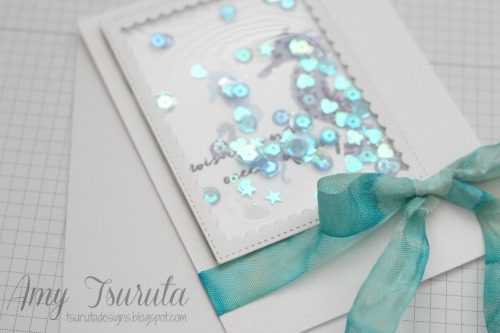
Then I position the frame die cut to where I want it to be situated.  When that has been completed.  I finish off the panel with any other embellishments.  I decided to top off my card with some crinkle ribbon.

AmyTsuruta-Oceans of Joy-7

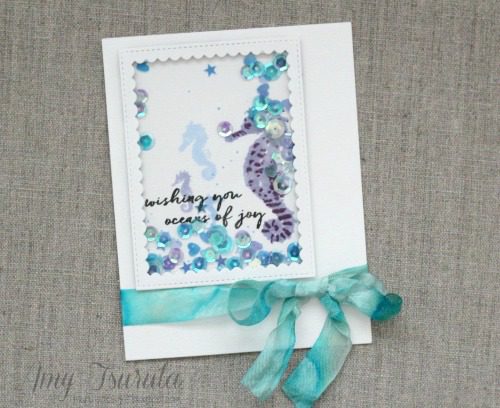
I used the E-Z Runner® Grand Dispenser to adhere the panel to my card base.

AmyTsuruta-Oceans of Joy-8


There you go!  I hope for those of you that haven’t designed a shaker card yet, that this might be the inspiration that you need.  They really are pretty easy to make and they packed so much of a punch.  It is always fun finding the perfect shaker mix to compliment your design.

Thanks so much for stopping by!

Amy Tsuruta 

SUPPLIES
Scrapbook Adhesives by 3L®:
E-Z Runner® Grand Dispenser
Crafty Foam Tape – Black

Other products:
Cardstock: Bazzill
Stamps:  Hero Arts
Ink:  Hero Arts
other:  Lucy’s Card Mermaid Sequin mix exclusive to Hero Arts, Pretty Pink Posh Scallop Frame, DL. ART crinkle ribbon


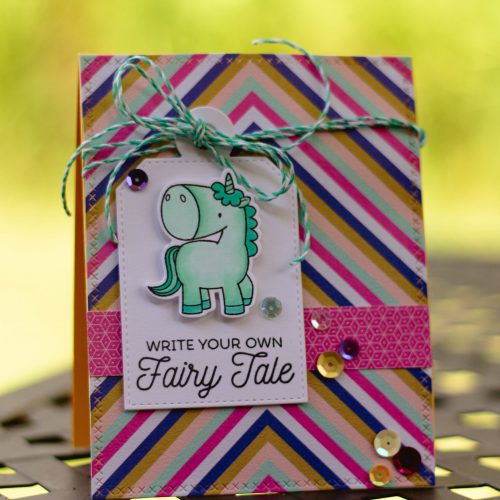
Unicorns Are Real! Fun Fairy Tale Card using 3D Foam Squares

0716unicorncard2_LatishaYoast


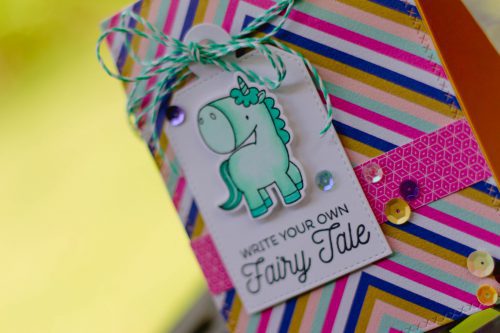
Hello, Latisha here with you today, sharing a bright & fun unicorn card.  I recently colored a bunch of unicorns from this particular stamp set, so assembling this card was actually very fast.  Its nice to have already colored images on hand, for when you need to make a card fast!  I love unicorns, and I love this sentiment.


0716unicorncard3_LatishaYoast


Instructions:

  1.  Adhere die cut panel to the card base using MyStik® Permanent Strips.
  2. Adhere pink pattern paper to the front.
  3. Die cut tag using white card stock.  Adhere using Thin 3D Foam Squares (white, regular).
  4. Adhere the unicorn die cut using Crafty Foam Tape White.
  5. Add twine to the top of the card.
  6. Adhere the sequins to the card using Adhesive Dots Mini.

Materials Used:
Scrapbook Adhesives by 3L®:
MyStik® Permanent Strips
Thin 3D Foam Squares – White, Regular
Scrapbook Adhesives by 3L Crafty Foam Tape White
Adhesive Dots Mini

Others: Yellow and White card stock; Fancy Pants Designs pattern paper; Sequins; Twine; Lawn Fawn die cuts; MFT stamps and dies

Watercolors and Coffee Card!

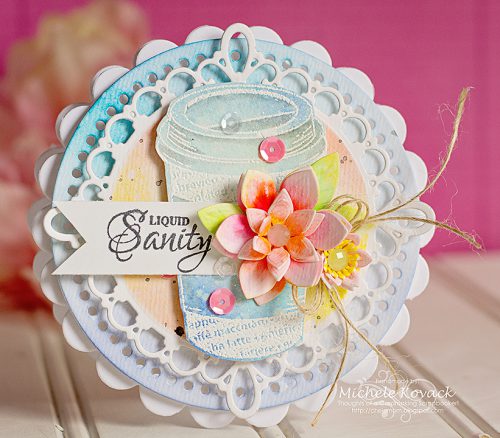
Good morning! Michele here with a card that truly speaks to me.  Coffee. Gotta have it. Every. Day. 😉

liquid sanity

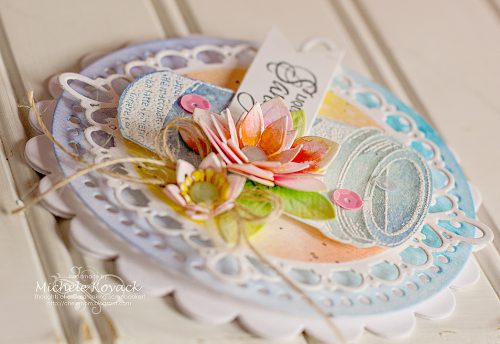
I stamped and embossed the coffee cup in white and gave it a wash of water colors in shades of blue.  The flowers were also water colored and assembled using the Dodz Adhesive Dots Mini (For the smaller pieces) and the Dodz Adhesive Dots Medium, to attach to the coffee cup and sentiment.

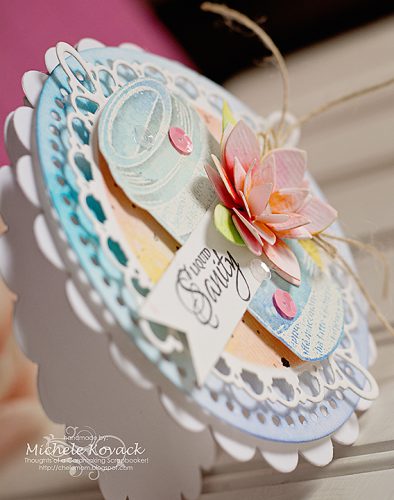
liquid sanity2

I attached the coffee cup/flower/sentiment to the die cut background using 3D Foam Squares.  The card base itself was created using various circle dies and water colored.  Each layer was adhered using Crafty Foam Tape. I love the depth these adhesives give to my projects! For my finishing touches I added a few sequins (again, using Dodz Adhesive Dots Mini) and a bit of rustic twine.

liquid sanity3

Thank you so much for stopping by today!

Supplies:
Scrapbook Adhesives by 3L®:
Dodz Adhesive Dots Mini
Dodz Adhesive Dots Medium
Crafty Foam Tape in white
3D Foam Squares White Regular
Others: Stamp Set and Die Cuts (JustRite PaperCraft); Sequins (DoodleBug Designs); Watercolors (Zig Kuretake)

Little Square Mini Album for Instagram Photos

Hi there,

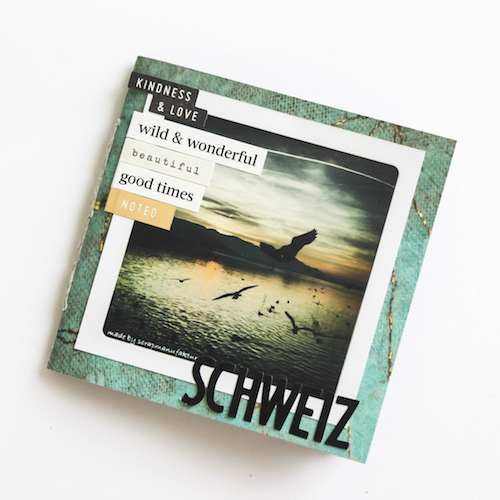
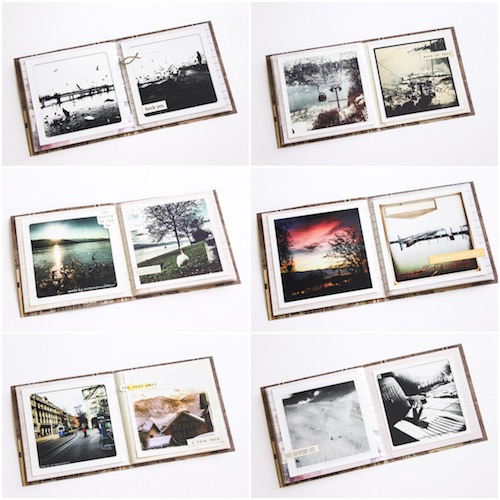
It’s Stephanie here today. I love to take pictures and I love the social network in Instagram. There are a lot of creative people and we all share the joy of scrapbooking, cardmaking and mixed media together. Some years ago I made a lot of landscape photos of where I lived and some of them I wanted to archive in a small little Mini Album.

Stephanie_minialbum_1

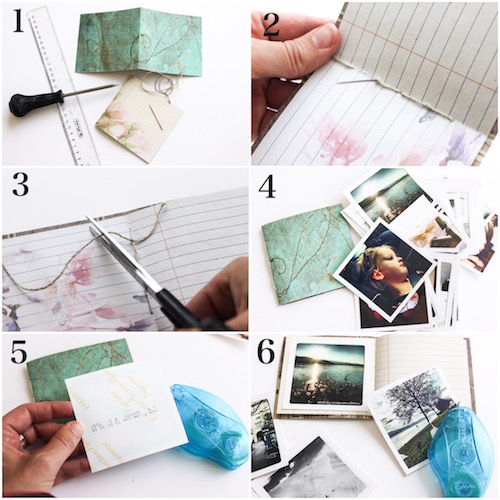
Here is my little tutorial how I made this little square mini album.

Stephanie_minialbum_2

1 – I prepared some double pages and a cover. The cover is 5mm larger on each side.

2 – Then I made 5 holes equidistantly with a big needle and sewed the pages and the cover together with a baker twine.

3 – I cut the excess thread.

4 – Then I chose some photos for my mini album.

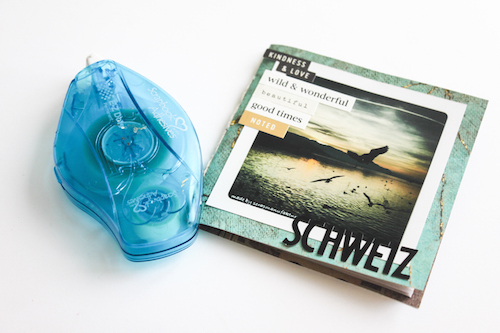
5 – I adhered them with the E-Z Dots® Permanent Refillable Dispenser

6 – And I added some sticker and notes after all.

Stephanie_minialbum_3

And here are some inside pages of this album.

Stephanie_minialbum_4

Thanks for visiting us today!

I wish you a nice creative day!

Stephanie 🙂

Supplies from Scrapbook Adhesives by 3L®

E-Z Dots® Permanent Refillable Dispenser

Save

Save

How to Create a DIY Mini Sewing Kit from Mint Tin

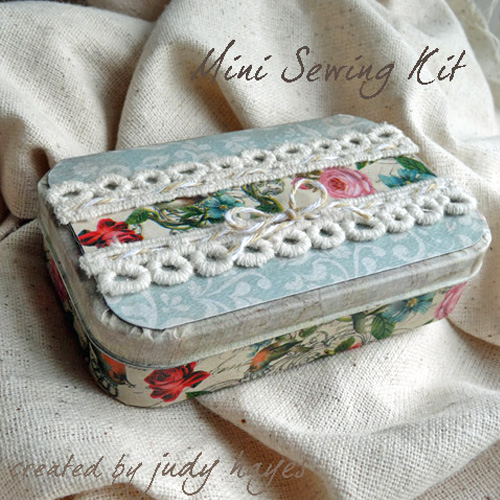
Hello blog friends! It’s Judy here today to share a Mini Sewing Kit created from a mint tin. The last time I traveled I discovered my plastic sewing kit was broken. I decorated this tin and transferred all the supplies into it!

How to Create a DIY Mini Sewing Kit from a Mint Tin

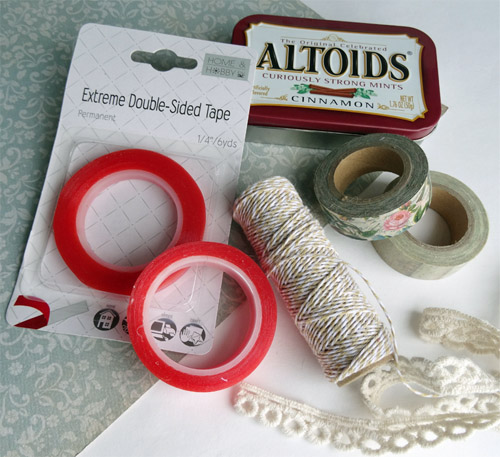
Here are my supplies!

judy_hayes_sewing_kit-2

To decorate this tin, wrap  washi tape around the bottom of tin.  Then wrap TWO layers washi tape around edge of lid.

Fasten a piece of patterned paper to top of the tin with Extreme Double-Sided Tape ½ʺ . Add a strip of washi tape to thin cardboard and trimmed it same width as tape.  Fasten to tin with Extreme Double-Sided Tape ½ʺ. Next thread twine  through the top straight edges of the Lace Ribbons. With another piece of twine, tie a bow and secure with a dot of Art Medium to the knot. This will keep the bow from coming undone.

The Lace Ribbons were fastened to top of tin with Extreme Double-Sided Tape ¼ʺ. Then add a piece of patterned paper to the bottom of the tin with Extreme Double-Sided Tape ½ʺ. For the inside, add washi tape around the sides of bottom. Patterned paper was added on the inside lid and bottom.

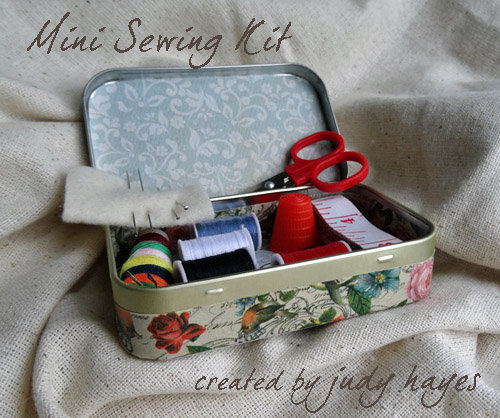
To finish it off, I transferred all the supplies from my broken kit and I have a pretty (and sturdy) Mini Sewing Kit!

judy_hayes_sewing_kit-1b

Thanks for visiting!
Judy

Supplies Used:

HomeHobby by 3L

Others:

  • Patterned Paper (Carta Bella);
  • Mint Tin;
  • Thin Cardboard
  • Art Medium glue
  • Twine
  • Lace Ribbons
  • washi tape

Visit our Website and Blog!
Sign up for our Newsletter so you never miss a contest or giveaway!

instagram purple icon facebook icon purple pinterest purple icon twitter purple icon YouTube icon blog subscription purple icon

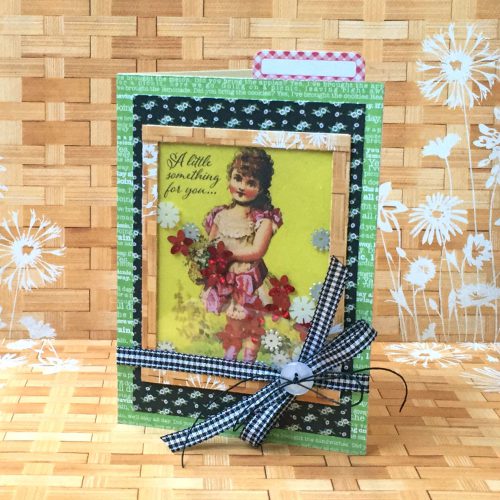
A Little Something Shaker Card with 3D Foam Frames

It’s Erica and today I’m sharing a fun and simple way to use 3D Foam Frames to create a cute shaker card! Before I made this shaker card I read and watched several tutorials to see how others were creating shaker cards. I was amazed at how complex the instructions seemed to be, I decided there had to be a simpler way…guess what? There is! Our 3D Foam Frames are the perfect solution – check out my tutorial below!

A Little Something Shaker Card with 3D Foam Frames

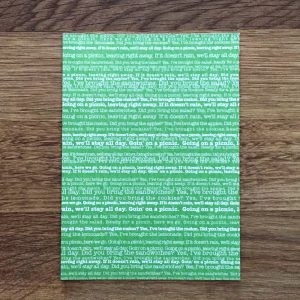
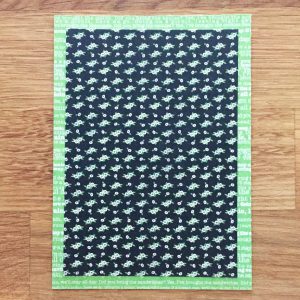
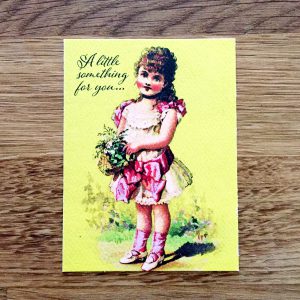
I started by cutting a 4.25 x 5.5” rectangle and adhered it to the base of my card using the E-Z Runner® Ultra Refillable Dispenser. Next, I cut a 3.75 x 5” rectangle – creating a second layer – as well as a 3 x 4” journaling card.

A Little Something Shaker Card with 3D Foam Frames A Little Something Shaker Card with 3D Foam Frames A Little Something Shaker Card with 3D Foam Frames

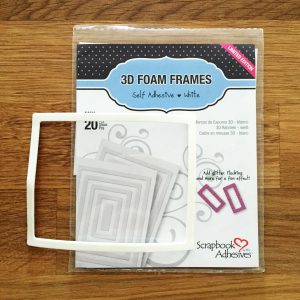
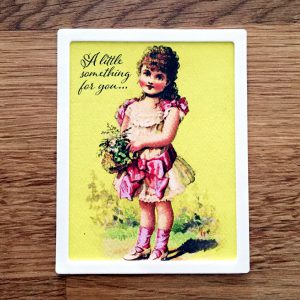
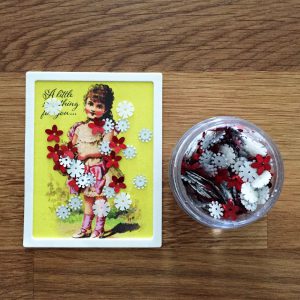
Next, I selected one of the 3D Foam Frames that fit the perimeter of the 3 x 4” journaling card. Once the 3D Foam Frame was in place I sprinkled a few sequins onto the journaling card.

A Little Something Shaker Card with 3D Foam Frames A Little Something Shaker Card with 3D Foam Frames

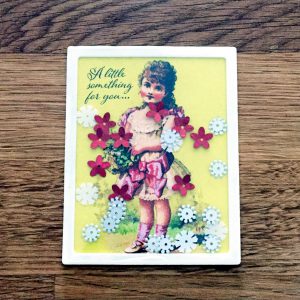
I then removed the paper covering from the 3D Foam Frames (i.e., the adhesive was showing) and placed a 3 x 4” transparency on top. I pressed the transparency down firmly ensuring it was completely adhered to the 3D Foam Frames – I didn’t want my sequins to escape!

A Little Something Shaker Card with 3D Foam Frames A Little Something Shaker Card with 3D Foam Frames

I wanted to give my shaker piece a clean look so I placed Premium Double-Sided Tape 1/8″ Permanent along all four edges and then covered it with pattern paper. I considered my shaker complete and adhered it using the E-Z Runner® Ultra Refillable Dispenser to the 3.75 x 5” rectangle. (Remember our E-Z Runner® Ultra Refillable Dispenser is really strong so it’s perfect for adhering those heaver items when creating).

A Little Something Shaker Card with 3D Foam Frames A Little Something Shaker Card with 3D Foam Frames

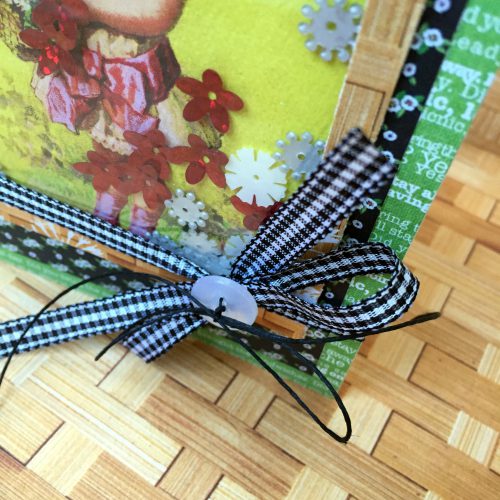
To finish my card I tied a black and white checkered bow and added a white button. Finally, I adhered the 3.75 x 5” rectangle using the E-Z Runner® Ultra Refillable Dispenser to the base of my card.

A Little Something Shaker Card with 3D Foam FramesThat’s it! Not only is it simple it’s cute too!

IMG_6609_1

Scrapbook Adhesives by 3L®:
E-Z Runner® Ultra Refillable Dispenser
3D Foam Frames
Premium Double-Sided Tape 1/8″ Permanent

Other:
Paper (Authentique Paper); Sequins/Twine (Fun Stampers Journey); Button (Sewology)

Thanks for joining me today!
Erica Houghton

Save

Save

Fringed 4th of July Card Tutorial

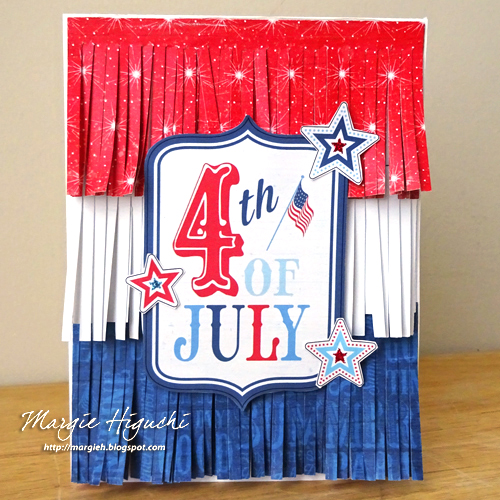
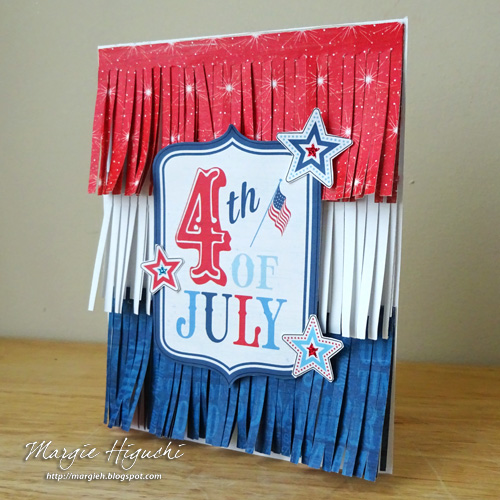
Happy Birthday, America! For today’s fringed card, I wanted to create something that had movement so I took out my fringe scissors and went to town with my strips of red, white and blue patterned papers. Of course, using my Scrapbook Adhesives by 3L® products, I adhered everything all together. What do you think?

Fringed 4th of July card by Margie Higuchi for Scrapbook Adhesives by 3L

Making the Fringed Card

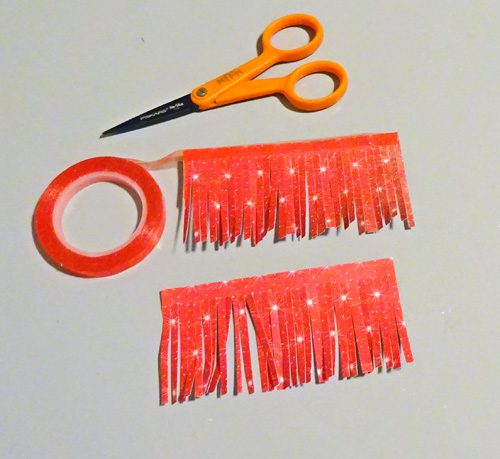
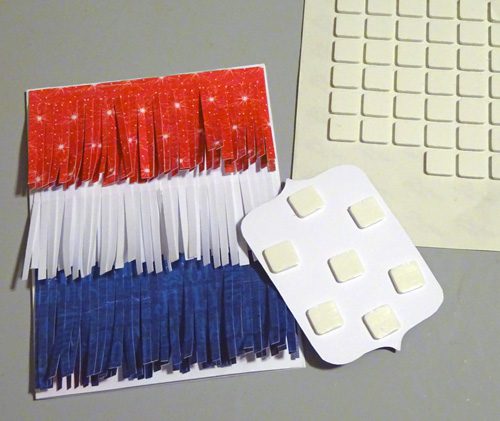
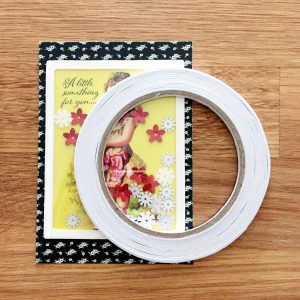
After I cut my fringes (two layers for each color), I placed Extreme Double-Sided Tape 1/8″ on the back edge of each fringe and adhered onto my white A2-sized (4.25 x 5.5 inches) card base.
MargieHiguchi 500 Fringed4thCard Step1

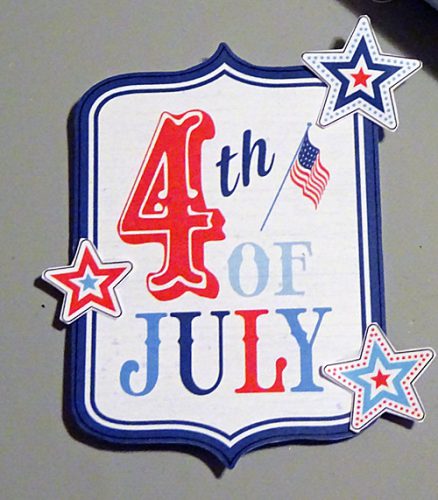
I fussy cut the sentiment and stars from patterned papers. With the Dual Tip Glue Pen, I placed the stars onto the sentiment and let dry.

MargieHiguchi 500 Fringed4thCard Step3

For more dimension and not to flatten the fringes, I used 3D Foam Squares White, Regular on the back of the sentiment. Took off the liner and center on the card front.

MargieHiguchi 500 Fringed4thCard Step2

The finishing touch of glitter in the centers of the stars and it’s ready to go! Another look…

MargieHiguchi 500 Fringed4thCard Jul0416

If you want to see more 4th of July and other summer inspired projects, click: Summer Projects from Scrapbook Adhesives by 3L.

Patritotic cards, scrapbook pages, banners & projects

Click to see more patriotic projects!

Thanks for stopping by!
Margie Higuchi

Supplies List:
Scrapbook Adhesives by 3L®:
3D Foam Squares White, Regular
Dual Tip Glue Pen
Extreme Double-Sided Tape 1/8″ Permanent
Patterned Papers: Photo Play Paper Co. (Main Street Parade Collection)
Cardstock: Darice/Core’dinations
Glitter: Ranger Ink (Stickles)
Fringe Scissors: Martha Stewart Crafts

Save

Save

Save

With Thanks Card using Tissue Tape

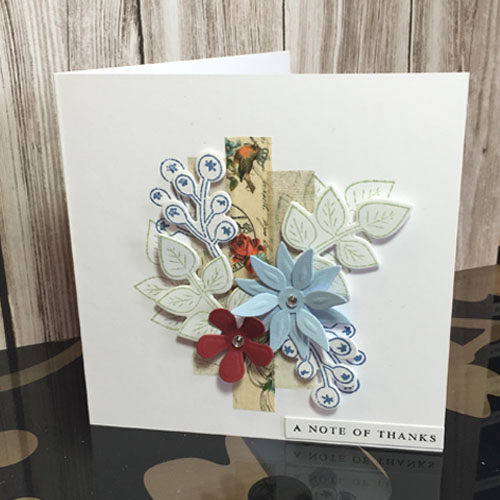
Hi everyone, Christine here today with a thank you card using some brilliant Scrapbook Adhesives by 3L® products featuring the beautiful  Tissue Tapes.

IMG_4184 Square

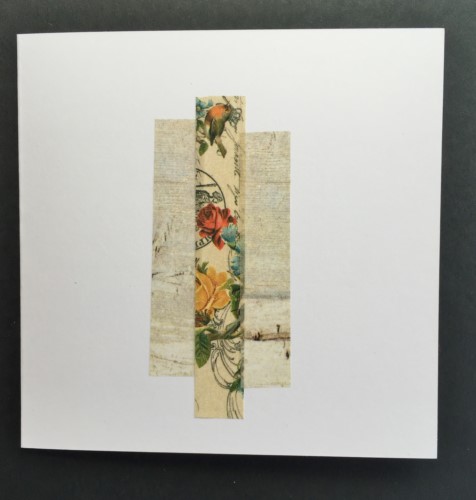
I’ve chosen to use two designs – one from Denim and Flower and the other from Ash and Oak.

Affixed three strips vertically onto my card front.

Thanks CEmberson 3

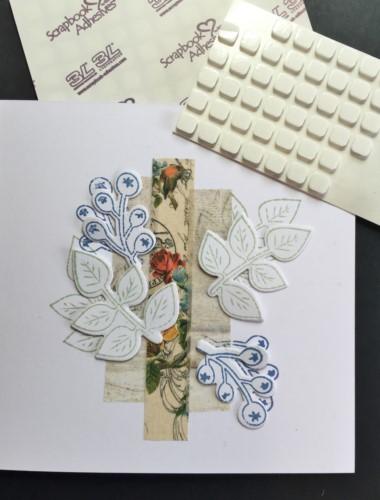
I stamped some foliage images and die cut as embellishments, affixed in place with 3D Foam Squares – White, Small.

Thanks CEmberson 4

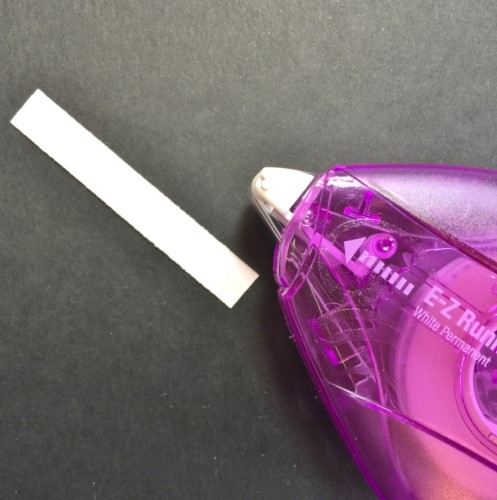
The sentiment has been stamped onto a very narrow piece of card, easily adhered with E-Z Runner Micro Refillable – this dispenses a narrow strip which is perfect for accurate precision.

Thanks CEmberson 5

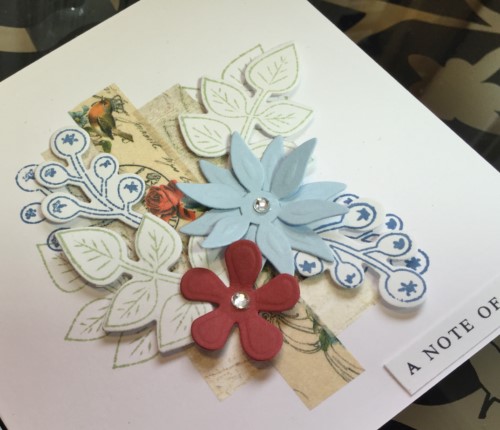
Added a few more die cut flowers and gemstones to finish.

Thanks CEmberson 7

Thank you for joining me today and please remember to check out the brilliant products on the website.

Christine

Products used:
Scrapbook Adhesives by 3L®:
E-Z Runner Micro Refillable and 3D Foam Squares White Small

Denim and Flower
Ash and Oak
White card; Dies (Spellbinders® Creative Arts: Floral Divine and Marisa’s Bouquet); Gemstones