You are in our US store • Switch to Europe store

Birthday Shaker Card

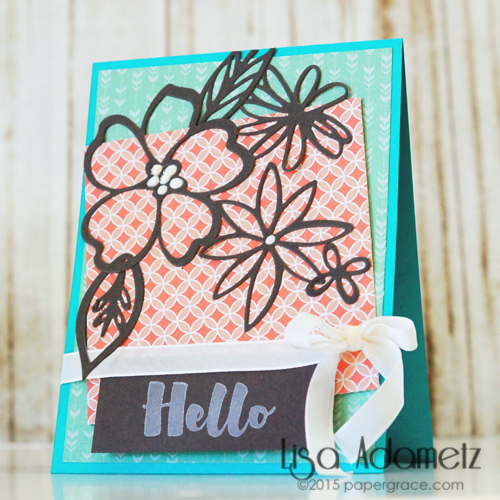
Hi everyone and Happy Saturday! It’s Lisa with you today and I have a Birthday Shaker card that I’m sharing with you today. This card is super fun and easy to make using our Keepsake Envelopes.

LisaAdametz-BirthdayShaker-072015-1

To put this card together first create your card base. I used a standard A2 card base of 4¼” x 5½” scored on the horizontal edge.

Then using the new E-Z Runner® Grand Permanent Strips I adhered my first layer of patterned paper. Die-cut two more pieces of patterned paper and adhere those down using the E-Z Runner® Grand Permanent Strips, as well.

Stamp the sentiment and heat with embossing powder.

To create the flowers, I used scrap pieces of wool felt and die-cut the felt using flower dies. I rolled them up using tweezers and secured the bottoms using either a Dodz™ Medium or a Dodz™ 3D (depending on the size of the flower).

LisaAdametz-BirthdayShaker-072015-3

To keep the flower EXTRA secure I squeezed in a little of the glue from the Quick and Easy Dual Tip Glue Pen in between the petals of the flowers (photos 4 & 5).

To adhere flowers down I also used the Dual Tip Glue Pen liquid glue and allowed them to simply air dry.

Next, for the shaker part! I used one of the smaller envelopes from the Keepsake Envelopes – Mix.  I cut the ends of a straw to make sure that it would be easy to put the glass beads and sequins into the envelope. I also used the new Extreme Double-Sided Tape ¼” under the flap so that it would NOT be able to be opened. (I don’t want those beads flying everywhere!)

LisaAdametz-BirthdayShaker-072015-4

*Tip – Since the Keepsake Envelopes have a clear adhesive backing they’re perfect to apply on ANY surface and the flap is resealable!

I finished the card off by wrapping a little ribbon around the front and tying it in a bow. To keep it secure I added a dab of glue under the bow.

Here’s a little close-up:

LisaAdametz-BirthdayShaker-072015-2

Thanks so much for joining me today and I hope you all have an amazing weekend!

Supplies:
E-Z Runner® Grand Permanent Strips
Extreme Double-Sided Tape ¼ “
Dodz™ 3D
Dodz™ Medium
Keepsake Envelopes – Mix
** Quick and Easy Dual Tip Glue Pen

LisaAdametz-sig


Life is Good…

Howdy! Michele here with a card to share with you today! I have been on a water coloring kick lately and this is one of the finished cards.  The flower was cut using water color paper and given a water color wash in hues of pinks and purples.  I cut some leaves and adhered both to an inked panel using my Crafty Foam Tape.  I love that the flower pops off the card a bit.life is good

I adhered the panel to the card using my E-Z Squares®.  The sequins were added with the small DODZ™.  (Much easier than hassling with glue!)  It is a rather “simple” card for me, but sometimes, less is more.  😉

life is good two

Thank you so much for popping on by today!

Supplies:

Frame it – Home Decoration with Stitching and Paper Flowers

Hi there,

today I want to show you a frame with some stitching, a paper flower and great adhesives by Scrapbook Adhesives by 3L®.

Frame_Stephanie1_1

I love to create my own home decorations and this one is one of a series with paper flower I want to hang on my wall.

And here is my tutorial how I made it.

Frame_Stephanie_2

1 – Use leftovers of paper scraps and make a collage. Choose scraps of a color family and use the E-Z Dots Permanent Refillable Dispenser.

2 – Cut out a flower with your Diecutting machine to use it as a shape for stitching. I used the Sizzix Bigz Native Florals.

3 – Adhere your shape with the E-Z Dots® Repositionable Refillable Dispenser.

TIP: It’s always a good idea to use non permanent adhesive if you unsure of a composition or if you want to remove something.

4 – Make little holes with a needle (every 4-5 mm) around your shape.

5 – Use the holes to stitch your flower.

6 – Choose your inner flowers and use the 3D Foam Squares – white mix to make it dimensional. I used the other flowers from the Sizzix Bigz Native Florals. And I added some pearls.

7 – Adhere some leaves with the E-Z Dots Permanent Refillable Dispenser.

8 – You can add a little butterfly with 3D Foam Squares – white mix as decoration for the flower and to give your composition a color highlight.

9 – You can now frame it. Use also for that the E-Z Dots® Repositionable Refillable Dispenser, then you can replace an other ensemble easily.

Frame_Stephanie1_3

Stephanie_Frame_4

I hope you enjoyed the little home decoration tutorial. I would love to see yours.

Have a nice day!

Stephanie 🙂


Supplies from Scrapbook Adhesives by 3L®

E-Z Dots® Repositionable Refillable Dispenser

E-Z Dots Permanent Refillable Dispenser

3D Foam Squares – white mix

Paper scraps

Sizzix Big Shot Plus

Sizzix Bigz Native Florals

Pearls

Wedding Invitation – From Simple to Stunning!

Hello blog readers! It’s Angela here today….sharing a wedding invitation I created for my sister in law’s upcoming nuptials!

Wedding Invitation - From Simple to Stunning! by Angela Ploegman

The request was for simple, flat invitations with a western feel and a combination of fonts….the design process started with a few different iterations….one of my early favorites is used only card stock and Scrapbook Adhesives by 3L® Crafty Power Tape 20′ Roll and E-Z Runner® Permanent Strips Refillable.

Wedding Invitation - From Simple to Stunning! by Angela Ploegman

The bride requested a little more vintage detail and so I turned to lace ribbon and used some Extreme Double-Sided Tape 1/8″ to hold it down…

Wedding Invitation - From Simple to Stunning! by Angela Ploegman

She LOVED the end result and so do I….even the UPS clerk admired them and asked if I’d do her wedding invitations!

Thanks for stopping by today!

Angela

Scrapbook Adhesives by 3L® supplies used: Extreme Double-Sided Tape 1/8″, E-Z Runner® Permanent Strips Refillable, Crafty Power Tape – 20′ Roll

Other Supplies used: Bazzill Basics Paper card stock (brown and kraft), EK Success border punch

Save

Precious Layout

Hi everyone Laurel here with a… wait for it… a layout!  They are few and far between these days 🙂  I love scrapping photos of my grand daughter but she spends so much time here, I don’t have the time for scrapping!

2015 07 03_0713For this layout I first gathered my supplies – pretty much always a runner and 3D Foam squares 😉

IMG_7066TIP:  I love using the E-Z Runner as a little goes a long way.  I always do a bit of stitching on my projects so I don’t need a lot of adhesive.  The stitching is only for decoration, the adhesive works wonders!

IMG_7067


2015 07 03_0715Another way I like to add interest to my project is with layers and bits.

2015 07 03_0714After fussy cutting some flowers from a piece of the pattern paper, I mounted them with the 3D Foam Squares

2015 07 03_0716

Products Used:

E-Z Runner® Permanent Strips Refillable Dispenser

3D Foam Squares, White, Regular size

Other supplies:  Pattern Paper and Stickers: Elle’s Studio;  Die: My Favorite Things;  Die Cut Machine: Silhouette


Laurel Seabrook

Smile Card with E-Z Runner® Grand

It’s Erica and today I’m sharing a card I created using E-Z Runner® Grand Permanent Strips.

Smile Card with E-Z Runner® Grand by Erica Houghton

Step 1: I adhered a piece of pattern paper to the base of my card using the new E-Z Runner® Grand Permanent Strips.

Smile Card with E-Z Runner® Grand by Erica Houghton

Step 2: I adhered two pieces of pattern paper together using the new E-Z Runner® Grand Permanent Strips and added machine stitching.

Smile Card with E-Z Runner® Grand by Erica Houghton

Step 3: I adhered a piece of ribbon to the base of my card using the new E-Z Runner® Grand Permanent Strips and then adhered the layer from step 2 to the base of my card (on top of the ribbon).

Smile Card with E-Z Runner® Grand by Erica Houghton

Step 4: I fussy cut and adhered a birdcage, bird, flowers and a sentiment to finish my card.

Smile Card with E-Z Runner® Grand by Erica Houghton

Scrapbook Adhesives by 3L

Paper

  • Marion Smith Designs, Junque Gypsy

Embellishments

  • Heidi Swapp – ‘smile’
  • Marion Smith Designs – flowers
  • Celebrate It – ribbon
  • Misc. – sequins

Products

  • Ranger Ink – Tim Holtz – distress ink

Thanks for joining me today!

Erica Houghton

Make Your 4th Sparkle with 3D Foam Stars

I am excited to share my FUN and simple card that I created with our 3D Foam Stars shapes. What a great way to celebrate America’s birthday 🙂

3DFoamStarBurst 6x6 Card by Margie Higuchi

Let’s start with the card panel. I used three different patterned papers to create my 6 x 6″ card. Loved the look and they were scraps left from my Wish You Were Here Travel Book project. I cut/embossed it using my 6 x 6 Matting Basics B Die #8 (the smallest size die is #1) with my Grand Calibur® Machine.

MargieHiguchi 3DFoamStarBurst6x6Cd Step 1
MargieHiguchi 3DFoamStarBurst6x6Cd Step 2

To give the edges a finished look, I inked them with a teal colored ink.

MargieHiguchi 3DFoamStarBurst6x6Cd Step 3

I cut/embossed 6 x 6 Matting Basics B Die #8 with teal cardstock. Adhere this layer with E-Z Runner® Permanent Strips on the card base.

MargieHiguchi 3DFoamStarBurst6x6Cd Step 4

Now for the fun part! Center the largest star from our 3D Foam Stars onto the card panel. Then place the second largest star by shifting it slightly to the right so that the top peak of the largest star is in between the peaks of the second star. This creates a star burst look. Repeat this shift for each star. TIP: use all five nesting star sizes for a FULL EFFECT – creates a spectacular focal piece!.

MargieHiguchi 3DFoamStarBurst6x6Cd Step 5

To finish, I sprinkled glitter on top of the entire center piece and brushed off the excess. Added a rhinestone in the center.

MargieHiguchi 3DFoamStarBurst6x6Cd Step 6

I adhered the embellished card panel with Thin 3D Foam Squares – Mix Black on top of the teal cardstock. Here’s another look at the finished card…

3DFoamStarBurst 6x6 Card by Margie Higuchi

Supplies List:
Scrapbook Adhesives by 3L®: 3D Foam Stars, Thin 3D Foam Squares – Mix Black and E-Z Runner® Permanent Strips
Cardstock: Core’dinations ColorCore Cardstock® (White and Teal)
Patterned Paper: Lawn Fawn (Beachside Collection)
Dies: Spellbinders® Creative Arts (S6-025 6 x 6 Matting Basics A and S6-026 6 x 6 Matting Basics B)
Glitter: Stampendous™ (Ultra Fine Glitter – Teal)
Ink: IMAGINE Craft/Tsukineko (Momento Luxe – Teal Zeal)
Rhinestone: Want2Scrap©

Are you inspired by these fabulous 3D Foam Star shapes like me?! Take a look at the various projects that were created by our designers by visiting 3D Foam Stars Projects!

As always, thanks for stopping by.
Happy Birthday, America!
Margie Higuchi
Save

With Love – A Layered Tag

Hi everyone Christine here today with a layered tag, again using some of my most favorite products from Scrapbook Adhesives by 3L®.

CE With Love Tag 1

I’m a huge fan of kraft card and the color so the Creative Photo Corners – Kraft are a real hit with me, I like to use them on the corners of patterned paper – remember you can ink them too.  I’ve cut a piece of patterned paper – My Mind’s Eye, On Trend, positioned the corners and attached to a tag with E-Z Runner® Permanent Strips Refillable.CE With Love Tag 2

I then layered a smaller tag and attached this with 3D Foam Squares – White, Regular.CE With Love Tag 4

My sentiment is a rather fine die cut and these can be challenging to stick but no problem with Adhesive Sheets, perfect to run through your die cutting machine.CE With Love Tag 3I applied some further die cuts to create a multi layered look.CE With Love Tag 5 The finished tag.CE With Love Tag 6

Don’t forget to check out all the other Scrapbook Adhesives by 3L® products.

Christine 

Supplies:

Scrapbook Adhesives by 3L:  E-Z Runner® Permanent Strips Refillable3D Foam Squares – White, RegularCreative Photo Corners – Kraft and Adhesive Sheets.

Spellbinders dies: Pretty Petals D, Sprigs, Victorian Picket, Sentiments Three.

Papers: My Mind’s Eye – On Trend

Other supplies: Kraft tags.

Spellbinders Partner Road Trip and Giveaways!

Welcome to the Spellbinders® Partner Road Trip! We’re thrilled to be partnering with Spellbinders for Day 3 of this blog hop! Today we’re featuring not only Spellbinders dies, but a few new adhesives too! Beth Pingry and Erica Houghton are showing them off below – and don’t forget we’ve got Giveaways!

Explore Tag

Hi, it’s Beth Pingry and I’m sharing a tutorial for this flower filled Explore tag today!

Beth Pingry - Explore Tag for Scrapbook Adhesives by 3L & Spellbinders

Make the Flowers

BethPingry-3L-Spellbinders Hop 13

Apply an Adhesive Sheet 4×6″ to back of denim fabric then adhere to cardstock.

BethPingry-3L-Spellbinders Hop 12

Die cut with Bitty Blossoms die, run thru the machine twice, you may need to finish with scissors to cut small threads. Roll the flowers from the outside secure with Adhesive Dots 3D in the centers. Die cut and emboss old book pages with Rose Creations die – not pictured – just tear some pages out and die cut several pages at once with 3-4 different sized dies.

BethPingry-3L-Spellbinders Hop 6

Crinkle and ink the Rose Creations die cuts, layer 2-3 of each size using  Adhesive  Dots Medium, then add rolled denim flowers. Add glitter to center of roses to stick to the exposed Dodz adhesive.  For the third flower, roll 6″ of lace, add to top of Rose Creations with Adhesive Dots 3D.

The Rest of the Tag

BethPingry-3L-Spellbinders Hop 8

Emboss white cardstock in Bricks & Bark embossing folder, ink with red to give the look of bricks. Tear the edges and add brown ink around edges. Trim dotted paper to fit tag, ink edges with brown ink. Add brown ink to doily edges, then adhere to tag using the E-Z Runner® Grand.

E-Z Runner Grand

Add brown ink to doily edges, then adhere to tag using the E-Z Runner® Grand.

BethPingry-3L-Spellbinders Hop 10

Cut and emboss the Basic Tag One, ink the top and sides.

BethPingry-3L-Spellbinders Hop 11

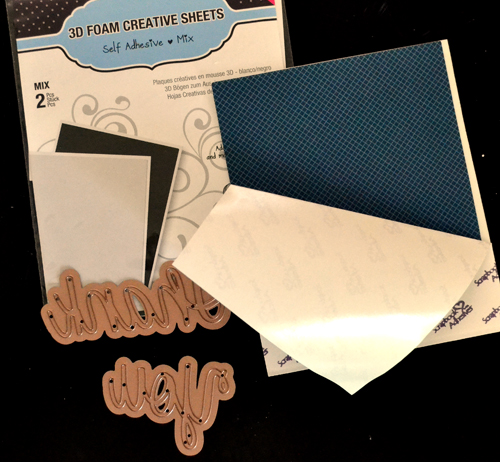
Cut letters “Explore” with Numbers and Letters Two dies and 3D Foam Creative Sheets in black- you get both a black and white sheet in each package!

Remove top liners from letters, rub on brown pigment powder to cover the letters.
BethPingry-3L-Spellbinders Hop 7

Remove the letters from the sheet and adhere to the Basic Tag One die cut. Pull organza through the tag ends and secure on back with E-Z Runner Grand. Adhere the tag at an angle onto the doily.

BethPingry-3L-Spellbinders Hop 4

Adhere flowers above and below the tag with Adhesive Dots Medium.
Add glitter to 3D Foam Leaves, tuck under flowers.

BethPingry-3L-Spellbinders Hop 2
Cut about 10″ of organza and tie a bow. Heat it slightly to melt the organza and create a crinkled look (short blasts of heat work best, one section at a time).

Tie keys with twine, secure onto tag with Adhesive Dots Medium, then add the ribbon too.
Pull Organza through top hole of tag to complete the tag, add it to a gift box or bag!

These are my supplies:

For more of my projects, check out my blog: Beth Pingry – Cookies for Breakfast

Hello Card Tutorial

Erica has a gorgeous card tutorial:

Hello Card tutorial Erica Houghton 3L - Spellbinders Blog Hop
Step 1: I adhered a piece of pattern paper to the base of my card using the Double Sided Tape Runner.
Hello Card tutorial Erica Houghton 3L - Spellbinders Blog Hop
Step 2: I adhered two additional layers of pattern paper to the base of my card using Crafty Foam Tape (I love giving my cards dimension).
Hello Card tutorial Erica Houghton 3L - Spellbinders Blog Hop
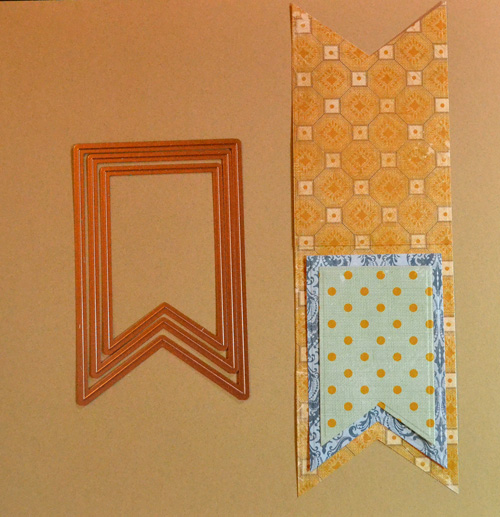
Step 3: I adhered two pattern paper banners to my card using the Double Sided Tape Runner.
Hello Card tutorial Erica Houghton 3L - Spellbinders Blog Hop
Step 4. I cut several stars using the Spellbinders® Sapphire PHS-508 Celebrate Set which includes these Stars dies.
Hello Card tutorial Erica Houghton 3L - Spellbinders Blog Hop
Step 5. I also cut a ‘hello’ sentiment using the Die D-Lites Sentiments 5 die.
Hello Card tutorial Erica Houghton 3L - Spellbinders Blog Hop
Step 6. I adhered flowers, a bow and the stars I cut to finish my card.
Hello Card tutorial Erica Houghton 3L - Spellbinders Blog Hop
Here are a few close-ups:
Hello Card tutorial Erica Houghton 3L - Spellbinders Blog Hop


Be sure to visit all the Partners posting today:

There will be 4 Spellbinders winners – 1 each day and 1 Grand Prize winner!

Spellbinders Be Free Partner Blog Hop

Today’s winner will get prizes from each of these manufacturers and the Spellbinders Sapphire dies!

Spellbinders winners

  Enter a comment into the Rafflecopter app to enter to win a selection of our New HomeHobby  tapes!

a Rafflecopter giveaway

Thanks for stopping by!

Save

3D Foam Shapes Wedding Ensemble

This time of season we are into the wedding events. I just got back from watching my sweet friend’s daughter getting married last weekend! Congrats Ally & Jon!! With that in mind, I created a wedding ensemble using 3D Foam Shapes that I hope will help to inspire in an upcoming event.

3D Foam Shape Wedding Ensemble by Margie Higuchi for Scrapbook Adhesives by 3L
I am sharing some of the highlights with you in each of the pieces I created in this ensemble…

Wedding Shaped Card

I cut and embossed the pieces used for the card from various die templates. The smallest oval I stamped the sentiment onto patterned paper and then placed the die over to cut/emboss.

Scored 1″ from the top of the largest frame die cut (this will be the back of the card base).

MargieHiguchi 3DFoamShapeWeddingEnsemble Card Step 3

I applied E-Z Dots® Permanent in the scored area only. This will act as a hinge to create the shaped card. Placed the matching die cut over it to create one shape.

MargieHiguchi 3DFoamShapeWeddingEnsemble Card Step 2

I placed one Adhesive Dots Small on each corner and sprinkled glitter on top. Gently press down the glitter and shake off excess. You just created sparkly embellishments! Assemble card by stacking die cuts with 3D Foam Squares and tie a bow with organza ribbon.

MargieHiguchi 3DFoamShapeWeddingEnsemble Card Step 4

Wedding Gift Bag

Cover the front with patterned paper, using E-Z Runner® Permanent Strips.

Cut a piece of patterned paper to fit the largest 3D Foam Frames and place the frame on top of the paper. Take the liner off and sprinkle with glitter. Shake off excess and place a stamped circle die cut on the left side of frame with a 3D Foam Square Black Regular to balance.

Cut a piece of patterned paper to fit the top of bag (think border or band), punch a hole 1″ from the end on each side, thread organza ribbon through and tie a bow. Next, ink edges and adhere on top of bag with 3D Foam Square Black Regular. Add the embellished frame sentiment to finish.

Wedding Boxed Place Card

Assemble the box from die template with E-Z Dots® Permanent.

MargieHiguchi 3DFoamShapeWeddingEnsemble PlaceCard Step 1

Poke a hole in the center of the box top with a memo pin and stack two 3D Foam Squares Black Regular inside. Set aside.

MargieHiguchi 3DFoamShapeWeddingEnsemble PlaceCard Step 2

Sprinkle glitter on two bows from the 3D Foam Party Shapes and one small heart from the 3D Foam Hearts sets.

MargieHiguchi 3DFoamShapeWeddingEnsemble PlaceCard Step 3

Place the glittered heart on the name card.

MargieHiguchi 3DFoamShapeWeddingEnsemble PlaceCard Step 4

Match up the two glittered bow with the memo pin in between to create an accent.

MargieHiguchi 3DFoamShapeWeddingEnsemble PlaceCard Step 5

Cut/emboss a small circle doily and adhere on top of the box top with E-Z Dots® Permanent. Poke a hole with piercing tool and add the embellished memo pin. Add mints in the box and it’s ready!

MargieHiguchi 3DFoamShapeWeddingEnsemble PlaceCard Step 6

Here’s another look at the entire ensemble…

3D Foam Shape Wedding Ensemble by Margie Higuchi
Supply List:
Scrapbook Adhesives by 3L®: E-Z Dots® Permanent, Adhesive Dots Small, E-Z Runner® Permanent Strips, 3D Foam Frames, 3D Foam Squares Black Regular, 3D Foam Party Shapes and 3D Foam Hearts
Patterned Paper: Teresa Collins (Life Emporium Collection)
Cardstock: Darice/Core’dinations ColorCore Cardstock
Dies: Spellbinders® Creative Arts (LF-010 Square Bracket Edge Box (retired), S4-114 Standard Circles LG, S4-110 Classic Oval LG, S5-177 A2 Filigree Delight and Spellbinders Grand Calibur® Machine)
Scoring Tool: ScorPal Score Board
Stamp: JustRite® Papercraft (Wedding Wishes Vintage Labels Eight and Nine Clear Stamps)
Ink: Imagine Craft®/Tsukineko® (Memento™ Ink – Rich Cocoa)
Memo Pin: Advantus (Tim Holtz™)
Ribbon: Offray
Glitter: Stampendous
Other: Gift Bag; Black Marker

Find more wedding inspiration on Top Wedding Ideas!

Thanks for visiting the blog! Come see us soon!
MargieH