You are in our US store • Switch to Europe store

Whimsy Ribbon Flower Hello Card Tutorial

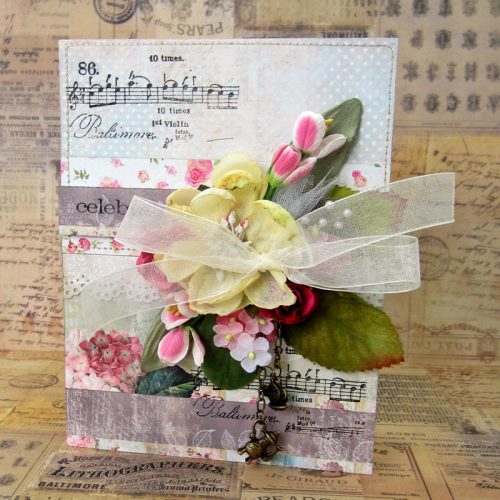
I have Spring on my mind as I look out the window to snow…LOL! To brighten up my surroundings, I created a cheerful grouping of flower embellishments to accent the card.
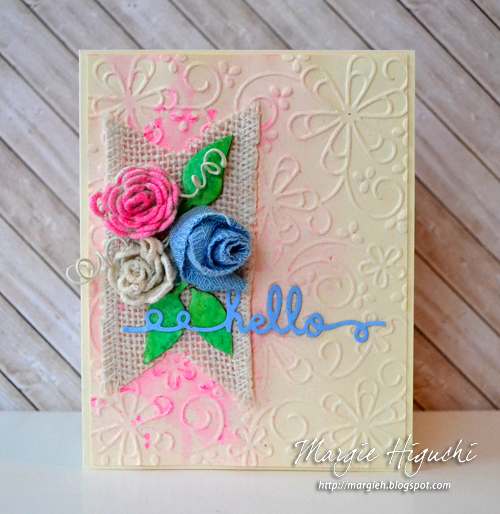
 

Whimsy Ribbon Flower Hello Card by Margie Higuchi

I took a 4⅛ x 5⅜” card panel and embossed it in a folder. (Tip: lightly mist the cardstock with water for a crisper embossing).
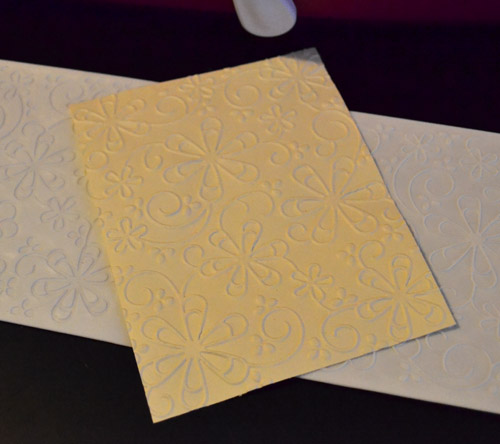
 Margie Higuchi LoopyHello Step1


Mix water and Bubble Gum Gelato® color medium together to create a color mist which I sprayed and splattered on the left side of the card panel.
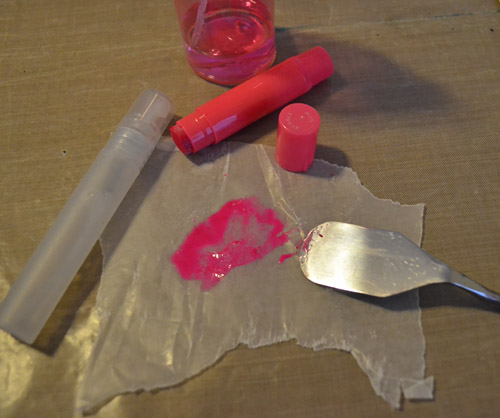
Margie Higuchi LoopyHello Step2

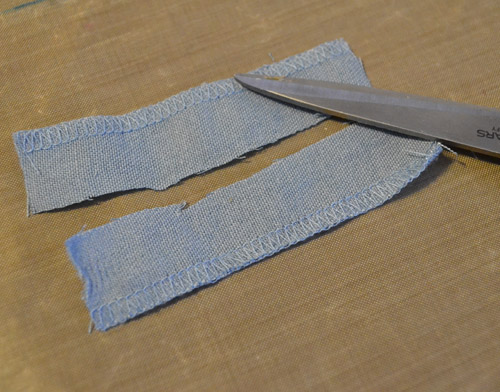
Next I cut in half a 4″ canvas ribbon, adhered together with a DODZ Adhesive Dots Small to create an 8″ ribbon. I rolled it into a flower and secured the end with another DODZ Small. I stuck the bottom to a DODZ Adhesive Dot and set aside to create more ribbon rolled flowers.
 

Margie Higuchi LoopyHello Step3


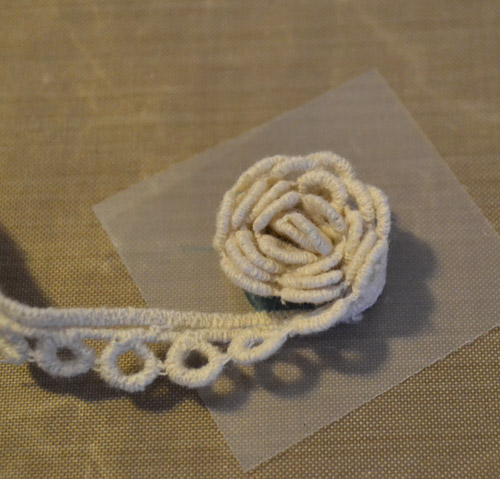
This one was created by using lace r. I colored the flower with the leftover Gelato® color mist using a watercolor brush.
 

Margie Higuchi LoopyHello Step4


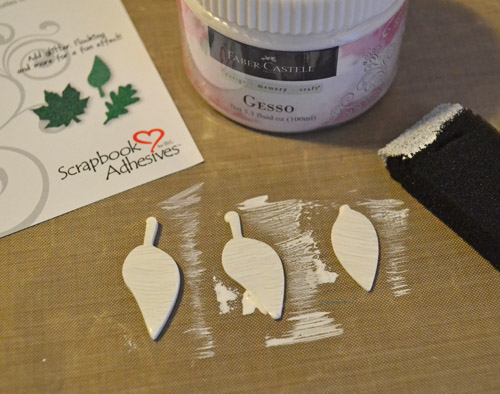
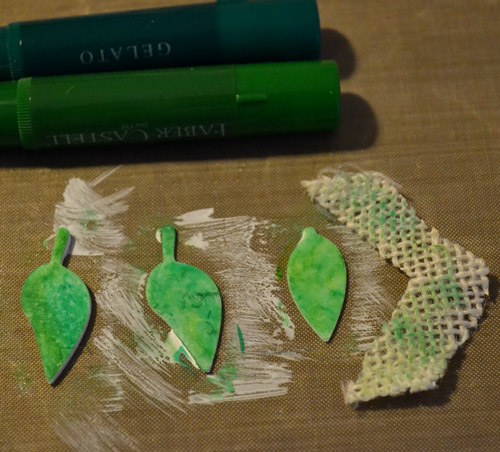
3D Foam Leaves were primed with Gesso and colored with a combination of Gelatos® in Green Tea and Spearmint, along with the Stamper’s Big Brush Permanent Olive Green Pen.
 

Margie Higuchi LoopyHello Step5
Margie Higuchi LoopyHello Step6


Another tip: I used the leftover from the ribbon tail I cut below to create texture in the leaves while the Gelatos® colors were wet. LOVE how it turned out 🙂
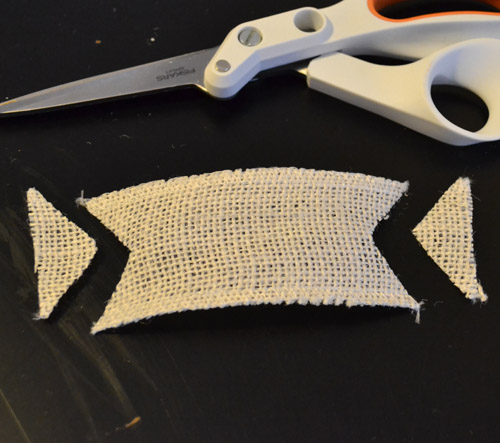
 

 Margie Higuchi LoopyHello Step7

Assemble all the pieces with a combination of E-Z Runner® Permanent Strips and Crafty Power Tape to create this sweet card. Here’s a close up look at my flower embellishments 🙂
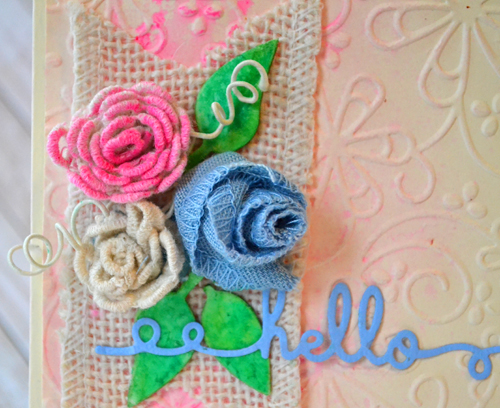
500 MargieHiguchi LoopyHelloCard CloseUp FEB2015

Project Supplies:
SCRAPBOOK ADHESIVES BY 3L®: 3D Foam Leaves, E-Z Runner® Permanent Strips, Crafty Power Tape and DODZ™ – Small & XL

Cardstock and Card Base: Darice and Core’dinations ColorCore Cardstock®/David Tutera™ Celebrate Cardmaking System (Cream Cardstock and A2 Card) and Bazzill Basics Paper (Light Blue Cardstock)
Die Template and Embossing Folder: Spellbinders® Creative Arts (Sentiments 5 and Whimsy Em-bossing Fold’er™)
Color Medium and Markers: Faber-Castell® Design Memory Craft® (Gelatos® in Bubble Gum, Green Tea and Spearmint, Gesso and Stamper’s Big Brush in Permanent Olive Green)
Wire: Prima Marketing Inc. (Wire Thread in Ivory)

As always I appreciate you stopping by!
MargieH
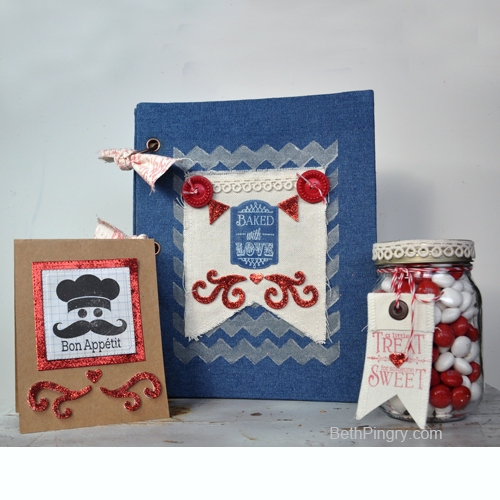
Recipe Book, Card and Treat Jar Trio

Welcome to Monday! Today I’m sharing my CHA project, a trio that would make a great gift for the foodie in your life.

Recipe Trio by Beth Pingry, book, treat jar and card

Beth Pingry Recipe Book, treat jar and card

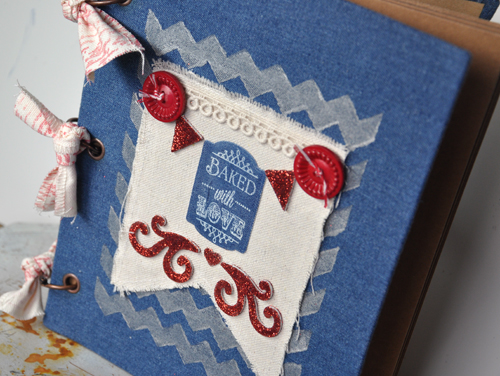
First up, the Recipe Book, I used a stencil and paint to make the chevron pattern, the layered with the canvas flag from the pennants set. I stamped  onto the blue fabric, then die cut it. Crafty Power Tape secures the canvas pennant to the cover, and Adhesive Sheets 4×6″for the fabric to fabric. Crafty Power Tape also holds the Lace Ribbon at the top edge. Dodz Adhesive Dots 3D hold the buttons. I added glitter to the 3D Foam Heart, 3D Foam Pennants, and swirls and adhered them directly to the canvas. The ribbon ties are stamped canvas.

BethPingry-recipetrio2

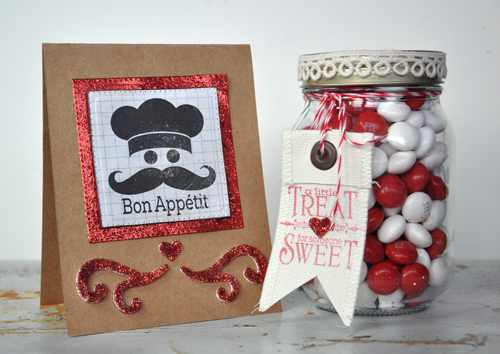
For the card, I used Adhesive Sheets on the front of die-cut cardstock to get edge to edge coverage of the glitter. Then I added stamped image with 3D Foam Squares. More glitter for the 3D Foam Heart and swirls!

For the jar, I was just in time to catch the clearance sales of Christmas candy, and the red and white M&M’s were perfect (and delicious peppermint white chocolate!) I covered the top of the jar with the denim colored fabric and Adhesive Sheets, then wrapped lace ribbon around the edge. I folded over the canvas and added a grommet, and then stamped onto it. One more glittered 3D Foam Heart and the project is done!

Thanks for stopping in today!

Beth Pingry

Supplies I used:

Scrapbook Adhesives by 3L: 3D Foam Hearts, 3D Foam Pennants, Crafty Power Tape, Adhesive Sheets 4×6″, 3D Foam Squares, Dodz™ 3D

A Jillian Vance Design: Baking Tags stamps, Chalkboard Backdrop die

Clearsnap: Colorbox Warm Red Fluid Chalk ink, Frost White Pigment Ink

My Favorite Things: Chevron stencil

Liquitex: Soft Body Silver Paint

Glitter, cardstock, candy, glass jar

Gold Foil card using ClearSnap Designer Foils

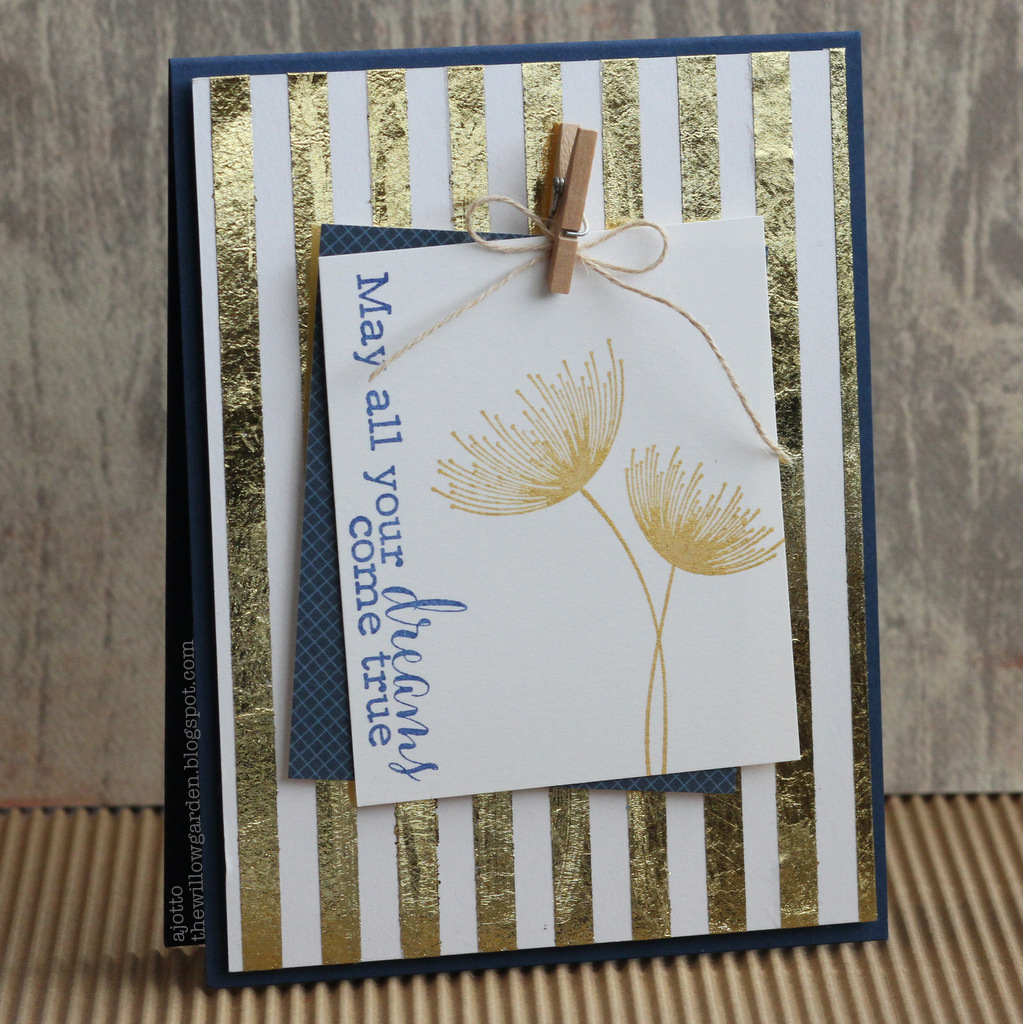
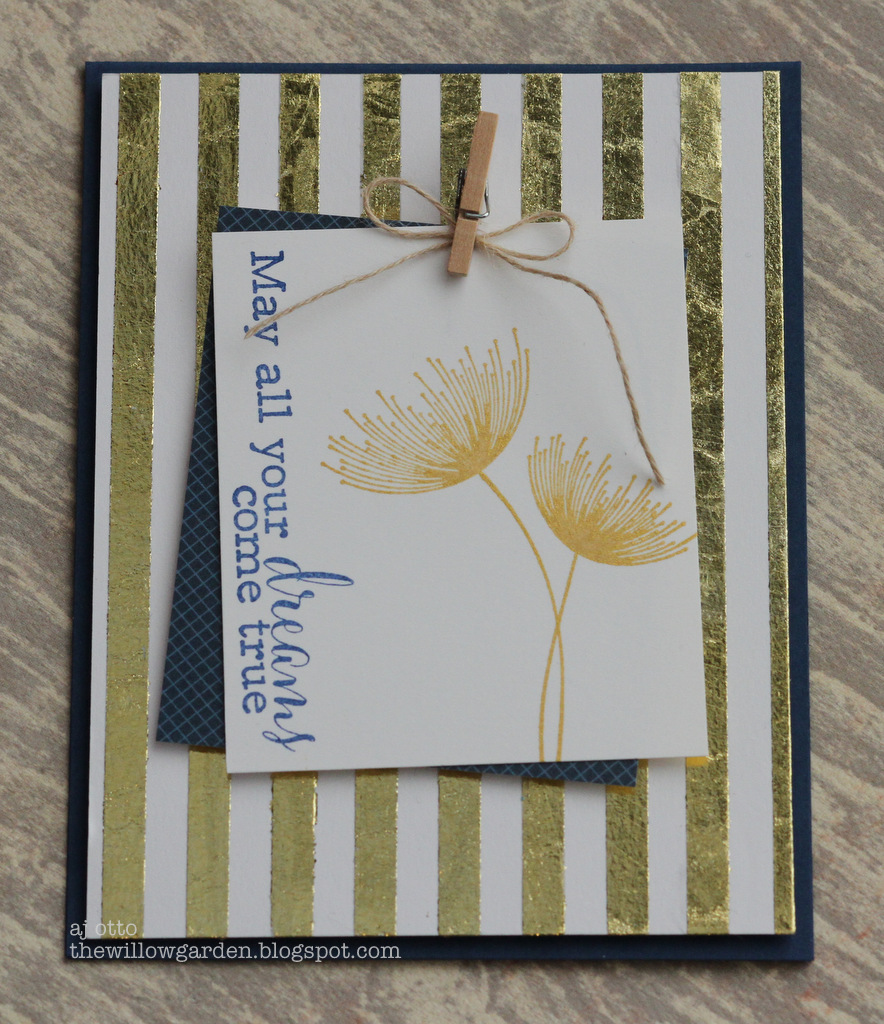
Hello!  AJ here with one of my favorite cards to date.  If you haven’t noticed, Gold foil is on everything lately!

AJOtto-Gold-1

I got some of Clearsnaps Designer Foils a long while back and just recently dug them out to join in on the FOIL craze happening everywhere.

AJOtto-Gold-2

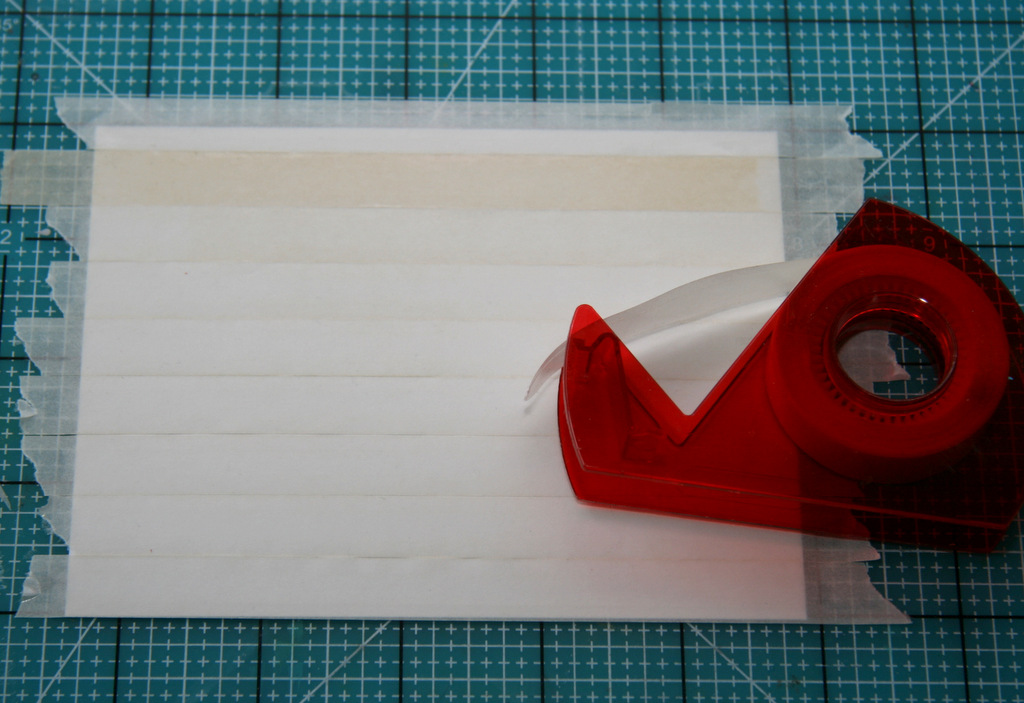
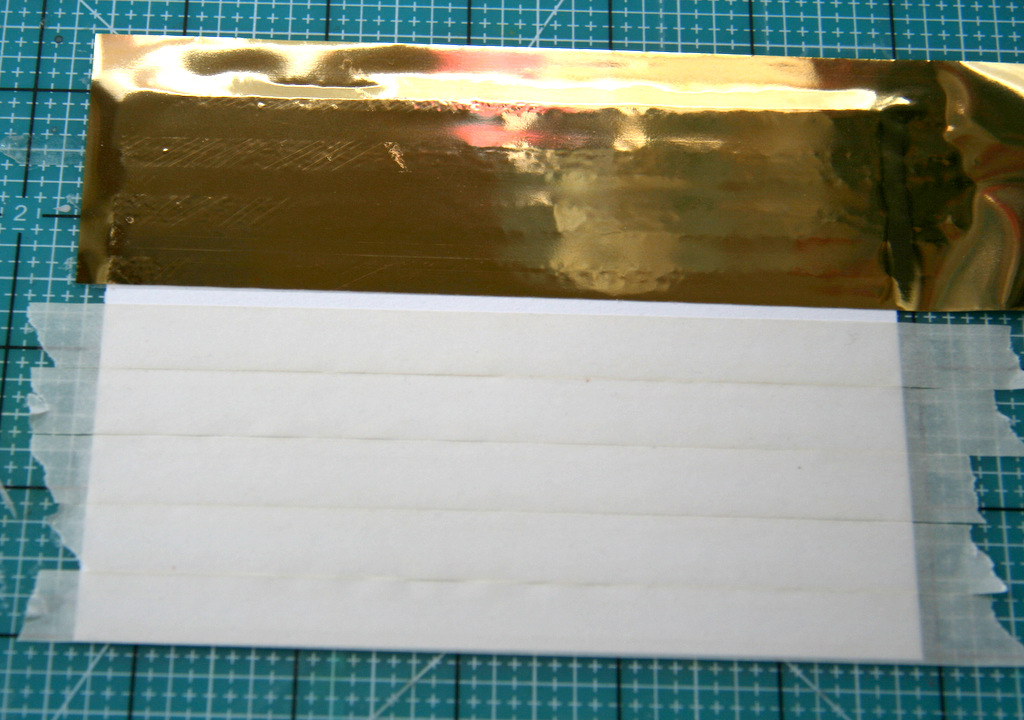
I love stripes. Stripes are hands down my favorite- they are timeless and can be used for any theme or style project.  To start with this project. I placed my card stock on to my work space to make sure it was even.  I just laid strips of Crafty Power Tape down, each one butting up to the previous.
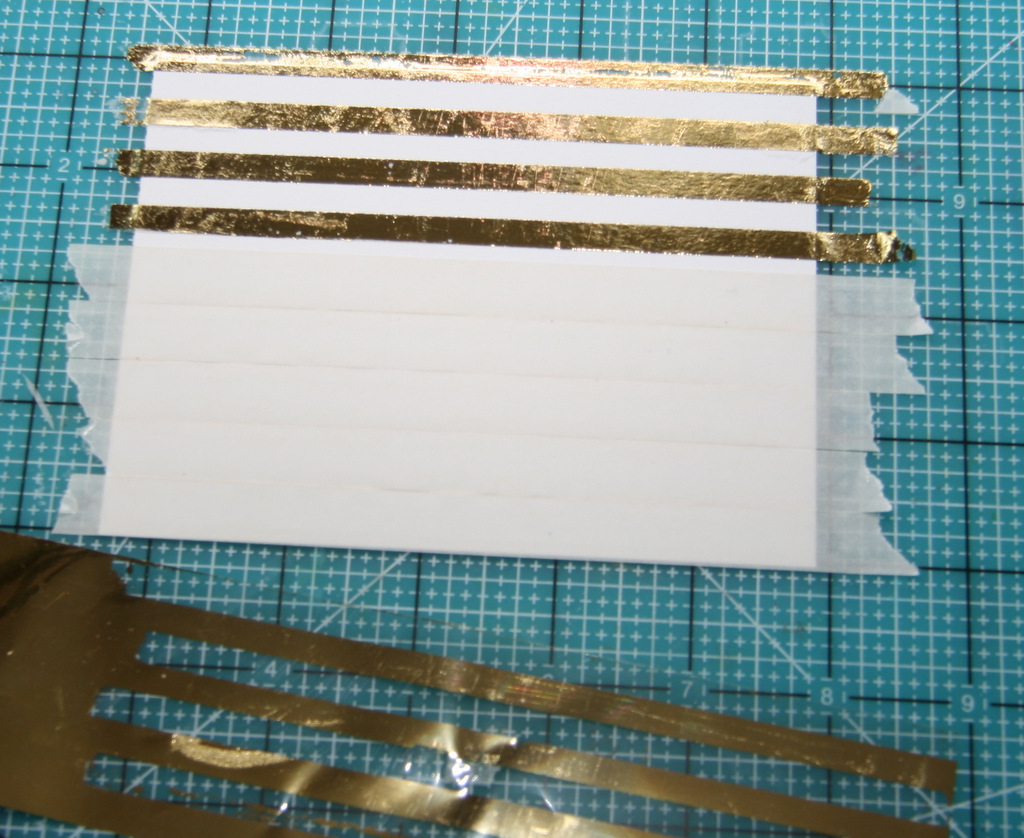
AJOtto-Gold-3When your card stock is fully covered, remove the backing of about 4 strips.  Place your foil, (color side up) and press into the tape.  You can carefully burnish it with your finger to make it all adhere.AJOtto-Gold-4Here’s with half done, and the remaining strips left on my foil strip I am using.  AJOtto-Gold-5

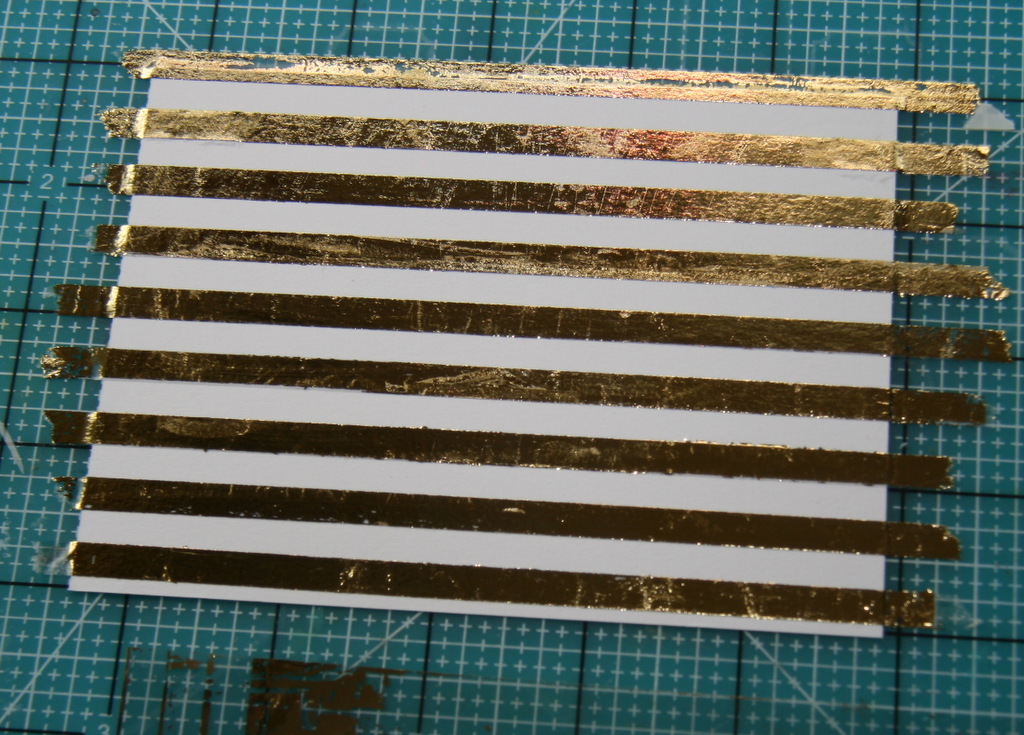
Remove the backing from the remaining strips, and repeat.  Gently lift up from your work space, and press the ends into the back.
AJOtto-Gold-6

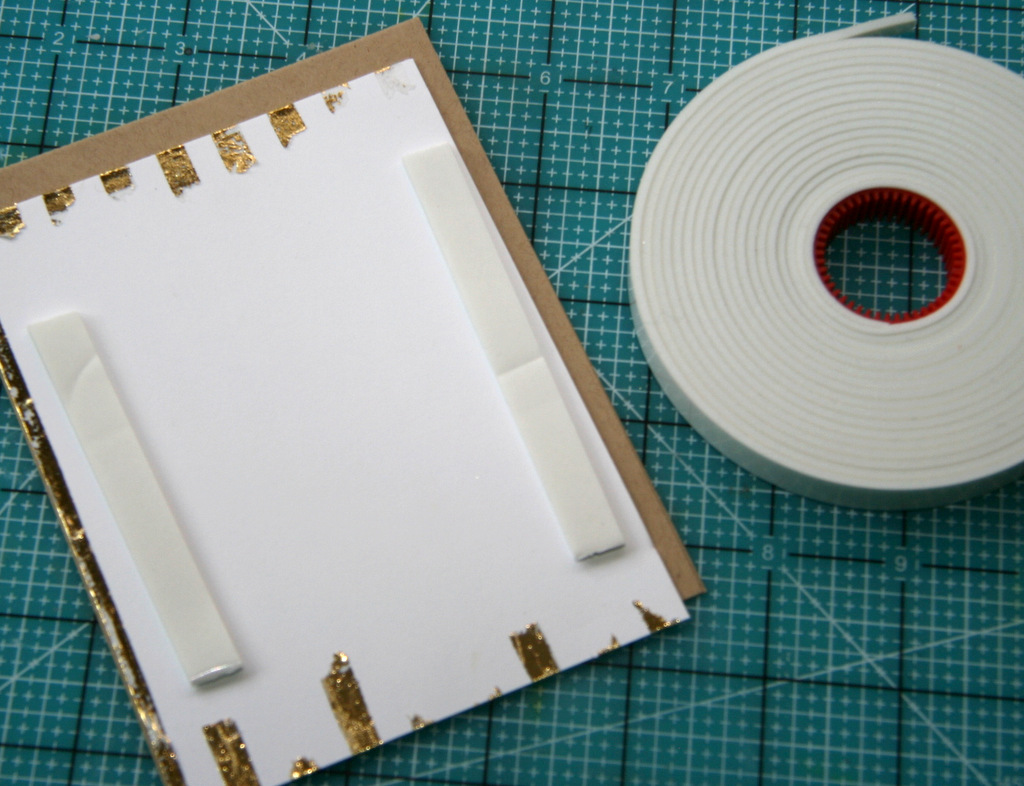
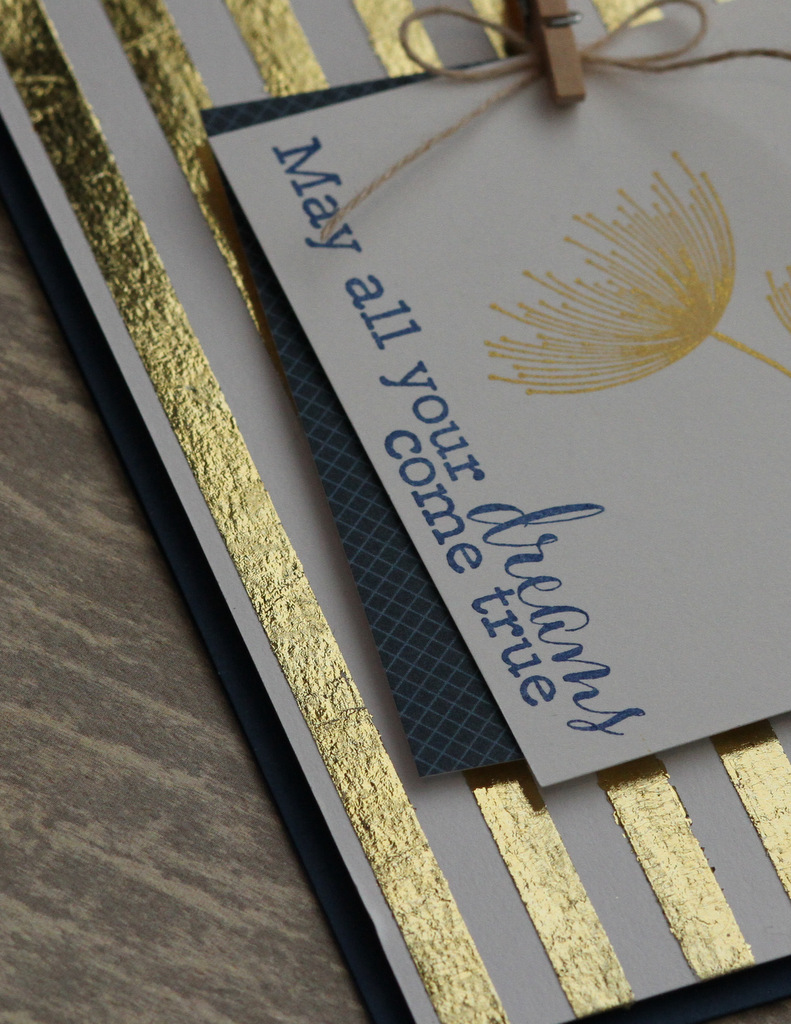
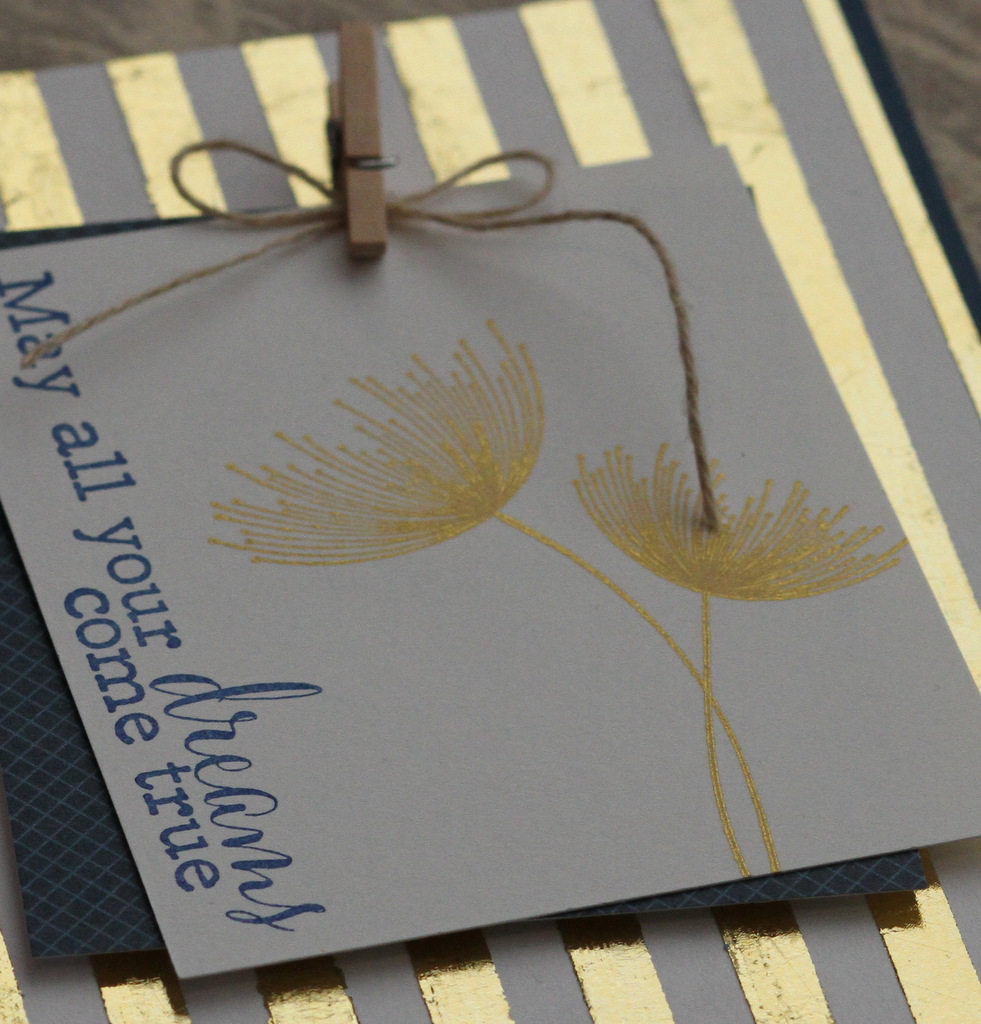
I used Crafty Foam Tape to adhere my panel to my card front.AJOtto-Gold-7A few close ups of the gold.  I just love it paired with the navy.AJOtto-Gold-8

AJOtto-Gold-9The Clearsnap brand comes with about 6 or 8 sheets.  I still have quite a bit left to play with! Im thinking something for my wall next! 😉

enjoy!
AJ

Scrapbook Adhesives by 3L® Products used: Crafty Power TapeCrafty Foam Tape

Clearsnap Designer Foils in gold, Tsukineko Delicata in Golden Glitz, Clearly Besotted stamps, Lawn Fawn patterned paper, Canvas Corp clip, twine, card stock.


I’m So Tuned Into You – Valentine Radio Tutorial

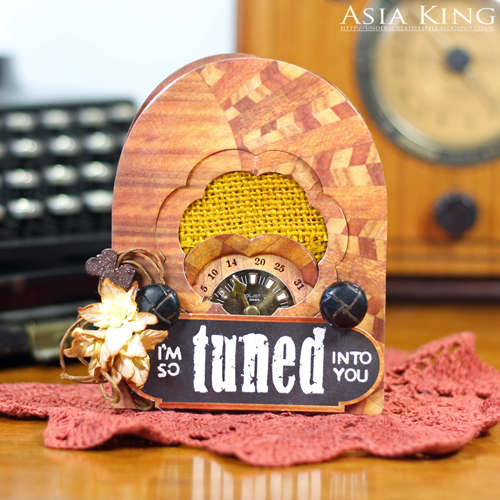
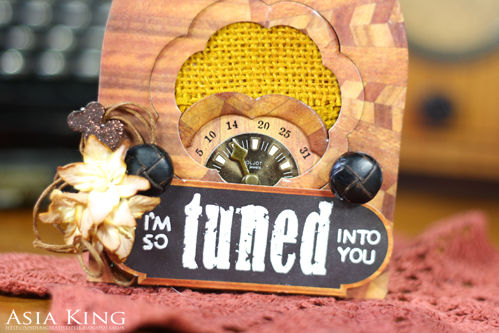
Happy Valentine’s Day everyone! Asia King here and today I would like to share a tutorial for this cute Valentine’s Day card I made for my husband.

My husband loves collecting vintage radios and I have been on a lookout for some related crafty items to make a card for him. I couldn’t find anything suitable so I decided to make my own ‘vintage radio’. I hope this tutorial will inspire you to try it out, too! So let’s begin!

Tuned into you_Asia King1

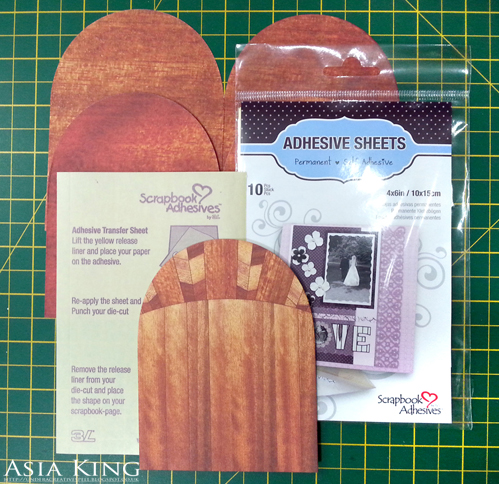
1. Trim in half a 12×12″ scrapbook paper with a wood design. Trim each piece to 6″ tall and 8″ wide. Score each piece at 4″ length and fold in half. Align each piece with the folded edge closely within the aperture of the largest Round Tag die and die cut. This way each die-cut shape will form two folding ‘pages’.

Apply Adhesive Sheets 4×6″ to the pages and bind them together – this will form a sturdier base for the card. If required, embellish the folds with some washi tape.

Cut an additional single shape for the card front.

Tuned into you_Asia King4

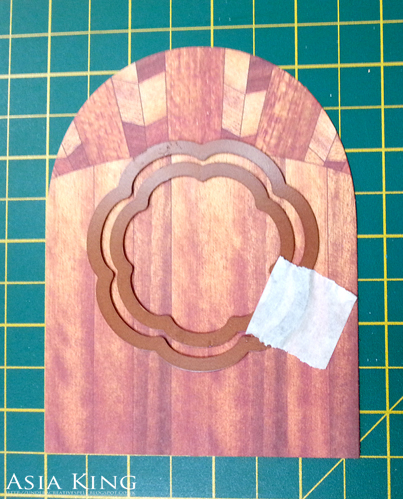
2. Layer Blossom Dies (as shown) and die cut a small aperture in the middle of the front panel. Keep all the cut outs.

Tuned into you_Asia King5

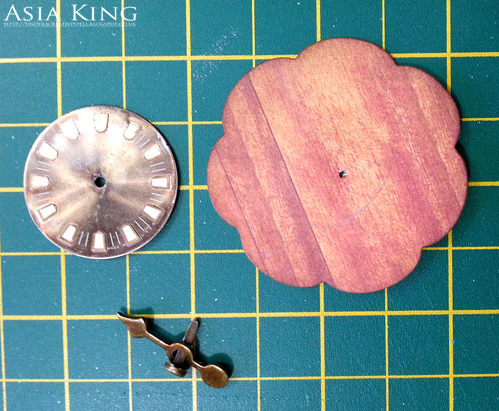
3. Pierce a small hole in the die cut blossom shape, align with a metal clock face and a small clock hand and secure all with a brad.

Tuned into you_Asia King6

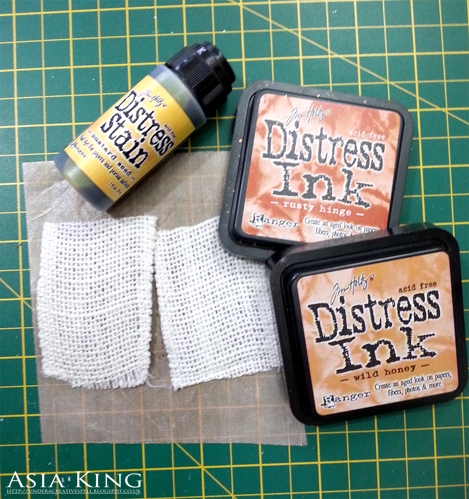
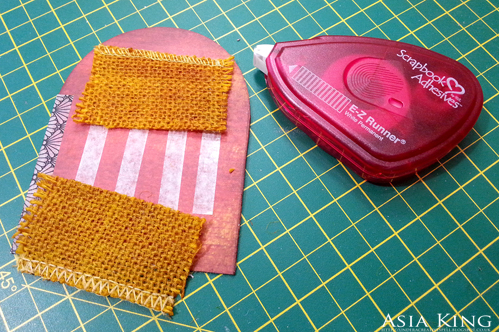
4. Cut two pieces of the burlap ribbon, big enough to fit the aperture of the front panel. Dye with Distress Inks and Stains. Allow to dry.

Tuned into you_Asia King7

5. Add some adhesive to the front of the card base with E-Z Runner® Permanent Strips and cover with the dyed ribbon.

Tuned into you_Asia King8

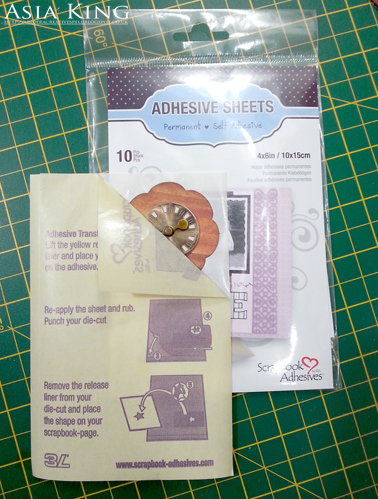
6. Cover the element created in step 3 with Adhesive Sheets 4×6″ and layer over the ribbons. Use the die cut front panel from step 2 as a guide for your positioning.

Tuned into you_Asia King9

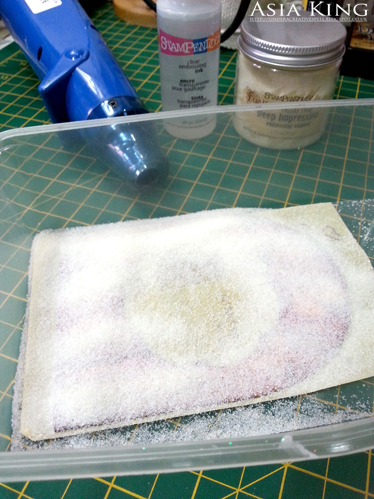
7. Cover the front panel generously with Boss Gloss and sprinkle with Clear Deep Impressions enamel. Heat with a heat gun. Repeat two more times.

Follow the same steps for the die cut blossom outline created in step 2.

Tuned into you_Asia King10

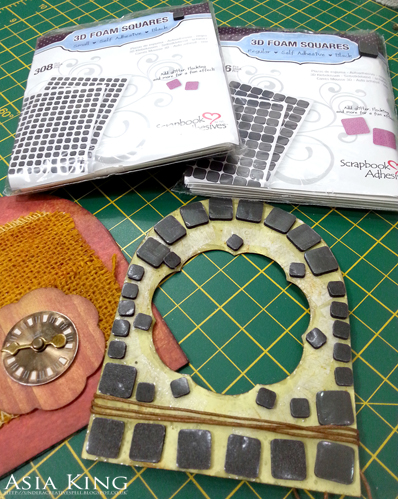
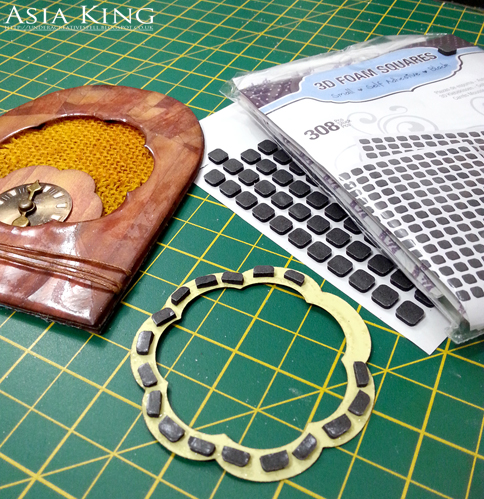
8. Cover the back of the panel with 3D Foam Squares Black Regular and 3D Foam Squares Black Small and adhere to the base of the card.

Tuned into you_Asia King12

9. Cover the back of the blossom outline with 3D Foam Squares Black Small and fit within the aperture of the front panel.

Tuned into you_Asia King13

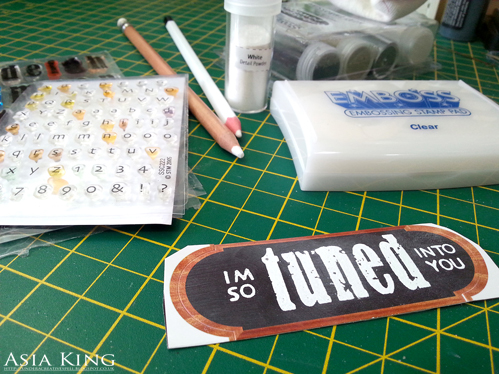
10. Stamp the sentiment onto a chalkboard sticker with clear embossing ink and heat emboss in white. Add some chalky finish with chalk pencils.

Tuned into you_Asia King14

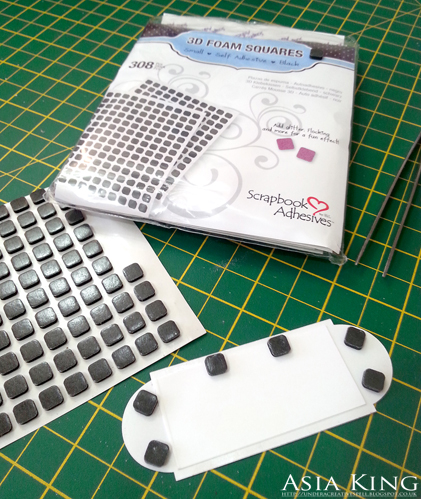
11. Attach the sentiment panel to the card with 3D Foam Squares Black Small. Just before you layer it onto the card, gently heat up the clear-embossed area of the front panel where the sentiment will be added. This will help the foam squares adhere to the embossed area.

Tuned into you_Asia King15

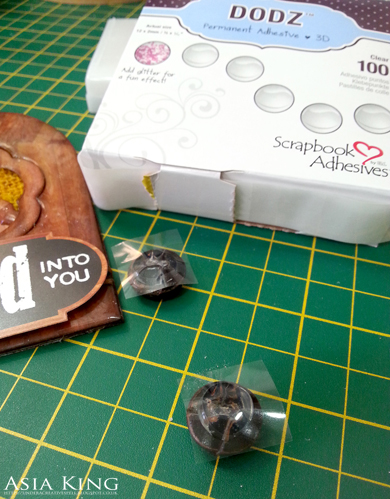
12. Adhere a couple of large leather buttons as radio dials with Adhesive Dots 3D. Again, gently heat the enamel before positioning to help ’embed’ the elements.

Tuned into you_Asia King16

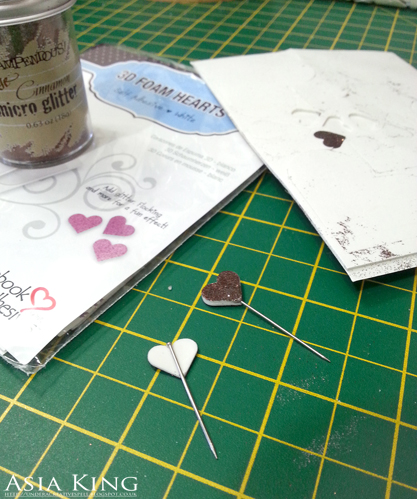
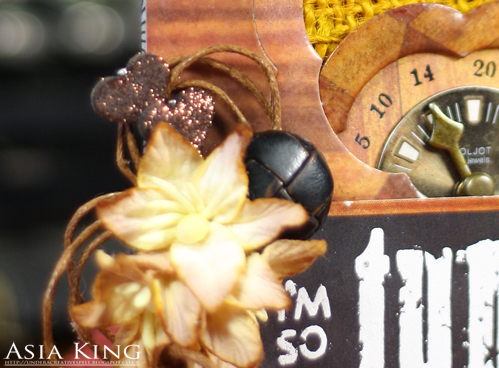
13. Cover the tops of 4 small 3D Foam Hearts with Maroon glitter. Create two decorative pins by ‘sandwiching’ dressmaking pins between two hearts stuck together.

Tuned into you_Asia King17

14. Add the pins to the card.

Tuned into you_Asia King2

15. Embellish the card further with a suede twine bow, paper flowers and rub-on numbers for the tuning dial.

Tuned into you_Asia King3

Supplies used:

Adhesive Sheets 4×6″E-Z Runner® Permanent Strips3D Foam Squares Black, Regular3D Foam Squares Black, SmallAdhesive Dots 3D, 3D Foam Hearts

Other supplies:

Stampendous Tiny Alphabet and Vintage Lowercase Perfectly Clear stamps, White Detail Embossing Powder, Deep Impressions Chunky Embossing Enamel (clear), Boss Gloss, Maroon Micro Glitter

Sizzix Tags Round  dies and Spellbinders Blossom Die; Monte Paper Mill Take2 papers, Maya Road Calendar rub-ons, clear embossing ink, Tim Holtz Ideaology Game Spinners and fasteners, small metal clock face from a hand watch, Tim Holtz Distress Inks/Stains (Mustard Seed, Rusty Hinge, Wild Honey), suede twine (May Arts)

I hope you enjoyed today’s tutorial – and if you did, please leave some love for us in the comments below :). Thank you for sharing your Valentine’s Day with us!

Big crafty hugs

Asia King Blog signature

Save

A Vintage Valentine Card Tutorial

Happy Valentine’s Day everyone!  Ahhhh….the day of love! Have you been making any Valentines?  I created a few, and here is one that is a more elegant, vintage design.

kellyklapstein-valentine-4

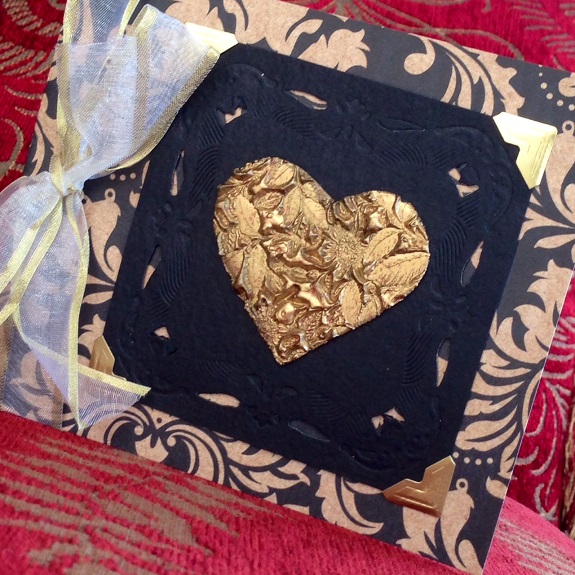
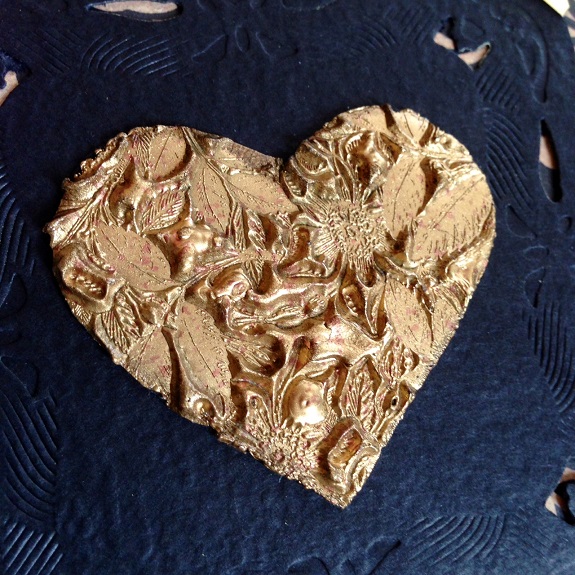
I heat embossed a 3D Foam Heart with gold embossing powder onto a die cut piece of black card stock, which is attached to my card base with Gold Creative Photo Corners.

kellyklapstein-valentine-2
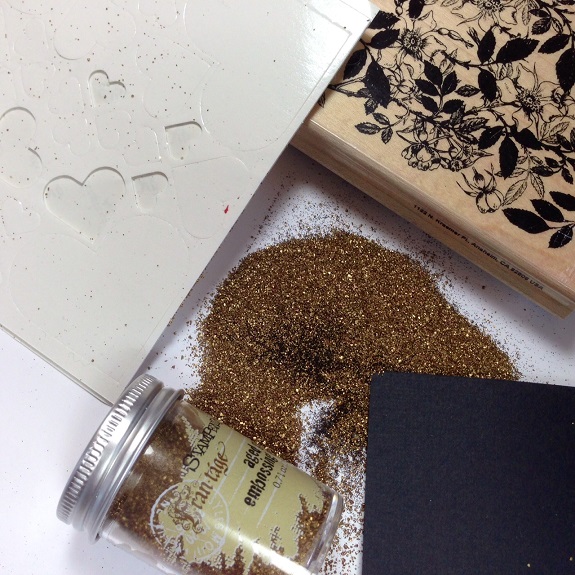
To do this, you need the following supplies: a rubber stamp, gold embossing powder, a heat gun, cardstock, and of course a 3D Foam Heart. You can also do this technique with every 3D Foam Shape because the high density foam can be heat embossed!
kellyklapstein-valentine-1

Here is a short video tutorial that demonstrates this technique:

Direct link to the video

I hope you give it a try with your 3D Foam Shapes and impress the ones you love!

Kelly Klapstein

ADHESIVES: 3D Foam Hearts, Creative Photo Corners Gold, E-Z Dots Permanent
SUPPLIES: Bazzill Basics cardstock, Kaisercraft paper, May Arts Ribbon, Stampendous stamp and Embossing Enamel, Spellbinders die and Grand Calibur

Mason Jar Candy Holder

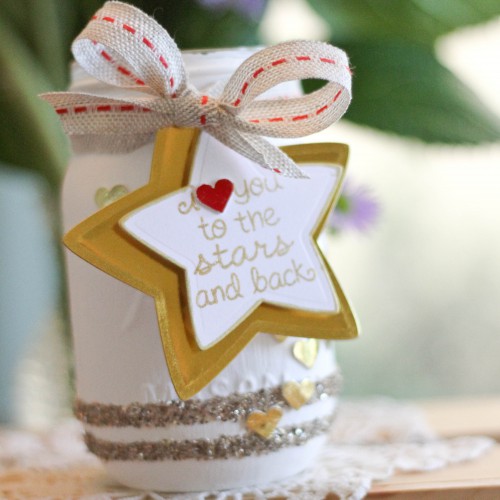
0212LYmasonjar1

Latisha here with you today.  I have a whole lot of unused mason jars laying around, so I decided to put them to use as Valentine Candy Holders.

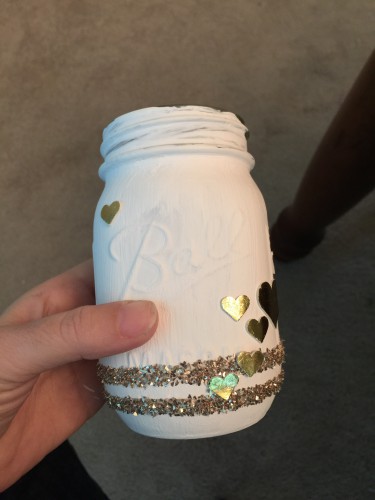
1. Paint mason jar with paint of choice, I used DecoArts Chalk Finish paint (2 coats)

2. Wrap Scrapbook Adhesives by 3L Crafty Power Tape around the mason jar, sprinkle glitter over top.

3. Repeat step #2, so you have to lines of glitter that circle the jar.

4. Add gold ClearSnap foil to the Scrapbook Adhesives by 3L 3D Hearts, adhere to the jar.

IMG_7526


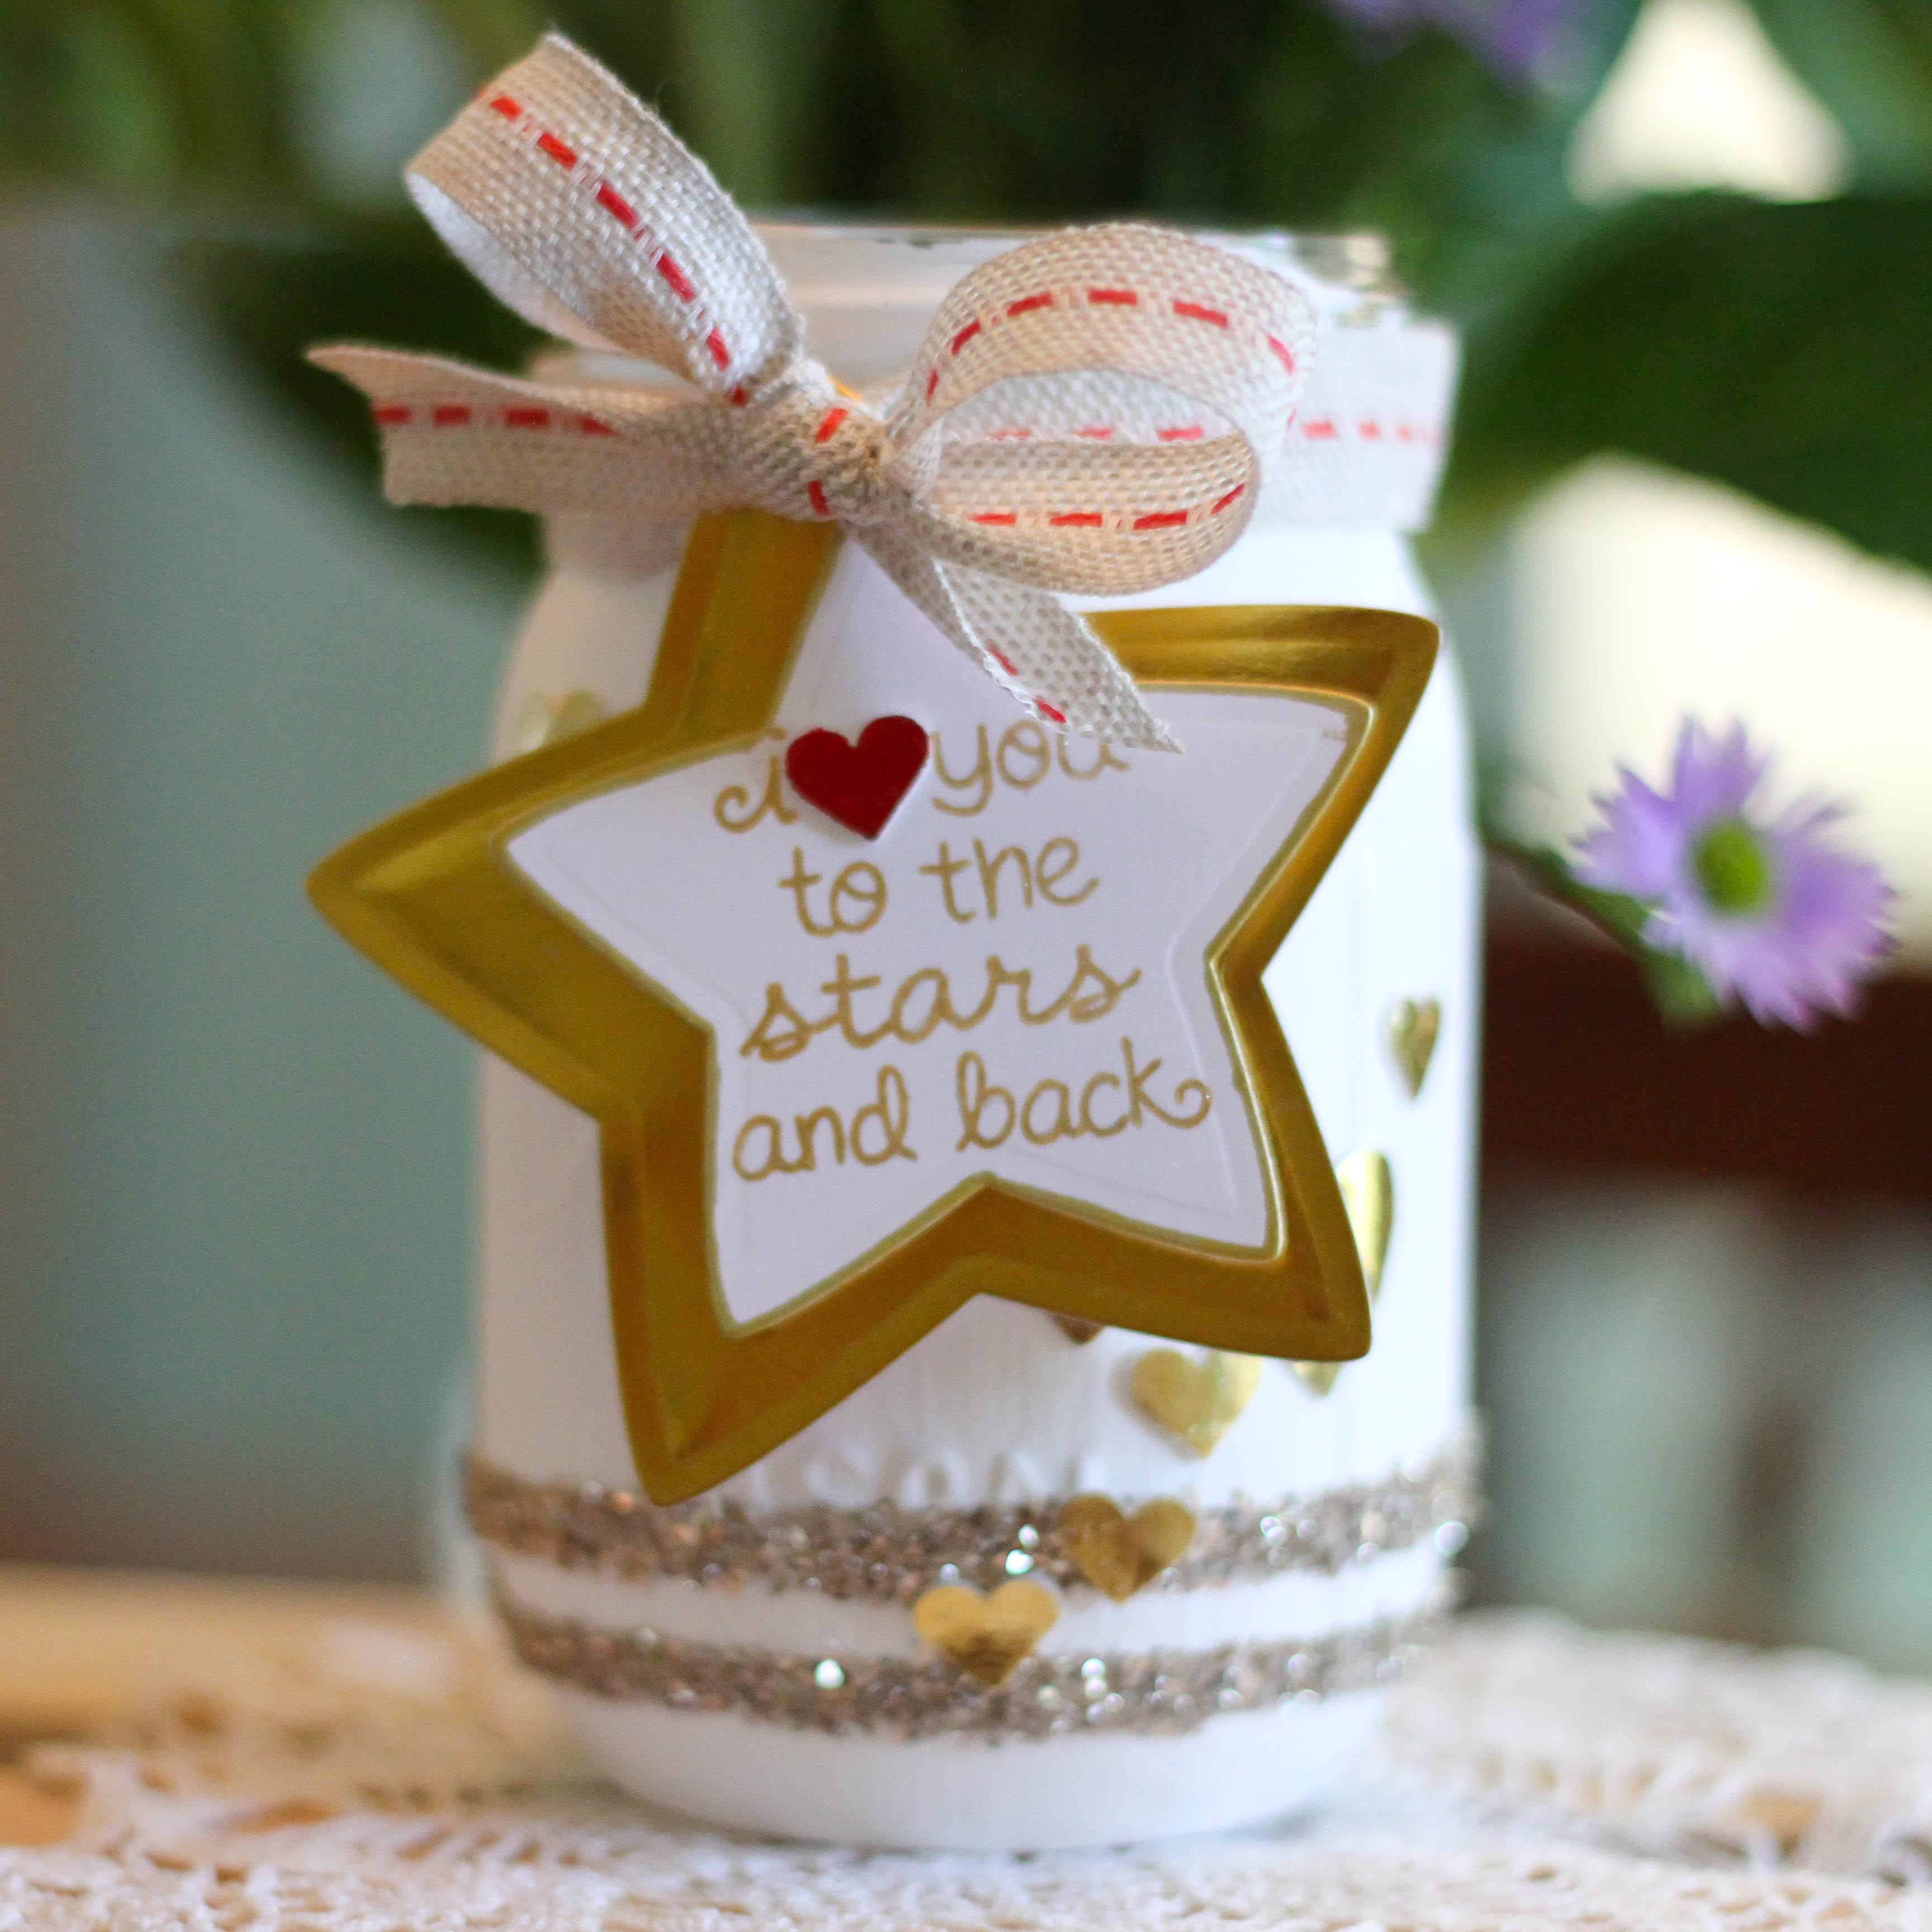
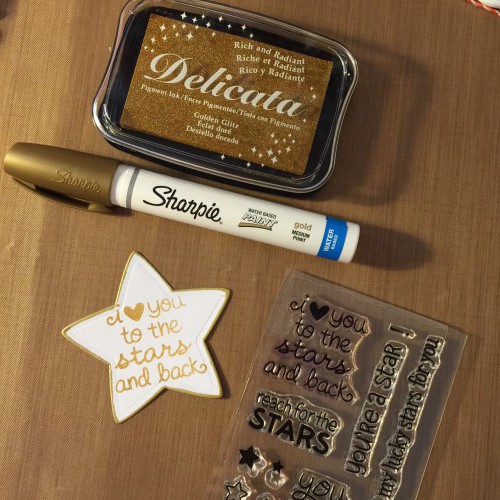
5.  Die cut white card stock using Lawn Fawn Star dies.

6. Stamp sentiment in gold ink.

7. Line the star using a gold pen.

IMG_7528


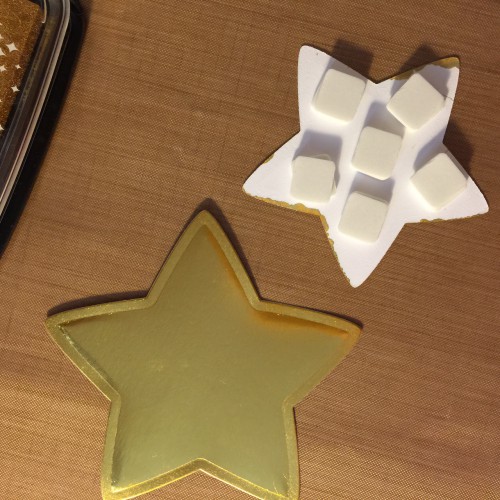
8. Using Scrapbook Adhesives by 3L 3D Foam Squares, adhere the stamped diecut to a larger gold diecut.


IMG_7529


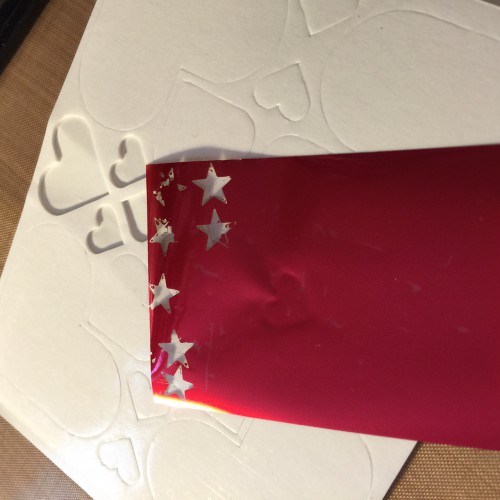
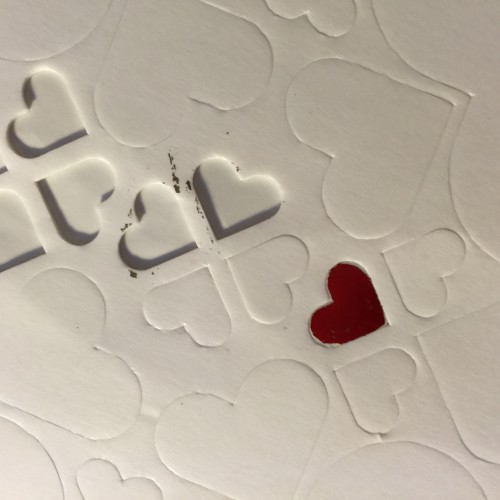
9. Add red ClearSnap foil to a Scrapbook Adhesives by 3L 3D heart, and adhere it to the sentiment.


IMG_7531

IMG_7532


10. Punch a hole in the star diecut, tie ribbon through the hole and attach to the jar.


0212LYmasonjar2


Fill with candy and give to someone you love.


Materials Used:

Scrapbook Adhesives by 3L Crafty Power Tape

Scrapbook Adhesives by 3L 3D Foam Hearts

Scrapbook Adhesives by 3L 3D Foam Squares (white, regular)

Lawn Fawn star diecuts

Lawn Fawn Stamps

Fancy Pants Designs Gold Foil Cardstock

Stampendous gold glitter

ClearSnap gold foil

ClearSnap red foil

Tsukinkeo Delicata gold ink

DecoArts Chalk Finish Paint

May Arts ribbon


Grateful For You – Simple Valentine’s Day Card

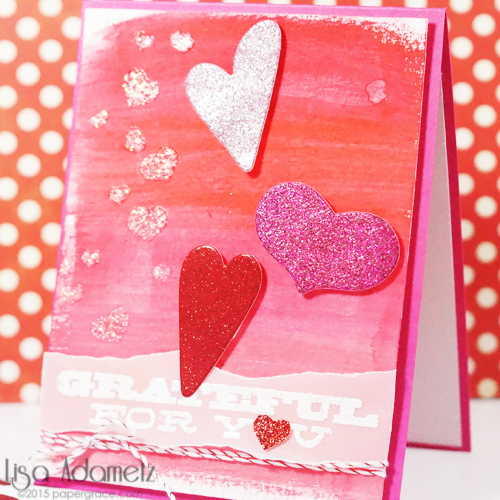
Hi everyone! It’s Lisa here to share a really simple, but beautiful, Valentine card. Cards like these are just perfect for friends, neighbors, or anyone that you just want to say “thanks” to.

LisaAdametz-Grateful4You-1

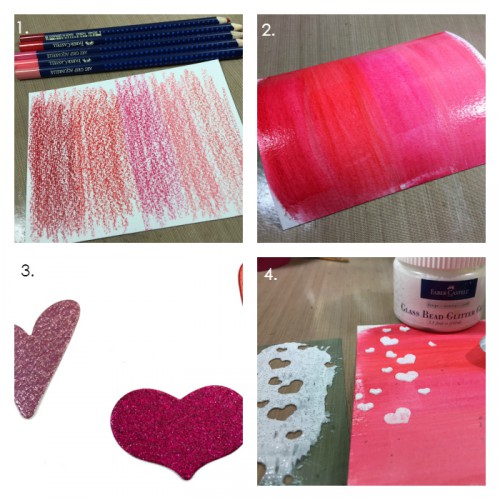
1. Scribble watercolor pencils over the watercolor paper (I chose reds and pinks for Valentine’s Day).

2. With a paintbrush, baby wipe, or wet fingers blend the scribbled colors so that they are now watercolors. Either allow to air dry or heat set with heat tool. Set aside.

3.  Using different colors of glitter paper, a die-cutting machine, and dies – die-cut 3 hearts.

4. Using stencil with hearts, apply Glass Bead Glitter Gel to one portion of card front very thinly using palette knife. If Gel is applied too thickly it can take a long time to dry. This should NOT be heat set as it will bubble.

LisaAdametz-Grateful4You-4

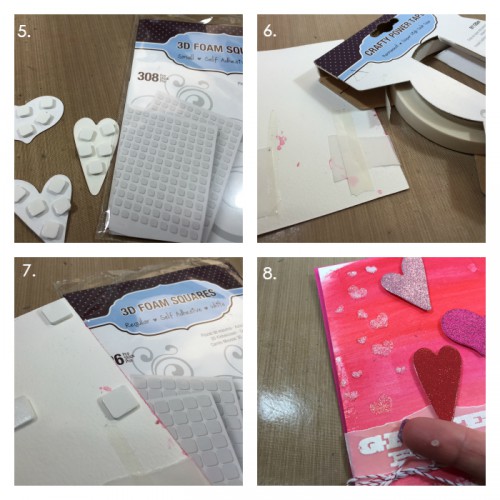
5. Apply 3D Foam Squares – White, Small to backs of hearts and apply the hearts to the card front.

6. Tear piece of vellum, stamp sentiment in Versamark, heat emboss using white embossing powder. Wrap vellum around card front and secure in back using Crafty Power Tape.

7. Place 3D Foam Squares – White, Regular all over back of card front.

8. Wrap baker’s twine around card front and secure in bow. Using Dodz Small roll in ball and place under bow to secure. Remove backing from 3D Foam Squares – White, Regular and secure to card base.

LisaAdametz-Grateful4You-5

This card is so easy to make AND replicate! How fun would it be to make a bunch of these cuties for your best girlfriends?

Supplies:
From Scrapbook Adhesives by 3L®:
E-Z Dots® Permanent Refillable Adhesive (inside card)
3D Foam Squares White – Regular
3D Foam Squares White – Small
Crafty Power Tape
Dodz Small

Other Supplies:
My Favorite Things: Cardstock, Stamp (My Favorite Sentiments), Die (Rustic Hearts)
Faber-Castell Design Memory Craft®: Art GRIP® Aquarelle Watercolor Pencils, Glass Bead Glitter Gel
Twine: Target; Stencil: Heidi Swapp; Punch: Martha Stewart/EK Success.
Watercolor paper.

LisaAdametz-sig

Save

Happy Valentine’s Day!

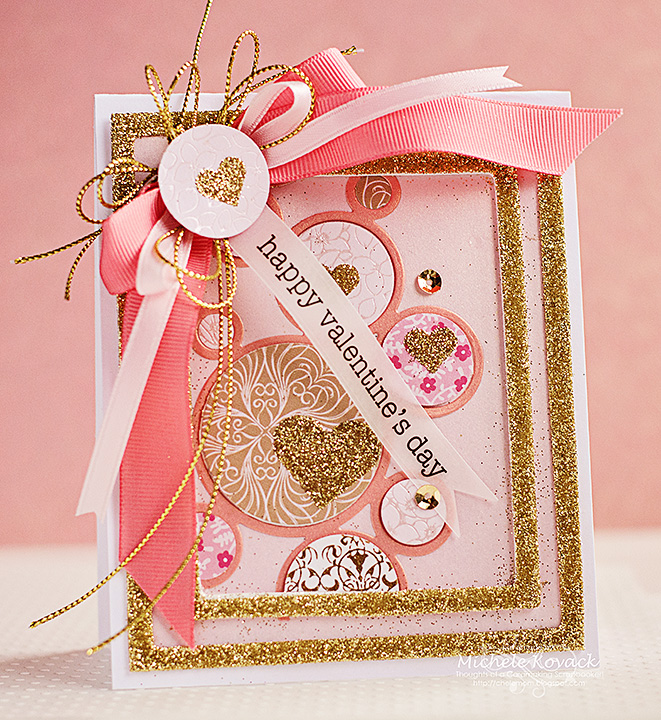
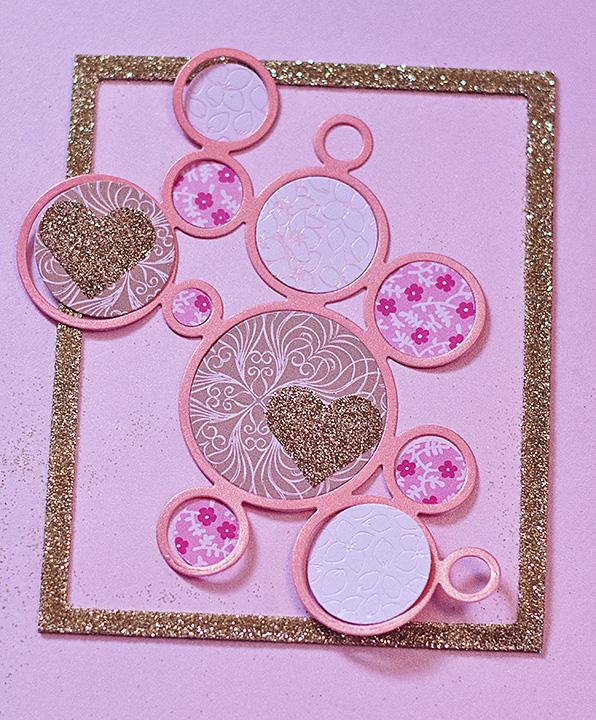
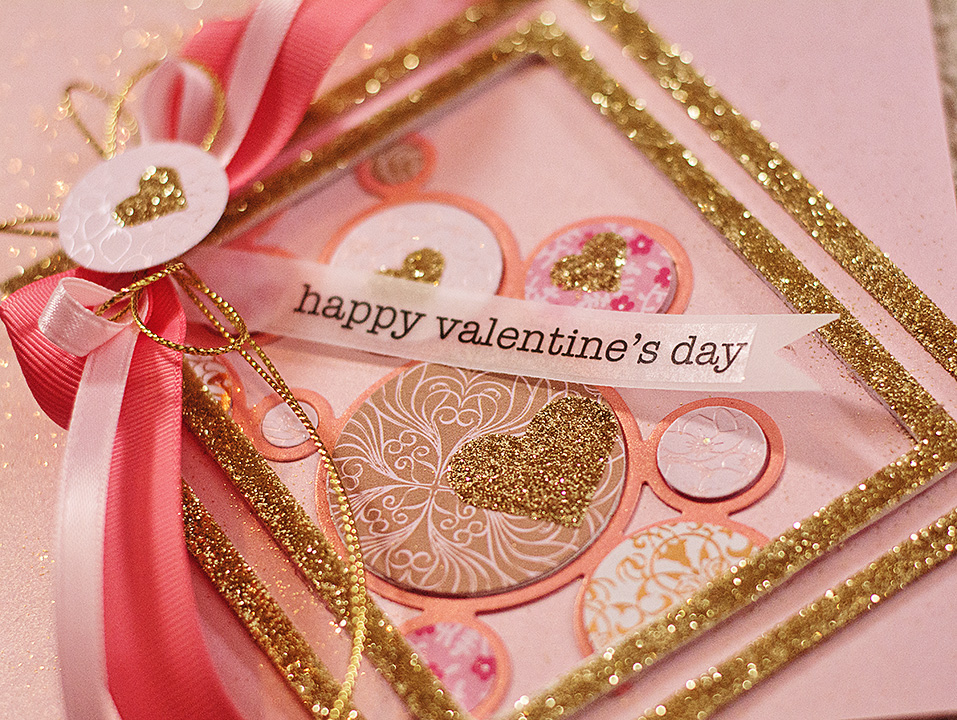
Michele here with a Valentine’s Day card! I’ve noticed that I have been on a pink/coral/gold kick these days! So please forgive me if I am being somewhat repetitive. I used some of my favorite Scrapbook Adhesives by 3L products to create my glittery dimensional card.

valentine circles

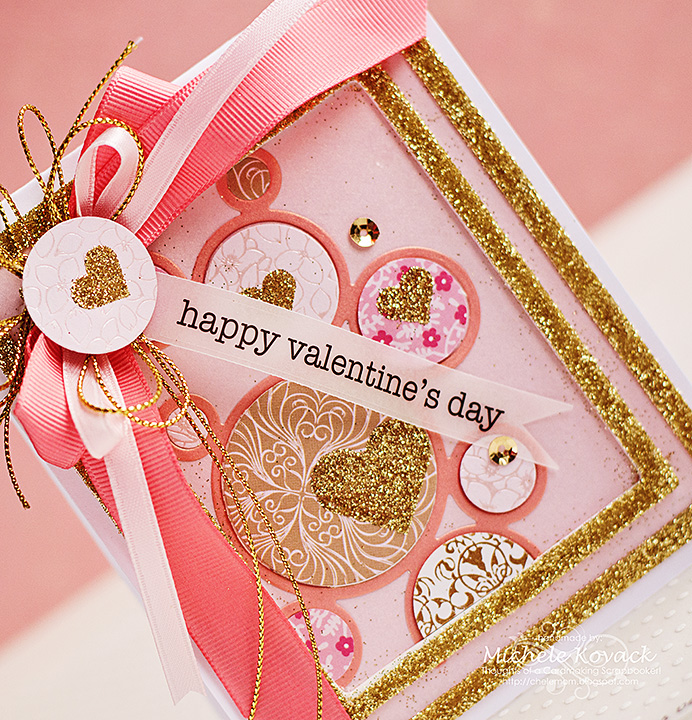
I have a step by step photo tutorial to share my chaotic creative process! 😉

valentine circles close

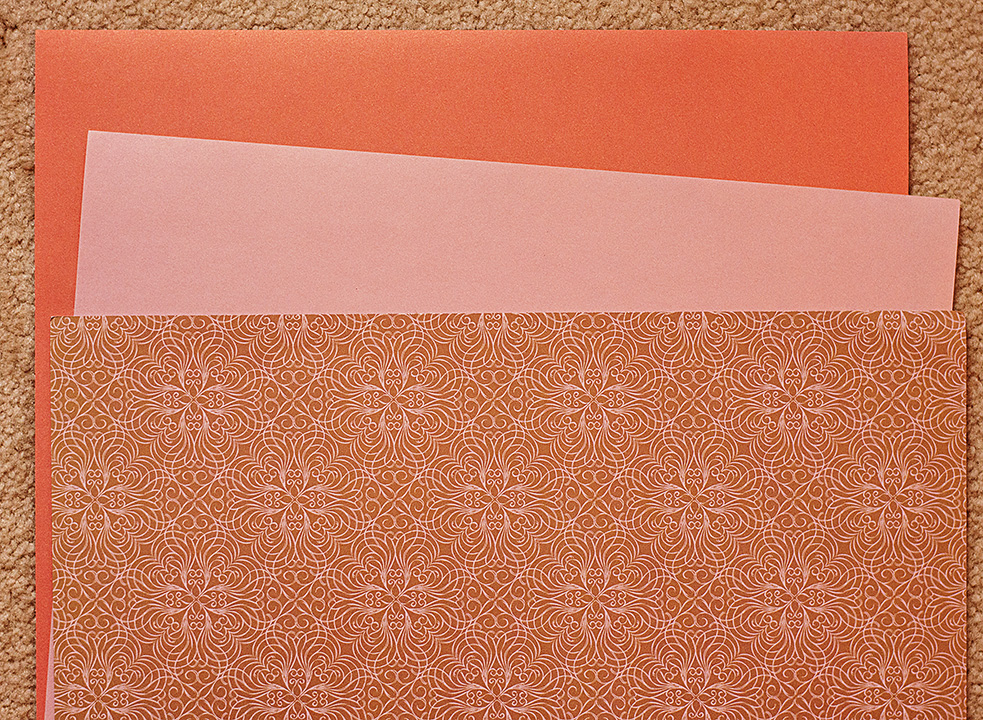
I’ve been asked many times if I have a plan when I am starting a card.  Nope, not really. Though I do try and pick papers first to inspire me.  From there the project takes on a life of its own. For today’s card I used some older papers in my stash.  (I’ve got lots and lots of old paper!)

step4

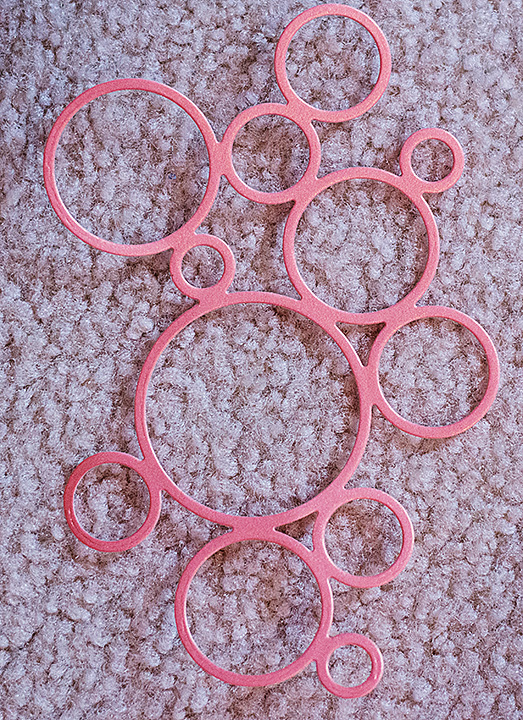
Does this die cut also look familiar?    I can’t seem to get away from some of my favorites. They just seem to suck me in!

step5

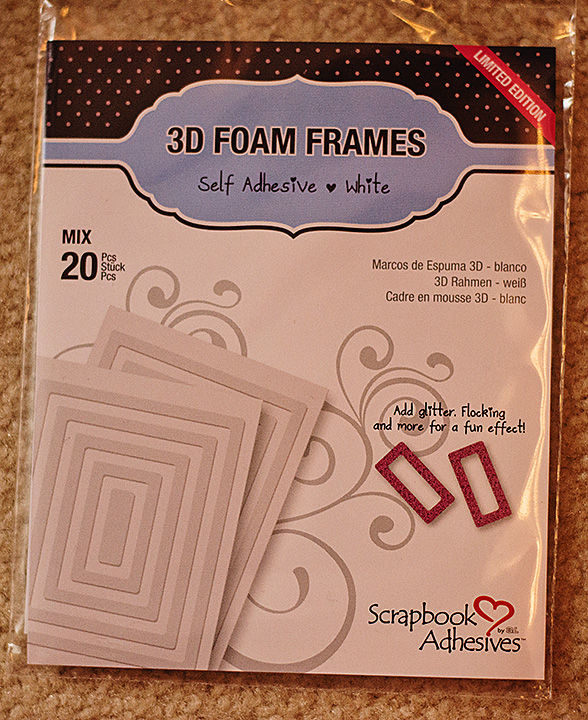
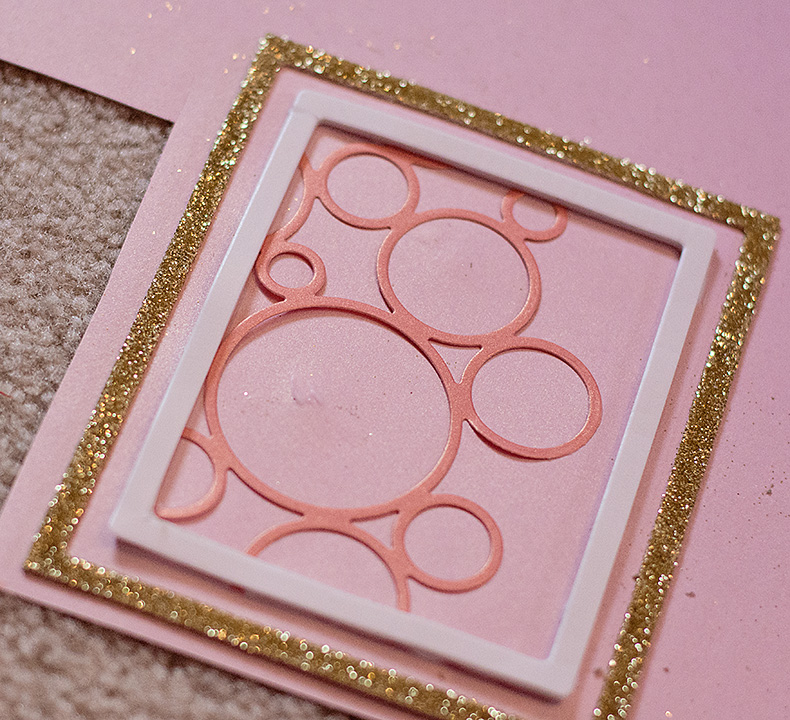
I love these 3D Foam Frames. Such an easy way to add dimension to a card without a crazy amount of bulk!

step3

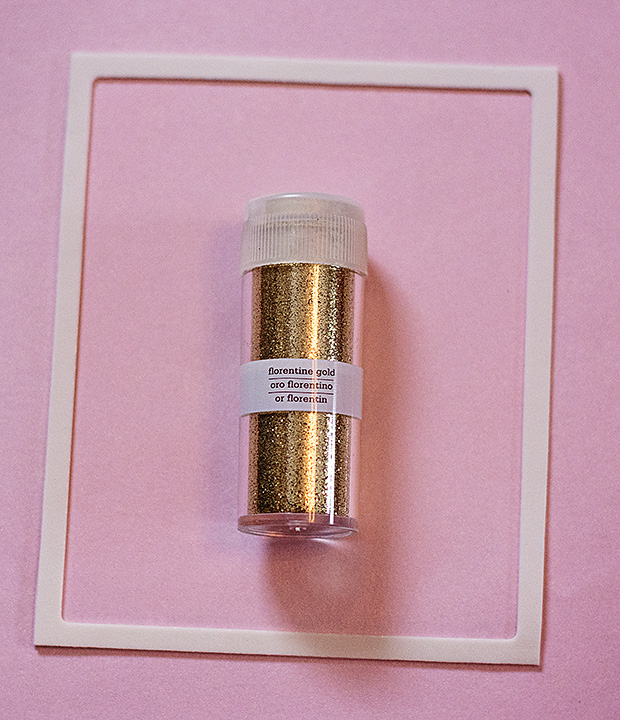
The frames are double sided so I peeled one side off and stuck it directly to my pink background paper.

step7

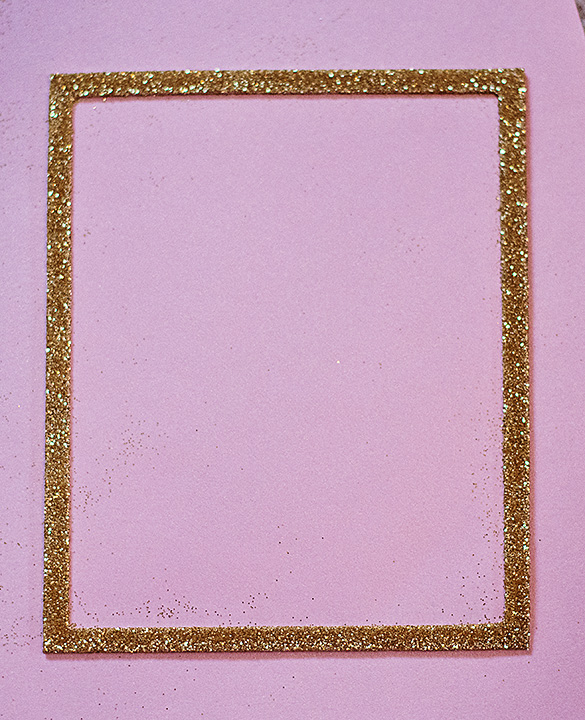
I peeled the other side off and dumped my gold glitter over it.

step8

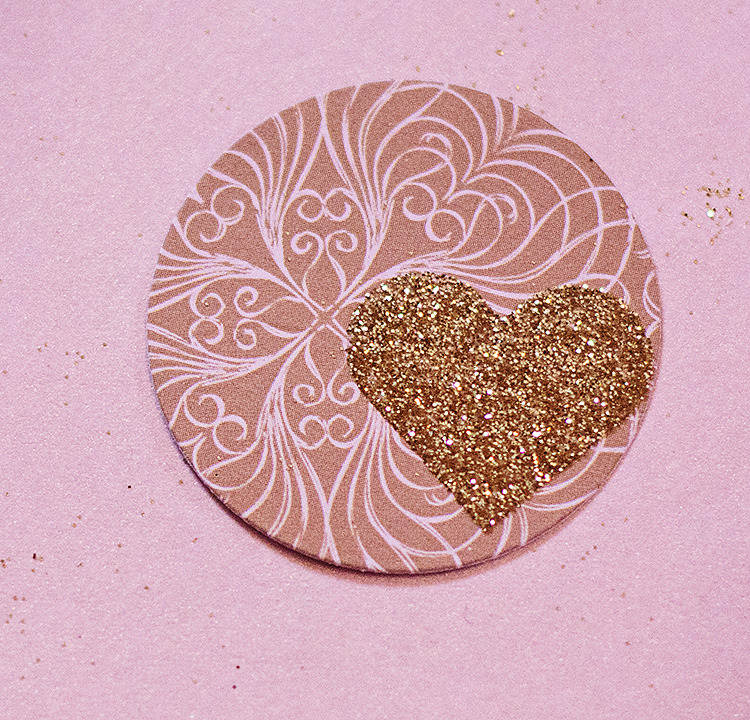
I had several different circles from the die cut above and knew I wanted to place many of them back into the die cut.  But first I added  3D Foam Hearts to random circles.

And of course, add more glitter!

step9

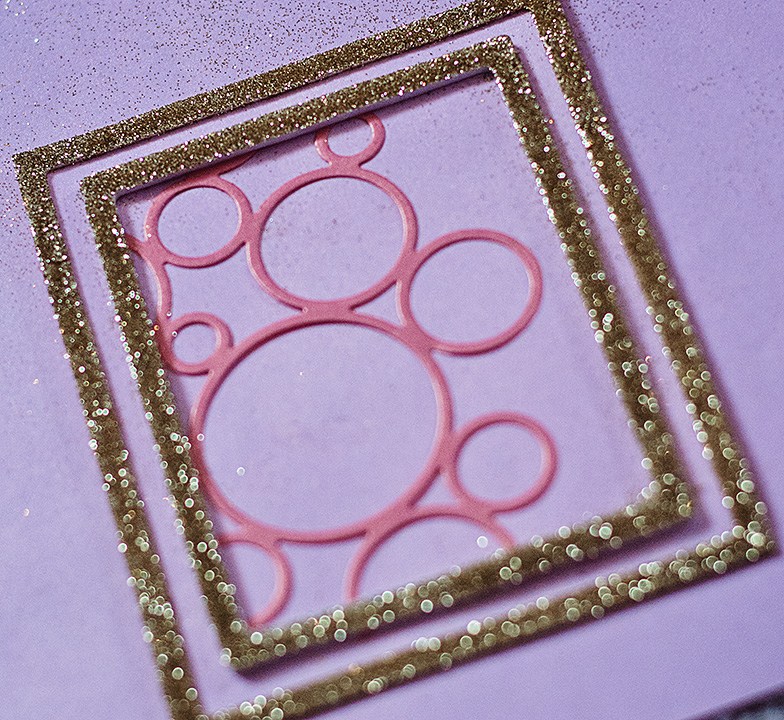
I placed the circles on my paper and decided that I wanted a second frame.

step10

I added the second 3D Foam Frame and cut off any excess circles.

step11

Once again, I dumped more glitter over the frame.

step12

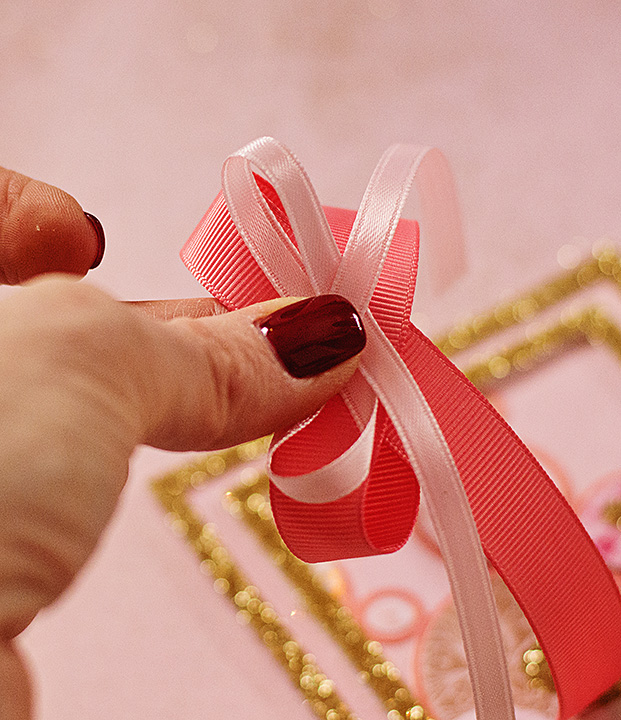
I am often asked about my bows.  I rarely “tie” a bow the traditional way.  Instead I overlap each loop and pinch in the center. For this card I did this with two bows and placed them on top of one another.

step13

Then I take coordinating string and tie it off in the center.

step14

I added a sticker to vellum and placed it under my bow.  I didn’t like how the sentiment was resting on the card.  I wanted it curved a bit.

step16

So my Dodz™ Small came to the rescue!  Just place a small Dodz™ at the end of the sentiment….Dodz Small


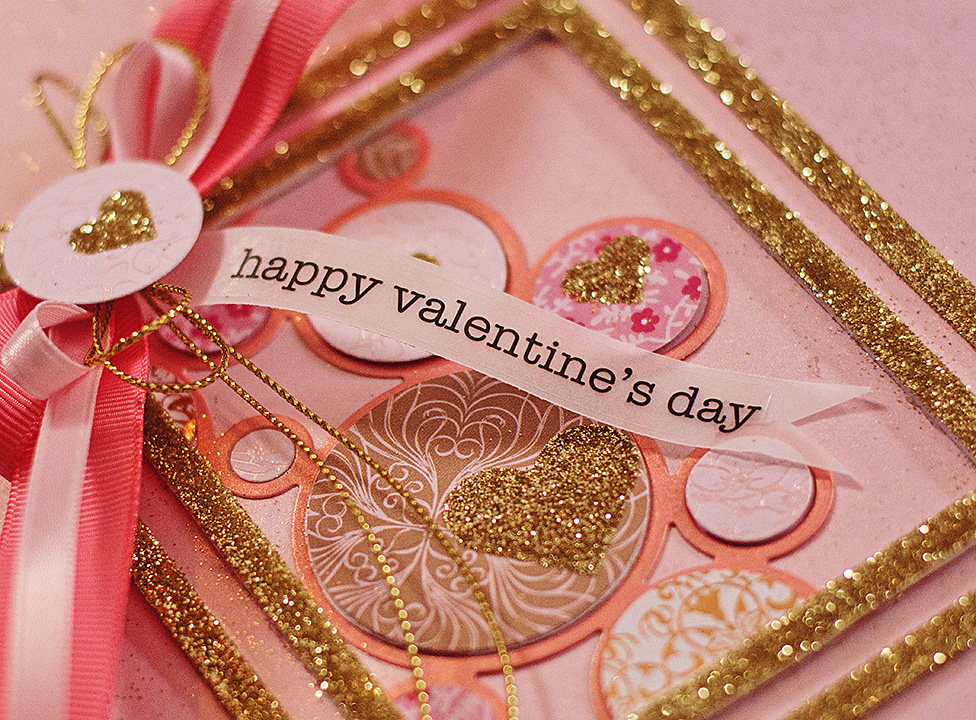
Voila!  A curved, dimensional sentiment!

step17

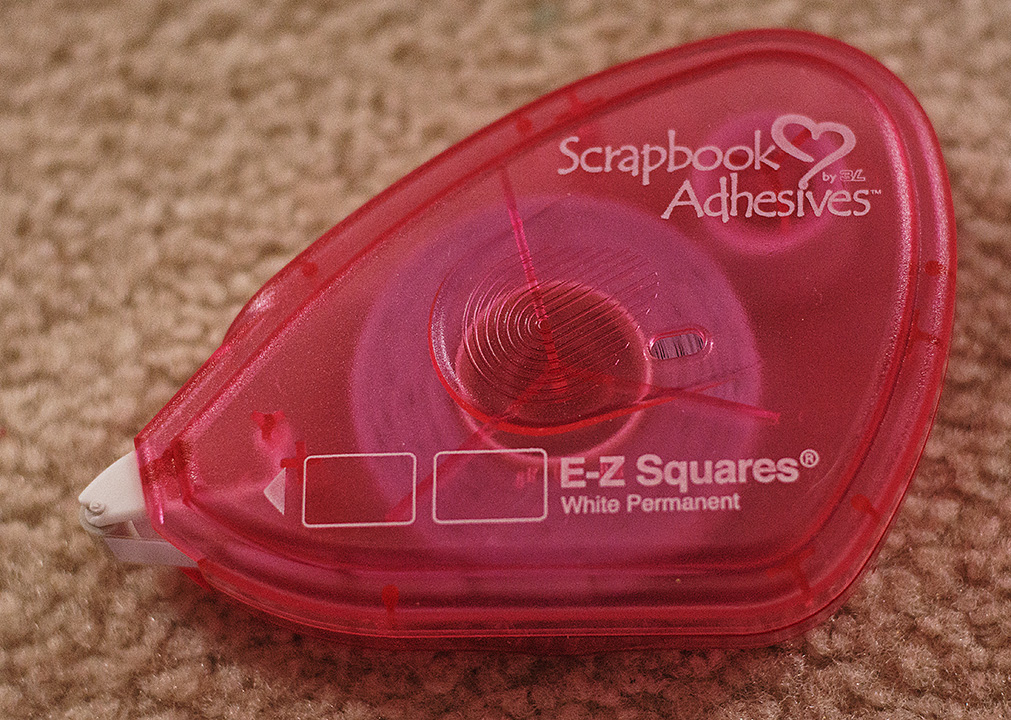
The whole thing was adhered to the front of my card using E-Z Squares®.

step18

Here is one last look at the finished card.  🙂

valentine circles

Thank you so much for stopping by today!!

Supplies:

Other Supplies:

  • Circle die
  • Sticker
  • Vellum
  • Ribbon
  • Gold cord
  • Sequins
  • Gold glitter

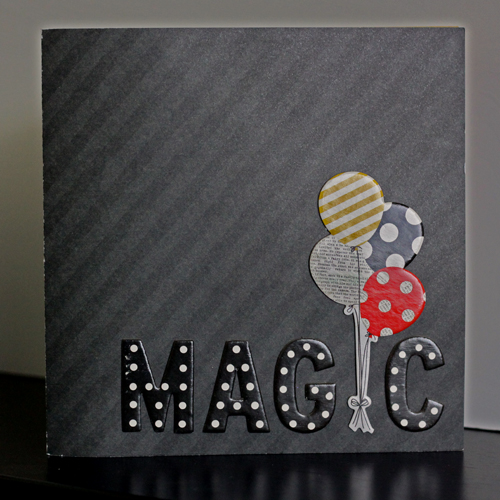
“Magic” Accordion Fold Mini Album – Ready for Photos!

Hello all! It’s Angela today sharing a accordion fold style mini album that I made in advance of our family’s upcoming Disney cruise.

"Magic" Accordion Fold Mini Album by Angela Ploegman

This album is completely pre-made, ready for my photos to be added. I haven’t done anything with our Disneyland pictures from several years ago. Maybe having a ready made album might help ensure the timely documentation of our family vacation.

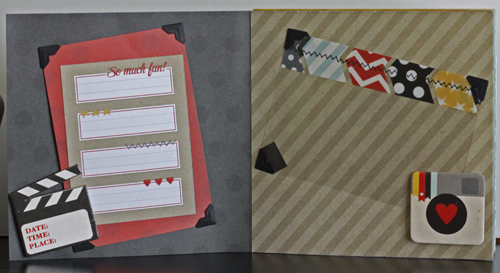
All of the self-adhesive chipboard in the album was reinforced with the Adhesive Sheets – 4 x 6″. I find for projects that will be handled often (especially by little hands) that this extra step ensures all the pieces stay in their correct places!

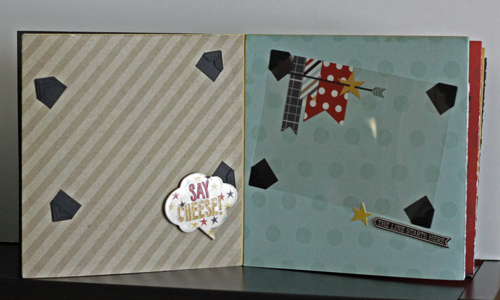
The album is held together (i.e. the accordion folds are fastened) with the E-Z Runner® Permanent Strips – Refillable. Spots for the photos are identified by the Creative Photo Corners – Black. Here are a couple of examples of the inside pages. Some of the embellishments were popped up with the 3D Foam Squares – White, Regular.

magic accordian mini album angela ploegman inside 2

magic accordian mini album angela ploegman inside 1

Now that the album’s all done, I can hardly wait for the trip!

Thanks for stopping by today!

Angela

Scrapbook Adhesives by 3L® supplies used: Adhesive Sheets – 4 x 6″, E-Z Runner® Permanent Strips – Refillable, Creative Photo Corners – Black, 3D Foam Squares – White, Regular

Other supplies used: Simple Stories patterned paper, card stock and chipboard stickers, clear overlays

Card Duo with 3D Foam Creative Sheets

Hi! It’s Erica and today I’m sharing a set of cards I created using E-Z Runner® Permanent Strips Refillable and 3D Foam Creative Sheets, as well as a step-by-step tutorial showing you how I created my cards!

Card Duo with 3D Foam Creative Sheets Celebrate Card by Erica Houghton for Scrapbook Adhesives by 3L

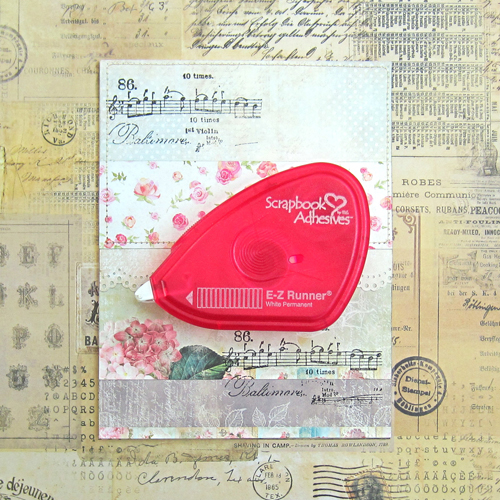
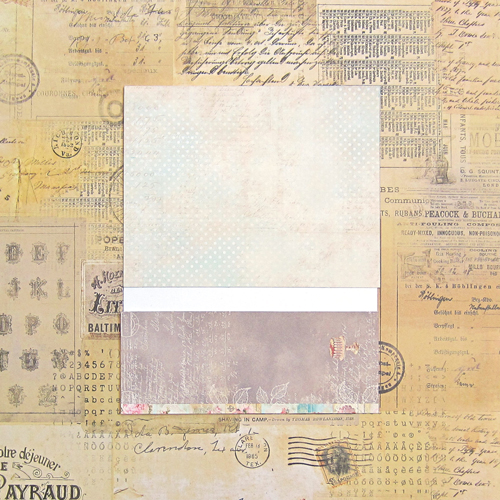
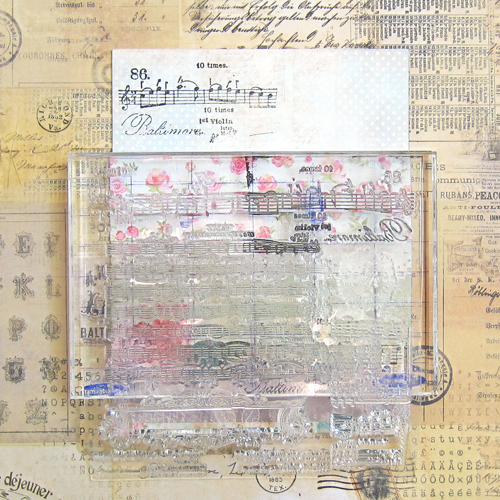
First, I cut four pieces of the Tea Time Collection by Craft and You Designs, stamped and adhered them to the base of my cards using the E-Z Runner® Permanent Strips Refillable.

(adhere paper to base of cards; stamp image)

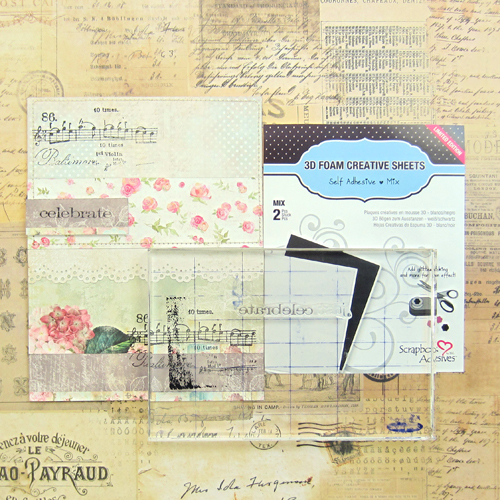
Finally, I adhered a sentiment using 3D Foam Creative Sheets, and adhered flowers and a bow to finish my cards.

Card Duo with 3D Foam Creative Sheets Celebrate Card by Erica Houghton for Scrapbook Adhesives by 3L
Card Duo with 3D Foam Creative Sheets Hello Card by Erica Houghton for Scrapbook Adhesives by 3L

Adhesives

Paper

  • Craft and You Designs, Tea Time

Embellishments

  • Petaloo & Prima Marketing – flowers
  • Flying Unicorn – adornments
  • Bead Landings – jump rings, chain
  • Studio His & Her – tulle
  • Celebrate It – ribbon

Products

  • Martha Stewart – punch
  • Heidi Swapp – stamp
  • Tim Holtz – stamp
  • Versafine – pigment ink
  • Ranger Ink – Tim Holtz – distress ink

Thanks for joining me today!

Erica Houghton