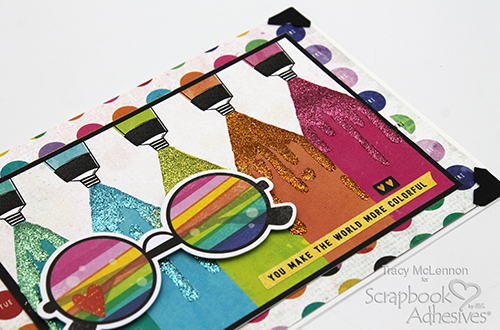
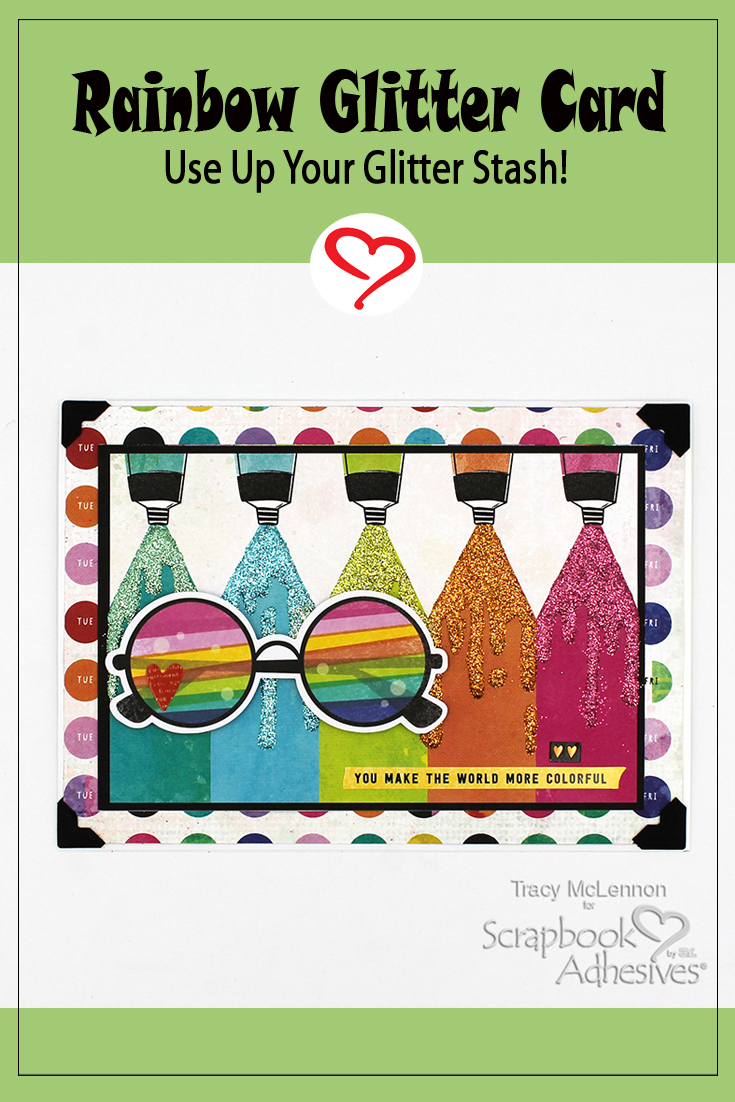
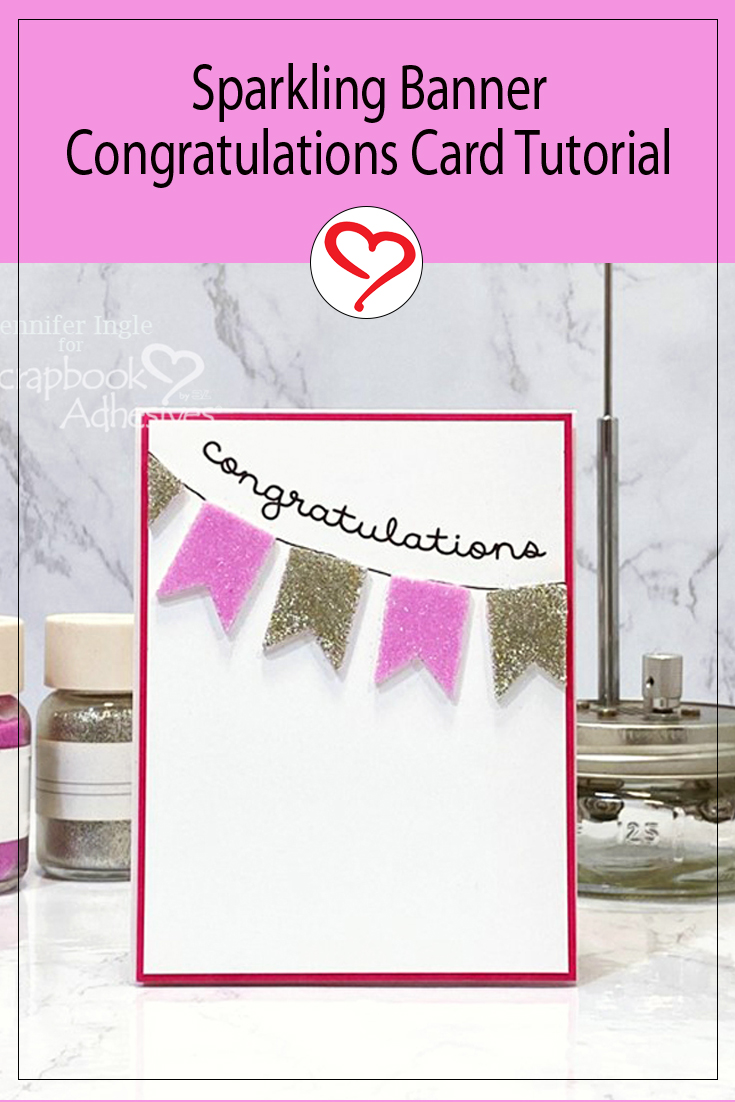
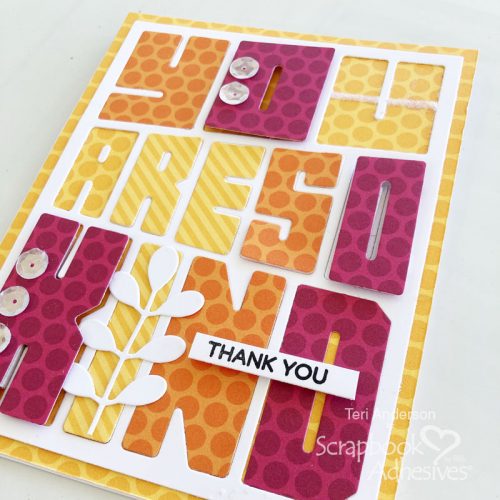
Hi, everyone! Do you love the look of foil on handmade cards? Teri here to show a fun way to use Metallic Transfer Foil Sheets with Extreme Double-Sided Tape to create a neat look! Let me show my process in making this Thinking of You Card.
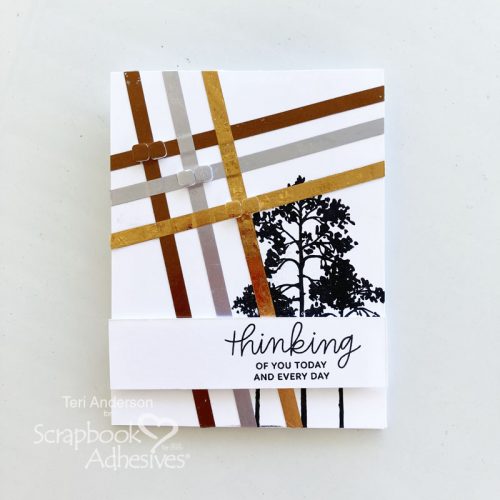
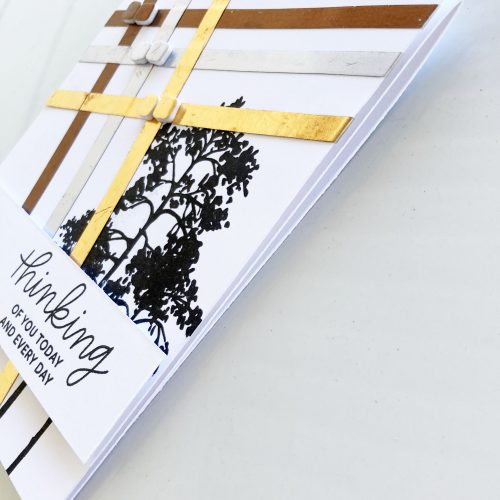
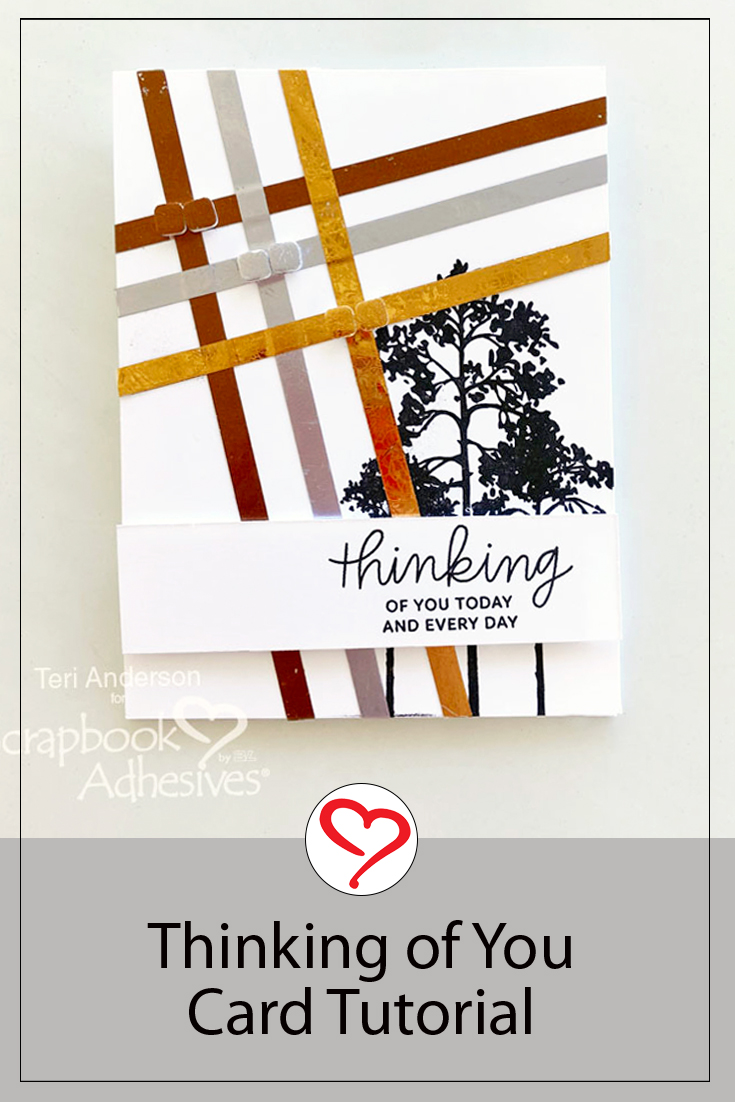
Thinking of You Card Front
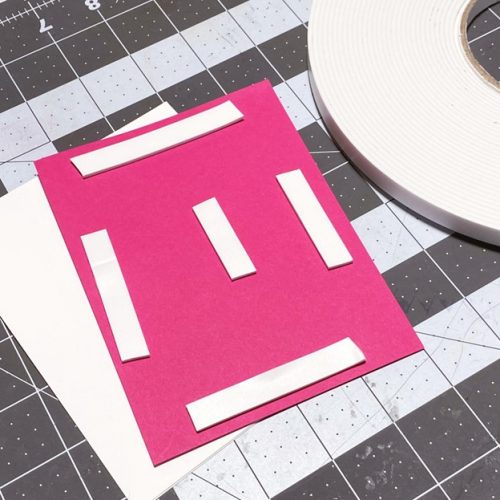
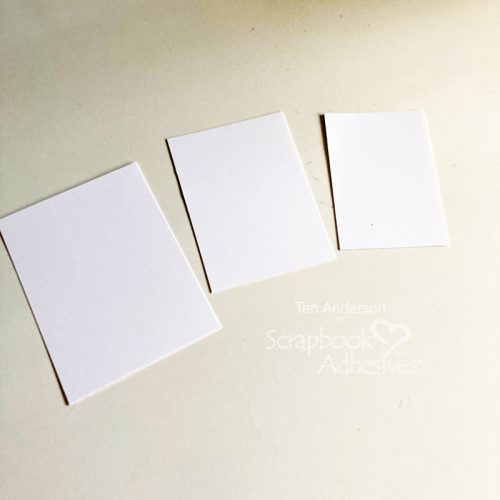
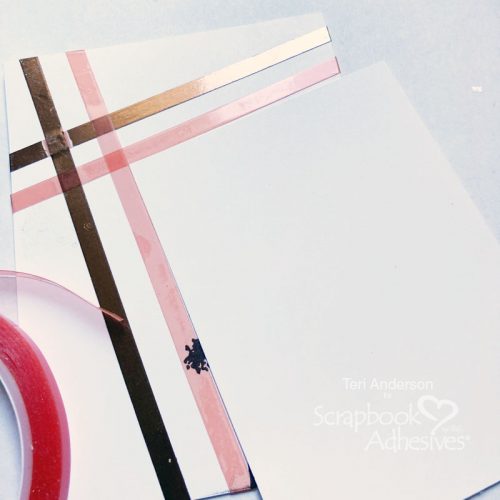
Start by cutting three rectangles from cardstock to use a placement guide. You can make them as big or as little as you want. Just make sure they are different sizes.
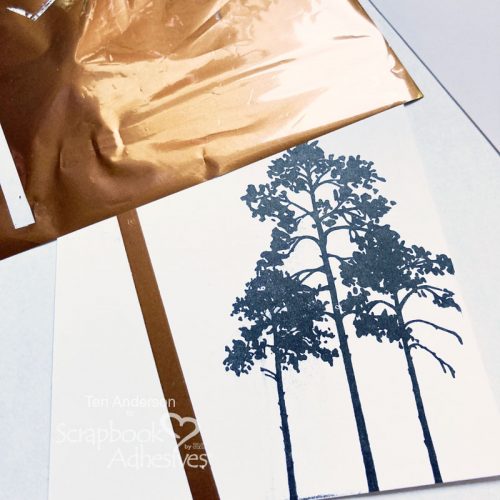
Cut a panel of cardstock to fit on a card. Stamp an image in black ink onto it.
Wear Your Adhesive on the Outside Technique
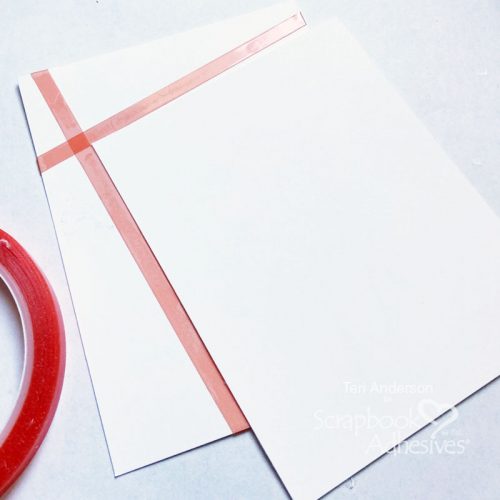
Set your largest rectangle at an angle partly on the panel. Use it as a guide to add stripes of Extreme Double-Sided Tape 1/4in across it. Remove the liner and apply a foil sheet from the Metallic Transfer Foil Sheet Nature Colors.
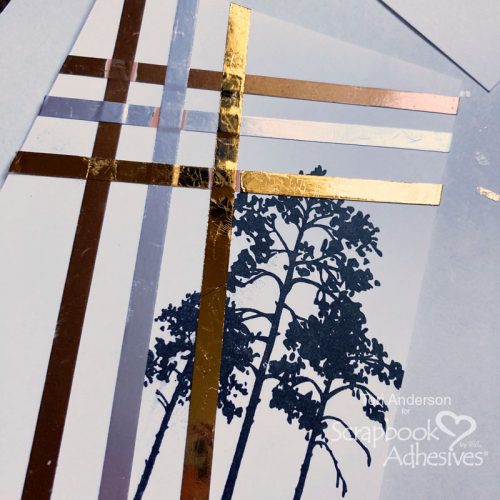
The foiling application is simple, face the foil color to you and rub it with your fingertips to transfer the color to the tape. Peel the foil to reveal beautiful results! Where tape insects, you’ll need to use your scissors to snip right up to the intersection. You won’t be able to place foil on that spot. Don’t worry! Just keep going.
Use your second largest rectangle as a tool to add more strips of the Extreme Double-Sided Tape 1/4in to your panel. Once again, apply the foils (color side up) from the Metallic Transfer Foil Sheet Nature Colors to the strips. Repeat these steps with the smallest rectangle.
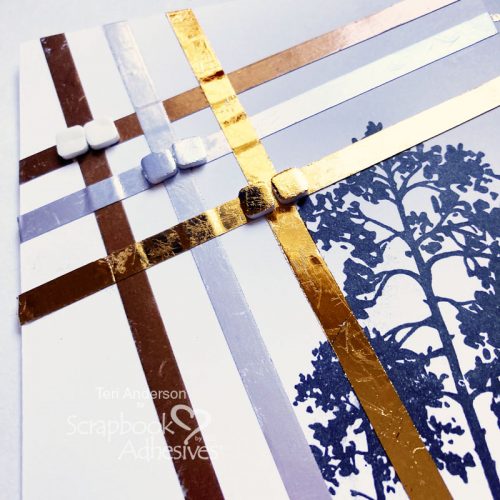
Cover up the points where the tape pieces intersect by placing a couple of the smallest size squares from the 3D Foam Squares Mix in White on top. You can add one, two, three, or more! Put down as many as your creative heart desires. Burnish foil onto the squares.
Complete with Sentiment and Card Base
Stamp a sentiment on a strip of cardstock. Adhere it to your panel with Crafty Foam Tape. Be sure to put a lot of tape on the strip so it doesn’t sag!
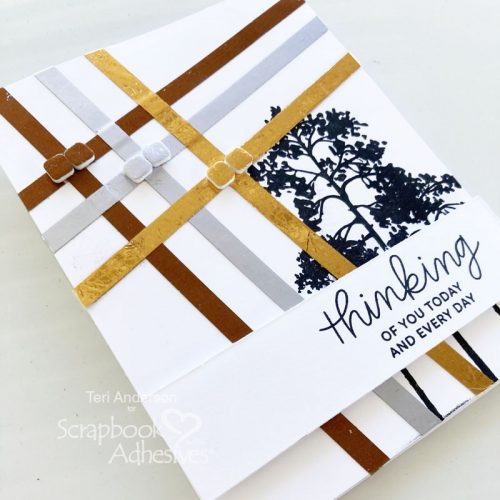
Complete your card by placing it on a card base created from cardstock.

You can use this Wear Your Adhesive on the Outside foiling technique with any stamped design! You can also use other colors of foil for an equally fun look!
I hope you are inspired to give this Thinking of You Card Tutorial a try! Thanks for visiting the blog today!
Happy Creating!
Creative Time: 60 minutes
Skill Level: Beginner
Materials Needed:
Scrapbook Adhesives by 3L®
Metallic Transfer Foil Sheet Nature Colors
HomeHobby™ by 3L:
Extreme Double-Sided Tape 1/4in
Other: Cardstock: Neenah; Stamps: Picket Fence Studios (Watercolor Trees and Bushes Stamp Set + Sentiment Strips Die) and Pretty Pink Posh (Thoughtful Greetings Stamp Set); Ink: Ranger Ink (Black)
Save to Pinterest!
Visit our Website and Blog!
Sign up for our Newsletter so you never miss a contest or giveaway!