You are in our US store • Switch to Europe store

Social Distancing Flip Book

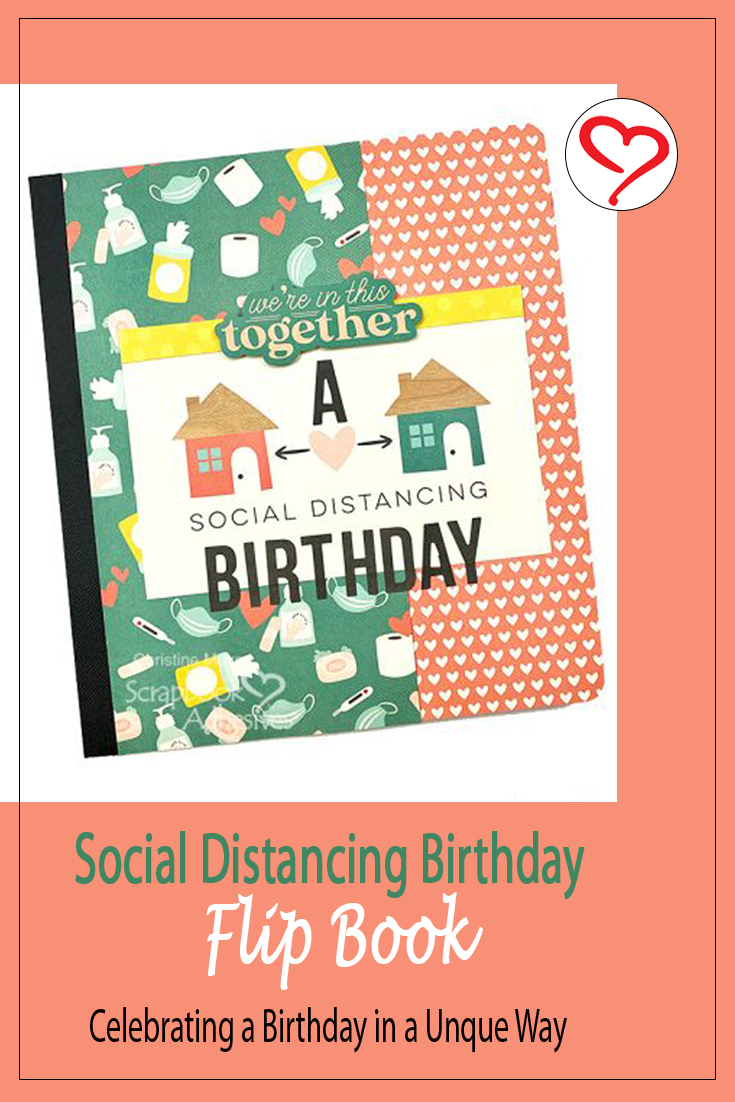
What do you do when you have too many pictures of an event? Too many to put on one layout, or even two, or three layouts? Christine joining you today to show you how I created a Flip Book showcasing my daughter’s recent Social Distancing birthday!
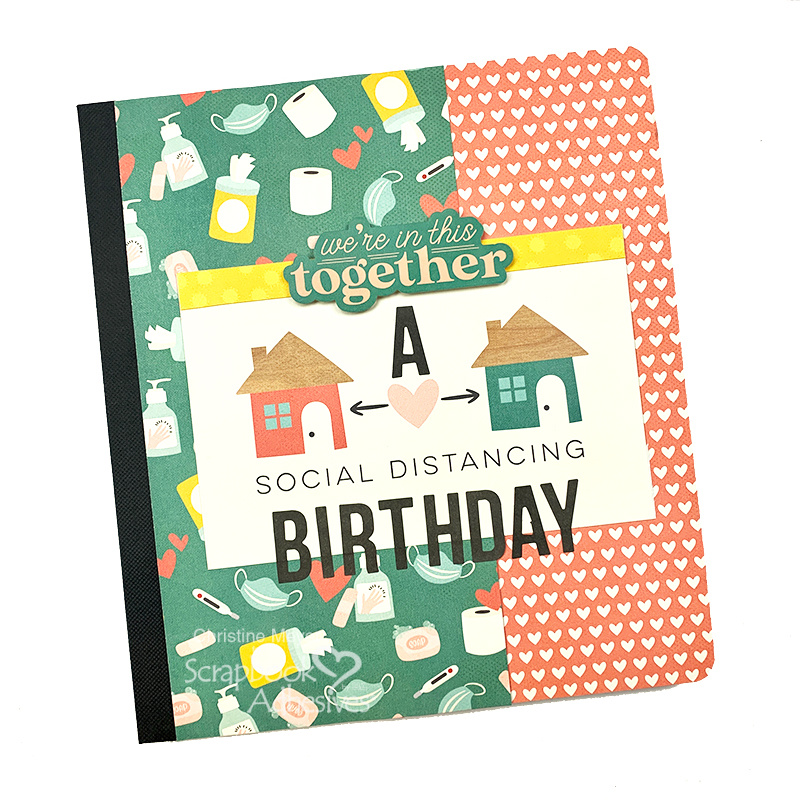
Social Distancing FlipBook by Christine Meyer for Scrapbook Adhesives by 3L

The Flipbook itself came from Simple Stories, I just go to decorate it and put it together. In doing so, I used several adhesives that I will talk about today.

Social Distancing Flipbook Adhesives
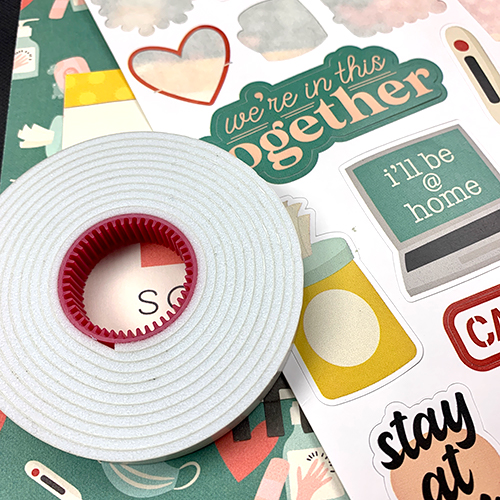
Social Distancing FlipBook by Christine Meyer for Scrapbook Adhesives by 3L

First off I created the cover. I used the E-Z Runner Grand Ultra Strong to attach my patterned papers to the cover. I knew I needed the strongest possible option! Then I used some Crafty Foam Tape to pop up the “We’re in this together” sticker.
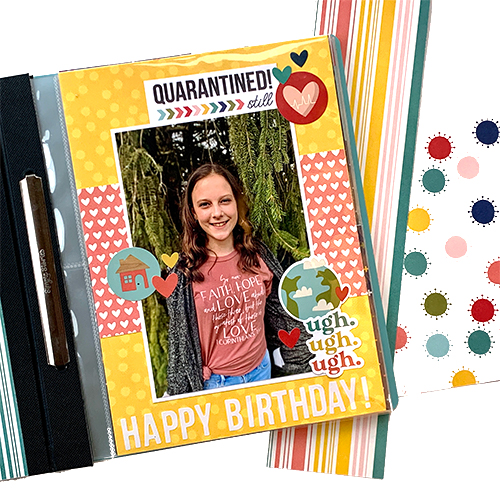
Social Distancing FlipBook by Christine Meyer for Scrapbook Adhesives by 3L

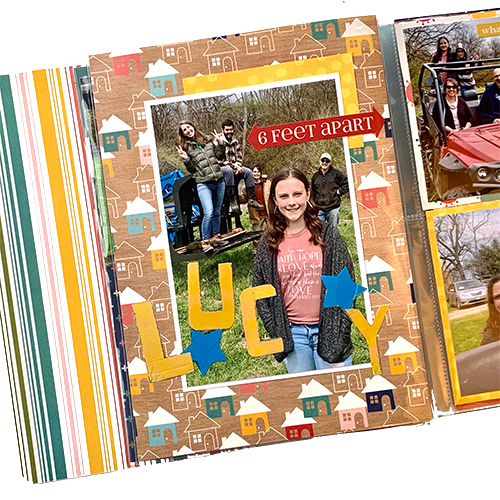
For my inside pages, I stuck primarily with the E-Z Runner Grand Permanent Strips. These made it quick and easy to assemble, without having to worry about it falling apart later.
Social Distancing FlipBook by Christine Meyer for Scrapbook Adhesives by 3L

On this page, I fussy cut the word “Lucy” out of another picture. Because it was so narrow, I used the E-Z Runner Micro to add the letters on.
Social Distancing FlipBook by Christine Meyer for Scrapbook Adhesives by 3L

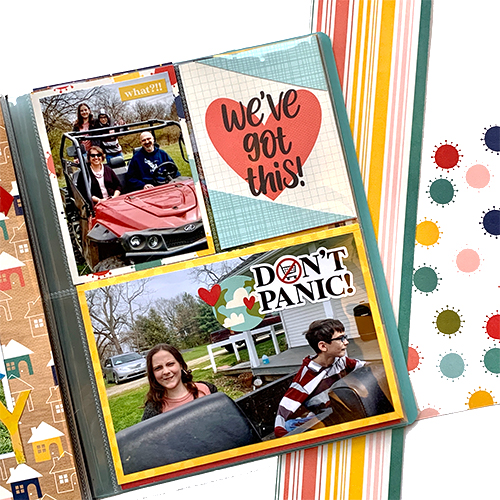
Having the right adhesives on hand allowed me to add in extra papers behind my pictures instead of just slipping in pictures of cut apart cards.
Social Distancing FlipBook by Christine Meyer for Scrapbook Adhesives by 3L

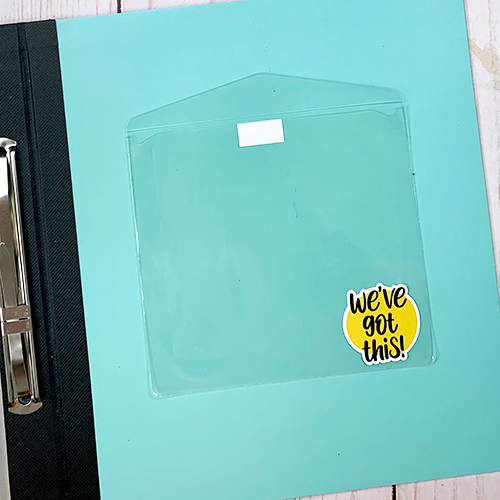
My back page includes a large Keepsake Envelope to allow her to tuck in some trinkets and memory pieces from that day.

Social Distancing Flip Book Video

I do not have a full process video for this Social Distancing Flip Book but I do have a video that flips through every page and shows the whole thing. You can check that out below:

Thanks so much for joining me today!
Christine Meyer

Creative Time: 4 hours
Skill Level: Intermediate

Materials Needed
Scrapbook Adhesives by 3L®

E-Z Runner Grand Permanent Strips Dispenser
Crafty Foam Tape
E-Z Runner Grand Ultra Strong Refill
Keepsake Envelopes Mix
E-Z Runner Micro Refill

Other
Patterned Paper and Flip Book (Simple Stories)

Save It!
Social Distancing FlipBook by Christine Meyer for Scrapbook Adhesives by 3L Pinterest

Visit our Website and Blog!
Sign up for our Newsletter so you never miss a contest or giveaway!

instagram purple icon facebook icon purple pinterest purple icon twitter purple icon YouTube icon blog subscription purple icon

Extravagant Craft Adhesive Giveaway with Favecrafts

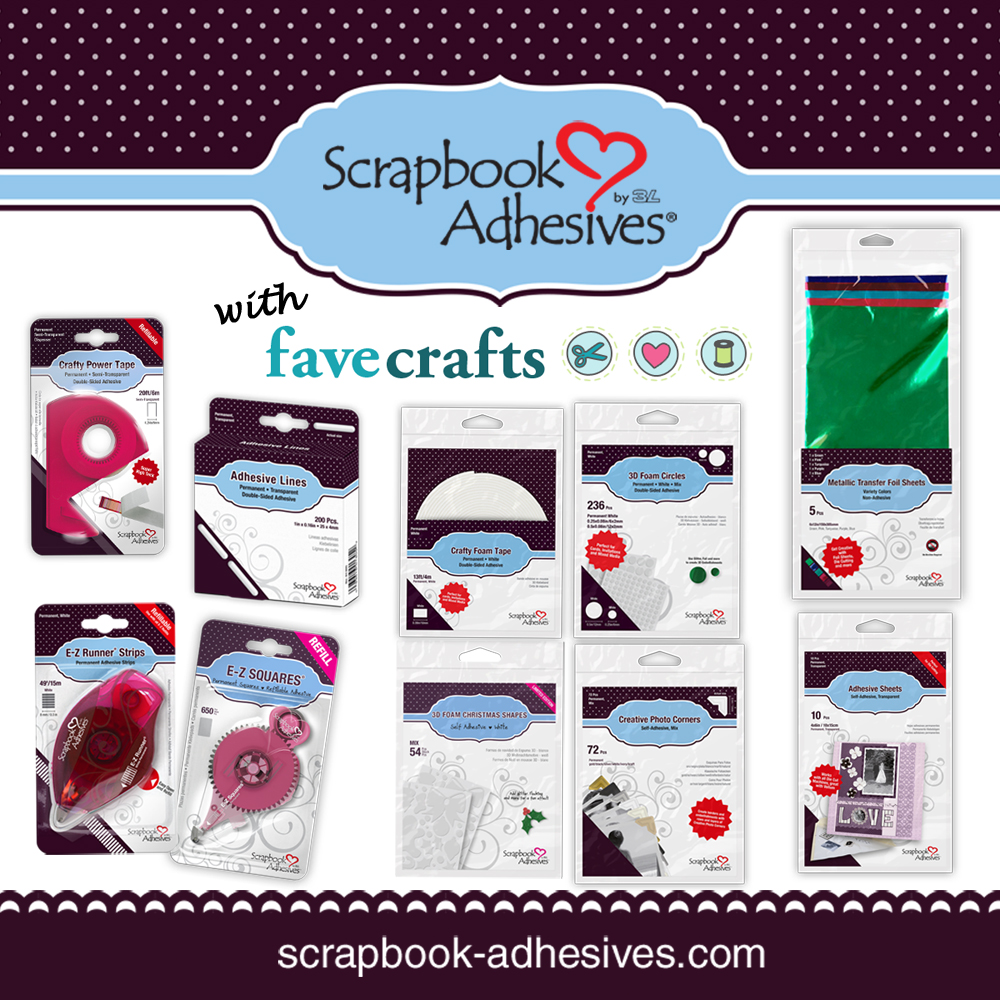
It’s time to celebrate the fall season and get your holiday craft on with an Extravagant Craft Adhesives Giveaway with FaveCrafts! You can enter to win a $38 value prize package of Scrapbook Adhesives by 3L adhesives!

This giveaway ends on 11/22/2020 at 11:59 PM Eastern. Enter here:

The contest host, Favecrafts, will send an email to the winner, so make sure your email address is entered correctly.

You can enter 5 times a day, so return often to improve your chances of winning.

The deadline to enter is November 22nd, 2020 at 11:59 p.m. Eastern Time. US and Canada only, excluding Quebec and Puerto Rico.

Don’t miss this Sweepstakes with Creative Scrapbooker Magazine! Click:

Visit our Website and Blog!
Sign up for our Newsletter so you never miss a contest or giveaway!

instagram purple icon facebook icon purple pinterest purple icon twitter purple icon YouTube icon blog subscription purple icon

DIY Holiday Gift Card Holder

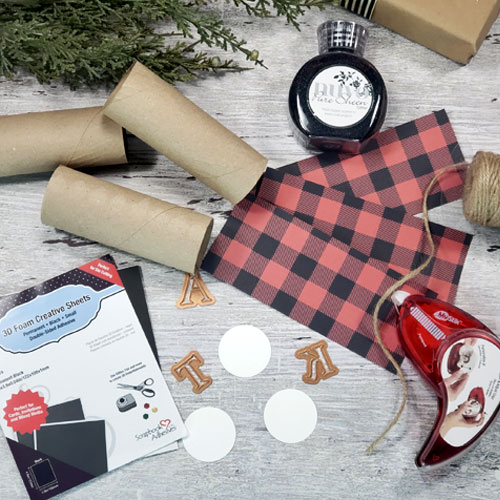
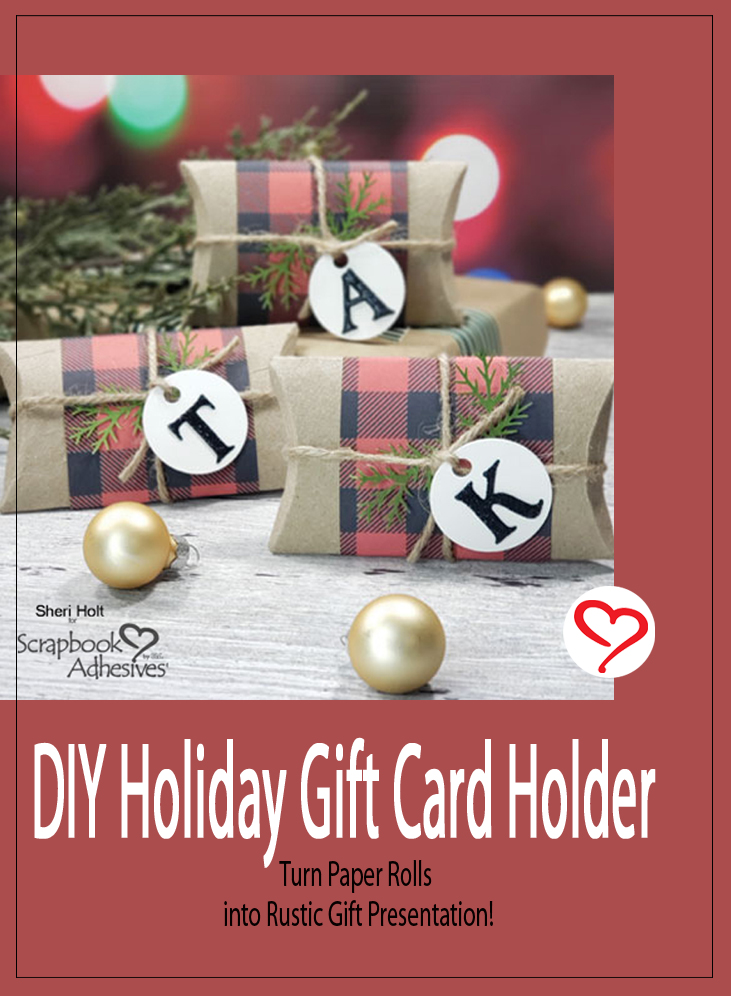
Hello, it’s Sheri again with a personalized gift card packaging idea using empty paper rolls into DIY Holiday Gift Card Holders. They are super easy to make so get the kids involved! Let’s get started!

DIY Holiday Gift Card Holder by Sheri Holt for Scrapbook Adhesives by 3L

It’s only 2 months until the holidays so be sure to start saving those discarded paper rolls now. These will make great little decorations tucked into the tree as well.

DIY Holiday Gift Card Holder by Sheri Holt for Scrapbook Adhesives by 3L

DIY Gift Card Holder Base

Let’s create a rustic buffalo plaid DIY gift card holder box.

DIY Holiday Gift Card Holder by Sheri Holt for Scrapbook Adhesives by 3L
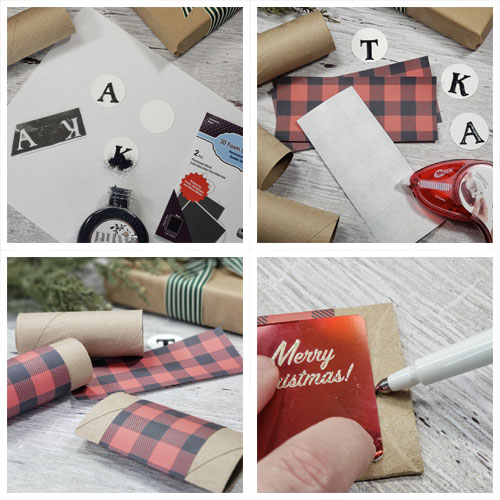
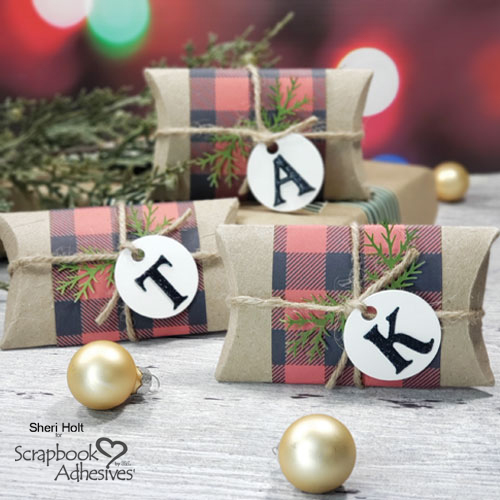
  1. For the personalized tags, die-cut small circles out of white cardstock and initials out of 3D Foam Creative Sheet Small Black. Place the letters on the circles towards the bottom to leave room for the hole to be placed at the top. Sprinkle the adhesive foam letters generously with black glitter and press it in for complete coverage.
  2. Use the MyStik® Permanent Strips Dispenser on the back
    of each 2-1/2” x 6” strips of patterned paper to attach securely to each paper roll.
  3. Placing the seam in the back, press
    each of the wrapped rolls flat.
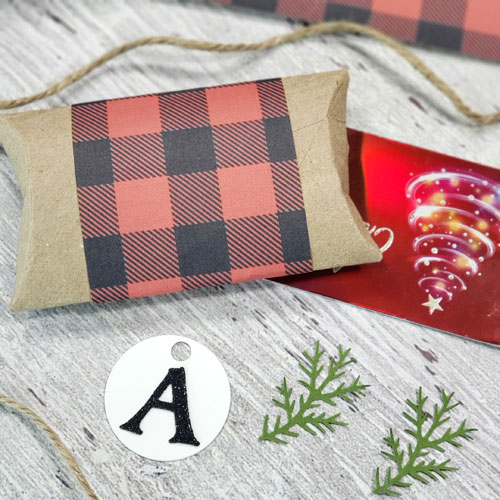
  4. Lay the gift card on top and center to use as a guide to score the end of the roll to form the closure.
DIY Holiday Gift Card Holder by Sheri Holt for Scrapbook Adhesives by 3L

Finishing Steps

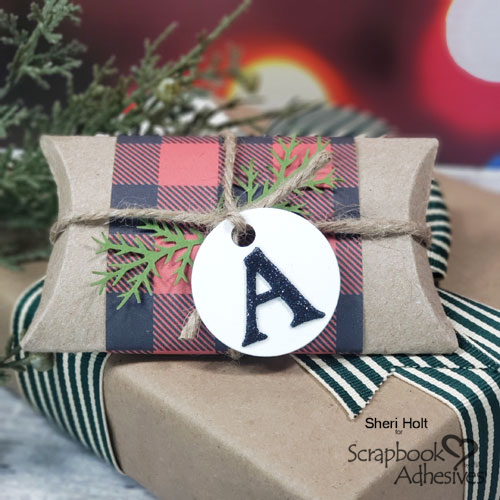
Insert your gift card and secure the flaps by wrapping with twine and attaching your tag. You can add simple extra elements such as a couple of pine sprig die cuts. It’s ready to give out!

DIY Holiday Gift Card Holder by Sheri Holt for Scrapbook Adhesives by 3L

I hope you were inspired to try this DIY Holiday Gift Card Holder this holiday season!

Thanks for stopping by!
Sheri Holt

Creative Time: 30 minutes
Skill Level: Intermediate

Materials needed:
Scrapbook Adhesives by 3L®

MyStik® Permanent Strips Dispenser
Black 3D Foam Creative Sheets

Other
Patterned Paper; Burlap Twine or Jute; Circle Die; Alphabet Die; Branch Die; Black Glitter; Paper Rolls

Save It!

DIY Holiday Gift Card Holder by Sheri Holt for Scrapbook Adhesives by 3L Pinterest

Visit our Website and Blog!
Sign up for our Newsletter so you never miss a contest or giveaway!

instagram purple icon facebook icon purple pinterest purple icon twitter purple icon YouTube icon blog subscription purple icon

Easy Leaf Gift Tag Tutorial

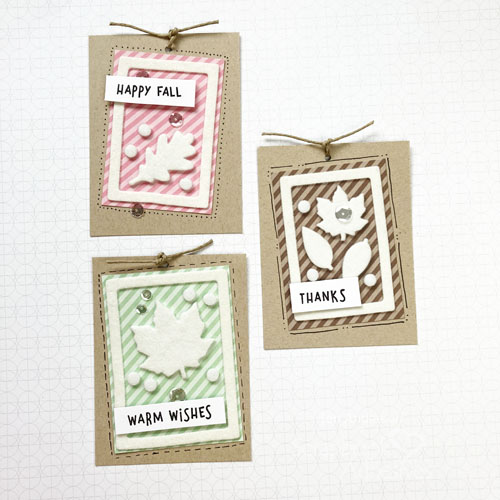
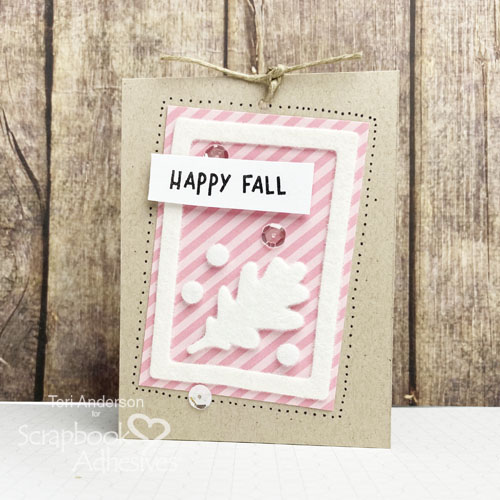
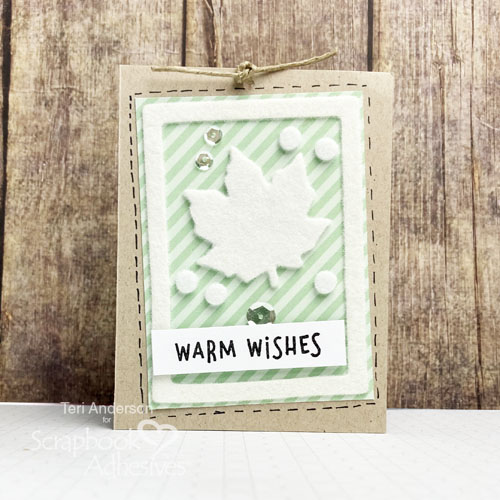
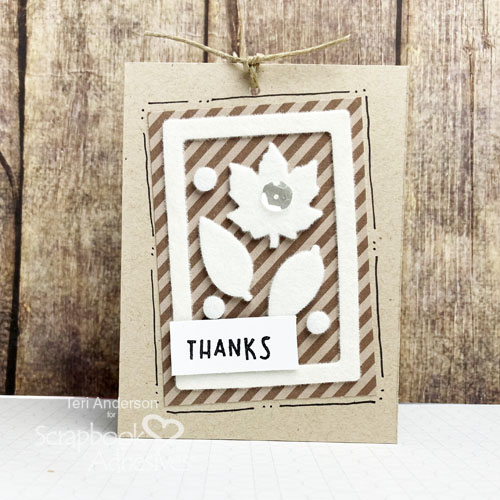
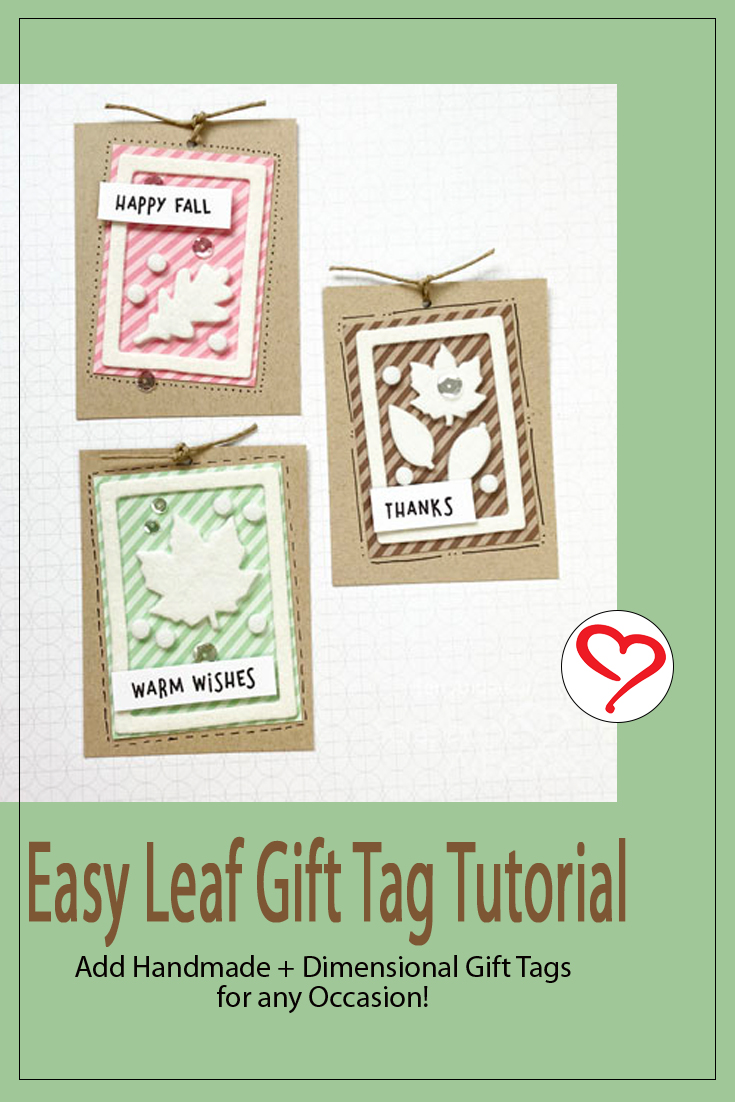
Hi, everyone! Teri here to show you how to create some Fall-themed gift tags! These are so easy to make and goes well with really, any occasion. But today I am sharing an easy leaf gift tag tutorial. So come on!

Easy Leaf Gift Tag Tutorial |by Teri Anderson fo rScrapbook Adhesives by 3L

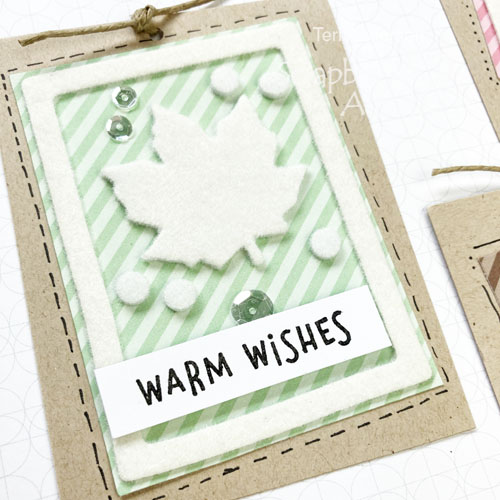
These gift tags were unbe-“leaf”-ably easy to make and look great when added to gifts handed out during the Fall months. They also are fun to use to decorate Thanksgiving and Harvest dinner tables with.

Easy Leaf Gift Tags with Foam Shapes + Flock

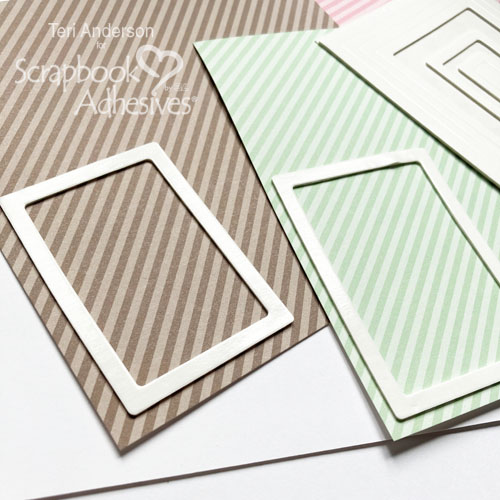
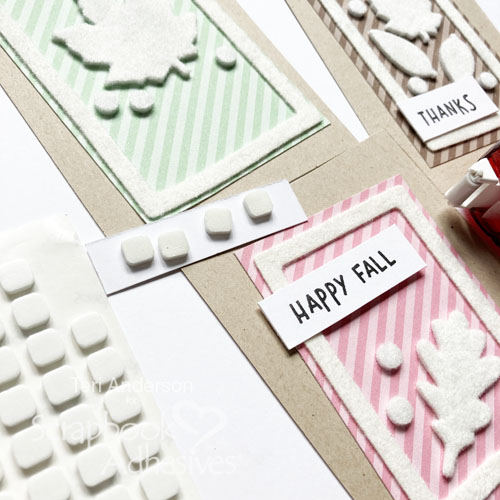
Start by placing several 3D Foam Frames on different color patterned papers.

Easy Leaf Gift Tag Tutorial |by Teri Anderson fo rScrapbook Adhesives by 3L

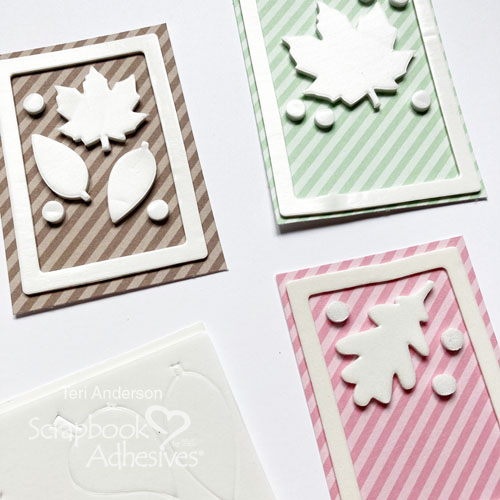
Trim the frames, leaving a border around each one. You can make the border as thick or thin as you’d like. Add some 3D Foam Leaves and Circles to the inside of your frame until you get the desired look.

Easy Leaf Gift Tag Tutorial |by Teri Anderson fo rScrapbook Adhesives by 3L

To Wear Your Adhesive on the Outside, remove the liners from all the 3D Foam shapes and cover them with either flock or glitter. Make sure you burnish the flock or glitter onto the foam by rubbing your fingers over it until there are no sticky parts exposed. Tap off excess. It’s that easy!

Easy Leaf Gift Tag Tutorial |by Teri Anderson fo rScrapbook Adhesives by 3L

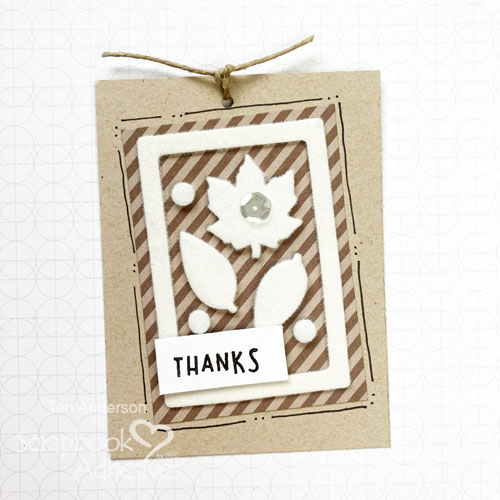
Adhere your patterned paper panels to a rectangle piece of kraft cardstock. Add a stamped or handwritten sentiment strip to each tag. Any sentiment fitting your desired occasion for your tags will do!

Easy Leaf Gift Tag Tutorial |by Teri Anderson fo rScrapbook Adhesives by 3L

Poke a hole through the top of each tag and add a little kraft jute to it.

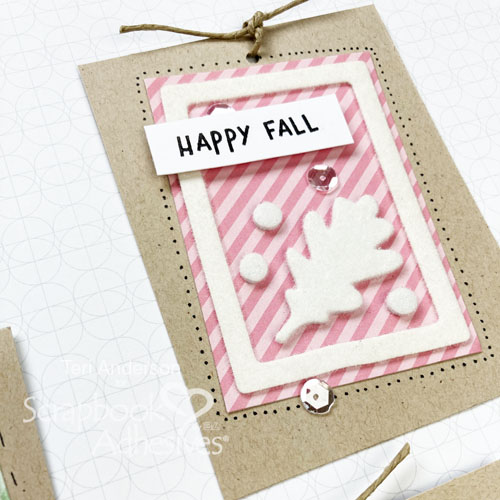
Complete your tags by adding stitch marks with a pen. You can even make dots or add both dots and stitch marks!

Easy Leaf Gift Tag Tutorial |by Teri Anderson fo rScrapbook Adhesives by 3L

Add Glitz to Your Tags

For a little sparkle, add a few sequins to your tags. Gems would work too.

Easy Leaf Gift Tag Tutorial |by Teri Anderson fo rScrapbook Adhesives by 3L

Don’t limit yourself to decorating around the foam shapes. You can decorate the shapes as well by adhering a sequin (or two) onto them.

Easy Leaf Gift Tag Tutorial |by Teri Anderson fo rScrapbook Adhesives by 3L

I hope you are inspired to create some easy leaf gift tags of your own. Add them to your Fall gifts or even decorate your Harvest table with them!

Happy creating,
Teri Anderson

Creative Time: 45 Minutes
Skill Level: Beginner

Materials Needed
Scrapbook Adhesives by 3L®

Other
White and Kraft Cardstock: Neenah Paper; Patterned Papers: Lawn Fawn (Let’s Polka, Mon Amie Collection); Stamps: Lawn Fawn (Thanks a Latte Stamp Set); Sequins: Pretty Pink Posh; Black Ink Pad: Ranger Ink; Black Sharpie Marker: Newell Brands; Jute: Darice; White Flock: Stampendous!; Hole Punch

Save It!

Easy Leaf Gift Tag Tutorial |by Teri Anderson fo rScrapbook Adhesives by 3L

Visit our Website and Blog!
Sign up for our Newsletter so you never miss a contest or giveaway!

instagram purple icon facebook icon purple pinterest purple icon twitter purple icon YouTube icon blog subscription purple icon

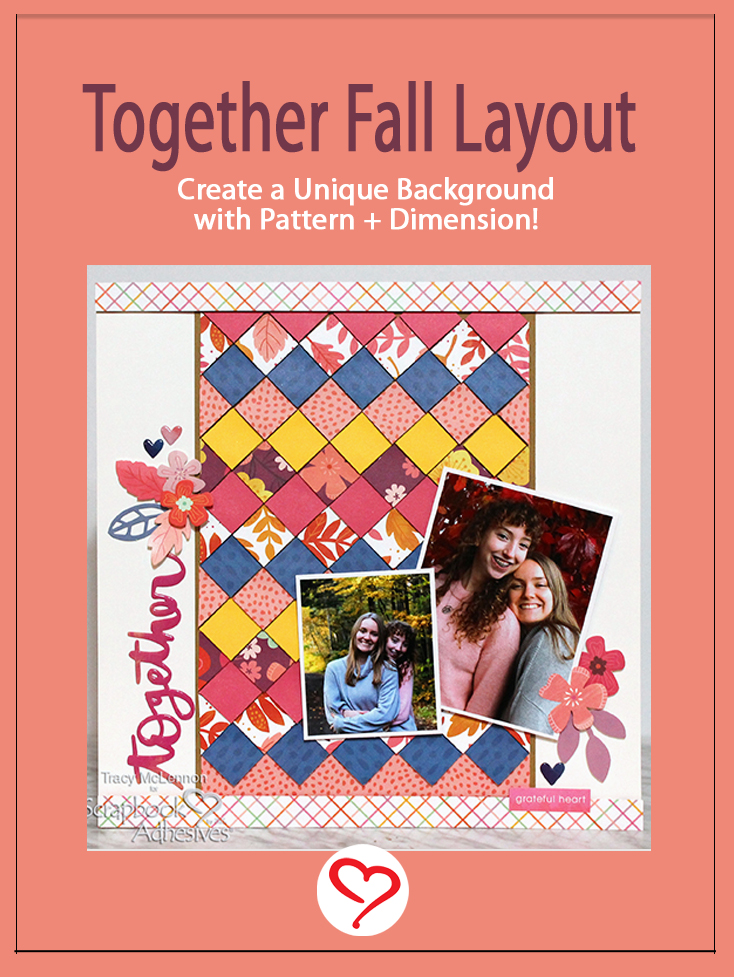
Together Fall Layout

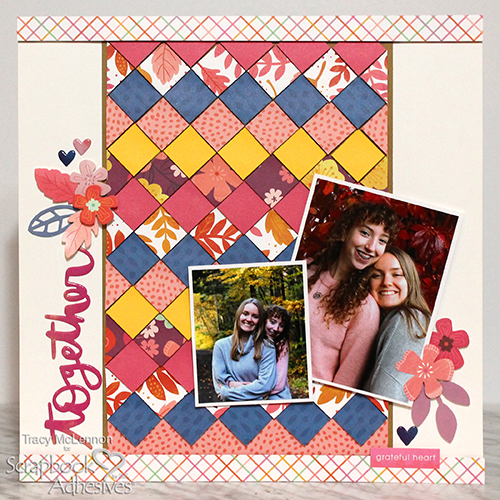
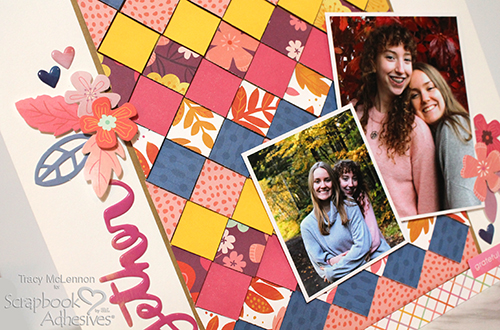
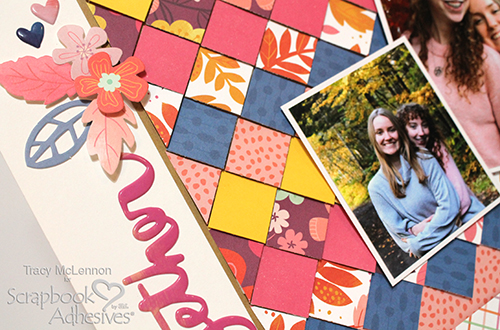
Hello, autumn loving crafty friends! Tracy here, and today I have a fun Together Fall Layout to share. It features a dimensional background using some of my favourite Scrapbook Adhesives by 3L. Here are all of the details.

Together Fall Layout By Tracy McLennon for Scrapbook Adhesives by 3L

Together Fall Layout Basics

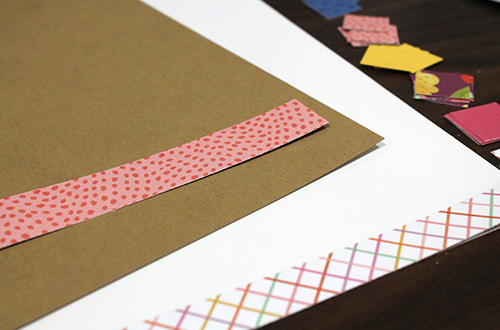
First, you will want to gather your patterned papers and start creating a simple background for this Together Fall Layout. The white cardstock is the base. Cut a piece of kraft cardstock to 7.5 x 12-inch and adhere up the middle of the layout using the E-Z Runner® Ultra Strong Refillable Dispenser.

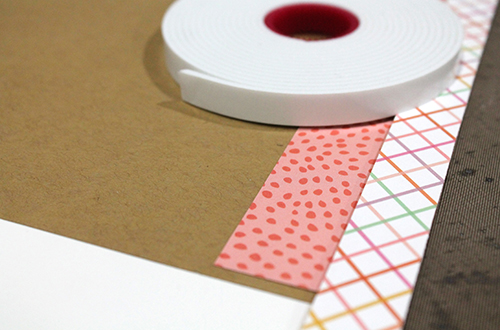
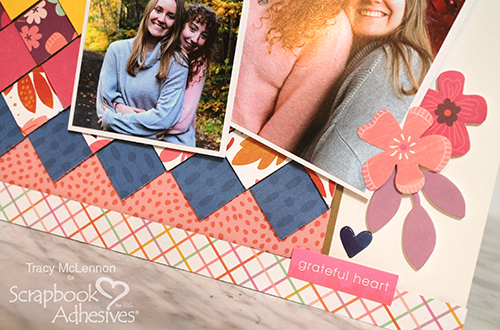
Next, cut two strips of the plaid pattern to 0.75 x 12-inch. Adhere one strip to the bottom of the layout using Crafty Foam Tape108ft. Set the other aside for now.

Together Fall Layout By Tracy McLennon for Scrapbook Adhesives by 3L

Background Details

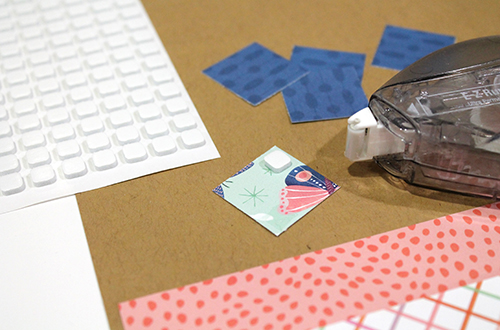
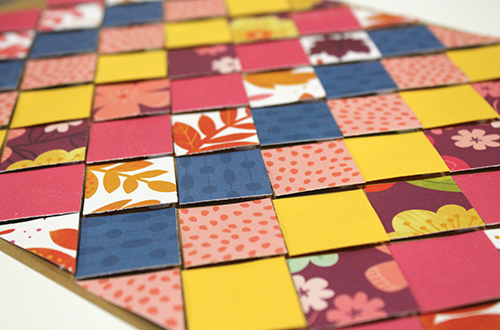
Cut many 1-inch patterned squares. There are five squares in each row, so I cut and piled the squares in the order that I wanted them to appear.

Also cut a strip of the polka dot pattern to 1 x 7.25-inch and adhered it to the bottom of the kraft cardstock using the E-Z Runner® Ultra Strong Refillable Dispenser.

Together Fall Layout By Tracy McLennon for Scrapbook Adhesives by 3L

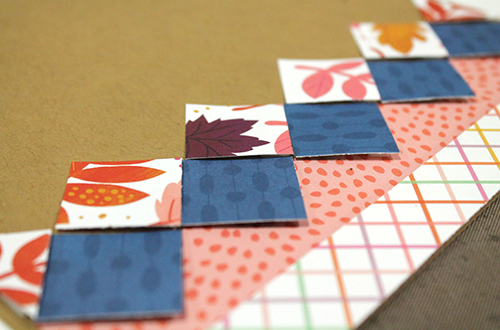
Each row of squares are added using a 3D Foam Squares White Small Size in one corner, and E-Z Runner® Ultra Strong Refillable Dispenser in the opposite corner.

Adhere to the Together Fall Layout with the foam square at the bottom, this lifts each square for that little bit of dimension.

Together Fall Layout By Tracy McLennon for Scrapbook Adhesives by 3L

Repeat this for each row, all the way up the kraft cardstock.

Together Fall Layout By Tracy McLennon for Scrapbook Adhesives by 3L

Once the squares reach the top of the kraft cardstock. Add the plaid border strip that you previously set aside using Crafty Foam Tape108ft.

Together Fall Layout By Tracy McLennon for Scrapbook Adhesives by 3L

The Finishes

Mat the photos in white cardstock using the E-Z Runner® Ultra Strong Refillable Dispenser, and adhere to the Together Fall Layout with the 3D Foam Squares White Mix.

The sticker title was added to the left-hand side of the layout. Add the ephemera pieces around the matted photo and on the left-hand side of the layout using a combination of 3D Foam Squares White Mix and Adhesive Dots Micro.

Together Fall Layout By Tracy McLennon for Scrapbook Adhesives by 3L

Thanks so much for stopping by!
Tracy McLennon

Creative Time: 60 minutes
Skill Level: Intermediate

Materials needed:
Scrapbook Adhesives by 3L®
3D Foam Squares White Small Size
E-Z Runner® Ultra Strong Refillable Dispenser
Crafty Foam Tape108ft
3D Foam Squares White Mix
Adhesive Dots Micro

Other:
Pink Paislee Truly Grateful Collection (patterned paper, ephemera, puffy stickers), Natural Burlap String, Cardstock (white, kraft)

Save It!

Together Fall Layout By Tracy McLennon for Scrapbook Adhesives by 3L Pinterest

Visit our Website and Blog!
Sign up for our Newsletter so you never miss a contest or giveaway!

instagram purple icon facebook icon purple pinterest purple icon twitter purple icon YouTube icon blog subscription purple icon

It’s Your Day Birthday Slimline Card

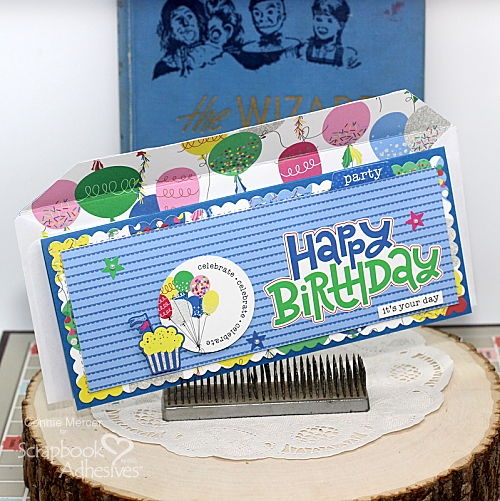
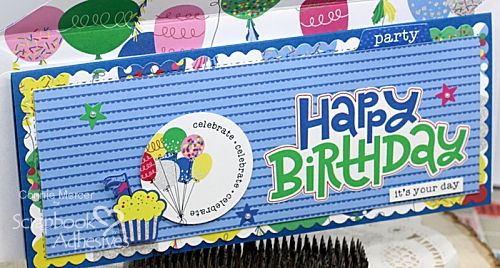
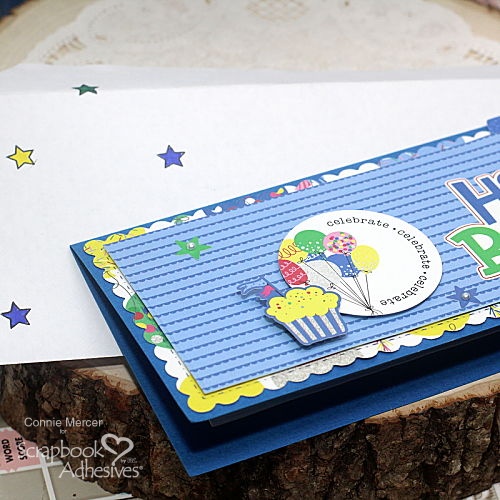
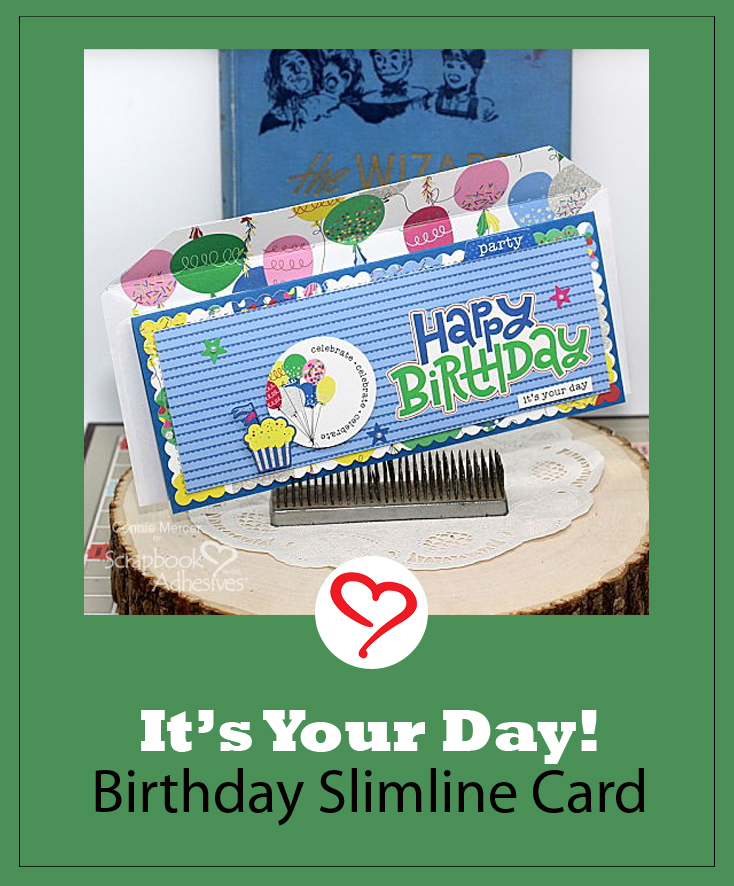
Hi, Connie here with a birthday slimline card using fun and festive patterned papers and die cut shapes. Along with coordinating acrylic stamps, enhance and decorate a special occasion that you can’t help but feel like celebrating!

It's Your Day Birthday Slimline Card by Connie Mercer for Scrapbook Adhesives by 3L

Birthday Slimline Style

It's Your Day Birthday Slimline Card by Connie Mercer for Scrapbook Adhesives by 3L

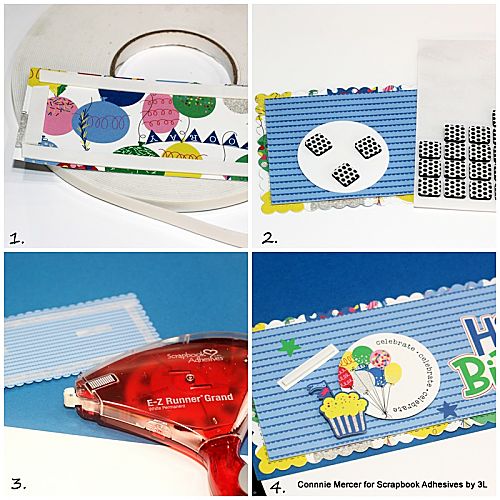
First of all, die-cut the card panels with desired patterned papers. Then gather the die cut shapes that you want to add to the card panel.

Step by Step

It's Your Day Birthday Slimline Card by Connie Mercer for Scrapbook Adhesives by 3L
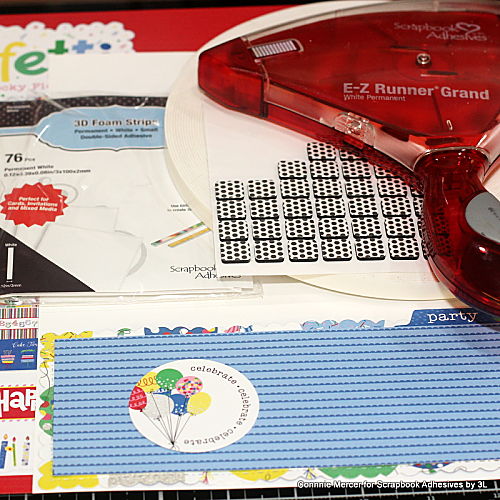
  1. Add Crafty Foam Tape 108ft to the back of the rectangle card panel and adhere to the top of the scalloped edge card panel.
  2. Using 3D Foam Squares Black Regular Size pop up embellishments on the card front.
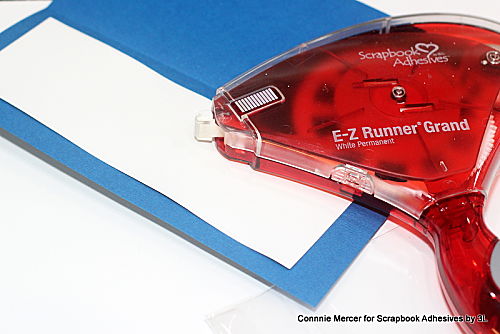
  3. Add the layered card panel to the card base using the E-Z Runner® Grand Permanent Strips Dispenser.
  4. Add stamped sentiment under the Happy Birthday sticker using the 3D Foam Strips.
It's Your Day Birthday Slimline Card by Connie Mercer for Scrapbook Adhesives by 3L

A white rectangle of cardstock piece was added to the inside of the card
for writing a personalized note to finish off the birthday slimline card.

It's Your Day Birthday Slimline Card by Connie Mercer for Scrapbook Adhesives by 3L

Decorating the Envelope

It's Your Day Birthday Slimline Card by Connie Mercer for Scrapbook Adhesives by 3L

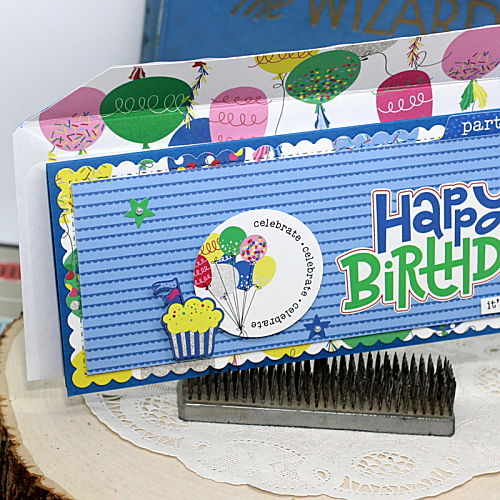
What’s a card without an envelope?! It’s as simple as adding a decorative paper to the inside of the envelope. Secure it with the E-Z Runner Grand Permanent Strips Dispenser for that surprise element when opening.

It's Your Day Birthday Slimline Card by Connie Mercer for Scrapbook Adhesives by 3L

Using the coordinating acrylic stamps, add some stars to accent to the front of the envelope. Then color the stars with markers.

Such a fun card!! Can’t wait for a birthday to come around so I can sign my name to the card and give it to a special someone.

Thanks for stopping by~
Connie Mercer

Creative Time: 40 Minutes
Skill Level: Beginner

Materials Needed
Scrapbook Adhesives by 3L®

E-Z Runner Grand Permanent Strips Dispenser
Crafty Foam Tape 108′
3D Foam Strips
3D Foam Squares Black Regular Size

Other
Patterned Papers, Die Cuts and Stamps: PhotoPlay Paper Co. (Confetti Collection); Craft Dies: Kat Scrappiness (Rectangle Slimline Die) and Gina Marie Designs (Scalloped Slimline Die); Flatback Pearls

Save to Pinterest!

It's Your Day Birthday Slimline Card by Connie Mercer for Scrapbook Adhesives by 3L Pinterest

Visit our Website and Blog!
Sign up for our Newsletter so you never miss a contest or giveaway!

instagram purple icon facebook icon purple pinterest purple icon twitter purple icon YouTube icon blog subscription purple icon

Glittered Cage Fall Card

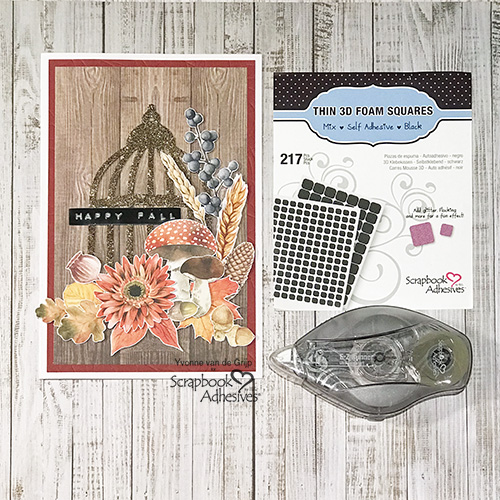
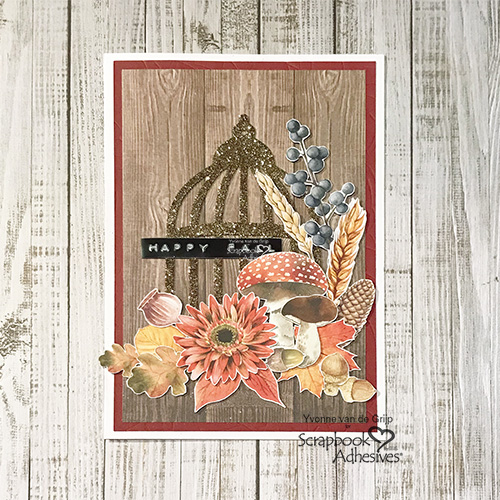
Hi everyone, Yvonne here. With the trees changing colors and the leaves falling, I was inspired to make this happy fall card to celebrate the season’s beautiful colors. For a pop of glamour, I added a glittered cage!

Glittered Cage Fall Card by Yvonne van de Grijp for Scrapbook Adhesives by 3L

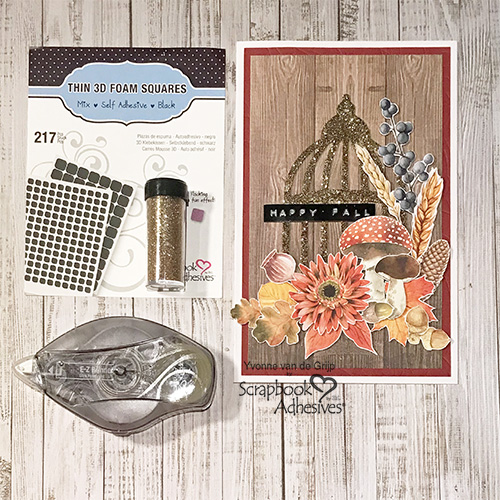
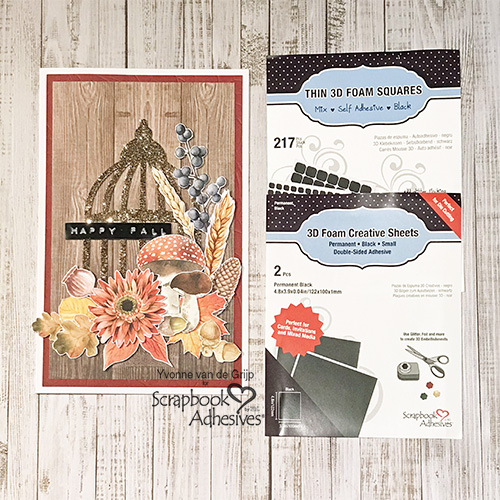
Layering the fall images is made simple using Thin 3D Foam Squares Black Mix. But the unexpected surprise is adding a glittered element.

Glittered Cage Card Base

First, choose the colors you want to use for your fall themed card. How wonderful to choose such a beautiful fall color palette!

Glittered Cage Fall Card by Yvonne van de Grijp for Scrapbook Adhesives by 3L

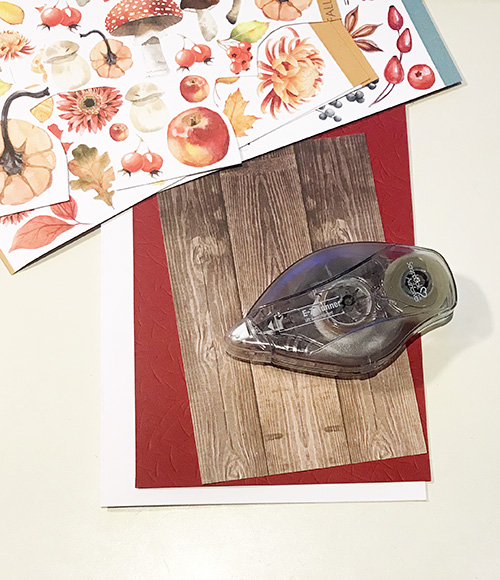
For my card, I used a white card base and paired it with a burgundy card panel as a second layer. Adhered together using the E-Z Runner® Ultra Strong Refillable Dispenser. Next, mat with a piece of wood panel patterned paper. Again use the E-Z Runner® Ultra Strong Refillable Dispenser to adhere to the card base and this panel layering part is done.

Add Sparkle Accent

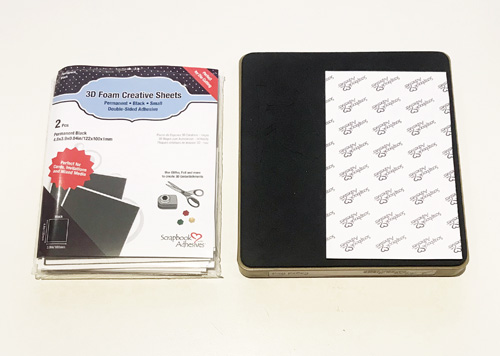
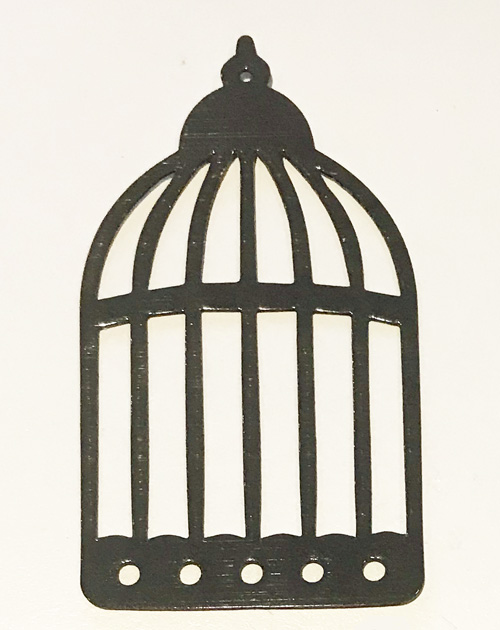
Now for the fun part! Start with die-cutting a bird cage shape from 3D Foam Creative Sheets Small, Black. This foam sheet is so easy to use and cuts like butter! No foam residue on the die.

Glittered Cage Fall Card by Yvonne van de Grijp for Scrapbook Adhesives by 3L

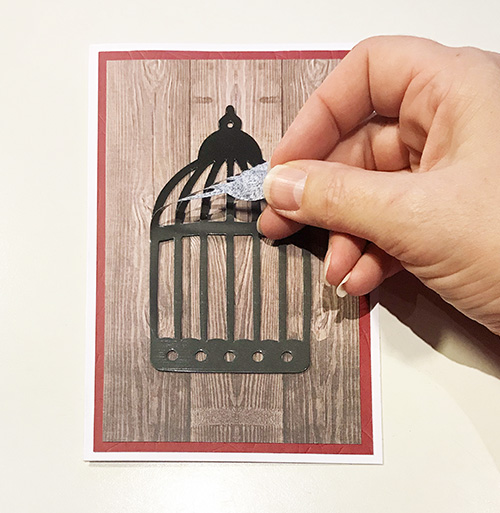
Pull off the liner of the cage die cut and adhere it to the centre of the card.

Next, carefully pull off the top liner of the cage shape. Grab a fall color glitter and sprinkle on top of the exposed adhesive. Press the glitter into the cage shape to secure and then tap off the excess.

Glittered Cage Fall Card by Yvonne van de Grijp for Scrapbook Adhesives by 3L

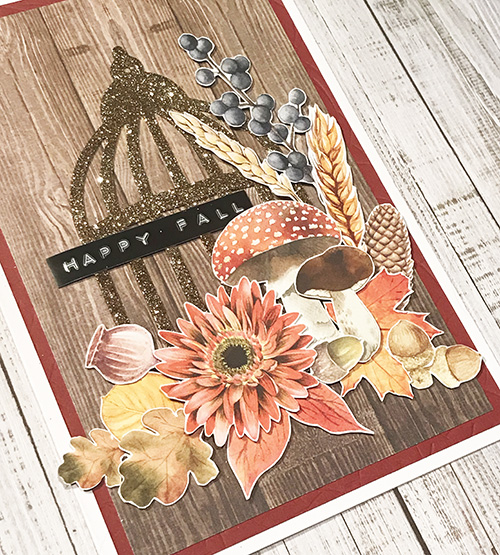
Now you have this amazing glittered element and the extra surprise? It is also dimensional! We call this technique Wear Your Adhesive on the Outside. Instead of hiding the adhesive under layers of paper, it shines on the outside as an important element of my card.

Card Embellishing

Let’s embellish more! Start with fussy cutting images from a piece of patterned paper. Use a pair of small scissors to work around the details. Then adhere the images to the card using Thin 3D Foam Squares Black Mix.

Finally, using my label maker, punch out the happy fall sentiment and adhered it to the card.

Glittered Cage Fall Card by Yvonne van de Grijp for Scrapbook Adhesives by 3L

Voila…your Glittered Cage Fall Card is ready to celebrate autumn. I hope you enjoyed this tutorial and wish you happy crafting!
Yvonne

Glittered Cage Fall Card by Yvonne van de Grijp for Scrapbook Adhesives by 3L

Creative Time: 40 minutes
Skill Level: Intermediate

Materials Needed
Scrapbook Adhesives by 3L®
E-Z Runner® Ultra Strong Refillable Dispenser
Thin 3D Foam Squares Black Mix
3D Foam Creative Sheets Small, Black

Other
Etched Dies: Sizzix (Caged Bird by Tim Holtz); Die Cutting Machine: Spellbinders® Paper Arts (Platinum 6 Machine); White, Burgundy, and patterned Cardstock (Joy Crafts: Wood Texture Paper Bloc); Fall images (Mintay papers: Flora Book 3, Fall & Winter edition); copper Glitter; Dymo Omega Label Maker; Scissors; Paper Trimmer

Save It!

Glittered Cage Fall Card by Yvonne van de Grijp for Scrapbook Adhesives by 3L Pinterest

Visit our Website and Blog!
Sign up for our Newsletter so you never miss a contest or giveaway!
instagram purple icon facebook icon purple pinterest purple icon twitter purple icon YouTube icon blog subscription purple icon

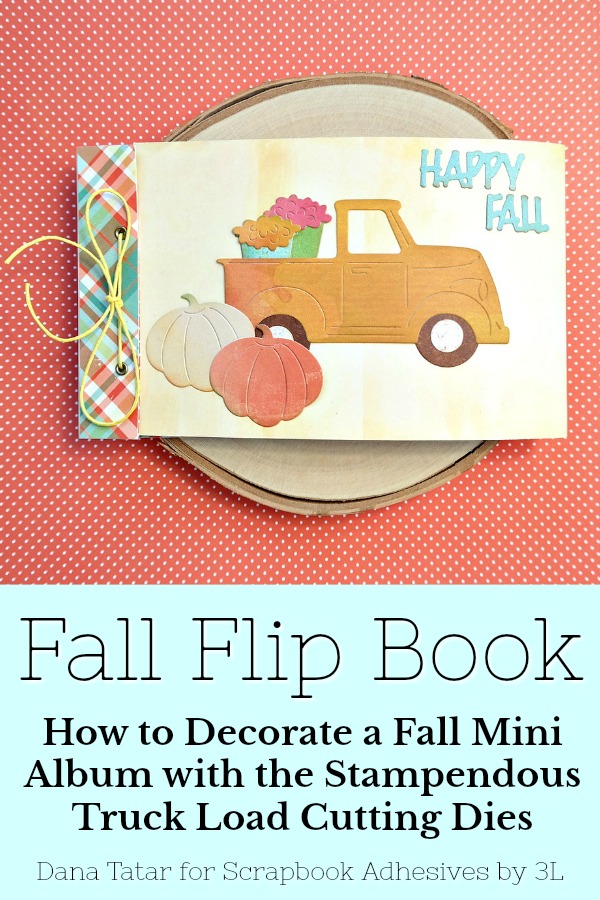
Happy Fall Flip Book

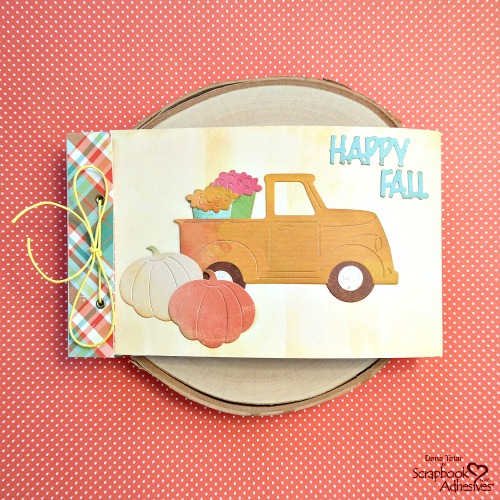
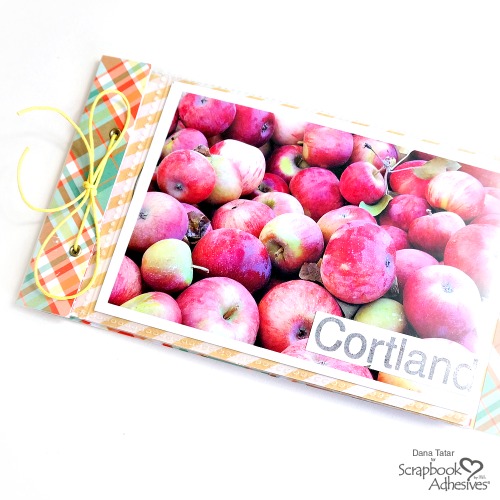
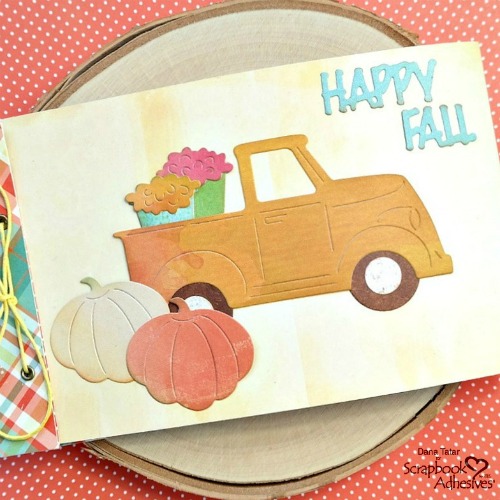
Hi friends! Dana here today sharing a quick and easy fall flip book album that I used to document my trip to a fruit farm. It doesn’t officially feel like fall for me until I spend a day outside collecting apples and pumpkins.

Happy Fall Flip Book Album by Dana Tatar for Scrapbook Adhesives by 3L

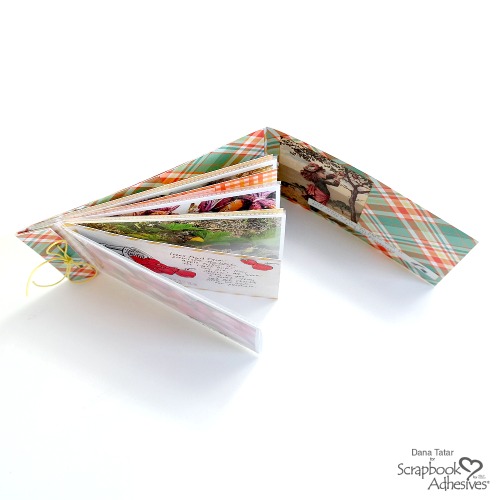
I repurposed a store-bought flip book, converting the album from summer to fall, by swapping out some of the patterned paper pages and by embellishing the front cover with some fall imagery using the Stampendous Truck Loading Die Cutting Set.

Happy Fall Flip Book Album by Dana Tatar for Scrapbook Adhesives by 3L

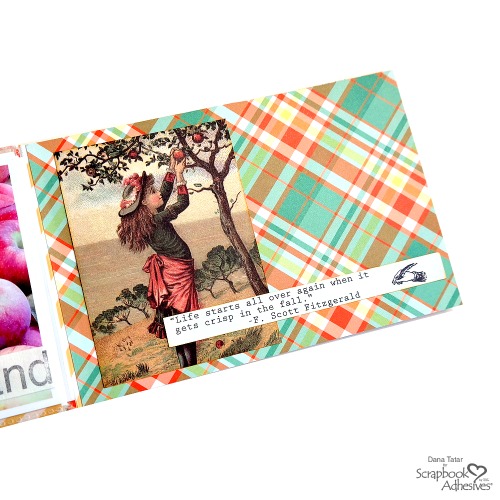
The flip book measures approximately 7.25 x 4.25 inches, and contains four 4 x 6 inch photo inserts and four printed pages that are perfect for journaling and memorabilia. To alter this flip book for my day trip, I first applied plaid patterned paper to the inside covers and the front cover binding using 1/4 inch Extreme Double-Sided Tape. Next, I cut fall patterned papers to size and alternated those pages with the 4 x 6 photo sleeves. Finally, I punched holes in each page and strung a piece of string through the holes to hold the album together.

Embellishing the Flip Book

Happy Fall Flip Book Album by Dana Tatar for Scrapbook Adhesives by 3L

I saved the apple bag from my trip and used pieces of it in my flip book. The E-Z Runner Ultra Strong Refillable Dispenser was perfect for sticking a piece of stamped paper to a plastic photo sleeve.

Happy Fall Flip Book Album by Dana Tatar for Scrapbook Adhesives by 3L

I added fall imagery and quotes to many of the book pages to reinforce the themes of my photos.

Die-Cut Cover Details

Happy Fall Flip Book Album by Dana Tatar for Scrapbook Adhesives by 3L Pinterest

I used the Stampendous Truck Load Cutting Die Set to create the fall scene for the flip book cover. After cutting and applying chalk ink to the die-cut pieces of patterned paper, I used the E-Z Runner Petite Permanent Dots Refillable Dispenser to adhere theme to the album cover.

Thanks so much for stopping by today!
~Dana Tatar

Creative Time: 1 Hour
Skill Level: Intermediate

Materials Needed
Scrapbook Adhesives by 3L®

E-Z Runner Petite Permanent Dots Refillable Dispenser
E-Z Runner Ultra Strong Refillable Dispenser

HomeHobby™ by 3L
1/4 inch Extreme Double-Sided Tape

Other Flip Book: Heidi Swapp; Patterned Paper: Authentique, Glitz Design, Photo Play Paper; Truck Load Die Set: Stampendous; Chalk Ink: Clearsnap; String

Pin It!

Happy Fall Flip Book Album by Dana Tatar for Scrapbook Adhesives by 3L Pinterest

Foiled Dots and Buttons Holiday Card

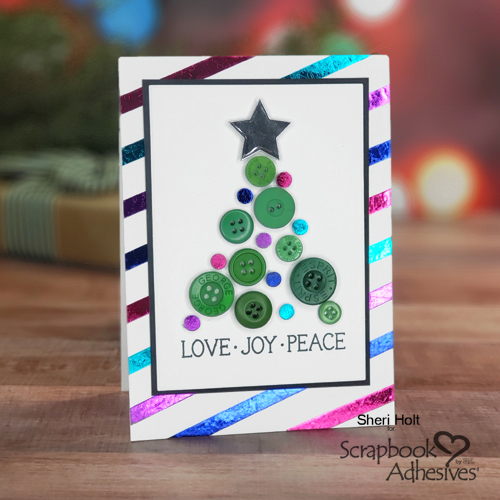
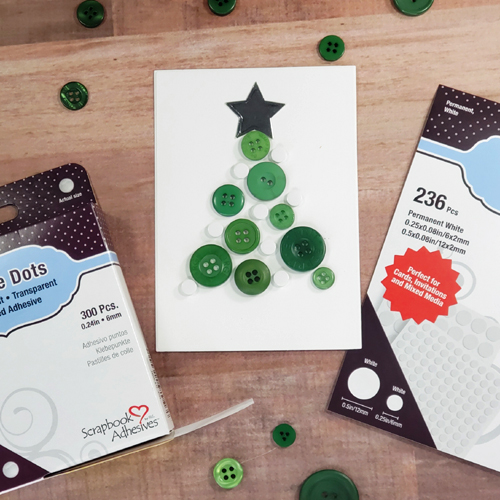
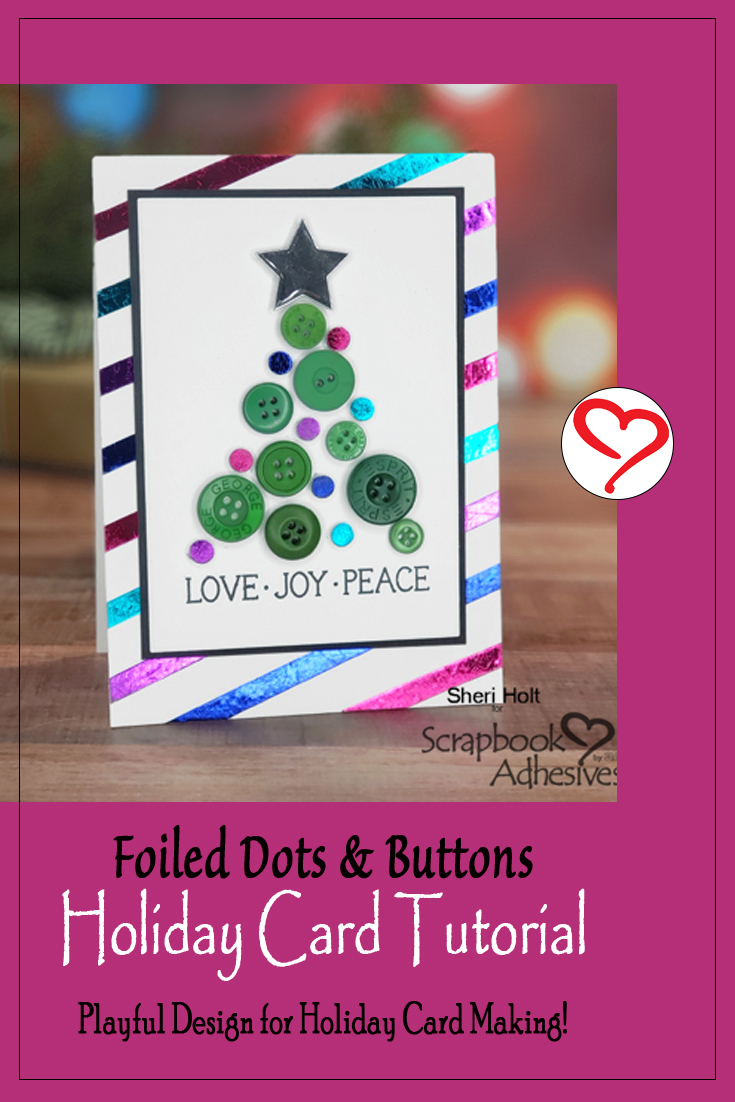
Hello, Sheri here again and I have a very quick & easy card that uses foiled dots and buttons accents to create a custom holiday card. Let me show you how!

Foiled Dots and Buttons Holiday Card by Sheri Holt for Scrapbook Adhesives by 3L

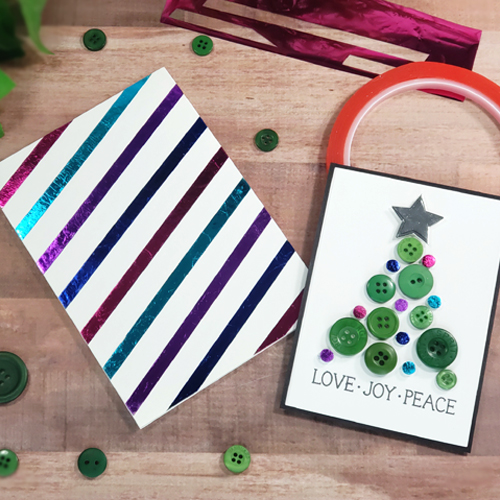
It only takes a few ingredients to create this one-of-a-kind card with lots of shine. I created my own background to match my focal image using adhesives and Metallic Transfer Foil Sheets in Variety Colors.

Foiled Dots and Buttons Holiday Card by Sheri Holt for Scrapbook Adhesives by 3L

Foiled Dots & Buttons Tree

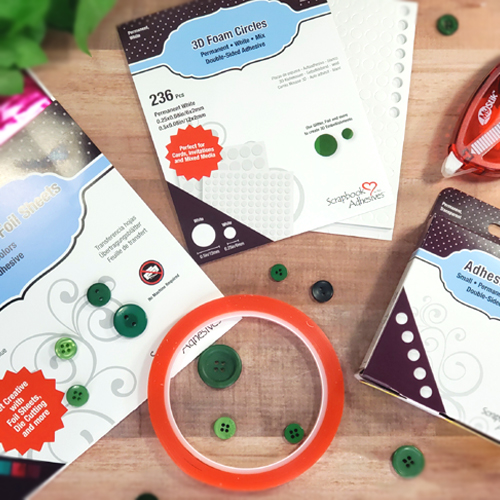
On a card panel, place various sized buttons to form a tree. Fill in the gaps of the tree with 3D Foam Circles in small size until I got my desired shape. Next, I picked up each button and attached small Adhesive Dots to the back and put back in place.

Foiled Dots and Buttons Holiday Card by Sheri Holt for Scrapbook Adhesives by 3L

Foiled Stripes

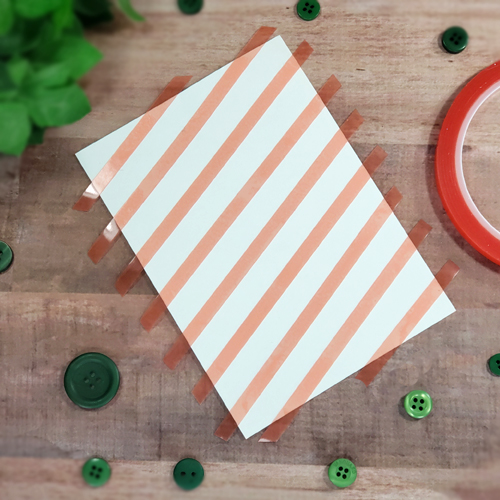
To create my background, I simply added stripes with Extreme Double-Sided Tape ¼ inch to the front of my card base. One by one lay each color foil on the tape (color side up) and pressed to transfer each color.

Foiled Dots and Buttons Holiday Card by Sheri Holt for Scrapbook Adhesives by 3L

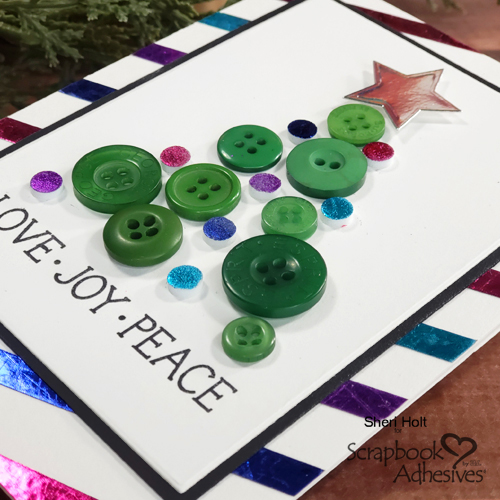
Once my background was complete, I used the same process with the foam circles on my tree. Designer’s Tip: press with the end of an eraser head to make sure the circle was completely covered.

A simple stamped sentiment and black matting completed my focal image. I attached the panel to my custom background with the MyStik® Permanent Strips Dispenser.

Foiled Dots and Buttons Holiday Card by Sheri Holt for Scrapbook Adhesives by 3L

I hope you try this easy foiling method like my Foiled Dots & Buttons Holiday Card!
Sheri Holt

Foiled Dots and Buttons Holiday Card by Sheri Holt for Scrapbook Adhesives by 3L

Creative Time: 20 minutes
Skill Level: Beginner

Materials needed:
Scrapbook Adhesives by 3L®
MyStik® Permanent Strips Dispenser
Adhesive Dots – Small
3D Foam Circles Mix – White
Metallic Transfer Foil Sheets Variety

HomeHobby™ by 3L
Extreme Double-Sided Tape ¼ inch

Save It!

Foiled Dots and Buttons Holiday Card by Sheri Holt for Scrapbook Adhesives by 3L Pinterest

Visit our Website and Blog!
Sign up for our Newsletter so you never miss a contest or giveaway!
instagram purple icon facebook icon purple pinterest purple icon twitter purple icon YouTube icon blog subscription purple icon

Bountiful Blessings Fall Card

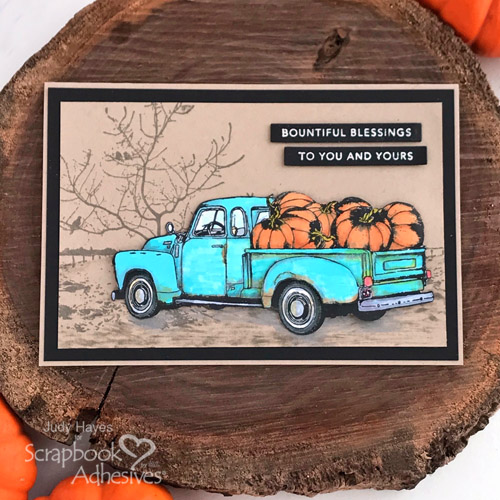
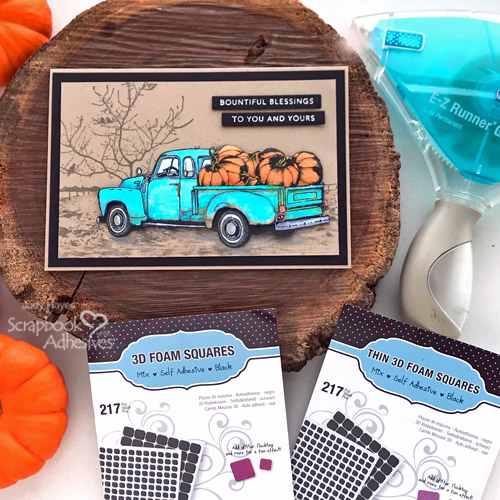
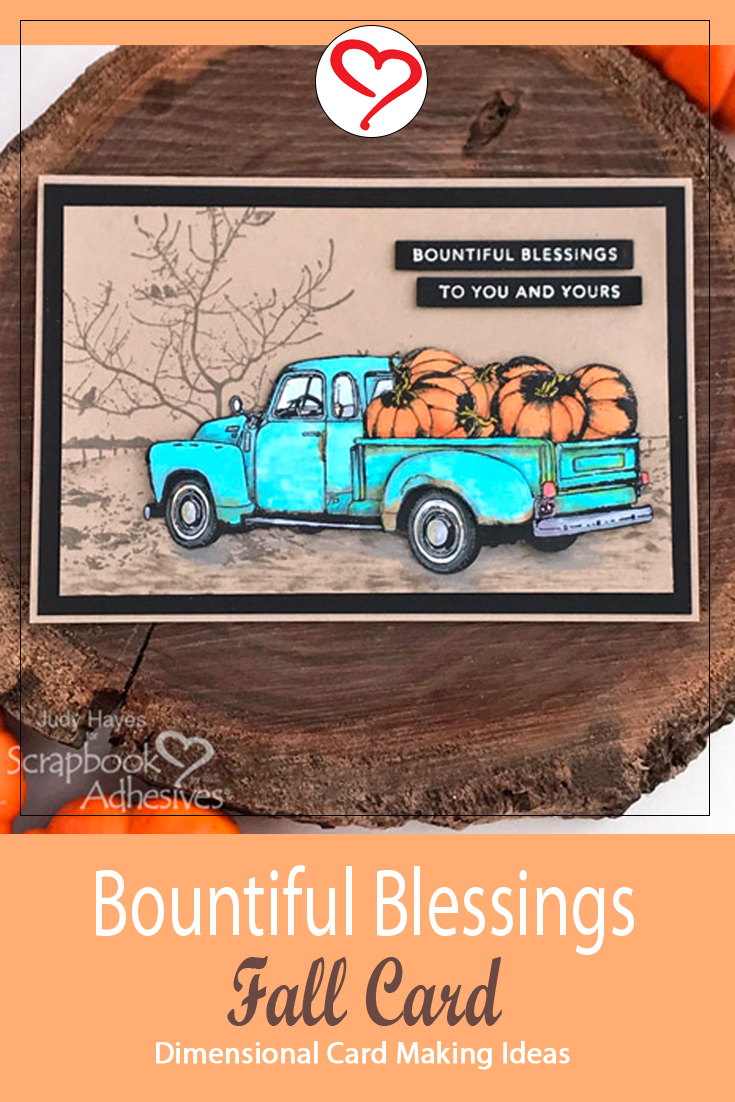
Hello friends! Judy here with a wonderful Pumpkin Truck card. When I was looking for fall ideas for this card, I found this pumpkin truck stamp in my stash. I’m a lover of old farm trucks and pumpkins! So this was perfect for me to make this fall card!

Bountiful Blessings Fall Card by Judy Hayes for Scrapbook Adhesives by 3L

Working the Pumpkin Truck

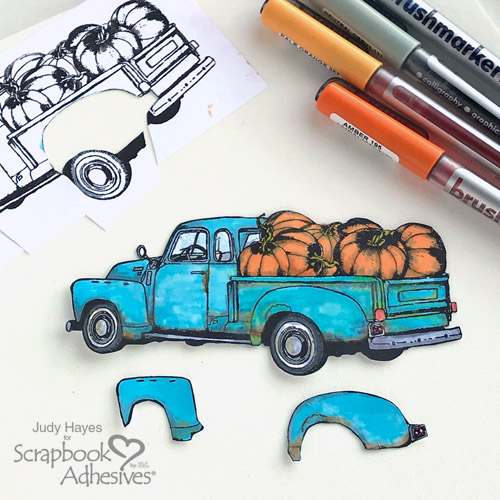
To make this card, stamp pumpkin truck two times with Versafine Onyx Black ink on white cardstock. I used Misti for stamping so I could re-stamp each image as needed for a good impression.

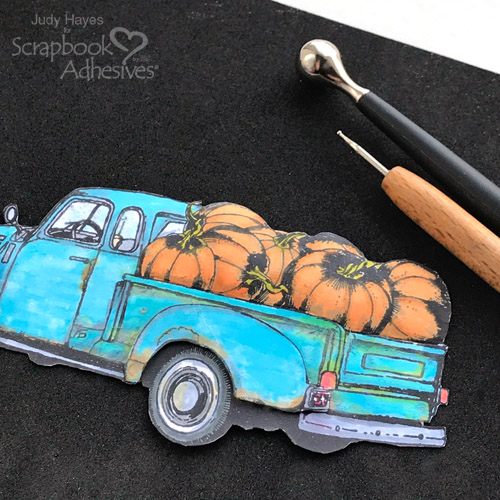
Color one pumpkin truck image with markers. On the other image, color the front and back fenders only.

Bountiful Blessings Fall Card by Judy Hayes for Scrapbook Adhesives by 3L

Cut out the colored truck. Cut out each separate fender.

Bountiful Blessings Fall Card by Judy Hayes for Scrapbook Adhesives by 3L

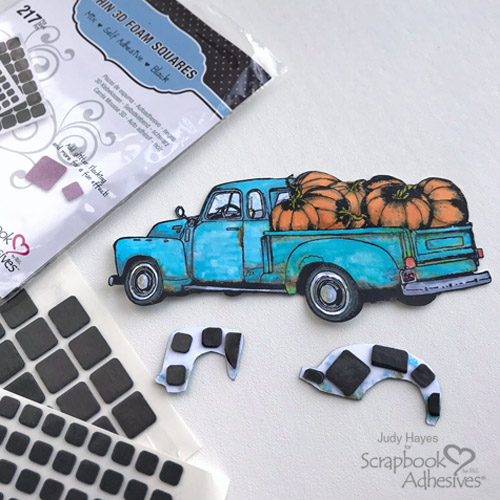
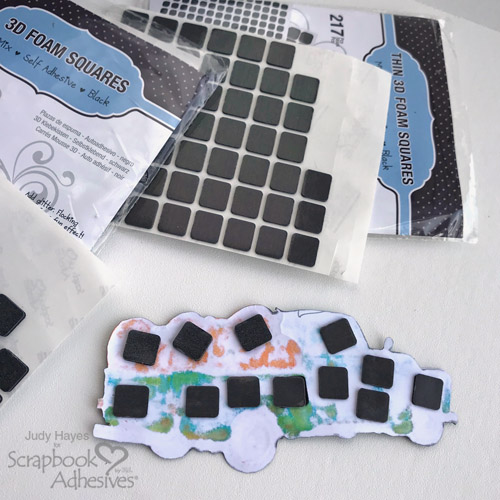
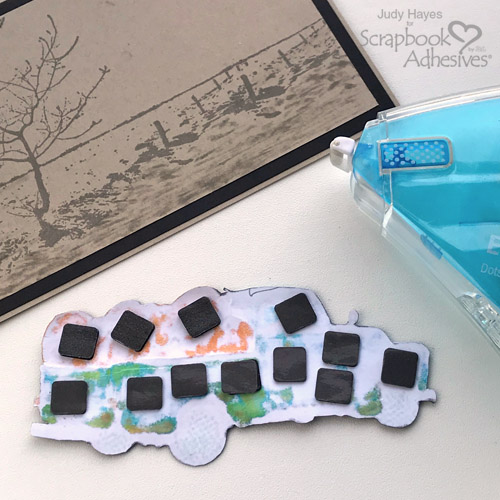
Apply Thin 3D Foam Squares Black Mix to the back of each fender. Squares can be cut in half and trimmed to fit. Fasten each fender in place on the truck.

Bountiful Blessings Fall Card by Judy Hayes for Scrapbook Adhesives by 3L

Use a small ball stylus on a piece of foam to trace around the edge of the truck near pumpkins. Use stylus lines as a reference to know where pumpkins are for shaping them.

On the backside, use a large ball stylus to rub over the center of each pumpkin in a circular motion. This will make the paper slightly rounded on the front so pumpkins are slightly dimensional.

To define them even more, place truck face up on foam. Trace around each pumpkin with a small stylus.

Bountiful Blessings Fall Card by Judy Hayes for Scrapbook Adhesives by 3L

Place Thin 3D Foam Squares Black Mix on the back of the pumpkin truck but not on the pumpkin area.

Place 3D Foam Squares Black Mix on the back of pumpkins. This will raise pumpkins slightly more than truck to keep them dimensional.

Background Building

Bountiful Blessings Fall Card by Judy Hayes for Scrapbook Adhesives by 3L

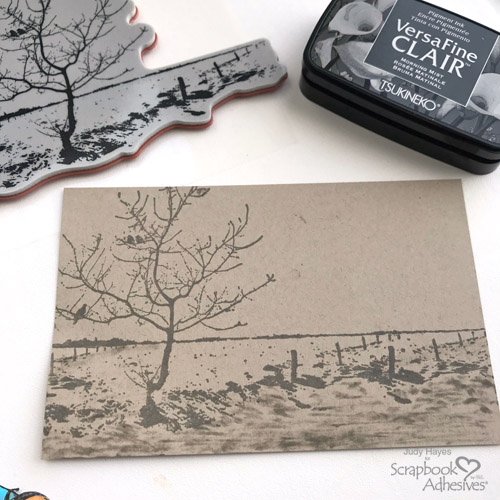
Stamp tree background on 4.125 x 6.375 inch Kraft cardstock using Morning Mist ink. Stamp off the edge of the paper on the left edge. The image will not go clear across the paper. Ink and stamp again on edge with the fence.

Place scrap paper as a mask over the previously stamped background. Stamp on the right edge to continue the background across the paper on the right side.

Notice the two fences in the photo at the center and right side are the same. Use eye shadow applicator or cotton swab with Morning Mist ink to continue horizon if needed and to fill in the lower area below stamped images.

Bountiful Blessings Fall Card by Judy Hayes for Scrapbook Adhesives by 3L

Card Layers

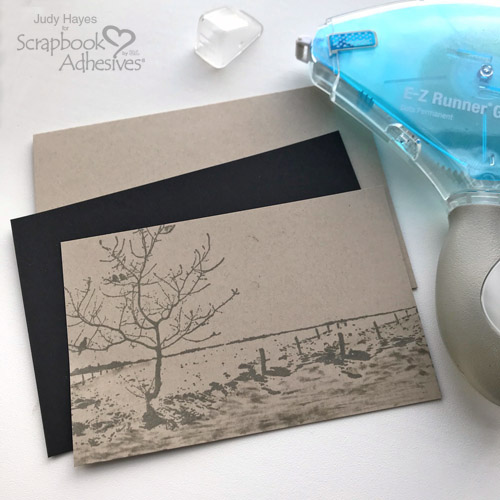
Form 4.75 x 7 inch top fold card from Kraft cardstock. Designer’s Tip: this will easily fit in a 5 x 7-inch envelope.

Cut 4.5 x 6.75-inch mat from black cardstock. Use the E-Z Runner Grand Permanent Dots Dispenser to secure the layered card panel to the card front.

Bountiful Blessings Fall Card by Judy Hayes for Scrapbook Adhesives by 3L

Assemble the Truck

Use the E-Z Runner Grand Permanent Dots Dispenser to apply adhesive to the back of wheels on the truck. This will hold wheels flat on the card so it doesn’t appear to be floating. Adhere the pumpkin truck on the card.

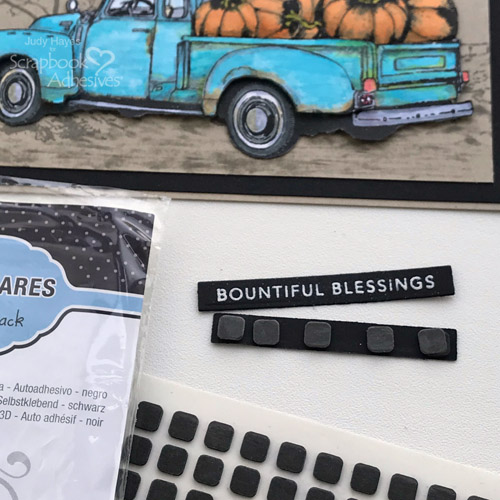
Stamp Mini Strips Harvest on black card stock with Versafine Onyx Black Ink. Heat emboss with white embossing powder. Die-cut into strips with matching die.

Bountiful Blessings Fall Card by Judy Hayes for Scrapbook Adhesives by 3L

Apply small squares from Thin 3D Foam Squares Black Mix to the back of strips.

Bountiful Blessings Fall Card by Judy Hayes for Scrapbook Adhesives by 3L

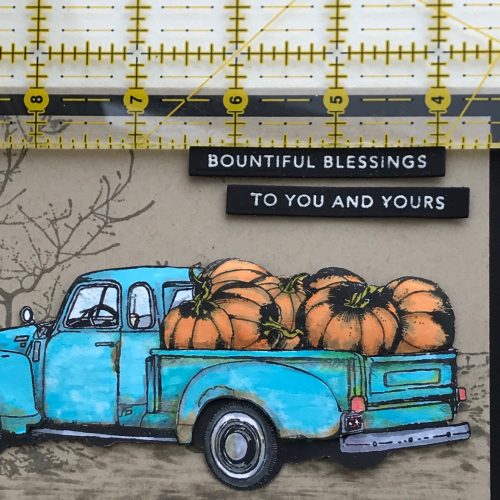
Attach the greeting strips to the card. I use a quilting ruler to line them up straight. It works really well!

Use a gray marker to add shading near the wheels and under the pumpkin truck.

Bountiful Blessings Fall Card by Judy Hayes for Scrapbook Adhesives by 3L

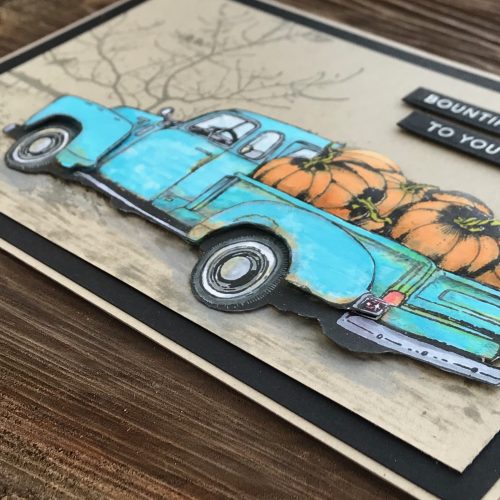
You can see some of the dimension of the fenders in this photo. Although pumpkins feel dimensional, it was difficult to photograph them to show that.

I hope you’ve enjoyed my Pumpkin Truck Card! Thanks for Visiting!
Judy Hayes

Creative Time: 45 Minutes
Skill Level: Intermediate

Materials Needed
Scrapbook Adhesives by 3L®

Other:
Tsukineko – Versafine Onyx Black Ink Pad, Versafine Clair Morning Mist Ink Pad; Karin Brushmarker Pro markers; Penny Black Stamps – “restful”, “pumpkin truck”; Ranger White Embossing Powder; Taylored Expressions – Mini Strips Harvest, Mini Strips Die; Cardstock – White, Kraft, Black

Bountiful Blessings Fall Card by Judy Hayes for Scrapbook Adhesives by 3L

Save it to Pinterest!

Bountiful Blessings Fall Card by Judy Hayes for Scrapbook Adhesives by 3L

Visit our Website and Blog!
Sign up for our Newsletter so you never miss a contest or giveaway!
instagram purple icon facebook icon purple pinterest purple icon twitter purple icon YouTube icon blog subscription purple icon