You are in our US store • Switch to Europe store

Halloween Shaker Card Tutorial

Hi Crafters! Valerie here today, and I decided to create a fun Halloween shaker card for today’s post!
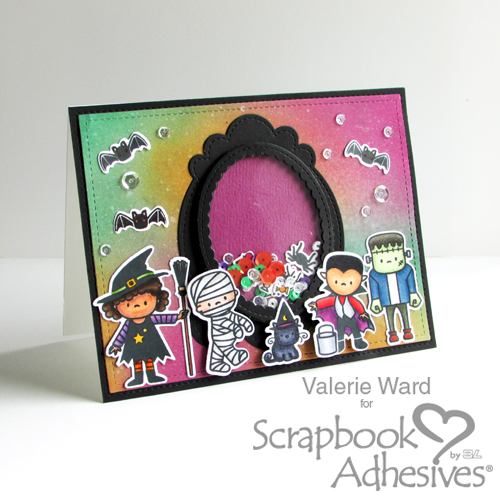
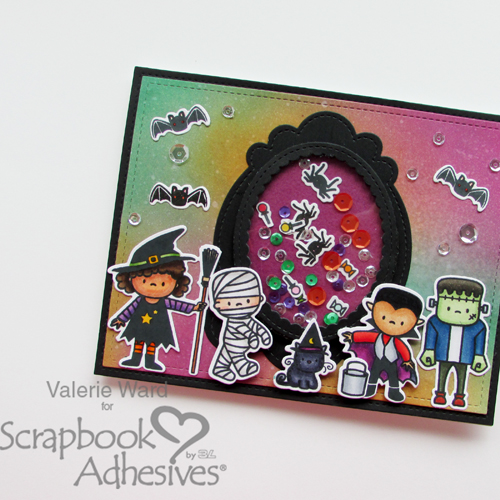
Halloween Shaker Card Tutorial by Valerie Ward for Scrapbook Adhesives by 3L

The Colorful Halloween Background

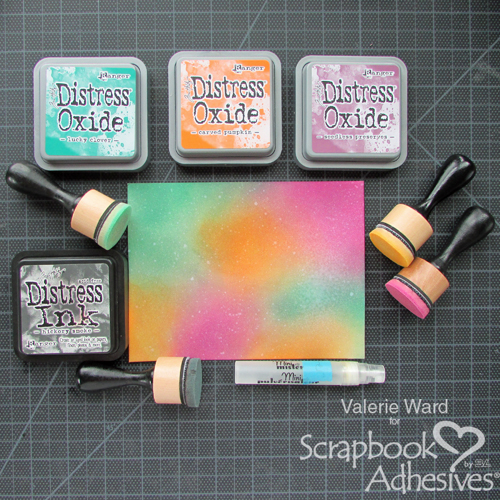
I started by making a very colorful background with three Distress Oxide inks (Carved Pumpkin, Lucky Clover, and Seedless Preserves). When I got my desired colors blended, I added a thin layer of Hickory Smoke Distress Ink over the paper.
Halloween Shaker Card Tutorial by Valerie Ward for Scrapbook Adhesives by 3L

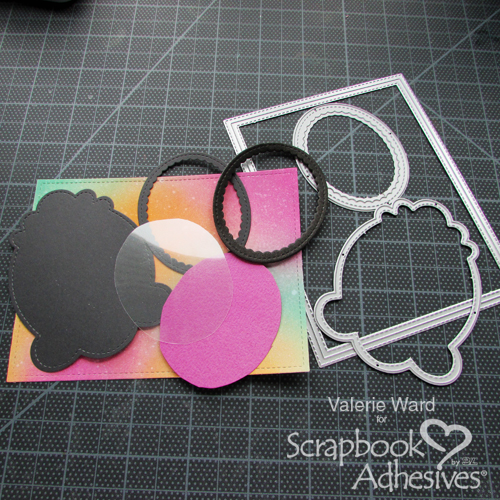
Next, I got all my die cutting done:

Halloween Shaker Card Tutorial by Valerie Ward for Scrapbook Adhesives by 3L

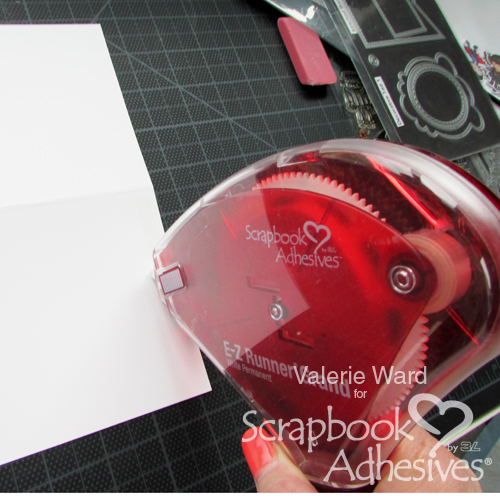
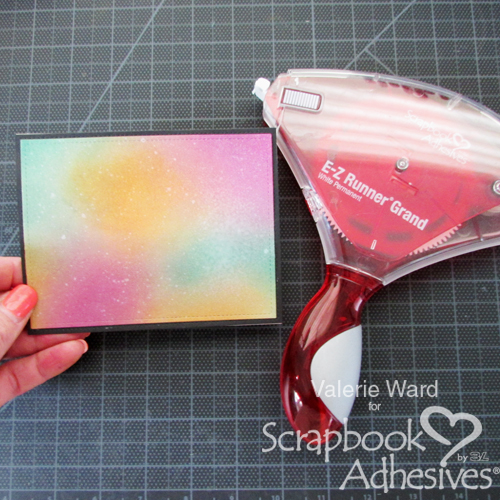
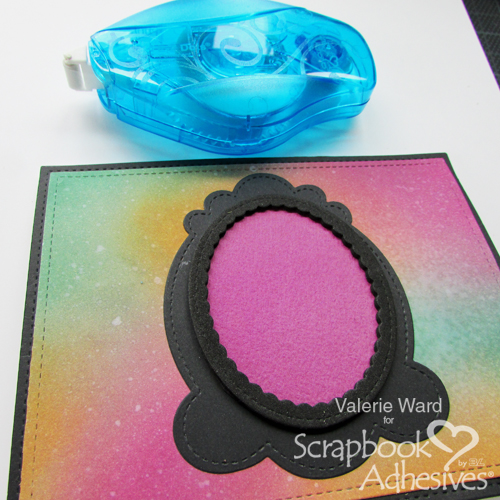
Here is where I used my E-Z Runner Grand Dispenser to attach the black base to the top of the card, and then the colorful background piece centered on top of the black base:
Halloween Shaker Card Tutorial by Valerie Ward for Scrapbook Adhesives by 3L

Make the Halloween Shaker

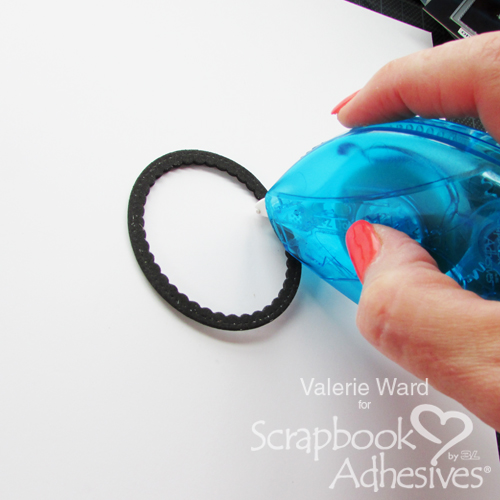
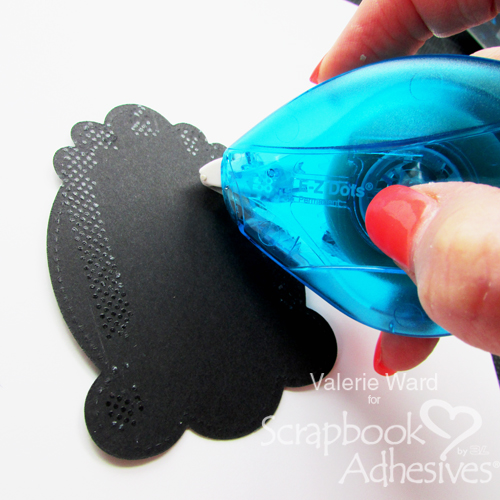
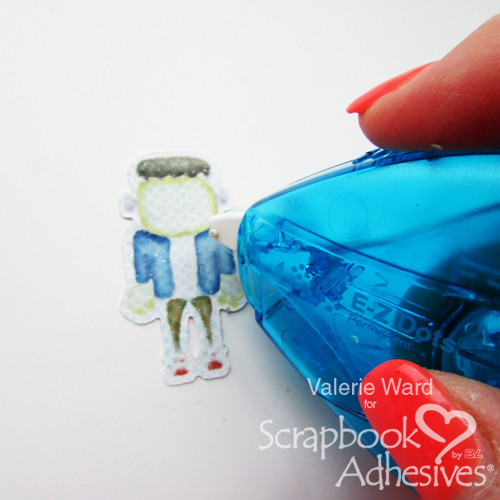
First, I used my E-Z Dots Permanent Dispenser to attach the very bottom piece of the shaker unit to the card front:
Halloween Shaker Card Tutorial by Valerie Ward for Scrapbook Adhesives by 3L

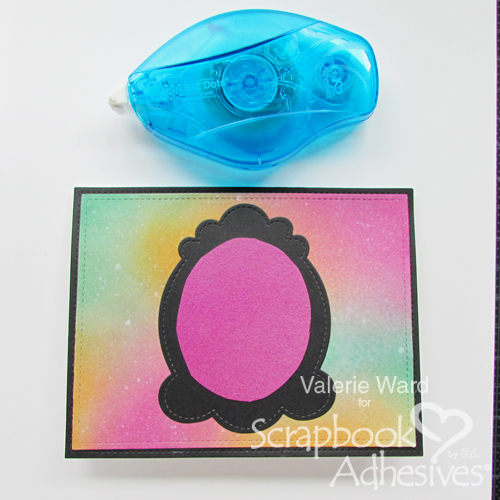
I used the same adhesive to adhere this purple piece on top of the black one:
Halloween Shaker Card Tutorial by Valerie Ward for Scrapbook Adhesives by 3L

And I was thrilled to see my beloved E-Z Dots Permanent Dispenser also worked on this foam piece:

This piece goes on top of the purple piece and the black piece and will hold the shaker pieces.
Halloween Shaker Card Tutorial by Valerie Ward for Scrapbook Adhesives by 3L

I used various Pretty Pink Posh sequins.
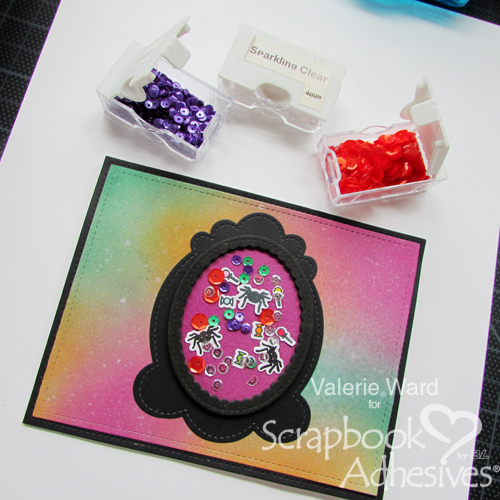
Halloween Shaker Card Tutorial by Valerie Ward for Scrapbook Adhesives by 3L

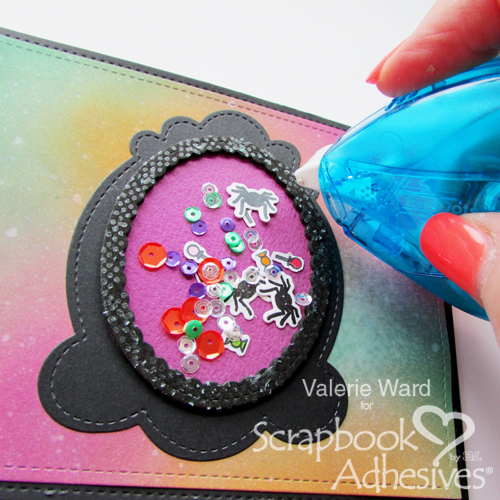
Once again I pulled out and used my trusty E-Z Dots Permanent Dispenser on top of the foam frame piece.

And here is where I put down the transparent piece.
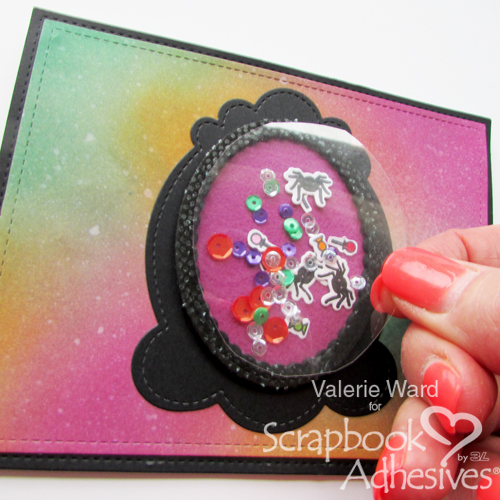
Halloween Shaker Card Tutorial by Valerie Ward for Scrapbook Adhesives by 3L

Add the Finishing Touches

For the colored images that will lay flat on the card, I used my E-Z Dots Permanent Dispenser.


There are pieces that will need to be raised up because they will partially be attached to the raised shaker portion, so I added 3D Foam Circles Black Mix to them:
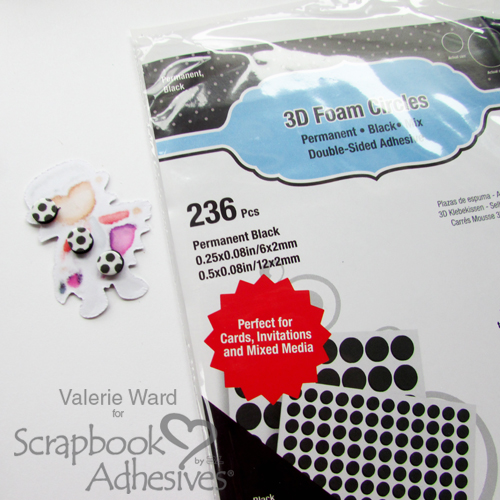
Halloween Shaker Card Tutorial by Valerie Ward for Scrapbook Adhesives by 3L

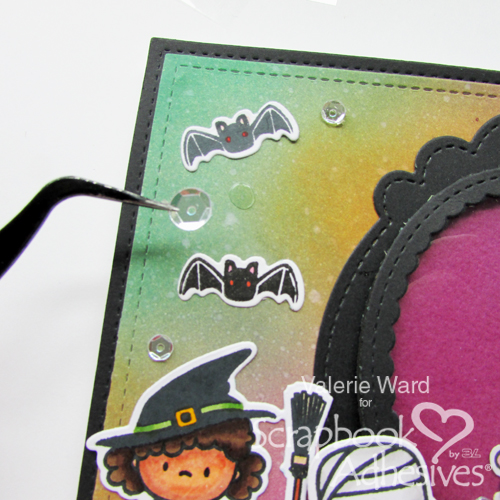
I decided to add some sequins to the front of the card and to do that I used Adhesive Dots Micro.
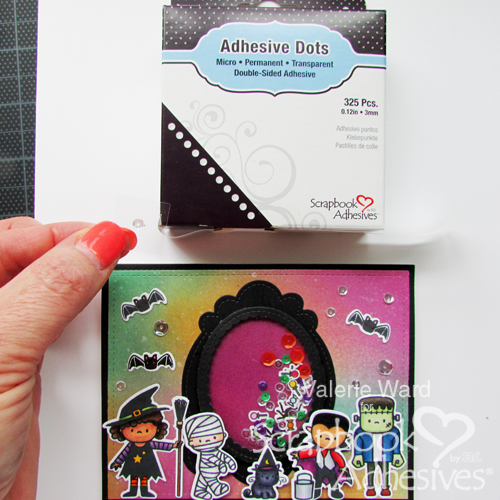
I like to put the Adhesive Dots Micro directly onto the card, and then attach the sequins on top of them:
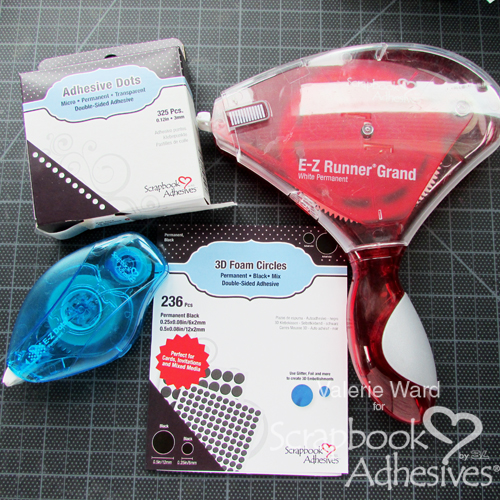
Now the card is complete, and these are the Scrapbook Adhesives by 3L products I used on this project:
Scrapbook Adhesives by 3L

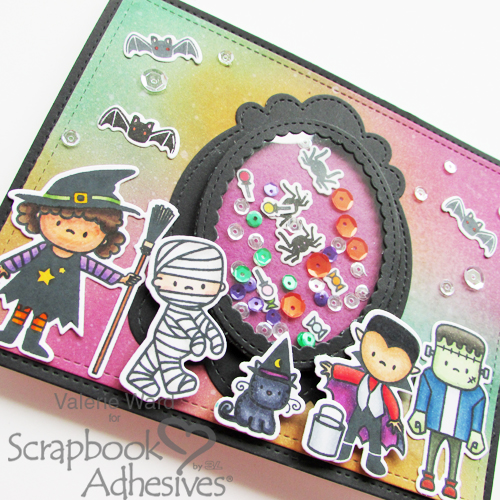
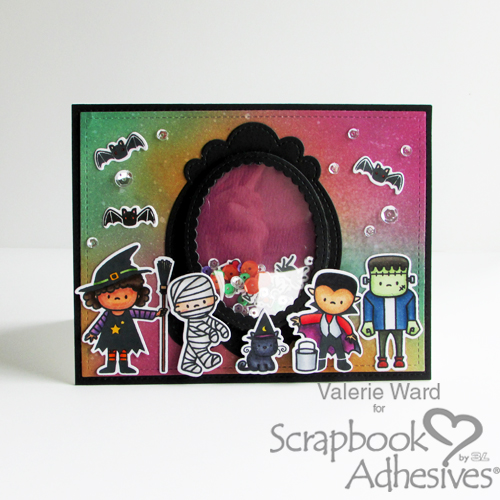
Here’s another look at the finished card.
Halloween Shaker Card Tutorial by Valerie Ward for Scrapbook Adhesives by 3L

Thank you for stopping by! I had so much fun with this card, and it’s pretty easy, too!
Valerie

  • Creative Time: 1 hour
  • Skill Level: Beginner

Materials Needed:
Scrapbook Adhesives by 3L:

E-Z Runner Grand Refillable Dispenser
E-Z Dots Permanent Refillable Dispenser
Adhesive Dots Micro
3D Foam Circles Black Mix

Other products:
Halloween stamp set and coordinating die set; Distress Oxide Inks and Ink Applicators (Ranger Inks); Sequins

Visit our Website and Blog!
Sign up for our Newsletter so you never miss a contest or giveaway!
instagram purple icon facebook icon purple pinterest purple icon twitter purple icon YouTube icon blog subscription purple icon

DIY Paper Calla Lily Bouquet

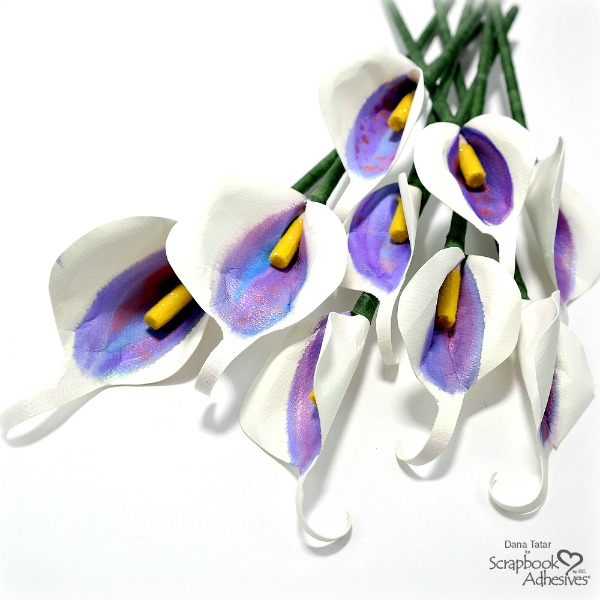
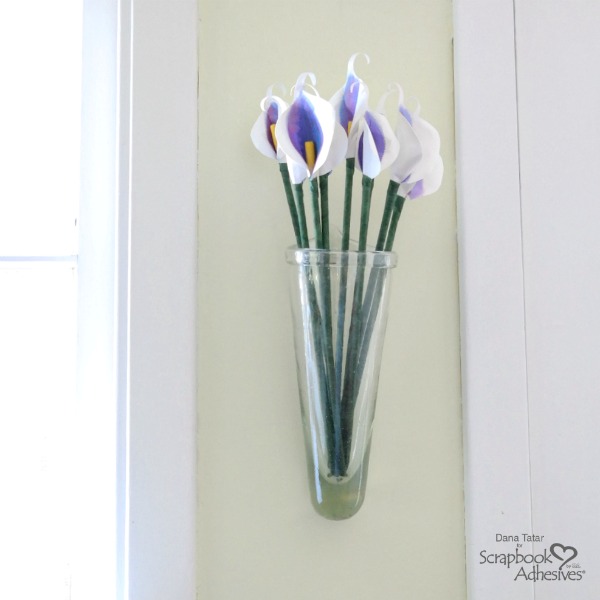
Hi friends! Dana Tatar here today sharing how to create a paper calla lily bouquet. I love the look and scent of fresh flowers, but I usually only splurge for a bouquet on special occasions. The wall vase in my kitchen is something that I don’t like to leave empty. I created a paper bouquet of calla lilies, my favorite, to add a bold pop of color to my space.

DIY Paper Calla Lily Bouquet by Dana Tatar for Scrapbook Adhesives by 3L

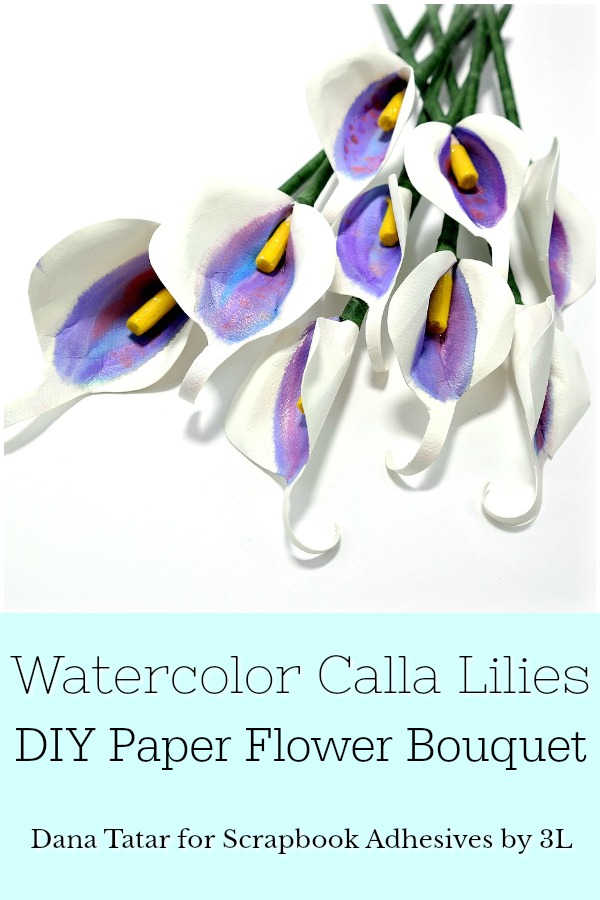
My flower-making skills are at a beginner level, so this simple design was perfect for me. I used iridescent watercolors to paint a bold center for the flower petals. I wrapped the paper petals around wood dowels that I covered with a glittered yellow flock for the stamen and green floral tape for the stem.

How to Create a Paper Calla Lily Bouquet

How to cut petals for DIY paper calla lilies

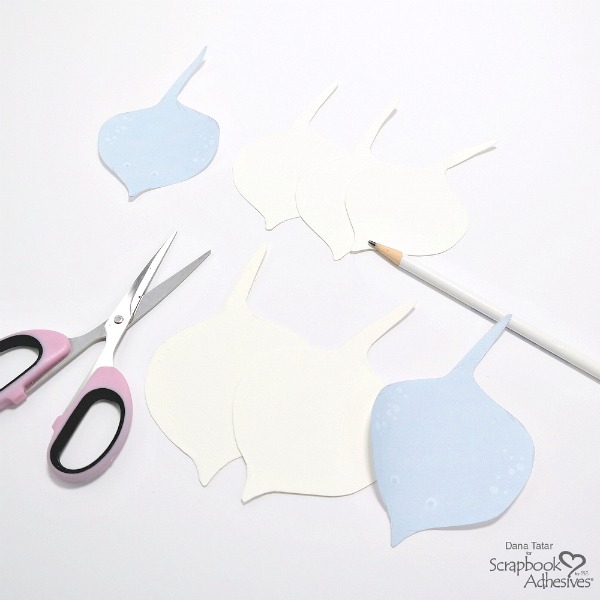
Step 1. Use a petal template to trace petal shapes onto a piece of watercolor paper. Cut out the paper petals with scissors. I found a clip-art animal (stingray) that I thought looked like a lily petal as a template for this step. I printed out two sizes to add variety to my bouquet.

How to Add Color to Paper Calla Lily Petals with Watercolor Paint

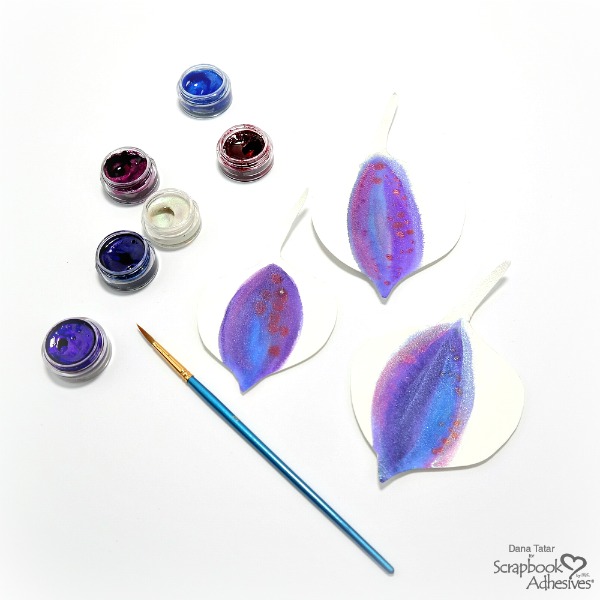
Step 2. Use watercolor paint to add color to the center of the flower petals. Let dry. My favorite calla lilies have white petals with a dark purple center. I used red, pink, blue, purple, and white paint. Any color palette and a full-coverage paint application would also work for this step.

How to create flower stamens using Adhesives Lines and Dots, glittered yellow flock, and wood dowels.

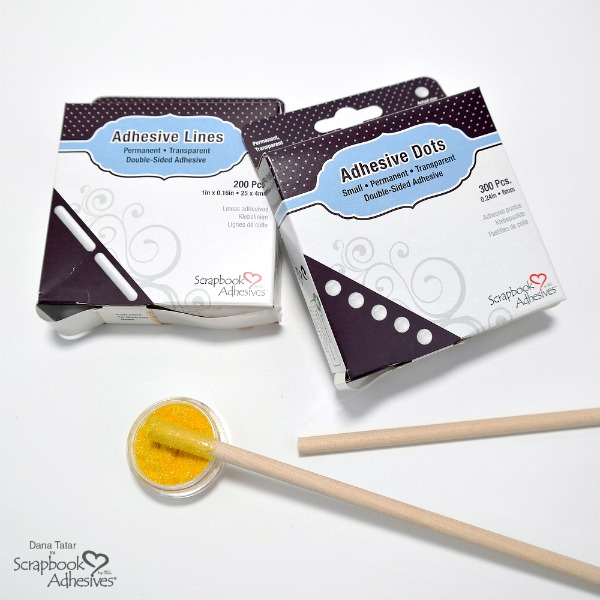
Step 3. Create a flower stamen for each flower petal. Apply a Small Adhesive Dot to the end of a wood dowel. Next, apply Adhesives Lines around the top. Press the adhesive-covered end of the dowel into yellow flock. Gently tap the dowel to remove any excess flock.

How to use Extreme Double-Sided Tape to Create Paper Calla Lilies

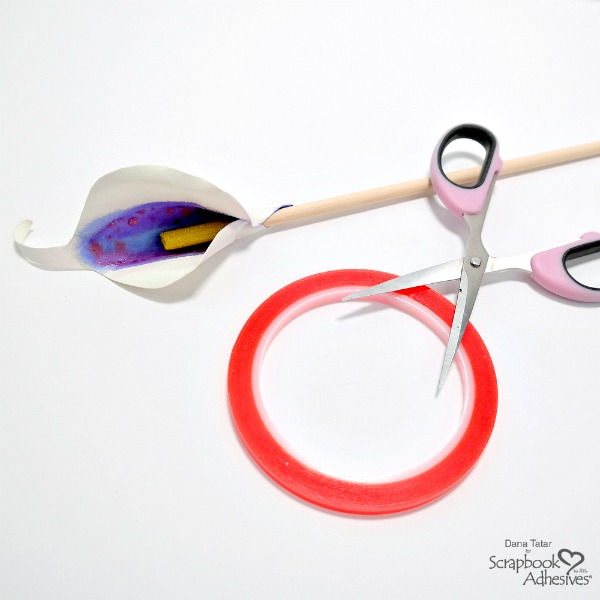
Step 4. Bend and curl a dry flower petal into the desired shape. Attach the flower petal to the wood dowel, just under the flocked stamen, using Extreme Double-Sided Tape.

DIY Paper Calla Lily with Floral Tape Wrapped Stem

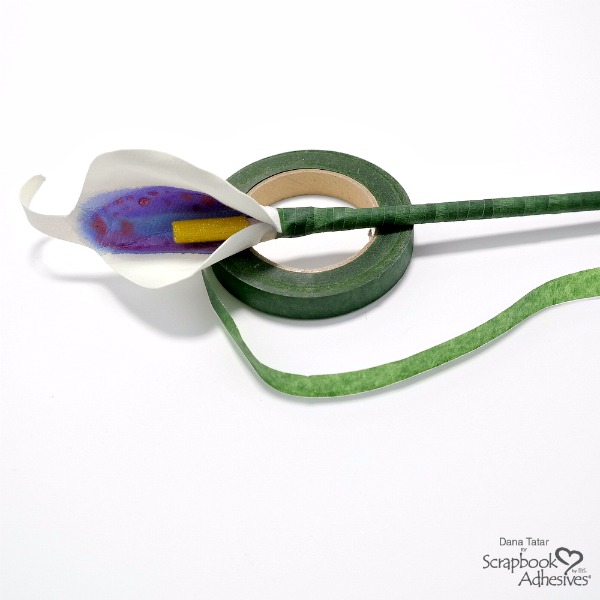
Step 5. Wrap the wood dowel with green floral tape. The floral tape is more tacky than sticky. Use a Small Adhesive Dot to secure the ends of the tape to the dowel to prevent unraveling.

Paper Calla Lily Bouquet in Wall Vase

I hope I have inspired you to create your own paper bouquet. Thanks for stopping by today!
~Dana

Creative Time: 1 hour
Skill Level: Beginner

Materials Needed:
Scrapbook Adhesives by 3L Supplies:

Adhesive Dots Small
Adhesive Lines
HomeHobby by 3L®:
Extreme Double-Sided Tape 1/4in
Other Supplies:
Watercolor Paper; Watercolor Paint (Twinkling H2Os); Flock; Floral Tape; Wood Dowels

Pin It!

Watercolor Calla Lilies DIY Paper Flower Bouquet Tutorial


Summery Gift Card Wallet Tutorial

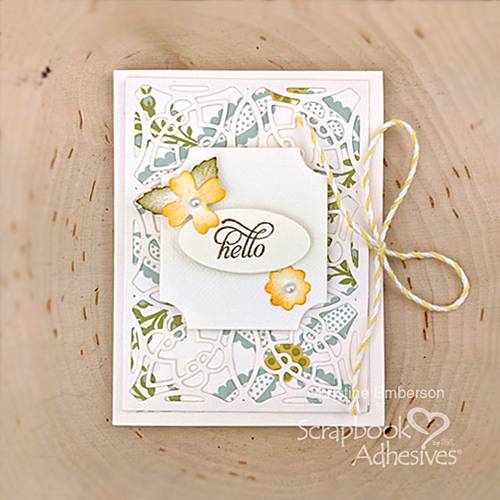
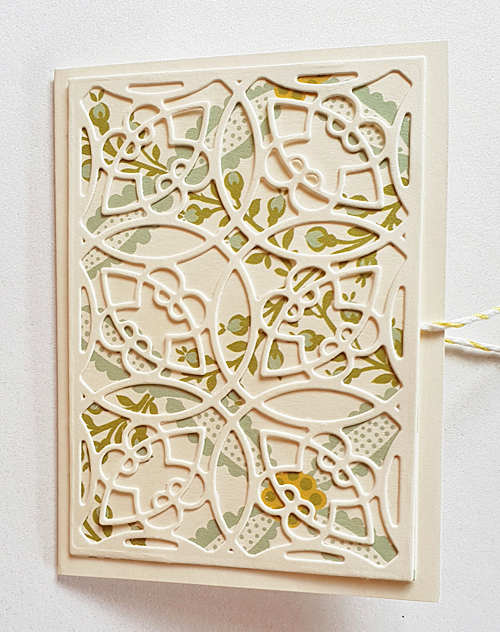
Christine here with a summery gift card wallet, perfect for so many occasions and definitely when you really don’t know what to buy someone!  Pop inside a gift card and hey presto, gift sorted!  Take a look to see how this gift card holder is easily made with Scrapbook Adhesives by 3L® products.


Summery Gift Card Wallet by Christine Emberson for Scrapbook Adhesives by 3L

Gift Card Wallet Details

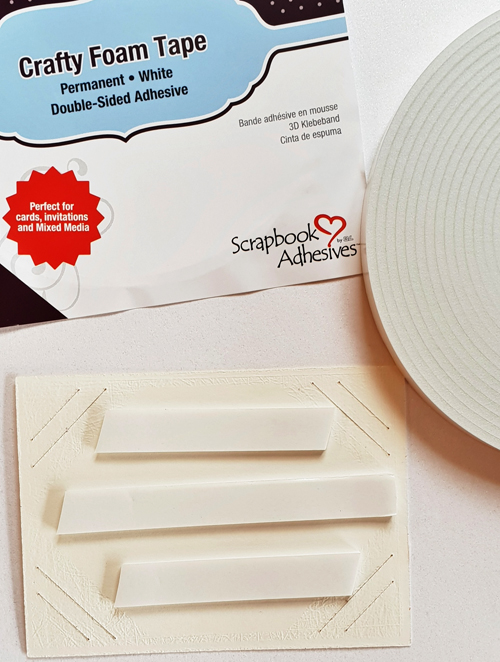
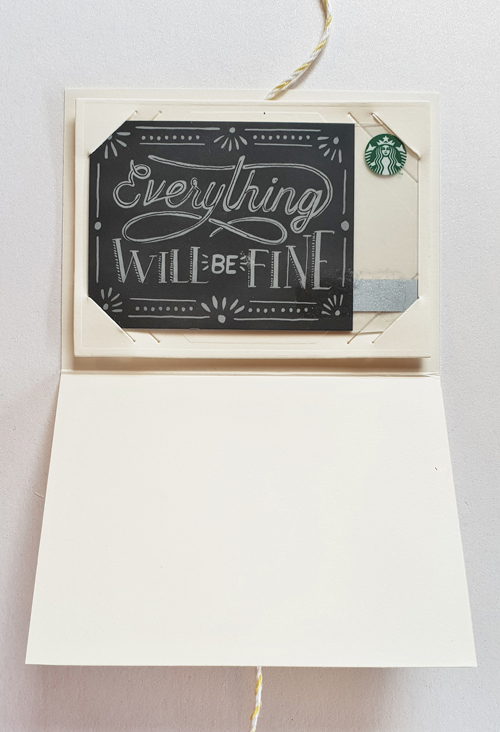
Die cut each piece from the die set and apply Crafty Foam Tape to the inner die cut that holds the gift card. Be aware not to affix tape over the slots.


Summery Gift Card Wallet by Christine Emberson for Scrapbook Adhesives by 3L


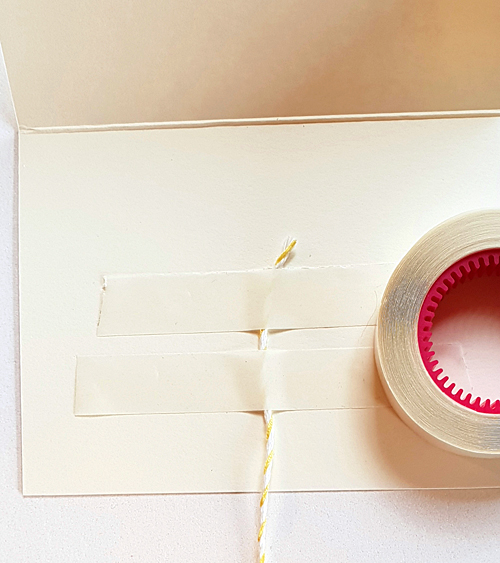
The outer wallet is created by folding a piece of ivory card, trim to size.  To the inside and front affix twine with Crafty Power Tape.  This twine will act as a closure with a bow.


Summery Gift Card Wallet by Christine Emberson for Scrapbook Adhesives by 3L


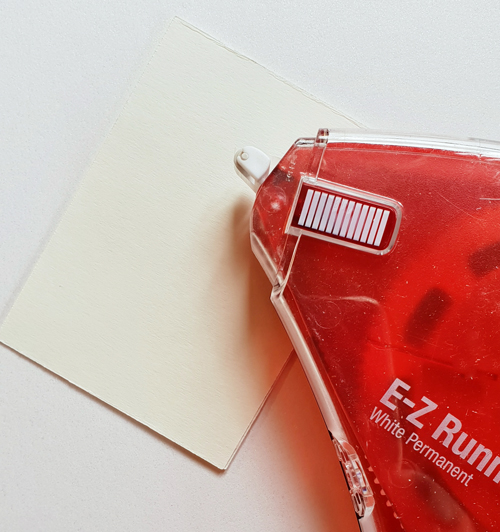
The front die cut decoration is affixed to the outer wallet with  E-Z Runner Grand Refillable Dispenser.  It’s ideal to apply as little or as much you need because it dispenses in little strips.


Summery Gift Card Wallet by Christine Emberson for Scrapbook Adhesives by 3L


The wallet is now made, this is how it looks on the outside.


Summery Gift Card Wallet by Christine Emberson for Scrapbook Adhesives by 3L


Pop inside a gift card and write your special message.


Summery Gift Card Wallet by Christine Emberson for Scrapbook Adhesives by 3L


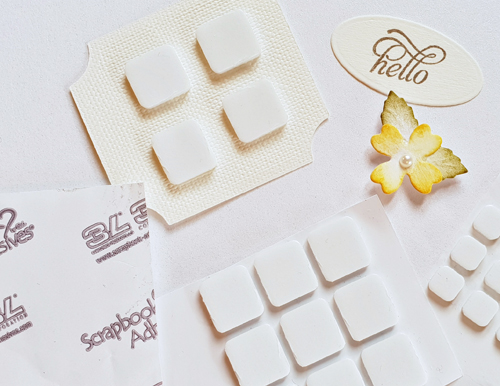
To decorate the front.  The 3D Foam Squares White Small are ideal for embellishments like these little flowers and 3D Foam Squares White Regular for this sentiment label. It is possible to have both sizes of foam squares in one pack with 3D Foam Squares White Mix.


Summery Gift Card Wallet by Christine Emberson for Scrapbook Adhesives by 3L


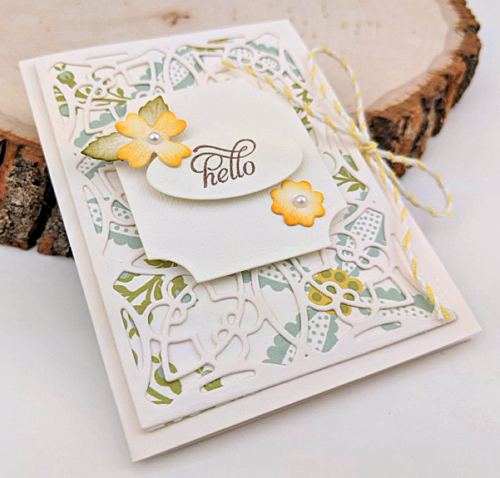
The finished project with added tiny flowers, pearls, and a stamped sentiment.  Switch out the papers and embellishments for something festive and get ahead with your Christmas planning.


Summery Gift Card Wallet by Christine Emberson for Scrapbook Adhesives by 3L


Be sure to check out all the super handy adhesives on the website. Thanks for stopping by!
Christine Emberson

  • Creative Time: 30 minutes
  • Skill Level: Beginner

Scrapbook Adhesives by 3L®:
E-Z Runner Grand Refillable Dispenser
Crafty Foam Tape
Crafty Power Tape
3D Foam Squares White Regular
3D Foam Squares White Small

Others:
Dies: Spellbinders® Paper Arts (Swirl Booklet Insert)
Ivory Card; Twine; Sentiment Stamp; Die cut flowers and tag; Pearls; Distress Inks; Patterned Paper: Anna Griffin

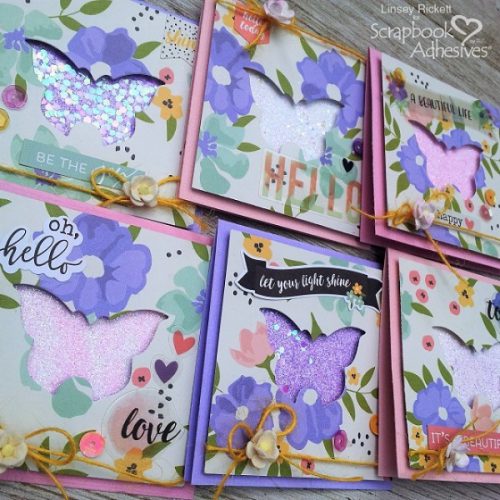
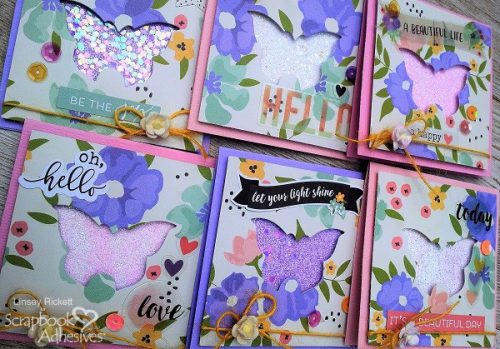
3 x 3 Notecards with Butterfly

3 x 3 notecards are one of my favorite things to make in bulk because they are useful for so many occasions. Hi friends, Linsey here today sharing a simple set of 3 x 3 notecards that I hope will inspire you!

3 x 3 Notecards with Butterfly by Linsey RIckett for Scrapbook Adhesives by 3L

Keeping with an all-occasion design on the front of your 3 x 3 notecards and leaving them blank on the inside makes them super versatile and even handier. I wanted the card fronts to have an easy, yet striking design and discovered a way to accomplish both with a few fantastic products from the Scrapbook Adhesives by 3L® family. Here’s how!

Creating the Notecards Basics

Choose a general design, theme (if any) and colors for 3 x 3 notecards. If making in bulk, it’s best to pre-cut all cardstock and paper first.

Cut cardstock into 6 3 x 6″ pieces, then score and fold in half to make 3 x 3.

Cut 6 2-3/4 x 2-3/4″ pieces coordinating patterned paper, then cut a window shape in the center of each piece of patterned paper with a butterfly etched die or shape of choice. A punch would also work nicely here.

Cut 6 2 x 2″ pieces of white cardstock, then set all cut papers aside.

3 x 3 Notecards with Butterfly by Linsey RIckett for Scrapbook Adhesives by 3L

Building the Notecards Details

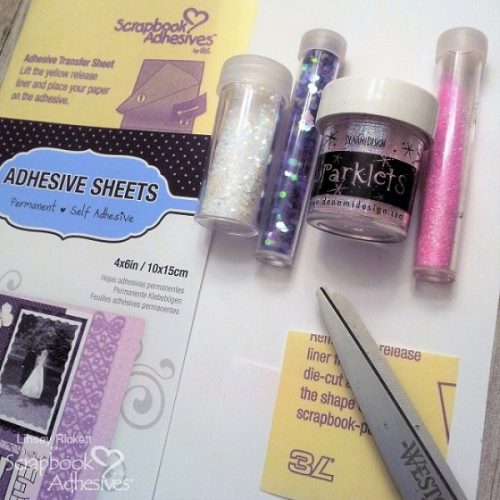
Adhesive Sheets 4×6 inch sheets were used. However, when doing bulk 3 x 3 notecards, Adhesive Sheets 6×12 inch is recommended.

Cut Adhesive Sheet into 6 2 x 2″ pieces. Remove backing and adhere to front of each 2 x 2″ piece of white cardstock.

Next, adhere white cardstock to the center of each 3 x 3 notecard base with E-Z Runner® Permanent Strips Dispenser.

Pull off the liner of Adhesive Sheet piece and cover entire 2×2″ front with glitter. Gently tap off excess from the back of notecard. I experimented with fine, regular and chunky glitters and they all adhered flawlessly to the Adhesive Sheet. The result was a smooth, fully covered 2 x 2″ square of sparkling cardstock every time!

3 x 3 Notecards with Butterfly by Linsey RIckett for Scrapbook Adhesives by 3L

Now add 3D Foam Squares White Mix to the back side of the patterned paper pieces and adhere each to the front of 3 x 3 notecards, centering the butterfly shape window over the glittered cardstock piece.

Finish with a simple embellishment, such as ribbon, twine or little sequins, added here using Adhesive Dots Micro. Add a sentiment, if desired, or leave as is and consider this batch of 3 x 3 notecards complete!

3 x 3 Notecards with Butterfly by Linsey RIckett for Scrapbook Adhesives by 3L

Thanks so much for visiting today and allowing me to share my 3 x 3 notecards with you! I hope you enjoyed this project and feel inspired to make something special with Scrapbook Adhesives by 3L®! Until next time, happy crafting!

Creative Time: 45 mins.
Skill Level: Intermediate

Materials Needed:
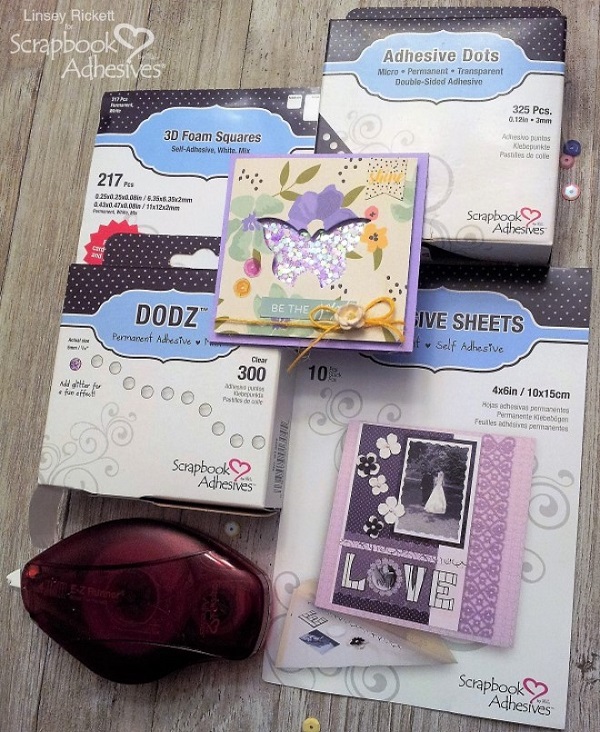
Scrapbook Adhesives by 3L®
E-Z Runner® Permanent Strips Dispenser
Adhesive Sheets 4×6 inch
3D Foam Squares White Mix
Adhesive Dots Micro

Other:
White and colored cardstock
Designer Patterned Paper
Glitter
Die cut (butterfly) and Cuttlebug
Paper cutter
Ribbon
Sequins

Traveler’s Notebook Adhesives

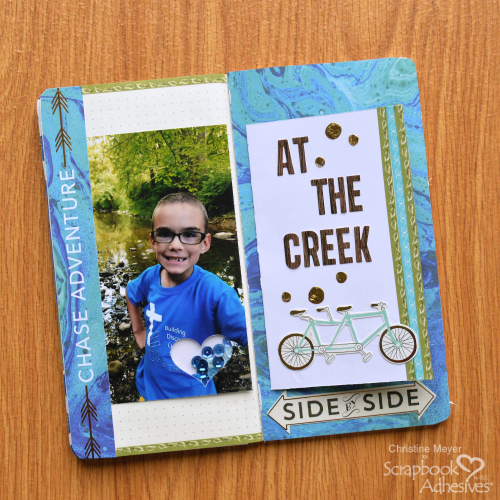
A Traveler’s Notebook is a great way to capture your memories on a smaller scale and keep them contained in one area.  Adhesives don’t have to change dramatically for this scale but I do have some ideas for you on what to use and how to incorporate them!  I started one specifically about our family’s bike riding adventures.  We/I ride often enough that there were a lot of memories to document but I didn’t want to have to keep doing big layout after big layout.  It’s perfect for capturing short but meaningful memories. Here’s my spread!

Traveler's Notebook Adhesives by Christine Meyer for Scrapbook Adhesives by 3L

Traveler’s Notebook Pictures and Details

The main component for this was the necessity for all my crafting needs – the E-Z Runner Grand!  That is my go-to for adhering patterned papers and pictures to things!

Traveler's Notebook Adhesives by Christine Meyer for Scrapbook Adhesives by 3L

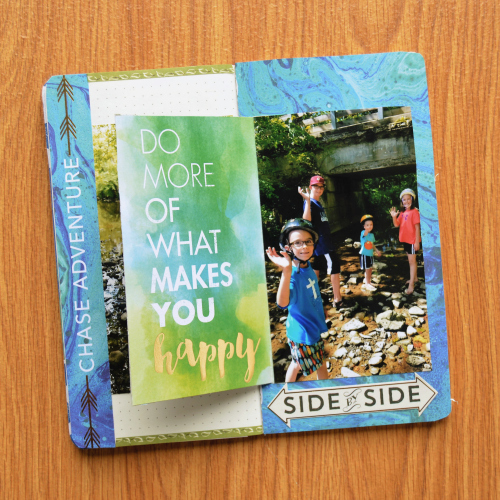
It was also an important part in creating this flap on the right side of my spread. There’s nothing better than a solid and quick way to adhere things in your crafting!

Traveler's Notebook Adhesives by Christine Meyer for Scrapbook Adhesives by 3L

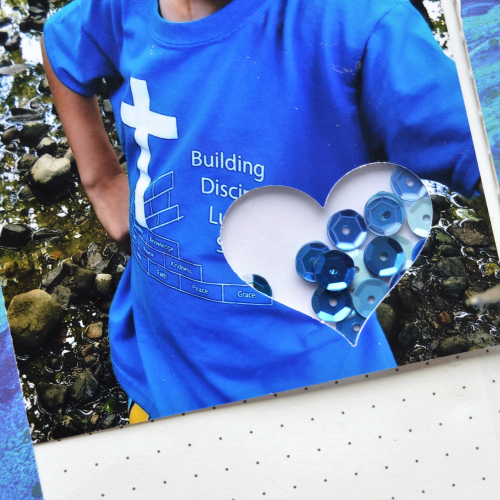
By using a punch and a Keepsake Envelope – I was able to create a shaker element within my picture.  That added a unique touch to the whole notebook spread and was so easy to do!

Traveler's Notebook Adhesives by Christine Meyer for Scrapbook Adhesives by 3L

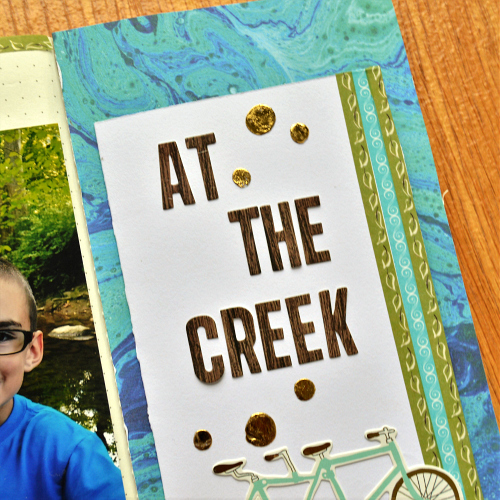
I also used Adhesive Dots in multiple sizes to embellish my notebook spread by applying them and then adding gold foil. Embellishing with gold foil was an easy choice since I already had lots of gold foil throughout!

Now that I have thrown a lot of details at you – how about if we check out how I did them in a video?

Traveler’s Notebook Process Video

Thanks so much for joining me today!
-Christine

Creative Time: 30 Minutes
Skill Level: Beginner

Materials Needed:
Scrapbook Adhesives by 3L®:

E-Z Runner® Grand Refillable Dispenser
Adhesive Dots Medium
Adhesive Dots Large
Keepsake Envelope Mix
3D Foam Creative Embellishment Kit

Other Supplies:
Patterned Papers & Stickers from Paper House Productions

Good Luck Tags with Creative Photo Corners

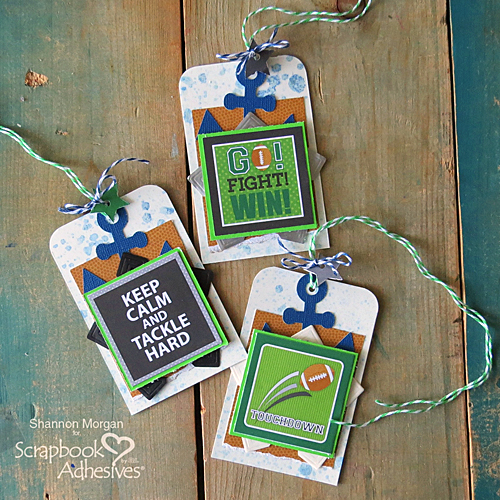
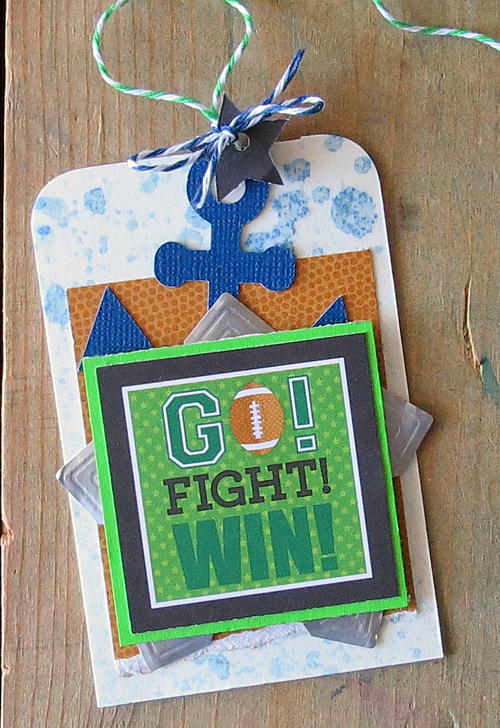
Shannon here, sharing some good luck tags with you today. In my little corner of the world, its back to school…aaandd FOoTBaLl season! In fact, I am sharing some “good luck” tags for your favorite player with you.

Good Luck Tags with Creative Photo Corners by Shannon Morgan for Scrapbook Adhesives by 3L

Good Luck Tags With Gusto!

Good Luck Tags with Creative Photo Corners by Shannon Morgan for Scrapbook Adhesives by 3L

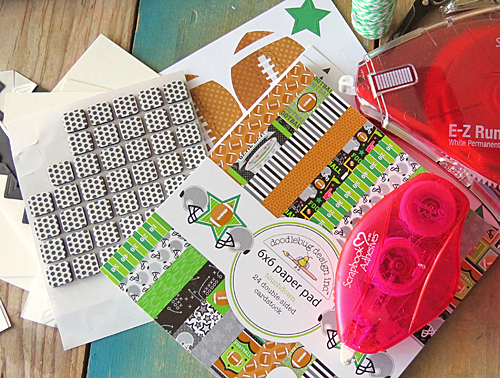
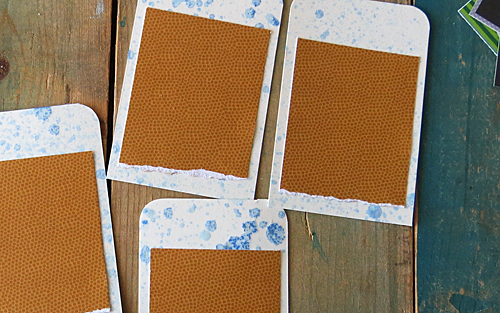
After you’ve chosen some great patterned papers,  you’ll want to cut yourself tags or grab some pre-made tags. The patterned papers were 6 x 6″ and had perfect sayings and accents. Adding cardstock as an extra layer, together with paper,  gives my tag a perfect pop created for each tag. (Use your EZ Runner Grand Refillable Dispenser for this step.)

Good Luck Tags with Creative Photo Corners by Shannon Morgan for Scrapbook Adhesives by 3L

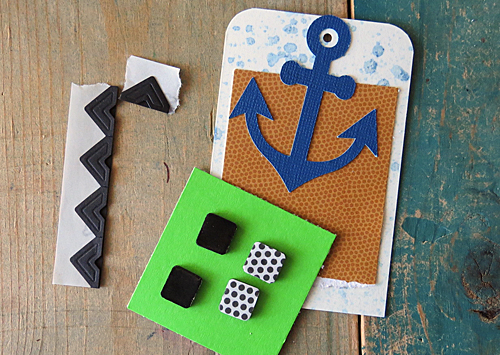
Each tag is a little bit different in design, but I have designed them in the same fashion. Take a look at the photo below.  I used 3D Foam Squares Black Mix in the regular size, to create dimension and interest to my tags.

Good Luck Tags with Creative Photo Corners by Shannon Morgan for Scrapbook Adhesives by 3L

Accenting with Creative Photo Corners!

Creative Photo Corners, being perfectly symmetrical, are surprisingly ideal for creating a star effect. As an illustration, look at this photo to see that the corners are “tucked in” to the tag. The corners are peeking out because of the shape that they are.

Good Luck Tags with Creative Photo Corners by Shannon Morgan for Scrapbook Adhesives by 3L

I enjoyed sharing this little project with you today! My hope is that I have inspired you to create some good luck notes for your favorite athlete. There are 20 boys who have my heart for at least the next 9 weeks.

Creative Time: 45 minutes
Creative Skill: Intermediate

Materials Needed:
Scrapbook Adhesives by 3L:
Creative Photo Corners Variety Pack
3D Foam Squares Black Mix
EZ Runner Grand Refillable Dispenser

Other Materials:
twine, cardstock, patterned paper pad, spray mist, anchor die cut

Visit our Website and Blog!
Sign up for our Newsletter so you never miss a contest or giveaway!

instagram purple icon facebook icon purple pinterest purple icon twitter purple icon YouTube icon blog subscription purple icon

What’s Poppin’ Gifting Treats

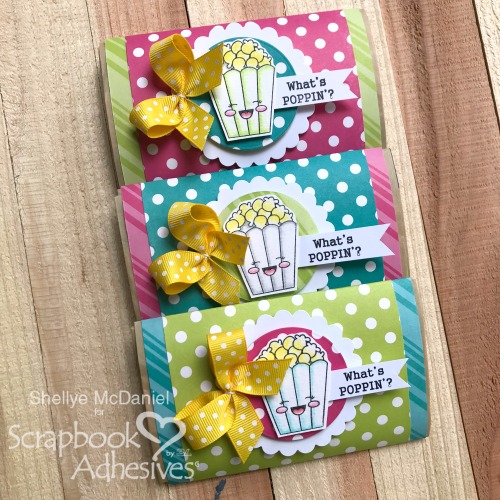
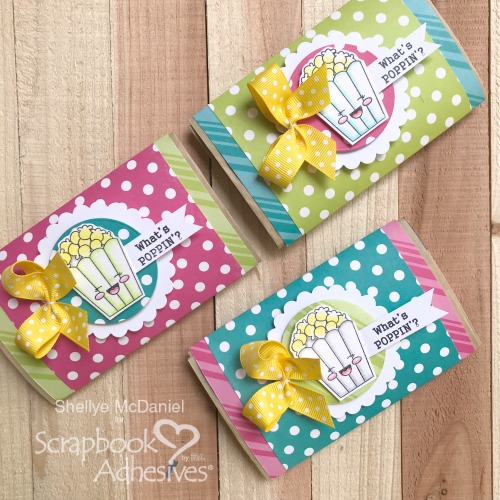
Hello, Shellye McDaniel with you today! I have a really fun way to decorate plain bags of popcorn to give as gifts or party treats!
What's Poppin' Gifting Treats by Shellye McDaniel for Scrapbook Adhesives by 3L

Let’s Decorate These Treats!

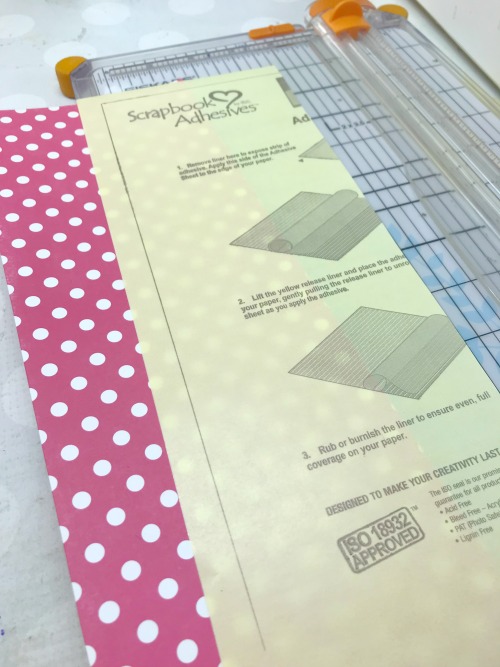
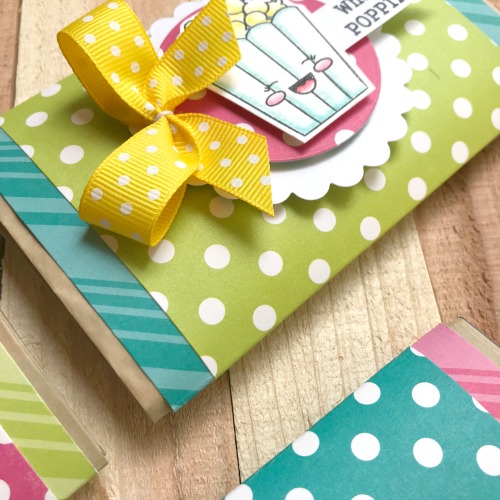
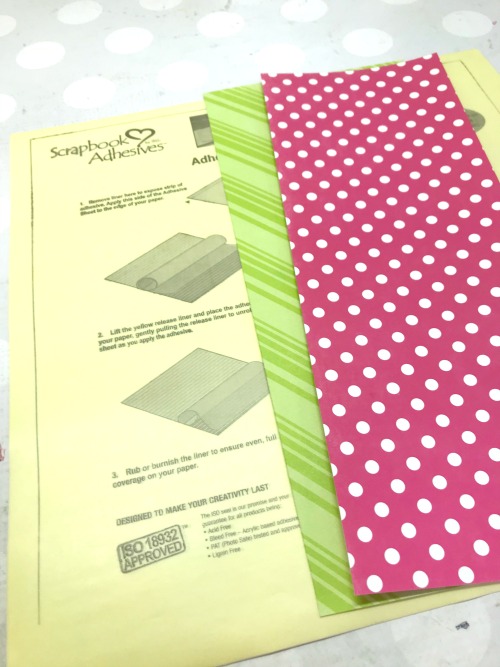
First I measured the size of the unpopped popcorn bags.  The folded bags that I used measured 3.5 x 5.5 inches.  I cut two different patterned papers and layered them together with a strip of the Adhesive Sheet 12 x 12 inches:

What's Poppin' Gifting Treats by Shellye McDaniel for Scrapbook Adhesives by 3L

What's Poppin' Gifting Treats by Shellye McDaniel for Scrapbook Adhesives by 3L

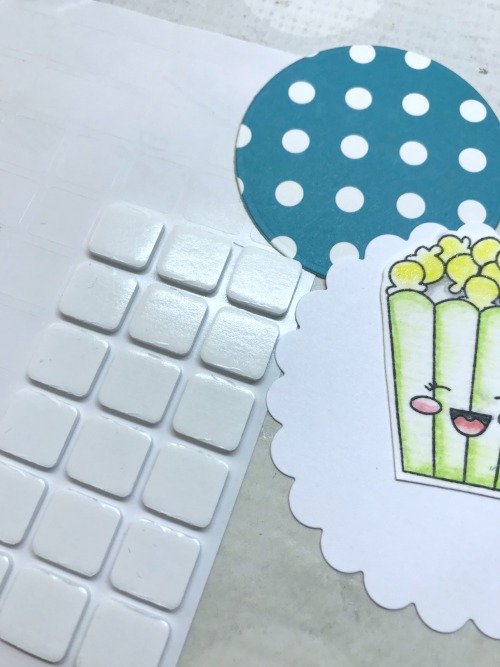
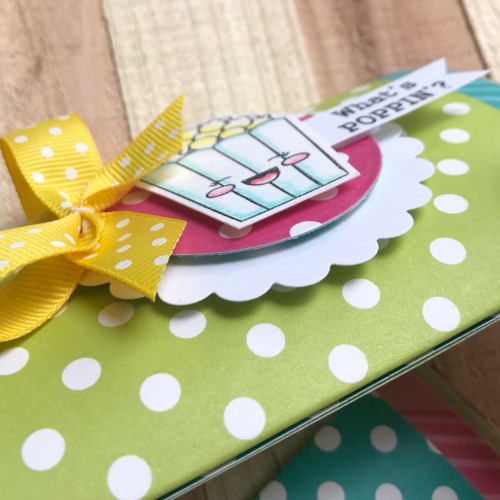
Next, I picked a cute popcorn motif and stamped, colored and cut the image out.  I used the 3D Foam Squares White Regular to layer the image onto a larger, round circle and then a scalloped circle.  That’s three layers of 3D!

What's Poppin' Gifting Treats by Shellye McDaniel for Scrapbook Adhesives by 3L

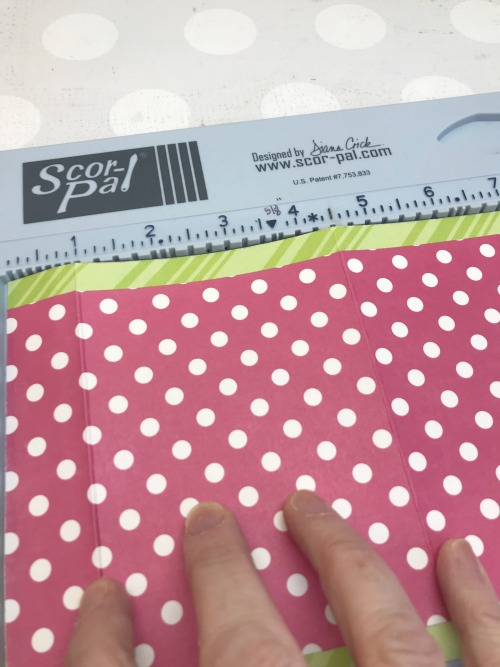
Secondly, three lines were scored on the paper: the 1″ flap (for adhering) and two panels of the same size for the front and back.

What's Poppin' Gifting Treats by Shellye McDaniel for Scrapbook Adhesives by 3L

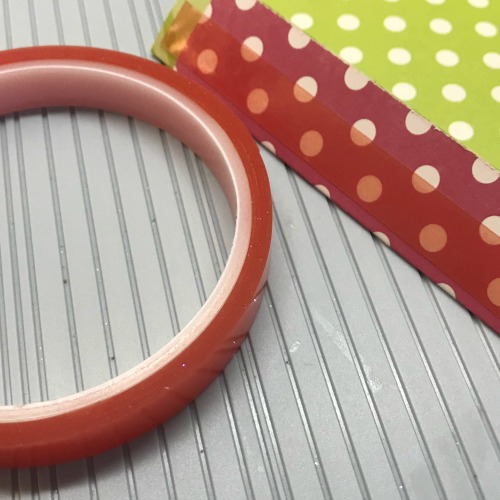
Next, I folded the paper along the score lines and then added a piece of Extreme Double-Sided Tape 1/2in to the entire length of the 1 inch flap.

What's Poppin' Gifting Treats by Shellye McDaniel for Scrapbook Adhesives by 3L

In finishing, the adhesive strip was attached to the opposite flap and the popcorn bag was inserted into the sleeve.

What's Poppin' Gifting Treats by Shellye McDaniel for Scrapbook Adhesives by 3L

What's Poppin' Gifting Treats by Shellye McDaniel for Scrapbook Adhesives by 3L

What's Poppin' Gifting Treats by Shellye McDaniel for Scrapbook Adhesives by 3L

This would also be a sweet treat for trick-or-treaters, stocking stuffers or wedding favors!

Thanks for joining us today!
Creative Time: 45 mins
Skill Level: Intermediate

Materials Needed:
Scrapbook Adhesives by 3L® Products used:

Adhesive Sheet 12 x 12 inch
3D Foam Squares White Regular
HomeHobby by 3L®:
Extreme Double-Sided Tape 1/2″

Patterned Paper: Echo Park Paper

Ribbon: May Arts Ribbon

E-Z Dots Permanent Background Birthday Card

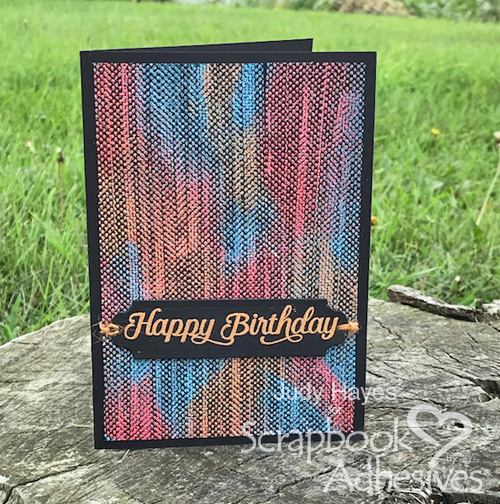
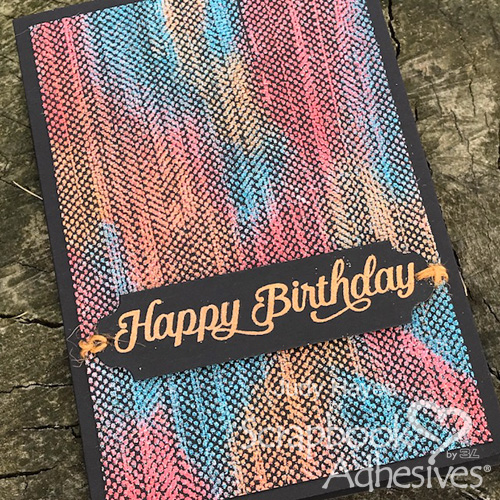
I created this E-Z Dots Permanent Background Birthday Card with an easy technique using embossing powders and E-Z Dots Permanent Refillable Dispenser or its related products like E-Z Runner® Grand Permanent Dots Refill!
It’s  Judy here today to show you how to make this quick background and embossing powders in different colors to make it your own!

E-Z Dots Permanent Background Birthday Card by Judy Hayes for Scrapbook Adhesives by 3L

Creating the Background

E-Z Dots Permanent Background Birthday Card by Judy Hayes for Scrapbook Adhesives by 3L

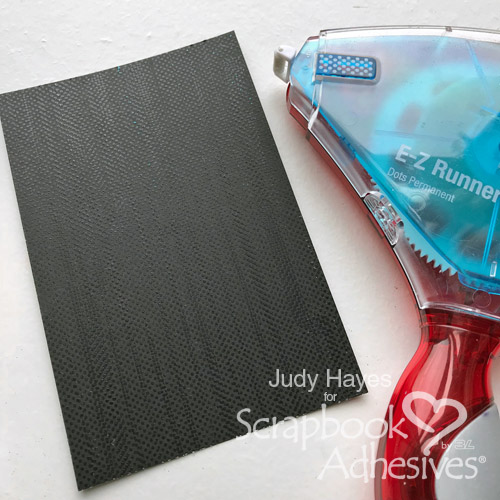
Start with cardstock cut desired finished size.  My piece is 4 x 6 inches. Cover with adhesive dots using E-Z Runner® Grand Refillable Dispenser and E-Z Runner® Grand Permanent Dots Refill. Overlap is okay.

Here’s a quick video on how to change out the E-Z Runner Grand Refills, view below.

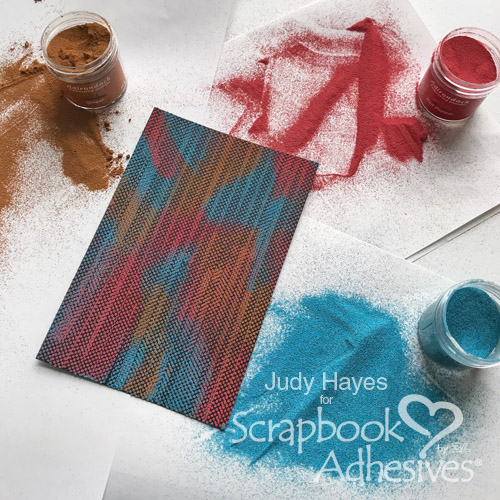
Cover with embossing powder of three different colors. First, apply embossing powder from the edge in a small area and remove excess. Next, apply another color allowing excess to slide off over the previously covered area.  Continue with different colors until completely covered.  Heat with a heating tool to melt the embossing powder. Voila! A dots background!

E-Z Dots Permanent Background Birthday Card by Judy Hayes for Scrapbook Adhesives by 3L

Cardmaking Details

E-Z Dots Permanent Background Birthday Card by Judy Hayes for Scrapbook Adhesives by 3L

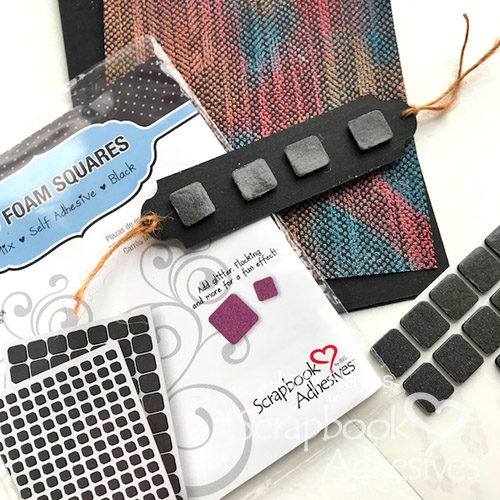
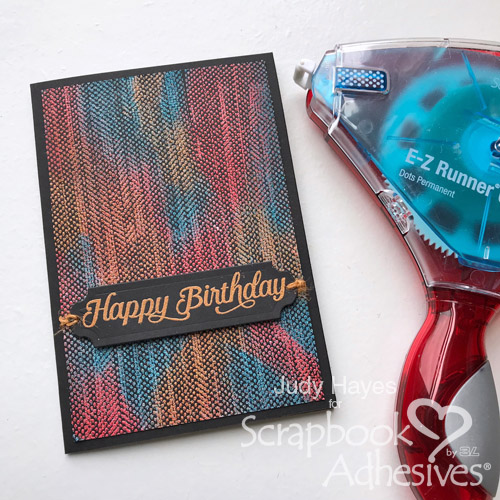
Stamp and heat emboss “happy birthday” on a black cardstock label die cut.  Apply 3D Foam Squares – Black Mix to its back.  Fasten twine to ends.  Position and press in place on dots background piece.  Fasten twine to back with E-Z Runner® Grand Refillable Dispenser with E-Z Runner® Grand Permanent Dots Refill.

E-Z Dots Permanent Background Birthday Card by Judy Hayes for Scrapbook Adhesives by 3L

Fasten the dots card panel to a 4.5 x 6.5 inch black card base using E-Z Runner® Grand Refillable Dispenser with E-Z Runner® Grand Permanent Dots Refill.

E-Z Dots Permanent Background Birthday Card by Judy Hayes for Scrapbook Adhesives by 3L

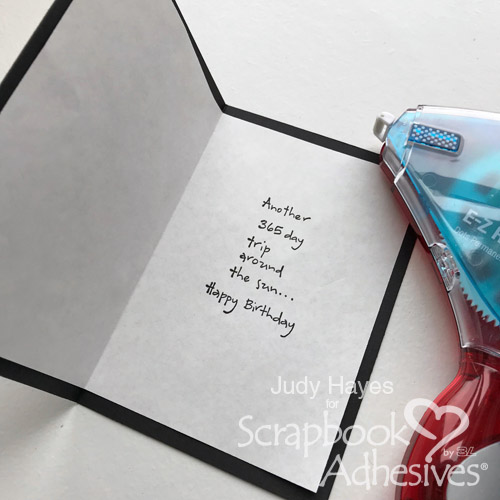
Cut 6 x 8.5 inch piece of printer paper.  Fold and stamp with verse.  Fasten inside the card with E-Z Runner® Grand Refillable Dispenser and E-Z Runner® Grand Permanent Dots Refill applied near the fold. Now, it’s ready to be sent!

E-Z Dots Permanent Background Birthday Card by Judy Hayes for Scrapbook Adhesives by 3L

This is a technique that can have a totally different look with different embossing powder colors or paper color.  Try it with just one color embossing powder like gold on black!  Or black on bright cardstock! Endless combinations.

Thank you for visiting!
 judy

Creative Time: 30-45 minutes
Skill Level: Intermediate

Materials Needed:
Scrapbook Adhesives by 3L®:
E-Z Runner® Grand Refillable Dispenser
E-Z Runner® Grand Permanent Dots Refill
3D Foam Squares – Black Mix

Other Supplies:
Spellbinders® Paper Arts: Happy Day Elegant; Imagine Crafts/Tsukineko: Versamark Ink; Embossing Powders: Turquoise, Red Pepper, Ginger; Black Cardstock; Twine; White Printer Paper

Interactive Peek-a-Boo Card Tutorial

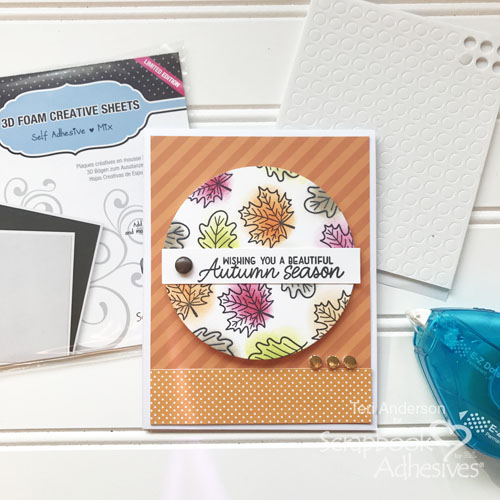
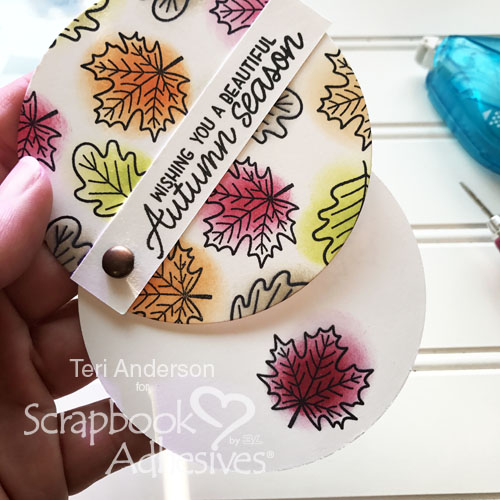
Hi, everybody! Teri here with a stamped card featuring a fun Peek-a-Boo element that’s easy to pull off with the 3D Foam Creative Sheets from Scrapbook Adhesives by 3L.

If you love making interactive cards, you are going to enjoy trying this interactive card making technique!

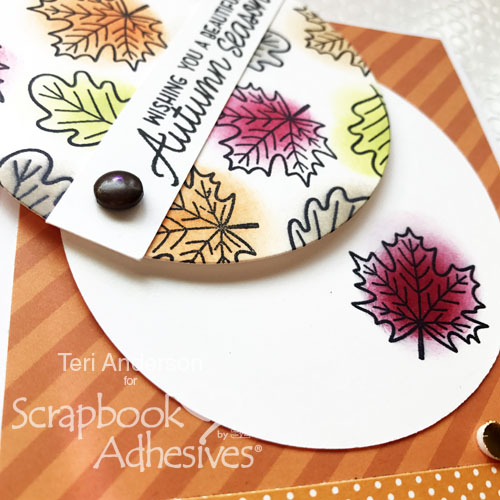
Interactive Peek-a-Boo Slider Card Tutorial by Teri Anderson for Scrapbook Adhesives by 3L

Creating the Peek-a-Boo Slider!

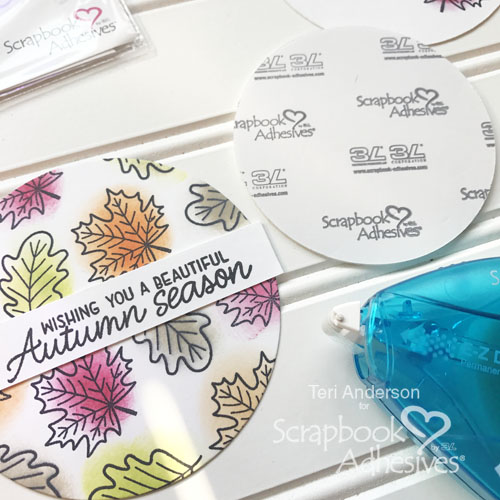
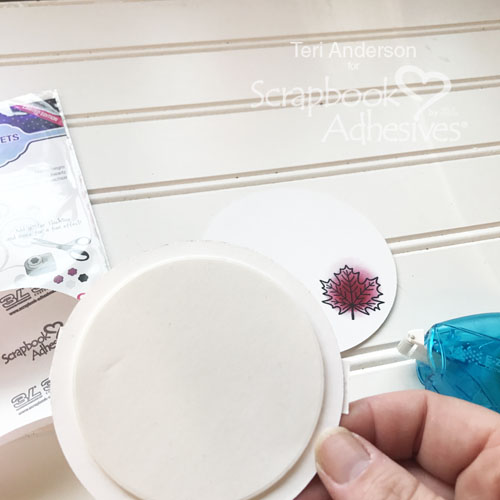
Start by stamping and die-cutting two large circles from cardstock. You’ll also want to die-cut a circle out of one of the 3D Foam Creative Sheets.

Stamp a sentiment on a strip of cardstock and adhere it to one of the circles. I love using the E-Z Dots Permanent Dispenser for this. If you happen to get some stray adhesive on your work surface or on another piece of paper, it rubs off easily! I love that.

Interactive Peek-a-Boo Card Tutorial by Teri Anderson for Scrapbook Adhesives by 3L

Mount the foam circle to the backside of what will be the top circle. Be sure to leave one side of the foam’s backing paper attached. You’ll see why in a second.

Interactive Peek-a-Boo Card Tutorial by Teri Anderson for Scrapbook Adhesives by 3L

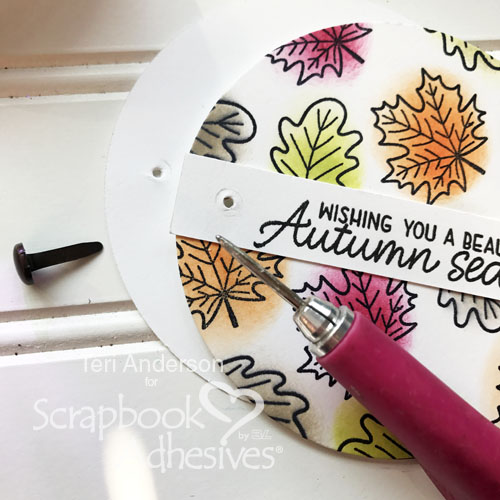
Set the circles on top of each other. Use a push pin or paper piercing tool to poke a hole through both circles.

Interactive Peek-a-Boo Card Tutorial by Teri Anderson for Scrapbook Adhesives by 3L

Connect the circles together with a brad. Remember when I said to leave the backing paper on the foam circle? Here’s where the magic comes in! The backing paper helps make the circles easily slide!

Interactive Peek-a-Boo Card Tutorial by Teri Anderson for Scrapbook Adhesives by 3L

Putting the Peek-a-Boo Slider on a Card!

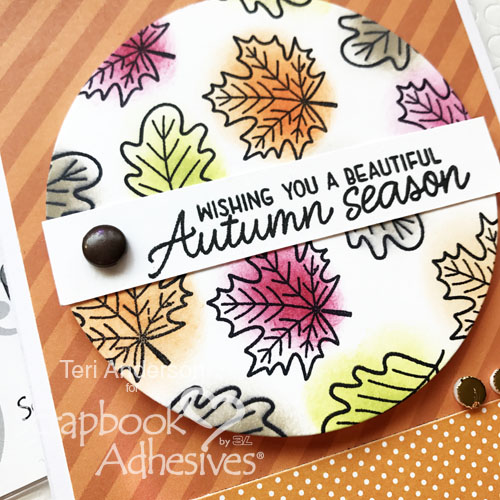
Finish your card by adding your Peek-a-Boo Slider to it. Consider writing a sentiment inside it or adding a few more stamped images.

Interactive Peek-a-Boo Card Tutorial by Teri Anderson for Scrapbook Adhesives by 3L Interactive Peek-a-Boo Card Tutorial by Teri Anderson for Scrapbook Adhesives by 3L

Repeat the circle theme of your card by adding a few small foam circles to it. Making an Autumn-themed card? Remove the backing paper and burnish some foil onto the small circles.

I hope you are inspired to make your own Peek-a-Boo Slider card! If you are, please share a link to your project in the comments! I’d love to see it and leave you some love!

Creative Time: 1 hour
Skill Level: Beginner

Materials Needed:
Scrapbook Adhesives by 3L®:
3D Foam Creative Sheets
3D Foam Circles White Mix
E-Z Dots Permanent Dispenser
3D Foam Creative Embellishment Kit

Other:
Beautiful Autumn stamp set from Sunny Studio Stamps; Circle dies by Spellbinders; Patterned papers from Simple Stories; Green, Orange, Red, Brown and Black Ink Pads; White Cardstock; Brad

Backpack Name Tag with Self-Laminating Cards

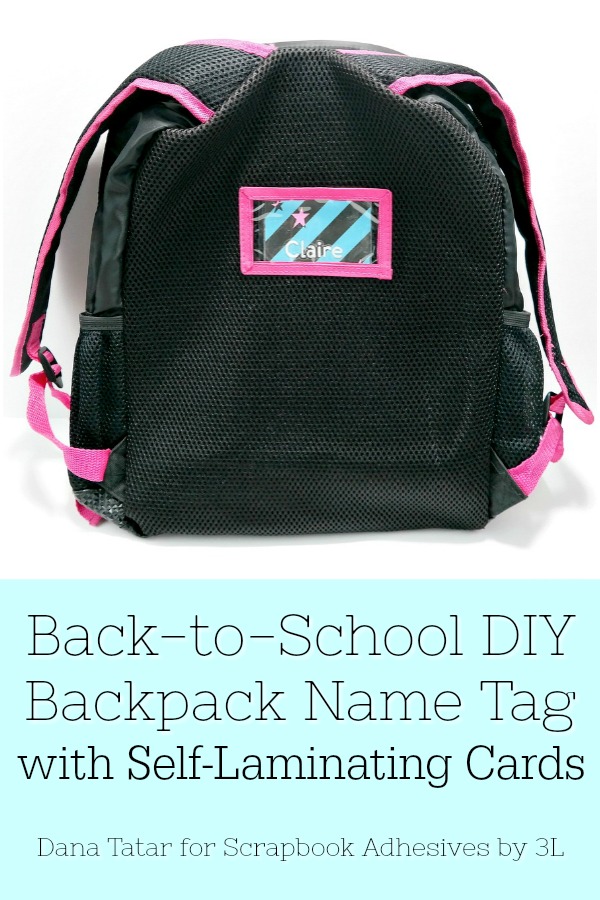
Hi friends! Dana Tatar here with you today sharing a quick craft idea for a child’s backpack during the back-to-school season. My family moved over the Summer, which was equal parts exciting and nerve-racking. My daughters started in a new school a couple weeks ago and I wanted to be sure to have their names somewhere on their belongings. I made way more trips to the lost-and-found last year than I liked and I’m hoping to avoid that this year.

DIY Self-Laminating Backpack Name Tag

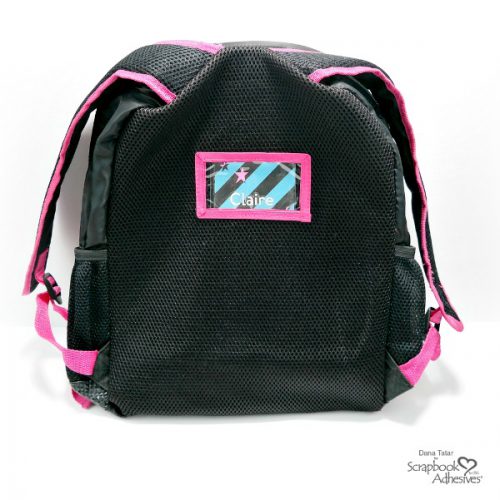
I used Adhesive Sheets and Self-Laminating Cards to create personalized backpack name tags. My daughters selected patterned paper and cardstock in their favorite colors. The cards are clear, so I was able to add contact information to the back of each card.

How to Create Backpack Name Tags

Skill Level: Beginner  Project Time: 30 Minutes

How to use Scrapbook Adhesives by 3L Self-Laminating Cards to create a backpack name tag.

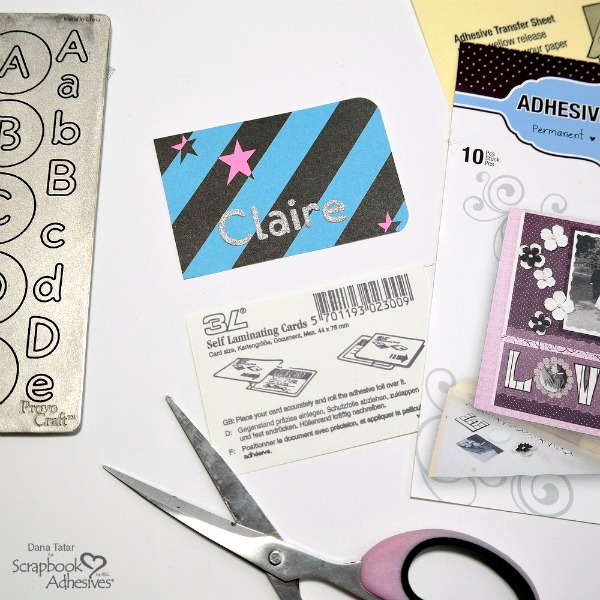
Step 1: Cut a piece of patterned paper to fit inside a Self-Laminating Card. Be sure to cut the patterned paper smaller than the card so that the edges seal. Add contact information to the back of the patterned paper.

Step 2: Remove the yellow backing paper from a 4×6 Adhesive Sheet. Align cardstock onto the adhesive. Use any die-cut machine, punches, or scissors to create letters. Remove the backing liner from each letter and adhere to the card.

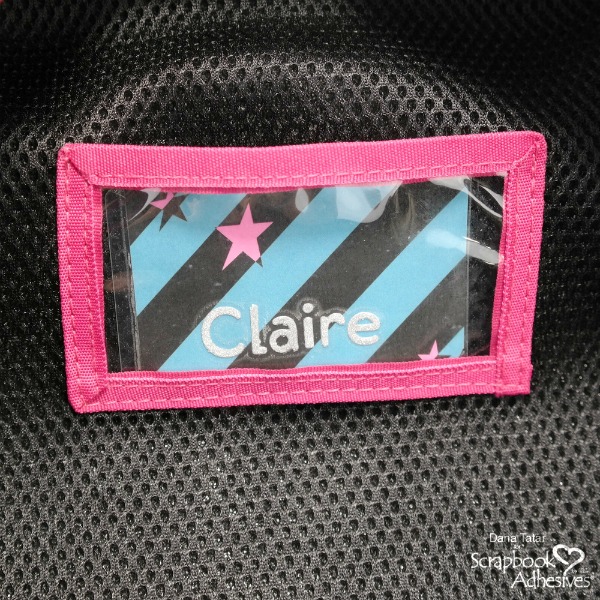
Step 3: Place the completed name tag inside the Self-Laminating Card. Remove the liner and press the sides together to seal.

DIY Patterned paper and die-cut glitter letter backpack name tag in a Self-Laminating Card

The laminated name tags fit inside the pockets on my daughter’s backpack. Try this project with the Self-Laminating Tags with Loops if a window pocket is not present on the bag.

Thanks for stopping by today. I hope your school-age family and friends have a great year!
~Dana

Scrapbook Adhesives by 3L® Supplies:
Adhesive Sheets 4×6 Inch
Self-Laminating Pouches – Cards Wallet

Other Supplies: Glitter Cardstock (DCVW); Patterned Paper (Bam Pop!); Letter Dies (ProvoCraft); Die-Cut Machine

Pin It!

Back-to-School DIY Backpack Name Tag with Self-Laminating Cards