You are in our US store • Switch to Europe store

Fall Leaf Home Decor with Dual Tip Glue Pen

I took a simple $3 wooden leaf and made it something extra special for my front door this fall season. Happy Fall everyone! Today I’m here to share this seasonal project with you.
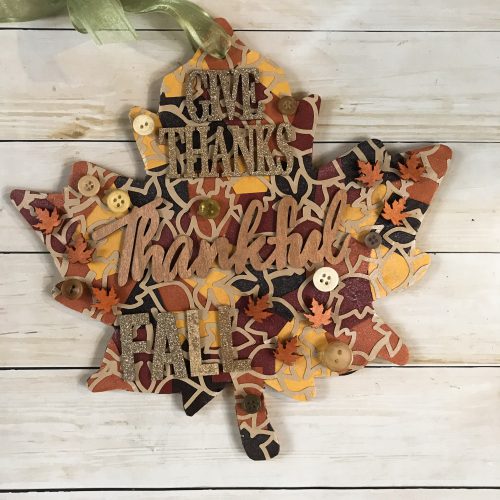
Fall Leaf Home Decor with Dual Tip Glue Pen by Latrice Murphy for Scrapbook Adhesives by 3L

Setting up the Fall Leaf Home Decor

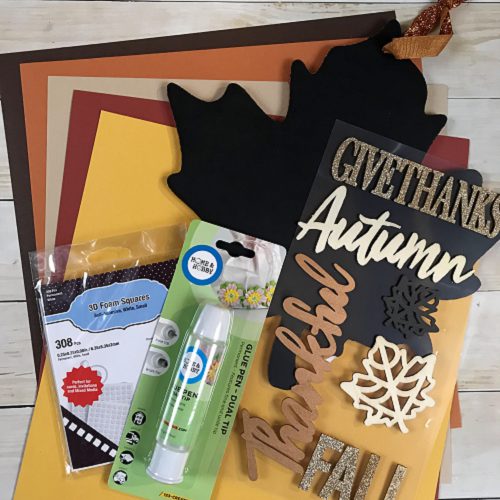
To begin this project, choose cardstock or embellishments you would like to cover your large wooden leaf with.
Next, decide on a design that will be large enough to cover the entire leaf.
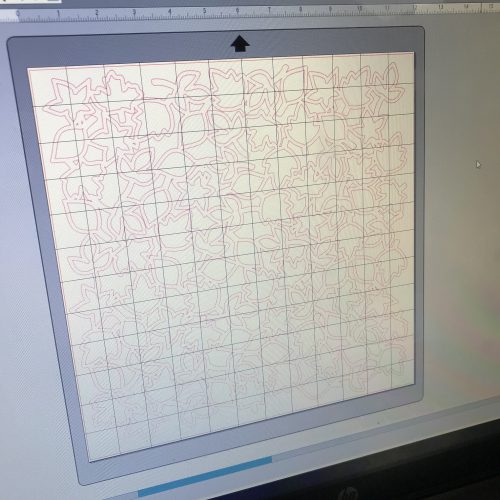
Using an electronic or manual die cutting machine, cut the leaf design. Also, I cut the ribbon off of the large wooden leaf that was attached to it and will replace it later in the tutorial.
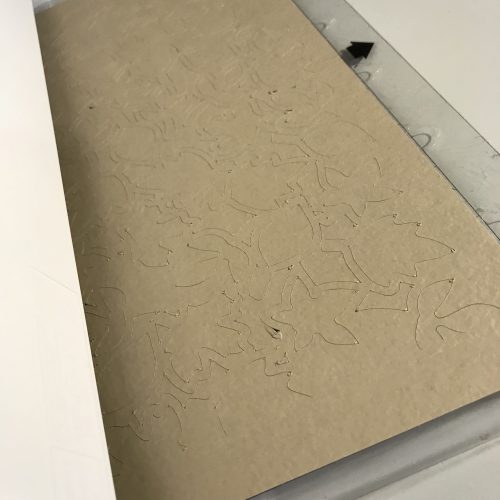
Cut up your solid cardstock of fall colors into small pieces. Use the brush end of the HomeHobby Dual Tip Glue Pen and apply glue to cover the entire wooden leaf. Randomly place the cardstock pieces on top and overlapping where you desire.
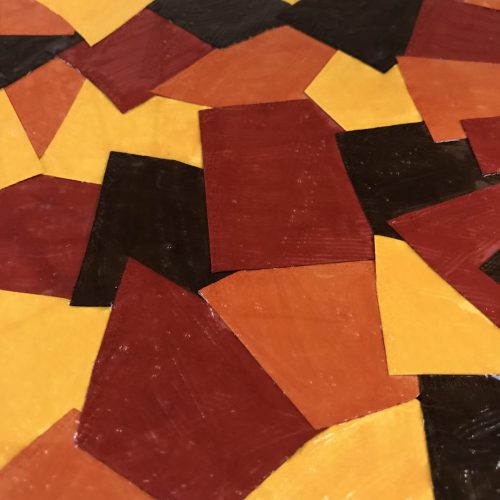
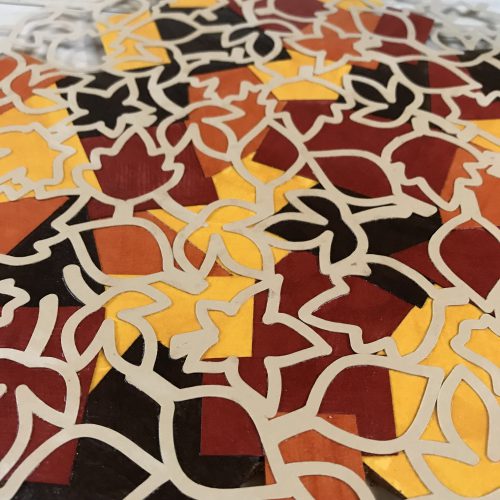
Then add a second layer of glue to seal the cardstock layer and place the cut leaf design on top. I’m not worried about the glue showing brush marks because there will be embellishments added on top. It does dry clear.
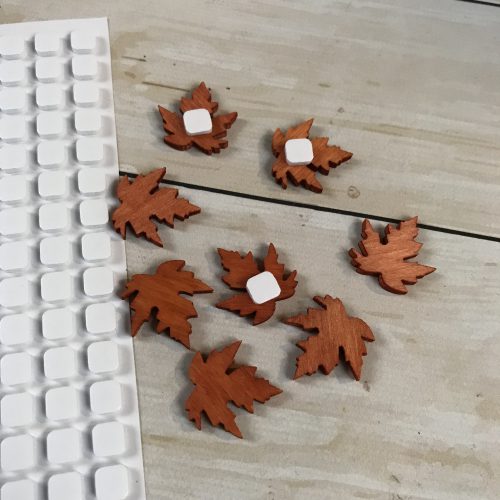
In my pile of embellishments, I have small wooden veneer leaves and vintage buttons to go with my project. I adhered them with the 3D Foam Squares White Small Size.
Trim the leaf design piece around the edges with an Exacto knife. Afterwards add your desired embellishments, word, stickers and etc.
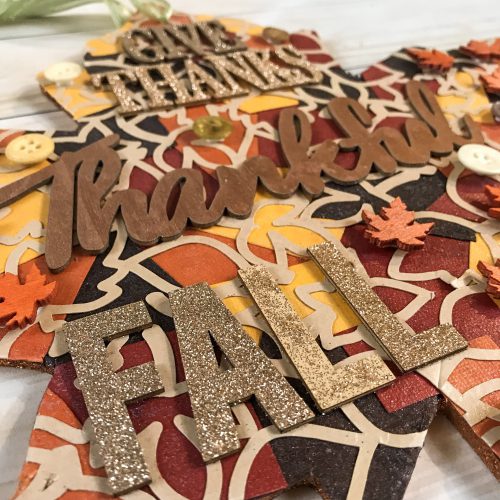
Create a hole with a paper piercing tool for the ribbon. I used a green ribbon and tied a bow. It’s ready to hang!

With Halloween last night, I’ve got my fall totes on standby ready to swap everything out! This will be on our front door this year. It’s something simple and easy to make, and fun at the same time.
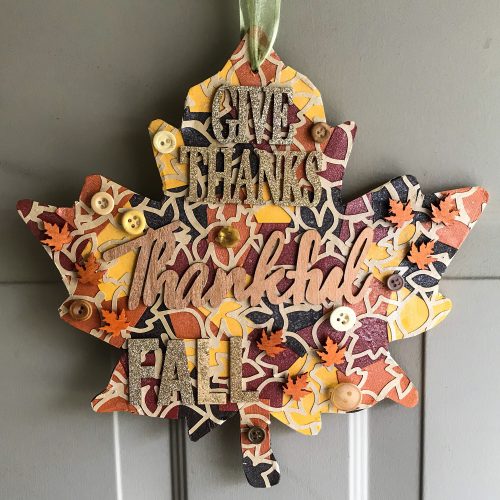
I can’t wait to make more decorations, and then on to DIY gift making for the holidays. Stay tuned!

Latrice Murphy

Scrapbook Adhesives by 3L® used:
3D Foam Squares White Small Size
HomeHobby Dual Tip Glue Pen
Other:
Silhouette Digital Design: Paige Taylor Evans for Pink Paislee
Cardstock: American Crafts and Bazzill Basics
Wooden leaves and embellishments: Target
Ribbon: May Arts Ribbon
Vintage buttons
Save

Save

Halloween Invitation Cards with Crafty Foam Tape

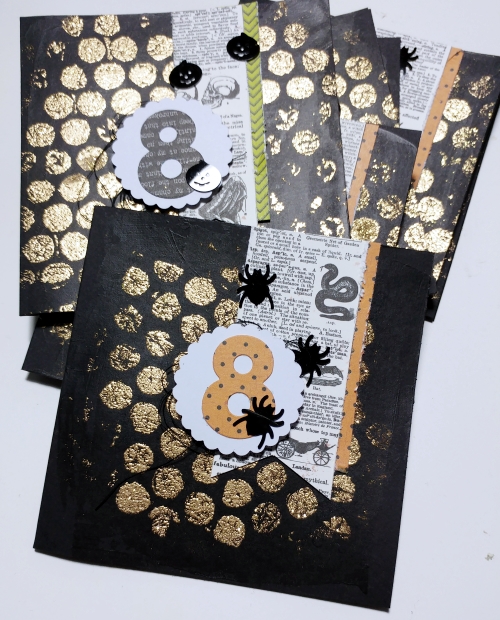
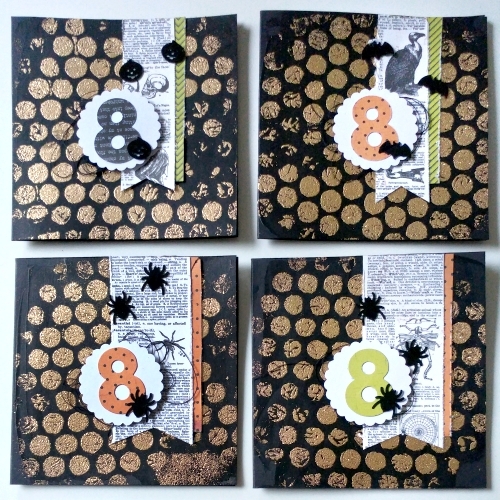
Happy Halloween! Jana here with some fun invitation cards for you. We do not celebrate Halloween here in Germany, but we’re having a birthday party! My little one turns eight and he wants to have a spooky Halloween party. Guests will be dressed up and I’m excited to see them!

Happy Halloween Invite Cards with Crafty Foam Tape by Jana Maiwald-McCarthy for Scrapbook Adhesives by 3L

How to Create the Birthday Invitation Cards

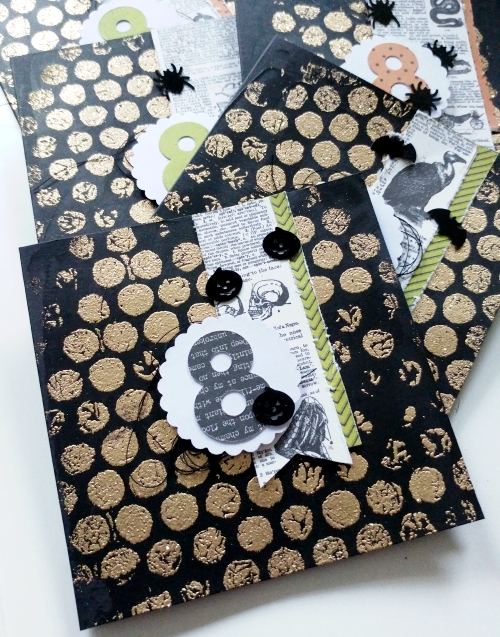
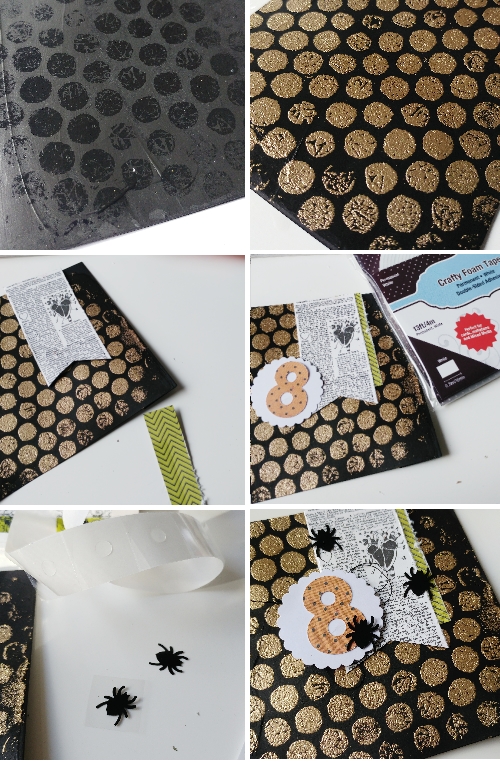
First, start with black 4 x 8″ cardstock for the card base, then I paint with black acrylic paint for texture. Stamp with bubble wrap and watermark ink. Sprinkle gold embossing powder and heat it to create a stunning background.

To hold down the paper strips, I use E-Z Runner® Permanent Strips Refillable Dispenser because it is strong enough to hold against the embossed dots.

I adhered the “8” die cut on the circle shape using E-Z Runner® Permanent Strips Refillable Dispenser. Then I added Crafty Foam Tape on the back and placed it by the paper strips.

Next, Halloween shaped sequins were randomly placed on the card front and secured with Adhesive Dots Mini.

Here they are after I put them all together. BUT there was something missing…

I need spider webs! With black thread, I looped them a few times and placed behind the white scallop circles. This gives it more interest and another texture. Looks like a bit of spiderweb, right?

The invitation cards were sent out and the guests (kids) loved the cards so much! I too really love how they turned out! Happy Halloween to all!

Scrapbook Adhesives by 3L® 
E-Z Runner® Permanent Strips Refillable Dispenser
Adhesive Dots Mini
Crafty Foam Tape
Other Supplies:
Echo Park Paper, Ranger Embossing Ink and Powder

Save

Visit our Website and Blog!
Sign up for our Newsletter so you never miss a contest or giveaway!

instagram purple icon facebook icon purple pinterest purple icon twitter purple icon YouTube icon blog subscription purple icon

Embossing with Adhesive Sheets – Happy Halloween

Need a new trick to try on your paper crafts projects? Do you love embossing powder? Well then, I have a treat for you today! Have you ever looked at the background on a patterned paper and felt like it needed a little more punch to go with your picture?

As I looked at my photo and the background paper I also wanted to use, I knew it needed a little more color – specifically color that matched my picture. Therefore once again, I dug into my Adhesive Sheets to turn things around! It’s Christine joining you today with a technique I have shared earlier but just love: heat embossing with Adhesive Sheets.

Embossing with Adhesive Sheets by Christine Meyer for Scrapbook Adhesives by 3L

Using Heat Embossing with Adhesive Sheets

I started things off with a simple background paper from Doodlebug Design and altered it dramatically using several different adhesives: 4 X 6 Adhesive Sheets, Crafty Foam Tape, 3D Foam Squares White Mix, E-Z Runner® Micro Refillable Dispenser, and the E-Z Runner® Grand Dispenser.  These are all some of my favorite go-to adhesives!

Embossing powder with Adhesive Sheets, Christine Meyer

The original base paper didn’t have a lot of the colors that were in my picture, however I had heat embossing powder in both aqua and yellow to coordinate perfectly with my picture. I used star punches to punch out the Adhesive Sheets and adhere them to my layout. Then I created a beautiful and colorful night sky by embossing with Adhesive Sheets. The video below walks you thru the entire process:

I never get thru an entire project without using either 3D Foam Squares or Crafty Foam Tape – both of these products are absolute necessities for me!  I love that they are an easy way to add dimension AND they also hold really well.  As I mentioned in the video – the Crafty Foam Tape speeds things up when you have longer pieces to add dimension to.

Thanks so much for joining me today – Have a Happy and Safe Halloween!
Christine

Scrapbook Adhesives by 3L®:
3D Foam Squares White Mix
E-Z Runner® Grand
E-Z Runner® Micro Refillable Dispenser
Crafty Foam Tape
Adhesive Sheets 4 x 6″
Other Supplies:
Patterned Paper, Stickers, Odds & Ends from Doodlebug Design; Embossing Powder from Wendy Vecchi and Stampendous

Visit our Website and Blog!
Sign up for our Newsletter so you never miss a contest or giveaway!

instagram purple icon facebook icon purple pinterest purple icon twitter purple icon YouTube icon blog subscription purple icon

Happy Haunting Card using 3D Foam Squares

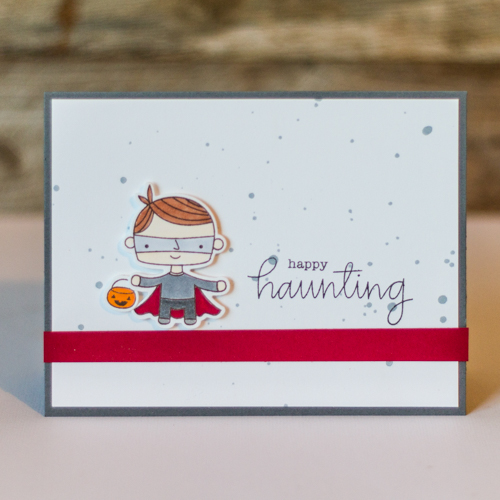
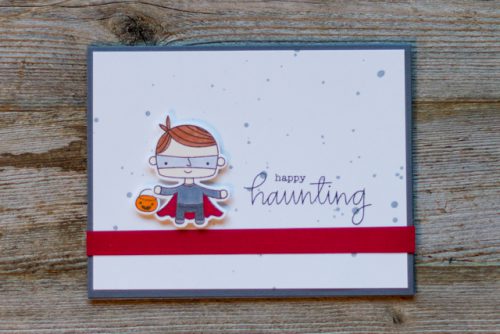
Happy Haunting to you all! Today’s card ventures out of my normal Halloween color palette by using red! I usually adore the standard Halloween colors together, but wanted my little superhero boy’s cape to be red! 🙂

Happy Haunting Card by AJ Otto for Scrapbook Adhesives by 3L

Happy Haunting Card Instructions:

This card comes together quite quickly. First of all, I used our E-Z Runner® Grand Dispenser to adhere to white card panel to the card base, and then, adhere the red strip to the white layer.

To give the background some interest, I swiped my ink pad onto a craft sheet and add water. Using a paintbrush, I flicked ink on the white card panel.

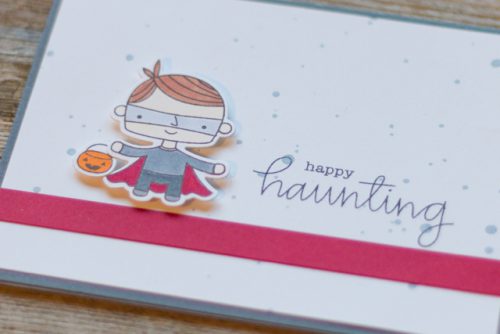
Next, I stamped the adorable little superhero with white cardstock, colored with Copic Markers and die-cut with its coordinating die. The die cut was attached to the card panel using our 3D Foam Squares for a pop of dimension. I stamped my sentiment and done!

I can’t wait to send this off to my little nephew! Do you use non-traditional colors in your holiday cards? Tell me below in the comments what you’ve used!

enjoy!!
AJ

Scrapbook Adhesives by 3L® Products used:
3D Foam Squares White Regular
E-Z Runner® Grand Refillable Dispenser
Other:
Stamp & Dies: My Favorite Things; Cardstock; Inks; Copic Markers


Visit our Website and Blog!
Sign up for our Newsletter so you never miss a contest or giveaway!

instagram purple icon facebook icon purple pinterest purple icon twitter purple icon YouTube icon blog subscription purple icon

Cute Halloween Tags with 3D Foam Squares and More!

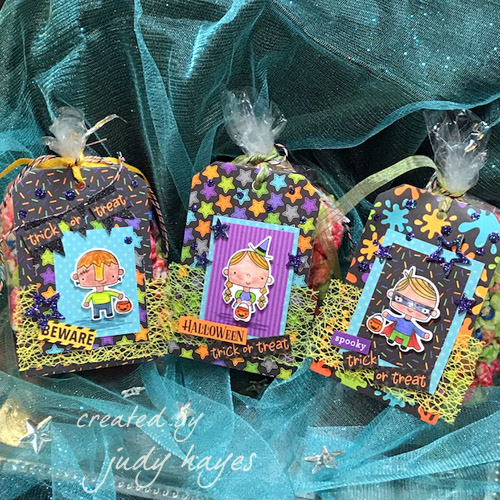
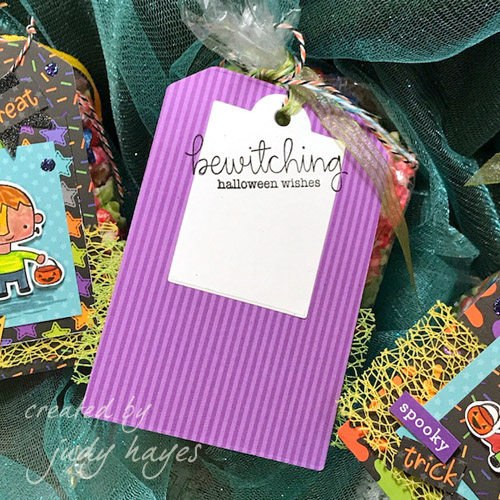
What better way to share colored popcorn than with CUTE Halloween Tags! These were easy to make with 3D Foam Squares White Mix and other 3D Foam shapes: 3D Foam Stars, and 3D Foam Pennants.

Hello Everyone!  It’s Judy here today to show you how to Wear Your Adhesives on the Outside with not only these 3D Foam shapes but adhesive dots like Adhesive Dots Mini and Adhesive Dots Small and glitter! The paper layers are fastened with E-Z Dots® Permanent Refillable Dispenser.

Cute Halloween Tags with 3D Foam Squares and More by Judy Hayes for Scrapbook Adhesives by 3L

How to make these Halloween Tags!

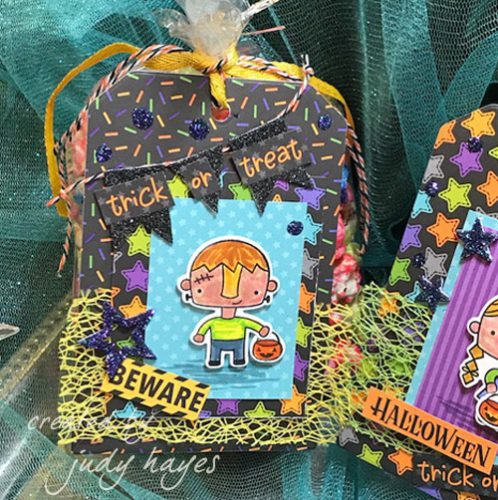
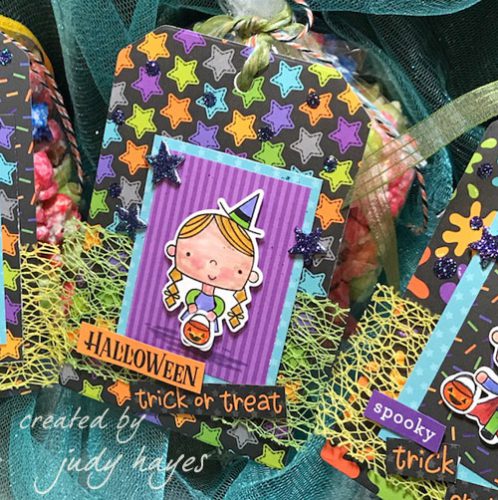
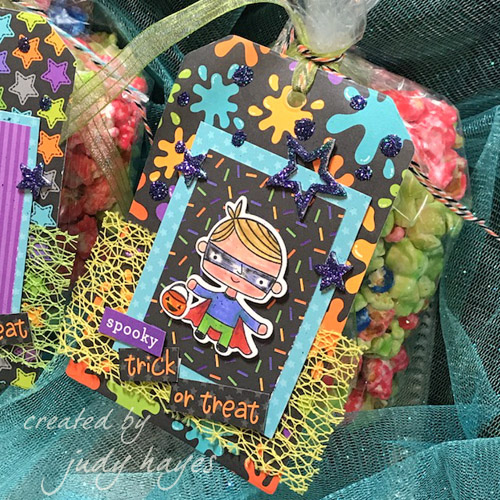
First of all, start with cute Halloween themed patterned papers and titles as the foundation for the tags. I stamped the little trick or treaters, die-cut in white cardstock and colored with Distress Markers. Aren’t they cute?

Cute Halloween Tags with 3D Foam Squares and More by Judy Hayes for Scrapbook Adhesives by 3L

Die cuts were given dimension, I used 3D Foam Squares White Mix and placed them on patterned papers cut in rectangle shapes as mats. Also, some of the titles were popped up with 3D Foam Squares White Mix. In addition, the matted images were fastened with Thin 3D Foam Squares Mix White to each tag because I wanted that subtle layer.

For one of the “Trick or Treat” title, I used Wear Your Adhesives on the Outside by adding black glitter on the top of the 3D Foam Pennants and then placed the title on top of the glitter. Brings something extra fun to the tag!

Cute Halloween Tags with 3D Foam Squares and More by Judy Hayes for Scrapbook Adhesives by 3L

Sparkly, glittered 3D Foam Stars accent each tag and I repeat the same process to the tops of Adhesive Dots Mini and Adhesive Dots Small across each tag.

Cute Halloween Tags with 3D Foam Squares and More by Judy Hayes for Scrapbook Adhesives by 3L

Can’t stop at just sparkle! Why not add twine and ribbon? Each bag had a colorful combination of the two for each bag of popcorn.

Cute Halloween Tags with 3D Foam Squares and More by Judy Hayes for Scrapbook Adhesives by 3L

Finally, I’ve fastened a smaller white tag on the back using E-Z Dots® Permanent Refillable Dispenser and stamped a verse with space to personalize it.

Hope you’ve enjoyed these tags.  Thanks for visiting!

Happy Halloween!

Judy Hayes

Creative Time: 45 Minutes
Skill Level: Intermediate

Materials

Scrapbook Adhesives by 3L®:
Adhesive Dots Mini
Adhesive Dots Small
E-Z Dots® Permanent Refillable Dispenser
3D Foam Squares White Mix
Thin 3D Foam Squares Mix White
3D Foam Pennants
3D Foam Stars

Other:
Doodlebug Design Papers; Little B Tag Dies; My Favorite Things Stamps and Dies (Happy Haunting); Ranger Distress Markers; White Cardstock; Glitter; Twine, Ribbon, Versafine Ink

Save

Visit our Website and Blog!
Sign up for our Newsletter so you never miss a contest or giveaway!

instagram purple icon facebook icon purple pinterest purple icon twitter purple icon YouTube icon blog subscription purple icon

Spellbound Halloween Treat Tins Tutorial

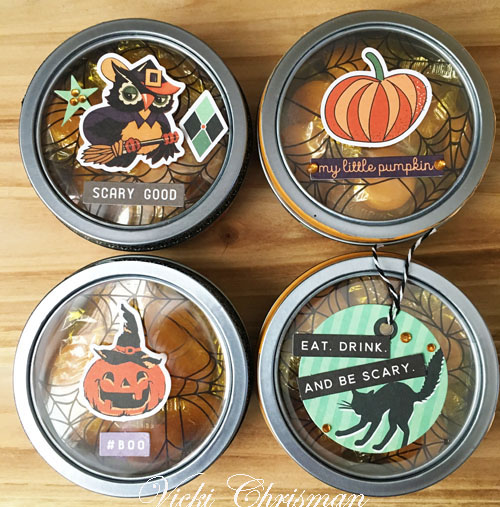
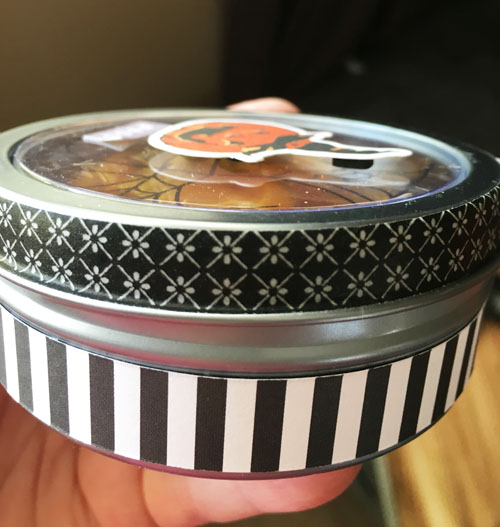
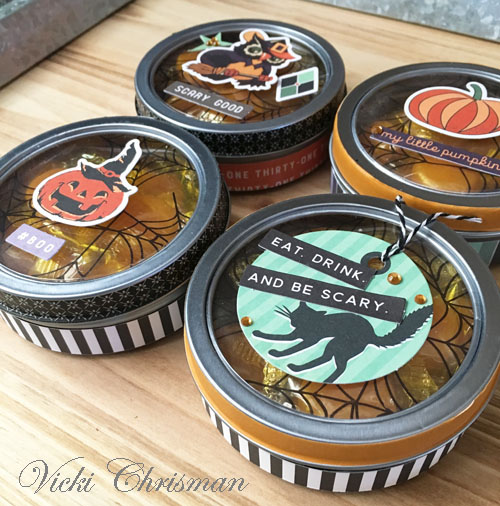
These treat tins are the perfect sweet treats to have around! They are quick and easy to make for the extra special little ones in your life… OR maybe even the big ones? LOL! These would be fun to leave on the desk of your coworkers, for teachers, the mail carrier, the UPS driver.. whoever. Halloween is just a few days away now. Who wouldn’t love a fun treat?

Spellbound Halloween Treat Tins by Vicki Chrisman for Scrapbook Adhesives by 3L

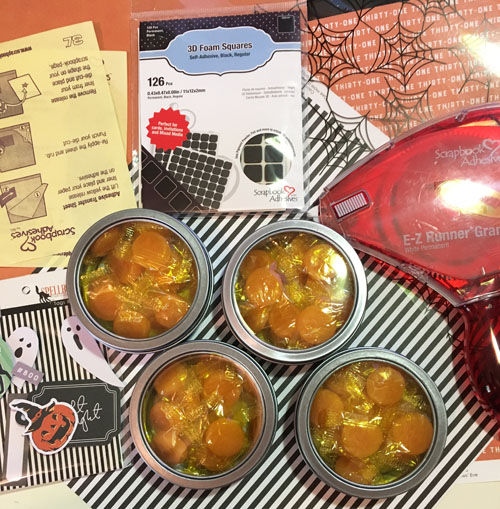
You can find these tins almost anywhere now. I found these at my local craft store, but many discount retailers carry them now.

Let’s make these Treat Tins!

With the help of some of my favorite adhesives, these came together in a flash!

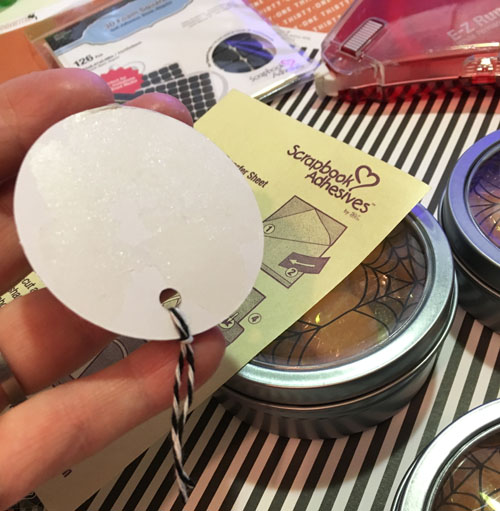
Adhesive Sheets 4×6 work great for adhering the pieces I want to add directly to the clear top.  I love how it seals right to the edge.

I added the acrylic sheet pieces with the spider web on it to the inside of the canister lid, using the HomeHobby Dual Tip Glue Pen around the inside rim.

To adhere the paper strip to the side, I used my E-Z Runner® Grand.

For a couple of the pieces that I wanted to give a little lift to, I used 3D Foam Squares. I love that I have a choice not only in size but also in two colors (black or white) for the project at hand.

These came together quickly and were so fun to make!

I hope I left you inspired to create some yourself.

Vicki Chrisman

Scrapbook Adhesives by 3L®:
E-Z Runner® Grand
HomeHobby Dual Tip Glue Pen
3D Foam Squares Black Mix
Adhesive Sheets 4×6
Other:
Fancy Pants Designs: Spellbound Collection
Treat Tins
Washi Tape
Gems

Save

Visit our Website and Blog!
Sign up for our Newsletter so you never miss a contest or giveaway!

instagram purple icon facebook icon purple pinterest purple icon twitter purple icon YouTube icon blog subscription purple icon

DIY 3D Foam Foiled Letters on a Halloween Scrapbook Layout

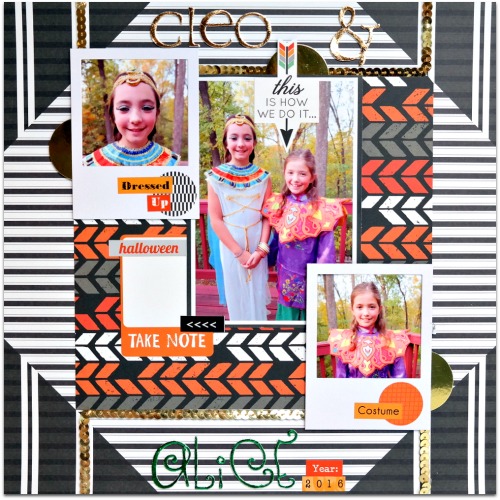
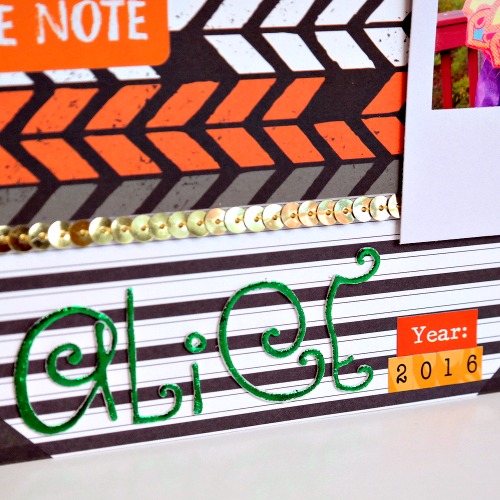
Hello! Dana Tatar here today sharing a scrapbook layout that I created with a photo of my daughters dressed up as Cleopatra and Alice from last Halloween. I am tired of not having all the letters for a title from a store-bought package of alpha stickers, so I die-cut and foiled my own title for this page using 3D Foam Creative Embellishment Kit!

Halloween Layout with DIY 3D Foam Foiled Letters  by Dana Tatar for Scrapbook Adhesives by 3L

Creating the Foiled Letters

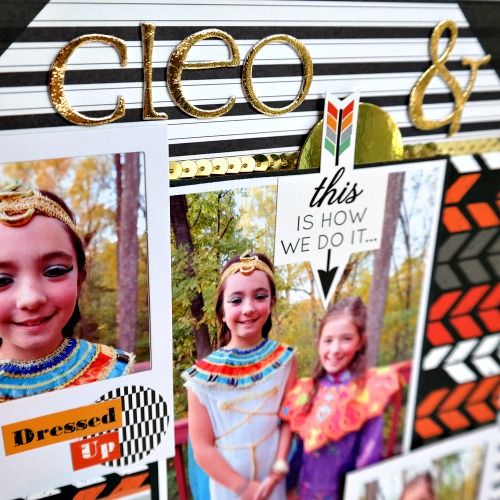
The 3D Foam Creative Embellishment Kit includes both 3D Foam Creative Sheets (4 Pcs) and a selection of colorful craft foil sheets (5 colors!) I had a lot of fun with the Wear Your Adhesive on the Outside technique while creating these metallic letters!

I selected two different metal alphabet die sets for my letters that I thought complimented the costumes my daughters were wearing.

How to Die Cut and Foil 3D Foam DIY Letter Stickers by Dana Tatar for Scrapbook Adhesives by 3L

After cutting the letters from 3D Foam Creative Sheets from the kit, I affixed them to my layout and pressed the craft foil sheets, color side up, onto the top of the letters. After gently rubbing the foil, I peeled it away to reveal a beautiful metallic finish.

DIY 3D Foam Green Foil Letters by Dana Tatar - Halloween Scrapbok Page

I really love the shimmer from the foiled letters. Shiny gold embellishments on the page  complement the gold accents on the costumes. HomeHobby Extreme Double-Sided Tape adheres a line of gold sequins to the layout. Finally, use the E-Z Runner® Grand with Permanent Strips Refill to secure the rest of the elements to the page.

My daughters tell me that clowns and superheroes will be popular this year. They chose to dress up as a cat and an Asian princess. I’d love to know what you and/or your children are wearing for Halloween this year. Leave me note in the comments section!

Thanks for stopping by today!
Dana Tatar

  • Creative Time: 45 Minutes
    Skill Level: Intermediate

Scrapbook Adhesives by 3L Supplies:
3D Foam Creative Embellishment Kit with Foil
E-Z Runner® Grand Dispenser
E-Z Runner® Grand Permanent Strips Refill
HomeHobby Extreme Double-Sided Tape 1/4″
Other:
Patterned Paper (Glitz Design); Stickers (Glitz Design); Cardstock Frames (Heidi Swapp); Gold Sequin Ribbon; Alphabet Dies (Provocraft)

Save

Visit our Website and Blog!
Sign up for our Newsletter so you never miss a contest or giveaway!

instagram purple icon facebook icon purple pinterest purple icon twitter purple icon YouTube icon blog subscription purple icon

We are like Snowflakes Card with Crafty Foam Tape

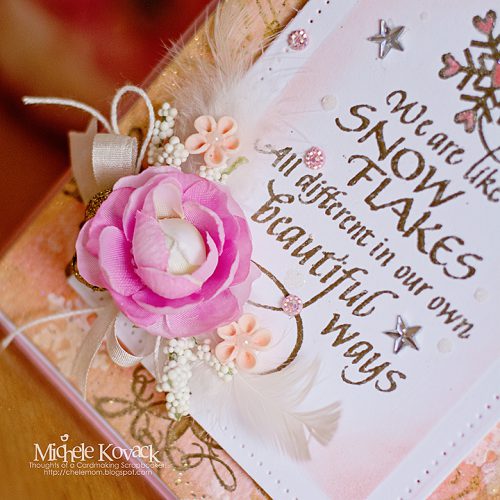
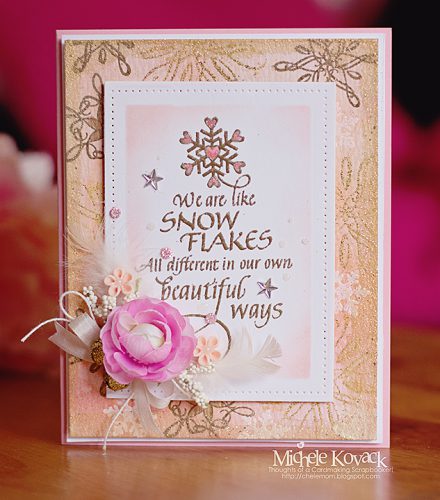
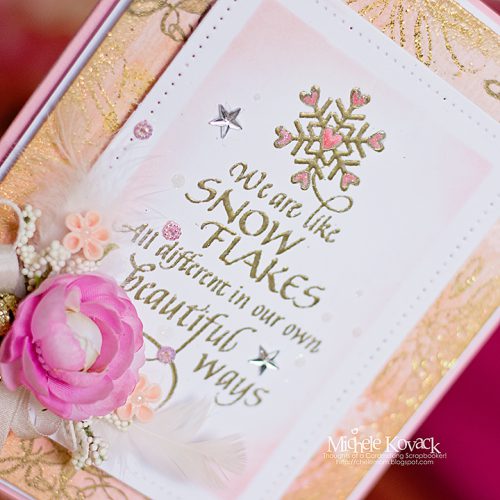
I really wanted to showcase this gorgeous We are like Snowflakes Mounted Stamp by heat embossing in gold and then layering the card with Crafty Foam Tape for that WOW! factor. Good morning! Michele here with a card using a Quietfire Design stamp. Let me share how I created this winter card.

Creating We are like Snowflakes Card

I die-cut the sentiment and left the die in place to ink a bit of pink around the edges. Set it aside to work on the background by stamping several snowflake stamps and heat embossed them in gold and white. After sponging pink ink around the entire background, layer the sentiment panel over the background using Crafty Foam Tape. Then continue to layer the card panel with white and then pink cardstock, using Crafty Foam Tape.

To embellish the sentiment card panel, I added a cluster of flowers, feathers and ribbon with a few sequins. For the larger flowers, I secured it with Adhesive Dots Medium and Adhesive Dots Micro for the teeny gems.

I colored the snowflake at the top with a pink Copic marker because I wanted to bring a bit more of the pink color in.

Thank you for stopping by today!

Scrapbook Adhesives by 3L® Supplies:
Crafty Foam Tape
Adhesive Dots Medium
Adhesive Dots Micro
Other:
Quietfire Design: We are like Snowflakes Mounted Stamp

Save

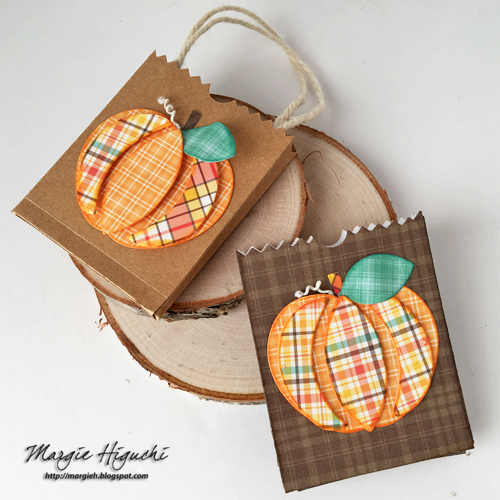
Dimensional Pumpkin Bags Tutorial

Fall is in the air and I had PUMPKIN on my mind so I pulled out 3D Foam Creative Sheets and my stash of etched dies from Spellbinders’ Market Fresh Collection to create my dimensional pumpkin bags!

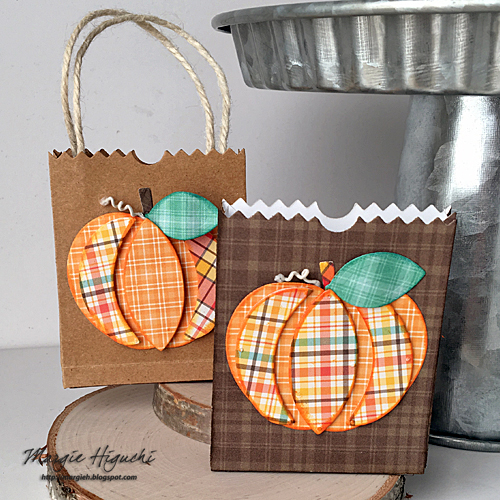
Dimensional Pumpkin Bags Tutorial by Margie Higuchi for Scrapbook Adhesives by 3L

Assemble these fun + sweet bags.

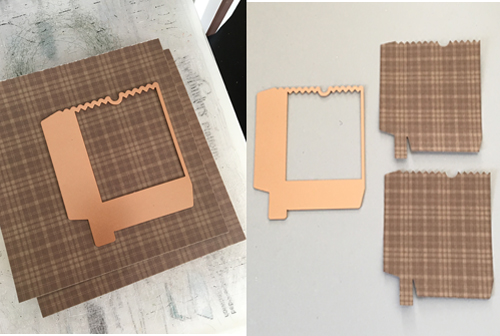
1. Cut two bag shapes with my manual die-cutting machine. If you are using patterned papers, make sure both cuts have patterns going the same way. I stacked my two papers together and cut…less confusion! LOL!

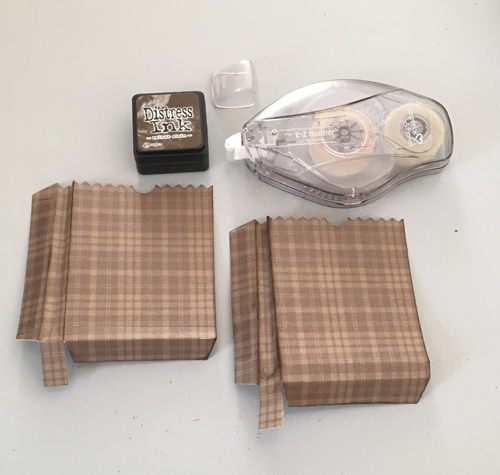
2. Next, let’s assemble the box. After scoring the folds, I inked the edges with Distress Ink in Walnut Stain and then adhered the tabs together with E-Z Runner® Ultra Refillable Dispenser…great for paper construction 🙂

Paper piecing pumpkins.

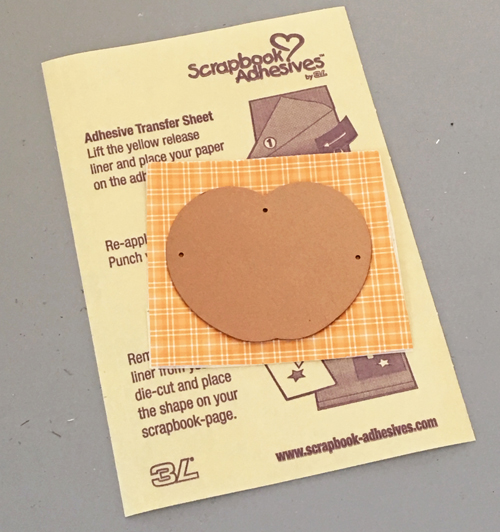
1. Cover your patterned paper with Adhesive Sheet 4 x 6″ and trim excess using your etched die as a guide. Die-cut patterned paper with Apple a Day Etched Dies Pumpkin Front Die. Set aside.

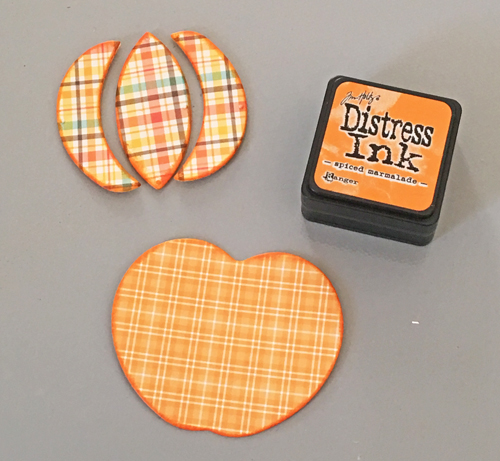
2. For the pumpkin sides, I wanted dimension so I grabbed a scrap piece of patterned paper and covered with 3D Foam Creative Sheets. Die-cut with Apple a Day Etched Dies Pumpkin Side Die twice and Apple/Pumpkin Center Die once.

3. Ink all of the die cut edges with Distress Ink in Spiced Marmalade. Then peel the bottom liner off and place on top of the Pumpkin Front die cut to make your dimensional pumpkin.

Making pumpkin details.

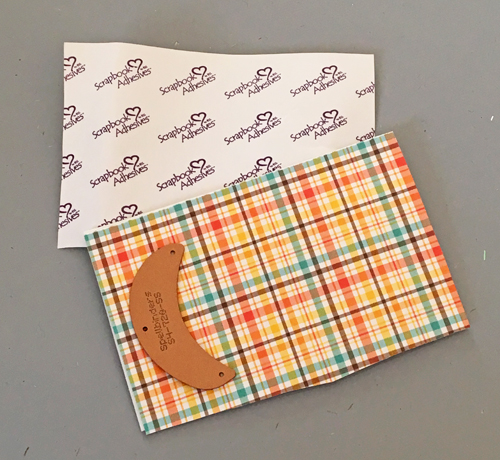
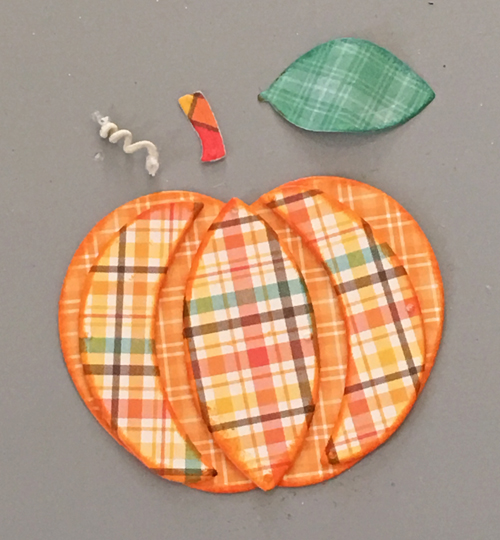
1. Using leftovers from the Adhesive Sheet 4 x 6″, adhere a piece of patterned scrap to cut your Apple a Day Etched Dies Stem Die. From the same set, cut Leaf Die from patterned paper, and ink the edges with Distress Ink in Spruce. Using a covered wire, I created a vine accent by wrapping around a paintbrush handle.

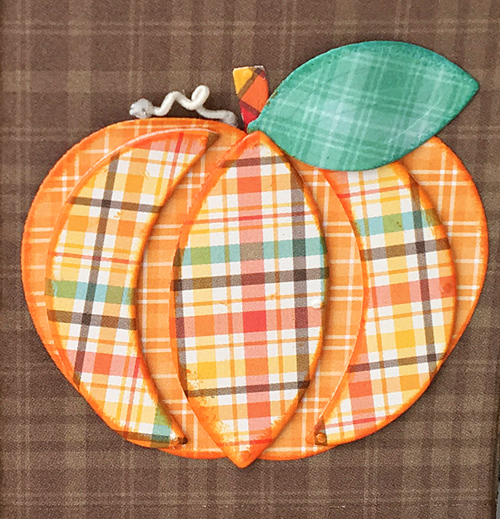
2. Adhere all on bag front in the following order:

  • Peel off the bottom liner of the stem (using the pumpkin front die cut as a guide) and adhere.
  • With a Dodz Adhesive Dots Mini, secure the vine accent down.
  • Peel off the bottom liner of the pumpkin front die cut and center to the bag.
  • Tuck the leaf die cut into the Dodz Adhesive Dots Mini, and then add an adhesive dot to the tip of leaf and press to adhere.


Here’s another look at the finished bags…


Do you have a fall themed project? Share link in comments – would love to see + visit!

Thanks for stopping by!
Margie Higuchi

Scrapbook Adhesives by 3L® Supplies:
E-Z Runner® Ultra Refillable Dispenser
Adhesive Sheet 4 x 6″
3D Foam Creative Sheets
Dodz Adhesive Dots Mini
Others:
Etched Dies: Spellbinders Paper Arts® (Apple a Day Etched Dies from the Market Fresh Collection by Debi Adams, Bag It n Tag It Etched Dies from the Market Fresh Collection by Debi Adams, and PL-001 Spellbinders® Platinum™ Die Cutting and Embossing Machine
Patterned Paper: Lawn Fawn (Perfectly Plaid Fall Collection)
Ink: Ranger Inks (Distress Ink)
Covered Wire: Prima Marketing Inc.

Save

Save

Heritage Scrapbook Layout Tutorial using Premium Double-Sided Tape

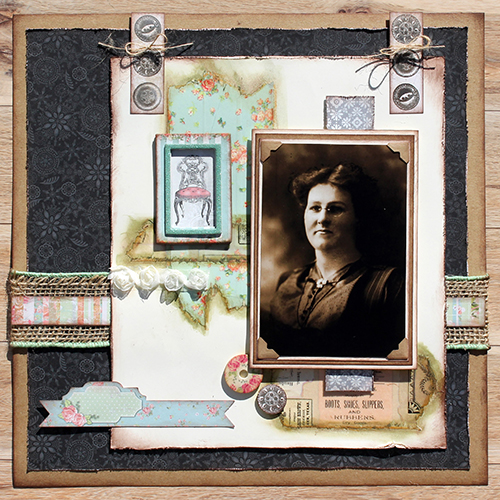
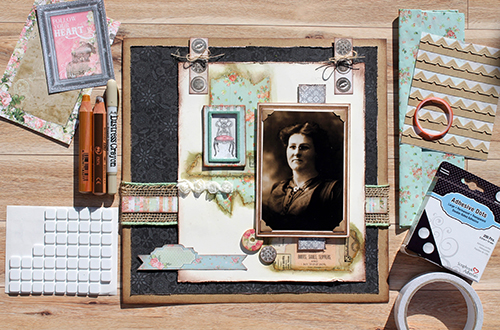
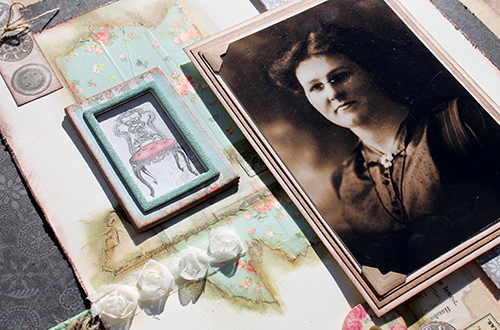
Today I am sharing a heritage scrapbook layout with a fun way to use Premium Double-Sided Tape 1in Permanent. I love scrapbooking vintage or heritage photos. I’m fortunate to have huge collections of photos from both sides of my family. Documenting the time before my parents’ generation is just so very important to me.

Heritage Layout Using Crafty Power Tape by Tracy McLennon for Scrapbook Adhesives by 3L

Creating my Heritage Scrapbook Page

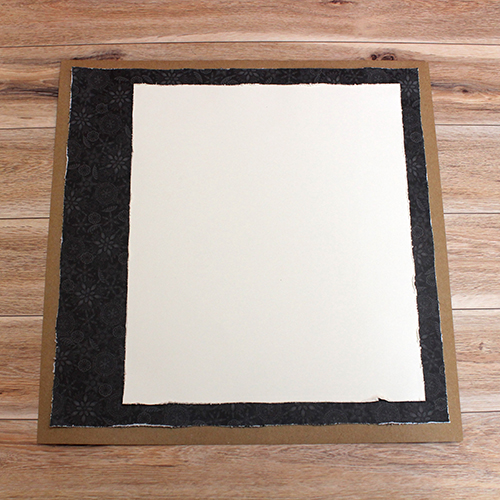
Start by creating the layered background with patterned paper, kraft and cream cardstock. Then distress the edges of these layers to create some vintage texture but do not adhere the cream cardstock to the background yet.

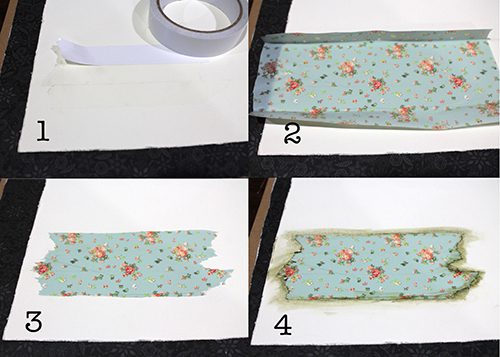
Instructions from the Step Out Images

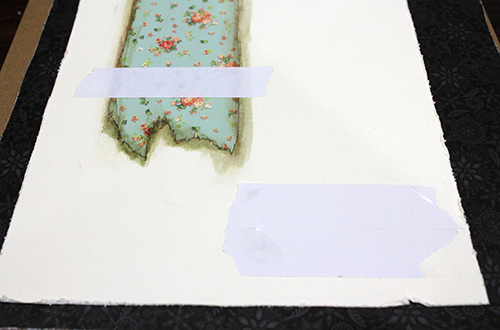
  1. On the cream cardstock layer, add strips of Premium Double-Sided Tape 1in with ends torn and not cut.
  2. Add patterned tissue paper on top of the taped section.
  3. Tear off tissue paper that does not adhere to the tape.
  4. Using watercolour crayons, add colour around the edges of torn tissue paper. Then with a water brush blend the colour.

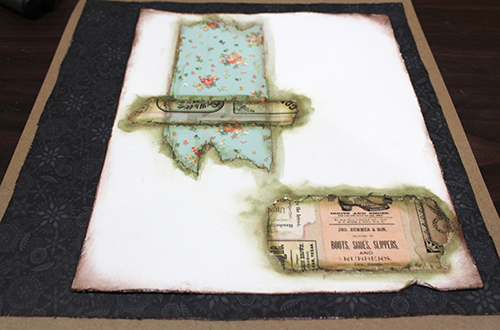
Add a single strip of the Premium Double-Sided Tape 1in over the section that I just completed, as well as another section in the bottom right-hand corner of the cream cardstock.

Next, add a brown toned tissue paper to both of these sections, and tear off excess tissue. Again I added colour to the edges using watercolour crayons and blended the colour using a water brush.

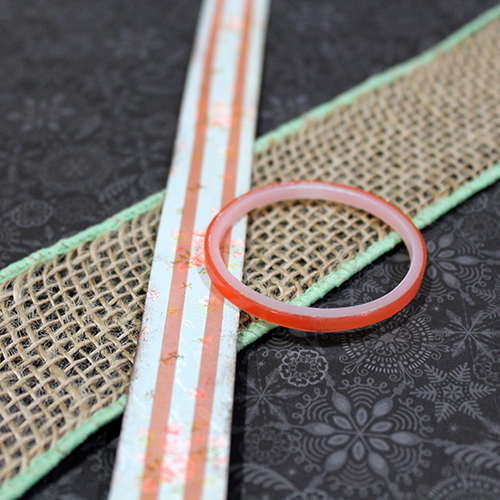
Then add the burlap ribbon and the strip of patterned paper that is on top of the burlap ribbon by using Extreme Double-Sided Tape 1/8in. Burlap is notoriously hard to adhere to anything, but the Extreme Double-Sided Tape has you covered.

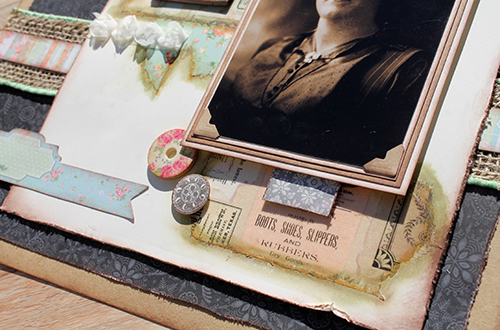
Adhere the cream cardstock layer to the background layers with 3D Foam Squares because you can bring the layer to the same level as the burlap ribbon underneath.

By adding lots of layers including patterned paper, embellishments and rosette ribbon, I bring dimension which means I use a lot of my favorite 3D Foam Squares!

I triple matted my photo and accent with Creative Photo Corners Kraft, then adhered it to the layout using two stacks of 3D Foam Squares. Not only do these Creative Photo Corners Kraft match this layout perfectly, but they also give that fabulous vintage feel to the photo.

Thanks so much for stopping by!
Tracy McLennon

Scrapbook Adhesives by 3L®:
3D Foam Squares White Mix
Premium Double-Sided Tape 1in Permanent
Extreme Double-Sided Tape 1/8″
Creative Photo Corners Kraft
E-Z Runner® Grand Refillable Dispenser
Other:
Cardstock (Kraft, Cream), Ranger Distress Crayons, BoBunny Soiree Collection, Burlap Ribbon, Rosette Ribbon, Buttons
Save

Save