You are in our US store • Switch to Europe store

Hoppy Easter Treat Bags Using 3D Foam Squares

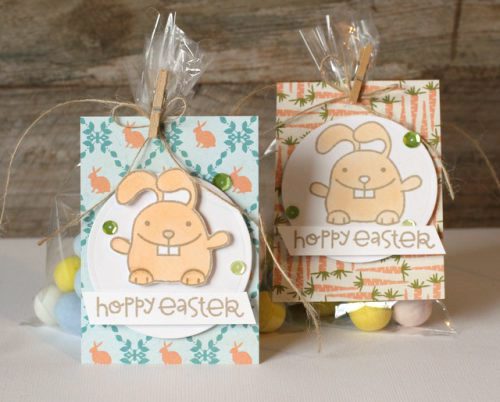
AJ here today with an easy bag treatment for your Easter treats! Mini eggs are hands down my kids favorite Easter treat. We tend to stock up on them at this time of year. Throw a cute little tag on a bag filled with them and bam, happy kids!
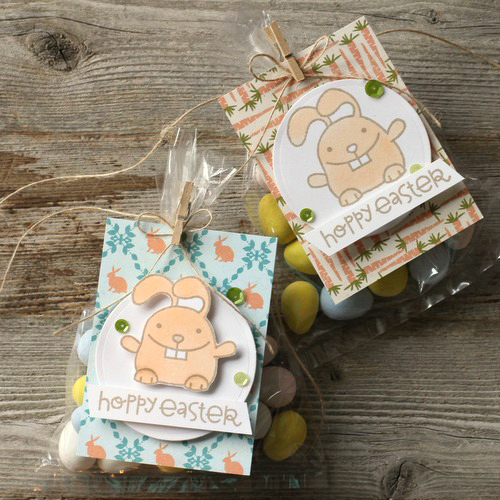
Easter Treat Bags Tutorial by AJ Otto for Scrapbook Adhesives by 3L

One of my favorite tricks- when making little bows with twine, sometimes they come undone, I like them to have the perfect little loops that are even on each side.
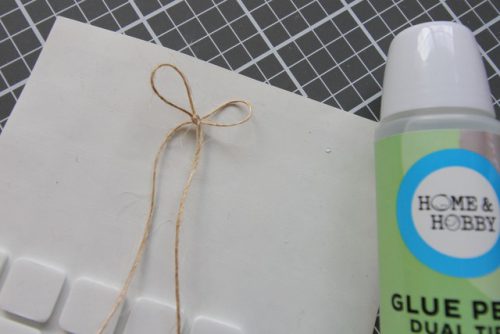
AJOtto-EasterTreats-2

Add a small (teeny tiny!) drop of glue from the Dual Tip Glue Pen to the center to hold the knot in place to prevent any slippage.
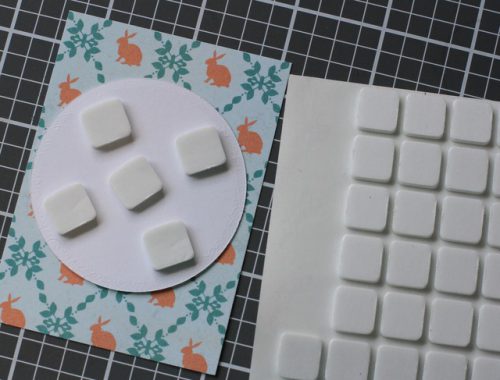
AJOtto-EasterTreats-3

I started by adhering my circle die cut to the patterned paper with 3D Foam Squares.
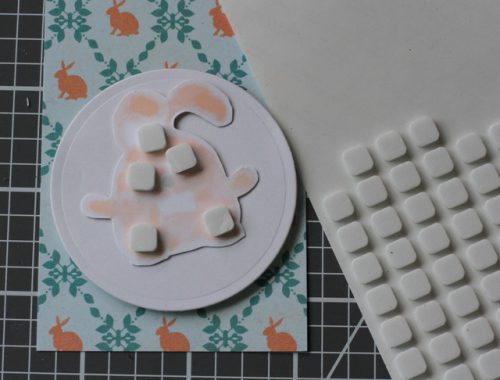
AJOtto-EasterTreats-004

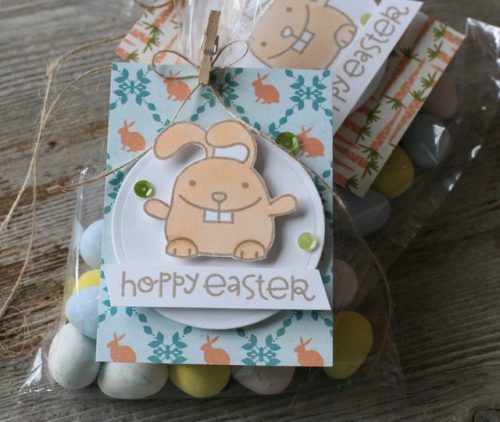
Using the smaller of the two sizes of 3D Foam Squares, I adhere my little bunny to the circle.
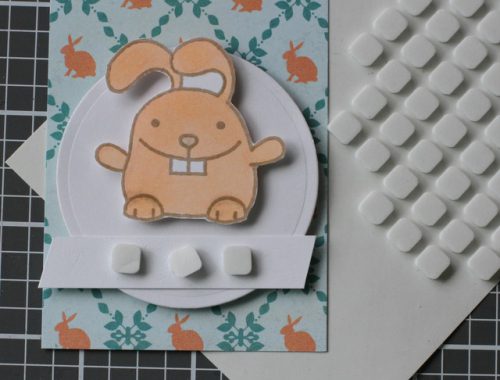
AJOtto-EasterTreats-5

To prevent placing adhesives where they aren’t needed and will end up hanging off the sides, I lay my sentiment down to see where I am going to place it.  Add a few 3D Foam Squares and then adhere.
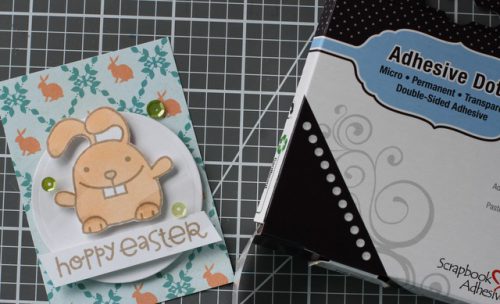
AJOtto-EasterTreats-6

Lastly, add a few sequins- With the Adhesives Dots Micro,  you can stick the sequin to it and lay it on your project with the backing still on to map out where you want them on your project.
AJOtto-EasterTreats-7

Easter Treat Bags Tutorial by AJ Otto for Scrapbook Adhesives by 3L

These are easy enough to create multiples and give to your favorites on Easter!

Enjoy!
AJ

Scrapbook Adhesives by 3L® Products used:
Adhesive Dots Mini
Adhesive Dots Micro
3D Foam Squares Mix, White
Dual Tip Glue Pen
Other:
Spellbinders® Die; Authentique Patterned Paper Sequins; Cardstock; Twine; Ink; Stamps- Paper Smooches
Accent a Journal with Paint, Paper and Adhesive Sheets

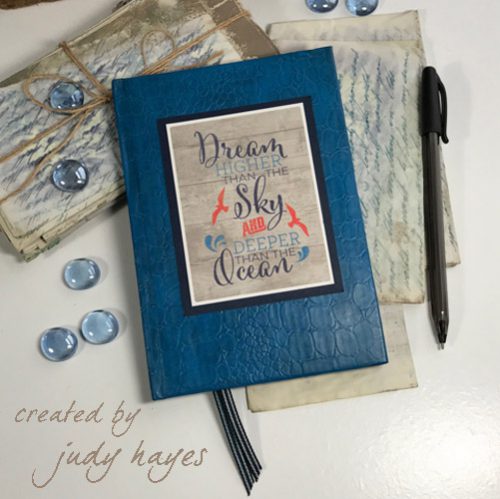
Hello everyone! Today I’m sharing a dollar store journal that I dressed up using Adhesive Sheets 6 x 12ʺ and Adhesive Dots Medium. Use little journals like this for gifts and it makes for both a gift and a card!  Sometimes I write a personal note inside and add a gift card or cash. It would be perfect for a graduate!
Accent a Journal with Paint, Paper and Adhesive Sheets by Judy Hayes for Scrapbook Adhesives by 3L

Journal Step Outs

Accent a Journal with Paint, Paper and Adhesive Sheets by Judy Hayes for Scrapbook Adhesives by 3L

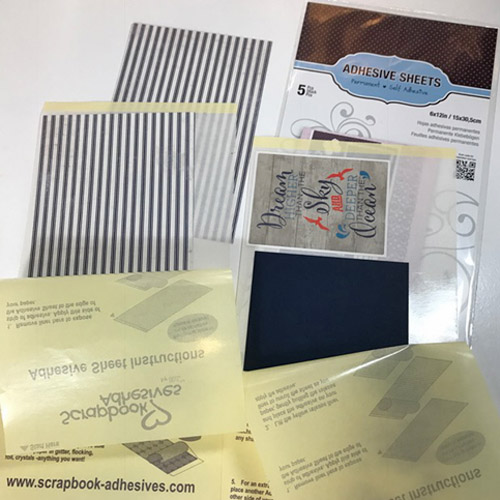
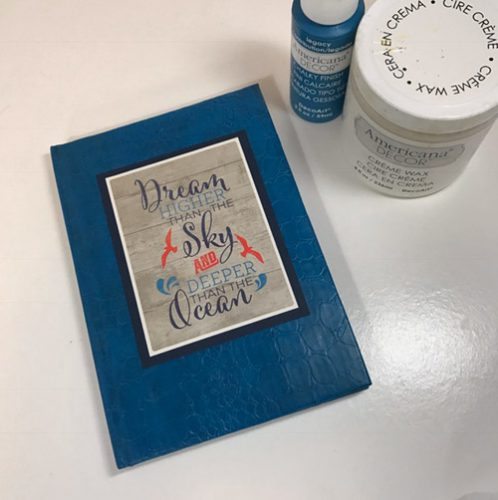
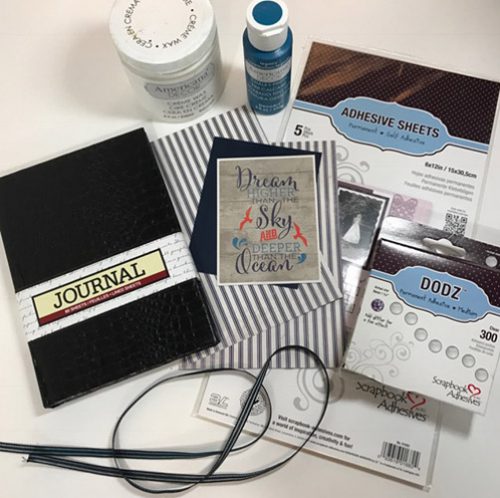
These are the supplies I used and note that I found the journal in a dollar store. Paint it with chalk paint and let it dry. Then I applied a layer of creamy wax and buffed it to show its texture.

Adhesive Sheet Application

Accent a Journal with Paint, Paper and Adhesive Sheets by Judy Hayes for Scrapbook Adhesives by 3L

For edge-to-edge adhesive coverage, I used Adhesive Sheets 6 x 12ʺ to apply to the back of the patterned papers and navy mat. It’s so easy to add the adhesive. Simply lift the adhesive liner, place the papers on the adhesive, place the liner back to cover, and rub well to transfer adhesive. Then peel the paper pieces off.

Accent a Journal with Paint, Paper and Adhesive Sheets by Judy Hayes for Scrapbook Adhesives by 3L

For the front, I adhered the verse to the navy mat and placed the layered verse on the journal cover. So Easy!

Ribbon Detail

Accent a Journal with Paint, Paper and Adhesive Sheets by Judy Hayes for Scrapbook Adhesives by 3L

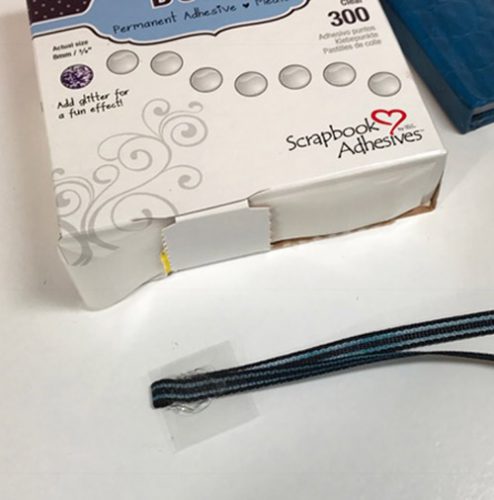
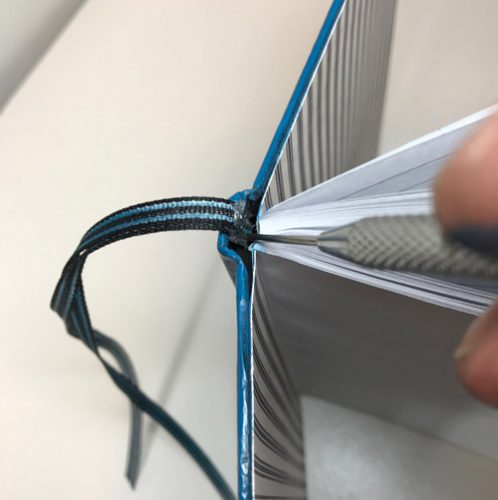
I folded ribbon about in half and secured together with Adhesive Dots Medium. Then I added two more Adhesive Dots Medium on one side of the ribbon. I used a needle tool to tuck the ribbon into the spine at top of the book. Once the journal was closed, I pressed along the book spine to make sure the ribbon was attached well.

Accent a Journal with Paint, Paper and Adhesive Sheets by Judy Hayes for Scrapbook Adhesives by 3L

Finishing Details

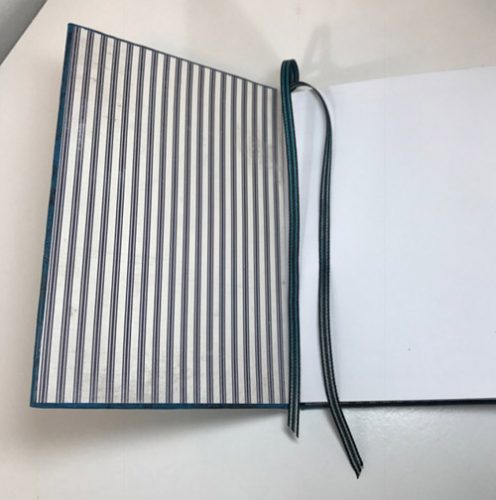
On the inside of the covers, I fastened striped paper.  It adds a finished and decorative touch to the journal.

Accent a Journal with Paint, Paper and Adhesive Sheets by Judy Hayes for Scrapbook Adhesives by 3L

All that’s left is to write a personal note and give this journal to someone special!

Thanks so much for visiting!
Judy Hayes

Creative Time: 40 minutes
Skill Level: Intermediate

Materials Needed:
Scrapbook Adhesives by 3L®
Adhesive Dots Medium
Adhesive Sheets 6 x 12ʺ

Other
Patterned Papers: Authentique™ Paper (Seafarer Collection); Paint and Wax: DecoArt® Americana® Decor™ (Chalky Finish Legacy and Crème Wax); Journal: Dollar Store; Navy Cardstock; Ribbon

Visit our Website and Blog!
Sign up for our Newsletter so you never miss a contest or giveaway!

instagram purple icon facebook icon purple pinterest purple icon twitter purple icon YouTube icon blog subscription purple icon

Layered Congrats Card with 3D Foam Squares

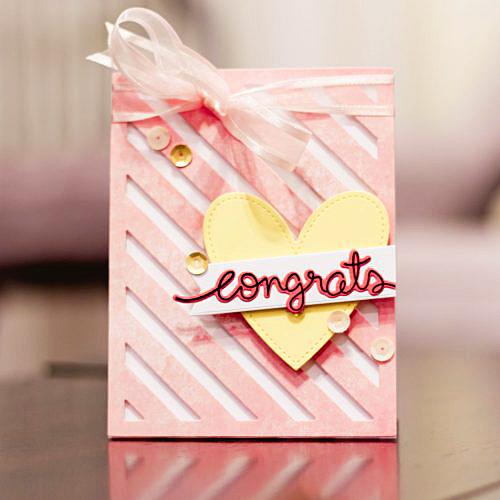
Now that spring has officially sprung, it seems like this is the time of year when “congratulations” cards are much needed.  With friends getting married, having a baby, graduating high school, etc… you can never have too many congrats cards on hand, especially popped with 3D Foam Squares White Regular!

Congrats Card by Latisha Yoast for Scrapbook Adhesives by 3L

Here’s how to create yours!

  1. Die cut pieces and start to assemble them onto the card base.
  2. Adhere the striped pink die cut to the card using 3D Foam Squares White  Regular.
  3. Adhere the yellow die cut using 3D Foam Squares White Regular.
  4. Adhere the congrats die cut onto the white banner using E-Z Dots® Permanent Refillable.
  5. Adhere the banner to the heart using 3D Foam Squares White Regular.
  6. Apply the sequins to the card using Adhesive Dots Small.
  7. Tie a bow to embellish.

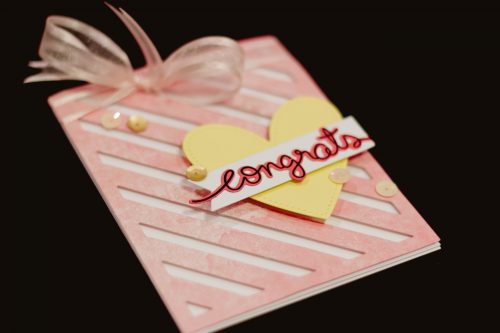
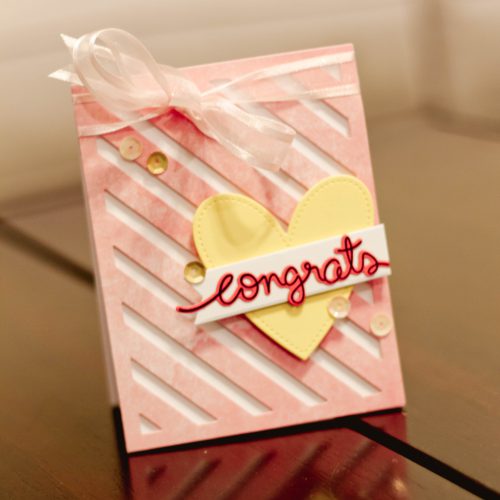
Another look at the project…

0317LY_Congrats2

0317LY_Congrats1

For a masculine graduation card, skip the pink and go for more muted colors.

Thanks for stopping by!
Latisha

Materials Used:
3D Foam Squares White Regular
E-Z Dots® Permanent Refillable
Adhesive Dots Small
Others:
Lawn Fawn Dies
Sequins
Cardstock
Patterned Paper
Ribbon

Save

Save

Wedding Layout with E-Z Runner Grand

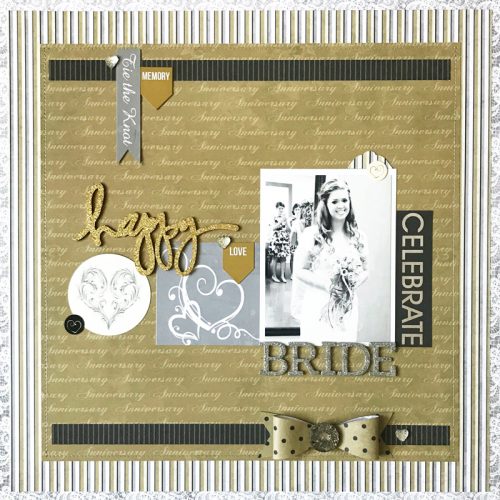
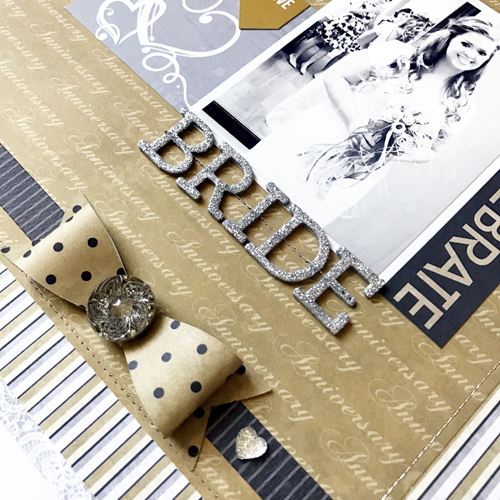
It’s Erica and today I’m sharing a wedding-themed scrapbook layout using the E-Z Runner® Grand Refillable Dispenser and Adhesive Dots Mini.

Wedding Layout by Erica Houghton for Scrapbook Adhesives by 3L

Creating the Wedding Layout

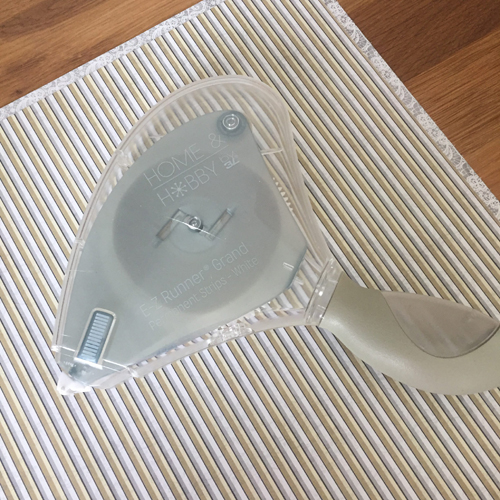
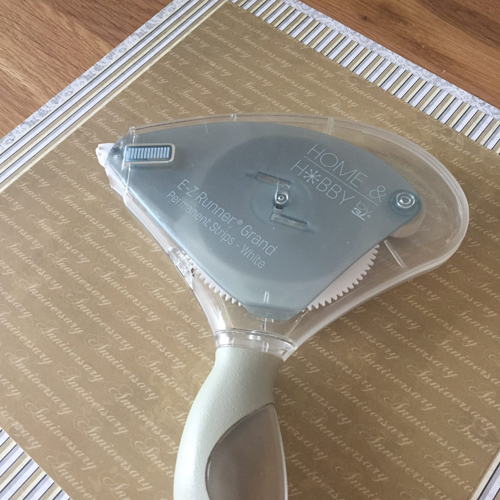
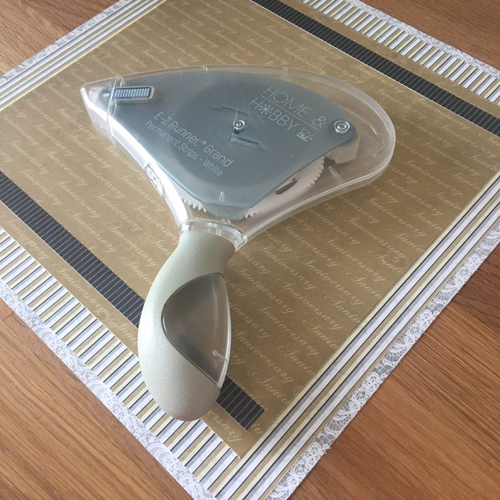
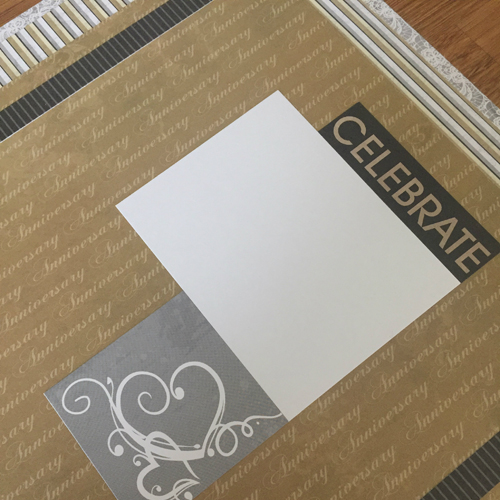
First cut a 12 x 12″ sheet of patterned paper to 11.5 x 11.5″. Center and adhere it to the 12 x 12″ patterned base sheet using the E-Z Runner® Grand Refillable Dispenser. With another sheet of patterned paper, cut to 10 x 10″, center and adhere it to the second layer using the E-Z Runner® Grand. Here I’m using the  Double-Sided Tape Dispenser from the HomeHobby by 3L brand, the refills are interchangeable within either dispenser from either brand.

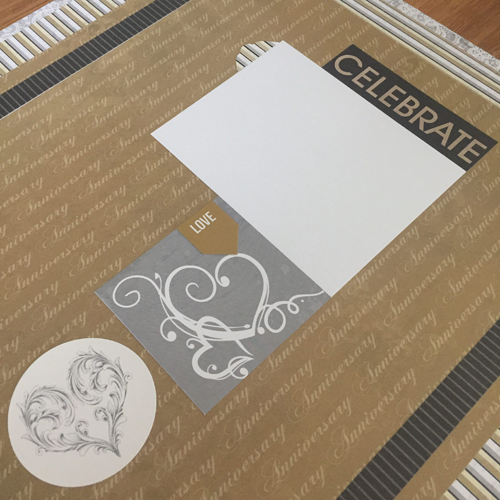
Now cut two 9.5 x 0.5″ strips, center and adhere it to the third layer using the E-Z Runner® Grand. Next, adhere a 3 x 4″ photo mat and other embellishments to the page using the E-Z Runner® Grand Refillable Dispenser.

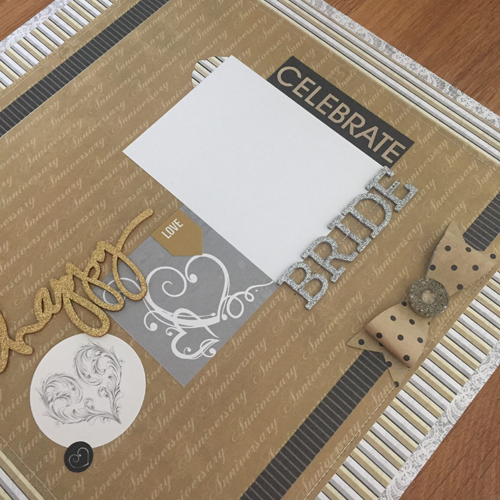
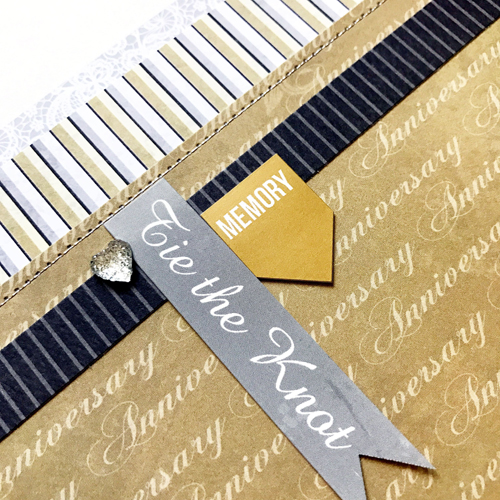
Continue to add embellishments and adhere them using the E-Z Runner® Grand Refillable Dispenser. I also use Adhesive Dots Mini to stick my smaller embellishments like crystal and sticker hearts.

Here are a few close-ups:

Find more wedding inspiration on Top Wedding Ideas!

Scrapbook Adhesives by 3L®:
E-Z Runner® Grand Refillable Dispenser
Adhesive Dots Mini
Other:
Paper & Stickers: Moxxie
Alphabet Stickers: American Crafts
Wood Title: Heidi Swapp
Bow Die Cut: My Favorite Things
Button: Tim Holtz

Thanks for joining me today!
Erica HoughtonSave

Save

Save

Save

Save

Embellishing Egg Cartons for Easter Decor

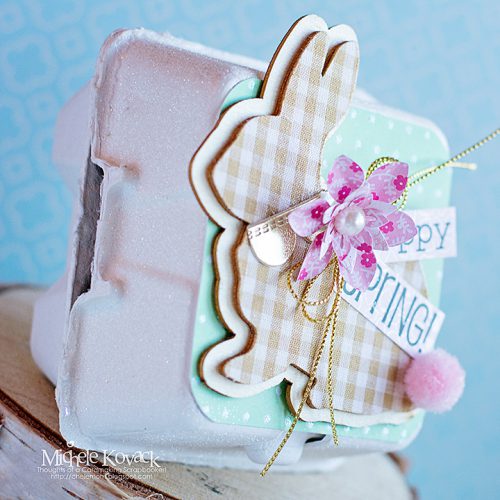
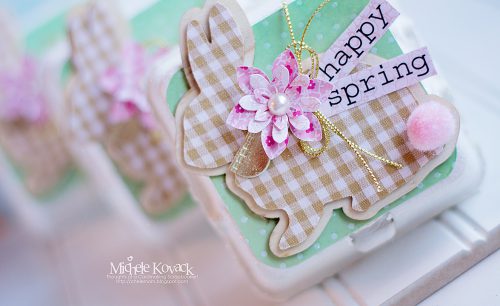
How about a few embellished egg cartons?! Good morning! Michele here, and who doesn’t have a love affair with Target’s Dollar Spot? I can’t ever walk past without picking something up. Not only are the items super cute, but heck they are only a dollar! Or two. Or three.

That’s where I picked up these cute wooden bunnies. I knew I wanted to do something for Easter with them. Egg cartons and bunnies? Together? Yes please!

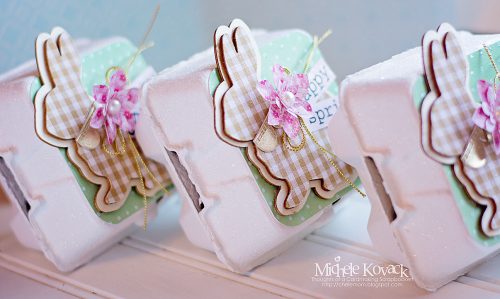
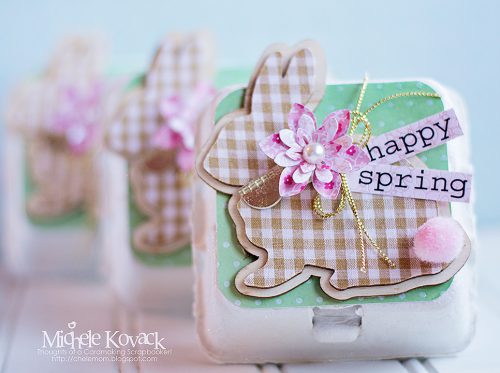
Embellishing Egg Cartons for Easter by Michele Kovack for Scrapbook Adhesives by 3L

How to Embellish Egg Cartons

Start by adhering the polka dot paper to the front of the egg cartons with E-Z Squares® Refillable. The bunnies were already sticky, so I adhered those directly onto the paper.

The gold trim bows were attached with the Dual Tip Glue Pen. I made a flower for each bunny and used Adhesive Dots Medium to attach it.

egg carton 3

Next I added gold cording and a sticker sentiment under the flower. I used the Adhesive Dots Medium to attach both of them. Adhesive Dots are double-sided, clear adhesive dots of glue. They have a strong and flexible adhesive and they come in a unique, patented single dot dispenser that provides touch-free application.

View a short video by clicking How to Use Dodz Adhesive Dots video below.


For the final touch, I added a tail – a fluffy pink pom pom using the Dual Tip Glue Pen.

egg carton2

egg carton box

Thanks so much for stopping by today!
Michele

Scrapbook Adhesives by 3L® Used:
Adhesive Dots Medium
E-Z Squares® Refillable Dispenser
HomeHobby by 3L®:
Dual Tip Glue Pen
Others:
Sticker: SRM; Bunny: Target; Flower: JustRite PaperCraft; Egg Carton and Gold Cording: Stampin Up!; Gold Trim: Michaels

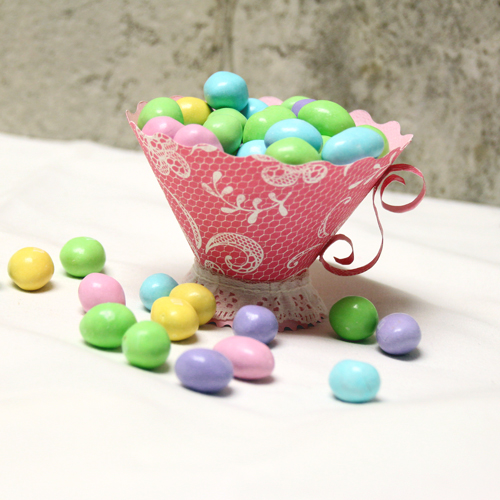
How to Create a Tea Cup Treat Holder

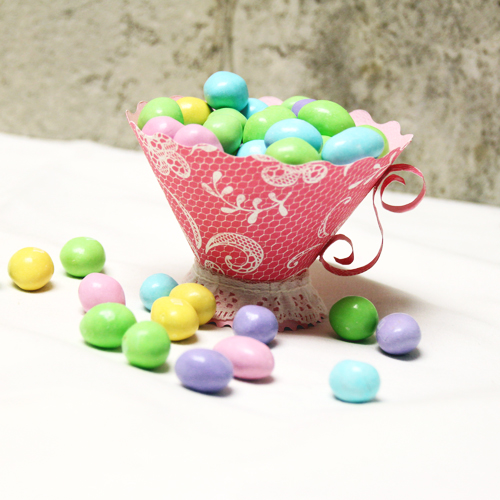
Hi all! Guest designer, Tami Mayberry, here again with another fun and easy project you can create with the help of your Scrapbook Adhesives by 3L® products. My son will be getting married this year so I have been working on various decoration and favor ideas. Today I share this adorable tea cup treat holder which is perfect for not only weddings but birthday parties, showers and gifts too.

Tea Cup Treat Holder by Tami Mayberry for Scrapbook Adhesives by 3L

Instructions:

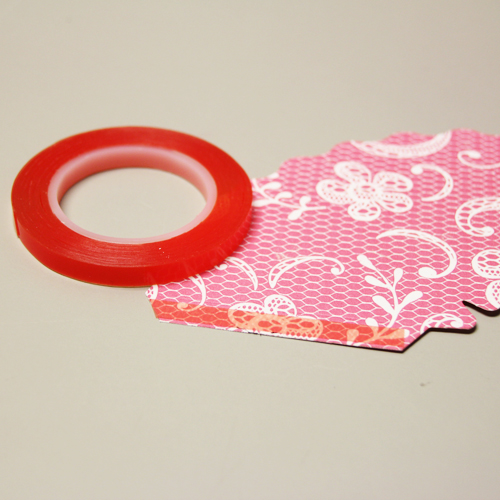
Die-cut tea cup pieces from double-sided patterned paper.

Attach Extreme Double Sided Tape 1/4″ to right side of cup  top along tab.

Tami_March23_Photo2

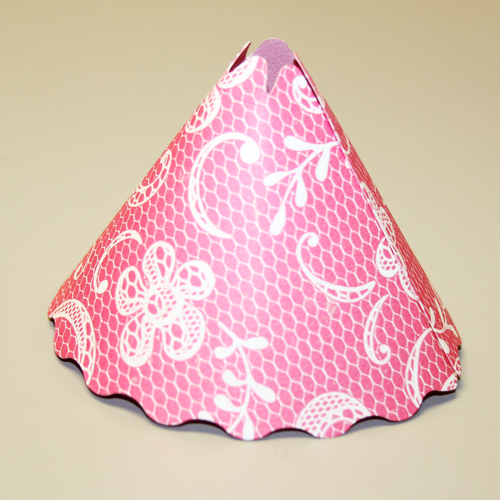
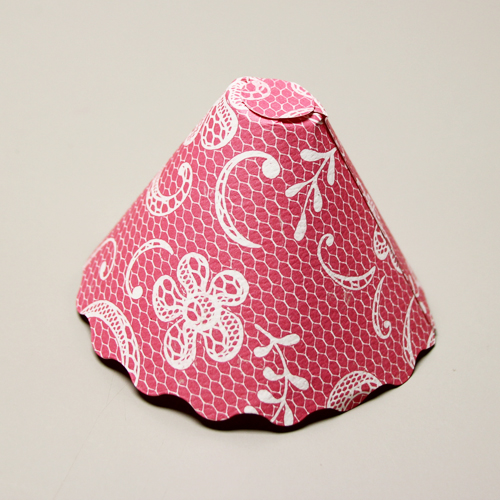
Remove backing; attach tab to opposite end creating a cone shape.

Tami_March23_Photo3

Attach Dodz Adhesive Dots Medium to die-cut circles. Fold down tabs; attach circles to inside and outside of cone shape securing tabs in place.

Tami_March23_Photo5

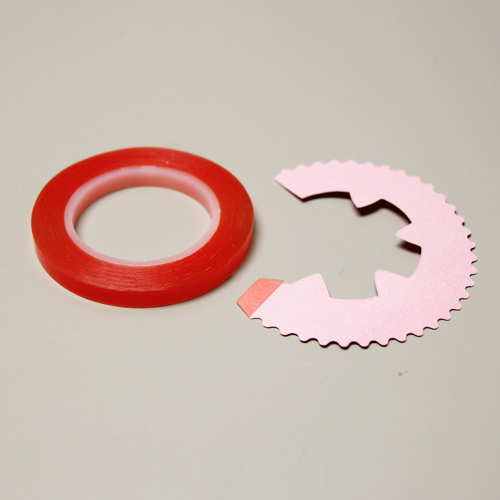
Attach Extreme Double Sided Tape 1/4″ to right side of cup base along tab.

Tami_March23_Photo6

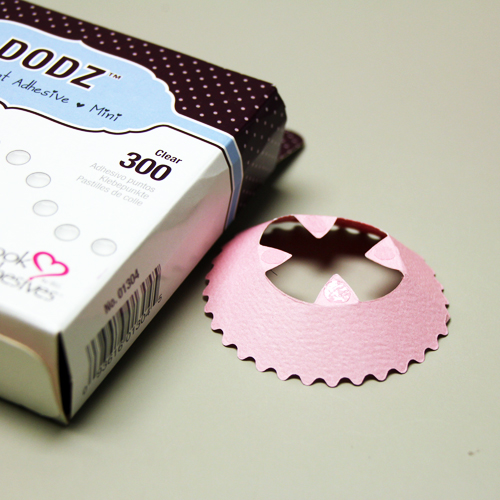
Attach to opposite end creating cup base. Fold down tabs; attach Dodz Adhesive Dots Mini to each tab as shown.

Tami_March23_Photo7

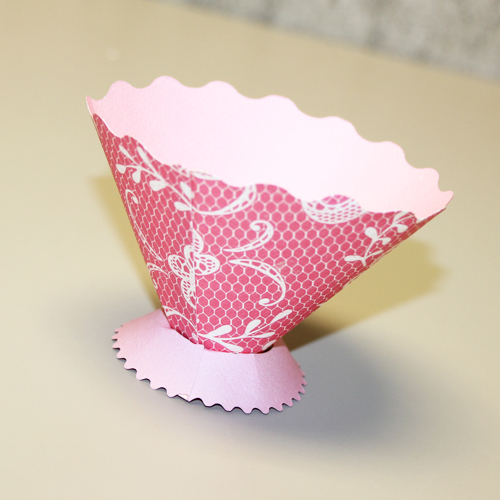
Place cup top onto base; secure in place along tabs. Curl handle into an “S” shape attach to side of cup using Dodz Adhesive Dots Medium.

Tami_March23_Photo8

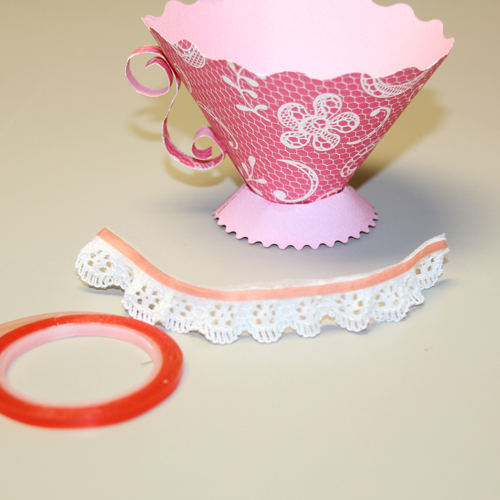
Attach Extreme Double-Sided Tape ⅛ʺ along edge of lace trim. Remove backing; attach lace to base of cup.

Tami_March23_Photo9

Fill with treats and there you have it!

Tami_March23_Photo10

Supplies:

Other:

  • Graphic 45 patterned papers
  • Tea Cup die
  • Lace Trim


Spring Card with Embellished 3D Foam Squares

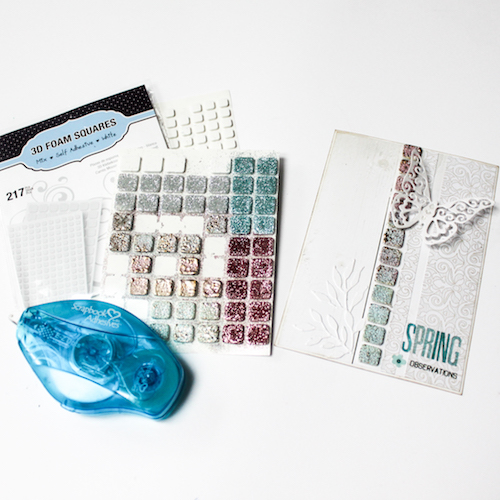
Hi there, it’s rainy and cold in Germany these days. So I decided to get in the spring by creating a spring card with fresh and light colors – thanks to a few 3D Foam Squares Mix White.

Stephanie_springcard_1 (1 von 1)

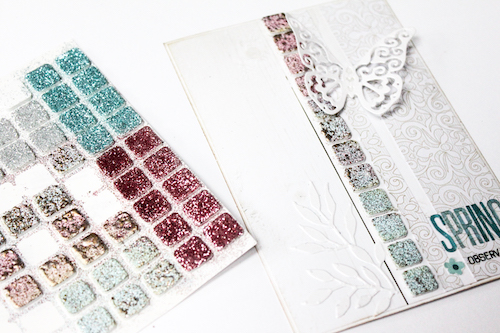
I used 3D Foam Squares Mix White on the outside of my card with embossing powder and glitter and some die cuts. My choice of colors are light blue and light and darker pink/rose.

Stephanie_springcard_2 (1 von 1)

On some squares I mixed my glitter and embossing powder together. These I liked most and used them for my card.

Stephanie_springcard_3 (1 von 1)

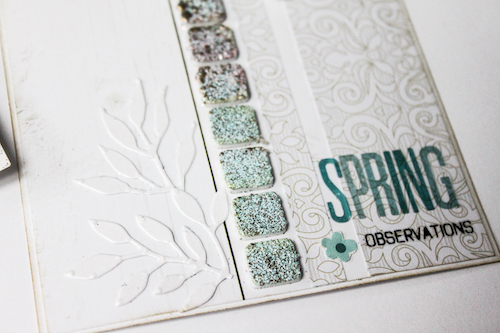
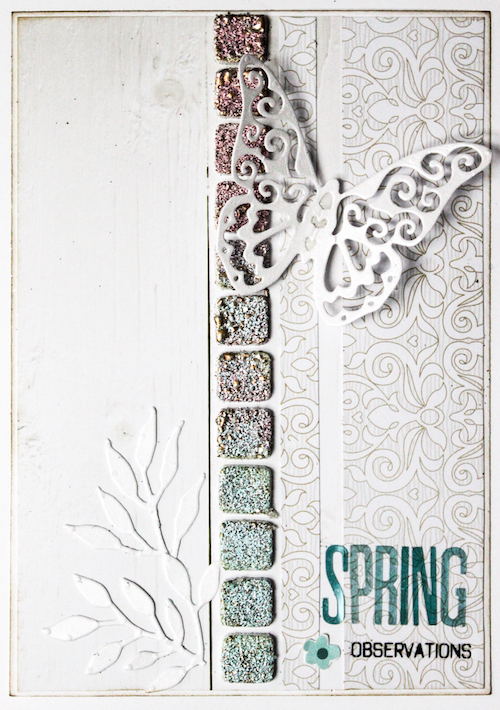
Then I added die cuts and adhered them with the E-Z Dots® Permanent Refillable Dispenser. I finished the card with alpha sticker, a rub on and a little flower sticker.

Stephanie_springcard_4 (1 von 1)

Spring is coming, for sure, but for now I have it on my card.

Thanks for visiting me today!
Stephanie 🙂

Supplies from Scrapbook Adhesives by 3L®:
3D Foam Squares Mix White
E-Z Dots® Permanent Refillable Dispenser

How to Adhere Those Tricky Die Cuts with Adhesive Sheets

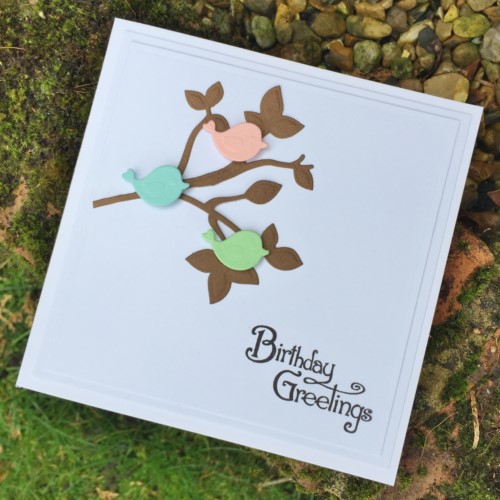
Hi everyone, Christine here today with a Springtime Birthday card.  Applying thin die cuts can often be tricky but they are no longer a problem with Adhesive Sheet 4 x 6″.

CEmberson - Bird Card 9


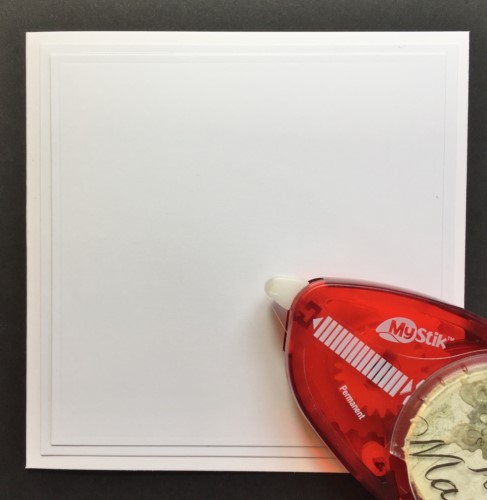
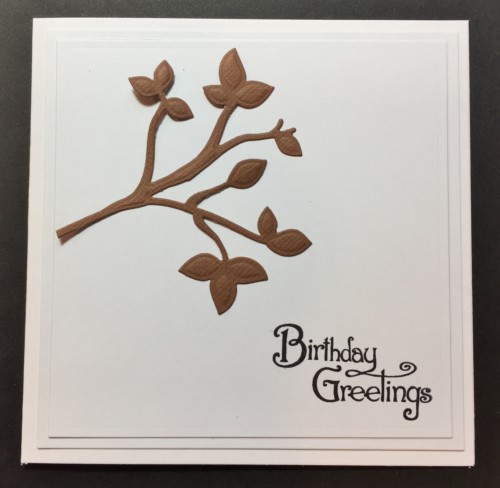
To start, my card base has two white mats affixed with  MyStik® Permanent Strips.

CEmberson - Bird Card 2

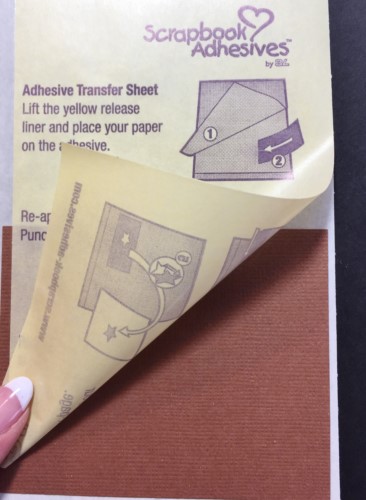
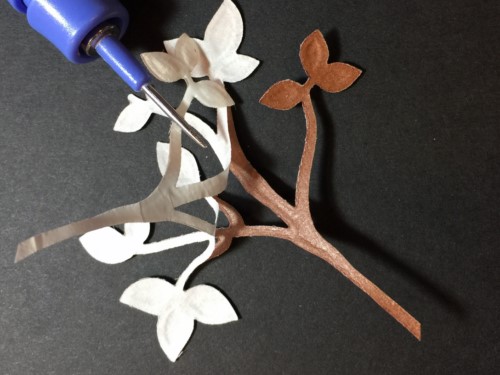
I then selected an Adhesive Sheet 4 x 6″. Lifted the yellow release paper and placed my colored card inside.

CEmberson - Bird Card 3

Smoothed it back down and positioned my die. Run this through my die cutting machine.

CEmberson - Bird Card 4

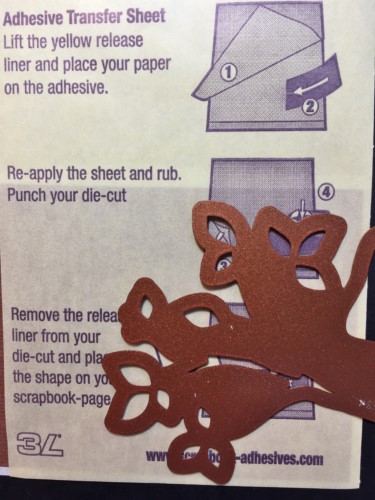
When cut and embossed I peeled away the backing to reveal that the adhesive from the sheet has transferred onto the back of my delicate die cut.

CEmberson - Bird Card 5

View the quick video below on How to Use Adhesive Sheets for Die Cutting.

Positioned onto my card front.

CEmberson - Bird Card 6

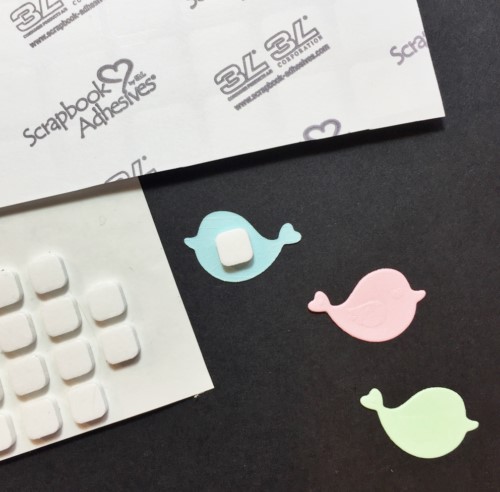
I added further little bird die cuts and adhered these with 3D Foam Squares – White, Small.

CEmberson - Bird Card 7

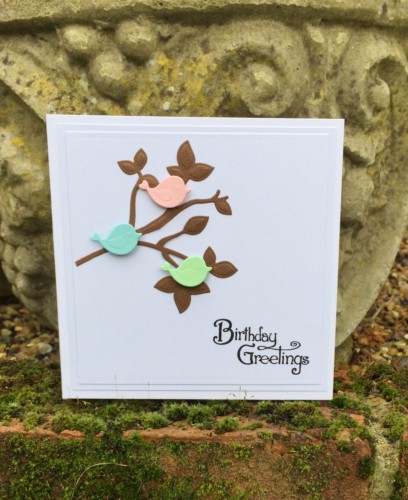
The finished card full of Spring-ness!

CEmberson - Bird Card 8

Thanks for stopping by today and don’t forget to check out all the great products on the website.

Christine

Products used:
3D Foam Squares – White, Small
Adhesive Sheets 6″ x 4″
MyStik® Permanent Strips
Others:
Dies: Spellbinders Paper Arts (Springtime and Out on a Limb)
White, Brown, Pink, Green and Blue Cardstock
Stamp – Little Darlings


Save

Save

Dimensional Hexie Shamrock Card Tutorial

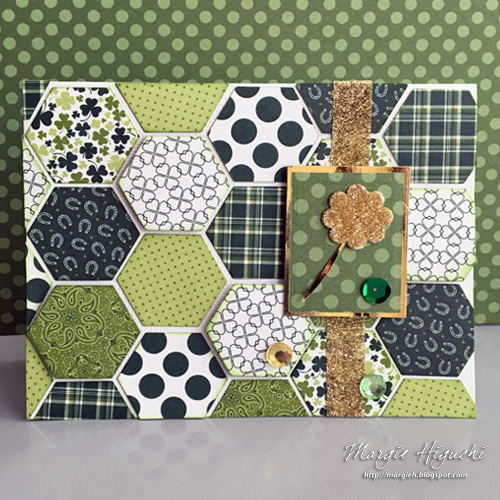
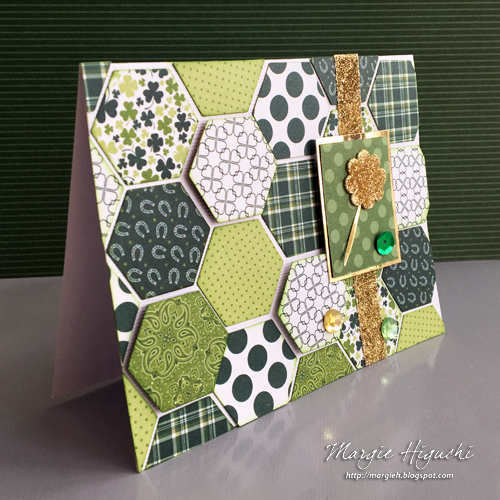
Happy St. Patrick’s Day everyone! I’d like to share a card that has a dimension in my background and in my embellishment, using our 3D Foam products. LOVE how it turned out!

Dimensional Hexie Shamrock Card by Margie Higuchi for Scrapbook Adhesives by 3L

Hexie Shamrock Card Tutorial

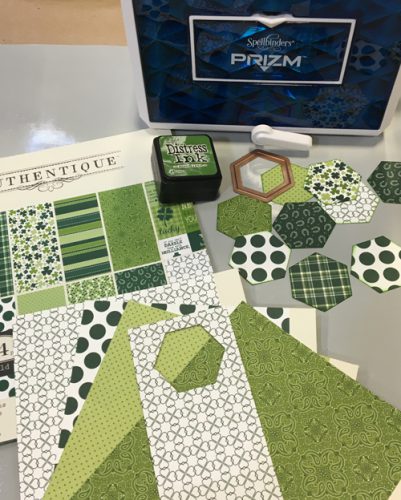
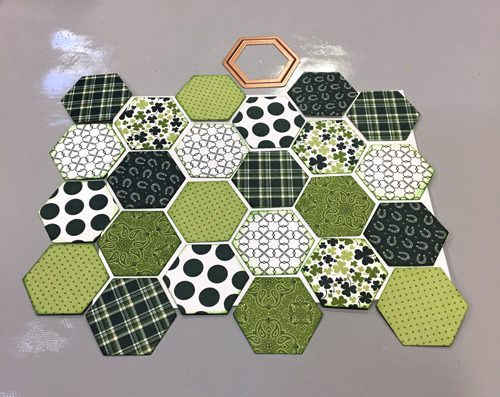
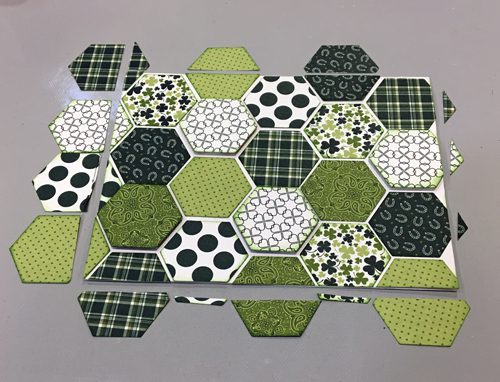
This green collection is the perfect pattern to use for this occasion. I cut about 26 Hexagons from my die and edged them with green ink for a subtle look. I ended up using 24 but I wanted a choice of patterns 😉

MargieHiguchi 500 DImensionalHexagonEmeraldCd 031717 Step1

Once I cut and inked them up, I placed the die cuts on top of my A2-sized (5.50 x 4.25″) card base.

MargieHiguchi 500 DImensionalHexagonEmeraldCd 031717 Step2

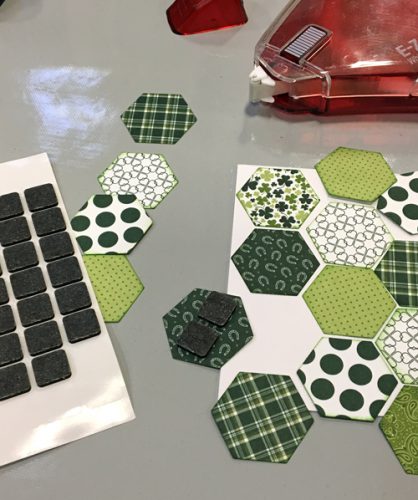
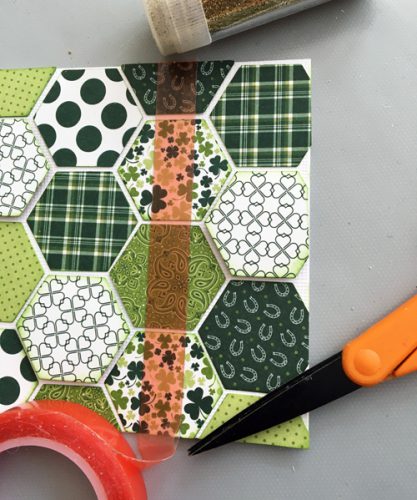
I used my E-Z Runner® Grand to adhere to most of my die cuts but popped up four random die cuts with 3D Foam Squares Black Regular.

MargieHiguchi 500 DImensionalHexagonEmeraldCd 031717 Step3

After all were secured them down, trim off the excess and your card base is done.

MargieHiguchi 500 DImensionalHexagonEmeraldCd 031717 Step4

Embellishing Details

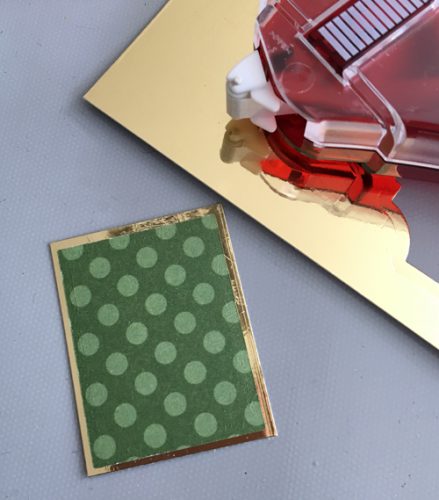
Now to embellish! I cut a rectangle shape from green patterned paper and cut another a little larger to the mat with gold mirror cardstock. I adhered them together with E-Z Runner® Grand.

MargieHiguchi 500 DImensionalHexagonEmeraldCd 031717 Step5

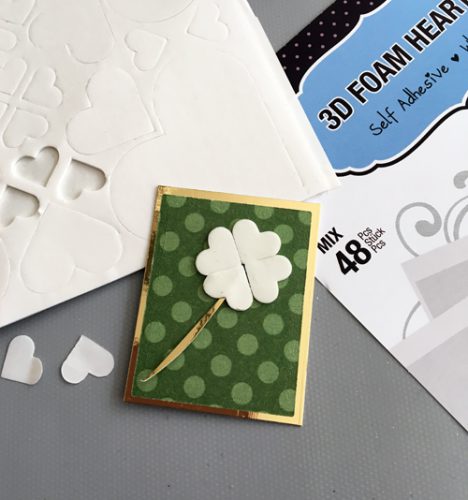
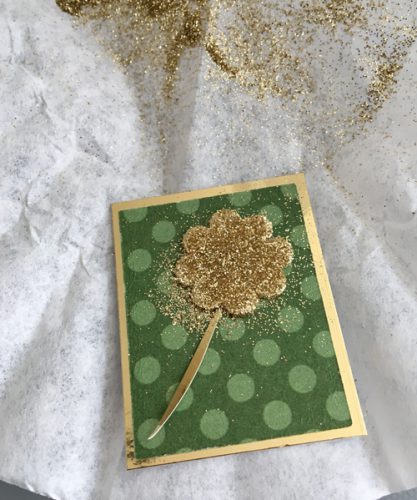
To create my gold shamrock, I took four 3D Foam Hearts and placed them on top of my matted rectangle. Remove the top liner to sprinkle gold glitter on top. Press firmly to make sure they are stuck on well. Shake off excess.

MargieHiguchi 500 DImensionalHexagonEmeraldCd 031717 Step6
MargieHiguchi 500 DImensionalHexagonEmeraldCd 031717 Step7

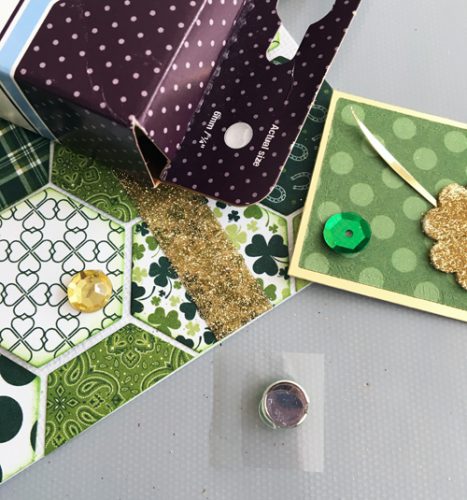
To anchor my embellished shamrock, I used Extreme Double-Sided Tape 1/2″ as a ribbon by adhering right down my card base. After taking off the liner, I sprinkled glitter. press down and dust off the excess.

MargieHiguchi 500 DImensionalHexagonEmeraldCd 031717 Step8

For these wonderful sequins and gems, I used the Adhesive Dots Small to adhere to the card front. These adhesive dots are perfect for many sizes of embellishment – we have six sizes of Adhesive Dots!

MargieHiguchi 500 DImensionalHexagonEmeraldCd 031717 Step9

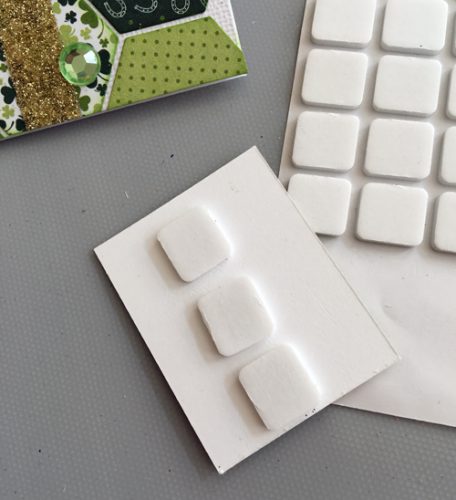
Add the embellished shamrock rectangle piece on top with 3D Foam Squares White Regular and you’re done!

MargieHiguchi 500 DImensionalHexagonEmeraldCd 031717 Step10

Here’s another look…

Dimensional Hexie Shamrock Card 2 by Margie Higuchi for Scrapbook Adhesives by 3L
Dimensional Hexie Shamrock Card by Margie Higuchi for Scrapbook Adhesives by 3L

If you are in need of more inspiration on this subject, click St. Patrick’s Inspiration by Scrapbook Adhesives by 3L® Design Team!

Thanks for stopping by!
Margie Higuchi

Creative Time: 35 minutes
Skill Level: Intermediate

Materials Needed:
Scrapbook Adhesives by 3L®
E-Z Runner® Grand Dispenser
3D Foam Squares Black, Regular
3D Foam Squares White, Regular
Adhesive Dots Small
3D Foam Hearts

Home Hobby by 3L®
Extreme Double-Sided Tape 1/2″ Permanent

Other
Ink and Foam Applicator: Distress Ink – Mowed Lawn (Ranger Ink/Tim Holtz); Patterned Paper: The Emerald Collection (Authentique Paper); Die and Machine: Hexagon and Prizm™ Die Cutting and Embossing Machine (Spellbinders® Paper Arts); Gold Mirror Cardstock; White Card Base; Sequin; Gems

Visit our Website and Blog!
Sign up for our Newsletter so you never miss a contest or giveaway!

instagram purple icon facebook icon purple pinterest purple icon twitter purple icon YouTube icon blog subscription purple icon

Not Older, Just Better Card Using Dual Tip Glue Pen

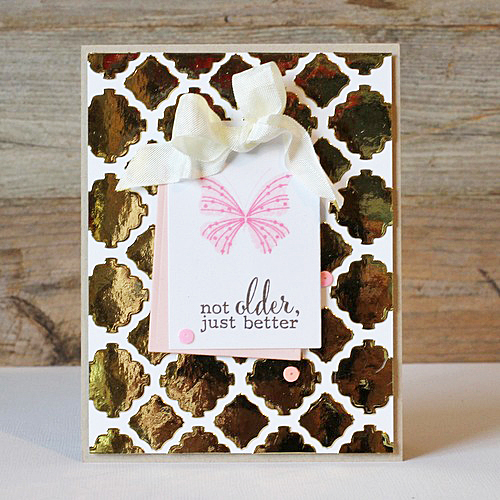
Hello, AJ here today with a card I created with leftovers from a die cover plate. While the pieces were all still intact in the die, I quickly added a light dot of liquid adhesive from our Dual Tip Glue Pen to each little piece.

Butterfly Birthday Card by AJ Otto for Scrapbook Adhesives by 3L

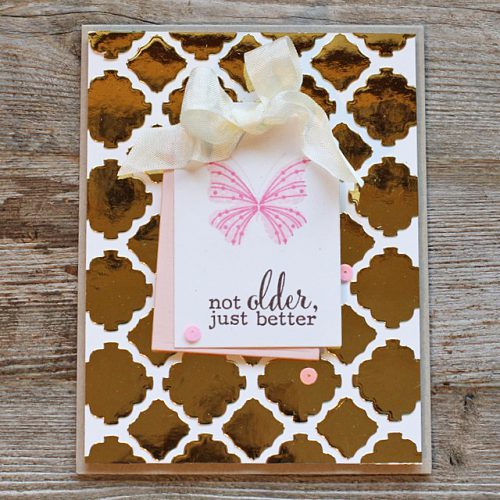
Then I adhered to the white card panel. I didn’t want to waste all the pretty little mirrored pieces, and it worked out perfectly for a second card!

Butterfly Birthday Card 2 by AJ Otto for Scrapbook Adhesives by 3L

To finish the card off, I stamped a butterfly and sentiment. Then popped it up with a few 3D Foam Squares, and adhered a few sequins using our Adhesive Dots Mini.

Do you ever thought to use your leftovers for a second project? Give it try in your next card project.

Enjoy!
AJ 

Scrapbook Adhesives by 3L® Products used:
Adhesive Dots Mini
3D Foam Squares, Mix White
Dual Tip Glue Pen
Other:
Spellbinders® Die; Sequins; Cardstock; Ribbon; Ink; Stamps