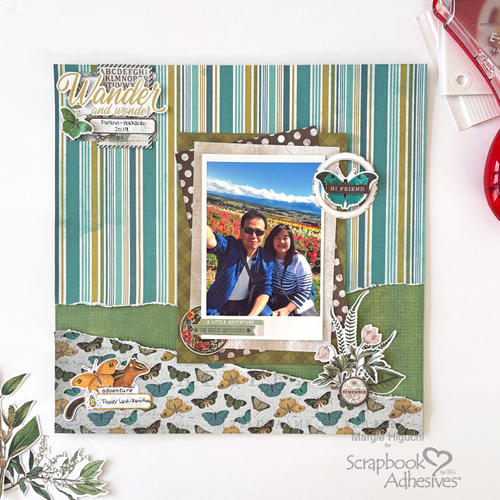
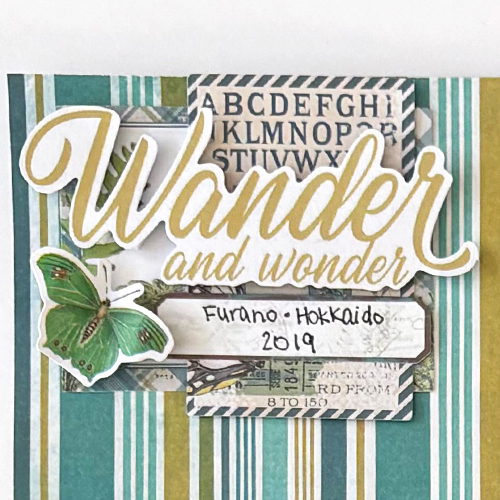
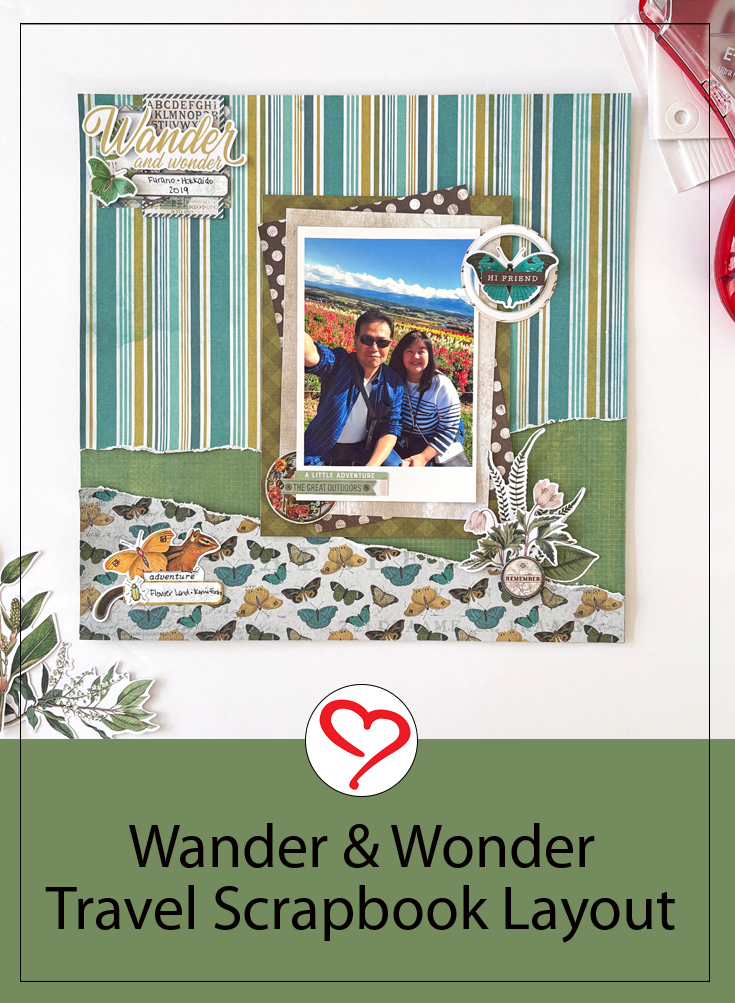
I found some pictures from a past trip so I decided to document one of them before I forget! LOL! Hi, Margie here today! Let me show you how I brought back an old technique, paper tearing, and creating clusters on the page.
Creating the Wander Layout Foundation
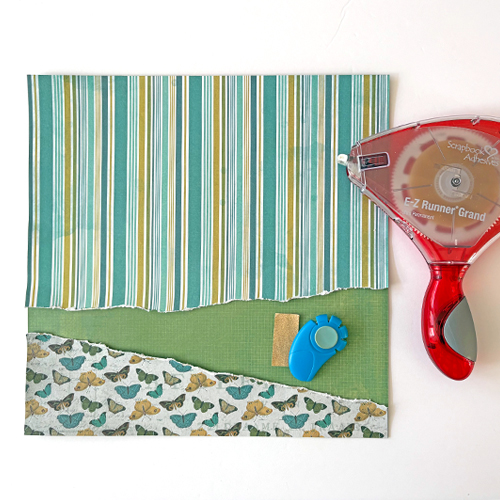
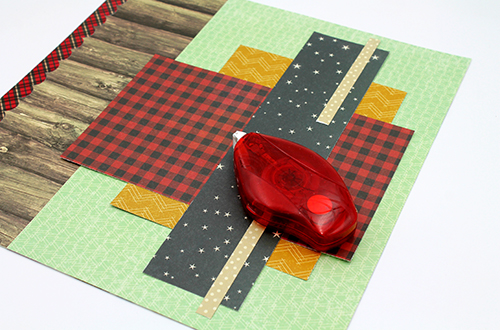
Three patterned papers were used to create my layout base. Two papers were hand torn, and the green patterned paper was kept as a whole 12 x 12-inch base. I secured all the layers with the E-Z Runner® Grand Ultra Strong Refillable Dispenser. I like this adhesive for its strong hold as I will have layers of papers on top of the base.
Designer’s Note: Fold the papers where I wanted to tear, lightly mist the fold lines before tearing, and when dry, sand or distress the edges.
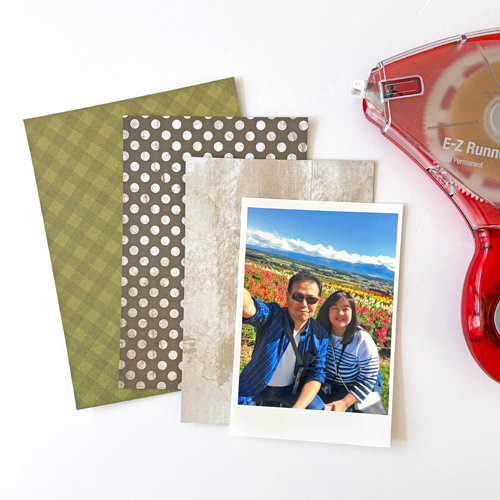
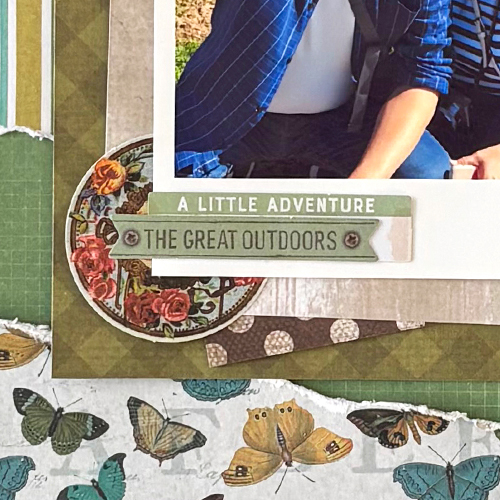
Photo Mat Layers
Using the same E-Z Runner® Grand Ultra Strong Refillable Dispenser, I cut three mats and adhered with patterned papers: 5.5 x 7.5-inch (green pattern), 4.5 x 6.75-inch (dotted pattern), and 4 5/8 x 6 5/8-inch (taupe pattern). The mats were slightly tilted to give interest. The photo measures 4 x 6-inches.
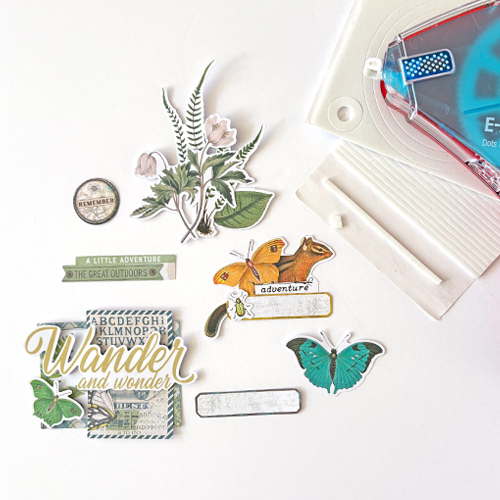
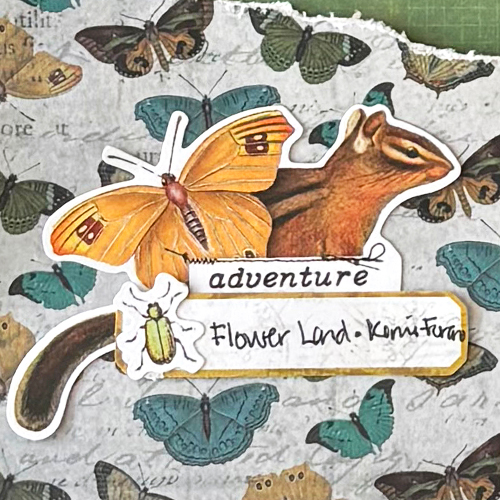
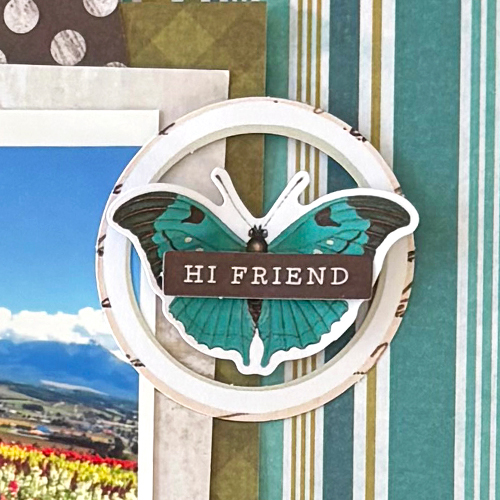
Four other clusters I created around the layout…love how they turned out. Always take another look at your page…you never know what other elements you can add.
I hope my Wander & Wonder Layout inspires you to document your trip!
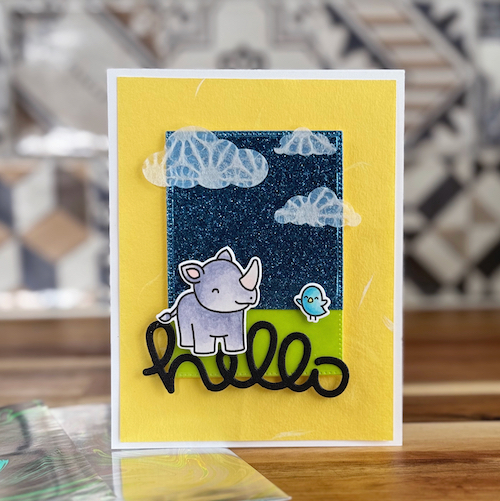
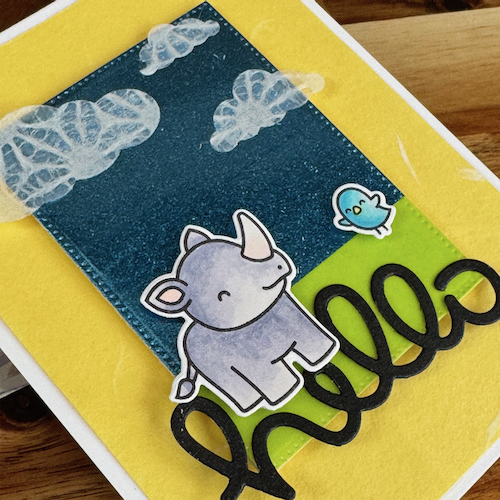
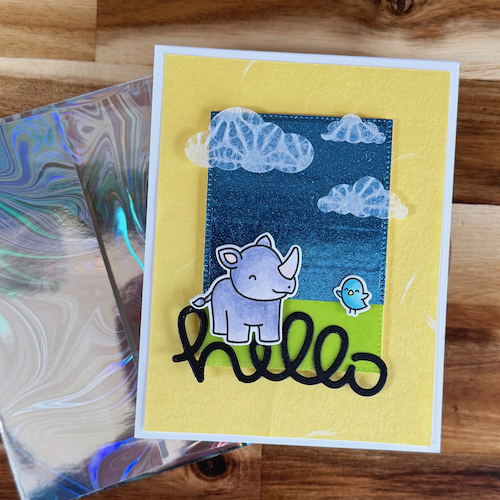
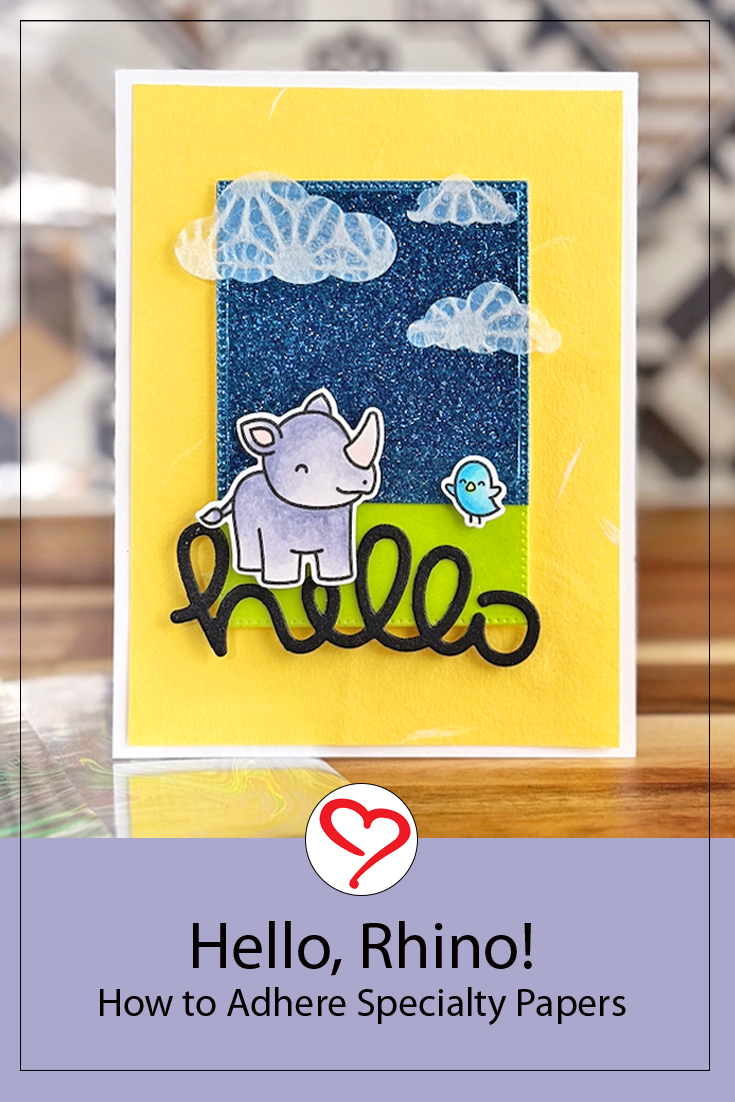
Hi, this is Jingle and I am excited to share a super cute Hello, Rhino Card with you that uses all kinds of fun specialty papers.
Design Ideas Behind Hello Rhino Card
The thing about specialty papers is that they have a lot of interesting qualities to them, but that also means that finding the right adhesive is important. For this card, I relied on some fantastic choices from Scrapbook Adhesives by 3L to ensure my adhesives were not visible through the papers and that they would stay permanently attached to the card.
Layers with Crafty Power Tape
For the yellow mulberry paper and the gorgeous Aquamarine Glitter Gloss cardstock, I relied on the super sticky and easy-to-work Crafty Power Tape Polybag 81ft. It works well with delicate papers better than a tape runner which can pull and tear them. On the flip side, the Crafty Power Tape is super strong to support heavyweight cardstock like the Glitter Gloss…a win-win!
Layers with Vellum and Rayon Papers
For the Kiwi Translucent Vellum and the White Hemp Flower Rayon papers, I use my trusty E-Z Runner® Permanent Fine Adhesive Dispenser (aka Vellum Runner). It hides away nicely and provides a gentle application for delicate papers.
Other: Papers and Envelope: Your Paper Insider (Box 10); Stamp and Die Set: Lawn Fawn (Rhino-Mite Stamp and Dies); Craft Dies: Memory Box (Stitched Rectangles); Markers: Olo Marker
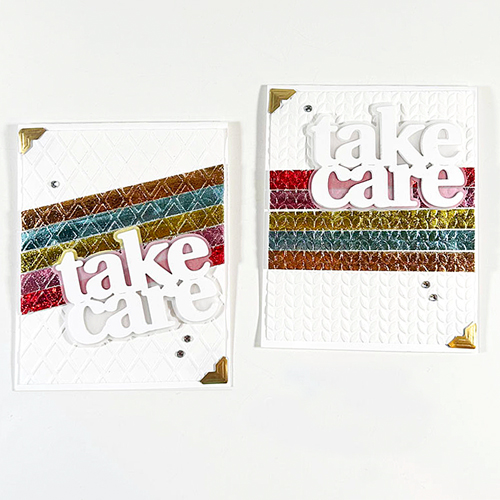
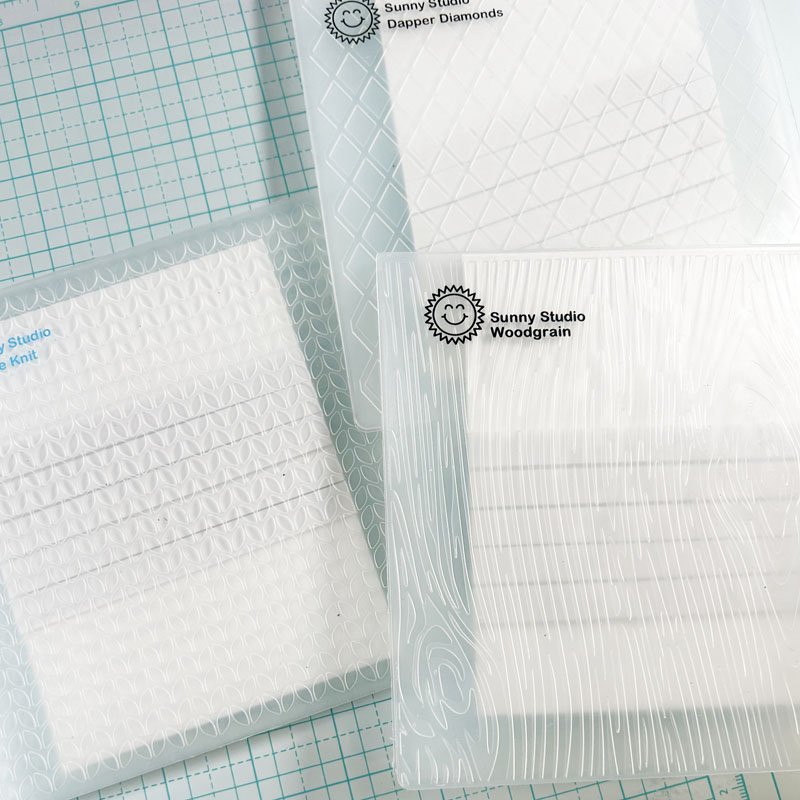
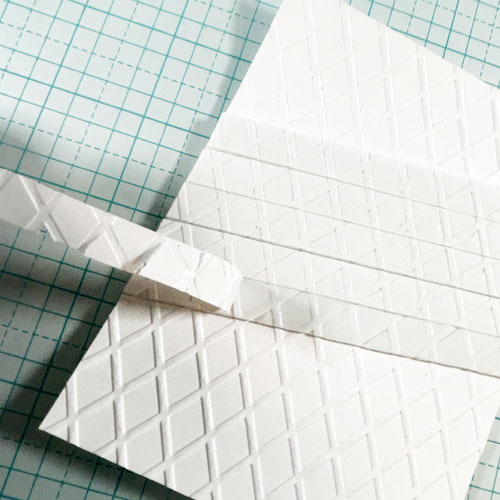
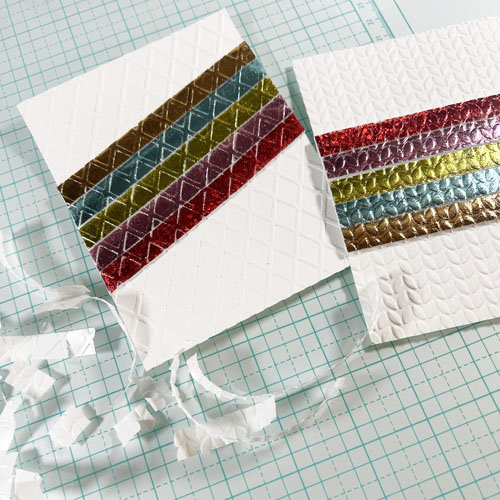
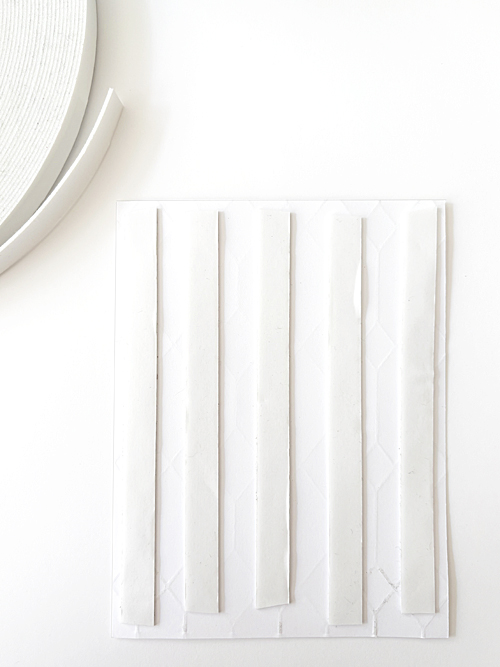
Apply strips of Crafty Foam Tape 54ft. across several white cardstock panels. Trim any excess tape over the sides of the panels. Next, place your panels in embossing folders and run them through your die-cutting machine.
Designer’s Tip: You might want to try this out before actually making a project. Pick a variety of embossing folders to see what takes to the foam tape best. Also, a good time to adjust your machine’s plate sandwich to ensure a good pass-through!
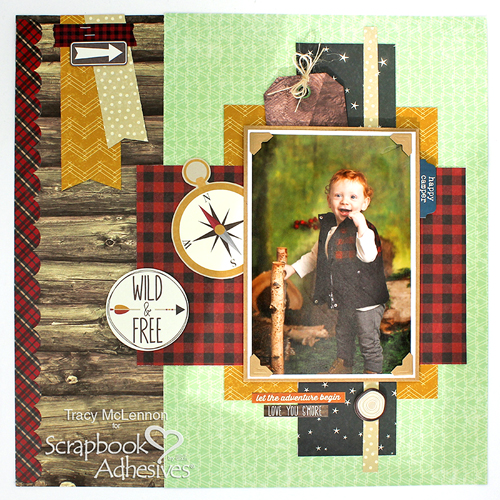
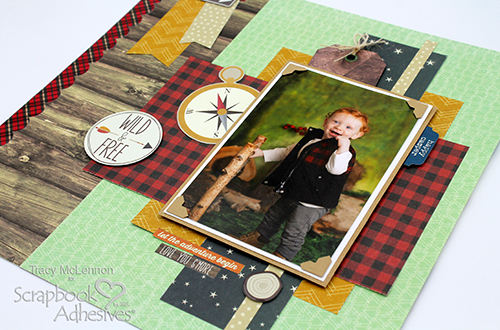
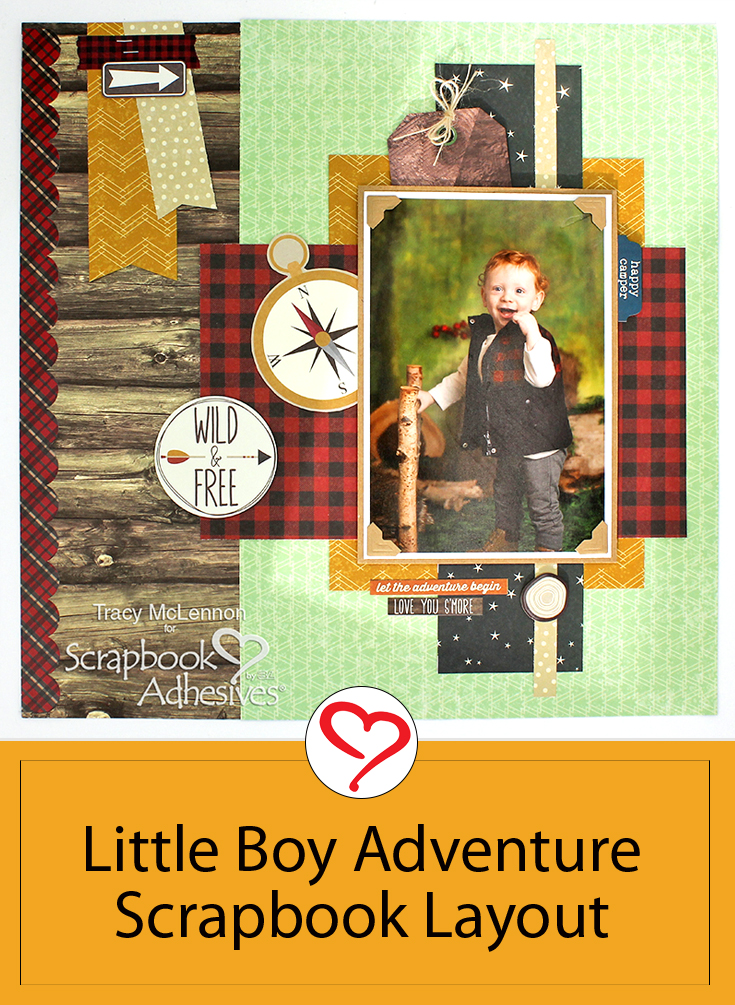
Hello crafty friends! Tracy here, and today I have such a sweet and simple Little Boy Layout to share. Here are all of the crafty details on how I created it.
Little Boy Layers
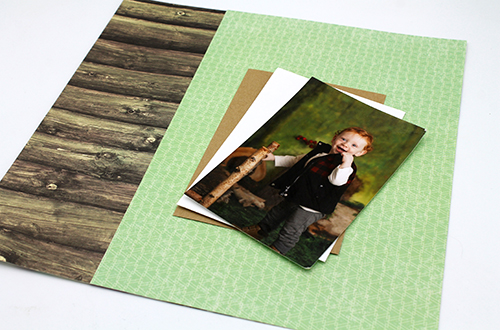
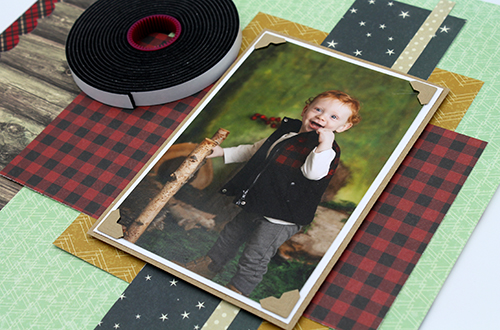
Cut the two background patterned paper pieces and the cardstock mats for the 4×6 photo.
Once again using the E-Z Runner® Permanent Strips Refillable Dispenser, add the individual background layers to the layout base. I also added a cardstock sticker border to the left edge of the little boy layout.
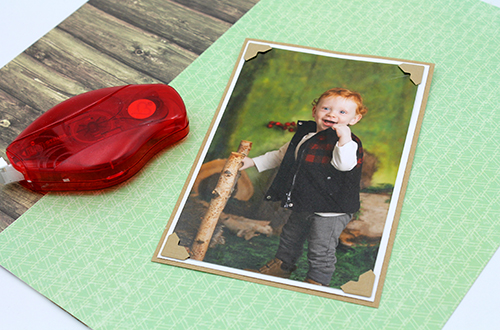
Design Layers
Add the matted photo to the layout using Crafty Foam Tape Black. I love that pop of dimension to this little boy layout.
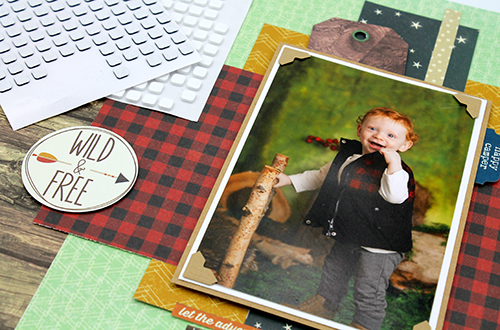
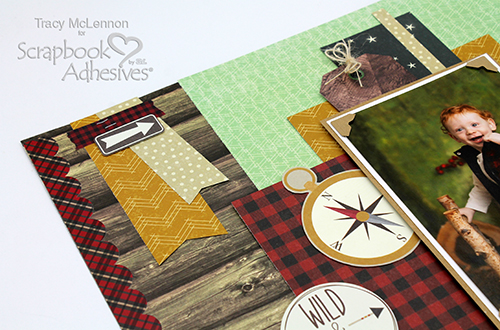
The final touches are a few more embellishments and a burlap string bow to the top of the tag. All of these things create the sweetest little boy layout.
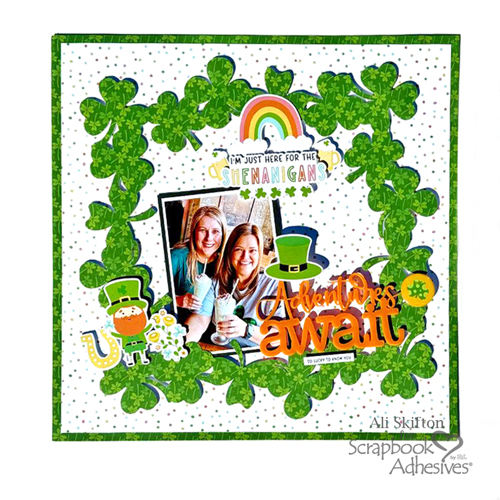
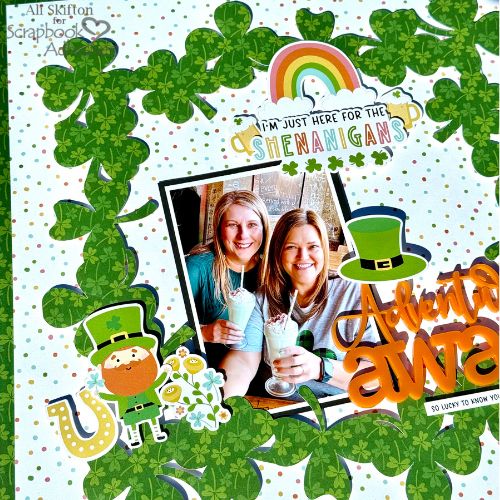
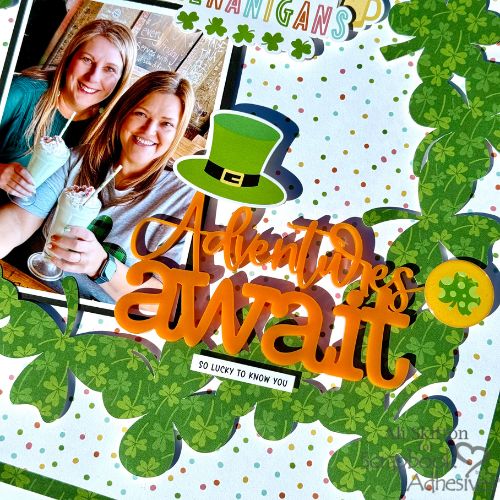
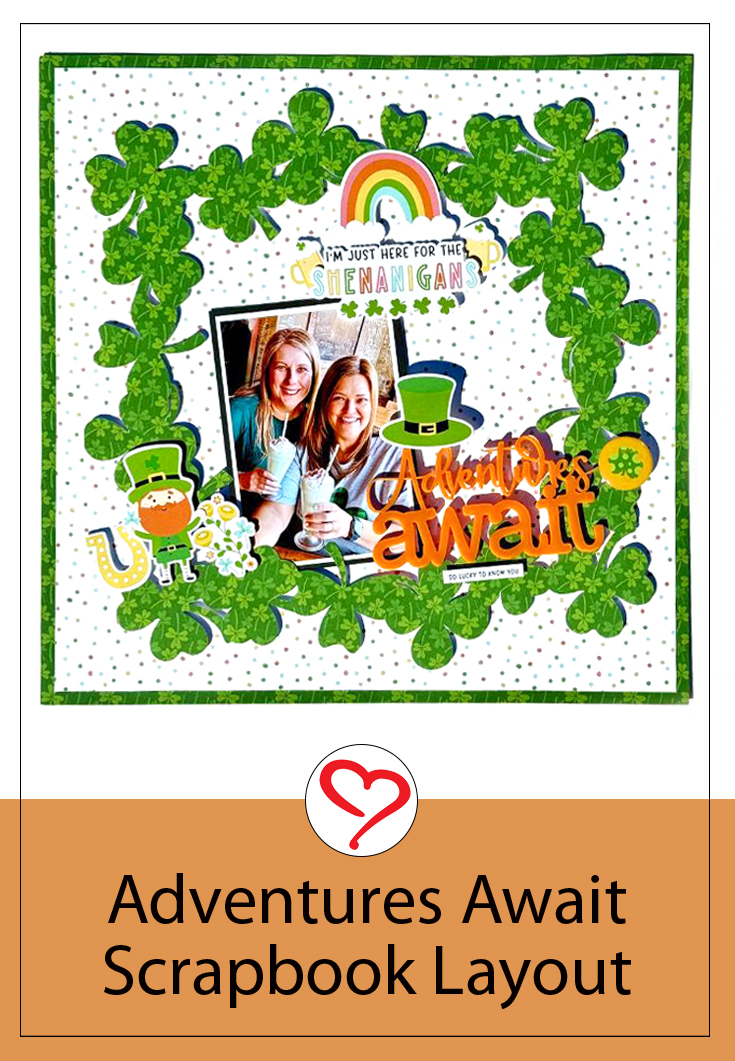
Hi everyone! It’s Ali here today! I’m super excited to share this fun St. Patrick’s Day layout, Adventure Awaits, featuring the Adhesive Dots Micro—perfect for using acrylic word titles! My friend Sheri and I celebrated St. Patty’s by heading out to dinner in downtown Milwaukee, where we indulged in the most delicious shamrock shakes—they were pure heaven!
Adventure Awaits Layout Back Story
For our adorable photo, I used an Echo Park collection, cutting out a shamrock frame from a 12×12 sheet. To add dimension, I used the Crafty Foam Tape White 108ft. on the frame, making it pop! Plus, I added the 3D Foam Squares White Mix behind my stickers and flair from Scrappin Happy Studio to really make my page come to life! Did you see the leprechaun hat popping off the title? That’s because I stacked three foam squares behind it!
Final Element Details
I also used the Adhesive Dots Micro behind my Color Cast Designs acrylic word title “Adventures Await!” These little dots are fabulous to work with and are strong enough to hold down heavier materials—even though they’re small, they are mighty!
Wherever you go and whatever you do, may the luck of the Irish be there with you!
Thanks for visiting! Ali Skifton (FunAdventuresWithAli)
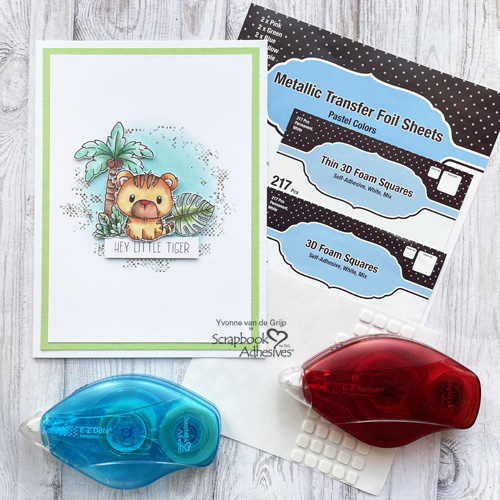
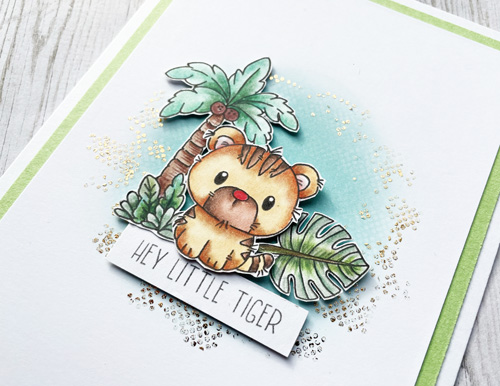
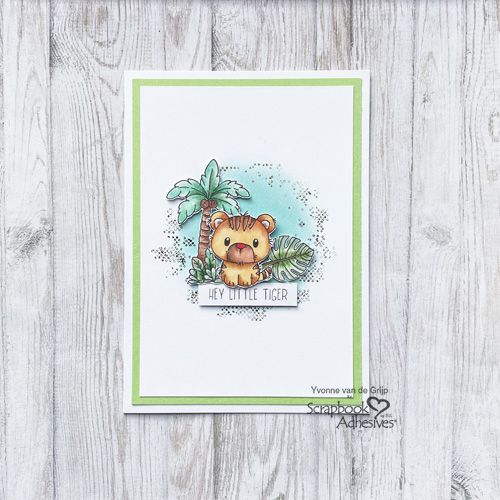
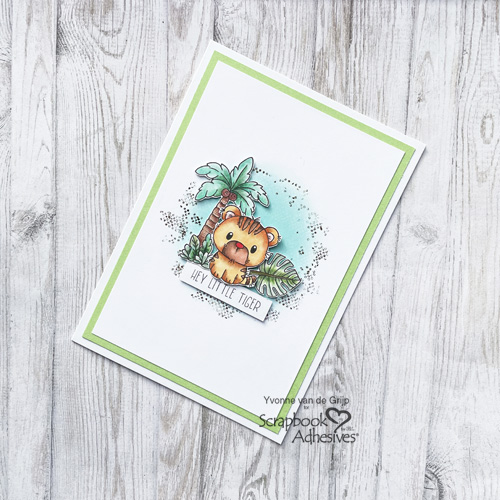
Hi everyone, Yvonne here with a Cute Little Tiger Card. To add a little extra sparkle to the card, I accented it with a subtle gold dotted background using the Wear Your Adhesive on the Outside technique.
I would love to share how I made my card. Would you like to join me?
Creating the Tiger Card Panel
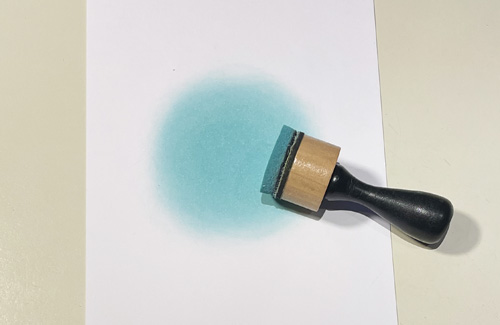
Make a blue circle on a piece of white cardstock with blue chalky ink and an ink blending tool. Just add a dab of the blue ink to the center of the cardstock and rub it in a circular motion. This creates a lovely “glow” of blue background for the Cute Little Tiger Card. Designer’s Tip: Use a chalky ink to give it a better glowing effect, as it dries slowly than normal ink and is easier to blend.
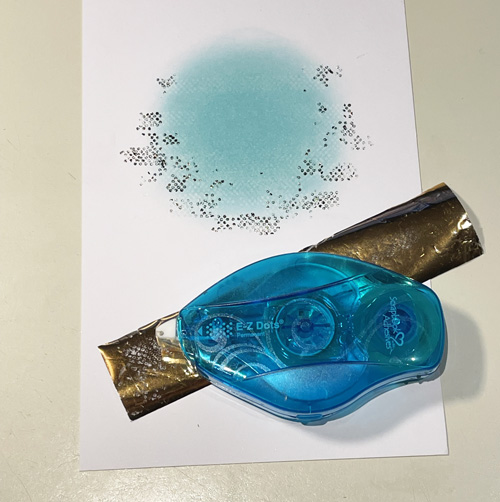
Wear Your Adhesives on the Outside with E-Z Dots®
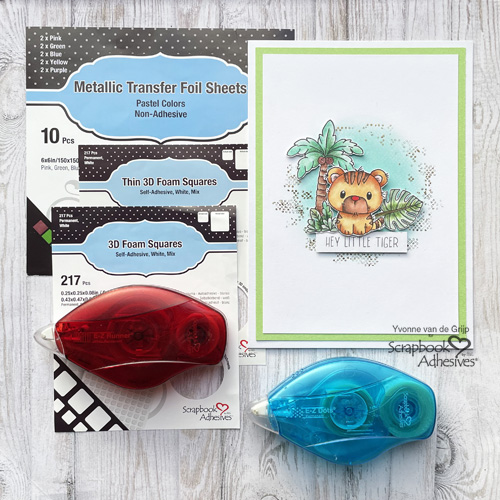
Roll and tap the E-Z Dots® Refillable Dispenser across the inked circle, leaving tiny glue dots, as shown in the image. Next, take a piece of gold foil from the Metallic Transfer Foil Sheets Pastel Colors and with the color side facing you tap on the exposed dotted adhesive. Rub the foil to transfer the color. Reapply the foil in missed areas.
For my Cute little Tiger Card, I stamped a little tiger, a palm tree, and a leaf on a piece of white cardstock. Next, I colored the images with color pencils, and fussy cut them. Adhere the palm tree and the leaves to the card using Thin 3D Foam Squares White Mix. Using 3D Foam Squares White Mix, I secured the little tiger for an extra lift. Lastly, cut a sentiment banner and adhere to the card with Thin 3D Foam Squares White Mix.
Other: Stamps: Lili of the Valley™ ( Safari A5 Stamp Set); Coloring Pencils: Caran d’Ache (Luminance Coloring Pencils); Ink: Ranger Ink (Distress Oxide Ink by Tim Holtz in Salvaged Patina); Ink Blending Tool; Paper Trimmer; Scissors; Craft Knife; White and Green Cardstock
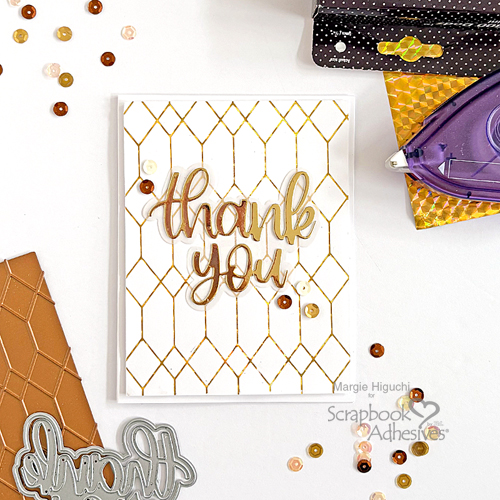
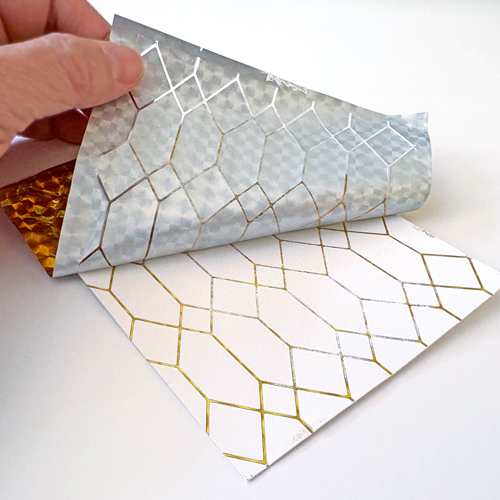
Are you looking for an elegant thank you card? I was! We have a wedding to plan this year with my youngest son 🙂 I created thank you cards like this Geo Diamond Thank You Card to give at the rehearsal lunch. Using our Metallic Transfer Foil Sheets with the hot foil system, I loved how they turned out! Hi, Margie here today and let me share my process with you.
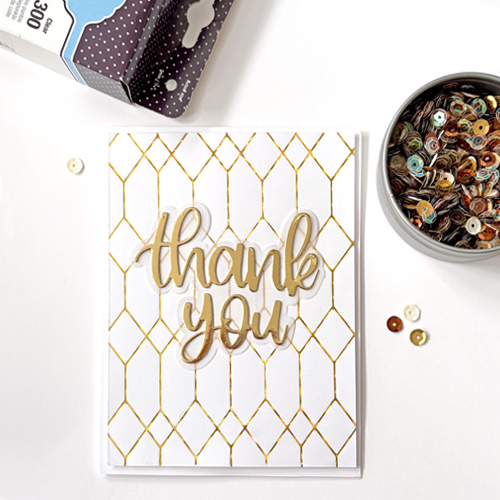
Geo Diamond Background
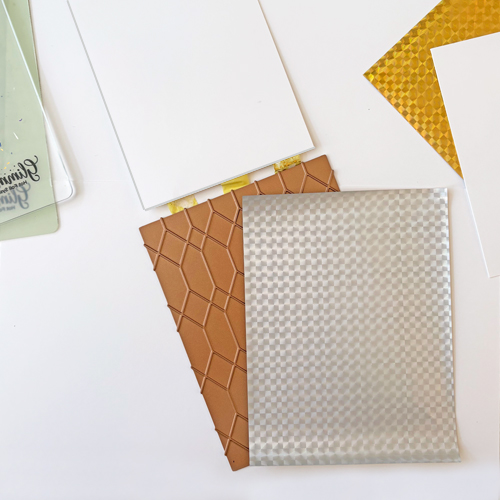
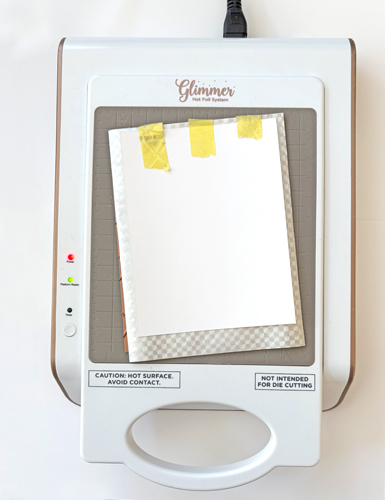
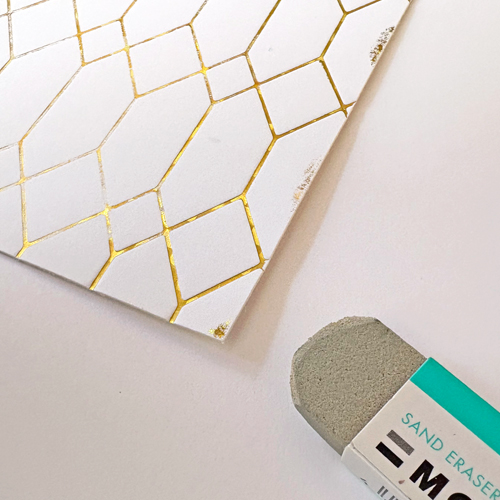
Following the instructions on my hot foil system, I used a gold foil sheet from the Metallic Transfer Foil Sheets Celebrate Colors. These foil packs are great as they have two sheets of five different colors and are packaged flat – no frustrating curled sheets! Depending on the pressure and the foil design, test before committing. Designer’s Tip: a sand eraser is your best friend if you have over-foiled areas.
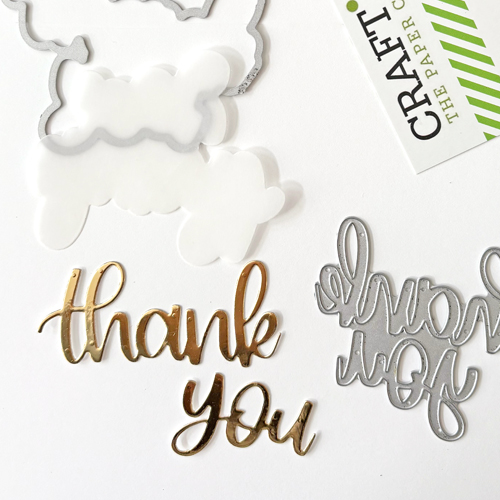
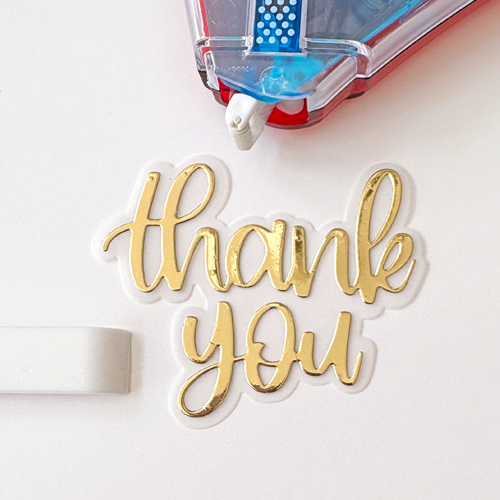
Creating the Sentiment
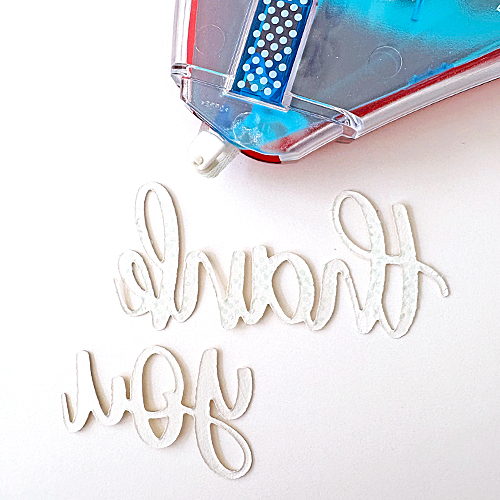
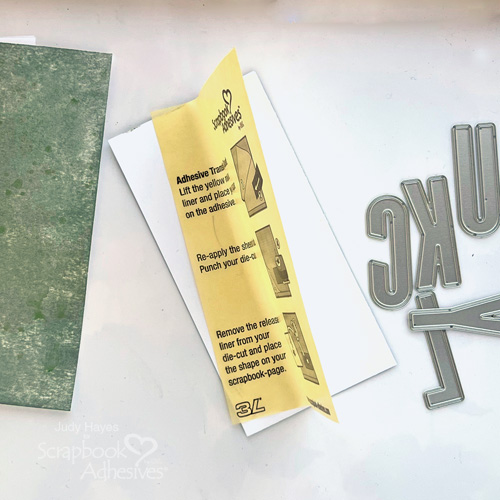
Die-cut the sentiment with gold mirror cardstock for extra sparkle! Then die-cut its outline with vellum paper to finish and anchor the greeting. Usually, I place the Adhesive Sheets 4 x 6″ on the back of the mirror cardstock before die-cutting but I ran out. #Gasp!
I used the E-Z Runner® Grand Permanent Dots Refillable Dispenser. If you run it through your die-cut words, it only hits the words and rarely leaves dots on the table surface below. If it does, rub them off. Designer’s Tip: Use the crease tool to press the words into the vellum outline for a firm adhesion.
Let’s put this Geo Diamond Thank You Card together! For a subtle lift, I used the Crafty Foam Tape White 108ft. because of its 1/32″ height (half of 1/16″). We also have Crafty Foam Tape White 54ft. which has a height of 1/16″. Add the panel to an A2-size (4.25 x 5.5 in.) white cardstock card base. To finish, I randomly placed sequins with the Adhesive Dots Mini.
I hope my Geo Diamond Thank You Card tutorial helps when looking for an elegant design!
Other: Craft Dies: Craft Fancy (Handwritten Thank You Die Set); Hot Foil Plate: Spellbinders Paper Art (Geo Diamond Glimmer Hot Foil Plate); Sequins: Buttons Galore & More (NAME); Vellum Paper; Gold Mirror and White Cardstock; Score Board and Crease Tool; Paper Trimmer; Sand Eraser
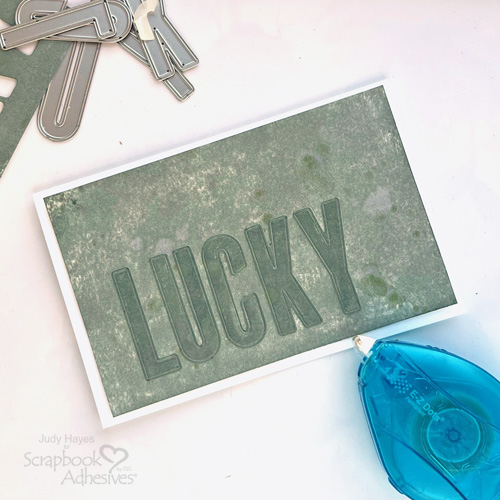
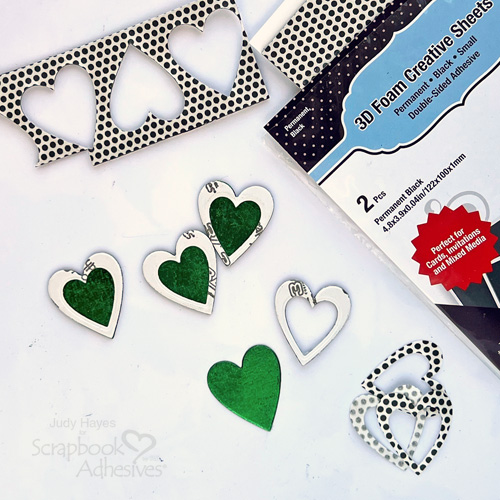
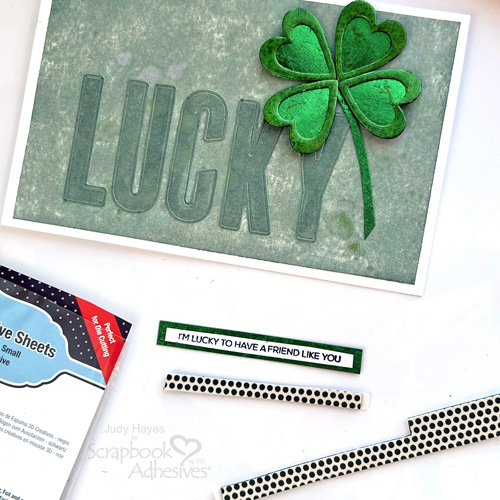
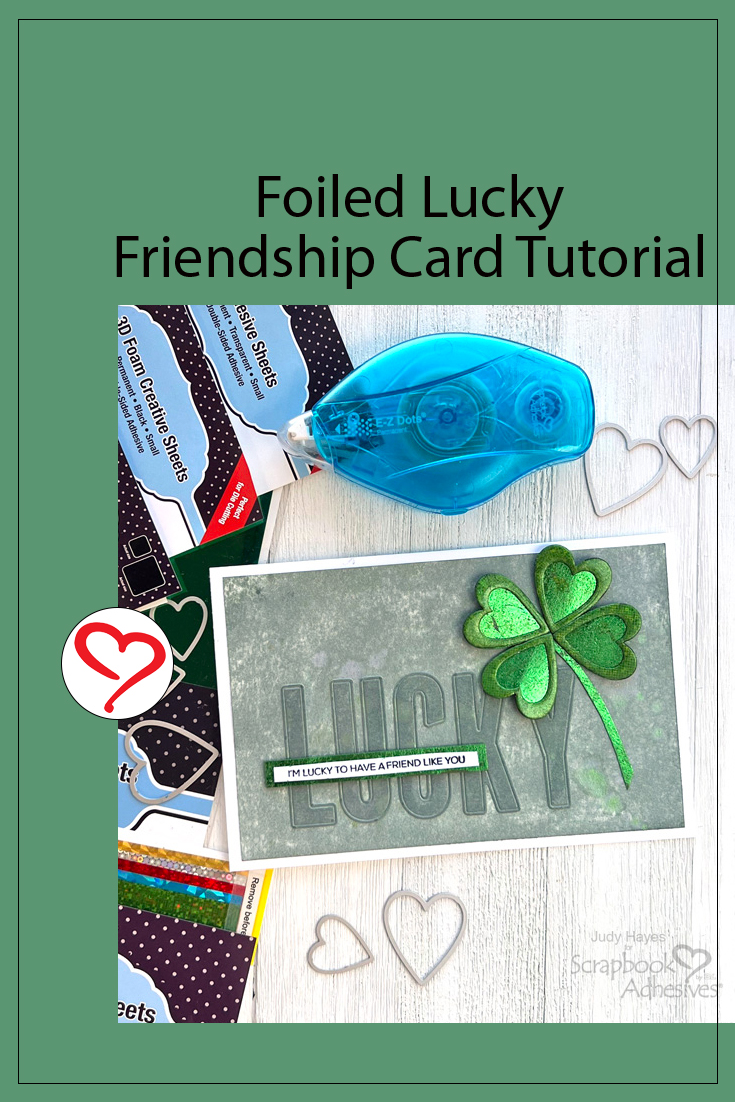
Hi, Judy here today! It’s almost St Patrick’s Day which inspired me to make this Lucky Friendship Card featuring a shiny shamrock. I used Adhesive Sheets, 3D Foam Creative Sheets and Metallic Transfer Foil to make hearts for the shamrock. Scroll down to read all the details.
Lucky Friendship Card Base and Layers
For the card base, cut a piece of 8.25 x 6.5-inch white cardstock, score and fold to form a 4.25 x 6.5-inch card. From another piece of white cardstock, cut it to a 4 x 6.25 inch rectangle and a 3 x 6 inch rectangle. Then cut a piece of 3 x 4-inch green cardstock.
Ink and Distress Cardstock Pieces
Use Distress Ink Oxide Iced Spruce ink pad for a direct-to-paper application to color both white cardstock pieces. Apply more ink to the smaller piece to make it darker. Mist both pieces with water. Then spritz each piece with Distress Spritz Mowed Lawn. Allow to dry
Die-Cut Letters
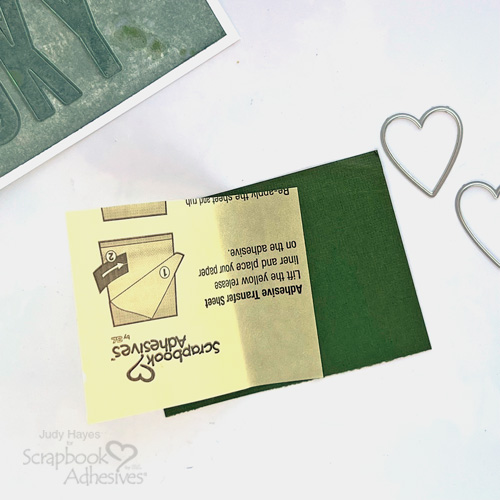
Apply a sheet of Adhesive Sheets 4 x 6in. to the back of the small inked paper and burnish to adhere well. From that piece, use a die-cutting machine and alphabet dies to cut letters for “LUCKY”
Attaching the LUCKY Letters
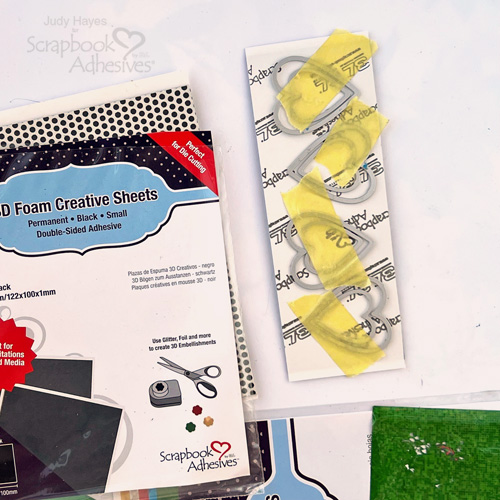
Carefully remove die-cut letters from dies, peel liners and fasten to large piece of inked paper. Use ruler to align letters about .375 inches from bottom and .75 inches from left edge. Press firmly in place. Designer’s Tip: Use a heat gun to heat letters to help adhesive be more sticky after being pressed through die cutting machine. Apply adhesive to back of panel with E-Z Dots® Permanent Refillable Dispenser and fasten to card front.
Make Shamrock Pieces
Cut 3 x 4 inches piece of Adhesive Sheets 4 x 6in. and apply to green cardstock. If cardstock has texture, fasten to that side. Smooth side with Adhesive Sheet applied will be front.
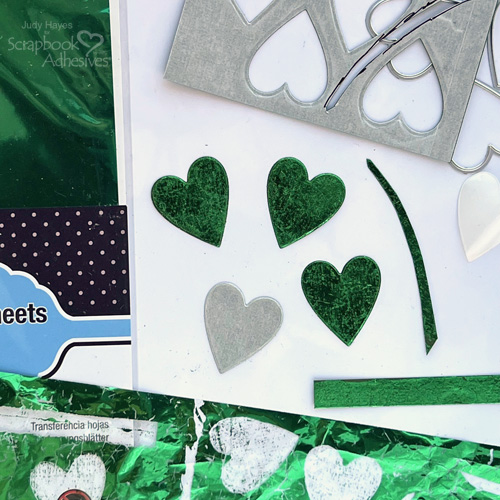
Use heart dies and die cutting machine to cut 4 hearts (approx.. 1.125 x 1 inches). Also cut strip .375 x 3.5 inches and stem for shamrock. Remember side with adhesive is front.
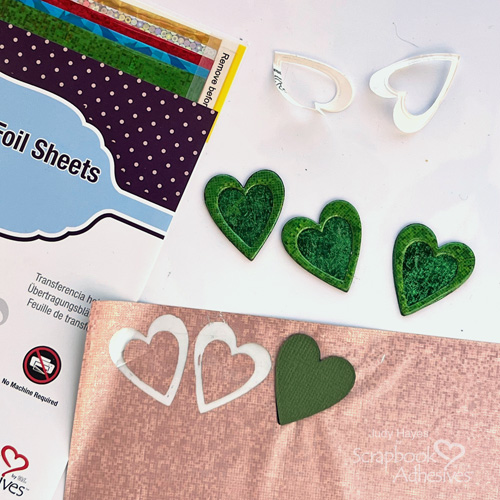
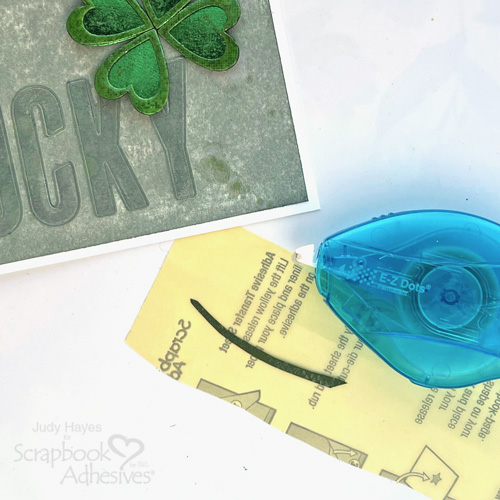
Peel liner from a heart, place face down on back side of green foil from Metallic Transfer Foil Sheets Variety Colors, turn over and press foil to transfer and then peel away. Repeat for each heart, stem and strip. (Designer Tip: I found it easiest to place heart face down on back of foil but you may lay heart on work surface, peel liner and press foil on it)
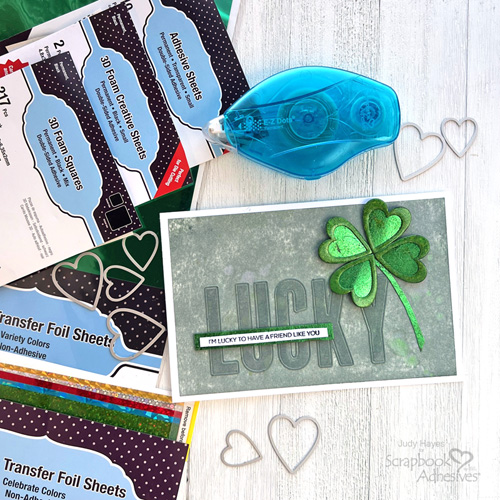
Cut a 2 x 6 inches piece of 3D Foam Creative Sheets Small Black. On the paper side of the 3D Foam Creative Sheet, align larger heart with smaller one inside, tape in place and repeat for 4 hearts. Run through the die-cutting machine to cut. Carefully remove hearts from 3D Foam Creative Sheet, and remove dies. Set aside smaller hearts for another project.
Carefully peel shiny liner from open heart, align on foil covered heart and press in place. Repeat for all hearts.
Peel liner from open heart and place on back of green foil from Metallic Transfer Foil Sheets Celebrate Colors. Turn over and press the foil to the heart and peel away. Repeat for all hearts.
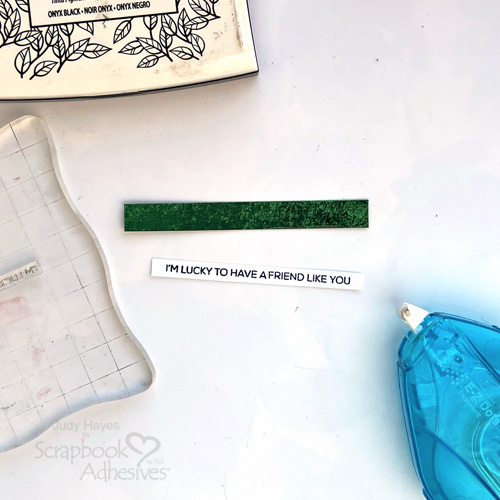
Stamp the Verse
Stamp verse on white cardstock with black ink and trim to narrow strip about 2.875 inches long. Place face down on scrap paper and apply adhesive to back with E-Z Dots® Permanent Refillable Dispenser. Fasten on foiled strip. Designer’s Tip: This verse stamp had word “crafty” in it which I omitted by cutting the verse apart.
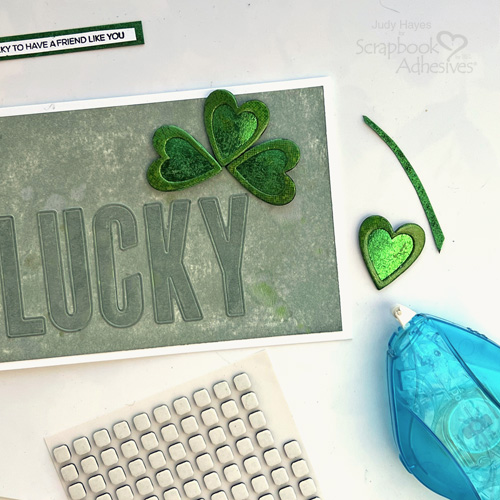
Assemble Shamrock
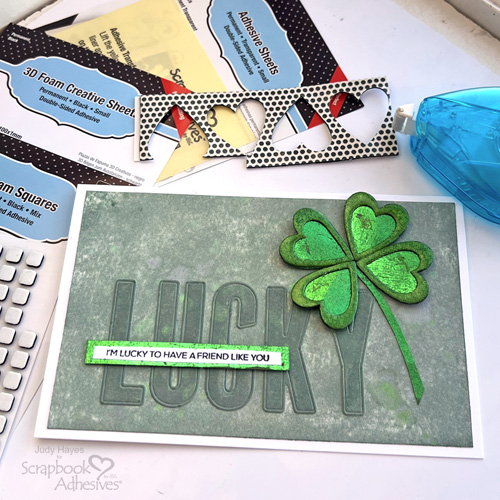
Slightly bend each heart so sides curl back. Place small square from 3D Foam Squares Black Mix near top on back of each heart. Arrange on card. Use E-Z Dots® Permanent Refillable Dispenser to apply adhesive on the back of one heart point, remove liner, and press the heart in place on card. Repeat for each heart.
Cut narrow strip of 3D Foam Creative Sheets Small Black and fasten to back of verse strip. Peel liner and attach the verse to the card front across the letters.
Now this sweet Lucky Friendship Card is ready to send! I hope you try making accents similar to mine with the 3D Foam Creative Sheets Small Black and dies in your stash!
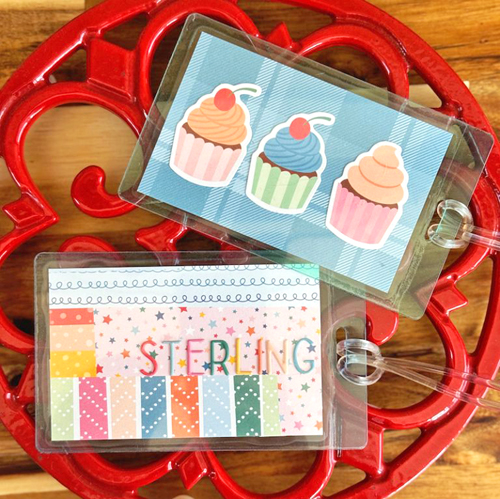
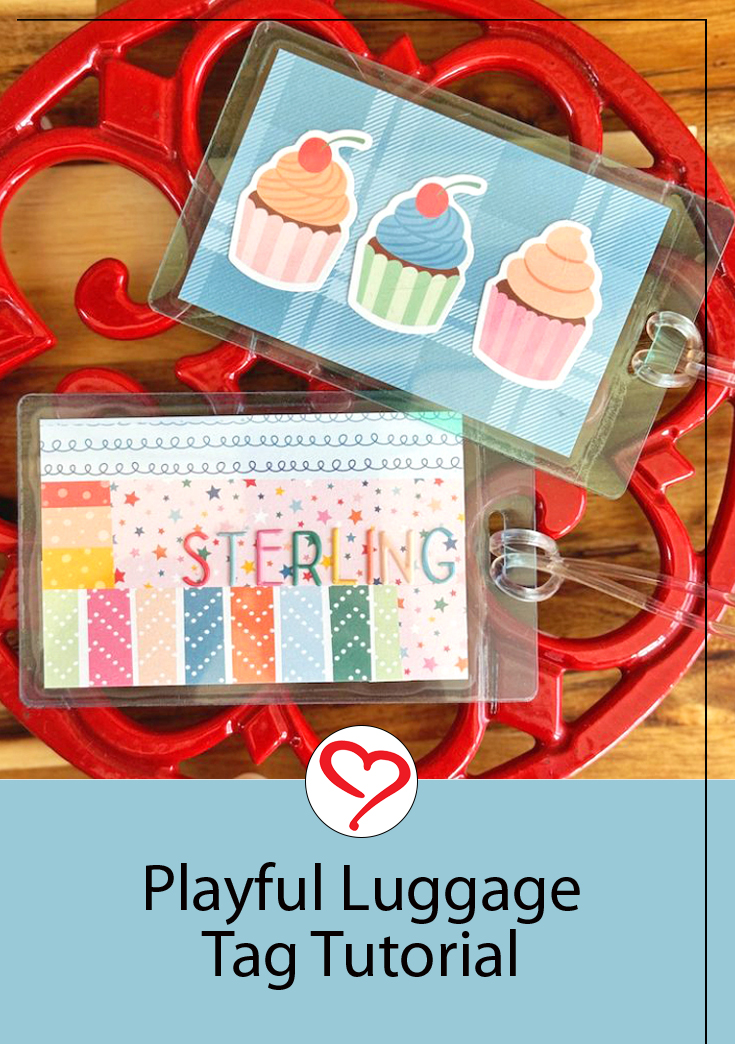
Hi, this is Jingle here today sharing a super simple and useful project! We are making Playful Luggage Tags to dress up a backpack, luggage, and more. Another bonus…it’s a great way to find your pack or luggage right away!
Playful Luggage Tag Ideas
These tags come together so quickly! A perfect accent for a kid’s backpack, your luggage…even as a gift tag on a basket or bottle of wine! Just customize your materials for the recipient!
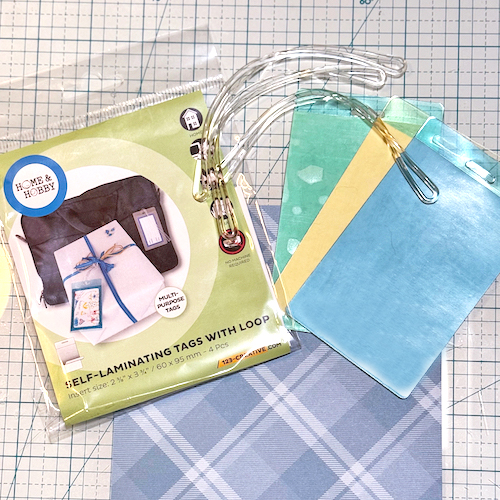
Gather Up Your Tags
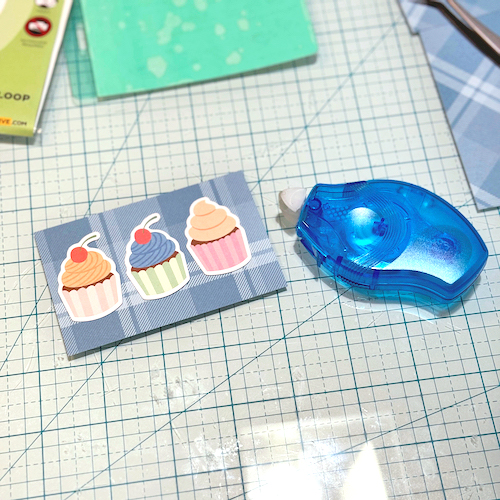
To begin, you are going to want to pull out the Self-Laminating Tags with Loops. These come with 4 different colors in the pack, so you can customize based on your favorite colors! There is a pink one, too, but my own kiddo stole that one before I took the photo. Naturally. You will also need some patterned papers of your choice, some stickers or die cuts, and alphabet stickers or dies.
Embellish The Tags
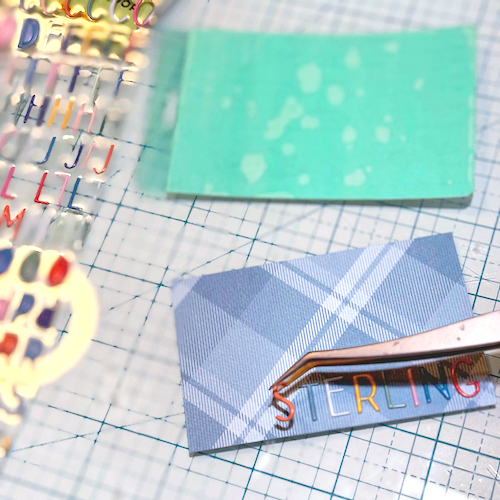
Begin by cutting the patterned paper to size. The package for the Self-Laminating Tags with Loops tells you the exact dimensions to use, which is super nice! After trimming, you can add your name using alphabet stickers or die cut letters. I use tweezers for placement as I find it easier to see where I am placing the letters that way.
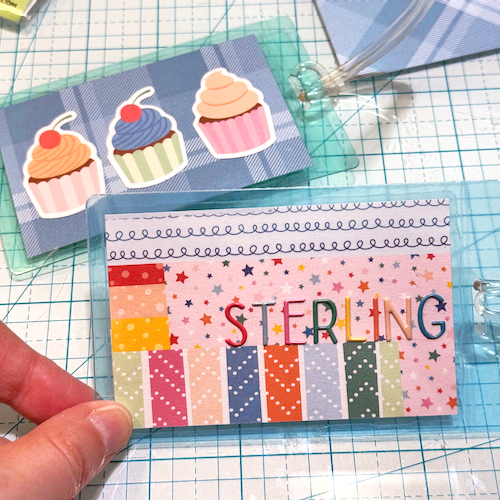
For this one, I kept the one side simple with the name and a single ice cream die cut and then added three cute cupcake die cuts using the E-Z Runner® Petite Permanent Dots Refillable Dispenser. That little guy is perfect for small projects like this one! I use plenty of adhesive so I am sure they will stay secure.
Assemble
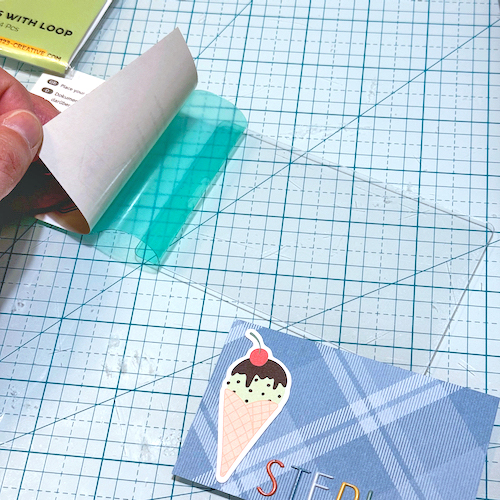
The next step is to add the insert into the Self-Laminating Tags with Loops! These are nice and sticky, so you will gently peel away the colorful side, carefully place your insert where you want it to be and then gently lay the sticky, colorful layer over the insert to seal it into the tag. Only the colorful side has the adhesive so you do have some wiggle room to move your insert into the perfect spot.
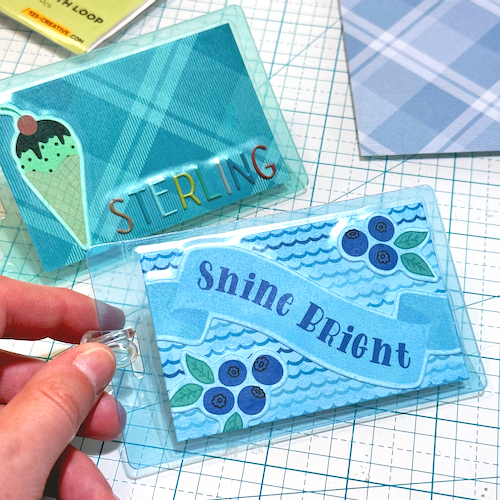
Finally, you simply add the clear plastic loop to the tag to finish it off! If this is for a gift, you could replace the loop with a ribbon or something different. But if this is for a backpack or luggage, these nice strong loops are really fantastic! I love the high quality of the tag pieces.
Remember that the colorful side of the tag will go over one side of your insert, providing a neat color overlay look. These were so fun, I made another one straight away.
I do hope you give these fun Self-Laminating Tags with Loops a try! This is a super kid friendly project, too. My five-year-old created one right alongside me to give to his Daddy.
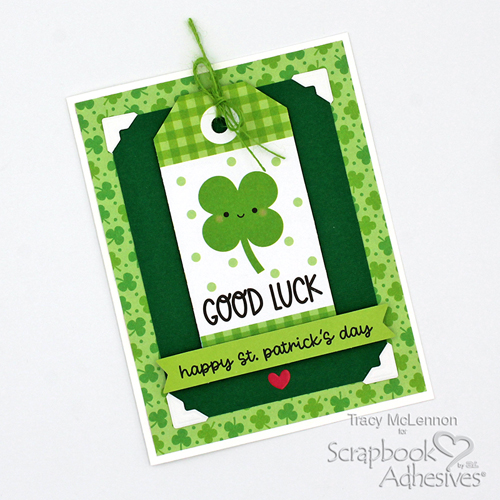
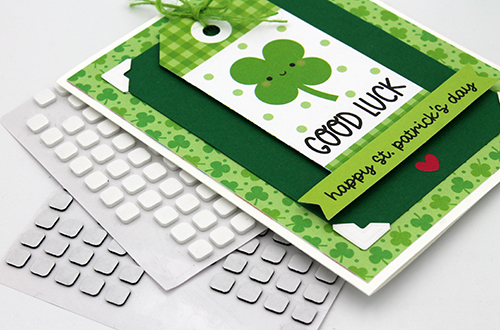
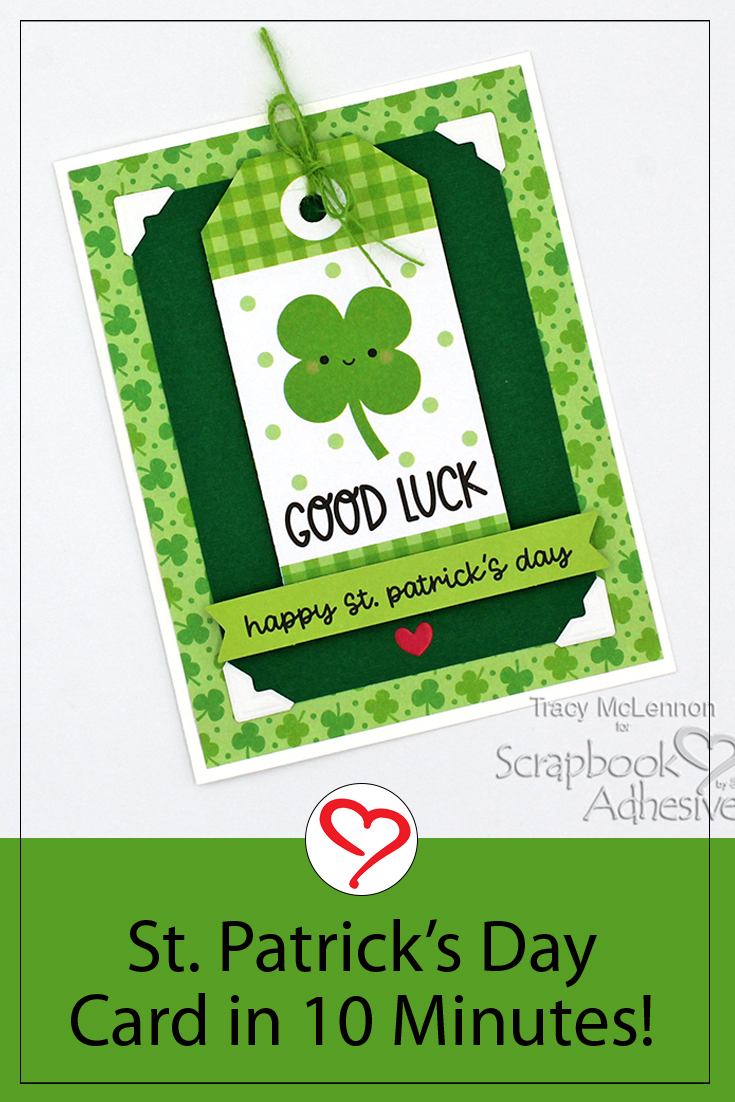
Hello crafty friends! Tracy here. Today, I have a quick and easy St. Patty’s Day 10 Minute Card to share. Here are all of the details.
St. Patty’s 10 Minute Card Base and Layers
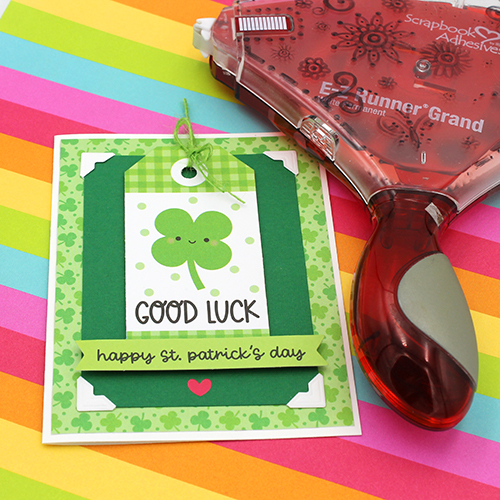
Cut the card base from white cardstock. Cut the card front from green patterned paper. The top layer of this St. Patty’s 10 Minute Card is cut from green cardstock. Adhere the bottom layers together using the E-Z Runner® Grand Refillable Dispenser.
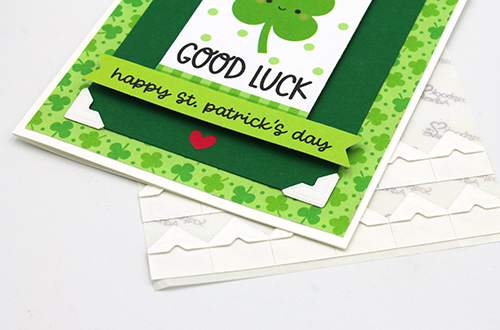
I chose to add the green cardstock layer to the card front using Creative Photo Corners White. Using Creative Photo Corners on a card front frames layers nicely, and adds dimension and texture.
Add the Tag Element and Finishing Touches
Place the coordinating tag to the St. Patty’s 10 Minute Card using Thin 3D Foam Squares Black Mix. Then pop up the sentiment towards the bottom of the card front with 3D Foam Squares White Small Size. Create differing heights from the 3D Foam Squares adds so much interest to a simple card.
The final touches are to add the heart sticker and the burlap string to the top of the tag.