You are in our US store • Switch to Europe store

Sympathy Card

Hey there friends! It’s Lisa with you today and I’m sharing a little geometric die-cut sympathy card that I created. Too many losses in my world lately and I really dislike that I need to have these on hand. Boo!

LisaAdametz-Sorry-1

Just a few simple steps to make this card and you can mix it up to make a few on hand.

1. Die cut a square panel from water color paper.

2. Use Gelatos® in 3 colors create a watercolor background.

3. Die cut another square. Stamp sentiment in embossing ink and heat set with a silver embossing powder.

4. Die cut a circle with another circle inside. This will make a solid circle and a “ring”. Apply E-Z Dots® Permanent Refillable Adhesive to the ring and adhere to half of the watercolor background. (Set the circle aside for later.)

LisaAdametz-Sorry-2

5. (Positioning of ring)

6. Apply 3D Foam Squares – White, Regular onto back of watercolor square and sentiment square.

(Not pictured.) Cut patterned paper so that it is 1/4″ smaller than card base.

7. Apply E-Z Runner® Permanent Strips to the back of the patterned paper, wrap piece of satin ribbon around left hand side of paper, and adhere on backside.

8. Adhere patterned paper to card base. Again, using E-Z Runner® Permanent Strips, adhere the silver circle under the ribbon on the upper left hand side.  Remove the backing and adhere the watercolor background square with the 3D Foam Squares – White, Regular to the the patterned paper, and the sentiment square on top of that. I tucked some 3D Foam Squares – White – Small under the ring and then cut it off at the edge. Done!

LisaAdametz-Sorry-3

Here’s a little close-up from the side so you can see the shimmer of some of the elements used:

LisaAdametz-Sorry-4

Thanks so much for joining me today and I hope that this card inspires you to us your Adhesives, dies, and watercolors in a whole new way!

Supplies:
From Scrapbook Adhesives by 3L®:
3D Foam Squares White, Regular
3D Foam Squares White, Small
E-Z Dots® Permanent Refillable Adhesive
E-Z Runner® Permanent Strips Refillable Adhesive

Other Supplies:
Faber-Castell Design Memory Craft® Gelatos® in Iced Pear, Kiwi, and Metallic Icing
Technique Tuesday Stamp (You’re So Sweet)
Satin Ribbon
Dies from Lawn Fawn and My Favorite Things
Embossing Powder from Wow!

LisaAdametz-sig


Springtime Hello Friend Card

0315LYhellofriendcard


Hello Latisha here with you today.  There is just something about spring, and probably living in Florida that draw me to bright happy colors.  Recently I received the #ForeverYoung paper collection from Bo Bunny.  We have been having a staring contest of late, so I decided to open up the package and make a card.

1. I used one of the pieces from the collection to be my card base, so I trimmed that down to 4.25 x 5.5 inches.

2. Next, using the Spellbinders Floral die, I cut/embossed using another sheet of bright pink pattern paper.

IMG_8162


3.  Place Scrapbook Adhesives by 3L Crafty Foam Tape, as well as 3D Foam Squares (white small) on the back of the die cut.

IMG_8163


4.  Peel off the protective sheets on the adhesive, and adhere to the card front.

IMG_8164


5.  Trim out the little tag/square from pattern paper, round the corners with a corner rounder.

IMG_8165


6.  Place Scrapbook Adhesives by 3L Crafty Foam Tape on the back of the die cut.

IMG_8166


7.  Adhere die cut to the card.

8. Place Bo Bunny rhinestones onto the diecut.

9. Tie May Arts twine around the top of the card.

10. Add a rhinestone to the center of the bow.


0315LYhellofriendcard2


Materials Used:

Scrapbook Adhesives by 3L Crafty Foam Tape

Scrapbook Adhesives by 3L 3D Foam Squares (white, small)

Bo Bunny #ForeverYoung paper collection

Bo Bunny pink rhinestones

Spellbinders die template

May Arts twine

corner rounder

Spring Fever Blog Hop with Spellbinders!

Welcome to the second day of the Spring Fever Blog Hop sponsored by Spellbinders™!

Today we feature 2 tutorials from our Design Team Members Asia King and Angela Ploegman. We’re sure you’ll love them!

Dress Form Tutorial from Asia King!

I have a tutorial showing how to turn an old tired paper mache dress form into a shabby chic number.

Shabby Chic Dressform_Asia King6

I bought this old dress form at a charity jumble sale and it was crying for a make-over :). So let’s get started.

Shabby Chic Dressform_Asia King1

1. Prepare your dress form and paints. Give it a gentle wipe to make sure it is clean and free of grease.

2. Cover the dress form with a couple of generous coats of paint. Allow to dry.

3. Add a layer of Primitive paint, wiping it off gently in parts with a wet baby wipe. For ease of distressing work in sections to avoid paint drying out too quickly. Allow to dry fully.

4. Randomly stamp the text stamps all around the dress form. I stamped freehand without a stamping block. Alternate the direction of text, overlap the prints and stamp parts of the images – this will help create a decoupaged look.

Shabby Chic Dressform_Asia King2

5. To create a pleated skirt cut several square-ish pieces of canvas ribbon. Turn each piece round with a corner pointing up (it will resemble a diamond shape).

6. Pull the left edge towards the centre and press with your finger to make a small fold – use the photo as a guide. Add a strip of Extreme Double-Sided Tape 1/8″ along the right edge.

7. Pull the right side of the fabric and align it with the edge of the fold as shown.

8. Wrap Extreme Double-Sided Tape 1/4″ around the waste of your dress form.

Shabby Chic Dressform_Asia King3

9. Arrange your fabric pleats as shown. Press the fabric into the Extreme Double-Sided Tape to ensure good contact with the adhesive.

10. Die cut vintage music sheet using the Oval Regalia die set- arrange the dies as show (at this point I wasn’t sure if I was going to use all the die cuts). Use the largest oval to create a frilly ‘ribbon’ for the skirt.

11. Adhere the die cut ‘ribbon’ by pressing the paper into the tape in the gaps between the pleats.

12. Continue adding layers with lace ribbons and Extreme Double-Sided Tape 1/4″ until you are happy with the result. I also added a small diamante buckle.

Shabby Chic Dressform_Asia King4

13. Die cut several petals and blooms from the Peony set and create a 3D flower.

14. Add ribbons and pearl strings to the back of the flower with Adhesive Dots Small and Adhesive Dots 3D. Adhere to the dress form. Secure with decorative pins, if necessary.

15. Tear narrow strips from Adhesive Sheets 6×12″ and adhere around the bottom and the neck of the dress form. Sprinkle generously with Pearlized Mica and rub any excess flakes off.

16. Cover your second largest die cut shape with adhesive using Adhesive Sheets and adhere around the neck to create a necklace.

Shabby Chic Dressform_Asia King5

17. Cut a length of the narrow lace ribbon and cover with adhesive. Adhere around the neck line and embellish with small flat back pearls.

18. Cover some mulberry paper with Adhesive Sheets and die cut some leaves using the die from the Peony set.

19. Add Adhesive Dots Small to three small ribbon roses.

20. Arrange the leaves and the roses over the shoulder as shown above.

Shabby Chic Dressform_Asia King9

I have recently fallen madly in love with the crushed glass mosaic finishes that are currently trending in the home decor department stores across the UK. You can see them used on lamp bases, vases, mirrors, frames and even small table tops. For me the most exciting thing was to discover that you can easily recreate this sophisticated look with Adhesive Sheets and Mica Fragments.

Shabby Chic Dressform_Asia King8

You don’t have to be limited to the straight lines of your Adhesive Sheets either. And that’s because you can die cut your Mica covered sheets with a guaranteed full coverage and no gummed up dies 🙂 – just as I have done to create a rose lattice trellis in my recent Roses of Friendship card.

Shabby Chic Dressform_Asia King10

I hope you enjoyed my tutorial – I would love to know what you think! Feel free to share and pin the graphic above for future reference :).

To finish my dress form I replaced the original ugly metal stand with a new one I made myself from old wooden chess pieces :). To find out more and to check out additional close-up pictures of my project, be sure to also visit my blog Under A Creative Spell!

Supplies:

Foiled Ombre Card Tutorial by Angela Ploegman

Spellbinders Dies and Scrapbook Adhesives by 3L® Adhesive Sheets are a perfect match! The super thin and super sticky Adhesive Sheets cut cleanly, leaving no residue…a MUST in order to be successful with this technique. Here’s the card I created using the technique to produce the custom foiled and inked background:

angela ploegman spellbinders thank you card

Tutorial

1. Die cut the Adhesive Sheet 4×6″ with a background die.

angela ploegman spellbinders thank you card die cut adhesive

2. Peel the protective backing and apply the die cut Adhesive Sheet to the card base. It’s difficult to see in the photo, but it’s there!

angela ploegman spellbinders thank you card die cut application

3. Burnish the adhesive and then remove the top protective backing and apply silver leafing.

angela ploegman spellbinders thank you card foiled

4. Apply three different colors of ink blending well between colors. The super thin Adhesive Sheets make this possible!

angela ploegman spellbinders thank you ombre ink

5. Die cut the card border and apply to the card base using Crafty Foam Tape White.

angela ploegman spellbinders thank you card crafty foam tape

6. Stamp the sentiment, emboss with clear embossing powder and color the sentiment with the blue ink from the card base. Die cut using the perforated circle dies.

7. Adhere loops of jewelry wire the back side of the sentiment block with a Adhesive Dots Small. Adhere the sentiment block to the card front with 3D Foam Squares White Regular.

angela ploegman spellbinders thank you card 3D foam squares

That’s it! Super trendy and super easy….it’s what the right tools bring to EVERY project! Here’s a close up of the sentiment block with the foiled background:

angela ploegman spellbinders thank you card detail

Scrapbook Adhesives by 3L® Supplies used: Adhesive Sheets 4x6in, Crafty Foam Tape White, Adhesive Dots Small, 3D Foam Squares White Regular

Spellbinders Botanical Swirls, 5 x 7 Matting Basics A and B, Celebra’tions Perforated Circles,

Bazzill Basics Paper Card Stock, Close to my Heart Stamp, Tsukineko Ink, Ranger Embossing Powder, EK Success Silver Foil, Ranger Distress Inks, misc. jewelry wire.

And now on to the contests:


Spellbinders Spring Fling Blog Hop

a Rafflecopter giveaway

Be sure to visit Basic Grey® and Clearsnap® today for their tutorials and chances to win!

Check back with Spellbinders tomorrow for more tutorials and prizes!

Save

Save

Save

Save

Save

Save

Mother’s Day Card with 3D Foam Creative Sheets and Die cutting

Hi there,

it’s Stephanie here today and I want to show you a quick and easy Mother’s Day Card with 3D Foam Creative Sheets I made.

Stephanie_motherdaycard_1

You only need a piece of cardboard (I used a piece of an old packing box), 3D Foam Creative Sheets, your Die Cutting Machine and one or two flower Dies, a wood veneer and baker twine.

Stephanie_motherdaycard_2

First choose a Die with flowers and use your Die cutting machine to cut them out with 3D Foam Creative Sheets.

Stephanie_motherdaycard_3

I used the black and white 3D Foam Creative Sheet to got these two flowers. I made two flowers in different sizes to use them one above the other.

Stephanie_motherdaycard_4

Then emboss the flowers with beige embossing powder or another color you like and adhere them on your cardstock one above the other. I added a bit of white Gesso on my cardstock to give the background a shabby look. I also rounded the edges of my card.

Stephanie_motherdaycard_5

Use your E-Z Dots® Permanent to adhere the wood veneer on the top of the flowers.

Stephanie_motherdaycard_6

Color the wood veneer with red watercolor pens.

Stephanie_motherdaycard_7

Punch two holes on top of the cardboard.

Stephanie_motherdaycard_8

Tie a loop with twine. And that’s it. You are ready.

Stephanie_motherdaycard_9

Stephanie_motherdaycard_10

It was quick and easy card and I like the simplicity of it.

Have fun with the Mothers Day preparation and have a good day!

Stephanie


Supplies from Scrapbook Adhesives by 3L®

E-Z Dots® Permanent

3D Foam Creative Sheets

Beige Embossing Powder

Cardboard

Big Shot Plus

Sizzix Bigz XL Die – Jumbo Tattered Florals

Baker Twine

Neocolor II red

white Gesso

Card with Creative Photo Corners

Hello! Christine here today with a simple-to-make card that looks very effective with Creative Photo Corners.

CEmberson - Fan Card - 1

The base of my card is kraft and that matches perfectly with  Creative Photo Corners – Kraft.  I matted jade colored cardstock using E-Z Dots® Permanent Refillable Adhesive.  Before I matted the patterned paper I added the photo corners.

I then printed the sentiment and cut to a banner shape.  Both the fan die cut and banner have been adhered with 3D Foam Squares – White, Small – always good to have that extra dimension.

CEmberson - Fan Card - 2

Thank you for joining me today, remember to stop by the blog regularly to see lots of creativity with Scrapbook Adhesives by 3L® products.

Christine 

Supplies:

Scrapbook Adhesives by 3L® – Creative Photo Corners – Kraft,
E-Z Dots® Permanent Refillable Adhesive, 3D Foam Squares – White, Small

Spellbinders® dies – Blossom Fan, Blooms Four

Papers: Kaisercraft, Kaleidoscope Collection

Other supplies: kraft, jade, pale blue and pink cardstock, printer for sentiment.

3D Foam Happy Easter Card Tutorial

Today I am excited to be featuring Scrapbook Adhesives by 3L® adorable 3D Foam Easter Shapes set, 3D Foam Squares – Black, Regular, Pigment Powder – Brown and Pink, Adhesives Sheets – 4 x 6″ and E-Z Runner® Permanent Strips – Refillable adhesive to create this sweet Happy Easter card.

3D Foam Happy Easter Card by Margie Higuchi

With the 3D Foam Easter Shapes set, I took off the liner from the Bunny shape and brushed lightly the Pigment Powder – Pink on the sticky surface. Love the shimmer and light color it gave the shape.

3DFoamHappyEaster Step 2

Then I repeated the same process with the “Happy Easter” sentiment with Pigment Powder – Brown.

3DFoamHappyEaster Step3

After creating an A2 (4¼ x 5½”) size card base out of patterned paper, I started working on the card panel by using A2 Filigree Delight die set. I used the Adhesive Sheets – 4×6″ sheet for the Frame die cut and for the Oval die cut, I used E-Z Runner® Permanent Strips – Refillable adhesive.

3DFoamHappyEaster Step4 Step 5

To highlight the Bunny shape, I used the Tag die cut to frame the shape and used 3D Foam Squares – Black, Regular to make it pop.

3DFoamHappyEaster Step 1 Step 6

Assemble all the pieces and add “Happy Easter” to the card. Finished the card with two brown gems and it’s ready to send! Here’s another look…

3D Foam Happy Easter Card by Margie Higuchi

Supplies:
Scrapbook Adhesives by 3L®: Pigment Powder – Pink and Brown, E-Z Runner® Permanent Strips – Refillable, Adhesive Sheets – 4×6″, 3D Foam Easter Shapes and 3D Foam Squares – Black, Regular
Die: Spellbinders® Paper Arts (S5-177 A2 Filigree Delight)
Patterned Paper: Chickaniddy (Date Night Collection)
Cardstock: WorldWin Papers (Canvas)
Gems: Want2Scrap©

Happy (early) Easter 🙂
MargieH

Save

Baked With Love Card using Adhesive Sheets

Last week I was a baking fool, getting ready to visit my boys in college. I grabbed a cookie and my crafting supplies and got busy! I wish I could keep baked goods in the house all the time!

Baked with Love Card by Beth Pingry

Stamping the Baked Treats

I stamped the images twice, once onto white cardstock, then patterned paper. Next, I added Adhesive Sheets to the top of the white cardstock.Then I fussy cut all the stamped pieces. I layered the patterned shaped pieces onto the white cardstock pieces.

There are 2 spots on the serving dish without patterned paper; instead I covered the exposed adhesive with glitter.

BethPingry-BakedwithLoveCard2

To create a surface for the platter to ground it, I masked off the white cardstock with scrap paper and applied chalk with a stylus and foam tip. Using E-Z Dots Repositionable will hold the cardstock in place while chalking. Now it’s not floating in the center of the card.

Assembling the Layers and Creative Photo Corners

Next I stamped the sentiment, and assembled the card using Creative Photo Corners. I like to double up the Creative Photo Corners when I do layers, I feel like it creates a bit of a frame for the focal point. Here I used White and Kraft Corners, alternating the color of the corner with the color of the layer. White Corner on kraft paper, Kraft Corner on white paper.

You don’t need to use adhesive between the layers here, the Creative Photo  Corners will hold securely. However, since my cards get a lot of handling, I usually add E-Z Squares® between the layers and to secure the card base.

Sweet!

Thanks for visiting today!

Beth Pingry

Supplies Used:

Hello card using Adhesive Sheets for intricate die cuts

Hello!  AJ here sharing how I use the Adhesive Sheets with my dies for quick and easy adhesive die cuts!

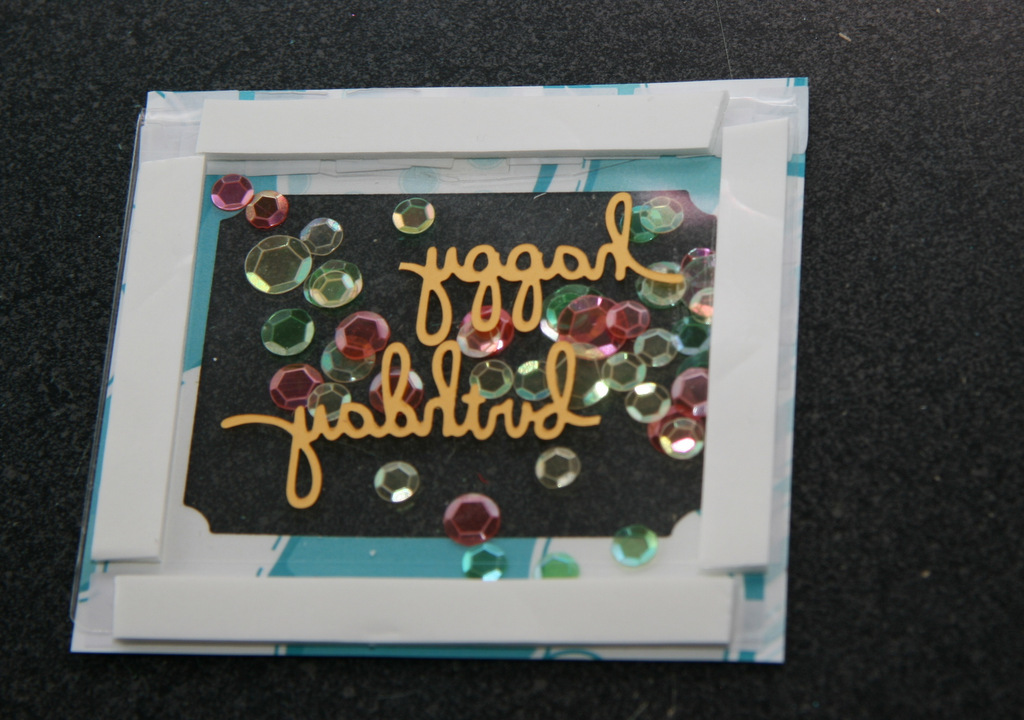
AJOtto-Hello-1Sometimes your die cuts are so small and thin getting your adhesive on them and not every where else is such a pain.  When you start with the Adhesive Sheets, it’s only on your die cut and no mess elsewhere.  And they come in 3 sizes, 4X6, 6 X 12, & 12 X 12.

AJOtto-Hello-2

To get started with the Adhesive Sheets, (here I am using the 6 X 12 size) peel back the yellow baking and adhered your card stock down to the sticky side.  Lay the yellow backing back over the card stock and gently burnish the adhesive to your card stock.AJOtto-Hello-3Because I want the backside of my dies sticky, I am placing my dies onto the yellow side, ensuring that when I pop them out, the backside will be covered with adhesive.  (If you are wanting the front to be covered with adhesive, you would cut from the other side)AJOtto-Hello-4Pop your dies out of the sheet, and they should easily come out of the die as well, peel the backing off and adhere to your card.  I adhered mine to my green tag.
AJOtto-Hello-5I then place a few 3D Foam Squares onto my tag, and secure it to my card.

Have you tried the Adhesive Sheets yet? love them!!


enjoy, AJ

Scrapbook Adhesives by 3L® products used: E-Z Runner® Permanent Strips RefillableAdhesive Sheets3D Foam Squares

Supplies: Spellbinders dies, twine, & card stock; Faber-Castell Design Memory Craft Glass Bead Glitter Gel, stencil, clothespin.


Roses Of Friendship With Adhesive Sheets

Hello everyone, Asia King here. Today I am sharing a friendship card, which I had lots of fun with. The inspiration for my card came while looking through some old photos of my auntie’s cottage garden. She has a lovely patch with a beautiful rose bush climbing over a wooden trellis. I’ve always loved sitting there, enjoying the sweet scent and delicate rustic blooms so I thought it would be fun to create a small rose trellis on my card.

Roses of friendship_Asia King1

I began by covering a piece of golden sand cardstock on both sides with Adhesive Sheets 6×12″. Next I peeled off the protective sheet from one of the sides and covered the card fully with Gilded Mica Fragments. Once I’ve rubbed off any excess flakes, I run the panel through my die cutting machine with the Grateful Lattice die. This became my trellis frame (I’ve kept the die cut Lattice pieces for another project). Because the frame already had the adhesive, it was really quick and easy to fix it in place on a red mat card.

Roses of friendship_Asia King5


Next I stamped Wild Roses collage stamp onto the Shuttered cardstock, covered the back with Adhesive Sheets 6×12″ and die cut it with the Grateful Lattice die. This time I used the Lattice shapes to ‘fill the gaps’ in the trellis frame (and kept the rest for another project).

Roses of friendship_Asia King4

Finally, I stamped the Wild Roses again onto watercolour paper and coloured them in with Inktense pencils. I again covered the back with Adhesive Sheets 6×12″ and fussy cut the roses. I then decided to snip the stems off and adhere them straight onto the card and I popped the blooms onto some Thin 3D Foam Squares – Mix White.

Roses of friendship_Asia King3

To assemble the rest of my layers I used Home & Hobby E-Z Runner® Grand – Permanent Strips (available soon!) and for my embellishments I used DODZ 3D. I finished the card with pearls, seam binding ribbon and decorative pins. I also cut out some words from an old acetate packaging (for Prima flowers) and fixed them in place with Adhesive Sheets 6×12″. Adhesive Sheets are perfect for transparencies because they are ‘invisible’ due to their full and even coverage – seriously, I just love this stuff! 🙂

Supplies:

Adhesive Sheets 6×12″Thin 3D Foam Squares – Mix White, Home & Hobby E-Z Runner® Grand – Permanent Strips, DODZ 3D

Other supplies:

Stampendous: Cling Wild Roses, Friendship Assortment Perfectly Clear stamps, Gilded Mica Fragments; Spellbinders Grateful Lattice die

Core’dinations Tim Holtz Kraft Core Shattered cardstock, patterned papers, Ganache StazOn Mini ink, Liquid Pearls, Inktense pencils, seam binding ribbon

Roses of friendship_Asia King2

I hope you’ve enjoyed today’s inspiration. Thank you for stopping by today!

Big crafty hugs

Asia King Blog signature

Save

Lucky Shamrock Card Tutorial

Hello everyone…or should I say “Top O’ the Mornin” to you?  St. Patrick’s Day is coming up, and I’m seeing green!

kellyklapstein-shamrock-10
I created this dimensional Lucky card with lots of Foam Products.

After I cut out my shamrock shape with my Brother ScanNCut machine, I matted it onto another piece of green cardstock using my Crafty Foam Tape and 3D Foam Squares.
kellyklapstein-shamrock-6

I placed 4 medium sized 3D Foam Hearts into each of the shamrock leaves and added green glitter. I love the sparkle!
kellyklapstein-shamrock-5

Then I used my E-Z Runner™ Permanents Strips to adhere this layer to my card base. The dispensers are interchangeable, so I put a red E-Z Runner™ Permanent Strips into my blue E-Z Dots™ Permanent dispenser.
kellyklapstein-shamrock-4

I also cut out the “Lucky” sentiment with my ScanNCut and used the small 3D Foam Squares to pop it up.
kellyklapstein-shamrock-3

Add a bit of twine, and the card is done!  With my leftovers, I quickly made another card.kellyklapstein-shamrock-9

Now I just have to figure out who is lucky enough to receive these cards!

May all your rainbows have a pot of gold! Happy St. Patrick’s Day!

Kelly Klapstein

ADHESIVES:  3D Foam Hearts, Crafty Foam Tape, 3D Foam Squares, E-Z Runner Permanent Strips

OTHER SUPPLIES:  Bazzill Basics Paper cardstock; Brother ScanNCut machine; Divine Twine