You are in our US store • Switch to Europe store

You’re Special Shaker Tutorial!

Happy Friday my friends! Michele here with a quick easy shaker card all ready for spring!  Shaker cards are all the rage these days!  They are so fun and interactive!
someone special

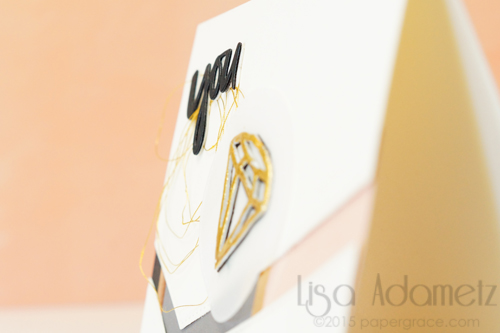
someone special close

someone special close two

The Keepsake Envelopes are perfect for slipping a handful of sequins and beads into.  I also used the 3D Foam Creative Sheets to create a focal point for my sentiment.

someone1

I used the die with my 3D Foam Creative Sheet to create my dimensional frame.  I adhered it directly to my Keepsake Envelope.  ( I love that it is sticky on both sides!)

someone2

I wanted a bit of subtle sparkle, so I sprinkled a bit of glitter.  No glue, no hassles, just peel the top off and you have this wonderfully sticky die cut!

someone3 copy

I cut my flower out of felt…..

someone4

Grabbed my patterned paper…..

someone5

I took a section of ribbon and pink twine……

someone7 copy

And tied my bow…..

someone8

I added my sequins to the envelope.

someone6

All of the  embellishments were adhered using Dodz™-Medium

someone9

I attached the envelope/shaker card to my card stock using the E-Z Squares®.

One last look at the finished product before you go!

someone special

I hope you all have a great day! Thanks so much for stopping by!

Supplies:

Save

Hello Card with E-Z Dots Permanent and 3D Foam Squares and Lawn Fawn

Hello there, It’s Stephanie here today and I want to show you a card with Lawn Fawn paper and stamps and my favorite Adhesives I made for Scrapbook Adhesives by 3L®.

card_1

Here is my tutorial for you how I created this card.

IMG_3657


1 – Take your Lawn Fawn Paper Pad “Beachside” and choose coordinating paper. Tear some strips.

2 – Adhere your strips with the E-Z Dots Permanent onto a paper. The torn paper looks like waves.

3 – Cut out your size of card from that paper scraps paper.

4 – Stamp your image from the Lawn Fawn stamp set “Critters in the Sea” on a piece of white cardstock.

5 – Cut out your motive with a scissors.

6 – Stamp on a white strip of cardstock your sentiment.

IMG_3656


7 – Use the 3D Foam Squares White Small and 3D Foam Squares White Regular to adhere your motive with a 3D effect.

8 – Select a favorite place to adhere it.

9 – Adhere your card on another cardstock with the E-Z Dots Permanent.

10 – Enjoy your card. 😉

card_12full

card_11detail

I hope you will have fun with this little tutorial. This technique is also very good to use up your leftovers paper. 😉

Stephanie

Supplies from Scrapbook Adhesives by 3L®

E-Z Dots Permanent

3D Foam Squares White Small

3D Foam Squares White Regular

Lawn Fawn Clear stamp set – Critters of the Sea

Lawn Fawn 6×6 paper pack – Beachside

Mirror Cardboard

Faber Castell Big Brush Pen – black

Happy Birthday Card Using Adhesive Sheets With Stencils

Hello blog readers! It’s Angela today, making the most of supplies I have on hand. For this project, I got out my stencils and figured out how to use them successfully with the Scrapbook Adhesives by 3L® Adhesive Sheets – 12 x 12″. I used this new technique to create the background for the following card:

Happy Birthday Card Using Adhesive Sheets With Stencils by Angela Ploegman

The trick for using stencils with the Adhesive Sheets – 12 x 12″ is to ‘dust’ the stencil before applying the adhesive through the stencil gaps. This prevents the excess adhesive from sticking to the stencil, allowing it to be easily rubbed off in the occasional spot that it transfers to the stencil. I used my embossing powder duster (usually used to prevent stray embossing powder mishaps) to dust my stencil, but expect that other powders used for the same purpose would work similarly.

Here’s a close up photo of the (stenciled) striped background:

Happy Birthday Card Using Adhesive Sheets With Stencils by Angela Ploegman

I quite like the tone on tone appearance achieved with the clear embossing powder….it adds just a little bit of texture to the background and keeps things visually interesting. Give it try! Stretch those supplies!

Angela

Scrapbook Adhesives by 3L® products used: Adhesive Sheets – 12 x 12″, Creative Photo Corners – White, 3D Foam Squares – White, Small, DODZ™-Small, E-Z Runner® Permanent Strips – Refillable

Other Supplies used: Bazzill Basics Paper card stock, Spellbinders Paper Arts dies and die cut machine, jewelry wire, Ranger embossing powder

So Happy to be Here

Big News!

We are thrilled to introduce Laurel Seabrook! She’s the newest member of the Design Team and we are so happy to be working with her! Today is her first post, please give her a warm welcome! Take it away, Laurel!

Hi everyone it is Laurel here with my first blog post as a Design Team member (so go easy on me 😉 )  I was very honored when I was contacted and asked to be a part of this fabulous team and then the goody box arrived!  Wow!

I decided to pull out one of my favorite adhesives, the 3D Foam Squares – texture and dimension are something I always love on my projects 🙂

 DSC_8237 copy

The E-Z Runner® makes adhering the panels so quick and easy!

DSC_8238

A clean and simple card but the dimension from the 3D Foam Squares adds more interest.

DSC_8239

Products used:

Scrapbook Adhesives by 3L®: E-Z Runner® Permanent Strips, 3D Foam Squares White Small
Pattern paper:  Homemade (Pebbles)

Stamp: 2 Tulips (Unity)

Thanks for visiting!

Laurel Seabrook

Easter Tag Tutorial with Crafty Foam Tape

Happy Easter! It’s Erica and today I’m sharing a tag I created using the  E-Z Runner® Permanent Strips Refillable dispenser and Crafty Foam Tape White, as well as a step-by-step tutorial showing you how I created my tag!

Easter Tag Tutorial with Crafty Foam Tape by Erica Houghton

First, I traced my tag onto a sheet of pattern paper and then cut it out.

Easter Tag Tutorial with Crafty Foam Tape by Erica Houghton

Next, I adhered the piece I cut out onto my tag and cut and adhered a second layer using the MyStik® Permanent Strips Refillable dispenser.

Easter Tag Tutorial with Crafty Foam Tape by Erica Houghton

I then cut out a sentiment and adhered it with Crafty Foam Tape White.

Easter Tag Tutorial with Crafty Foam Tape by Erica Houghton

Here are a few close-ups:

Easter Tag Tutorial with Crafty Foam Tape by Erica Houghton Easter Tag Tutorial with Crafty Foam Tape by Erica Houghton Easter Tag Tutorial with Crafty Foam Tape by Erica Houghton

Easter Tag Tutorial with Crafty Foam Tape by Erica Houghton

Scrapbook Adhesives by 3L

Paper

  • Authentique Paper, Treasure

Embellishments

  • Ashland, Manor House Creations & Prima Marketing – flowers
  • Celebrate It – ribbon

Products

  • Ranger Ink – Tim Holtz – Distress Ink

Thanks for joining me today! Erica Houghton

3D Foam Easter Shape Bunny Tag Tutorial

Since it’s the day before Easter, I thought I would share a QUICK & EASY 3D Foam Easter Shape Tag. So for those last minute folks (COUGHmeCOUGH), this is for you – LOL!

3D Easter Foam Shape Bunny Tag by Margie Higuchi

Did you know you can use many different kinds of mediums to apply ON TOP of your 3D Foam Shapes? Mediums such as glitter, foil, pigment powder, flock and more. Today I wanted to try Pigment Powder in Brown (for chocolate eggs = YUM!) and purple micro beads.

MargieHiguchi 3DEasterFoamTag Step1A

I was impressed with how the micro beads stuck on the bunny shape and love the texture it created.

MargieHiguchi 3DEasterFoamTag Step2

The tag also was textured using the Basket Weave Sculpted Embossing Folder. I cut/embossed Medallion Three die to frame the 3D Easter Foam Bunny Shape.

MargieHiguchi 3DEasterFoamTag Step1

To finish off, I tied a knot with Organza Ribbon and it’s ready to go!

3D Easter Foam Shape Bunny Tag by Margie Higuchi

Supplies:

Scrapbook Adhesives by 3L®: E-Z Runner® Permanent Strips Refillable, 3D Foam Easter Shapes

Organza Ribbon, Pigment Powder
Die: Spellbinders® Creative Arts (E3D-004 Basket Weave Sculpted Embossing Folder, S2-017 Medallion Three and the Grand Calibur® Machine)
Cardstock: Core’dinations ColorCore Cardstock
Micro Beads: American Crafts (POP! Microbeads Lip Gloss)
Other: Tag

Thanks for stopping by! Have a safe and wonderful Easter!
MargieH
Springtime Gift Box

Looking for a springtime project to be inspired by? Hi everyone, Christine here today with a spring themed mini gift box to share.  It’s speedily and easily created with Scrapbook Adhesives by 3L® products.

Springtime Gift Box by Christine Emberson for Scrapbook Adhesives by 3L

Springtime Gift Box Tutorial

First I created my box using a box die.  Onto each flap, I applied MyStik® Permanent Strips. It’s ideal, as you can dispense as much or as little as you need.  If you prefer to use double-sided tape, then Crafty Power Tape is a superb choice.

CEmberson - Spring Box 1

For my box decoration, I chose a flower die set. Simply die-cut each flower, layered and attached with 3D Foam Squares White, Small on the reverse side, as double-sided adhesive and for dimension.

CEmberson - Spring Box 2

I clustered the flowers onto the box lid along with its leaves and added a pearl to the center of each one.

CEmberson - Spring Box 3

I created a tag and embellished it with a smaller flower and leaf. Tie it with twine and tuck it inside the box to affix it. Perfect for a little message.

These would make ideal table favors for your Easter table or as gifts for your guests – pop some chocolate mini eggs inside! More uses are as bridal shower favors, Mother’s Day tea party favors and so much more.

CEmberson - Spring Box 4

Thank you for joining me today, remember to stop by the blog regularly to see lots of creativity with Scrapbook Adhesives by 3L® products.
Christine

Scrapbook Adhesives by 3L® Used:
MyStik® Permanent Strips
3D Foam Squares White, Small
Other:
Etched Dies: Spellbinders® Paper Arts (Square Bracket Edge Box and Marisa’s Bouquet)
Kraft, Green, Pale Blue and Pink Cardstock; Pearls

Easter Bunny Card

Wishing you and yours a very happy Spring and a wonderful Easter! It’s Beth, and I’m sharing an Easter Bunny card I made from our 3D Foam Easter Shapes.

Beth Pingry - Easter Bunny Card

I created a background with stencils and ink, then added Mr. Bunny, once I had him covered in Brown Pigment Powder. The 3D Foam Frames and White Creative Photo Corners frame him nicely.  I stamped the banner and added the word HAPPY and covered it with glitter. The banner is adhered with 3D Foam Squares.

BethPingry-EasterBunnyCard2

This was easy and fun! If you’re not up to creating the background, patterned paper will do too.

Thanks for visiting! You’ll see how I created the background soon on my blog, Cookies For Breakfast!

Beth Pingry

I used these supplies:

Spring Mixed Media Canvas with 3D Foam Shapes

Happy Spring everyone!  It’s Kelly Klapstein here, and I’m excited to share a different kind of project than I usually make.  Here is a mixed media canvas I designed using lots of pretty 3D Foam Designer Shapes.

kellyklapstein-spring-1

Here are some close ups and details about how I altered all the different 3D Foam Shapes.

kellyklapstein-spring-2

I added blue and yellow glitter to the 3D Foam Butterfly, and I heat embossed the 3D Foam Pennants with pink and white glitter embossing powder.

kellyklapstein-spring-4

The 3D Foam Leaves are covered with green flocking.  After fussy cutting the floral patterned paper, I pressed Adhesive Sheets on top and then adhered clear microbeads.All of the floral paper pieces are layered with Crafty Foam Tape and 3D Foam Squares.

kellyklapstein-spring-5

My ‘Spring’ title was cut with my electric die cut machine.  I put an Adhesive Sheet onto my patterned paper before cutting, and then removed the backing afterwards and applied clear glitter.   This made my title sparkle!

kellyklapstein-spring-6

The little flower with flocking that is dotting the ‘i’ in ‘Spring’ is from the 3D Garden Shapes.

It’s always nice to have some spring home decor on display to celebrate the end of winter!

Kelly Klapstein

ADHESIVE PRODUCTS:  3D Foam Butterflies, 3D Foam Leaves, 3D Foam Pennants, 3D Foam Garden Shapes, 3D Foam Squares, Crafty Foam Tape, Adhesive Sheets

OTHER SUPPLIES:  Dollar Store canvas; Golden Gesso and Molding Paste; Heidi Swapp papers and Color Shine; EK Success flocking and microbeads; Clearsnap glitter; Brother ScanNCut; Viva Decor Stencil

Elements of a Kooky Easter Owl

Changing it up a little with a fun Easter owl! Yep, a bit kooky I know, but why not? I found this really adorable owl die on clearance at a big box store and knew I wanted to do something cute with it.

Happy Saturday! Michele here. A few oval punches and some eggs cut from my electronic cutting machine, and voila!

Owl Elements in Details

For his ears, I adhered them using E-Z Squares® Refillable Dispenser and for the pink inner ear portion, popped up with Crafty Foam Tape in white.

I also wanted the glittered eggs to have some depth so I also adhered them using E-Z Squares® Refillable Dispenser and Crafty Foam Tape.

The banner, ribbon, and flower were adhered using Adhesive Dots Small.

easter owl close

Sometimes with a bit of creativity, you can stretch those dies a bit further!  🙂

Have a great weekend, friends!
Michele

Scrapbook Adhesives by 3L®:
Crafty Foam Tape in White
Adhesive Dots Small
E-Z Squares® Refillable Dispenser

Other:
Owl Die; Oval Punches; Sentiment Stamp; Ribbon; Flower; Glossy Accents; Glitter; Electronic Cutting Machine (eggs)