You are in our US store • Switch to Europe store

Happy Hexagon Birthday!

Sharing a trendy but super quick Hexagon design birthday card today! Hey there, Ashley here to show you how to make a birthday card when you’re short on time.

AshleyHarrisHexagonBirthday

Making of a Hexagon Birthday Card

1. Emboss a card with an embossing folder.

AshleyHarrisHexagonBirthday2

2. Using watermark ink to stamp a birthday sentiment. Pour embossing powder over it and tap off excess. With your heating tool, melt the powder.

AshleyHarrisHexagonBirthday3

3.  Using the E-Z Runner® Permanent Fine Adhesive, adhere the strip of vellum to the card.

AshleyHarrisHexagonBirthday4

4.  For a little dimension and interest, adhere hexagon die cut with 3D Foam Squares White Regular.

AshleyHarrisHexagonBirthday5

5.  Using Adhesive Dots Small, cut them in fourths and adhere sequins to the card.

There you have it!!  Hope you enjoyed this fun card!
Ashley Harris

Scrapbook Adhesives by 3L®:
E-Z Runner® Permanent Fine Adhesive
Adhesive Dots Small
3D Foam Squares White Regular
Other:
Cardstock:  Recollections; Clear Stamp:  Simon Says Stamp; Watermark Ink:  Versamark by Tsukineko; Embossing Powder:  Zing in Grapefruit by American Crafts; Electronic Cutting Machine; Sequins: Avery Elle and Cartwright’s

See other projects using E-Z Runner Permanent Fine and vellum by clicking the image or text.

Fuzzy Easter Bunny

Who doesn’t love a fuzzy bunny?! Couldn’t resist with this silhouette and Fun Flock 🙂 Hello, Kimberly here with a card just in time for Easter. Using the 3D Foam Easter Shapes make this card quick, easy, and adorable!

Fuzzy Easter Bunny by Kimberly Crawford for Scrapbook Adhesives by 3L

Bunny Card Basics

The card base was layered with patterned papers. I always use E-Z® Runner Permanent Strips Refillable to adhere all my paper to projects. Then I cut out a piece of cardstock and stamped upon it with various images. When I adhere panels like this to my cards, I reach for my 3D Foam Squares Regular White.

Kimberly Crawford bunny 2

Fuzzy Details

And now for the darling bunny! I peeled the shape carefully off the backing sheet of 3D Foam Easter Shapes and placed it on a craft mat. Then I generously poured flock over the top. Gently burnishing the into the bunny in a circular motion with my finger, I tapped off the excess. I repeated the same process for the carrot and its top. I love how they are separate to allow you to be creative with each piece!

See below a quick video on How to use 3D Foam Shapes.

For more Easter project inspiration, click: DIY Easter Crafts on Parade.

Thanks for stopping by!
Kimberly Crawford

Scrapbook Adhesives by 3L®:
3D Foam Easter Shapes
3D Foam Squares Regular White
E-Z® Runner Permanent Strips Refillable

Other:
Stamps, Ink, Cardstock (My Favorite Things), Patterned Paper (Crate Paper) and Fun Flock (Stampendous!)

Card with Heart

Hi there, it’s Stephanie here today with a Card.

Stephanie_card_cheer_1Actually I love to work with old vintage book pages. O love the grip and smell. For this card I also use old book pages and scraps, leftovers from pattern scrapbook paper. I added a bit vintage feeling with Distress Ink at the edges of the paper.

Stephanie_card_cheer_2 To adhere the scraps I used the pink E-Z Squares® Refillable.

Stephanie_card_cheer_3My sewing machine created a little frame on the top paper.

Stephanie_card_cheer_4Then I added my text (just a word sticker) and a handmade wire heart. Ready!

Stephanie_card_cheer_1

Thanks for visiting and have a nice day!

Stephanie

Material I used:

E-Z Squares® Refillable

Paper from Pink Paislee “Cottage Farms” and Prima Marketing “Delight Collection”

Old book pages

sewing machine

wire

Distress Ink “vintage photo” Ranger Ink

word sticker from Authentique “Celebrate”

Custom Made Pocket Pages: Exploring Boston Scrapbook Layout

Hello blog readers! This is Angela and I don’t know about you, but I’m desperately wishing for warmer weather! The winter in the Midwest US has definitely overstayed its welcome! So in that frame of mind I created a summer themed scrapbook page using the Keepsake Envelopes – Mix to customize a pocket page style layout!

Custom Made Pocket Pages: Exploring Boston Scrapbook Layout by Angela Ploegman

It was super easy to mix and match the envelopes to create the perfect grid for my layout. Love that I could layer behind and on top of the pockets on this page using Crafty Power Tape 20′ Roll and 3D Foam Squares White, Regular. I even created a catch pocket for the journaling tag on the back of the layout, to ensure the tag didn’t slip through and get lost.

Custom Made Pocket Pages: Exploring Boston Scrapbook Layout by Angela Ploegman

What a fun page to create and the layout is EXACTLY how I wanted it! I feel warmer already! Thanks for stopping by today.

Angela

Scrapbook Adhesives by 3L® supplies used: 3D Foam Squares White, Regular, Crafty Power Tape 20′ Roll, Keepsake Envelopes Mix

Other Supplies used: Bazzill Basics Paper card stock, Bella Blvd Sophisticates patterned paper, Jillibean Soup patterned paper and card stock word stickers, Cocoa Daisy and American Crafts stamps, Tsukineko Ink, old typewriter font (Internet), Jenni Bowlin for Fiskars mini ticket punch, EK Success red glitter

Visit our Website and Blog!
Sign up for our Newsletter so you never miss a contest or giveaway!

instagram purple icon facebook icon purple pinterest purple icon twitter purple icon YouTube icon blog subscription purple icon

Foam Washi Tape Tutorial

Hi There!

Shell Carman Foam Washi Tape Tutorial

Funky & graphic is a popular trend right now. I am really loving the idea of mixing some black with bright colours. Sometimes too much black can be too over powering so I have found stamping a great way to add some black too the mix without it looking too strong. Because I also love dimension I started thinking of ways of adding black stamping with dimension & came up with the idea to stamp directly onto some Crafty Foam Tape White .

Shell Carman Foam Washi Tape Tutorial 1First lay a strip of Crafty Foam Tape onto some Transparency Film

Shell Carman Foam Washi Tape Tutorial 2Use a good quality ink to stamp an image onto the Crafty Foam Tape

Shell Carman Foam Washi Tape Tutorial 3Too easy!

To put together the rest of my card I have used the E-Z Runner Permanent Strips Refillable to adhere some pattern paper onto cardstock

Shell Carman Foam Washi Tape Tutorial 4then layered some more patterned paper using the Crafty Foam Tape

Shell Carman Foam Washi Tape Tutorial 5The E-Z Runner Permanent Fine was perfect to adhere the vellum love note. 3D Foam Squares White Mix  helped me add some more dimension & layers to my card
Sjell Carman Foam Washi Tape Tutorial 7

Shell Carman Foam Washi Tape Tutorial 8Here are a few closeups

Shell Carman Foam Washi Tape Tutorial 9

Shell Carman Foam Washi Tape Tutorial 10

Scrapbook Adhesives by 3L® Products Used
Crafty Foam Tape White  E-Z Runner® Permanent Strips Refillable, 3D Foam Squares White Mix E-Z Runner Permanent Fine

Other Products Used
Crate Paper Maggie Holmes Style Board Paper, Ephemera, frame & Flair Button
Prima Stitch Stamp Lines
Mixed Media Inx ColorBox Black by Clearsnap

Thanks for looking!
Cheers
Shell Carman
Another Scrappy Day

Save

Save

Create Beautiful Texture with Adhesive Sheets Tutorial

Birgit Koopsen shares a fabulous tutorial to create beautiful texture with Adhesive Sheets by Scrapbook Adhesives by 3L® and embossing powder!

Create Beautiful Texture with Adhesive Sheet and Embossing Powder Tutorial by Birgit Koopsen for Scrapbook Adhesives by 3L

To create the background of these tags I used Adhesive Sheets and Ultra High Embossing Powder. The clear embossing powder creates a resist revealing the color that is underneath, which makes the embossed parts really stand out after spraying with darker colors.

Create Texture with Embossing Powder

Adhesive Sheets - Embossed Texture - step 1 - Birgit Koopsen for Scrapbook Adhesives by 3L

Start with a tag sprayed with 1 or 2 not-too-dark colors. Make sure the tag is really dry.

Adhesive Sheets - Embossed Texture - step 2 - Birgit Koopsen for Scrapbook Adhesives by 3L

Take (part of) an Adhesive Sheet, peel of the yellow liner sheet and randomly apply the adhesive to the tag. Go on until you have the desired amount of adhesive on the tag. The adhesive is clear and permanent.

Adhesive Sheets - Embossed Texture - step 3 - Birgit Koopsen for Scrapbook Adhesives by 3L
Adhesive Sheets - Embossed Texture - step 4 - Birgit Koopsen for Scrapbook Adhesives by 3L

Cover the tag with Clear Ultra High Embossing Powder and tap off the excess.

Adhesive Sheets - Embossed Texture - step 5 - Birgit Koopsen for Scrapbook Adhesives by 3L

Heat it with a heat tool until the embossing powder starts to melt and turns clear.

Adhesive Sheets - Embossed Texture - step 6 - Birgit Koopsen for Scrapbook Adhesives by 3L

Spray 1 or 2 darker colors right on top. Take off the excess paint with a paper towel. The spray will not stick to the embossed parts and the lighter color underneath will be revealed.

Adhesive Sheets - Embossed Texture - step 9 - Birgit Koopsen for Scrapbook Adhesives by 3L
Adhesive Sheets - Embossed Texture - step 10 - Birgit Koopsen for Scrapbook Adhesives by 3L

Of course this Wear Your Adhesive on the Outside technique is also perfect to create texture on any other project like cards, scrapbook pages, art journals and canvas.

Adhesive Sheets - Embossed Texture - step 11 - Birgit Koopsen for Scrapbook Adhesives by 3L


Finish the Tag

Use an Adhesive Sheet to cover the back of some clear glass pebbles. Apply the pebbles to patterned paper and cut them out. Put them on another Adhesive Sheet to create sticker pebbles that can be applied to the tag.

Adhesive Sheets - Embossed Texture - step 15 - Birgit Koopsen for Scrapbook Adhesives by 3L
Adhesive Sheets - Embossed Texture - step 16 - Birgit Koopsen for Scrapbook Adhesives by 3L

Die cut butterflies, outline them with a black and a white pen and apply them to the tag using Adhesive Dots Medium. Add ribbon and word stickers. The pom pom ribbon was applied with a strip of Crafty Power Tape, folded length wise.

Finished Tags with Texture

Pin it!

Birgit Koopsen Adhesive Sheet texture tags for Scrapbook Adhesives by 3L
Adhesive Sheets - Embossed Texture - final tags.detail1 - Birgit Koopsen for Scrapbook Adhesives by 3L
Adhesive Sheets - Embossed Texture - final tags.detail2 - Birgit Koopsen for Scrapbook Adhesives by 3L
Adhesive Sheets - Embossed Texture - step 12 - Birgit Koopsen for SAby3L_resize
Adhesive Sheets - Embossed Texture - step 13 - Birgit Koopsen for Scrapbook Adhesives by 3L
Adhesive Sheets - Embossed Texture - step 14 - Birgit Koopsen for Scrapbook Adhesives by 3L Blog

Thank you for stopping by and happy crafting!

Birgit Koopsen

Scrapbook Adhesives by 3L® supplies:

Adhesive Sheets 4×6″
Adhesive Dots Medium
Crafty Power Tape

Other Supplies:

Spray paints: Tattered Angels and Ranger Ink, Embossing Powder: WOW! Embossing Powder, Butterfly die, Pebbles and word stickers: Prima Marketing Inc., Patterned paper: Jillibean Soup

See Beth Pingry’s Artsy Tags, inspired by Birgit’s tutorial!

Artsy Tags Tutorial by Beth Pingry

And check out Christine Meyer’s video tutorial for texture on a scrapbook page:

Create Colorful Backgrounds by Christine Meyer

Visit our Website and Blog!
Sign up for our Newsletter so you never miss a contest or giveaway!

instagram purple icon facebook icon purple pinterest purple icon twitter purple icon YouTube icon blog subscription purple icon

Video Tutorial: Wrapped Twine Card

Hi Blogosphere! It’s Tiffany here today with another Video Tutorial.

TiffMarchTutorial1

 This time I’ll be showing you how easy it is to make a Wrapped Twine Card using our Adhesive Sheets! You’ll also get a glimpse of our brand-new 3D Foam Butterflies!

Video Tutorial:

Close-up:

TiffMarchTutorial2

I bet you’re thinking of all sorts of ways to incorporate twine into your die-cutting projects! Easter is nearly here… How cute would this be for an Easter Egg Window? I think I’ll get on that 😉

Thanks so much for stopping by,

TiffJohnsonSignature

Supplies Used-

Scrapbook Adhesives by 3L® (Adhesive Sheets 4×6, 3D Foam Butterflies, 3D Foam Squares, Dodz™ Medium, MyStik® Permanent Strips)

Mini Round Gift Box

Hi everyone, Christine here today with a decorated mini round gift box.

CEmberson - RoundBox 8

I’ve chosen pretty flowers because hopefully here in the UK Springtime is on its way!  I selected a shop bought mini round gift box.  It looks extremely boring and plain but not for long!

CEmberson - RoundBox 1I cut a strip of paper – Basic Grey – RSVP and wrapped this around the base section of the box.  I used E-Z Runner® Permanent Strips – Refillable to make sure it was adhered securely.

CEmberson - RoundBox 2I then decided to have lace around the edge of the box lid, Crafty Power Tape is perfect to adhere lace.  The tape comes in a handy refillable dispenser.

CEmberson - RoundBox 5

To decorate the top of my box I die cut a circle from the patterned paper – Spellbinders® Standard Circles LG

CEmberson - RoundBox 3For dimension I applied 3D Foam Squares – White Regular to the reverse of my die cut and then placed this onto the box lid.

CEmberson - RoundBox 4

For decoration, I cut/embossed Spellbinders® Blooms Three from pale blue cardstock and attached them using 3D Foam Squares – White Small.

CEmberson - RoundBox 6

The finished mini round gift box.

CEmberson - RoundBox 8

CEmberson - RoundBox 7

Perfect for a gift of jewellery, gift vouchers, lottery tickets!  Thank you for joining me today, have fun crafting with the brilliant Scrapbook Adhesives by 3L products.

Christine

Supplies used:

Scrapbook Adhesives by 3L:  E-Z Runner® Permanent Strips – Refillable,  Crafty Power Tape, 3D Foam Squares – White Regular, 3D Foam Squares – White Small

Spellbinders: Standard Circles LG, Blooms Three

Basic Grey: RSVP paper collection

Gift box, pearl, lace

Die Cutting and Embellishing 3D Foam Creative Sheets!

Hi it’s Beth, today I have a new technique for 3D Foam Creative Sheets. These are pieces of our 3D Foam that are not cut, so that you and I can get creative! These 3D Foam Creative Sheets can be punched and die cut, and of course you can use scissors. Let me show you how I made this card.

Beth Pingry Journey Card

First I die cut the white 3D Foam Creative Sheet (the pack of 2 comes with one white and one black sheet).  You can see that it embosses the thin metal dies too!

Remove the top liner paper and brush on pigment powder.
BethPingry-Journey2

When the surface is covered, stamp the sentiment onto the die cut.

BethPingry-Journey3

For the large butterfly from the 3D Foam Gardens Shapes set, remove the liners from the inside of the design and add pigment powder.

BethPingry-Journey4

Remove the rest of the liner and add a second color of pigment powder.

BethPingry-Journey5

Next I added enamel dots to the butterfly, then assembled my card. I added antennae and lines with a pen.

BethPIngry-Journey6

Thanks!

Beth Pingry

Supplies Used:

  • Scrapbook Adhesives by 3L: 3D Foam Creative Sheets, 3D Foam Garden Shapes, Mounting Squares
  • A Jillian Vance Design: Charming Photos stamp and die set
  • Basic Grey: RSVP paper collection, Candy Buttons
  • Jacquard: Pearl Ex Pigment Powders
  • Imagine Crafts/Tsukineko: Stazon Jet Black ink
  • Kraft Cardstock, black pen

A Sunny Trip To Serengeti And a Tutorial

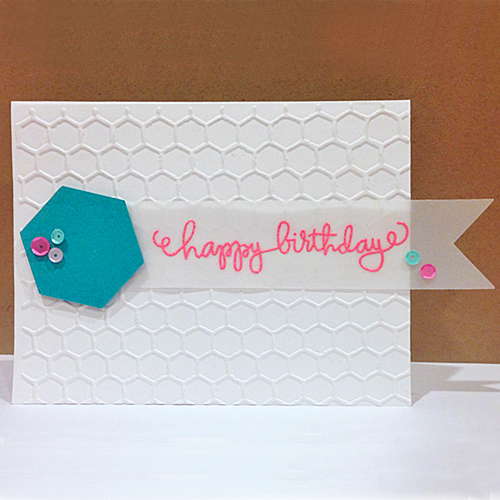
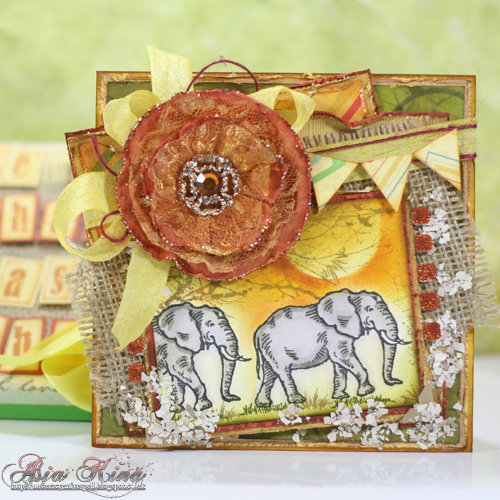
Hello everyone, Asia King here. Lovely to see you again and I am delighted to take you today on a trip to Serengeti! This is a gift I made for my friend’s daughter who absolutely adores elephants. Ok, let’s begin!

Serengeti_Asia King21

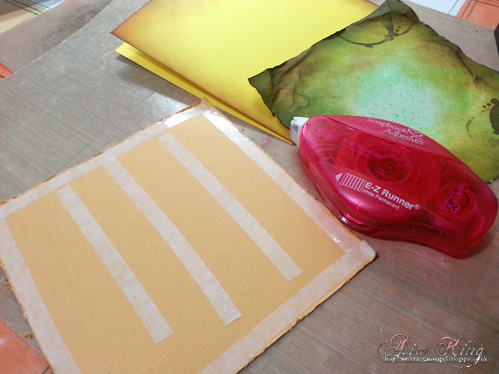
1. Prepare your cardstock for mats (various sizes in coordinating colours, whatever you have to hand), 6×6″ card blank, matching patterned papers and also plain-ish patterned papers (doesn’t matter what colour as they will be inked over). Gather a selection of distress inks and blending tools for your chosen colour scheme.

Serengeti_Asia King1

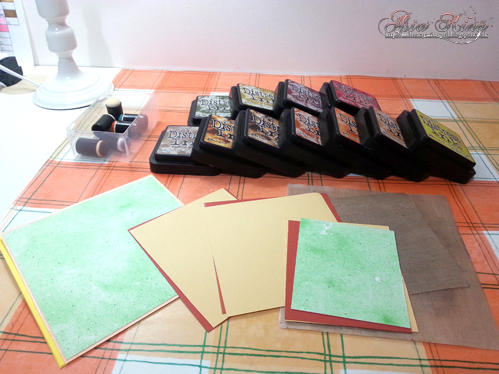
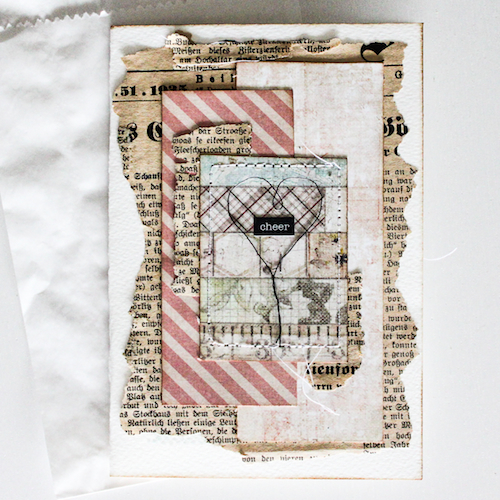
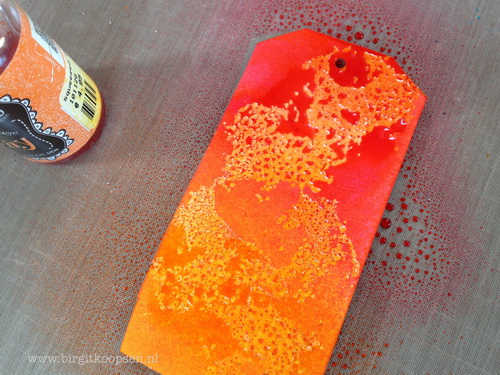
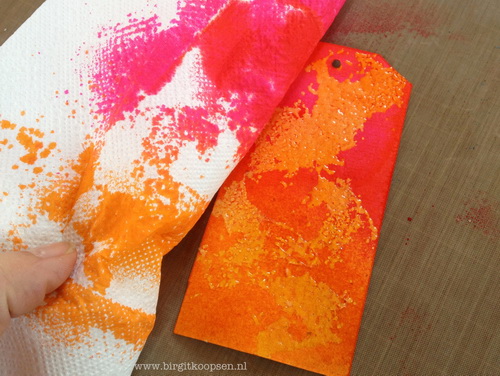
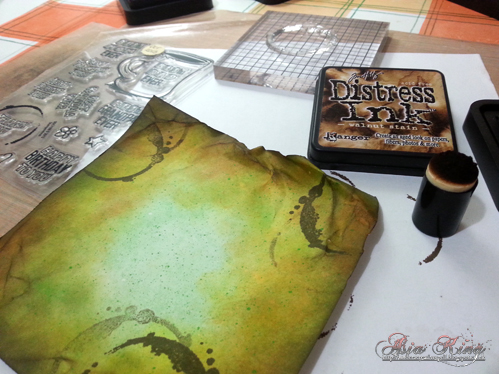
2. Ink up the patterned paper panel to match your chosen colour palette. Stamp some coffee mug rings using Stampendous clear stamps. Crinkle and distress the edges.

Serengeti_Asia King2

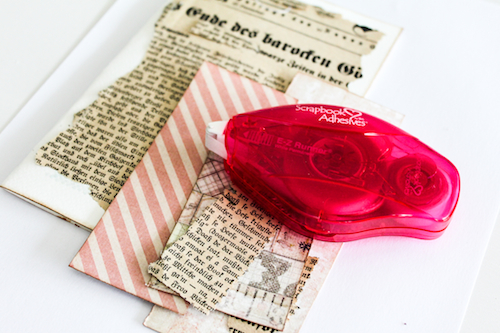
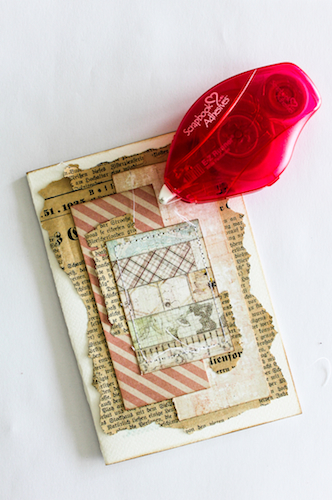
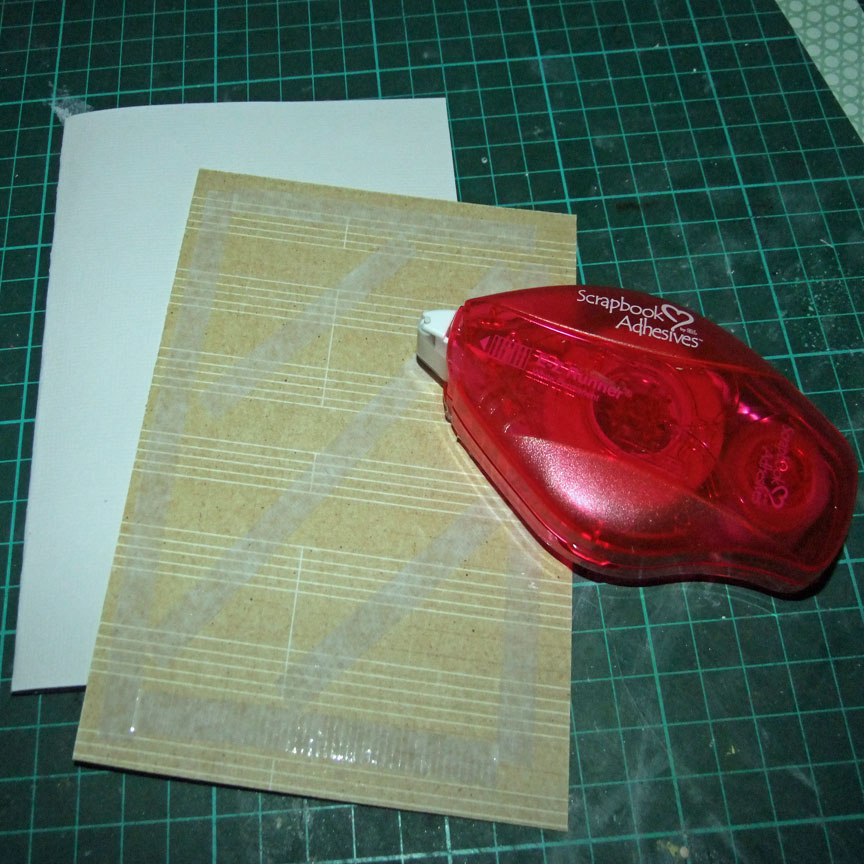
3. Mount a couple of mat/paper panels onto the card blank using E-Z Runner® Permanent Strips – Refillable, varying the angles slightly.

Serengeti_Asia King3

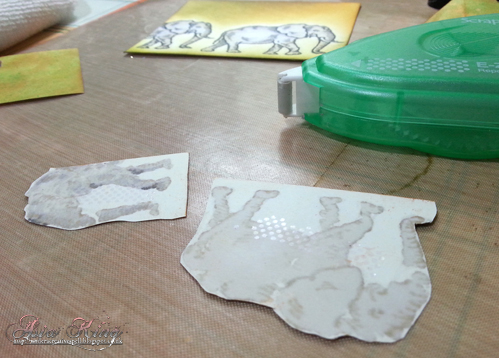
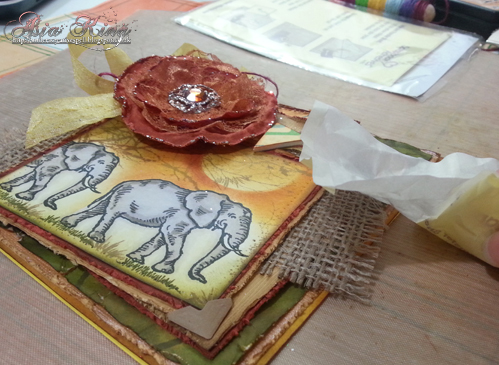
4. Stamp the elephant from the Serengeti stamp set twice onto a cream card and colour with your favourite medium (I used Spectrum Noir and Distress markers). Stamp the elephants again onto scrap paper and cut out the outlines. Use E-Z Dots® Repositionable at the back to help the mask stay in place whilst inking. Mask of the images and ink around to create a warm Serengeti setting.

Serengeti_Asia King4

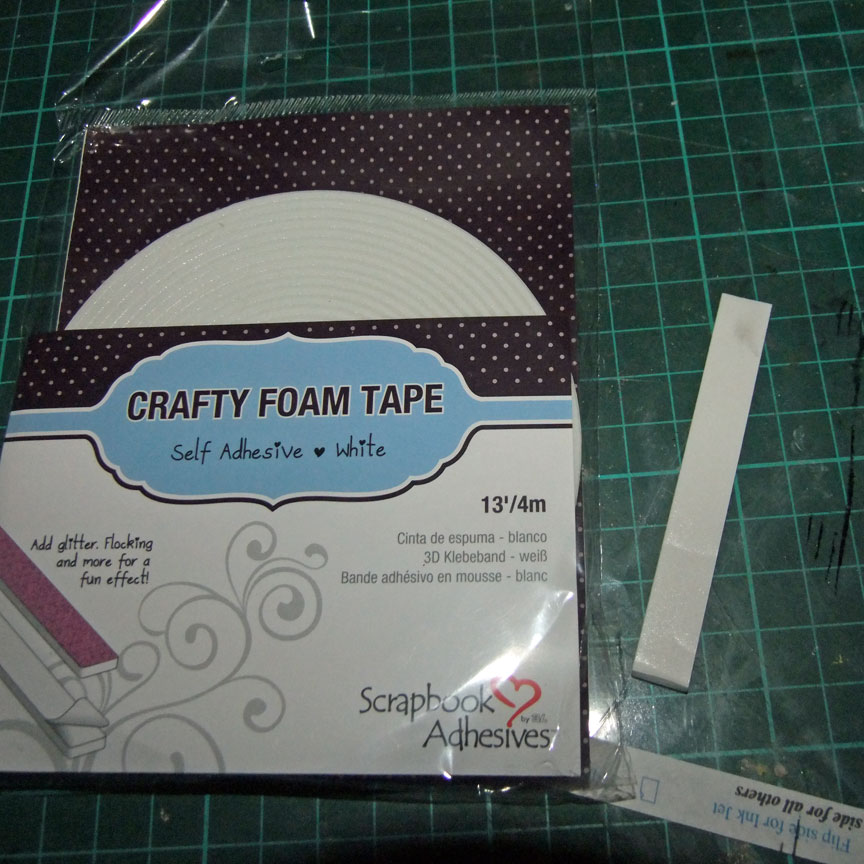
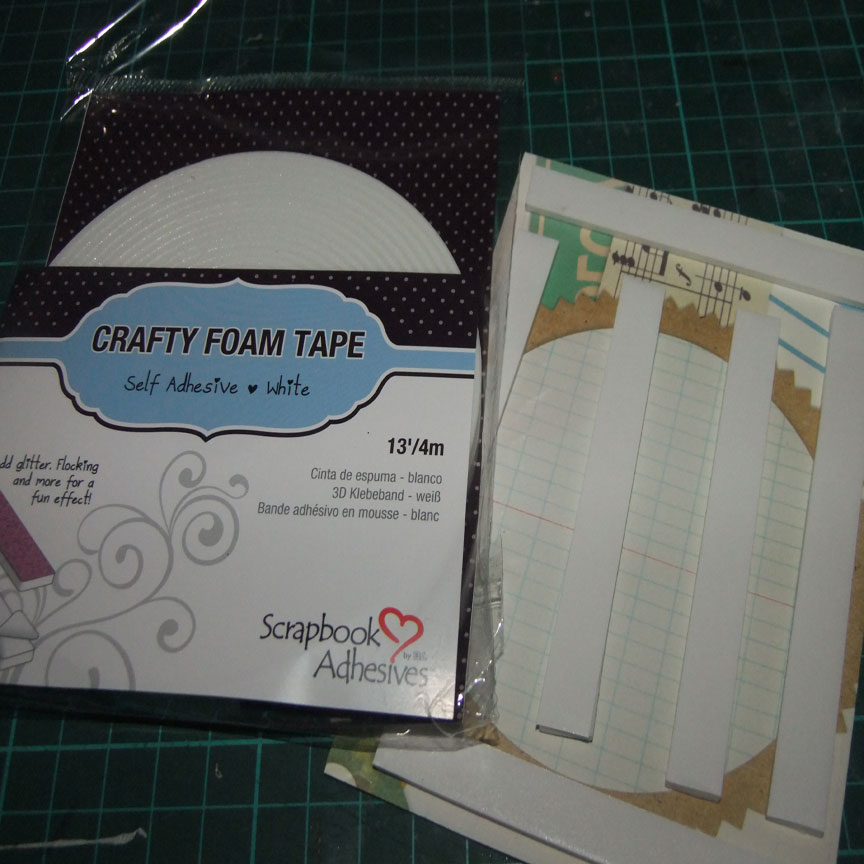
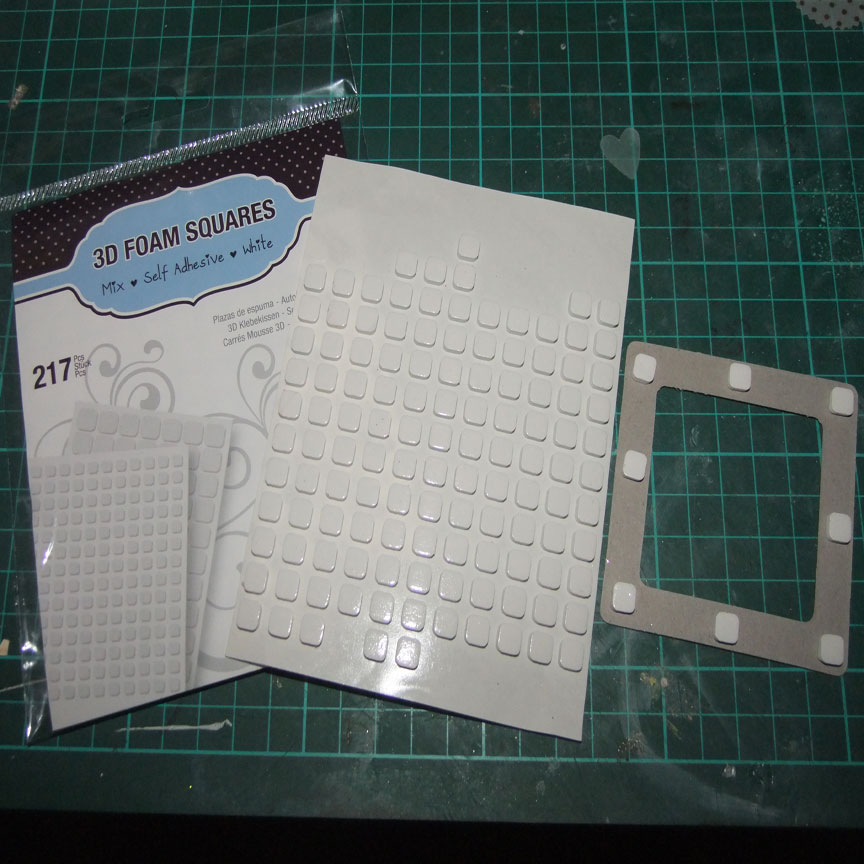
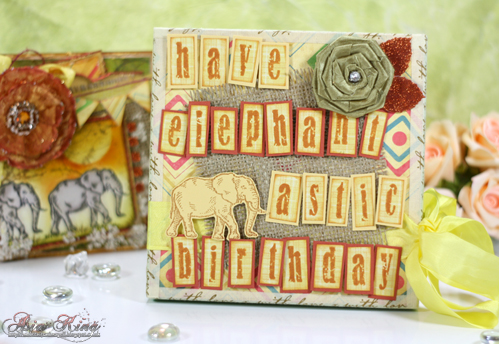
5. Mat the image panel and embellish with Kraft Creative Photo Corners. This will be mounted over a piece of burlap. Cover the area that will go over the burlap with Crafty Power Tape. For the rest of the panel use black Thin 3D Foam Squares. Adhere all elements to the card.

Serengeti_Asia King5

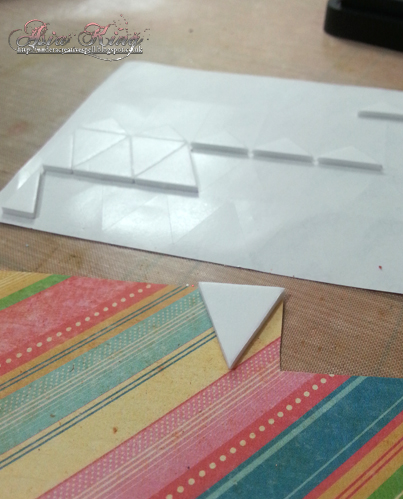
6. Cover a handful of 3D Foam Pennants with the patterned papers and adhere to the card over a decorative ribbon to create a banner.

Serengeti_Asia King8

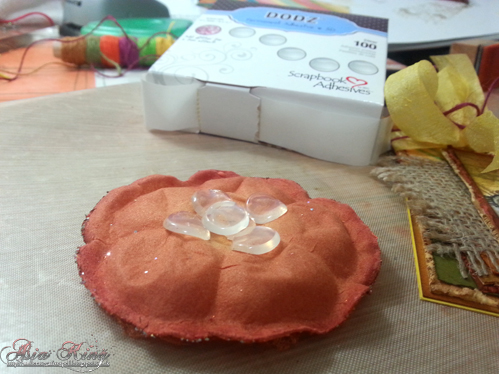
7. Use several DODZ™ – 3D to adhere additional embellishments.

Serengeti_Asia King7

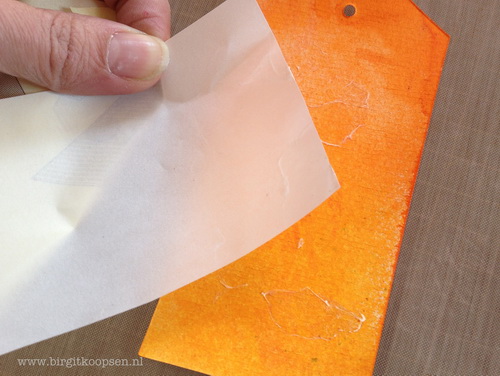
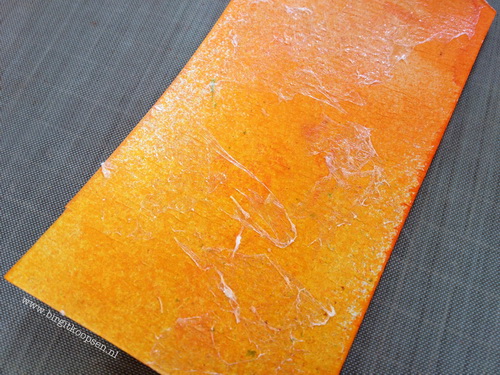
8. Crumple a piece of 4×6″ Adhesive Sheet and partially remove the yellow protective layer. Dab the sticky side of the sheet randomly over the burlap and the rest of the card.

Serengeti_Asia King9

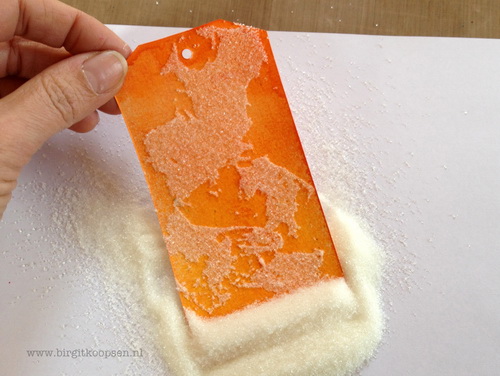
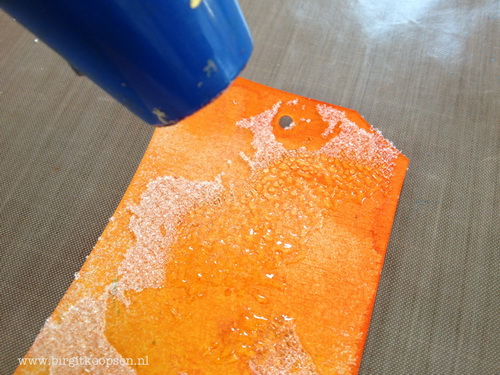
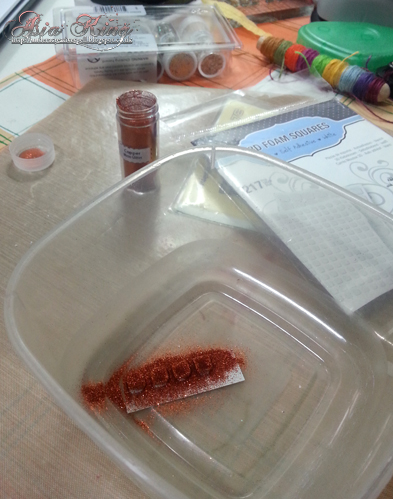
9. Sprinkle the adhesive with Taupe Colour Fragments. Press gently with your fingertips to help them adhere. Shake off the excess fragments.

Serengeti_Asia King10

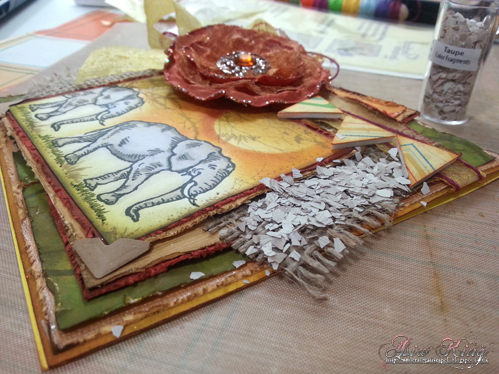
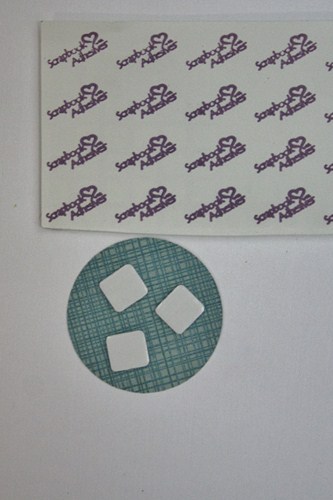
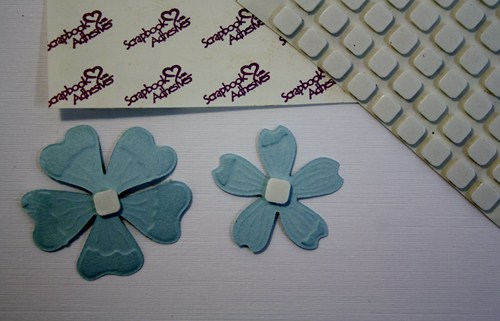
10. Sprinkle a handful of 3D Foam Squares – White, Small with the Copper Micro Glitter. Add to the card as desired.

Serengeti_Asia King11

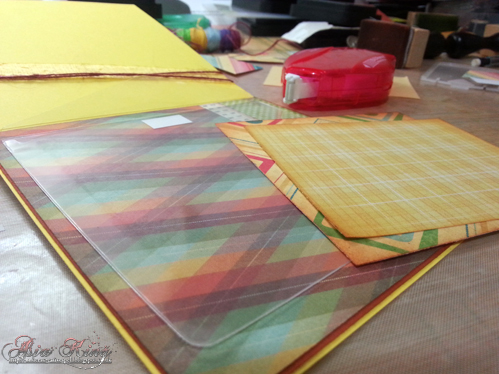
11. Decorate the inside of the card with patterned papers using E-Z Runner® Permanent Strips – Refillable. Add a Keepsake Envelope inside for a gift voucher.

Serengeti_Asia King12

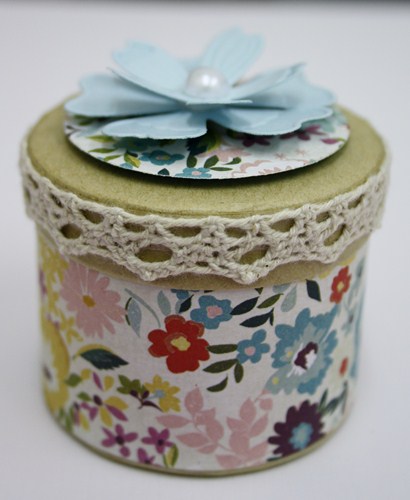
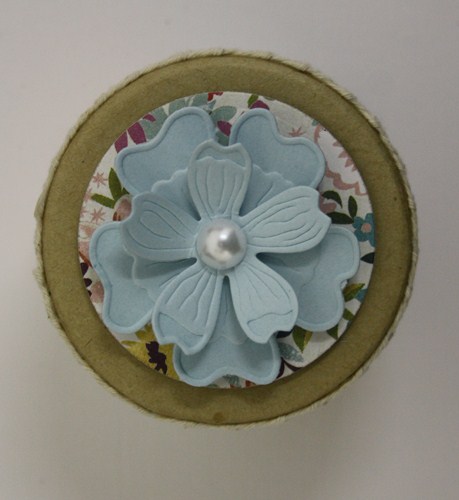
And here is a picture of a box I decorated as well to hold the card as part of the gift set.

Serengeti_Asia King22

If you’d like to see some close up photos of the project, please pop over to my blog here. I hope you enjoyed this sunny trip. Thank you for visiting and I hope you have a wonderful weekend!

Supplies: E-Z Runner® Permanent Strips – RefillableE-Z Dots® RepositionableKraft Creative Photo CornersCrafty Power Tapeblack Thin 3D Foam Squares3D Foam PennantsDODZ™ – 3D4×6″ Adhesive Sheets3D Foam Squares – White, SmallKeepsake Envelopes, 3D Foam Leaves.

Other: Serengeti, Coffee Mug & Vintage Lowercase clear stamps, cling Crowscape, Taupe Colour Fragments, Copper Micro Glitter (all Stampendous);

Cardstock and papers (Ambrosia collection) – Bazzill Basics; Distress Inks various colours (Ranger Ink); crinkly ribbon (May Arts); flowers (Prima Marketing).

Big crafty hugs

Asia King