You are in our US store • Switch to Europe store

Layout Hello

Hi there,

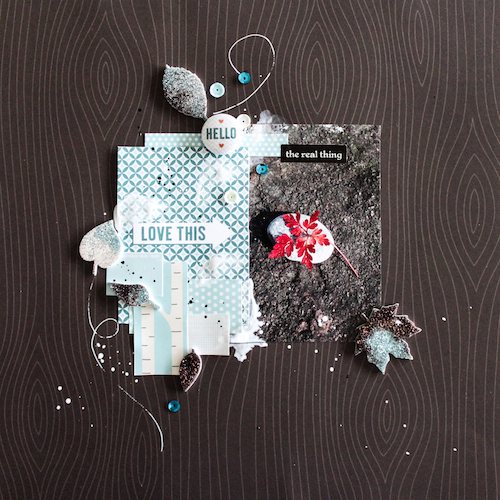
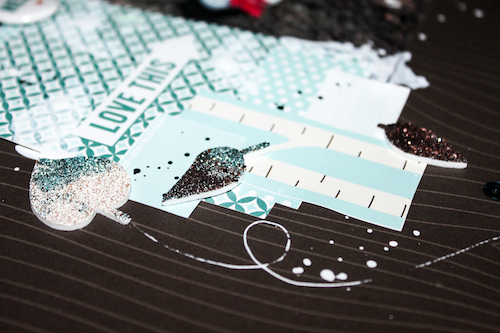
it’s Stephanie here today and I want to share a layout I made with the wonderful Lawn Fawn paper collection “Into the Woods”. I also used some awesome 3D Foam Leaves Designer Shapes from Scrapbook Adhesives by 3L®. Just perfect for your last autumn layouts before the winter layouts start.

Stephanie_Layout_iLoveFall_1For this layout I made a step by step tutorial.

Stephanie_Layout_iLoveFall_2

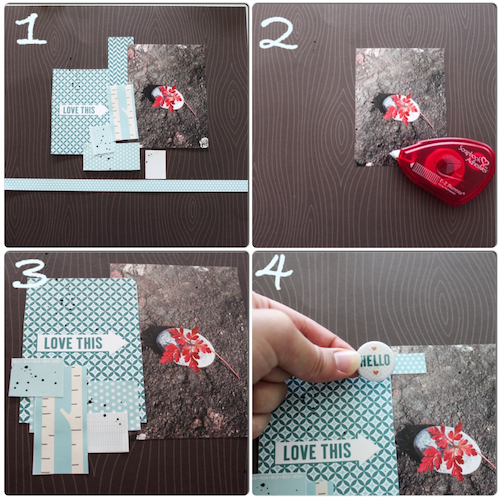
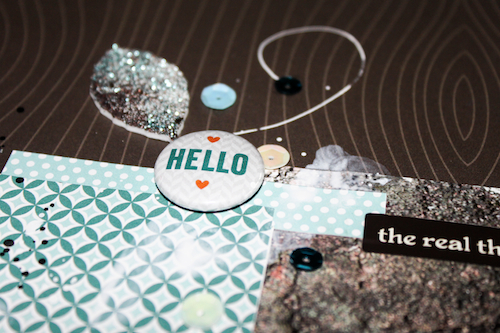
1 – This is what I used for the background, some matching paper scraps and my photo.

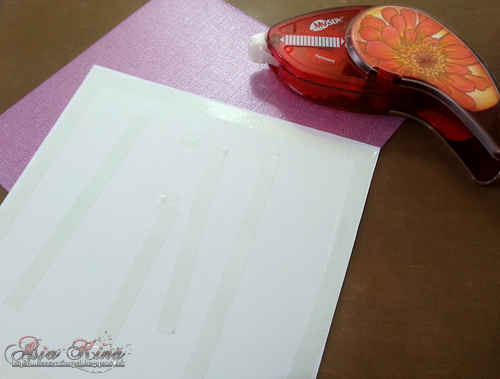
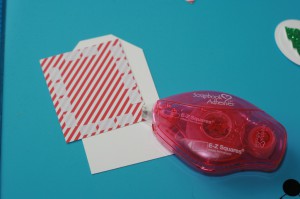
2 – Adhere the photo with the E-Z Runner Permanent Stripes.

3 – Then arrange the paper scraps around, creating two parties. Adhere them.

4 – Adhere a Button from Lawn Fawn Into the Woods collection between the two parties.

Stephanie_layout_ilovefall_3

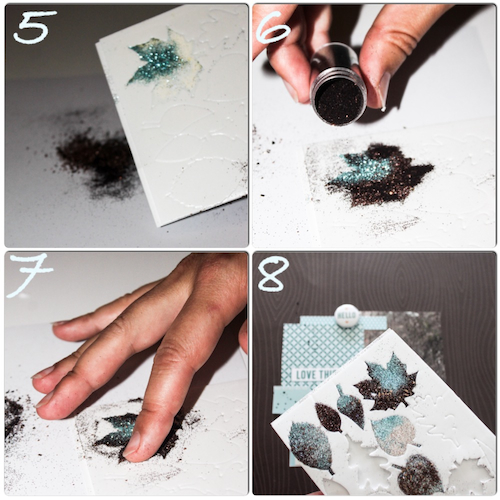
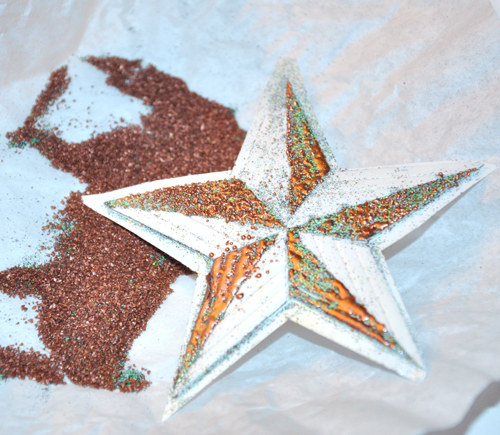
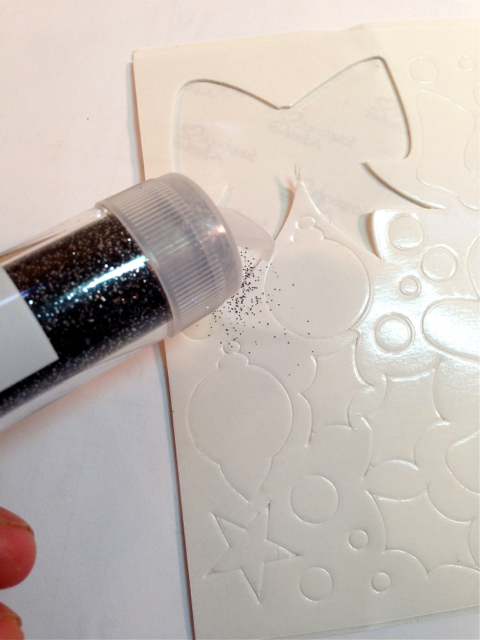
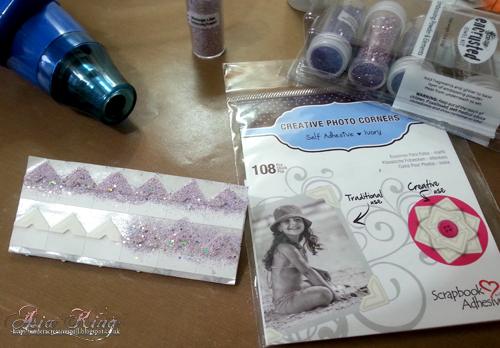
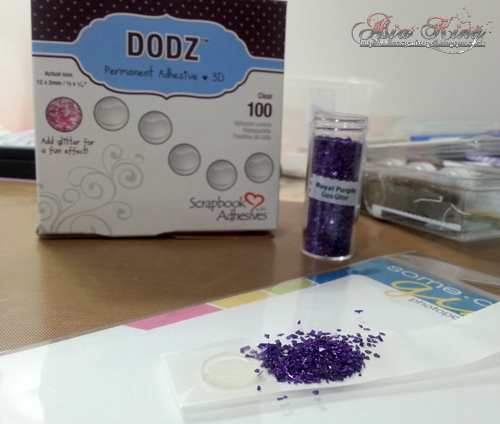
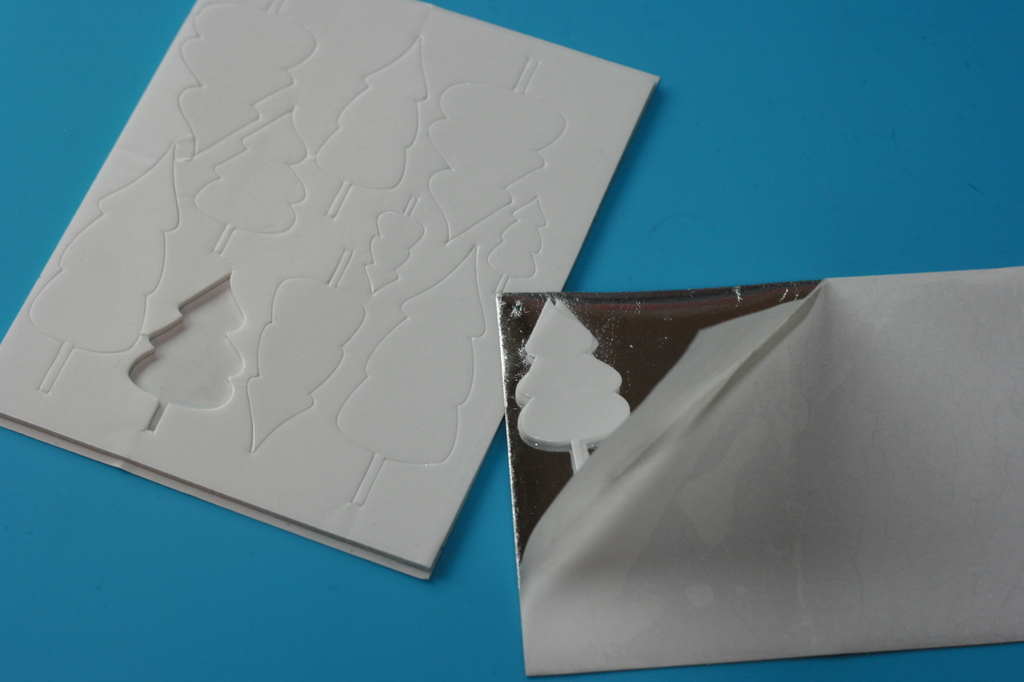
5 – Prepare some Glitter leaves by using some white, brown and blue Glitter from Stampendous and the 3D Foam Leaves Designer Shapes from Scrapbook Adhesives by 3L®.

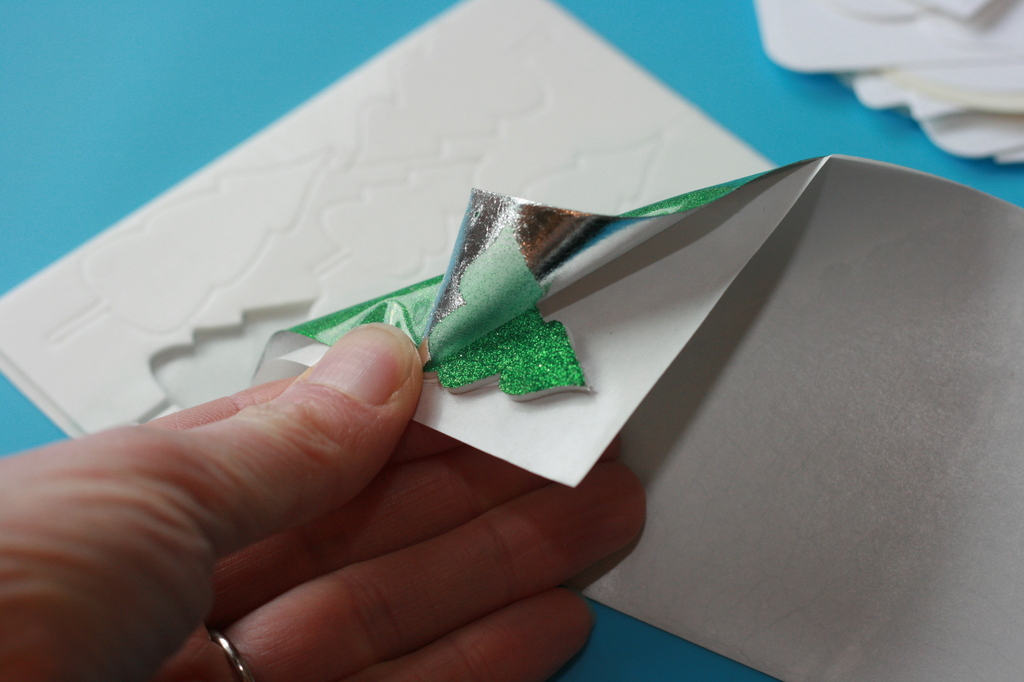
6 – First apply the blue Glitter and then brown Glitter directly on the leave.

7 – Rub the Glitter a little bit with the finger to adhere the Glitter into all edges.

8 – Add some mixed Glitter on other leaves.

Stephanie_layout_ilovefall_4

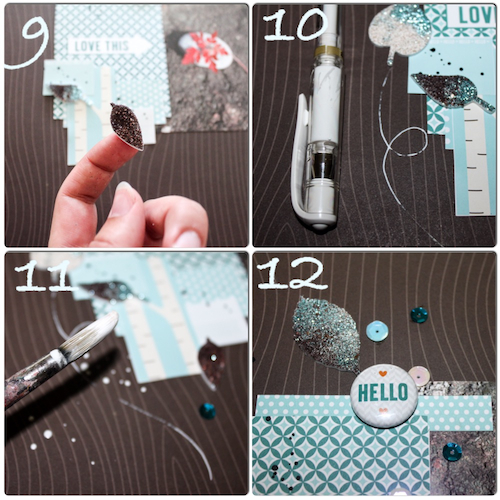
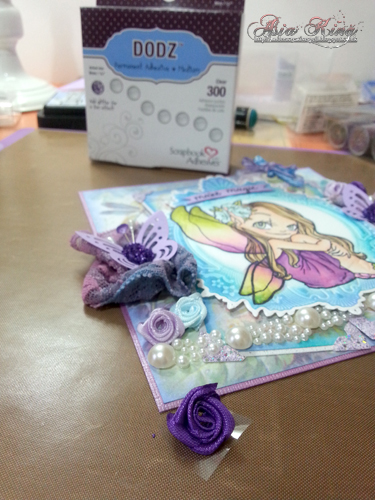
9 –  Now adhere the shapes on your layout.

10 – Use a white pen to make some doodles.

11 – Splash with white Acrylic paint and a brush.

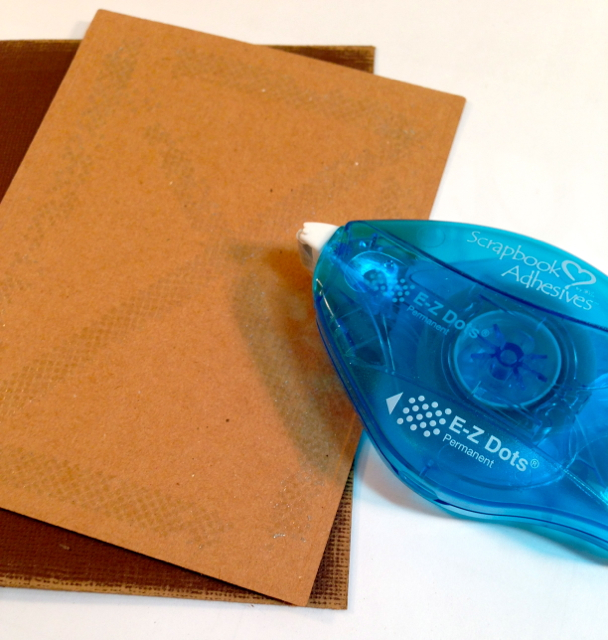
12 – Add some matching sequins from Lawn Fawn by using the E-Z Dots Permanent Refillable.

Stephanie_Layout_iLoveFall_5 Stephanie_Layout_iLoveFall_6

Thanks for visiting! Have a nice creative day!.

Stephanie

DIY Holiday Ornaments Featuring Adhesive Sheets and Designer Shapes

Good Saturday morning everyone! It’s Angela here sharing some quick and easy DIY Christmas ornaments.

DIY Holiday Ornaments Featuring Adhesive Sheets and Designer Shapes by Angela Ploegman

Love how easy it is to customize the color scheme when making your own glass ornaments for display in your home. To make the one above, I first crumpled an Adhesive Sheet – 12×12″, then removed the backing and applied it loosely to a frosted glass ornament. I was pleasantly surprised to see an uneven adhesive application. I then covered the adhesive with gold micro beads.

The ornament was finished with a strip of Crafty Power Tape around the metal cap that was then covered with ribbon. A bow was tied and attached with a DODZ Adhesive Dots Small.

Here’s a second example using a different color scheme and tinsel glitter:

DIY Holiday Ornaments Featuring Adhesive Sheets and Designer Shapes by Angela Ploegman

I made a third ornament using 3D Foam Snowflakes and glittered flock. Just as easy and super cute too!

DIY Holiday Ornaments Featuring Adhesive Sheets and Designer Shapes by Angela Ploegman

I’m dreaming of a white Christmas and a multi-colored holiday tree featuring ornaments I’ve made at home with my kids! Happy Holidays everyone!

Angela

Scrapbook Adhesives by 3L supplies used:

3D Foam SnowflakesAdhesive Sheets 12 x 12″Crafty Power Tape, DODZ Adhesive Dots Small

Other supplies used:

Recollections tinsel glitter, Martha Stewart for EK Success glittered flock and micro beads, frosted glass ornaments, May Arts Ribbon and misc. trim.


Save

Reindeer Food

Shell Carman Reindeer Food

Hi There!

Shell Carman here today with some Christmas craft fun. Every year my kids love to hand out some special Reindeer food (museli mixed with glitter) along with their Christmas cards to the other Children in their class. Each year I change the packaging but I always like to keep it simple (because there are so many to make)but cute!

This year I used a simple glad bag & covered the white strip with some paper from Graphic 45 Nutcracker collection using some Crafty Power Tape. I printed out a cute little poem that I found on Pinterest & used the Spellbinders Label 28 dies to cut & frame the poem.

The 3D Foam Christmas Shapes were perfect for this project I really couldn’t go past the adorable gingerbread man! To keep things nice & simple I used Clear Snap Designer Foils in Lucky Penny to cover the body. To add detail to the eyes & mouth I used some Papercraft glitter in Crimson & Ranger Distress Glitter in Black Soot. I used a white gel pen to draw the piping onto the body and added some Basic Grey Candy Buttons.

Shell Carman Reindeer Food a

The candy cane & bow were covered with red Foil.

Shell Carman Reindeer Food c
Shell Carman Reindeer Food d
I like to create small 4X4 cards when making them in bulk. I have used Graphic 45 Chipboard Stickers & some gorgeous ribbon.

The holly leaves were from the 3D Foam Christmas Shapes and covered with craft Foil and the berries are Basic Grey Candy Buttons

Shell Carman Reindeer Food e
I hope you enjoy making your Christmas Crafts & don’t forget to sprinkle your Reindeer food outside on Christmas Eve For the Reindeers to find!

Thanks for Looking
Shell Carman- Another Scrappy Day

Scrapbook Adhesives by 3L Products Used
3D Foam Christmas Shapes Crafty Power Tape

Other Products
Spellbinders Shapeabilities Label 28
Graphic 45 Nutcracker paper
Basic Grey Candy Buttons
Basic Grey 25th & Pine Designer Chipboard Stickers
Ranger Distress Glitter Black Soot
May Arts Ribbon 463 58 14 Jute
Papercraft Glitter Crimson

Sparkly Tree Tag Tutorial

Hi all, AJ here to share a fun and quick tag to dress up your gifts this holiday season!

AJOtto-Zoom-1

These awesome glitter sheets make it so quick, easy, and best of all- MESS free to add a little pop of flair to your projects.

AJOtto-Zoom-2

Simply peel back the backing to the 3D Foam Tree, and press down onto the Glitter Sheet.  Lightly burnish, and gently lift up, and your tree is covered with fabulous sparkly glitter and NO MESS. 🙂

AJOtto-Zoom-3

Sparkly!

AJOtto-Zoom-5
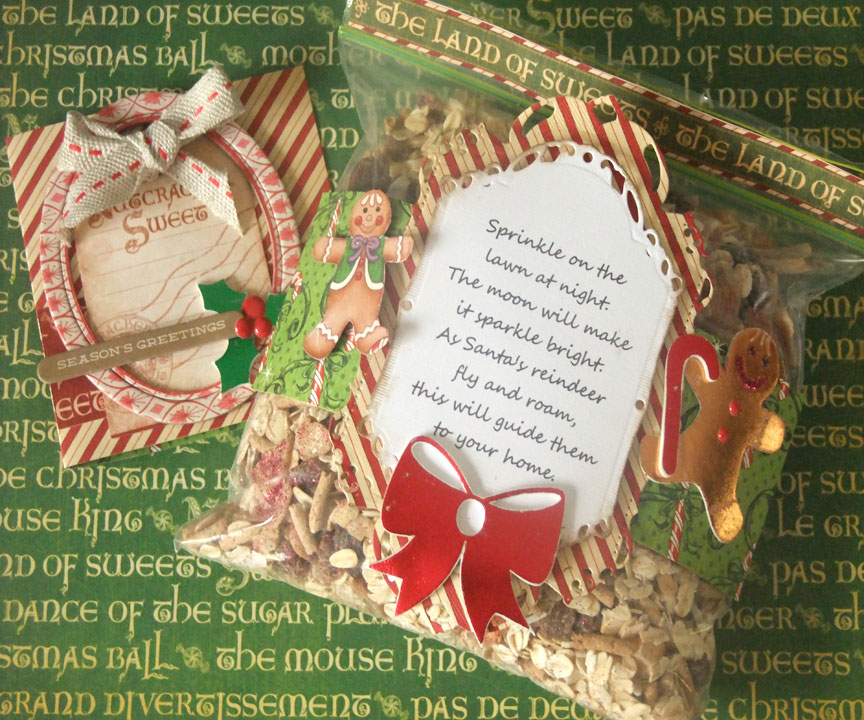
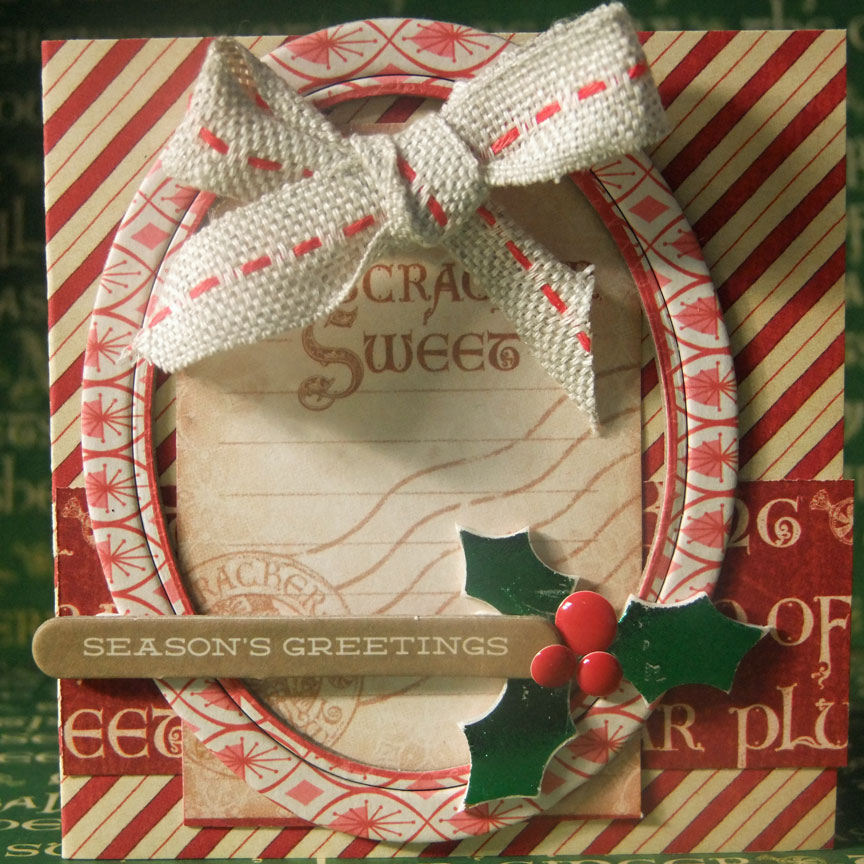
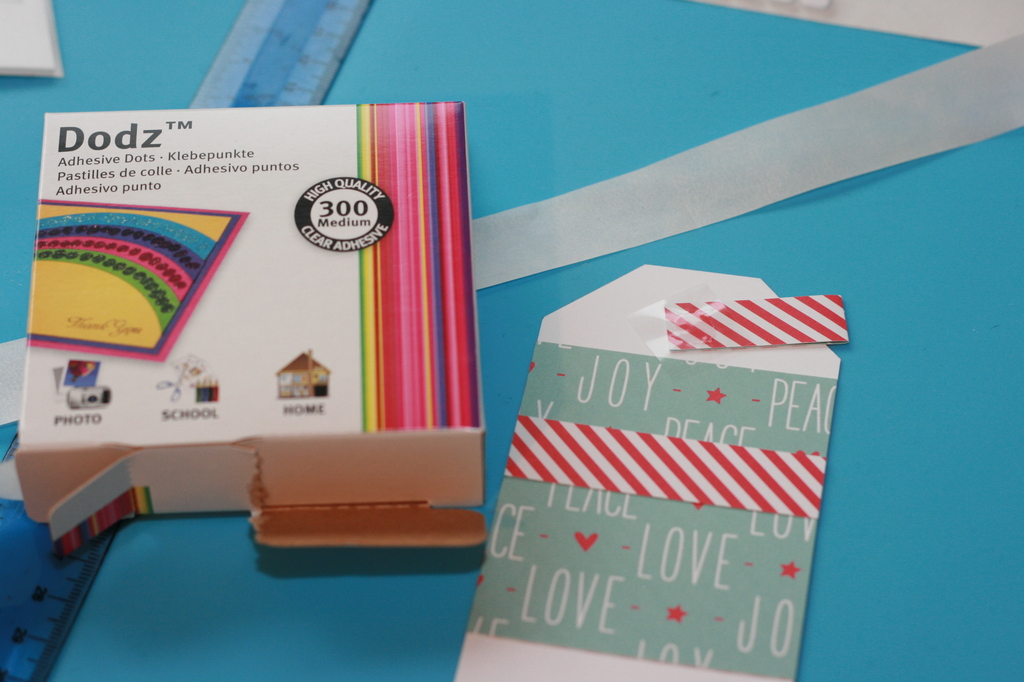
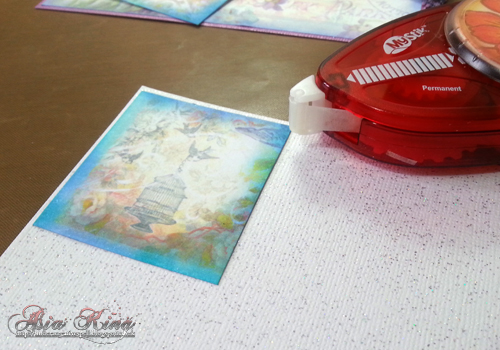
Adhere your patterned paper to the tag using E-Z Runner®­­ Permanent Refillable.

AJOtto-Zoom-6

And to adhere my paper ribbon tab, I used a Dodz Small.AJOtto-Zoom-4

Pop up your die cut using 3D Foam Squares before adhering to the tag.

Supplies

enjoy!!

AJ

Save

Save

Save

Merry Christmas Star Card

It’s December and time to get those Christmas cards finished! Here is a fun idea for 3D Foam Stars and embossing powder!

BethPingry Foam Star CardTo create the effect where I used 2 colors of embossing powder on the same star I used a ruler and a craft knife.

First I cut around the star to remove it from the sheet of stars.  Leave it stuck to the liner papers. I carefully sliced through the top liner to cut it, without cutting all the way through the foam (I did in one spot…a light hand and more practice required!)

BethPingry-FoamStars4

This created 10 sections on the 5 point star. Carefully peel off the liner on half of the sections, then apply the first color of embossing powder. Heat just until each section is melted. Wipe off excess from the star.

Tip: I like to pour embossing powder into round coffee filters. There’s no static, and it’s  easy to pour the excess back into the container!

BethPingry-FoamStars3 Now carefully remove the rest of the liners, add the second color of embossing powder and heat those sections. Tweezers or the tip of the craft knife work great on the tiny pieces!

Create the project to use this on, and then apply the star. Peel the backing off the star and place it on the project. Don’t stretch or pull apart the nested shapes, this takes a gentle hand, but is very doable. Just don’t rush it!

Thanks for coming by and have a great day!

Beth Pingry

Supplies:


A Christmas Wreath Card

Hello everyone!  It’s Kelly Klapstein here today, and I’m going to show you how I made this beautiful bow on my Christmas card.

kellyklapstein-door-0

The bow is one of the many wonderful designer shapes included in the 3D Foam Christmas Mix, and the door on the card was created with Spellbinders dies and Core’dinations card stock.

kellyklapstein-door-2

Here is a step-by-step tutorial that shows how I designed the card.

First, I cut out the pieces of the door and adhered the largest piece to the card base using my  E-Z Dots® Permanent Refillable adhesive.

kellyklapstein-door-6

I adhered the smaller door layers using Crafty Foam Tape.

kellyklapstein-door-4

kellyklapstein-door-5

The Crafty Foam Tape gives the door a dimensional appearance.

kellyklapstein-door-7

To create the wreath, I punched out branches from two shades of green card stock.

kellyklapstein-door-8

Then I cut out a wreath base freehand with a hole in the centre, and used Dodz Adhesive Dots to adhere the branches.

kellyklapstein-door-9

kellyklapstein-door-10

I put more Dodz Adhesive Dots on the back of the wreath to make it fuller and bigger.


kellyklapstein-door-11

To create the bow, I used both Zoom! glitter paper and Wow! Fab Foil in red.

kellyklapstein-door-12

First I took off the largest part of the bow protective backing and pressed down the red glitter paper.

kellyklapstein-door-13

Then I peeled off the remaining 3 pieces of bow protective backing and added my red foil.

kellyklapstein-door-14

kellyklapstein-door-15

I love the effect of the foil and glitter together on the bow!

kellyklapstein-door-16

I adhered the bow onto the wreath which was adhered onto my door with Dodz Adhesive Dots.

kellyklapstein-door-17

Of course my door needed a door handle, so I added black glitter to a foam circle from the 3D Foam Christmas Shapes.

kellyklapstein-door-18

And I even saved the white bow peeled off backing to use on another project!

kellyklapstein-door-19

The Crafty Foam Tape and the Designer Foam Shapes work so well on cards that I can send in the mail because they aren’t too bulky but still have 3D elements.

kellyklapstein-door-20

I hope you are enjoying making some Christmas cards as much as I am!

Happy Crafting!

Kelly Klapstein (aka KellyCreates)

ADHESIVES:

Crafty Foam Tape

E-Z Dots Permanent

3D Foam Christmas Shapes

Dodz Adhesive Dots Small

Dodz Adhesive Dots Medium


SUPPLIES:  Core’dinations Colorcore Cardstock; Spellbinders dies and Grand Calibur; EK Success/Martha Stewart punch and glitter; Zoom! Glitter paper; Foil.

Save

Some Odd Girl Blog Hop Day 5

 WELCOME, crafty friends!  We have an exciting week planned for you!  Scrapbook Adhesives by 3L and Some Odd Girl stamps-we’re STICKIN’ IT TO YA!

Scrapbook Adhesives by 3L

Some Odd Girl

AJOtto-SOG-1

Hello all! AJ here to share with you my card for today  I used Some Odd Girl’s Everyday Smiles set (which happens to be on sale today!) for my card.  I stamped the little arrow pieces up and down on my Kraft card stock layer which I adhered using the E-Z Runner® Permanent Refillable. I then stamped the sentiment and adhered it using 3D Foam Squares.  Lastly, I adhered the sequins by trimming a Dodz Small down and adhering to the card.

Other products- Some Odd Girl’s Everyday Smiles set

Cardstock, sequins, Memento Luxe ink from Imagine Crafts®/Tsukineko®

enjoy!! AJ

Save

Make Magic – Some Odd Girl Blog Hop Day 4

Hello Crafty Bloggers! Asia King here with another inspiration project for our fabulous week-long blog hop with Some Odd Girl. Today I am playing with this magical stamp Fairy Magic and I’m wearing my adhesives on the outside to add lots of magical sparkle.

Fairy Girl Some Odd Girl & Scrapbook Adhesives by 3L_by Asia King

I’ve started by stamping the fairy onto cardstock with Black Memento ink. Then I coloured it with SpectrumNoir markers – you can see the steps and marker numbers below.

Some Odd Girl Fairy Magiccolouring with Spectrum Noir markers by Asia King
Fairy Magic – colouring with Spectrum Noir Markers by Asia King.
Scrapbook Adhesives by 3L and Some Odd Girl blog hop

Next I die cut the image using a die from the Spellbinders Gold Majesty Circles set.

Make Magic steps_Asia King1a

Then, while still keeping the image in the die I added a smaller die from the set but this time I used it to only emboss the pattern.

Make Magic steps_Asia King1b

In the next step I kept the biggest die as a stencil and sponged some distress inks around the fairy.

Make Magic steps_Asia King2

To make the card, I cut a card blank from Core’dinations cardstock. Next I cut a front panel from Crafty Individuals paper book and adhered it to the base with MyStik® Permanent Strips. To embellish it further I added some vintage lace secured with Crafty Power Tape.

Make Magic steps_Asia King3

I also cut four smaller images from the paper pack and adhered them onto glitter cardstock mat.

Make Magic steps_Asia King4

This step is so much fun! I dabbed some Boss Gloss over the Ivory Creative Photo Corners and heat embossed them with Vintage Lilac Embossing Tinsel from Stampendous.

Make Magic steps_Asia King5

Don’t they look so pretty? :). I added the photo corners to my smaller panels.

Make Magic steps_Asia King6

I wanted the smaller panels to be raised from the base of the card so I popped them onto Thin 3D Foam Squares – White Mix.

Make Magic steps_Asia King7

Now I was ready to arrange the smaller panels on the card.

Make Magic steps_Asia King8

My fairy image was mounted onto the regular 3D Foam Squares – White Mix and white Crafty Foam Tape.

Make Magic steps_Asia King9

I also had a pearl string embellishment which I popped onto smaller foam squares.

Make Magic steps_Asia King10

On both sides of the card I added butterflies embellished with glitter dots – DODZ 3D and Royal Purple Crushed Glass Glitter.

Make Magic steps_Asia King11

I also added some coordinating fabric flowers glued with Adhesive Dots Medium.

Make Magic steps_Asia King12
Stampendous purple crushed glass glitter and 3D DODZ

Here are the main blog links:

Scrapbook Adhesives by 3L

Some Odd Girl

Spellbinders Gold Majesty Circles with distress inks

Happy hoppin’!

Asia King

Save

Visit our Website and Blog!
Sign up for our Newsletter so you never miss a contest or giveaway!

instagram purple icon facebook icon purple pinterest purple icon twitter purple icon YouTube icon blog subscription purple icon

Save

Some Odd Girl Stamps Blog Hop: Day 3

WELCOME, crafty friends!  We have an exciting week planned for you!  Scrapbook Adhesives by 3L and Some Odd Girl stamps-we’re STICKIN’ IT TO YA!


SONY DSCI was so lucky to get the HAPPY DAY stamp set to play with.

Was sitting there looking at it – its a great set – but I was in a Christmas mood and then I turned the ray/arrow stamp around….

“Trees” are embossed with white embossing powder and then inked with Tim Holtz Distress Ink to make the background.

Finished off with embossing powder and glass glitter on a strip of Crafty Power Tape

Do you make all your Christmas cards the same – or do all different kinds to try different techniques ?

I’m off to play some more with this great stamp set from Some Odd Girl – hope you’ll have some fun creating today too 🙂

Iben 

Products used for todays card:

Happy day stamp from Some Odd Girl, White cardstock, Tim Holtz distress ink, Stampendous embossing powder and glitter, diecut from the Silhouette Cameo.

Adhesives used for todays card:

Crafty Power Tape - 81'

Save

Save

Save

Some Odd Girl Stamps Blog Hop: Day 2


WELCOME, crafty friends!  We have an exciting week planned for you!  Scrapbook Adhesives by 3L and Some Odd Girl stamps-we’re STICKIN’ IT TO YA!

Here are the main blog links:

Scrapbook Adhesives by 3L

Some Odd Girl

3L LY Nov26OddGirl card

Hello!  Latisha here with you on the second day of the hop.  Today I am sharing a Holiday card using the Some-Odd-Girl Owl Days clear stamp set.  I stamped my image in Memento Tuxedo Black ink, then continued to color it in using a combination of Spectrim Noir and Copic markers.  The hat and owl are two separate stamps, so I colored and then cut them out.  I adhered the images to the card using a few different 3D foam supplies.  First was the Scrapbook Adhesives by 3L 3D Foam Squares (white, regular), and then the Thin 3D Foam Squares (mix-white).  Since the pattern paper had a lot of green in the pattern, to separate the layers a little bit more, I added Scrapbook Adhesives by 3L Black Photo Corners.

3L LY Nov26OddGirl card2

Adding 3D Foam Squares, give any project great dimension!

Latisha

Materials Used:

 Scrapbook Adhesives by 3L: Black Photo Corners,  3D Foam Squares White Regular, Thin 3D Foam Squares Mix White

  • Some-Odd-Girl Stamps: Owl Days
  • Lawn Fawn: Peace Joy Love Collection
  • Bazzill Green Cardstock
  • Spectrum Noir markers
  • Copic markers
  • Black Stickles
  • White Stickles
  • scissors

Save