You are in our US store • Switch to Europe store

Echo Park “Splash” Scrapbook Layout

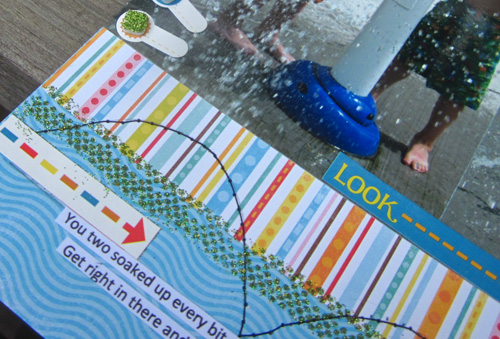
Well, it’s a fun month with Echo Park products , here on the Scrapbook Adhesives by 3L blog.  I used the “Splash” Collection for create a layout with some fun photos of my  nephews from last summer.
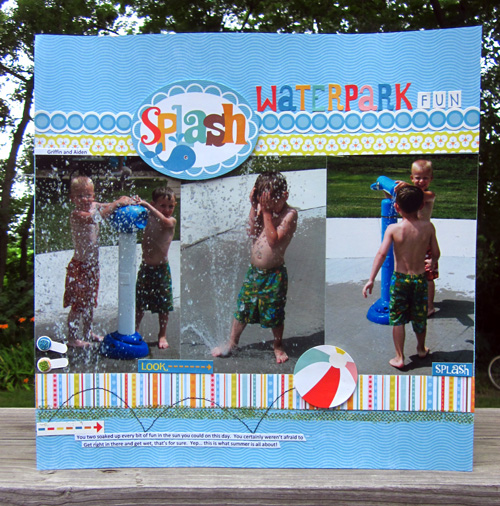
This was such a fun and colorful line to work with!  I thought I’d share some ways I incorporated my Scrapbook Adhesives by 3L products into this layout with the Echo Park goodies

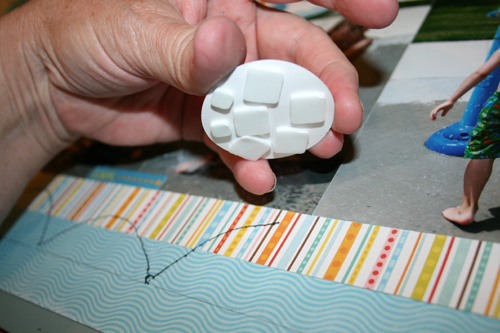
I love the coordinating stickers with this line..but sometimes adding some dimension is just what you need.. so…    I thought I’d share with you how I to that.   Baby powder lightly sprinkled on the backs of your sticker embellishments will take way the “stickem” lol.  I put it on lightly and then brush it way.  From there I add my 3D Foam Squares to the back.
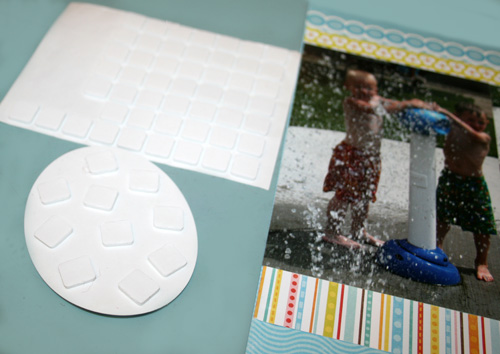
I added the 3D Foam Squares to my title sticker, and also to the bouncing beach ball, to give them so lift off the page.
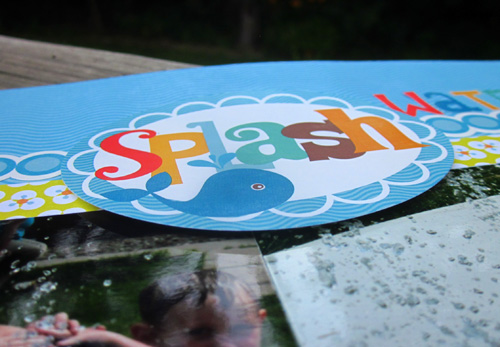
I used my E-Z Dots Repositionable once again, for a fun way to add glitter to my layout.
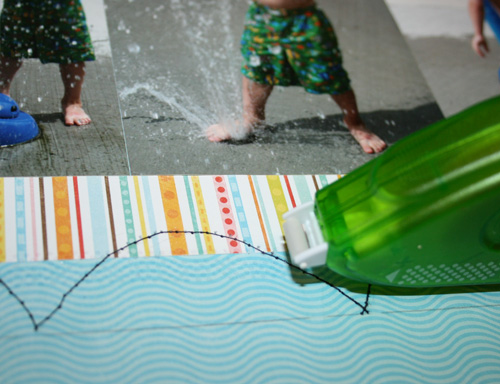
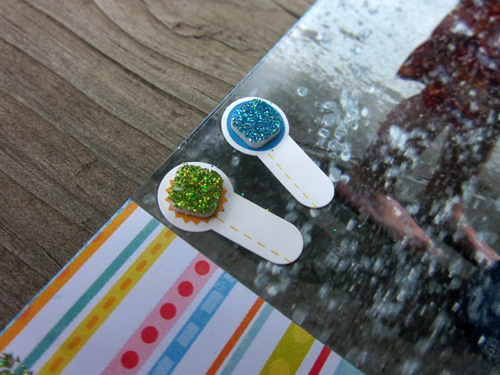
And for a quick and fun effect for my photo turn, (instead of using a brad), I used my small 3D Foam Squares to add a “glittery embellishment”
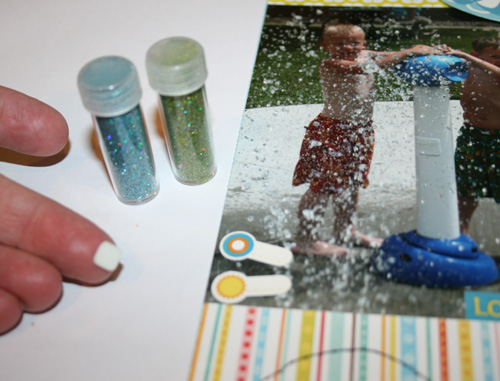
All you have to do, is sprinkle your favorite colors of glitter right on to the 3D Foam Square, and add it to your page.
Scrapbook Adhesives by 3L and Echo Park are a perfect pair!

Happy Creating!

Vicki Chrisman

my blog: “This Art that Makes Me Happy”
Save

Fun with Photo Corners!

Photo corners, they’re not just for photos anymore! Since I opened my Design Team supply package and saw the great collection of colors, my mojo has been working overtime. Today I have two cards that use Creative Photo Corners differently.

Feeling a bit sassy, I pulled out a Crafty Secrets Heartwarming Vintage Creative Scraps sheet, the Domestic Goddess theme.  And then I dug into my Echo Park Paper collection, full of bright and playful patterns!

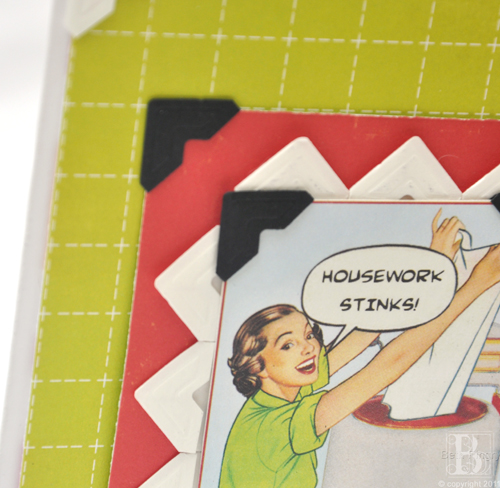
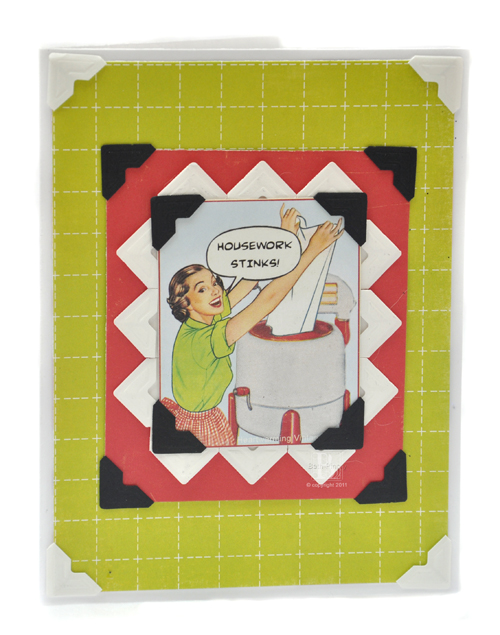
This first card features my mantra ‘Housework Stinks’.

Fun with Photo Corners by Beth Pingry

I created a frame for the image by cutting a piece of scrap paper exactly the same size as the image, applying White Photo Corners around the outside edge, and then attaching the image on top with Black Photo Corners.


Fun with Photo Corners by Beth Pingry

The red paper (Strawberry) is attached with a set of Black Photo Corners, and then layered onto green paper (Big Dots), and the attached to the card front with another set of White Photo Corners.

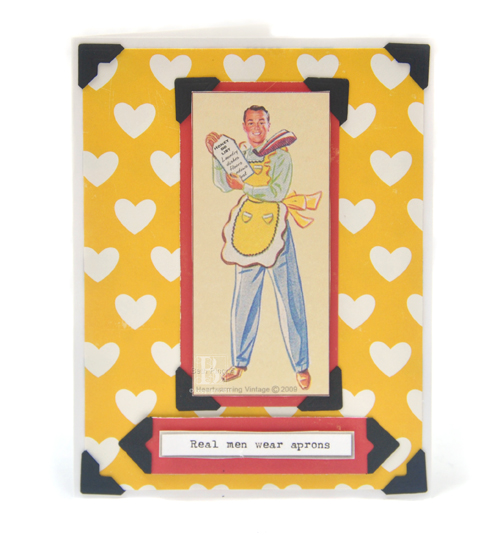
Honey-Do Guy Card

Fun with Photo Corners by Beth PingryMy second card starts with the Honey Do List Guy mounted onto red paper using 3D Foam Squares, then mounted onto the heart patterned paper (Cupcake Casey) and the card front with Black Photo Corners.
Fun with Photo Corners by Beth Pingry

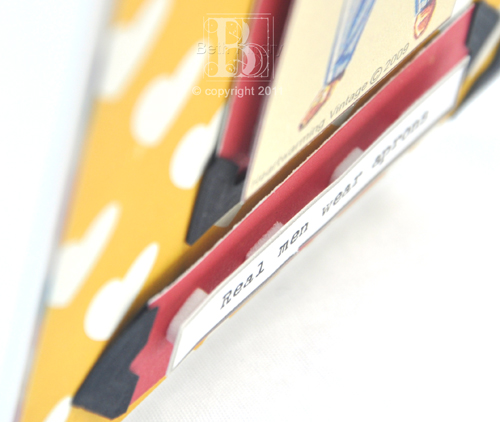
For the comment “Real Men Wear Aprons”, I used scissors to snip small 3D Foam Squares in half and adhered it to a strip of red paper. I scissor trimmed the ends of the red strip to fit into Black Photo Corners.

Use Creative Photo Corners on your next project, they’ll add interest and fun, and they’re easy to use!

Supplies:

  • SCRAPBOOK ADHESIVES BY 3L™: Black Photo Corners and White Photo Corners, White 3D Foam Squares
  • Echo Park Paper Co.:  Little Boy “Strawberry”, Summer Days “Big Dots”, Little Girl “Cupcake Casey” patterned Papers
  • Crafty Secrets: Heartwarming Vintage Creative Scraps “Domestic Goddess”

Have a wonderful day!

Beth Pingry

Save

Save

Save

My Idea of Housework…and Vintage Street Market Card

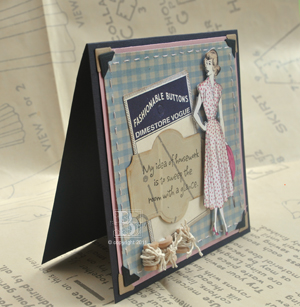
The Dimestore Vogue Collection from Vintage Street Market was so much fun to work with! I love the ladies of the past, how did they manage to do it all and look so fabulous?

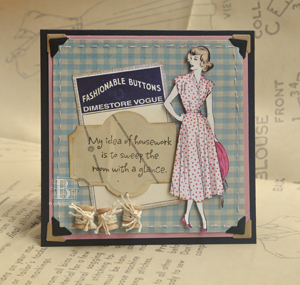
My card starts with a 6 x 6″ black base. I cut a piece of 5½”pink cardstock as a mat. Then I cut a blue gingham 5¼” squares background. This piece was stitched with pink thread.

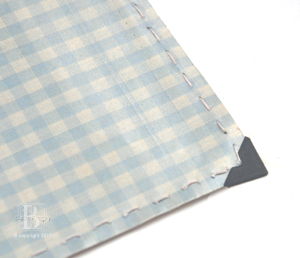
Let me just say, I can’t sew my way out of a paper bag. I used my Scor-Pal and Piercing Bug to  pierce the holes. I followed with thread for evenly spaced stitches. Both background pieces are adhered with SCRAPBOOK ADHESIVES BY 3L™ Photo Corners in Black and Kraft.

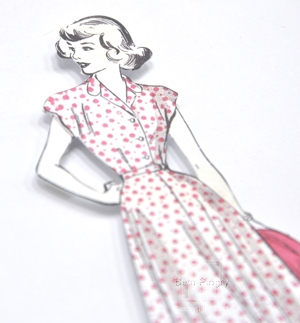
The lovely lady die cut is backed with 3D Foam Squares -White.  I love the dimension they give. I cut a few of the small squares in half while still on the backing sheet in order to fit behind the lady’s arms and legs.

The ‘Fashionable Buttons’ tag is from the same die cut sheet.  I stamped “My Idea of Housework” on the back side of the blue gingham paper, which resembles a sewing pattern.  I die cut and embossed that with Spellbinders™ Paper Arts Labels Twenty-One.  I inked the edges of all the die cuts with Clearsnap brown ink.  These are adhered with clear Mounting Squares.

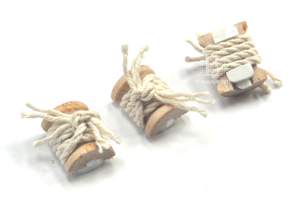
The spools are small wooden craft spools. I recruited my hubby and his tools to help cut the spools in half. I wrapped them in twine and tied a knot.  I cut a few more 3D Foam Squares to attach the spools to the card.

Voila! This card is so easy with SCRAPBOOK ADHESIVES BY 3L and Vintage Street Market products!

.

Supplies:

  • SCRAPBOOK ADHESIVES BY 3L: 3D Foam Squares, Photo Corners Black and Kraft, Clear Mounting Squares
  • Vintage Street Market: Dimestore Vogue Kit
  • Spellbinders Paper Arts: S5-027 Labels Twenty-One, Grand Calibur™ Machine
  • Clearsnap: Black Pigment and Chestnut Roan Fluid Chalk Inks, foam applicator
  • WorldWin® Papers: Black Treasures and Cotton Candy CutMates Cardstock
  • Scor-Pal: Scoring Board, Piercing Bugs Rotary Tool
  • Inkadinkado: Housework stamp # 94830MM
  • Darice: Craftwood ½” x ⅝” spools
  • String, pink thread

Thanks for visiting today, and have a wonderful day sweeping the room with a glance!

Beth Pingry

Save

Save

Cardmaking with Creative Photo Corners

Hi, it’s Beth today! Are you looking for creative ways to up your cardmaking? See how I played around with the Creative Photo Corners to come up with something different. I needed to make a few masculine cards for Father’s Day and graduation. Using Creative Photo Corners, I made a frame & embellishment design, I think it’s pretty cool!

Cardmaking with Photo Corners by Beth Pingry for Scrapbook Adhesives by 3L

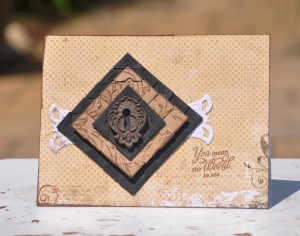
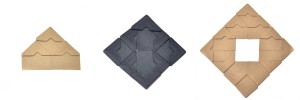
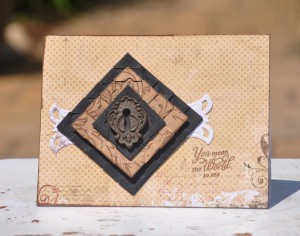
The embossed “V” on the Creative Photo Corners created an interesting texture when I started stacking and layering them. I created a frame, or a stack of frames made by lining up the Creative Photo Corners.

Cardmaking with Creative Photo Corners

First, start stacking and lining up the edges.  See how they build into a square!

Cardmaking with Photo Corners by Beth Pingry for Scrapbook Adhesives by 3LFor the larger black square, I didn’t like the way they lined up on their own so I cut a square and aligned the edges of the Black Creative Photo Corners to the edge of the square paper.  That was much easier then eyeballing it!
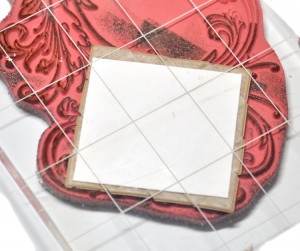
I stamped a flourish image to the Kraft square, and then inked the outside edges of it. I felt like it needed some kind of design element to it.

Cardmaking with Photo Corners by Beth Pingry for Scrapbook Adhesives by 3L

3D Foam Squares were added to the back of the Kraft square, and used MyStik™ Permanent adhesive with the other squares.  For the vintage keyhole I used Crafty Power Tape, perfect for heavier or bulkier items.

Next, I stacked the Creative Photo Corner elements onto each other, then added a die cut behind them, and adhered it onto a patterned paper card front.  I stamped a sentiment to finish it off.

Don’t you love the texture the Photo Corners add to this card!

Cardmaking with Photo Corners by Beth Pingry for Scrapbook Adhesives by 3L

  • Creative Time: 30 Minutes
  • Skill Level: Beginner

Supplies used:

  • SCRAPBOOK ADHESIVES BY 3L®™:  Creative Photo Corners in Kraft and Black , Crafty Power Tape, 3D Foam Squares White Regular, MyStik™ Permanent
  • Spellbinders™ Paper Arts: S5-030 Fancy Tags Two
  • Clearsnap: Colorbox Fluid Chalk Ink in Chestnut Roan
  • Bo Bunny:  Timepiece Collection paper in 6×6″ Pad
  • JustRite Stampers: Kindness stamp set
  • Stampers Anonymous: Fabulous Flourishes stamp set
  • Melissa Frances: Vintage Keyhole

Thanks for visiting!

Beth Pingry

Save

Grandma’s Strawberry Bread Recipe Scrapbook Page

One of the things few things I have from my Grandma is her collection of handwritten recipes, including this recipe one for her Strawberry Bread.  I have intentions of scanning them and making a CD to give to my sisters.  A scrapbook page would make a great gift when I give them the CD.  SCRAPBOOK ADHESIVES BY 3L™ Photo CD Pockets are perfect for storing a CD on a scrapbook page like this one.

Recipe scrapbook page by Beth Pingry

Scrapbooking a Recipe

The recipe and the Imaginisce paper inspired me to create a page focused on the recipe.

First I hand cut strawberries from a paper border then stacked them in sets of 3 and 2, with 3D Foam Squares in between the layers.  I added more strawberries to a banner with 3D Foam Squares under the strawberries and below the banner pieces, to give it more dimension.

Then I copied the recipe then trimmed patterned paper to fit the inside of the Photo CD Pocket.  When the flap is closed and secured it keeps the CD safely inside. Adhesive on the back side of the pocket keeps everything in place on the page. You could use the largest Keepsake Envelope here, just resize the recipe card to fit!

Supplies:

  • SCRAPBOOK ADHESIVES BY 3L™: 3D Foam Squares, Photo CD Pockets, MyStik™ Permanent adhesives
  • Spellbinders Paper Arts: Grand Calibur™ machine, S7-018 Big Scalloped Border Grand, LF-161 Grand Labels One, S4-046 Banner Basics 3
  • Imaginisce: “Berrylicious Collection” Sweet Summer Garden, Summer Stripe, Sunshine Seeds, Berry Patch, Just Peachy
  • WorldWin Papers: Black Cardstock
  • Clearsnap: Warm Red Fluid Chalk Ink
  • American Crafts:  Delight and Sprinkles White Glitter Letter Stickers

Enjoy!

Beth Pingry

Save

Save

Save

Rugby: Men in Striped Socks Scrapbook Page

My soft spoken teenage son has taken up the gentleman’s sport of Rugby, and there is nothing soft about it!  He’s really enjoying it and it gives me another photo op, so it’s all good, right?

Rugby Men in Striped Socks by Beth Pingry for Scrapbook Adhesives By 3L,

Creating the Rugby Scrapbook Page

First I created a flip book from a package of Photo CD Packets.  I printed photos to fit inside of and on the back side of each pocket.  The back side has adhesive on it, and the last page of the book is attached to the scrapbook page.  The other pockets have a photo on the back sides, and another photo inside the pocket.  You could even add a CD if you wanted to!

I stacked the pockets and used Crafty Power Tape on the flaps.

Just flip the pages to see all the photos.

Here is the way I created the stripes on the word Rugby. I started by placing a strip of blue cardstock onto an Adhesive Sheet.  Next I made two strips of Crafty Power Tape across the cardstock. Then I die cut the fonts and taped them in place.

I punched each letter, removed the Crafty Power Tape backing from the fronts.  Then I dipped the letters into Distress™ embossing powder and heated until set.  I removed the Adhesive Sheet backing and placed each letter on the top of the Photo CD Pocket.

The large photo and the mats are adhered with MyStik™  Permanent Dispenser.

The labels are stamped with “Men in” and “Striped Socks” and layered with 3D Foam Squares, for dimension and to match the height of the Photo CD Pocket mini-album.  Now when I add this to his scrapbook the pages will be level.

Using the right adhesive keeps my projects neat and clean. Speaking of neat and clean, which is not something I associate with Rugby, especially the laundry it generates, I roughed up and inked the edges of all the papers to give it that ‘just tackled’ look.

I used the following supplies:

  • SCRAPBOOK ADHESIVES BY 3L: Photo CD Pockets, Crafty Power Tape, MyStik™, 3D Foam Squares, Adhesive Sheets
  • Spellbinders S4-306 Wonky Rectangles, Grand Calibur machine
  • Clearsnap ColorBox Fluid Chalk Inkpad in Creamy Brown and Chestnut Roan
  • Ranger Distress Embossing Powder
  • WorldWin Papers Treasures Canvas, ColorMates Sunny Side Up and Blue Potatoes
  • JustRite Stampers® Clear Blocks and Brayton Font (95 and 50 pt.)

Thanks for stopping!

Beth Pingry

Save

How to Make a Paper Easter Basket

I created this basket with paper and adhesive, it’s so cute, and it’s easy enough that you can make multiples and even get the kids to help!

SCRAPBOOK ADHESIVES BY 3L – Crafty Power Tape and 3D Foam Squares
Spellbinders – Grand Calibur machine, LF-127 Grand Scalloped Squares, S4-314
Lacey Ovals, S4-110 Classic Ovals LG
My Mind’s Eye – Mary Mary: “Beautiful” Gorgeous and So Cute Papers, “Best of
Friends” Play and Share Papers
Colorbox – Clearsnap Fluid Chalk – Lime Pastel
Copic- Airbrush System and R20 Blush Sketch Marker, atyou Spica Olive pen
WorldWin Papers – ColorMates Dark Fairy Tale Pink
 

Start by die cutting a scalloped square.  I used my die cut machine and Grand Scalloped Squares, the largest die template in the set.  I die cut/embossed My Mind’s Eye patterned cardstock, because it was cute, springy and actually a nice heavy weight, which makes it perfect for a basket.

Fold the square four times, at the second scallop.  Then cut along 4 of the fold lines, as shown.

Add strips of Crafty Power Tape to the center panel between the cut lines.  See that I inked the inside with purple to show how I folded and adhered the sides.

I interlocked the scallops. Crafty Power Tape holds it all in place.

Fold in and adhere the opposite side to make the basket.

To make the handle usable, and to reinforce the bottom of the basket, I cut a piece of scrap cardstock to 3 x 3”.  I applied Crafty Power Tape to one side, along the outer edges. I cut coordinating My Mind’s Eye paper to strips of 1 x 12”, and then folded both ends in at ½”.

Remove the backing from the Crafty Power Tape and adhere the ½” folded part to the adhesive as shown.

Place the handle piece into the bottom of the basket, and voila!  We have a basket with a sturdy handle!

To embellish the basket, I cut/embossed Beaded Ovals and Classic Ovals.  I inked and airbrushed, and assembled the pieces and placed them on the basket using 3D Foam Squares.

These baskets come together quickly and easily.  They are perfect for holidays, parties and little gifts, just change the paper to fit the occasion.

You can even use them as place cards!

Thanks for visiting the Crafty Power Blog today!  Now if you’ll excuse me, I have to eat some jelly beans before my teenagers get to them!

Beth Pingry


Save

Happy Everything Banner!

I fell in love with the bright colors of this paper, and I love the trendy banners I’ve been seeing.  Layers and dimension add so much to the project and allow you to see the contrast between patterned paper and solid colors. Glitter and bling make it festive and fun, glitter is a great way to dress up a plain supply.

I used SCRAPBOOK ADHESIVES BY 3L products to assemble the banner.

The banner is created from die cuts that I cut/embossed in the Spellbinders™ Grand Calibur™ machine and die templates. All the die templates to create one pennant fit on the plate and cut/emboss in one pass, making this a quick project!!

1.       Arrange die templates on Grand Calibur Base Plate, cover each with paper, die cut and emboss.

2.       Assemble pennants with largest size on the bottom, using 3D Foam Squares to adhere layers.

3.       Place small 3D Foam Square at the ends of the banner toppers, adhere so that the topper arches over the pennant.

4.       Cut letter stickers and backing from packaging, keep stickers on the backing.  Cover the top of letters with an Adhesive Sheet and rub to cover the top of the letter with adhesive.  Sprinkle glitter over the top of letters.

5.       If glitter gets under the sticker, place it on an adhesive sheet to make it stick to the Beaded Oval die cut.

6.       Weave ribbon through the sides of the lacey pennants, leaving some space for the little paper ribbons.

7.       Layer the paper ribbons with 3D Foam squares, add Bling to top layer.  Adhere to the fabric ribbon with Crafty Power Tape, evenly spaced between pennants.

Supplies:

  • SCRAPBOOK ADHESIVES BY 3L: Adhesive Sheets, 3D Foam Squares, Crafty Power Tape
  • Spellbinders: Grand Calibur, S4-294 Beaded Ovals, S5-028 Nested Pennants, S5-029 Lacey Nested Pennants, S5-046 Banner Basic Three Topper
  • Clearsnap: Bits of Bling: Bright smooth Circle bling orange
  • Sparkle N sprinkle: Sunset Semi-Transparent Glitter
  • Cosmo Cricket: Salt Air – Sea Garden Fish Tales, Deck Chairs, Coral Bloom
  • WorldWin Papers:  Treasures (Honey), ColorMates ( Deep Caribbean Coral, Med Spring Green)
  • Ribbon:  Michaels
  • American Crafts:  Thickers (Platforms chipboard)

Hang and enjoy!

Beth Pingry


Quick and Beautiful Card using the new MyStik™

Tami here today with a quick and easy card that can be made in minutes using the new MyStik™ adhesives and a few 3D Foam Squares.

Here are the supplies I began with:

I began by lining the edges of my patterned paper with the re-positionable MyStik™. I was planning on stitching the edges so I chose this particular adhesive for a couple of different reasons. I like to have my papers in place and not have to worry about them slipping while I am sewing. By using the repositionable adhesive I won’t gunk up my needle if I get it too close to the edge. In addition, many times I like to curl the edges after I stitch (especially is it’s not straight!). With the repositionable adhesive I don’t have to worry about adhesive showing from the underside. It simply rubs off.

After stitching the pattern to the dark red panel I lined the back with the permanent MyStik™. This is great for adhering the piece but also to hold any loose ends that may be left from stitching.

Once the base was created I added my metal greeting. These embellishments were designed to be set with an eyelet tool. I am not a fan of this type of attachment so I simply apply mini foam squares to the corners. This gives it a good strong hold and makes it sit high enough that the metal sticking out on the back doesn’t come in contact with the paper.

Next, the flower. I ran thread through the holes and the ends with a 3D Foam Square. I then layered it onto the flower.

Finally, the card was wrapped with ribbon, the flower attached with another 3D Foam Square and it’s done!

Thanks for stopping by!

Tami Mayberry

Save

Such a Cute Snail

For this LO I used 3 of my favorite Scrapbook Adhesives by 3L products. The MyStik™, E-Z Dots™ Repositionable dispenser (green) and 3D Foam Squares.

I love to use the E-Z Dots™ Repositionable to keep any masks down on my LO when using any kind of spray ink. If you use little paper parts they often get blown way by the spray but a E-Z Dots™ Repositionable keeps them in place without leaving any trace of the adhesive behind.

The background of this LO is created using glimmer mist. In the background I wanted to have some white text circles so I punched out some circles and adhered  them to white cardstock using E-Z Dots™ Repositionable. The I sprayed with the glimmer mist and removed the circles. Now I got some nice white circles in my background. Then I used the E-Z Dots™ Repositionable to place the negative of the punched out circles over the white spots and stamped with a text stamp without any worries that the paper would move while stamping.

One of the reasons why I love the Mystik™ Permanent Strips Dispenser (Red) so much is that the tape in not one long strip but it is a lot a tiny little strips next to each other which makes it easy to use for circular shapes like the circle I used on my LO.

No need to replace the tape runner every cm, just put it down and go all the way round in one time!

I like to give a little depth to my projects and therefore am a big fan of 3D Foam Squares. They works easy, fast, give a lot of depth and are strong! No way your flowers or other embellishments will ever fall off your project!

And this is the final LO:

Supplies used:

Scrapbook Adhesives by 3L: Mystik™, E-Z Dots™ repositionable and 3D Foam Squares

My little shoebox: paper | Basic Grey: letter stickers, rubons, brads | Prima Marketing: paper | October Afternoon: letter stickers | Other: Cake doily, felt flowers | Limited Edition: stamps | Stazon: ink

Thank you so much for stopping by!

Birgit Koopsen

Save

Save

Save