You are in our US store • Switch to Europe store

Vellum on Vellum on Steampunk!

Today’s post for the SCRAPBOOK ADHESIVES BY 3L™ and Graphic 45® Blog Hop is a vellum on vellum card I created with the Steampunk Debutante collection.
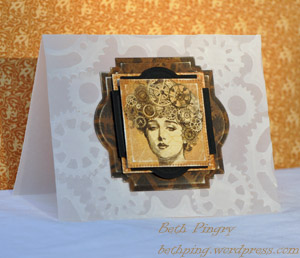
Vellum Adhesive solution by Beth Pingry for Scrapbook Adhesives by 3L I die cut the focal point image, then stacked it onto layers of die cuts, with black cardstock and then coordinating Steampunk Debutante papers.  Each layer is adhered with Crafty Foam Tape.  The Crafty Foam Tape adds dimension, and allows me to cut the tape to the exact size I need.
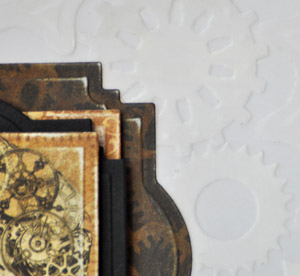
The vellum die cuts in the shapes of gears are adhered with E-Z Runner Permanent Fine Adhesive.  I adhered the pieces then trimmed them to fit the vellum card base.  They stick without showing adhesive lines or falling off.

Like us on Facebook, SCRAPBOOK ADHESIVES BY 3L  to stay up to date with us.

Supplies:

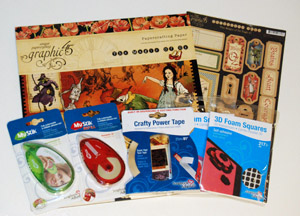
  • SCRAPBOOK ADHESIVES BY 3L: Crafty Power Tape, E-Z Runner Permanent Fine Dispenser
  • Graphic 45: Steampunk Debutante Collection Papers
  • Spellbinders™: Grand Calibur® machine, Classic Squares LG, Labels Twenty-Two, Sprightly Sprockets
  • WorldWin Papers: Vellum, Black Treasures Cardstock

Thank You for visiting!

Beth

Save

A Christmas Past Ornament

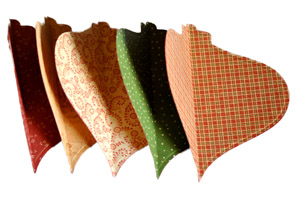
Today’s SCRAPBOOK ADHESIVES BY 3L™ and Graphic 45® Blog Hop item is an ornament I made using the 8 x 8″ pack of Christmas Past paper and images.

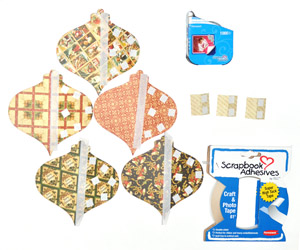
The ornament starts with five die cut shapes.

Ink the edges, score each down the center vertically.  Then apply adhesive to one half of the back side.  I used Crafty Power Tape down the score line, and then a few Click ‘n Stick™ Mounting Squares around the edges.

The simply match up the shapes and adhere back to back to make a dimensional ornament.  I added a piece of bakers twine to use as a hanger.  I dangled a plastic bead at the bottom of the ornament and added three of the same shaped images back to back below the main ornament.

I added a cone bead to the top, and then tied a bow to it.  I will loop the top of the twine so I can hang it from the tree at Christmas time.

I took the ornament one step further, buy die cutting another set of images in a smaller size, then adhering them inside the folds, giving the ornament an additional layer.

The possibilities are endless for this type of ornament, any shape, pattern or image will work, and you can embellish with any beads or bows or baubles.

Thanks for stopping by, and don’t forget to leave a comment for a chance to win our Prize Package! And then stop by the Graphic 45 Blog to leave a comment for their prize package!

Like us both on Facebook, SCRAPBOOK ADHESIVES BY 3L and Graphic 45, to stay up to date with us.

Supplies:

  • SCRAPBOOK ADHESIVES BY 3L: Crafty Power Tape, Click ‘n Stick™ Mounting Squares
  • Graphic 45: Christmas Past 8×8″ Paper Pad, Tag Sheet
  • Spellbinders: Grand Calibur machine, 2011 Heirloom Ornament die set
  • Jillibean Soup: Bakers Twine
  • Creative Impressions: Red silk ribbon
  • Crafts Etc: 15mm Cone Bead Cap
  • Other: Clear Bead

Thanks,

Beth Pingry

Save

Crafty Christmas Tags

Hi it’s Beth again, and welcome to the second week of the SCRAPBOOK ADHESIVES BY 3L™ and Graphic 45 Blog Hop! We’re giving away another prize package this week, and so is Graphic 45, so be sure to leave a comment on each post here this week, and then visit the Graphic 45 Blog and do the same!

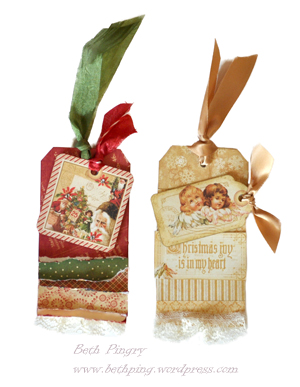
I’m more of a Christmas fan, and I was inspired to make some Christmas tags with the Christmas Past Collection from Graphic 45. Tags are a fun way to decorate gift packages, especially if you are bow-challenged like me. And tags are a great way to use up scraps!

I  used Crafty Power Tape to attach the lace, it is clear and strong, and I know the lace trim won’t come off!  The layers of papers were trimmed to size, inked and adhered with Mounting Squares.  The die cut tags were adhered with 3D Foam Squares to give them height, and to also make space for the thicker ribbons I used.

Supplies:

  • SCRAPBOOK ADHESIVES BY 3L: Mounting Squares, 3D Foam Squares, Crafty Power Tape
  • Graphic 45: Christmas Past Collection
  • Ink: Ranger Ink Distress, Fired Brick and Antique Linen
  • Ribbons: Offray Gold, Creative Impressions Red and Green Silk, Jillibean Soup Bakers Twine; Lace from my scraps
  • Bling: Want2Scrap Say it with Bling
  • Tags: Manilla office tags

Thank you Graphic 45, for joining us in this 2 week long blog hop! Don’t forget to visit the Graphic 45 Blog and Facebook page for more inspiration!

At the end of this week we’ll be drawing a winner for this awesome collection of SCRAPBOOK ADHESIVES BY 3L and Graphic 45 products.

Just leave a comment right here to be eligible to win! Come back every day for another chance to win! We are on Facebook, join us there too!

Good Luck!!

Beth Pingry

Spools of Creativity…

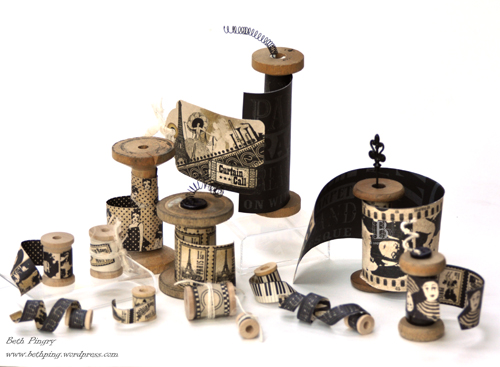
Hi, it’s Beth. First, we must establish that I can’t sew my way out of a paper bag. But I have this odd obsession with all things sewing. Recently I bought a set of five vintage wooden spools, and this is what I’ve done with them.

Spools of Creativity by Beth PingryI love (sigh) the Curtain Call papers (and well, all of the papers) from Graphic 45. The patterns lend themselves to so many different projects, with a nice mix of patterns and images in many sizes.
I gathered the many sizes of wooden spools I had and started trimming, wrapping and winding the different patterns.

The paper is easily formed and holds it shape, so I only needed a few spots of E-Z Runner® Permanent Fine Adhesive on each spool. The toppers, which include a button, a metal embellishment and spiral turned wire, are held in place with the new Crafty Foam Tape.  The Crafty Foam tape allows me to cut the exact size I need!

Supplies:

  • SCRAPBOOK ADHESIVES BY 3L™: Crafty Foam Tape, E-Z Runner Permanent Fine Adhesive
  • Graphic 45: Curtain Call Papercrafting Paper
  • Karen Foster Design: Page Pin Ups Baroque Black 5″
  • Artistic Wire: Black and Silver wire
  • Darice: Craftwood 1/2 x 5/8″ wood spools
  • Lara’s Crafts: 5/8 x 3/4″ wood spools
  • Crafts Etc: 3/16 x 7/8″ wood spools
  • Other: Vintage Wood Spools, various sizes, button, twine, cotton cloth

Just leave a comment right here to be eligible to win!  Come back every day for another chance to win! We are on Facebook, join us there too!

Thanks and happy crafting!

Beth Pingry

Save

Sparkly Photo Corners on a Gate Fold Card

It’s Beth again, and I’m back with another Creative Photo Corner idea. Seriously, who knew they were so versatile? Let me show you how I used them to enhance this gate fold card.

Sparkly Photo Corners on a Gate Fold Card by Beth Pingry for Scrapbook Adhesives by 3L

The Gate Fold Surprise!

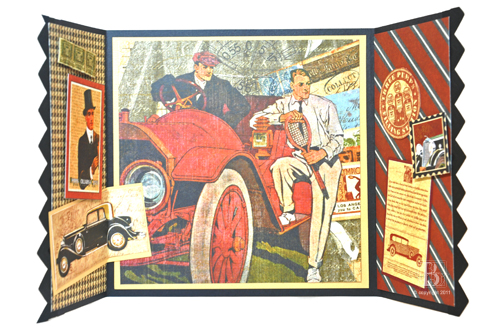
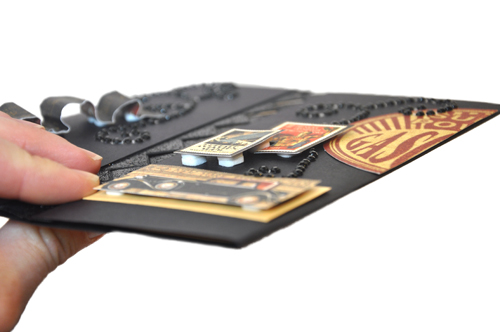
This gate fold card opens to reveal the large car image on the inside center panel. It can be used to write a message to the car loving guy in your life. I used images from the Graphic 45 “A Proper Gentleman” to embellish the inside and outside panels. Some of the images fold with the card, and have dimension from 3D Foam Squares.

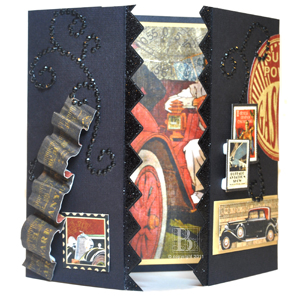
Sparkly Photo Corners on a Gate Fold Card by Beth Pingry for Scrapbook Adhesives by 3LMost significantly, the Photo Corners align at the center when the card closes.
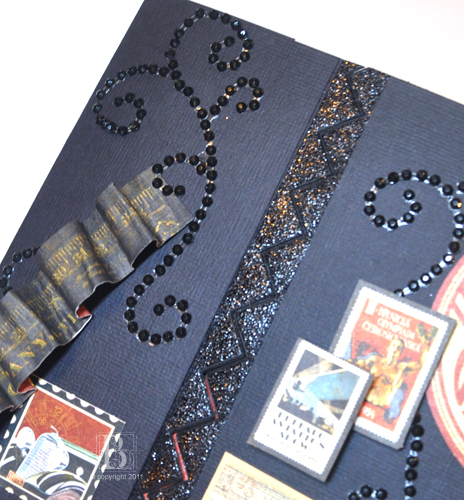
Sparkly Photo Corners on a Gate Fold Card by Beth Pingry for Scrapbook Adhesives by 3LThe Photo Corners were positioned so that the adhesive ‘back’ sides were facing up, and the ‘tab’ part is adhered to the inside flap, then covered with the patterned paper.
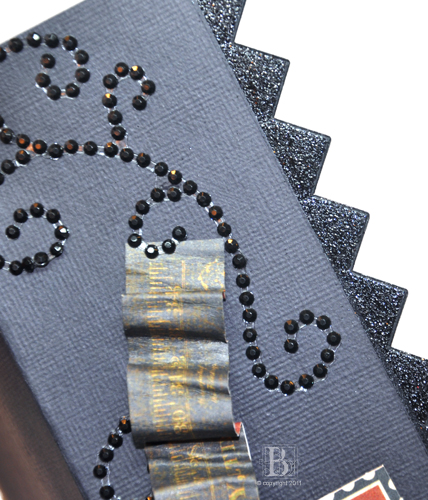
The exposed adhesive on the Creative Photo Corners was covered with embossing powder.  Quick work with the heat tool set the powder to a glossy and sparkly finish.

Sparkly Photo Corners on a Gate Fold Card by Beth Pingry for Scrapbook Adhesives by 3L

Next, I used 3D Foam Squares to add dimension to several pieces. For additional height and dimension, notice that I stacked the 3D Foam Squares on top of each other.

Sparkly Photo Corners on a Gate Fold Card by Beth Pingry for Scrapbook Adhesives by 3L

For a more stealth look, I could have used Black 3D Foam Squares, which would have blended into the background better. Hindsight is 20/20 you know!

The zig-zag look of the Photo Corners along the opening of the card adds an unexpected element to an ordinary card.

  • Creative Time: 1 Hour
  • Skill Level: Intermediate

Supplies:

Thanks for stopping by!

Beth Pingry

Trendy Frame Technique with Photo Corners

It’s Labor Day weekend in the US, and many of us have the day off. I hope you are enjoying the long weekend!

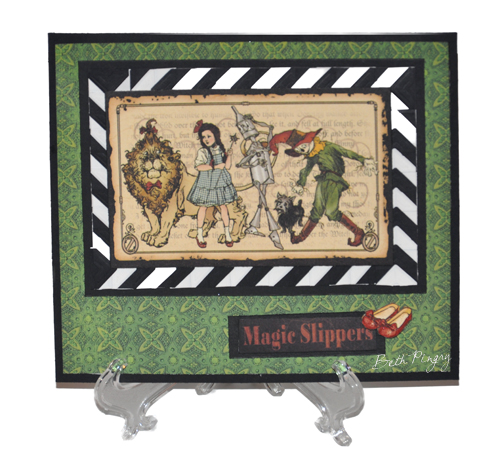
Trendy Frame Technique with Photo Corners by Beth Pingry Today’s project features the three of the products in the Adhesive Value Pack.

Making the Chevron Frame

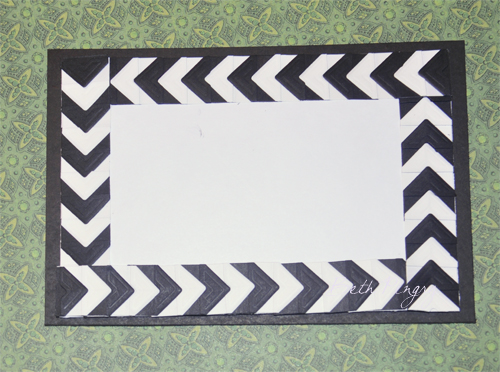
I started with the Photo corners in both black and white. I layered them around the outside of a piece of cardstock, which was cut the size of the Graphic 45 image, plus the width of one photo corner, on both sides.  (When the image is added, only half of the photo corners are visible.)

Trendy Frame Technique with Photo Corners by Beth Pingry

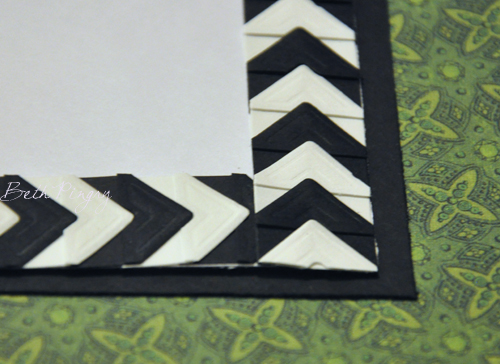
Next, I started in one corner and layered the photo corners, alternating colors, placing the point of one into the V of the other.  I tucked the ‘end’ under the previous line and trimmed the excess.

Trendy Frame Technique with Photo Corners by Beth Pingry

The texture and alternating colors of the photo corners create a unique design.

Once I had the frame made, I adhered the Graphic 45 “The Magic of Oz” image with 3D Foam Squares, and then used Mounting Squares to attach the frame to a black cardstock mat.

‘Magic Slippers’ comes from a sheet of paper in the same pack, I  matted it to black cardstock with 3D Foam Squares

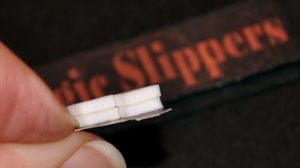
Then I added a pair of ruby slippers, colored with a Copic atyou Spica Pen in Lipstick Red.  To give the slippers more lift, I stacked 3D Foam Squares so the slippers sit higher than the words.

Assemble the images to a card base with Mounting Squares. It’s that easy!

The Adhesive Value Pack includes a variety of adhesives at a great price!

These are the supplies I used to create this card:

  • SCRAPBOOK ADHESIVES BY 3L™: Adhesive Value Pack
  • Graphic 45: The Magic of Oz (Emerald City, Journey to Oz, Munchkins, There’s No Place Like Home)
  • Copic Marker: atyou Spica Glitter Pen, Lipstick Red
  • Black cardstock

Enjoy the holiday, and thanks for stopping by!

Beth Pingry

A Photo Corner Framed Fairy Card

I more Photo Corner cards to show today.  Building on my other Photo Corner Creations on Cardmaking with Photo Corners, Fun with Photo Corners, and  More Photo Corner Art I created a frame for an image.

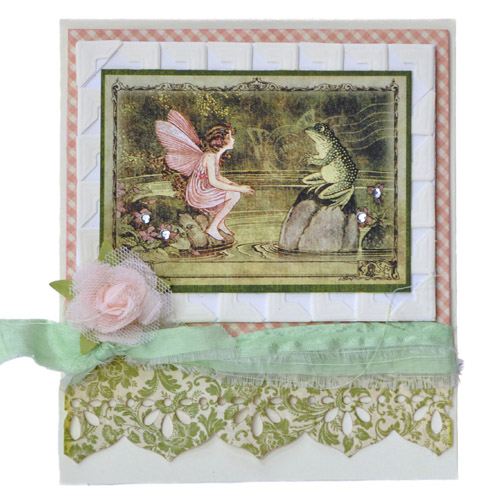
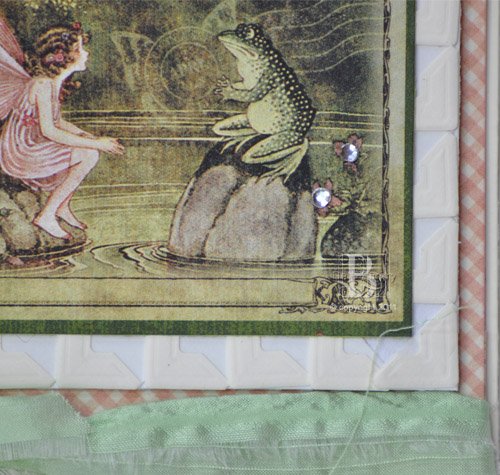
A Photo Corner Framed Fairy CardI cut out the image from the patterned paper pack and then cut out a mat about ½-inch wider and longer than the frame.
A Photo Corner Framed Fairy Card

Next I stacked Ivory Creative Photo Corners along the outer edge of the mat to create a textured design.

The image was adhered to the mat with MyStik™ Permanent Strips adhesive.  The Mat was adhered to the layered card using 3D Foam Squares.  A flower, a little bling, a fun die cut edge and some silk fabric finish off the card.

SCRAPBOOK ADHESIVES BY 3L™ Supplies:

  • Photo Corners – Classic Style Ivory
  • 3D Foam Squares – White
  • MyStik™ Permanent Strips Dispenser

Other Supplies:

  • Spellbinders Paper Arts™ Classic Petal Edgeabilities® Die Templates
  • Graphic45 Once Upon A Springtime Paper
  • Prima Marketing Esprit Champagne Rose Collection
  • WorldWin Papers Treasures – Canvas Cardstock
  • Want2Scrap Say it With Bling Rhinestones
  • Silk Fabric, torn into strips

Thanks for stopping by! What have you done with Photo Corners?

Beth Pingry

Save

Blue Vintage Card

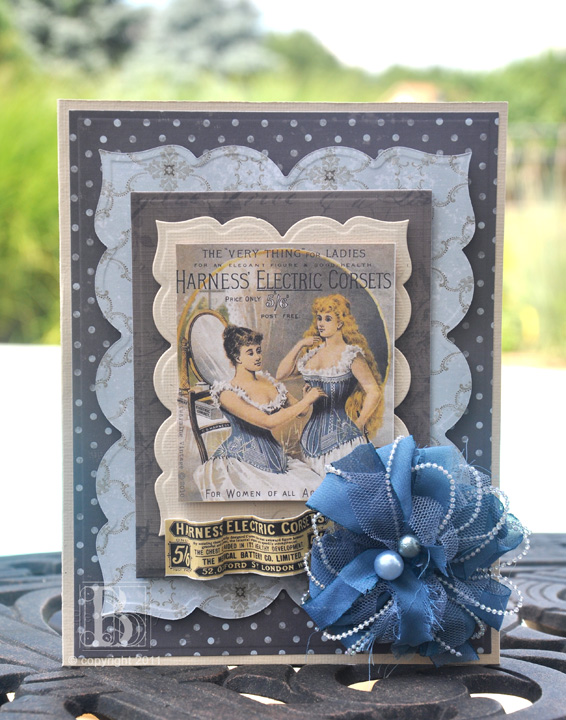
I fell in love with this blue ribbon bow and absolutely had to create something with it.  The image from Crafty Secrets coordinated perfectly to make this Blue Vintage Card.

Vintage Blue card by Beth Pingry

Blue Vintage Card Tutorial

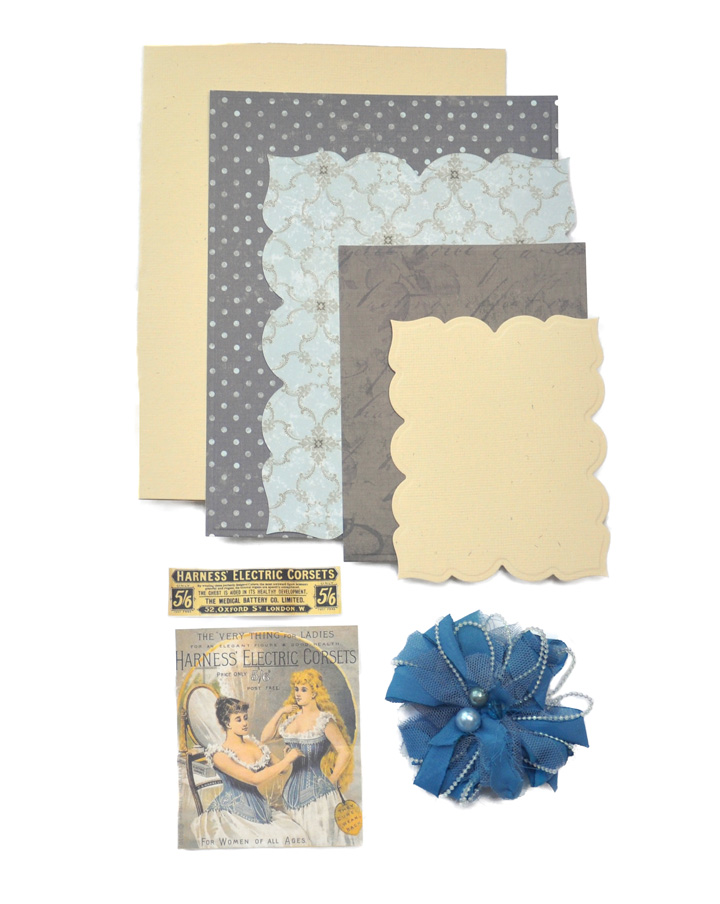
I started by die cutting some new Spellbinders shapes with GCD Studios and WorldWin Papers, along with the image and bow.

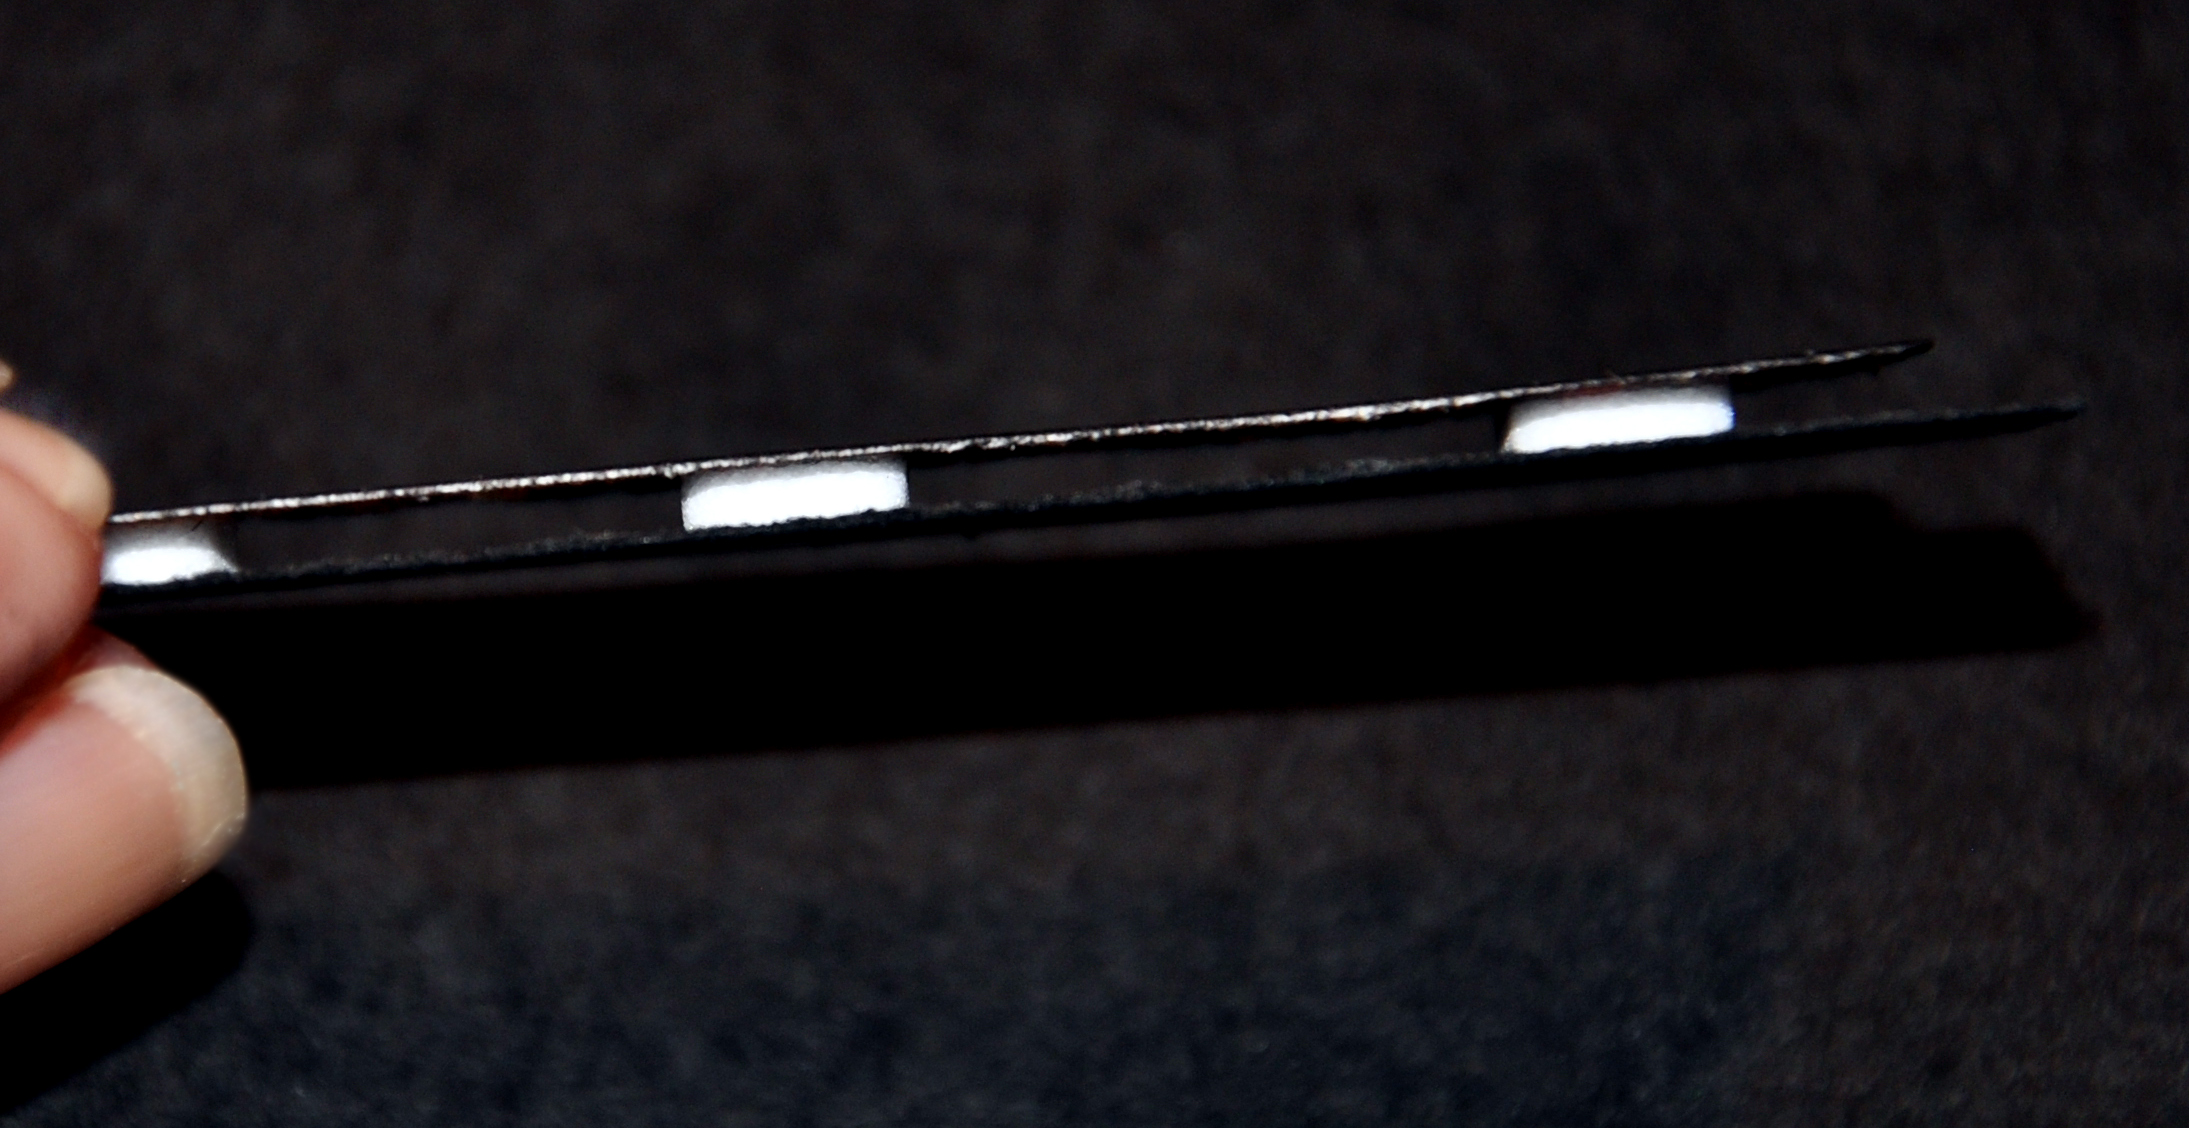
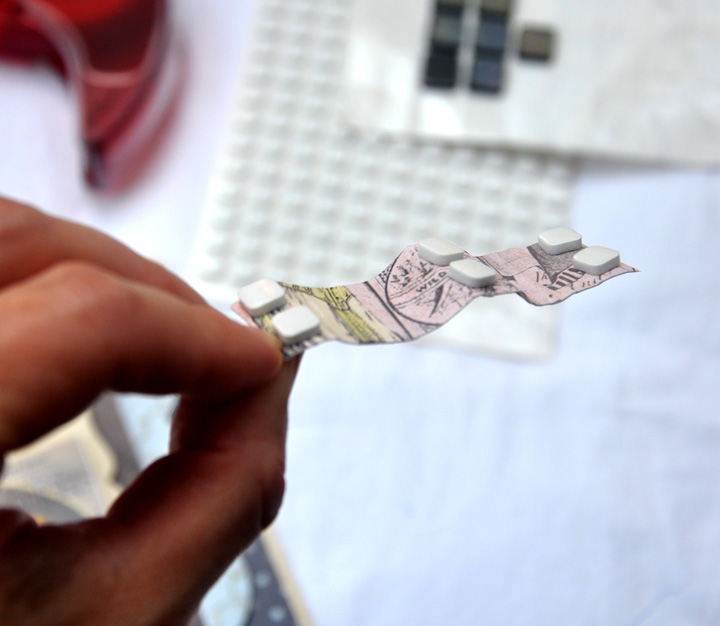
For the yellow “Harness Electric Corset” (who’s happy those aren’t required anymore!) piece, I manipulated it to break the paper fibers so I could attach it as a ribbon.  I placed white 3D Foam Squares in three places.

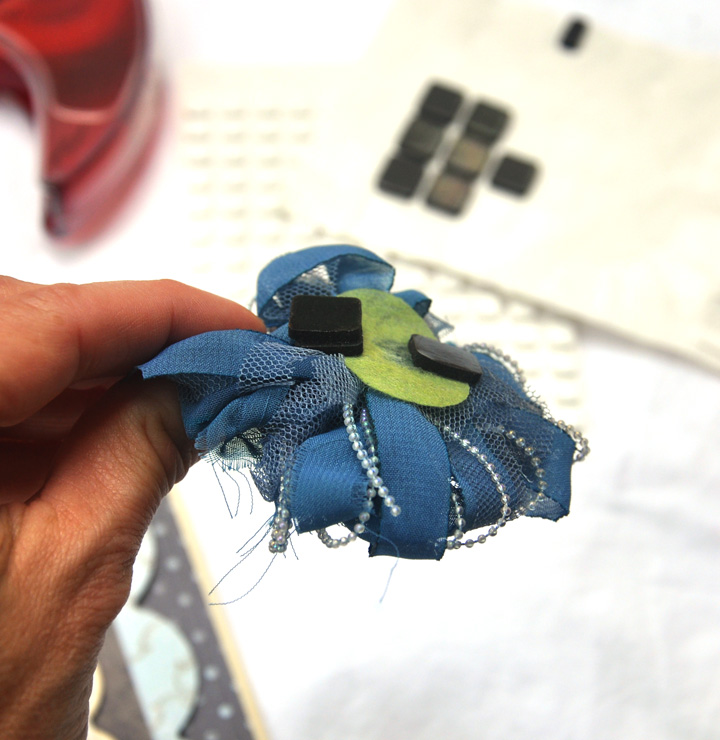
On the back of the blue bow, I added black 3D Foam Squares.  On one side I doubled them, so the ribbon didn’t sit lopsided on the card.

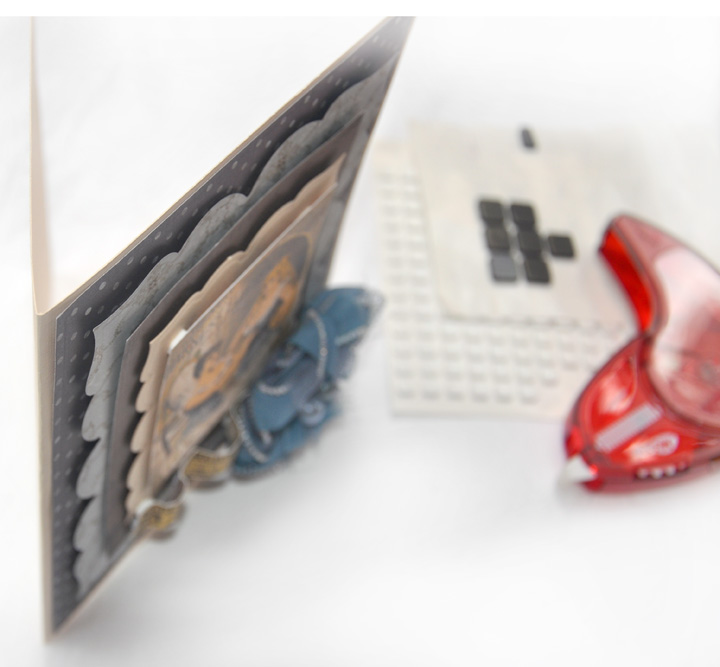
I layered the shapes by size, and adhered each layer with Black 3D Foam Squares, and the top image with white 3D Foam Squares (on darker papers I use black, on lighter papers I use white).

And that’s how easy it is to create this card!

These are the supplies I used:

  • SCRAPBOOK ADHESIVES BY 3L™ – Black 3D Foam Squares, White 3D Foam Squares, Mystik™ Permanent
  • Spellbinders™ Paper Arts – LF-132 Grand Rectangles, LF-347 Grand Labels Twenty-Three, Grand Calibur™  Die Cutting Machine
  • Prima Marketing – The Gatsby Collection (Bay)
  • Crafty Secrets – Creative Scraps (Girlfriends)
  • GCD Studios – Ella Blue Collection Patterned Papers
  • WorldWin Papers® – Treasures (Papyrus)
  • Scor-Pal®- Scoring Tool

Thanks for stopping by and have a great day!

Beth Pingry

Save

More Photo Corner Art and Echo Park Paper Co!

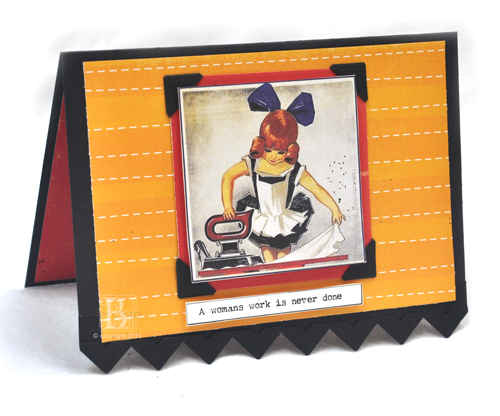
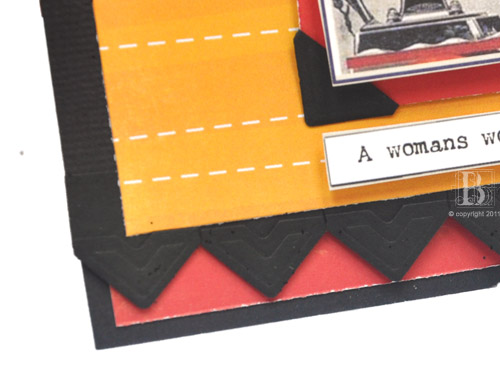
The CHA trade show is in full swing, which makes the sentiment on this card so timely! I used Black Creative Photo Corners along the bottom front as a border, and on the red mat as a decorative element to frame the image.

More Photo Corner Art and Echo Park Paper Co! by Beth Pingry

Making the Border with Creative Photo Corners

I love the deep tones of the Echo Park paper, they went perfectly with the Crafty Secrets image I chose.

The image was cut out and adhered to the red patterned paper with 3D Foam Squares. I added Black Photo Corners to the red paper and adhered it to a panel of yellow-orange paper. For the black card base, I cut a 4.25 x 5.5 card, the trimmed ½” from the front panel.

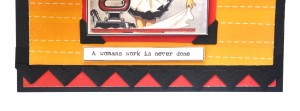
I adhered Black Photo Corners along the cut edge.

More Photo Corner Art and Echo Park Paper Co! by Beth PingryThe thing with Photo Corners is that they have adhesive on the back side of them.  If you used them the normal way, they stick to paper. Since I didn’t want my card stuck shut, I had to figure out a way to use the adhesive to my advantage.
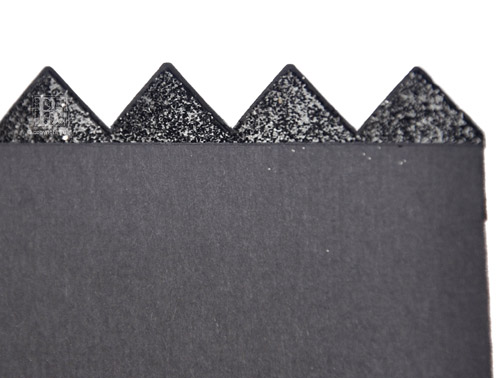
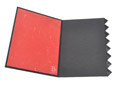
Glitter to the rescue!  I sprinkled black glitter to the exposed adhesive on the back of the photo corners, and then it created a little surprise when the card is opened.

More Photo Corner Art and Echo Park Paper Co! by Beth Pingry

And because the base of the card is black, I wanted the zig-zag edge to be more visible, so I added a panel of red patterned paper to the inside of the card.

More Photo Corner Art and Echo Park Paper Co! by Beth PingrySo that when the card is closed, you can really see the fun edge the Photo Corners make when lined up next to each other!
More Photo Corner Art and Echo Park Paper Co! by Beth PingryAnd when the card stands open, it stands on the points of the Photo Corners! You can appreciate the embossed design on the front of of the Corners too!
More Photo Corner Art and Echo Park Paper Co! by Beth Pingry

  • Creative Time: 30 Minutes
  • Skill Level: Intermediate

Supplies:

SCRAPBOOK ADHESIVES BY 3L:

Echo Park Paper Co.: Little Boy Strawberry, Summer Days Ice Cream patterned papers
Crafty Secrets: Heartwarming Vintage Creative Scraps Domestic Goddess images
Sparkle N’ Sprinkle: Black Ice Glitter

Thank you for stopping by today!

Beth Pingry

Colorful Summer Mini with Echo Park Paper

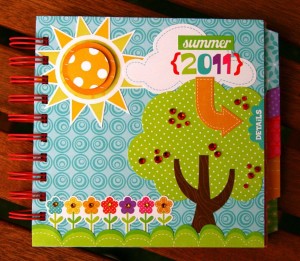
Hi there, I hope you’re all enjoying summer! Here in the Netherlands it’s like fall, raining for days, not something that makes me happy! Echo Park papers do make me happy though! The bright, happy and summery colors make me long for sunshine even more. So looking forward to be going to sunny France in a week! I created this colorful mini album with our upcoming vacation in mind.

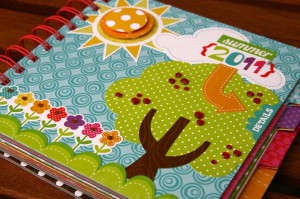
Colorful Summer Mini Album by Birgit Koopsen for Scrapbook Adhesives by 3L Blog

Making the Mini Album

I used MyStik™ Permanent Strips Dispenser to adhere the paper to the chipboard pages.

There are no pictures in the mini album yet. I will fill it together with my little girl after vacation so she can give it to her grandma, who will be visiting us in France for a couple of days. We thought that would make a nice gift for her to remember the fun days we will definitely have together!

Colorful Summer Mini Album by Birgit Koopsen for Scrapbook Adhesives by 3L Blog

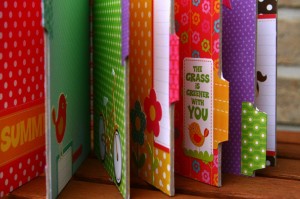
Therefor I used the MyStik™ Repositionable Dots Dispenser to apply the tags and labels inside. So we can lift them up and tuck the pictures underneath afterwards.

Colorful Summer Mini Album by Birgit Koopsen for Scrapbook Adhesives by 3L Blog

To create some depth on the cover I added some crystals on the tree and in the hearts of the flowers. I used 3D Foam Squares between the layers of the sun.

Colorful Summer Mini Album by Birgit Koopsen for Scrapbook Adhesives by 3L Blog

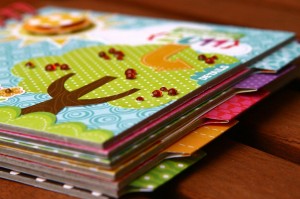
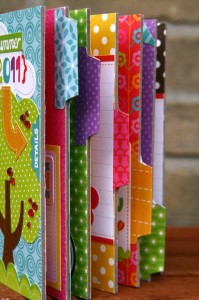
The little tabs where made with a label die and the Cuttlebug. Before running the paper through the Cuttlebug I applied a piece of Adhesive Sheets 4″ x 6″ / 10 x 15cm on the back creating stickers that easily can be applied to the edges of the pages.

Colorful Summer Mini Album by Birgit Koopsen for Scrapbook Adhesives by 3L Blog

Thank you for stopping by! Wishing you all a great, sunny and colorful summer!

Birgit

Save