You are in our US store • Switch to Europe store

And Now…Three Scrapbook Layout

Hi, Jennifer here! Today I have some super fun inspiration for you in the form of a scrapbook layout – And Now…Three! So I have a confession. I haven’t done a lot of scrapbooking in the last few years, but I still love to create a layout now and then and I had a blast creating this one for you! 

And Now...Three Scrapbook Layout by Jennifer Ingle for Scrapbook Adhesives by 3L

Inspiration Behind And Now…Three Scrapbook Page

I have used the Say Cheese: Main Street collection from Simple Stories, as it paired perfectly with these fun photos from my son’s third birthday! 

And Now...Three Scrapbook Layout by Jennifer Ingle for Scrapbook Adhesives by 3L

Those Banners!

I created three long banners as the foundation for the photos. The Crafty Power Tape is amazing for adhering those rolled tops of each banner with no fuss at all! They are good and stuck!

And Now...Three Scrapbook Layout by Jennifer Ingle for Scrapbook Adhesives by 3L

To give the appearance of the banners being hung, I threaded some twine through them and tied bows on each end. The bows are kept in place by a single small foam square, keeping them exactly where they should be!

And Now...Three Scrapbook Layout by Jennifer Ingle for Scrapbook Adhesives by 3L

A simple strip of black cardstock serves as a perfect foundation for the page title. This is adhered with black foam tape for added dimension! 

And Now...Three Scrapbook Layout by Jennifer Ingle for Scrapbook Adhesives by 3L

A few scattered printed die cuts from the collection serve as perfect embellishments! Just secure them with the E-Z Runner® Grand Permanent Strips Refillable Dispenser

I am so happy to share my “And Now…Three” Scrapbook Layout with you today! I hope you leave inspired to create!

Thanks for Visiting!
Jennifer Ingle

Creative Time: 35 mins
Skill Level: Intermediate

Materials Needed:
Scrapbook Adhesives by 3L®

E-Z Runner® Grand Permanent Strips Refillable Dispenser

Crafty Power Tape Polybag 81ft.

3D Foam Squares Micro White

Crafty Foam Tape Black 108ft.

Other: Papers: Simple Stories (Say Cheese Main Street Collection); Alpha Stickers: American Crafts (Cecily Thickers); Cardstock: Bazzill Basics Paper (Black and White)

Save to Pinterest!

And Now...Three Scrapbook Layout by Jennifer Ingle for Scrapbook Adhesives by 3L Pinterest

Visit our Website and Blog!
Sign up for our Newsletter so you never miss a contest or giveaway!

instagram purple icon facebook icon purple pinterest purple icon twitter purple icon YouTube icon blog subscription purple icon

Thinking of You Card Tutorial

Hi, everyone! Do you love the look of foil on handmade cards? Teri here to show a fun way to use Metallic Transfer Foil Sheets with Extreme Double-Sided Tape to create a neat look! Let me show my process in making this Thinking of You Card.

Thinking of You Card Tutorial by Teri Anderson for Scrapbook Adhesives by 3L

Thinking of You Card Front

Start by cutting three rectangles from cardstock to use a placement guide. You can make them as big or as little as you want. Just make sure they are different sizes.

Thinking of You Card Tutorial by Teri Anderson for Scrapbook Adhesives by 3L

Cut a panel of cardstock to fit on a card. Stamp an image in black ink onto it.

Wear Your Adhesive on the Outside Technique

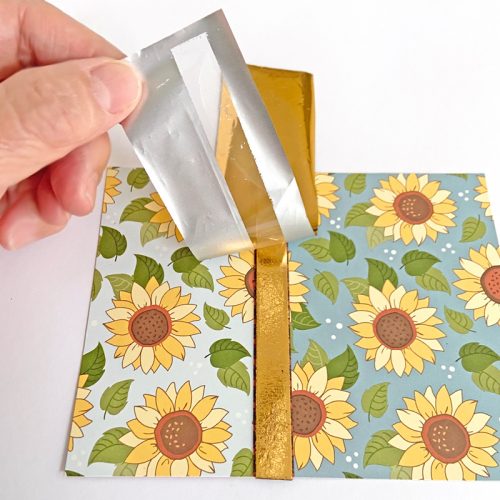
Set your largest rectangle at an angle partly on the panel. Use it as a guide to add stripes of Extreme Double-Sided Tape 1/4in across it. Remove the liner and apply a foil sheet from the Metallic Transfer Foil Sheet Nature Colors.

The foiling application is simple, face the foil color to you and rub it with your fingertips to transfer the color to the tape. Peel the foil to reveal beautiful results! Where tape insects, you’ll need to use your scissors to snip right up to the intersection. You won’t be able to place foil on that spot. Don’t worry! Just keep going.

Thinking of You Card Tutorial by Teri Anderson for Scrapbook Adhesives by 3L

Use your second largest rectangle as a tool to add more strips of the Extreme Double-Sided Tape 1/4in to your panel. Once again, apply the foils (color side up) from the Metallic Transfer Foil Sheet Nature Colors to the strips. Repeat these steps with the smallest rectangle.

Thinking of You Card Tutorial by Teri Anderson for Scrapbook Adhesives by 3L

Cover up the points where the tape pieces intersect by placing a couple of the smallest size squares from the 3D Foam Squares Mix in White on top. You can add one, two, three, or more! Put down as many as your creative heart desires. Burnish foil onto the squares.

Thinking of You Card Tutorial by Teri Anderson for Scrapbook Adhesives by 3L

Complete with Sentiment and Card Base

Stamp a sentiment on a strip of cardstock. Adhere it to your panel with Crafty Foam Tape. Be sure to put a lot of tape on the strip so it doesn’t sag!

Thinking of You Card Tutorial by Teri Anderson for Scrapbook Adhesives by 3L

Complete your card by placing it on a card base created from cardstock.

Thinking of You Card Tutorial by Teri Anderson for Scrapbook Adhesives by 3L

You can use this Wear Your Adhesive on the Outside foiling technique with any stamped design! You can also use other colors of foil for an equally fun look!

I hope you are inspired to give this Thinking of You Card Tutorial a try! Thanks for visiting the blog today!

Happy Creating!

Teri Anderson

Creative Time: 60 minutes
Skill Level: Beginner

Materials Needed:
Scrapbook Adhesives by 3L®

3D Foam Squares White Mix

Metallic Transfer Foil Sheet Nature Colors

Crafty Foam Tape White

HomeHobby™ by 3L:
Extreme Double-Sided Tape 1/4in

Other: Cardstock: Neenah; Stamps: Picket Fence Studios (Watercolor Trees and Bushes Stamp Set + Sentiment Strips Die) and Pretty Pink Posh (Thoughtful Greetings Stamp Set); Ink: Ranger Ink (Black)

Save to Pinterest!

Thinking of You Card Tutorial by Teri Anderson for Scrapbook Adhesives by 3L Pinterest

Visit our Website and Blog!
Sign up for our Newsletter so you never miss a contest or giveaway!

instagram purple icon facebook icon purple pinterest purple icon twitter purple icon YouTube icon blog subscription purple icon

Rainbow Glitter Card

Hello crafty friends! Tracy here, and today I have a sparkly little rainbow glitter card to share. This card is created in just a few easy steps with leftover bits of a beautiful collection. Here are the details.

Rainbow Glitter Card by Tracy McLennon for Scrapbook Adhesives by 3L

Let’s Get Started!

I had this pretty rainbow journal card image that was just begging to be created into a card. I chose ultra-fine glitters to match each color in the image.

Rainbow Glitter Card by Tracy McLennon for Scrapbook Adhesives by 3L

Using the Dual Tip Glue Pen, I added drip-type shapes on each section of color and added the coordinating ultra-fine glitters. This creates the perfect sparkly base for this Rainbow Glitter Card. Set aside to dry completely. Add the sticker sentiment to the bottom right-hand corner of the card front.

Rainbow Glitter Card by Tracy McLennon for Scrapbook Adhesives by 3L

Create a white cardstock 5×7 card base. Cut the polka dot patterned paper to 4.75 x 6.75-inch and adhere to the card base using CREATIVE. I adhered the glittered card front to the card using the E-Z Runner® Ultra Strong Refillable Dispenser.

Rainbow Glitter Card by Tracy McLennon for Scrapbook Adhesives by 3L

Adhere the final touch to this Rainbow Glitter Card, the die-cut piece to the card front using 3D Foam Squares White Mix.

Rainbow Glitter Card by Tracy McLennon for Scrapbook Adhesives by 3L

Thanks so much for stopping by!
Tracy

Creative Time: 30 Minutes (plus drying time)
Skill Level: Beginner

Material Needed:
Scrapbook Adhesives by 3L®
3D Foam Squares White Mix
E-Z Runner® Ultra Strong Refillable Dispenser
Creative Photo Corners Black

HomeHobby™ by 3L:
Dual Tip Glue Pen

Other:
Patterned Papers and Embellishments: Vicki Boutin; Ultrafine Glitter: Stampendous; White Cardstock

Save to Pinterest!

Rainbow Glitter Card by Tracy McLennon for Scrapbook Adhesives by 3L Pinterest

Visit our Website and Blog!
Sign up for our Newsletter so you never miss a contest or giveaway!

instagram purple icon facebook icon purple pinterest purple icon twitter purple icon YouTube icon blog subscription purple icon

Best Friend Note Pads

Hi, Connie here with a fun summer project that kids can enjoy creating. All you need is some really cute patterned papers, note pads, and Extreme Double Sided Tape 1/2″.

I’m using the “Doggone Cute” Collection by DoodleBug, and the note pads are from an office supply store. They measure 5″ x 8″ and I have them cut in half, giving me two note pads. Most of the time the office supply store will cut them for you for a small fee. These are the right size for list-making.

Best Friend Note Pads by Connie Mercer for Scrapbook Adhesives by 3L

Assembling the Best Friend Note Pads

Best Friend Note Pads by Connie Mercer for Scrapbook Adhesives by 3L

Hope you find these Best Friend Note Pads interesting!! The thing is you can make a bunch of these and have them for little gifts year around. It’s always nice to have something on hand!!!

Thanks for stopping by
Connie

Creative Time: 30 minutes
Skill Level: Beginner

Materials Needed:
Scrapbook Adhesives by 3L®

3D Foam Squares White Mix
E-Z Runner Permanent Strips Refillable Dispenser
HomeHobby™ by 3L
Premuim Double Sided Tape 1″
Extreme Double Sided Tape 1/2″

Other: Pattern Paper: DoodleBug/doggone cute, 5″x8″ note pads cut in half. twine

Save to Pinterest!

Best Friend Note Pads by Connie Mercer for Scrapbook Adhesives by 3L Pinterest

Visit our Website and Blog!
Sign up for our Newsletter so you never miss a contest or giveaway!

instagram purple icon facebook icon purple pinterest purple icon twitter purple icon YouTube icon blog subscription purple icon

All Occasion Sweet Bird and Star Card

Hi everyone, Yvonne here with an all-occasion Sweet Bird and Star Card. 3D foam is a perfect way to lift up elements on your card and give it that extra touch. I also used a technique called Wear Your Adhesive on the Outside. I would love to share how I made the card… wanna join me?

All Occasion Sweet Bird and Star Card by Yvonne van de Grijp for Scrapbook Adhesives by 3L

Bird and Stars Top Card Panel

Create a top card panel and embellish it by making a green circle using chalky ink and an ink blending tool. Then sprinkle some water over the colored circle and dab off the water using a piece of paper towel. This will make a distressed look.

All Occasion Sweet Bird and Star Card by Yvonne van de Grijp for Scrapbook Adhesives by 3L

Build the Card Base

Trim the embellished card panel to the size you like and then mat it to a piece of soft green cardstock using the E-Z Runner® Permanent Strips Refillable Dispenser. Then adhere to a white card base also using the E-Z Runner® Permanent Strips Refillable Dispenser. You’ve now created a layered card base.

The Birds

Stamp the bird images on white cardstock and color them. Fuzzy cut the images. Place a combination of 3D Foam Squares White Regular Size and 3D Foam Squares Micro White to the back of the birds. The 3D Foam Squares Micro White is a great adhesive for tiny areas making sure no adhesive is shown from underneath!

All Occasion Sweet Bird and Star Card by Yvonne van de Grijp for Scrapbook Adhesives by 3L

Simply remove the liners from the foam squares and adhere the images to the card. Isn’t this a great dimensional effect on your card? Love it!

Wear Your Adhesive on the Outside with Glitter

As a finishing touch, I used an easy technique called Wear Your Adhesive on the Outside which takes your adhesives from beneath layers to bring them up front as embellishments.

First I placed some E-Z Runner® Stars Refillable Dispenser on the card panel. I like to use tweezers to adhere the stars to the panel. Next, I sprinkle micro glitter on top of the stars and rubbed the glitter over the stars to secure them. Lastly, tap or brush off any excess glitter.

All Occasion Sweet Bird and Star Card by Yvonne van de Grijp for Scrapbook Adhesives by 3L

And voilá, the All Occasion Sweet Bird and Star Card is ready! I hope you enjoyed this tutorial and wish you happy crafting!

Yvonne van de Grijp

All Occasion Sweet Bird and Star Card by Yvonne van de Grijp for Scrapbook Adhesives by 3L

Creative Time: 60 minutes

Skill Level: Intermediate

Materials needed:

Scrapbook Adhesives by 3L®

E-Z Runner® Permanent Strips Refillable Dispenser

3D Foam Squares White Regular Size

3D Foam Squares Micro White

E-Z Runner® Stars Refillable Dispenser

Other

Stamps: Hero Arts® (Finch Greetings Stamp Set); Inkpad: Tsukineko (Versafine™ in Onyx Black) and Ranger Ink (Distress Oxide in Mowed Lawn and Twisted Citron); Coloring Pencils: Faber Castell (Polychromos Pencils); Alcohol Markers; Gold Micro Glitter; White and Soft Green Cardstock; Scissors; Acrylic Block; Ink Blending Tool; Craft Knife; Paper Trimmer; Tweezers; Paper Towel

Save to Pinterest!

All Occasion Sweet Bird and Star Card by Yvonne van de Grijp for Scrapbook Adhesives by 3L Pinterest

Visit our Website and Blog!
Sign up for our Newsletter so you never miss a contest or giveaway!

instagram purple icon facebook icon purple pinterest purple icon twitter purple icon YouTube icon blog subscription purple icon

Birthday Balloon Shaker Card

Does someone have a birthday coming up? I am excited to share a fun and colorful Birthday Balloon Shaker Card featuring the E-Z Runner® Stars, 3D Foam Circle Frames White, and the Crafty Foam Tape 54ft in White. Let me show you how!

Birthday Balloon Shaker Card by Margie Higuchi for Scrapbook Adhesives by 3L

Work with the Card Basics

Make a top fold vertical A2-sized (4 1/4 x 5 1/2-inch) card from orange cardstock. Cut a 4 1/8 x 5 3/8-inch blue cardstock layer. From a piece of patterned paper, cut a 3 7/8 x 5 1/8-inch piece and then die-cut a 2 5/8-inch circle into it to make a window.

Birthday Balloon Shaker Card by Margie Higuchi for Scrapbook Adhesives by 3L

Apply Crafty Foam Tape 54ft in White on the back of the window card panel and center it on top of the blue cardstock layer.

Birthday Balloon Shaker Card by Margie Higuchi for Scrapbook Adhesives by 3L

To finish the layering, adhere to the layered card panel on the orange card base with the E-Z Runner Grand Ultra Strong. Set aside.

Birthday Balloon Shaker Card by Margie Higuchi for Scrapbook Adhesives by 3L

The Birthday Balloon

Let’s get make a balloon! Nest a balloon die and a 2-inch circle die together and secure them with washi tape, die-cut with a piece of orange cardstock.

Birthday Balloon Shaker Card by Margie Higuchi for Scrapbook Adhesives by 3L

For the window covering, cut a 2 5/8-inch circle out of clear acetate.

Birthday Balloon Shaker Card by Margie Higuchi for Scrapbook Adhesives by 3L

Around the edge of the orange balloon, apply the E-Z Runner® Micro (it’s perfect for narrow areas and it curves too!) and add the acetate on top. Then add the 3D Foam Circle Frame White (the fourth largest ring) on top of the acetate. Set aside.

Birthday Balloon Shaker Card by Margie Higuchi for Scrapbook Adhesives by 3L

Start Shaking

In the layered card base, add sequins into the center to the circle opening. For interest, apply the E-Z Runner® Stars randomly on the blue cardstock background. Pick out some Metallic Transfer Foil Sheets and rub them (color side up) onto the stars. When the card stands, you’ll have something to look at instead of elements falling to the bottom! I also added one on the outside of the acetate later.

Birthday Balloon Shaker Card by Margie Higuchi for Scrapbook Adhesives by 3L

For more fun, roll out a few star shapes from the E-Z Runner® Stars onto a non-stick craft sheet and apply the same foils onto the stars. Next, peel the stars off the craft sheet and foil the backside. Now you’ve created shaped sequins! Clever, no? Now add those in with the other sequins in the card.

Birthday Balloon Shaker Card by Margie Higuchi for Scrapbook Adhesives by 3L

Finishing Touches

Peel off the liner on the back of the balloon and cover the window opening. Tie a bow with a narrow ribbon –  I used Adhesive Dots Micro to secure it from behind. Stamp Happy Birthday on an orange cardstock strip. Add an E-Z Runner® Stars between the words and foil it. Adhere to the card front with a piece of Crafty Foam Tape 54ft in White to pop up and finish!

Birthday Balloon Shaker Card by Margie Higuchi for Scrapbook Adhesives by 3L

Creative Time: 35 minutes
Skill Level: Intermediate

Material Needed:
Scrapbook Adhesives by 3L®
Crafty Foam Tape 54ft in White
3D Foam Circle Frames White
E-Z Runner Grand Ultra Strong, E-Z Runner® Stars Refillable Dispenser and E-Z Runner® Micro Refillable Dispenser
Adhesive Dots Micro
Metallic Transfer Foil Sheets in Holographic

Other
Patterned Paper: PhotoPlay Paper Co. (Birthday Boy Wishes Collection); Cardstock: My Colors Cardstock/My Mind’s Eye (Marine Blue and Sweet Potato); Stamp: Lawn Fawn (Oh Gnome! Stamp Set); Ink: Tonic Studios (Nuvo Hybrid Ink in Black Shadow); Sequins; Clear Acetate; White Narrow Ribbon

Save to Pinterest!

Birthday Balloon Shaker Card by Margie Higuchi for Scrapbook Adhesives by 3L Pinterest

Visit our Website and Blog!
Sign up for our Newsletter so you never miss a contest or giveaway!

instagram purple icon facebook icon purple pinterest purple icon twitter purple icon YouTube icon blog subscription purple icon

Collect Beautiful Moments Card

Hi, Judy here today! I’ve put together a layered card of botanical images to make the Collect Beautiful Moments Card. Once the stamped elements were created, it goes together easily with E-Z Runner® Ultra Strong Refillable Dispenser and Crafty Foam Tape Black 108ft.

Collect Beautiful Moments Card by Judy Hayes for Scrapbook Adhesives by 3L

Beautiful Moments Card Base

Collect Beautiful Moments Card by Judy Hayes for Scrapbook Adhesives by 3L

From white cardstock, cut an 8.5 x 6-inch piece and fold it to make a 4.25 x 6-inch card. Use a foam applicator to apply Vintage Photo ink around the edges. Cut a 3.75 x 5.5 inch Kraft cardstock. Use stamps from Field Notes with Vintage Photo ink to stamp the background and then rub Vintage Photo ink over the entire piece. Cut a piece of 3.875 x 5.625-inch mat from black cardstock.

Stamp and Die Cut Images

Collect Beautiful Moments Card by Judy Hayes for Scrapbook Adhesives by 3L

Stamp a large butterfly image two times on white cardstock, stamp a small butterfly once, and the number image once. Use a rectangle die to die-cut one of the large butterfly images. Fussy cut around the other butterfly image and color with markers.

For the small butterfly, align a small rectangle die horizontally across the image and along the left side and die cut. Then place the die over the opposite edge of the image, aligning the top and bottom edges in the die and die cut again to get a square image

Align narrow die over number image and die cut. Cut black cardstock mat for each stamped die-cut image (not for cut-out butterfly).

Assemble the Beautiful Moments Card Base

Collect Beautiful Moments Card by Judy Hayes for Scrapbook Adhesives by 3L

Secure each image to the corresponding mat using the E-Z Runner® Ultra Strong Refillable Dispenser. Using the same adhesive, layer the Kraft piece onto a black mat. Adhere it to the card base.

Adhere the Images to the Card Front

Collect Beautiful Moments Card by Judy Hayes for Scrapbook Adhesives by 3L

Arrange images on the card front allowing space for stamped verse. See the photo for the verse stamp placement on the card.

Collect Beautiful Moments Card by Judy Hayes for Scrapbook Adhesives by 3L

Apply strips of Crafty Foam Tape Black 108ft. to the back of the main image, peel liners and fasten to the card.

Collect Beautiful Moments Card by Judy Hayes for Scrapbook Adhesives by 3L

Place strips of Crafty Foam Tape Black 108ft. at the bottom and top right corner of the small butterfly image. Apply the E-Z Runner® Ultra Strong Refillable Dispenser along the top edge. Peel liners and press in place on the card.

To the number image, apply a small piece of Crafty Foam Tape Black 108ft. at the right end (use the end that will extend beyond the main image). Apply adhesive to the rest of it with E-Z Runner® Ultra Strong Refillable Dispenser. Peel the liner and press in place over the top edge of the main image.

Stamp Verse

Collect Beautiful Moments Card by Judy Hayes for Scrapbook Adhesives by 3L

Stamp the verse with a stamping positioning tool and ink. Cover the stamped verse with clear embossing powder, remove excess, and heat to emboss. Designer’s Tip: Use a small brush to remove stray embossing powder as needed

Lift the Butterfly

Collect Beautiful Moments Card by Judy Hayes for Scrapbook Adhesives by 3L

Cut pieces of Crafty Foam Tape Black 108ft. and place them on the back of the wings of the cut-out butterfly. Add a second layer of Crafty Foam Tape Black 108ft. to larger wings. Use E-Z Runner® Ultra Strong Refillable Dispenser to apply adhesive to the body only. Peel the foam tape liners and attach it to the card aligning the butterfly body first and then press the wings in place.

Collect Beautiful Moments Card by Judy Hayes for Scrapbook Adhesives by 3L

Thanks for Visiting!
Judy Hayes

Collect Beautiful Moments Card by Judy Hayes for Scrapbook Adhesives by 3L

Creative Time: 30 mins
Skill Level: Intermediate

Materials Needed:
Scrapbook Adhesives by 3L®

E-Z Runner® Ultra Strong Refillable Dispenser

Crafty Foam Tape Black 108ft.

Other: Stamp: Stampers Anonymous Tim Holtz (Field Notes, Botanic Collage, Noteworthy); Ink: Ranger Ink (Distress Vintage Photo and Archival Distress Black Soot), Tsukineko (Versafine Onyx Black); Clear Embossing Powder: Ranger Ink; Craft Dies: Sizzix (Tim Holtz Specimen); Markers: Copic; White, Black + Kraft Cardstock

Save to Pinterest!

Collect Beautiful Moments Card by Judy Hayes for Scrapbook Adhesives by 3L Pinterest

Visit our Website and Blog!
Sign up for our Newsletter so you never miss a contest or giveaway!
instagram purple icon facebook icon purple pinterest purple icon twitter purple icon YouTube icon blog subscription purple icon

Clean and Simple Tag Layout

hello scrappy friends! Tracy here, and today I have a Clean and Simple Tag Layout to share in just a few easy steps. Here are all of the crafty details.

Clean and Simple Tag Layout by Tracy McLennon for Scrapbook Adhesives by 3L

A Clean and Simple Tag Layout Design

First I cut the layered background for the tag layout. For the black cardstock, cut 12×12″, and for kraft cardstock, 11×11″. Cut out and adhere the coordinating tags to the kraft cardstock using the E-Z Runner® Ultra Strong Refillable Dispenser.

Add burlap string to each tag and adhere it behind the kraft cardstock using the E-Z Runner® Ultra Strong Refillable Dispenser again. Using the same adhesives, adhere the kraft cardstock to the black cardstock base.

Clean and Simple Tag Layout by Tracy McLennon for Scrapbook Adhesives by 3L

Create a simple layered border strip from patterned paper and white cardstock. Adhere these layers together, and then to the middle of the tag layout using the E-Z Runner® Ultra Strong Refillable Dispenser.

Clean and Simple Tag Layout by Tracy McLennon for Scrapbook Adhesives by 3L

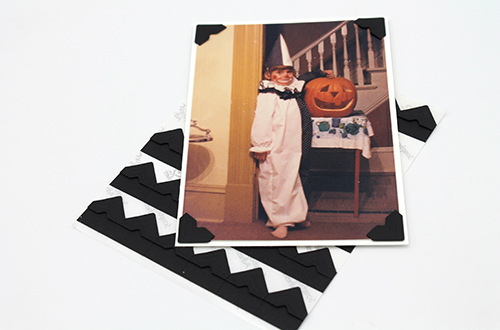
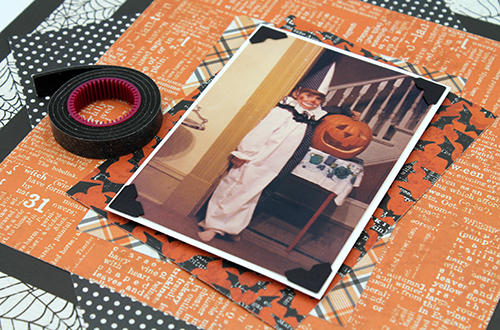
Mat the cropped 4×6″ photo in white cardstock using Creative Photo Corners Black. Then adhere the matted photo to the tag layout using Crafty Foam Tape Black.

Clean and Simple Tag Layout by Tracy McLennon for Scrapbook Adhesives by 3L

The final touch is to add some coordinating embellishments around the tag layout.

Clean and Simple Tag Layout by Tracy McLennon for Scrapbook Adhesives by 3L

Thanks so much for stopping by!
Tracy

Creative Time: 45 minutes

Skill Level: Beginner

Materials needed:

Scrapbook Adhesives by 3L®:
E-Z Runner® Ultra Strong Refillable Dispenser
Creative Photo Corners Black
Crafty Foam Tape Black

Other:
Patterned Papers: Simple Stories; White, Kraft, and Black Cardstock; Natural Burlap String

Save to Pinterest!

Clean and Simple Tag Layout by Tracy McLennon for Scrapbook Adhesives by 3L Pinterest

Visit our Website and Blog!
Sign up for our Newsletter so you never miss a contest or giveaway!
instagram purple icon facebook icon purple pinterest purple icon twitter purple icon YouTube icon blog subscription purple icon

Sparkling Banner Congratulations Card

Hello, Jennifer here with another Guest Designer project to share with you today! It’s a Clean and Simple Style Sparkling Banner Congratulations Card.

One of my absolute favorite things about Scrapbook Adhesives by 3L products is that they have so many creative adhesives on the outside products! Don’t get me wrong… the perfect, long-lasting adhesive that no one ever sees is essential, but I do love it when I can get creative with an adhesive and really let it shine! These 3D Foam Pennants are absolutely delightful! Let me share with you how I created this Clean and Simple design! 

Sparkling Banner Congratulations Card by Jennifer Ingle for Scrapbook Adhesives by 3L

Add the Sparkling Banner

I began with a simple pen drawn string across my white panel. I then adhered five fishtail pennants from the 3D Foam Pennants, trimming the two that hit the edge.

Sparkling Banner Congratulations Card by Jennifer Ingle for Scrapbook Adhesives by 3L

Wear Your Adhesive on the Outside with Glitter

Keeping the backing on three of the 3D Foam Pennants, I gently lifted the backing off the other two and sprinkled pink glitter on them. Use your finger to smooth out the glitter for best results. And, well, to sparkle a bit for the rest of the day. Love the Sparkling Banner result!

Sparkling Banner Congratulations Card by Jennifer Ingle for Scrapbook Adhesives by 3L

Once coated, the adhesive is no longer sticky (because it is covered with the glitter entirely), so you can gently remove the backing from the other 3D Foam Pennants and sprinkle silver glitter on those. Again, use your finger to smooth out the surface.

Sparkling Banner Congratulations Card by Jennifer Ingle for Scrapbook Adhesives by 3L

Aren’t these sparkling banners fantastic?! You can add them to any celebratory card!

Working on the Sentiment

Next, we want to stamp the sentiment. I chose a fun Congratulations Sentiment from Ink Blot Shop for this card. This is a long and thin sentiment that I knew I could bend to fit the curve of the banner.

Sparkling Banner Congratulations Card by Jennifer Ingle for Scrapbook Adhesives by 3L

Use your Misti grid guide to get that curve just right and then stamp with black ink.

Sparkling Banner Congratulations Card by Jennifer Ingle for Scrapbook Adhesives by 3L

Next, I used my E-Z Runner® Grand Permanent Strips Refillable Dispenser to adhere the white panel to a pink panel to coordinate with the glittered banner.

Finishing Up

Finally, use Crafty Foam Tape White 108ft. to adhere the completed panel to the card base to pop it up and add just a bit more dimension. 

Sparkling Banner Congratulations Card by Jennifer Ingle for Scrapbook Adhesives by 3L

Clean and Simple design with a whole lot of pop and sparkle! I hope you love this Sparkling Banner Congratulations Card. Share your sparkling creations with me by adding links in the comments.

Sparkling Banner Congratulations Card by Jennifer Ingle for Scrapbook Adhesives by 3L

Thanks for stopping by! Happy Creating!
Jennifer Ingle

Creative Time: 25 mins
Skill Level: Beginner

Materials Needed:
Scrapbook Adhesives by 3L®

E-Z Runner® Grand Permanent Strips Refillable Dispenser

Crafty Foam Tape White 108ft.

3D Foam Pennants

Other: Stamp: Ink Blot Shop (Scripty Sentiments Stamp Set); Ink: Tsukineko (Versafine Ink in Onyx Black); Pink + White Cardstock

Save to Pinterest!

Sparkling Banner Congratulations Card by Jennifer Ingle for Scrapbook Adhesives by 3L Pinterest

Visit our Website and Blog!
Sign up for our Newsletter so you never miss a contest or giveaway!
instagram purple icon facebook icon purple pinterest purple icon twitter purple icon YouTube icon blog subscription purple icon

So Kind Thanks Card Tutorial

Hi, everyone! Teri here to show you how to make a colorful So Kind Thanks Card that is packed with color and details! If you want to thank someone, do it big and bold! I used colorful patterned papers, a cover die, and 3D Foam adhesives to pop elements out.

So Kind Thanks Card Tutorial by Teri Anderson for Scrapbook Adhesives by 3L

Big & Bold So Kind Thanks Card

Start with a cover plate die with a lot of text on it. Die-cut the cover plate multiple times from cardstock and patterned paper.

Remove the letters from all the dies. Apply E-Z Runner® Petite Permanent Dots to the back of one of the dies. If you have left any letters in the die, don’t stress about it. Just put adhesive on them as well.

I like to use E-Z Runner® Petite Permanent Dots because the adhesive hits large spots, as well as narrow areas. Simply set the die on a piece of scratch paper and then run the E-Z Runner® Petite Permanent Dots over it until it’s completely covered.

So Kind Thanks Card Tutorial by Teri Anderson for Scrapbook Adhesives by 3L

Adhere a piece of patterned paper onto a card as a card panel and then add your cover plate die-cut shape.

Begin placing your letters in the die-cut shape’s open spaces. Use Crafty Foam Tape 13ft. in White to mount some of them to make them pop off the card. Don’t be afraid to use your scissors to cut your tape pieces to fit onto your letters. Continue adding letters to the card with the E-Z Runner® Grand Ultra Strong Refillable Dispenser.

So Kind Thanks Card Tutorial by Teri Anderson for Scrapbook Adhesives by 3L

Embellish the Card Panel

Embellish the card by adding a small die to it. Also, stamp a secondary sentiment onto a strip of cardstock as well. Mount it to the card base with Crafty Foam Tape 13ft. in White. Use your scissors once again to trim the tape to fit on the sentiment strip. If you have the 3D Foam Strips, use those and cut (pun intended!) your time.

So Kind Thanks Card Tutorial by Teri Anderson for Scrapbook Adhesives by 3L

Apply a strip of E-Z Runner® Micro Refillable Dispenser onto one of the letters. Give it a little texture by adding flock or glitter to it.

So Kind Thanks Card Tutorial by Teri Anderson for Scrapbook Adhesives by 3L

Complete your card by securing some sequins to some of the letters with Adhesive Dots Micro.

So Kind Thanks Card Tutorial by Teri Anderson for Scrapbook Adhesives by 3L

Got leftover die-cuts? Use them to make more cards. Replicate your card design or change it up by embellishing it in different ways! I hope you enjoyed this So Kind Thanks Card Tutorial.

Happy Creating!

Teri Anderson

Creative Time: 60 mins
Skill Level: Intermediate

Materials Needed:
Scrapbook Adhesives by 3L®

E-Z Runner® Micro Refillable Dispenser and E-Z Runner® Petite Permanent Dots Refillable Dispenser

E-Z Runner® Grand Ultra Strong Refillable Dispenser

Crafty Foam Tape White

Adhesive Dots Micro

Other: Cardstock: Neenah; Patterned Paper: Sunny Studio (Dots & Stripes Jewel Tones 6×6 Paper Pack); Stamps and Dies: Hero Arts (Everyday Sentiments Stamp Set, Sentiment Strips Die), Simon Says Stamp! (Leaf Column Background Die), Concord & 9th (So Kind Die); Ink: Ranger Ink (Black); Sequins: Pretty Pink Posh; Flock: Stampendous!

Save to Pinterest!

So Kind Thanks Card Tutorial by Teri Anderson for Scrapbook Adhesives by 3L Pinterest

Visit our Website and Blog!
Sign up for our Newsletter so you never miss a contest or giveaway!
instagram purple icon facebook icon purple pinterest purple icon twitter purple icon YouTube icon blog subscription purple icon