You are in our US store • Switch to Europe store

Hugs from New York City Collage Card

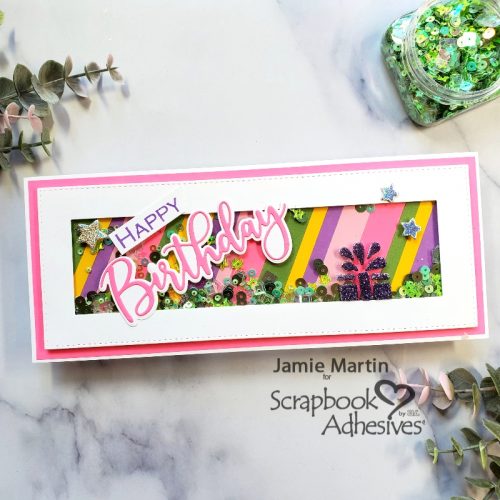
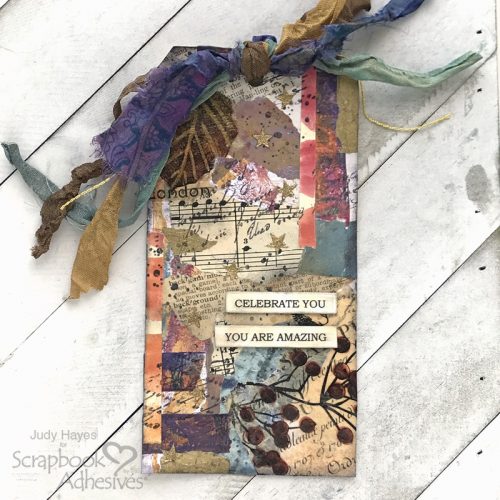
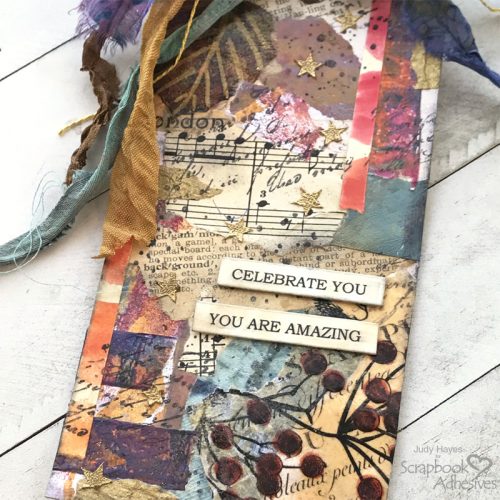
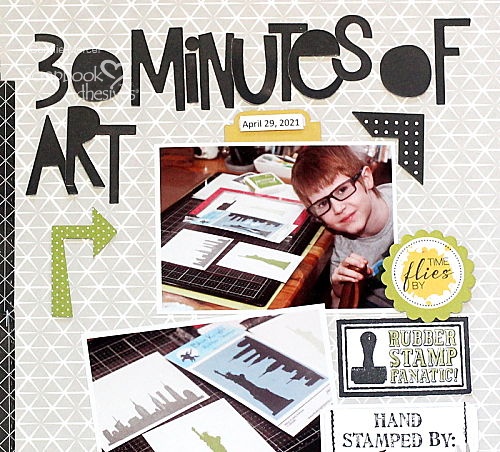
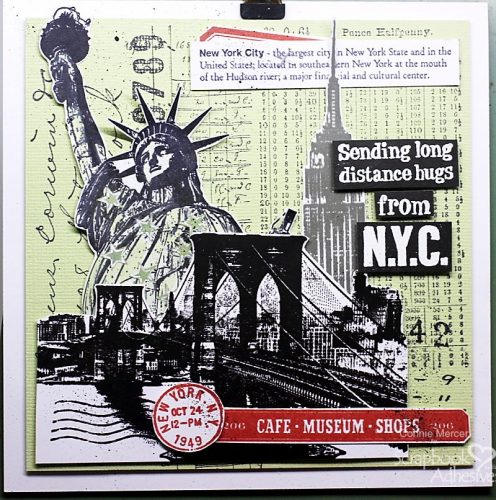
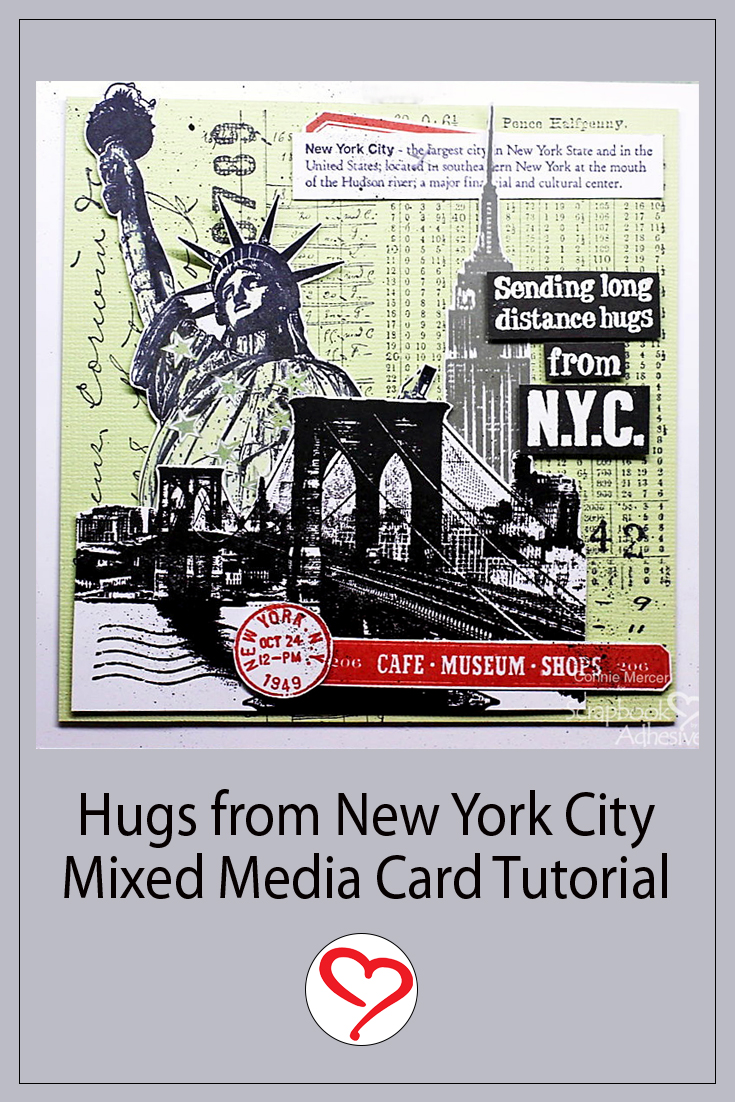
Hi, Connie here with a fun collage card showcasing stamped images with a New York City theme, and highlighting them using the E-Z Runner® Stars Refillable Dispenser. It may look complicated but breaking it down in steps will make it much easier to create this mixed media style greeting card.
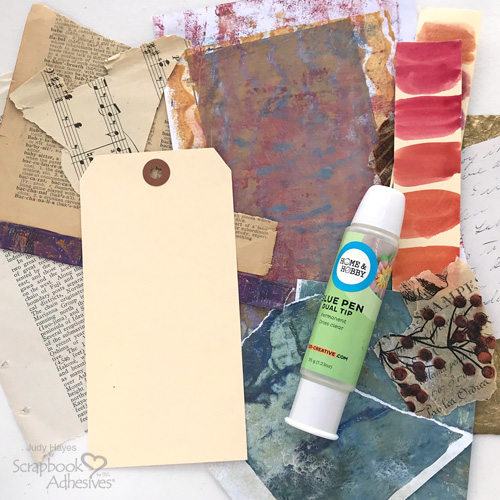
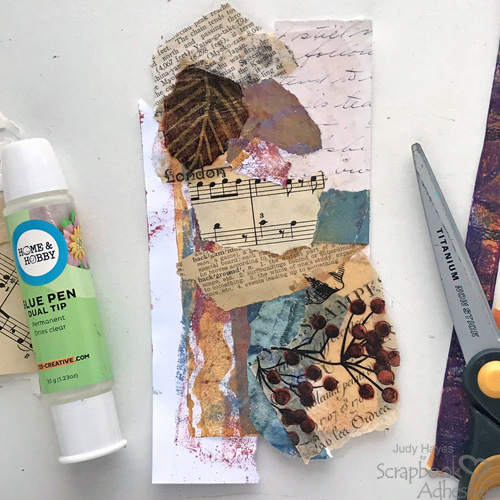
Hugs from New York City Collage Card by Connie Mercer for Scrapbook Adhesives by 3L

Collage Card Prep

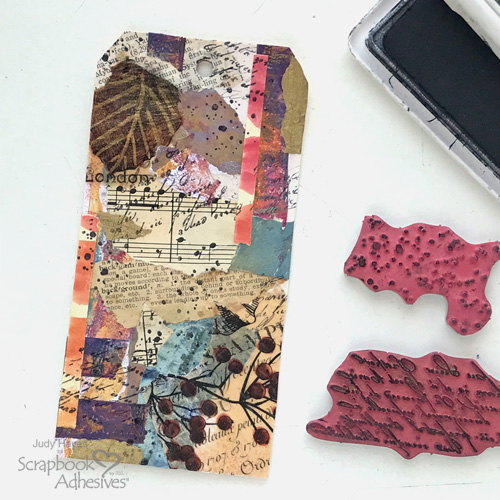
Stamp all the images first using a combination of black and red inks against a white cardstock background (with the exception of the sentiment and card panel), and trim out all the stamped images.

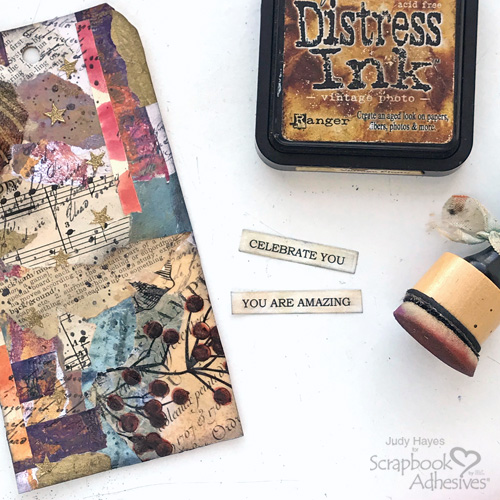
The card panel background was created using mixed media style stamps on sage green cardstock. The sentiment words were white embossed on black cardstock, and trimmed out in strips.

Stars for the LADY

Hugs from New York City Collage Card by Connie Mercer for Scrapbook Adhesives by 3L
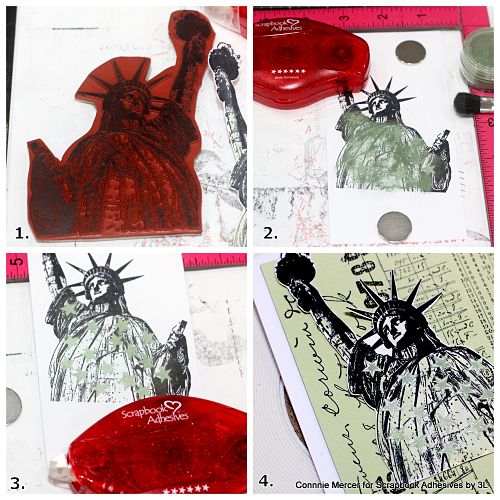
  • 1. Stamp the Statue of Liberty on white cardstock.
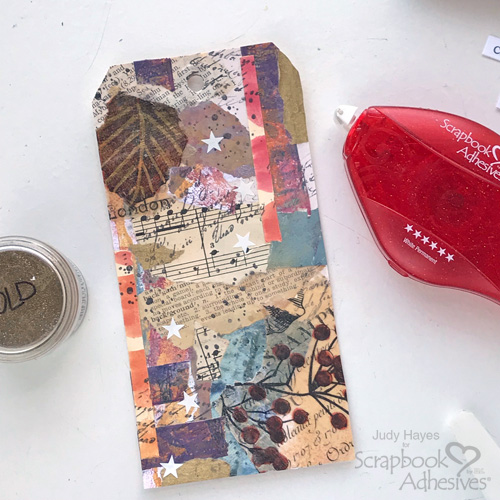
    2. Roll the stars over the image with the E-Z Runner Stars Refillable Dispenser. Apply Perfect Pearls in green patina over the statue, pressing into the adhesive to secure.
    3. Remove excess powder with a brush. Place the excess back into the Perfect Pearls container.
    4. Outline the stars with a white gel pen. Let dry. Color the statue with watered-down Distress Oxide ink. Adhere to the card panel with the E-Z Runner Grand Refillable Dispenser.
Hugs from New York City Collage Card by Connie Mercer for Scrapbook Adhesives by 3L

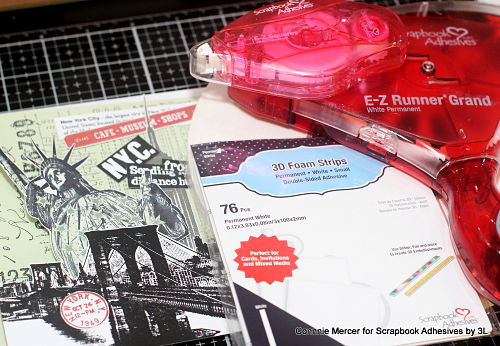
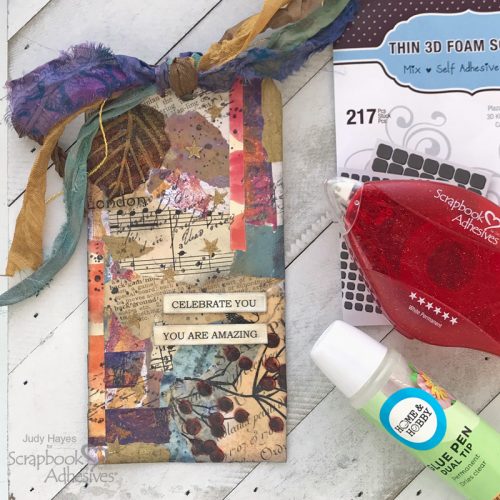
All of the elements to the card are ready to be adhered to the card front.
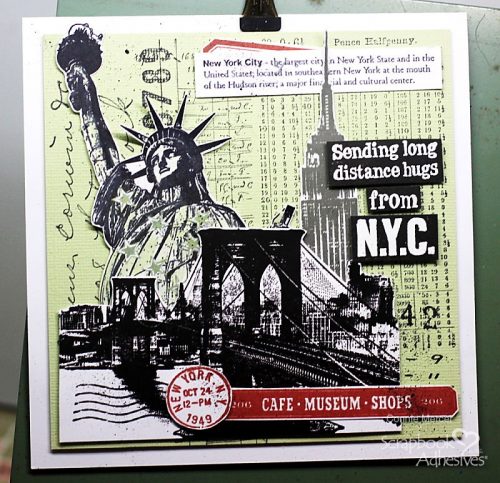
Building the card

Hugs from New York City Collage Card by Connie Mercer for Scrapbook Adhesives by 3L
  • 1. Use Crafty Foam Tape 108′ to adhere the mixed media style background to the card base.
    2. Using E-Z Squares Refillable Dispenser adhere the Lady and the Empire State Building stamped images to card front.
    3. Using the Crafty Foam Tape 108′ ( favorite product) to add the Bridge image to the card front. By adding dimension to the Bridge image I’m able to layer the stamped images for a collage look.
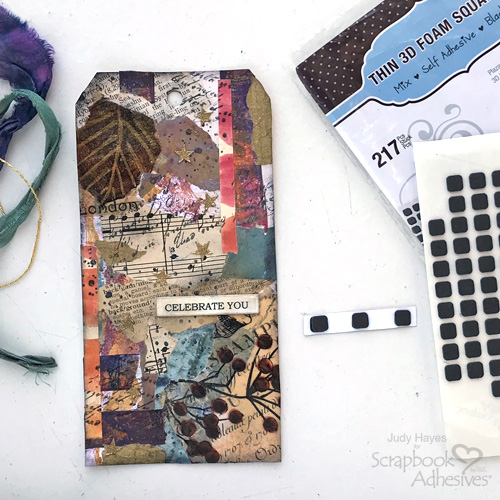
    4. The sentiment was embossed and adhered using the 3D Foam Strips.
Hugs from New York City Collage Card by Connie Mercer for Scrapbook Adhesives by 3L

This is a fun project to create and I love how the sentiment works perfectly with the stamped images.
Thanks for stopping by and I hope you enjoyed this project as much as I did creating it.
Connie Mercer

Creative Time: 90 minutes
Skill Level: intermediate

Materials Needed:
Scrapbook Adhesives by 3L®

E-Z Runner Grand Refillable Dispenser
E-Z Runner Stars Refillable Dispenser and E-Z Squares Refillable Dispenser
3D Foam Strips
Crafty Foam Tape 108′
Other: Darkroom Door Stamps, Ranger/Archival ink, WOW Embossing Powder, Ranger/Perfect Pearls, white gel pen, mixed media white cardstock, sage green cardstock and acrylic black paint (speckling card)

Save to Pinterest!

Hugs from New York City Collage Card by Connie Mercer for Scrapbook Adhesives by 3L Pinterest

Visit our Website and Blog!
Sign up for our Newsletter so you never miss a contest or giveaway!

instagram purple icon facebook icon purple pinterest purple icon twitter purple icon YouTube icon blog subscription purple icon

Striped Birthday Shaker Slimline

Hi my friends, Jamie here today on this first day of July. I always like to have birthday cards on hand and to have a lot to choose from so I thought I would go big and bold with a Birthday Shaker card. 

Striped Birthday Shaker Slimline by Jamie Martin for Scrapbook Adhesives by 3L

Background for the Birthday Shaker Card

Start off by making the striped background using strips of cardstock, I cut mine to 1/4″ and 1/2″ but you can use any size you like.

Cut a piece of an adhesive sheet to 3 1/4″ x 8 1/4″ and attach it to the same size piece of white cardstock.  Cut it to 3″ x 8″. Pull back half of the adhesive liner and lay your strips of cardstock along the entire panel diagonally. Trim off the overhang strips of paper.

Striped Birthday Shaker Slimline by Jamie Martin for Scrapbook Adhesives by 3L

Create the Shaker Feature

Using a slimline die, die-cut a frame from white cardstock. Cut a piece of acetate slightly smaller than the frame and attach it to the frame using the E-Z Runner.

Striped Birthday Shaker Slimline by Jamie Martin for Scrapbook Adhesives by 3L

Now use Crafty Foam Tape around the frame making sure there aren’t any spaces in the foam or the shaker bits might fall out.

Striped Birthday Shaker Slimline by Jamie Martin for Scrapbook Adhesives by 3L

Embellish the Birthday Shaker Card

Apply a present from the 3D Foam Party Shapes to the left side of the acetate and sprinkle with purple glitter.

Striped Birthday Shaker Slimline by Jamie Martin for Scrapbook Adhesives by 3L

Use the Dual Tip Glue Pen to layer this onto a slightly larger pink panel, then onto a white slimline card.

Striped Birthday Shaker Slimline by Jamie Martin for Scrapbook Adhesives by 3L

Place stars from the E-Z Runner Stars Refillable Dispenser randomly on the card and use the Metallic Transfer Foil Sheets Holographic Colors to apply to the top of the stars. Glue the words on using the Dual Tip Glue Pen.

Striped Birthday Shaker Slimline by Jamie Martin for Scrapbook Adhesives by 3L

Skill Level: Intermediate
Creative Time: 45 minutes

Materials Needed:
Scrapbook Adhesives by 3L®

Adhesive Sheets 12″ x 12″
Crafty Foam Tape White
E-Z Runner® Grand Refillable Dispenser
E-Z Runner® Stars Refillable Dispenser
Metallic Transfer Foil Sheets Holographic Colors
3D Foam Party Shapes

HomeHobby™ by 3L
Dual Tip Glue Pen

Other: Rubbernecker Stamps (Slimline Dies, Word Dies and Stamps), Cardstock, PrintWorks Specialty PaperGlitter- Stampendous Acetate

Save to Pinterest!

Striped Birthday Shaker Slimline by Jamie Martin for Scrapbook Adhesives by 3L Pinterest

Visit our Website and Blog!
Sign up for our Newsletter so you never miss a contest or giveaway!

instagram purple icon facebook icon purple pinterest purple icon twitter purple icon YouTube icon blog subscription purple icon

Celebrate You Collage Tag

Hello friends! Have you tried collage? Today, I have a Mixed Media Collage Tag to show you. I admit I was intimidated by collage the first time I tried it. Now, I enjoy it. To start I choose a palette of papers and ephemera. Once the background is done, the fun starts with embellishing with stamping or adding embossed stars as I did on this tag. It’s often the little details that pull the collage together.

Celebrate You Collage Tag by Judy Hayes for Scrapbook Adhesives by 3L

Collage Tag Prep

Celebrate You Collage Tag by Judy Hayes for Scrapbook Adhesives by 3L

Start with a #8 tag or tag or your choice. Then choose an assortment of papers including gel press prints, old music, old book pages, tissue paper, painted color swatch, painted papers or patterned papers.

Assemble Background

Celebrate You Collage Tag by Judy Hayes for Scrapbook Adhesives by 3L

Start by tearing papers to the desired size and adhere to the tag with the Dual Tip Glue Pen. Continue to add torn bits of paper lapping and create layers until the tag is covered. As the photo shows, layers can extend beyond the tag edge. Turn over the tag and cut edges flush with the tag edge.

Designer’s Tip: I started glued the papers from the bottom left piece and then added a piece at the top right before filling in the rest.

Use hole paper punch to punch hole from backside through original tag hole. Allow collage to dry or dry with heat tool.

Stamp over Collage

Celebrate You Collage Tag by Judy Hayes for Scrapbook Adhesives by 3L

Stamp script and speckles images over collage using black permanent ink to give more interest to the tag.

Wear Your Adhesive on the Outside with Stars

Celebrate You Collage Tag by Judy Hayes for Scrapbook Adhesives by 3L

Randomly apply adhesive stars with E-Z Runner® Stars Refillable Dispenser on the tag. Then cover the stars with gold embossing powder, press to secure, and remove excess. Use a soft brush to take off the powder. Next, melt the powder with a heating tool. The stars do not loose their shapes – love it!

Sentiment Strips

Celebrate You Collage Tag by Judy Hayes for Scrapbook Adhesives by 3L

Use computer and printer to print verses in black on white cardstock. Cut into narrow strips. Use a foam applicator to sponge on Vintage Photo ink over verses and then sponge the edges with black ink.

Celebrate You Collage Tag by Judy Hayes for Scrapbook Adhesives by 3L

Place small Thin 3D Foam Squares Black Mix to the back of the verses, remove the liners and attach them to the tag. Thread several coordinating ribbons to the tag opening and tie.

Celebrate You Collage Tag by Judy Hayes for Scrapbook Adhesives by 3L

By the way, I often use a tag in place of a card and write on the back. Something a little different but still has that personal touch! Hope you enjoyed this Celebrate You Collage Tag.

Celebrate You Collage Tag by Judy Hayes for Scrapbook Adhesives by 3L

Thanks for Visiting!
Judy Hayes

Creative Time: 30 Minutes
Skill Level: Intermediate

Materials Needed
Scrapbook Adhesives by 3L®

HomeHobby™ by 3L

Other Supplies: Assorted Papers for Collage (gel printed, old book pages, tissue paper, old music, painted paper, etc); Ranger #8 Tag, Distress Ink(Vintage Photo), Archival Ink (Black Soot), Gold Embossing Powder; Stampers Anonymous Tim Holtz Stamp set (The Poinsettia); Tim Holtz Tissue Paper; Seam Binding, Sari Ribbon, Gold Cord; Computer Printed Verses

Save it to Pinterest!

Celebrate You Collage Tag by Judy Hayes for Scrapbook Adhesives by 3L Pinterest

Visit our Website and Blog!
Sign up for our Newsletter so you never miss a contest or giveaway!

instagram purple icon facebook icon purple pinterest purple icon twitter purple icon YouTube icon blog subscription purple icon

You’re the Bees Knee Gift Pouch

Do you have someone that needs a pick me up? This You’re the Bees Knee Pouch is the perfect solution! It’s cute and so fun to make. I shared this project at a trade show in January and I am excited to show you. There are step-outs and then there is a video tutorial from the show. Let’s get started!

You're the Bees Knee Pouch by Margie Higuchi for Scrapbook Adhesives by 3L

Bees Knee Pouch Base

  1. With a piece of 3 x 10-inch patterned paper, score on the long side (10-inch side) at 4.25, 5.00 and 5.75 inches.
  2. Round all four corners.
  3. Burnish the score lines. Mountain-fold the middle score line (5-inch). Then valley-fold the other two score lines to create a W-shape.

Make the Rosette

  1. On the long side of a 1.5 x 10.5-inch patterned paper, score at every 0.25-inch increments.
  2. Then start with a mountain-fold on one end and accordion-fold through the strip. Make sure the other end ends with a mountain-fold.
  3. Apply a strip of Premium Double-Sided Tape 1/8-inch on each side of the mountain of one end.
  4. Remove liners and adhere the ends together to create a pleated ring.
  5. Apply two to three Adhesive Dots 3D on a 1.5-inch circle and remove liners.
  6. Place the pleated ring over the circle, form a rosette and press down onto the Adhesive Dots.

Embellish the Rosette

  1. On a hexagon shape, center a 3D Foam bee. Remove the top liner and place a piece of Metallic Transfer Foil Sheet in Gold (color side UP). Rub gently to transfer the color.
  2. Place an Adhesive Dot 3D in the center of the rosette and adhere the embellished hexagon on top.
  3. Adhere the rosette in the center of the pouch with an Adhesive Dot 3D or an E-Z Runner Ultra.

Adding Final Touches to Bees Knee Pouch

  1. Open the flap of the Keepsake Envelope and add item(s). Peel off the liner and seal the flap.
  2. Take off the back liner of the Keepsake Envelope and place it inside the pouch.
  3. Take off the top liner of a small 3D Foam flower and repeat the foiling step. Peel off and place on a mini clothespin. Add a rhinestone in the middle if desired. Then place the clothespin on top of the pouch to close.

You’re the Bees Knees Video Tutorial

Materials Needed:
Scrapbook Adhesives by 3L®
Adhesive Dots 3D
Metallic Transfer Foil Sheets Holographic
3D Foam Garden Shapes
Keepsake Envelopes
3D Foam Creative Sheets White Small
E-Z Runner® Ultra Refillable Dispenser

HomeHobby™ by 3L
Premium Double-Sided Tape 1/8in.

Other:
Patterned Papers: Photo Play Paper Co. (Honeycomb Patterned Paper from the Wild Honey Collection) and Pink Wood Panel Patterned Paper; Hot Foil System and Dies: Spellbinders® Paper Arts (Glimmer Hot Foil System, GLP-237 Just Bee-cause Glimmer Hot Foil Plates and Dies, DI-0290 Hexagon Die Set, and T-013 Tool ‘n One 16 pc DIY Kit); Punch: Dress My Craft (1.5-inch Circle Punch); Corner Rounder; Scoreboard; Clear Rhinestones; White Mini Clothespin

Save it to Pinterest!

You're the Bees Knee Pouch by Margie Higuchi for Scrapbook Adhesives by 3L Pinterest

Visit our Website and Blog!
Sign up for our Newsletter so you never miss a contest or giveaway!

instagram purple icon facebook icon purple pinterest purple icon twitter purple icon YouTube icon blog subscription purple icon

Beautiful YOU Card Tutorial

Hello crafty friends, I am sharing this simply stated Beautiful YOU card.  June is Pride Month and this card was inspired by one of my college friends whom I admire for his strength and grace. He is a beautiful person and I am his ally.   I chose a bright cardstock pack in rainbow colors to create a rainbow stripe cardstock for the sentiment. I hope you enjoy the tutorial!

Beautiful YOU Card by Jenn Gross for Scrapbook Adhesives by 3L

Beautiful YOU Rainbow Colors

Beautiful YOU Card by Jenn Gross for Scrapbook Adhesives by 3L

Let’s start with the rainbow portion of the sentiment. First, you’ll need ten 4.25 x 5.5-inch pieces of colored cardstock in rainbow colors (image A).

I’ll be using the Adhesive Sheets 12 x 12 in. to put together the rainbow background in image B. These sheets are so easy to use. Simply lift the liner off the sheet, add it to the back of your cardstock, burnish the adhesive to transfer for an edge-to-edge coverage (think sticker). There are also two other adhesive sheets sizes: 6 x 12 in. and 4 x 6 in.

In step C, I cut the colored cardstock into .75-inch strips. For a card panel, cut a piece of white cardstock to 7.5 x 5.5-inches as shown in image D. 

Adhesive Sheets Usage

See a quick video on How to Use Adhesive Sheets below.

Beautiful YOU Card by Jenn Gross for Scrapbook Adhesives by 3L

Take the card panel from step D to apply the Adhesive Sheet 12 x 12 in. to its back. In image E, remove the lower strip of release paper exposing the sticky area and in F, place the card panel on it (in the corner area would help line it up).

Gently burnish the back to transfer the adhesive (see image G) and trim off the excess (image H). Use the leftover adhesive sheet for another project.

Creating the Rainbow Background

Beautiful YOU Card by Jenn Gross for Scrapbook Adhesives by 3L

Now to start our Beautiful sentiment background! Peel back the liner from your card panel but not too much. Determine which color goes first – I did rainbow order (image I).

Next, in images J, K and L, start placing the strips of colored cardstock down onto the exposed sticky cardstock. Make sure the edges of each color strip touches the one before, lining up the edges together. Once all ten color strips are attached the sheet is complete.

Die-cutting Details

Beautiful YOU Card by Jenn Gross for Scrapbook Adhesives by 3L

In M, I used the Beautiful word and outline die set. Position the word starting on the red stripe and the outline starting on the yellow strip. Secure with washi tape before die-cutting. Image N shows after the dies and paper are cut. Then adhere the word die to the outline die as shown in O.

Creating YOU Sentiment

Beautiful YOU Card by Jenn Gross for Scrapbook Adhesives by 3L

Apply a piece of Adhesive Sheet to the back of a 4.25 x 5.5-inch white cardstock (P). Next, die-cut the letters Y O U with the 3″ Stitched Letter dies from white cardstock in step P.

On a 4 x 5.25-inch very light grey cardstock card panel, center the Y O U letters. As shown in R, use a ruler to line up the O in the center first and remove the release paper to stick it into place. 

Then in step S, line up Y and U on each side of O to finish spelling YOU. Remove the release paper and attach the letters to the card front.

Assembling Beautiful YOU Card

Beautiful YOU Card by Jenn Gross for Scrapbook Adhesives by 3L

In T, use a combination of the 3D Foam Squares White Mix, add them to the back of the die cut word Beautiful. Use a ruler to center the die cut word Beautiful over the word YOU on the card front. Remove the release paper from the 3D Foam Squares and attach it to the card front (steps U + V).

Lastly, turn the card front over and apply the E-Z Runner Grand Permanent Strips to the back side.  Attach the card front to an A2-sized (4.25 x 5.5-inches) white card base to finish the card.

I hope you enjoyed the Beautiful YOU card tutorial.
Be Creative ~ Stay Inspired
Jenn Gross

Skill Level: Intermediate
Creative Time:  40 Minutes

Materials Needed:
Scrapbook Adhesives by 3L®

Adhesive Sheets 12 x 12 in.
3D Foam Squares White Mix
E-Z Runner® Grand Permanent Strips

Other:
Craft Dies: Simon Says Stamps (Beautiful word die) and Diamond Press (3″ Stitched Alphabet dies); Cardstock: Park Lane

Save it to Pinterest!

Beautiful YOU Card by Jenn Gross for Scrapbook Adhesives by 3L Pinterest

Visit our Website and Blog!
Sign up for our Newsletter so you never miss a contest or giveaway!

instagram purple icon facebook icon purple pinterest purple icon twitter purple icon YouTube icon blog subscription purple icon

Dog Treat Gift Tag

Hi, everyone! Do you have a loved one or friend who recently added a canine buddy to their family? Teri here to show you how to make a tag to add to a bag of dog treats to welcome the newest furball to town.

Dog Treat Gift Tag by Teri Anderson for Scrapbook Adhesives by 3L
Creating the Tag and Decorating it

Start by cutting a tag from a small rectangle of cardstock. Simply slice off the top two corners. Apply a little ink onto the tag with a blending sponge and adhere a piece of patterned paper at the bottom.

Dog Treat Gift Tag by Teri Anderson for Scrapbook Adhesives by 3L

Stamp, color and cut several dog-themed images. (Not feeling like stamping? Look for patterned papers with dog images that you can use instead!) Adhere some of the images onto your tag.

Dog Treat Gift Tag by Teri Anderson for Scrapbook Adhesives by 3L

Take some of the smaller images and mount them onto the tag with 3D Foam Micro Squares. These squares are great for adhering tiny images to tags and other projects because they are so little. You can use one or several at a time. They’ll add just a hint of pop to your projects.

Dog Treat Gift Tag by Teri Anderson for Scrapbook Adhesives by 3L

Apply some adhesive hearts to your tag and add flock to them. Be sure to really burnish the flock onto the hearts with your fingers. You want to make sure you really cover all the sticky stuff up!

Dog Treat Gift Tag by Teri Anderson for Scrapbook Adhesives by 3L

Finish your tag by poking a hole in the top and tying some twine or ribbon through it. You’ll also want to add a sentiment and a few sequins or gems.

Turn the Tag into a Gift by Adding it to a Bag of Treats

Complete your gift by filling a clear bag with dog treats and affixing the tag onto it. You could easily change this gift up by tying the tag onto a dog toy or one really large dog bone!

Dog Treat Gift Tag by Teri Anderson for Scrapbook Adhesives by 3L

I hope you are inspired to play by today’s tutorial. Thanks for checking it out!

Happy creating,
Teri Anderson

Creative Time: 45 Minutes
Skill Level: Beginner

Materials Needed
Scrapbook Adhesives by 3L®

Other
White Cardstock: Neenah Paper; Patterned Paper: Doodlebug Design (Christmas Magic Collection); Stamps: Lawn Fawn (So Much to Say Stamp Set), Ink Blot Shop (Playful Pups); Ink Pads: Ranger Ink; Sequins: Pretty Pink Posh; Pink Flock: Stampendous; Twine: The Twinery; Markers: Copic

Save it to Pinterest!

Dog Treat Gift Tag by Teri Anderson for Scrapbook Adhesives by 3L Pinterest

Visit our Website and Blog!
Sign up for our Newsletter so you never miss a contest or giveaway!

instagram purple icon facebook icon purple pinterest purple icon twitter purple icon YouTube icon blog subscription purple icon

Dimensional Layout Step-by-Step

Hello scrappy friends! Tracy here, and today I have a pretty little dimensional layout to share and the easy steps I used to create it. Here are the details on how to easily add dimension to your next scrapbook layout.

Dimensional Layout Step by Step by Tracy McLennon for Scrapbook Adhesives by 3L

Dimension Made Easy

When creating a dimensional layout, this is how I always start. Create a simple layered background with some coordinating patterned papers, adhering them together using the E-Z Runner® Ultra Strong Refillable Dispenser. Then create simple layers behind the matted photo and add them using Crafty Foam Tape White. I also added the title piece using Crafty Foam Tape White.

Dimensional Layout Step by Step by Tracy McLennon for Scrapbook Adhesives by 3L

Next add the simple ephemera and chipboard embellishments around the matted photo using a combination of 3D Foam Squares White Mix, Thin 3D Foam Squares White Mix and Adhesive Dots Micro. These little differences in thickness make a big impact on a dimensional layout.

Dimensional Layout Step by Step by Tracy McLennon for Scrapbook Adhesives by 3L

My favourite part is adding flowers to a dimensional layout. To do this I use Adhesive Dots Large. These will make sure your large dimensional layout pieces stay put.

Dimensional Layout Step by Step by Tracy McLennon for Scrapbook Adhesives by 3L

Once the flowers are in place, I start adding smaller items like buttons or sequins around the embellishments clusters. For this I use Adhesive Dots Micro.

Dimensional Layout Step by Step by Tracy McLennon for Scrapbook Adhesives by 3L

Thanks so much for stopping by!
Tracy McLennon

Skill Level: Intermediate
Creative Time: 45 minutes

Materials Needed:
Scrapbook Adhesives by 3L®

Crafty Foam Tape White
Thin 3D Foam Squares White Mix
3D Foam Squares White Mix
Adhesive Dots Micro
Adhesive Dots Large
E-Z Runner® Ultra Strong Refillable Dispenser

Other:
Paper Distresser; Prima- Pretty Mosaic Collection (patterned paper, ephemera, chipboard stickers, flowers); Blending Brush; Cardstock- White; Burlap String; Buttons; Distress Ink- Vintage Photo

Save to Pinterest!

Dimensional Layout Step by Step by Tracy McLennon for Scrapbook Adhesives by 3L Pinterest

Visit our Website and Blog!
Sign up for our Newsletter so you never miss a contest or giveaway!

instagram purple icon facebook icon purple pinterest purple icon twitter purple icon YouTube icon blog subscription purple icon

30 Minutes of Art Scrapbook Layout

Hi, Connie here with a scrapbook page using seven of my go-to adhesives. This page has some tricky elements that need the perfect adhesive to keep it all in place. Let me take you through the process and you will see what I mean.

30 Minutes of Art Scrapbook Layout by Connie Mercer for Scrapbook Adhesives by 3L

I used the Stitched Slots die by Tim Holtz and some really skinny letters for the title, so that was just a couple of challenges. Before I start with how I put this page together I had prep work to do before I could start assembling the elements on the page.

30 Minutes of Art Scrapbook Layout Prep

  • 1. Stamp labels, letters, and number elements.
    2. Die-cut Stitched Slots two times with white cardstock and then two times in patterned paper.
    3. Punch a yellow star. It will be used for the label later.

Adding Adhesives to Different Elements

30 Minutes of Art Scrapbook Layout by Connie Mercer for Scrapbook Adhesives by 3L

Stitched Slots and Title

5. Glue the Stitched Slots together making two sets with the Dual Tip Glue Pen. Put the pattern paper over the white cardstock die cuts, and attached them with Tim Holtz’s Tiny Attacher to make one long stitched slot. I call it a photo catcher because it can hold six 2 1/2″ x 2 1/2″ photos.
6. Using the Extreme Double-Sided Tape 1/8″, adhere the photo catcher to the scrapbook page.
7. For the title, I used a combination of the 3D Foam Strips and the 3D Foam Micro Squares White to secure the narrow title.
8. The little scissor element was adhered with the 3D Foam Micro Squares White.

Assemble the Art Scrapbook Layout

Believe it or not you are ready to start adhering to the page! The elements are ready to be placed.

30 Minutes of Art Scrapbook Layout by Connie Mercer for Scrapbook Adhesives by 3L

On this page, each element tells the story. Starting with the title, and then the photo catcher was adhered next. After those two main pieces were added, I was able to get the spacing and placement for the other photos and elements even.

30 Minutes of Art Scrapbook Layout by Connie Mercer for Scrapbook Adhesives by 3L

The cool thing about this layout, it holds many extra photos, ephemera, little bits, and pieces that you might want to add but have no space for.

Thanks for stopping by and I hope you enjoyed this project!
Connie Mercer

Creative Time: 90 minutes
Skill Level: intermediate

Materials Needed:
Scrapbook Adhesives by 3L®

3D Foam Squares Regular White and 3D Foam Squares Small White
E-Z Runner Grand Refillable Dispenser
3D Foam Strips
3D Foam Micro Squares White

HomeHobby™ by 3L
Extreme Double-Sided Tape 1/8″
Dual Tip Glue Pen

Other:
Craft Die: Sizzix/Tim Holtz (Stitched Slots Die), Stamps: Darkroom Door, Patterned paper: Bella Blvd/Illustrated Faith, Inks: Ranger Ink (Archival Ink in Jet Black ink, and Distress Oxide Ink in Peeled Paint), Stapler: Tim Holtz (Tiny Attacher)

Love It? Save to Pinterest!

30 Minutes of Art Scrapbook Layout by Connie Mercer for Scrapbook Adhesives by 3L Pinterest

Visit our Website and Blog!
Sign up for our Newsletter so you never miss a contest or giveaway!

instagram purple icon facebook icon purple pinterest purple icon twitter purple icon YouTube icon blog subscription purple icon

Wavy Burlap Birthday Card

Hi everyone, Yvonne here with a fun Wavy Burlap Birthday Card. Adhesive sheets are a great way to turn your burlap cardstock into stickers.

Wavy Burlap Birthday Card by Yvonne van de Grijp for Scrapbook Adhesives by 3L

And with the help of the brand new 3D Foam Squares Micro White adhere any small item to your card without the need for scissors. And the card is very easy to make so also suitable for beginner cardmakers! Let me show you how I made my card.  

Making Wavy Burlap Card Panel

Making your own stickers is super easy using Adhesive Sheets 4×6 inch. Simply peel the yellow liner of the Adhesive Sheets 4×6 inch and adhere to the back of a piece of burlap cardstock.

Wavy Burlap Birthday Card by Yvonne van de Grijp for Scrapbook Adhesives by 3L

Leave the white liner on. Then drown with a pen a wave pattern onto the white liner back.

Wavy Burlap Birthday Card by Yvonne van de Grijp for Scrapbook Adhesives by 3L

Next cut the lines using scissors.

Wavy Burlap Birthday Card by Yvonne van de Grijp for Scrapbook Adhesives by 3L

Now remove the white liner and adhere the burlap cardstock waves onto a piece of pink cardstock.

Wavy Burlap Birthday Card by Yvonne van de Grijp for Scrapbook Adhesives by 3L

Designer’s Tip: I numbered the pieces to prevent me from adhere the pieces in the wrong sequence. Then trim the pink cardstock to the right size.

Assemble the Card Base

Next adhere the pink top cardpanel onto a soft blue card panel. And next adhere onto a white cardbase.

Wavy Burlap Birthday Card by Yvonne van de Grijp for Scrapbook Adhesives by 3L

Use the EZ Runner® Permanent Strips Refillable Dispenser for adhering the cardpanels.

Embellishing Details

To embellish the burlap  birthday card I used some printed sentiments. For adhering I used the brandnew 3D Foam Squares Micro White. These tiny pieces 3D Foam are perfect for invisible detailed adhering without needing any scissors..isn’t that easy!

Wavy Burlap Birthday Card by Yvonne van de Grijp for Scrapbook Adhesives by 3L

Tip: tweezers are a great tool to pick up the tiny 3D Foam Squares Micro White.

Then finish the birthday card with a mulberry flower which I adhered to the card using Thin 3D Foam Squares White Mix.

Wavy Burlap Birthday Card by Yvonne van de Grijp for Scrapbook Adhesives by 3L

And voila…your burlap birthday card is ready to make someone’s birthday extra special.

Wishing you happy crafting!
Yvonne van de Grijp

Wavy Burlap Birthday Card by Yvonne van de Grijp for Scrapbook Adhesives by 3L

Creative Time: 30 minutes
Skill Level: Beginner

Materials needed:
Scrapbook Adhesives by 3L®
E-Z Runner® Permanent Strips Refillable Dispenser
Adhesive Sheets 4×6 inch
Thin 3D Foam Squares White Mix
3D Foam Squares Micro White

Other
Cardstock (Burlap, White, Pink, Blue); Mulberry Flowers; Printed sentiment; Paper Trimmer; Scissors; tweezers

Save it to Pinterest!

Wavy Burlap Birthday Card by Yvonne van de Grijp for Scrapbook Adhesives by 3L Pinterest

Visit our Website and Blog!
Sign up for our Newsletter so you never miss a contest or giveaway!

instagram purple icon facebook icon purple pinterest purple icon twitter purple icon YouTube icon blog subscription purple icon

Framed Floral Harmony Card

Hello, friends! Jamie here and today, I have a Framed Floral Harmony Card. Making your cards a little extra special is easy with Creative Photo Corners, Adhesive Lines, and Adhesives Sheets 4 x 6in. I used these items to add interest and color to my card that can be used for most occasions with the sweet sentiment.

Framed Floral Harmony Card by Jamie Martin for Scrapbook Adhesives by 3L

Framed Floral Piece

Framed Floral Harmony Card by Jamie Martin for Scrapbook Adhesives by 3L

Trim an Adhesives Sheets 4 x 6in. slightly larger than the Nested Oval Scallop Die, remove the liner and place it on white cardstock. Then die-cut the piece with the die.

Framed Floral Harmony Card by Jamie Martin for Scrapbook Adhesives by 3L

Wear Your Adhesive on the Outside

This fun concept makes the adhesive an embellishment piece with embossing powder! Simply remove the liner from the other side of the oval scallop shape to expose the adhesive and sprinkle the edges with yellow embossing powder. Then melt the powder with a heating tool. Set aside.

Framed Floral Harmony Card by Jamie Martin for Scrapbook Adhesives by 3L

Framed Floral Sentiment

Die-cut white cardstock using a Nested Oval Stitch Die. Then stamp with the sentiment with black ink and emboss with clear embossing powder.

Framed Floral Harmony Card by Jamie Martin for Scrapbook Adhesives by 3L

Adding Colors

Another Wear Your Adhesive on the Outside concept is using Adhesive Lines and embossing powder! Place one Adhesive Line below the sentiment and emboss with green embossing powder. Next, place a second Adhesive Line below the first and emboss it with purple embossing powder. I love that they are heat resistant and hold their shape!

Framed Floral Harmony Card by Jamie Martin for Scrapbook Adhesives by 3L

Framed Floral Card Front

Place the oval sentiment in the center of the scallop oval which has exposed adhesive from the Adhesive Sheet. Using the EZ Runner Grand Refillable Dispenser, adhere it to a white cardstock panel. Next, add Creative Photo Corners in Black to each corner and attach the piece to a purple card base.

Other Embellishments

Framed Floral Harmony Card by Jamie Martin for Scrapbook Adhesives by 3L

Stamp the flowers and the butterfly on watercolor paper with black ink, emboss with clear embossing powder, and watercolor. Once the images have dried, cut them out.

Framed Floral Harmony Card by Jamie Martin for Scrapbook Adhesives by 3L

Place 3D Foam Circles in White on the back of the flowers and butterfly. Pop them up as shown in the photo below. Randomly add Violet Liquid Pearl above the flowers and below the scallop.

Framed Floral Harmony Card by Jamie Martin for Scrapbook Adhesives by 3L

I hope you enjoyed my Framed Floral Harmony Card. Make one and comfort someone who needs it!

Thanks for stopping by!
Jamie Martin

Skill Level: Intermediate
Creative Time: 35 minutes

Materials Needed:
Scrapbook Adhesives by 3L®

Adhesives Sheets 4 x 6in.
E-Z Runner® Grand Permanent Strips
Creative Photo Corners in Black
Adhesive Lines
3D Foam Circles in White

Other
Stamps and Embossing Powder: Stampendous (Tranquil Rose Perfectly Clear Stamp Set, and Floral Garden Embossing Powder Kit); Craft Dies: Rubbernecker (Nested Oval Scallop with Pierce); Ink: Tsukineko (VersaFine Ink in Onyx Black); Liquid Enamel: Ranger Ink (Liquid Pearls in Violet); PrintWorks Specialty Paper White and Purple Cardstock

Save it to Pinterest!

Framed Floral Harmony Card by Jamie Martin for Scrapbook Adhesives by 3L Pinterest

Visit our Website and Blog!
Sign up for our Newsletter so you never miss a contest or giveaway!

instagram purple icon facebook icon purple pinterest purple icon twitter purple icon YouTube icon blog subscription purple icon