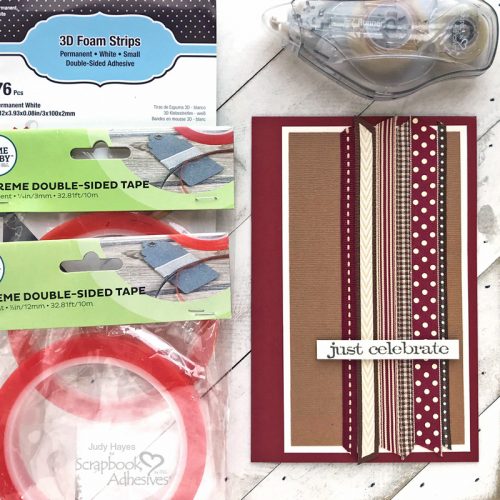
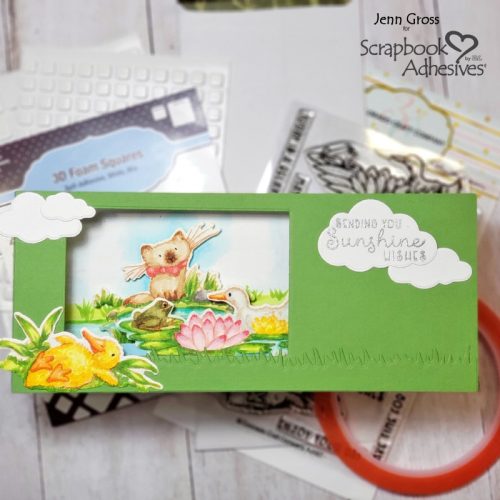
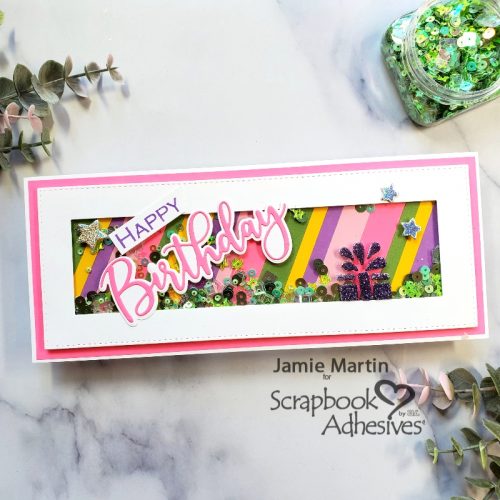
Hello, my crafty friends, Jenn Gross here! I’ve designed a fun Sunshine Wishes 3D slimline box card It folds flat to measure at 3 1/4″ x 8 1/4″. It includes a 3D relaxing pond scene. Using the Extreme Double-Sided Tape 1/8″ to adhere this card together, I am confident that this super-strong tape holds the folds with no problem! Let’s get started. Enjoy!
Sunshine Wishes Stamp Art
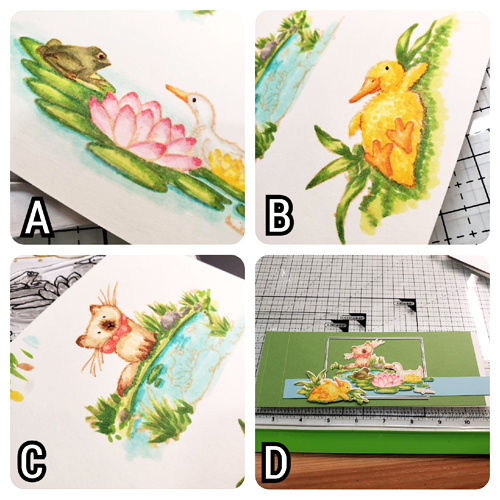
Stamp three image from the Pond Pampering stamp set in light peach ink onto premium marker-friendly paper. I colored each image with alcohol markers creating a no line coloring. Steps A – C images are what I colored from the stamps, and then die-cut each piece afterward.
Step D shows how the card front (8 1/2″ x 3 1/4″ green cardstock) is scored at 1/4″ and 1″ mark on the short side (3 1/4″) of the cardstock. Next, mountain fold the score lines on the left side towards the card back to crease the lines. Position the following stamped die cuts on the card front: kitten in the back, Frog and duck in middle, and fuzzy duck on top. Using these die cuts as guides, you are determining the rectangular window opening for this slimline box card.
Placement of Stamp Images
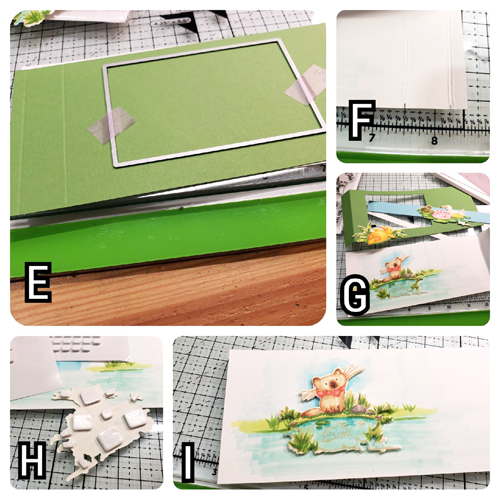
In Step E, the rectangle die opening is 3 5/8″ x 2 3/8″. After determining placement, make sure to leave 5/8″ of green framing the bottom of the card front, and secure the die with washi tape. Die cut the window opening
Use a piece of 8 1/2″ x 3 1/4″ white cardstock as the card back in Step F. On the short side, scored at the 7 1/2″ and 8 1/4″ marks. Valley fold the score lines on the right side of the card back forward towards the card front.
The Step G Image shows using both the green card front with the window and the white card back together as a guide, see where the window opening will fall when the card is popped open. Set the kitten die cut down in the opening and gently pencil sketch an extension of the image (grass and pond) on the white cardstock back and color the extension. Also, add a light blue sky shading on the page where the kitten will be placed
Add 3D Foam Squares to the back of the kitten die cut and attach the image over the colored extension as shown in Steps H and I.
Assemblying the Sunshine Wishes Box Card Part 1
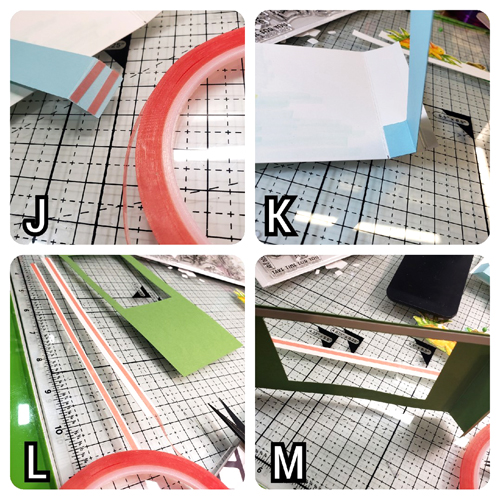
With a piece of 8 1/2″ x 1″ light blue cardstock, score on the short side at 1/2″ and 8″. Fold the 1/2″ tabs inward to each other and attach Extreme Double-Sided Tape 1/8″ to the 1/2″ tab as shown in Step J.
Then remove the liner and attach the right side of the blue strip to the bottom right of the white card back. Make sure to line up the edge of the blue strip with the 7 1/2″ fold (see Image K) and set aside.
In Step L, cut 2 1/4″ x 7 3/4″ strips of heavy white cardstock to use a stabilizer and attach a strip of Extreme Double-Sided Tape 1/8″ to one side of each strip.
Next, in Step M, remove the liner and attach one strip to the inside area (above the window opening) of the green card front. Do not cover any of the score lines. Attach the other white strip to the inside bottom 5/8″ area below the window frame.
Assemblying the Box Card Part 2
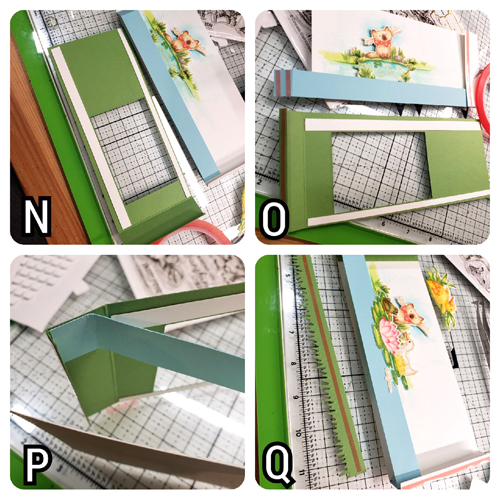
Gather the green card front and the white card back pieces and align the 5/8″ bottom of the green front to the bottom of the white card back’s blue strip. Add Extreme Double-Sided tape to the top of the 1/4″ folded edge of the right side of the card back and the 1/2″ fold of the left side of the blue strip as shown in Images N and O. Add Extreme Double-Sided Tape 1/8″ to the 1/4″ fold on the left card front as pictured.
In Step P, remove the liner from the blue strip and attach it to the 3/4″ side, lining up the edge of the 1/4″ score line of the green card front.
Image Q shows a piece of 7 1/2″ x 1″ green cardstock strip die-cut with a grass edge die at the top of the green strip. Add Extreme Double-Sided Tape 1/8″ and attach it to the green card front, from the right lower edge to the first score line fold on the left side. Position the frog and duck images and adhere it to the blue strip, lining up the frog’s eye just between the cat paw and the rock when folded flat.
The Final Steps
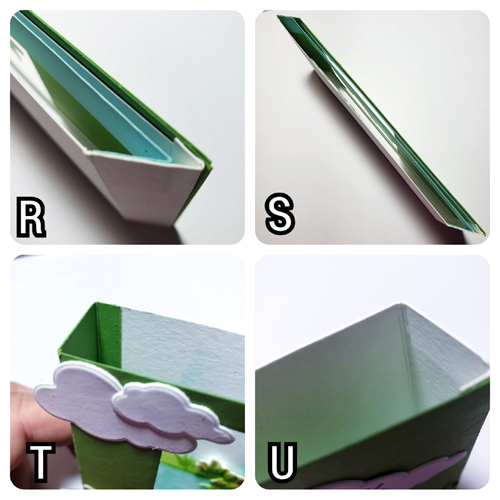
Remove the liner from the 1/4″ folded edge of the white card back and attach it to the inside edge of the green card front. Next take the liner off from the 1/4″ folded edge of the green cardstock (the opposite side previously connected) fold the card flat and attach this last edge together (Image R).
As shown in Step S, the card will now fold to a flat 3 1/4″ x 8 1/4″ slimline card. These photos share how the left side (T) and the right side (U) of the card look when unfolded.
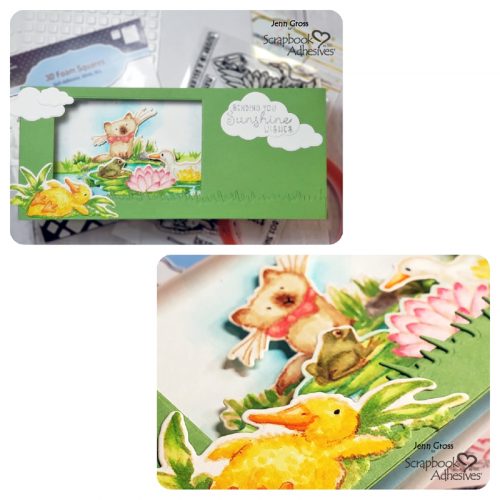
Complete the card front by attaching the fuzzy duck image to the left side of the card, overhanging the edge 3/4″ and on top of the grass edge. Next, die-cut four clouds ranging in length from 3/4″ to 2″ wide. Stamp and heat emboss the sentiment “Sending you Sunshine Wishes” on the large cloud in Silver embossing powder and attach all with Extreme Double-Sided Tape 1/8″ to complete the Sunshine Wishes 3D box slimline card.
Thank you for stopping by the blog. I hope you enjoyed this fun Sunshine Wishes slimline box card. Give box cards a try and share your link in the comments below!
Be Creative ~ Stay Inspired
Jenn Gross
Creative Time: 70 minutes (includes coloring time)
Skill Level: Advanced
Materials Needed:
Scrapbook Adhesives by 3L®
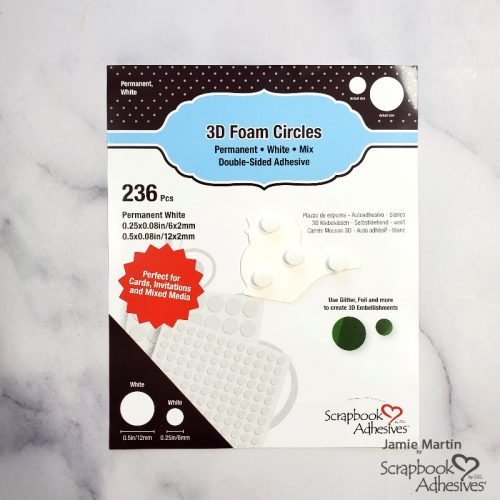
3D Foam Squares White Mix
HomeHobby™ by 3L
Extreme Double-Sided Tape 1/8″
Other:
Stamp and Die: Colorado Craft Company (Pond Pampering) and Mama Elephant (Slimline Window Dressing Die); Coloring Medium: Copic Alcohol Markers; Inks: Spellbinders® Paper Arts/FSJ (Peaches and Cream Hybrid ink) and Tsukineko (VersaMark Watermark ink); Embossing Powder: Brutus Monroe (Sterling Silver); Mini Cloud Craft Die; Heat Gun; Paper Trimmer; Bone Folder
Save to Pinterest!
Visit our Website and Blog!
Sign up for our Newsletter so you never miss a contest or giveaway!