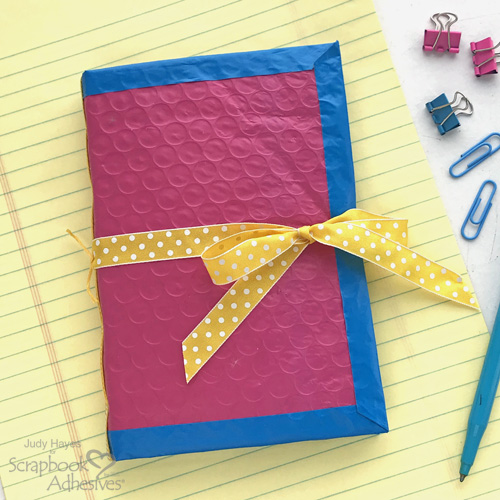
Hi crafty friends! Judy here today to share an upcycle packaging to a mini journal from a colorful and bright pink bubble mailer. Inside was a bright blue plastic bag protecting the contents. My mind immediately wondered how I could reuse this bright packaging and this is what I came up with!
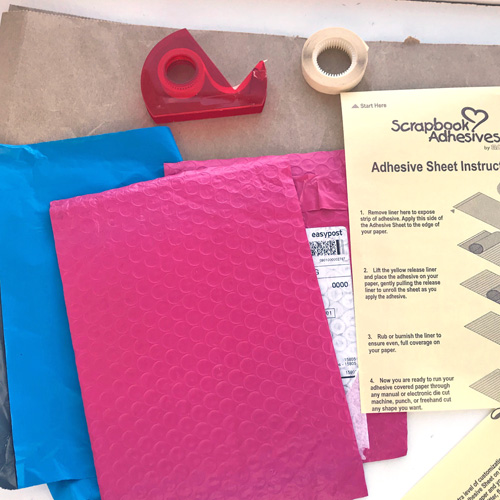
Upcycle Packaging Supplies
To make a journal like this, you’ll need a plastic bubble mailer, plastic mailer bag, and recycled Kraft packaging paper.
Make the Cover Pieces
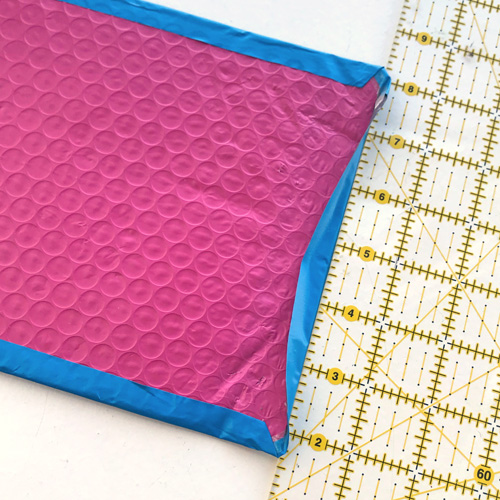
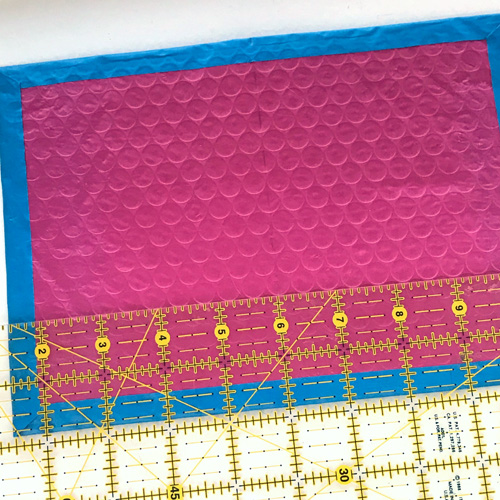
Grab the pink bubble mailer and cut it to 6.5 x 9.25 inches. From the blue mailer bag, cut a 7.5 x 10.25-inch piece which is an inch larger than the pink bubble mailer on all sides.
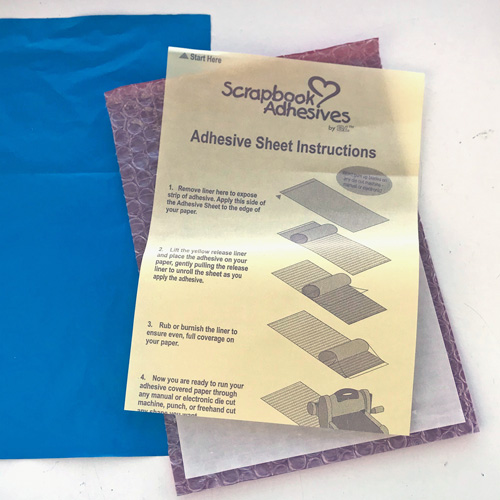
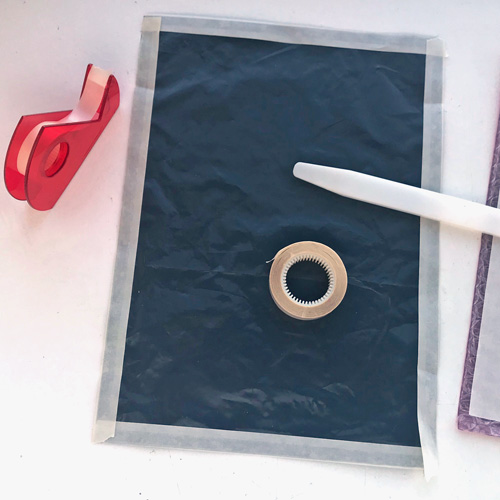
Cut Adhesive Sheets 6×12 inch to 8.75 inches long. On the back of the pink bubble mailer, adhere to the center.
Apply Crafty Power Tape from Crafty Power Tape Dispenser 20’ or Crafty Power Tape 20′ Refill Roll around the edges of the back of the blue mailer.
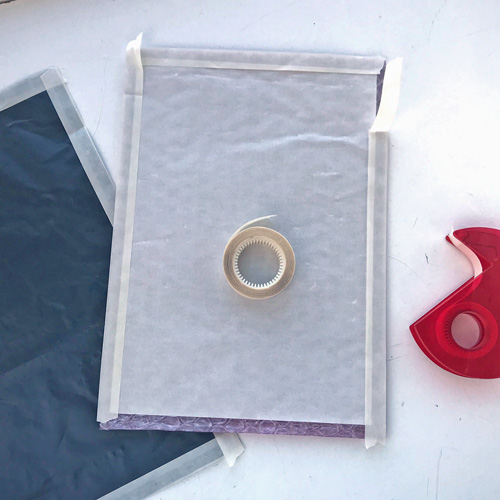
Apply Crafty Power Tape around the edges on the back of the pink bubble mailer along side the Adhesive Sheet.
Assembling the Covers
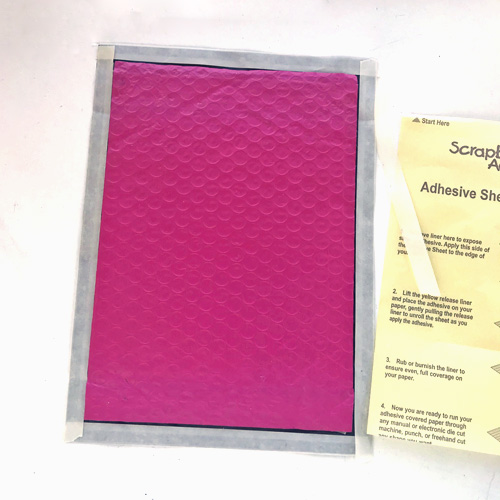
Peel the adhesive liners off of the pink bubble mailer and center on the back of the blue mailer. Press to secure.
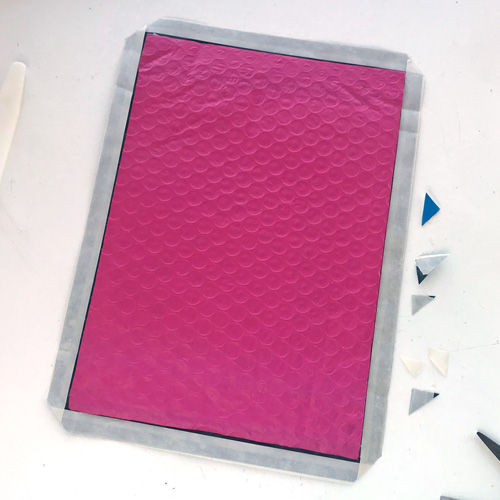
Miter the corners and fold each corner over the pink mailer. Note the fold line should be just beyond the corner of the pink mailer for a finished look.
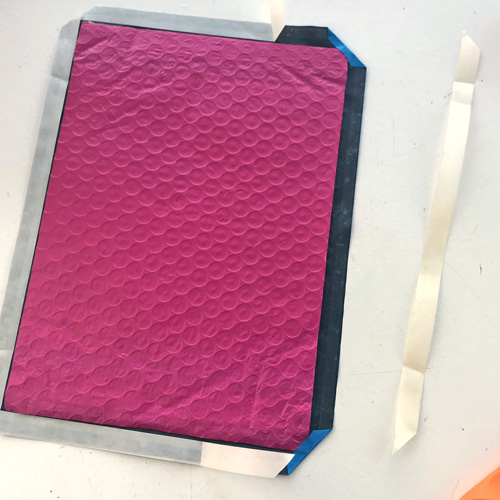
Remove the Crafty Power Tape liner one long edge at a time and fold the edge over the pink mailer. I used a thick ruler to press the edge against to keep it straight.
Peel off liners at one end. Fold blue plastic mailer over pink mailer. I used ruler to help the plastic stay straight as it was folded. Repeat at the opposite end.
Make a Ribbon Spine
Use a ruler to mark the center of the journal cover on the outside. Mark lightly with a pencil. The marks will be covered by the ribbon. Repeat on the inside to make the same pencil marks.
Cut narrow ribbon long enough to wrap around spine and lap inside book cover, about 14 inches.
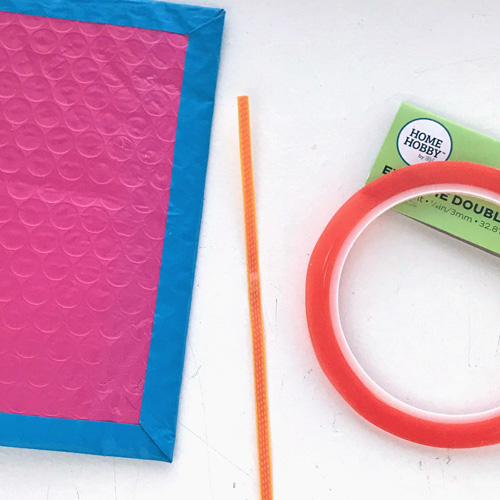
Apply Extreme Double-Sided Tape 1/8in to one side of the ribbon.
The ribbon on the spine of journal will reinforce it for the stitches of the signature (pages).
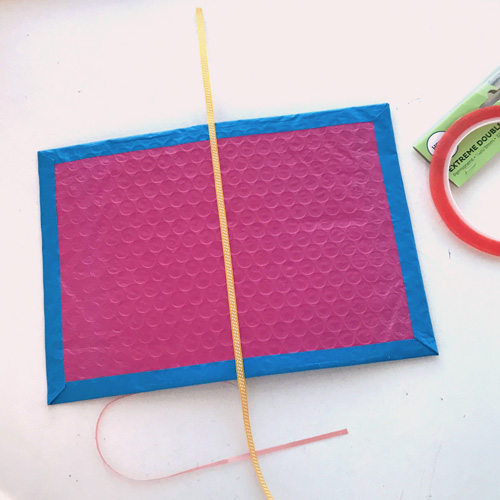
Remove liner about half way from ribbon. Starting on outside of journal cover, fasten ribbon centered over marks.
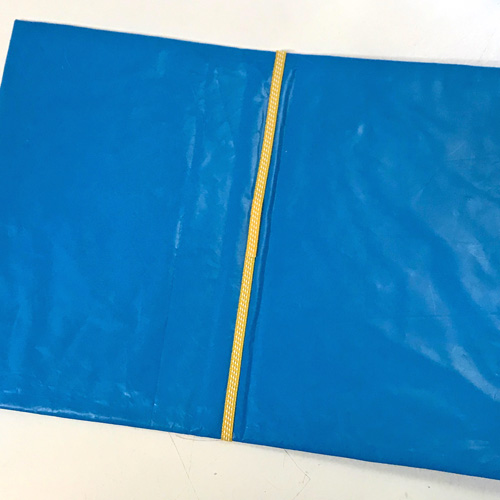
Wrap ribbon to the inside keeping it aligned and over the center marks. Lap ends. Press to secure.
Cut a scrap piece of cardstock to 2-3 inches wide and 6.25 inches long. This is the guide to use for binding size for pages. Fold in half lengthwise. Mark hole positions at .75 inch from each end, at center and half way between center and end holes. Use needle tool or awl to punch holes in it. Mark “top” and “bottom.”
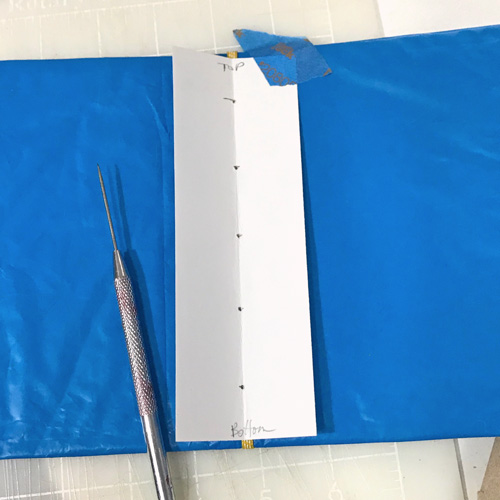
Place hole punching pattern over ribbon on inside of journal cover with “top” end at top. Center it top to bottom with about .125 inch space at each end. Align it carefully centered over the ribbon. Tape in place as needed. Use needle tool or awl to make holes through the cover. Check that holes are centered on the ribbon on the outside.
Creating the Signatures
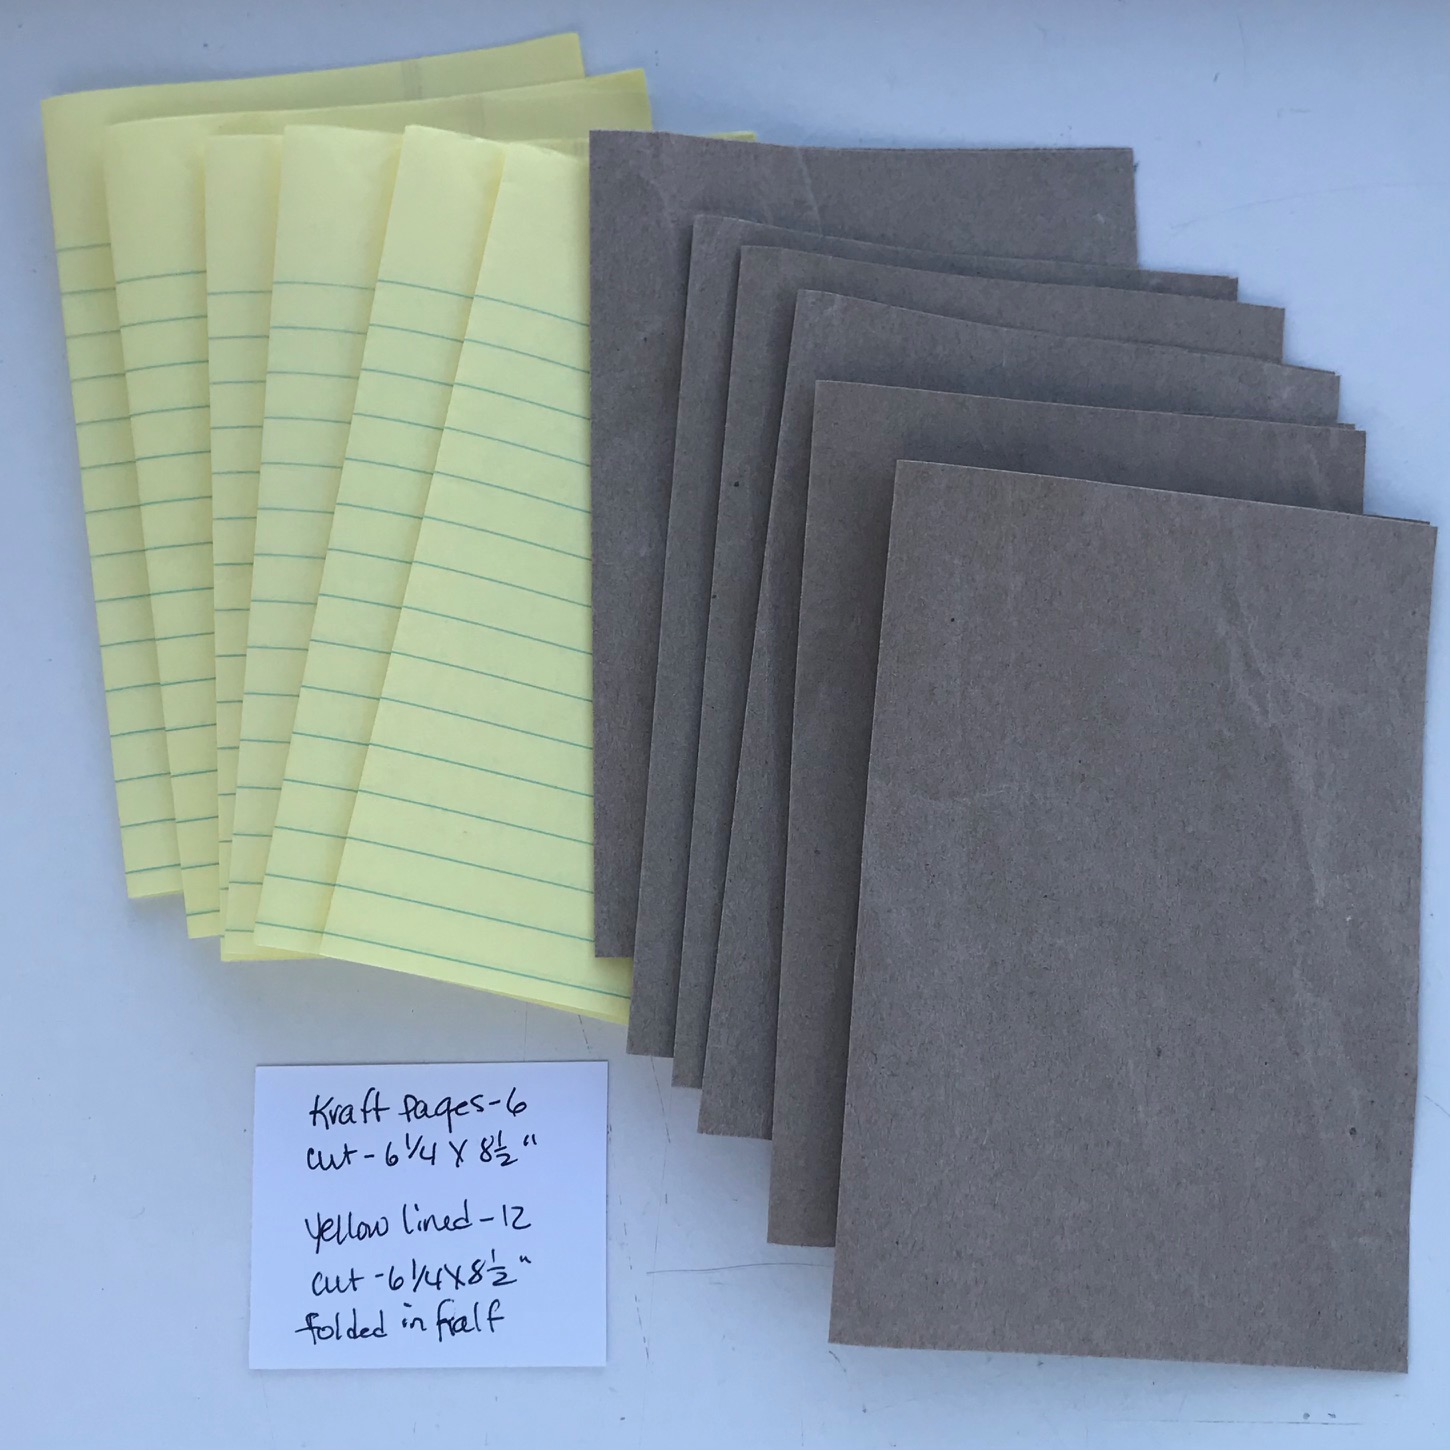
To create pages, cut the papers to 6.25 x 8.5 inches. From Kraft packaging paper, cut 6 pieces. From yellow notebook paper, cut 12 pieces.
The papers will make one signature for this journal with 18 pieces of paper, called folios, making 36 pages.
Make a stack of the pages by starting with one Kraft paper and 2 yellow notebook pieces. Repeat layers to use all pieces.
Align edges of all papers. Fold in half and crease well with a bone folder.
Upcycle Packaging Mini Journal Binding
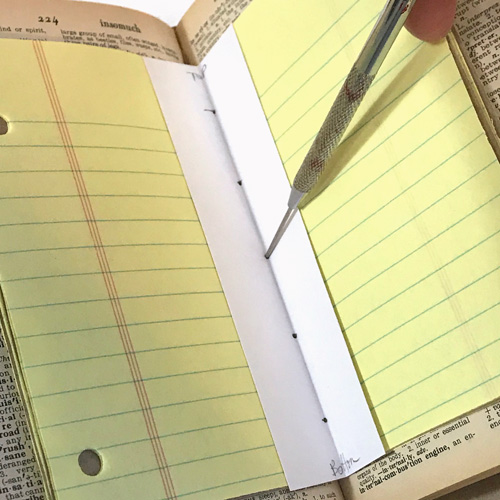
Use an open old book as a punching cradle. Place open signature (all pages) on top of the old book and then add the binding guide. Align the guide with the top and bottom of pages. Punch all holes.
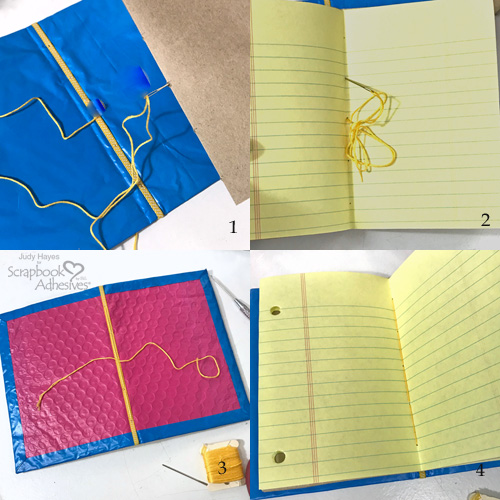
Use a pamphlet stitch to sew signature to journal cover starting from outside of the cover. You can find many step out directions or videos online.
Step 1: Stitch from outside center hole (3rd hole) to inside cover and through signature
Step 2: Next, stitch to outside through the second hole from the top. Insert the needle in the top hole (1st) through the cover and signature to inside. Continue stitching by inserting the needle through the second hole and back to the outside. Skip the center hole and stitch into the fourth hole and back out through the fifth hole.
Step 3: Stitch through the fourth hole to the inside. Make the last stitch back through the center hole to the outside. Keep the thread on opposite sides of the long stitch. Snug up stitches by carefully pulling thread at each hole and working to center. Tie square knot.
Step 4: This step shows stitches on inside. The journal now has pages!
The Final Details
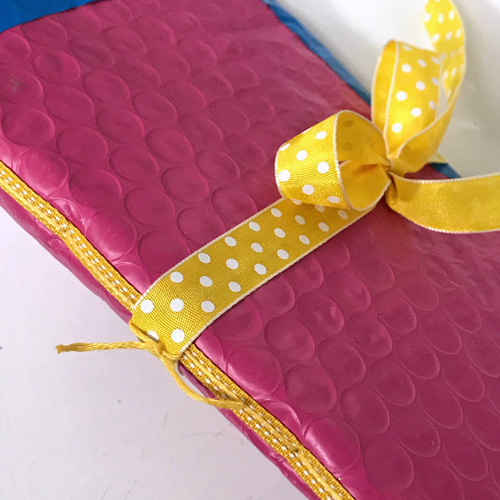
Cut a length of yellow dot ribbon long enough to tie around the journal. Wrap it around the journal and tie a bow. Tie threads around ribbon and knot. Trim the ends.
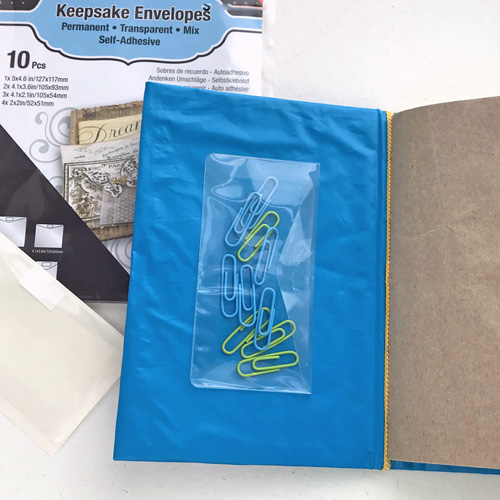
On the inside cover, fasten an envelope from Keepsake Envelopes Mix. Use it for paper clips or whatever!
For me, this was a fun project! I love making journals! And I like making something new out of something used! I hope you enjoyed this Upcycle Packaging Mini Journal and try it yourself.
Thanks for Visiting!
Judy Hayes
Creative Time: 60 Minutes
Skill Level: Advanced
Materials Needed
Scrapbook Adhesives by 3L®
- Adhesive Sheets 6×12 inch
- Crafty Power Tape Dispenser 20’
- Crafty Power Tape 20′ Refill Roll
- Keepsake Envelopes Mix
HomeHobby™ by 3L
Other:
Recycled Pink Bubble Mailer; Recycled Blue Plastic Mailer; Narrow Yellow Ribbon; Yellow Dot Ribbon; Kraft Packing Paper (ironed flat); Yellow Notebook paper; Yellow Floss
Save It to Pinterest!

Visit our Website and Blog!
Sign up for our Newsletter so you never miss a contest or giveaway!