You are in our US store • Switch to Europe store

Queen Bee Shaker Card Tutorial

Hi, Connie here with a wonderful Queen Bee shaker card constructed from scratch. Using the Crafty Foam Tape and a sheet of acetate (snagged some packaging), you’re set to go! Let me show you how.

Queen Bee Shaker Card Tutorial by Connie Mercer for Scrapbook Adhesives by 3L

Queen Bee Shaker Card Prep

Stamps are a major part of my embellishing the card front. Starting with the background to the detailed elements which are stamped, colored and trimmed are done and ready to go. Double-mat the background card front with black cardstock secured with the E-Z Runner® Grand Permanent Strips. Set aside the elements for now.

Making the Shaker Feature

Die-cut a Polaroid Frame to create the shaker front. Cut the acetate to cover the window frame. Flip the frame to its back to apply Extreme Double-Sided Tape 1/8″ around the frame. Take off the liner and place the acetate down. Attach the Crafty Foam Tape to the edges of the frame. Next, sprinkle in a mix of sequins and beads in the middle of the card front. Remove the backing from the Crafty Foam Tape on the frame and place it over the sequin grouping. Press down to secure and complete!!

Queen Bee Shaker Card Tutorial by Connie Mercer for Scrapbook Adhesives by 3L

The Embellishment Cluster

Collect the stamped elements created earlier and place them around the framed shaker to decide on the placement of pretties. The Dual Tip Glue Pen is great to secure them as well as the 3D Foam Squares to lift up the elements for dimension.

Queen Bee Shaker Card Tutorial by Connie Mercer for Scrapbook Adhesives by 3L

For more height, adhere the card front to a folded card base with 3D Foam Squares to complete the Queen Bee shaker card.

Queen Bee Shaker Card Tutorial by Connie Mercer for Scrapbook Adhesives by 3L

Thanks for stopping by~
Connie Mercer

Queen Bee Shaker Card Tutorial by Connie Mercer for Scrapbook Adhesives by 3L

Creative Time: 60 minutes
Skill Level: Intermediate

Materials needed:
Scrapbook Adhesives by 3L®

E-Z Runner® Grand Permanent Strips Refillable Dispenser
Crafty Foam Tape in White
3D Foam Squares Black Small

HomeHobby™ by 3L
Extreme Double-Sided Tape 1/8″
Dual Tip Glue Pen

Other
Ink: Ranger Ink (Archival and Distress Oxide); Stamps: Darkroom Door; Sequin: Buttons Galore & More; Craft Die: Sizzix (Polaroid Die); Acetate

Save It for Pinterest!

Queen Bee Shaker Card Tutorial by Connie Mercer for Scrapbook Adhesives by 3L

Visit our Website and Blog!
Sign up for our Newsletter so you never miss a contest or giveaway!

instagram purple icon facebook icon purple pinterest purple icon twitter purple icon YouTube icon blog subscription purple icon

Secret Message Mini Book

Hi friends! Dana Tatar here today sharing a fun Valentine’s Day craft. I really enjoy making books. The signature of this mini book requires only a single sheet of 8.5 x 1- inch paper. This design uses a simple variation on an accordion fold, and unfolds to reveal a secret message, making it a fun gift for a special valentine!

Secret Message Mini Book by Dana Tatar for Scrapbook Adhesives by 3L

Mini Book Assembly

Secret Message Mini Book by Dana Tatar for Scrapbook Adhesives by 3L

I used Extreme Double-Sided Tape to secure the folded pages, also called a signature, of the mini book to a paper cover. To add a string or ribbon closure to the book, peel the red liner from the tape and press the material onto the double-sided tape. Next, cover the tape with the signature and press to seal.

Embellishing the Mini Book

Secret Message Mini Book by Dana Tatar for Scrapbook Adhesives by 3L

The strong permanent bond of 3D Foam Circles makes them perfect for use with all types of embellishments. The circle shapes in the small size fit perfectly inside the curves of my metal heart embellishment. The added height from the 3D Foam provides space for the string closure to wrap around the mini book.

Secret Message Mini Book by Dana Tatar for Scrapbook Adhesives by 3L

The mini book unfolds to lay flat, revealing a secret message. I’d love to have you stop by my blog for the complete tutorial and to read the message I hid inside the pages!

This simple craft is a fun way to let your Valentine know they are special. These mini books are more affordable than handmade cards, so I’m looking forward to passing these out to my friends and loved ones this month.

~Dana Tatar

Creative Time: 45 minutes
Skill Level: Intermediate

Materials Needed
Scrapbook Adhesives by 3L®

3D Foam Circles White Mix

HomeHobby™ by 3L
Extreme Double-Sided Tape 1/2 in

Other
Specialty Paper; White Printer Paper; Silver Heart Charm (Simple Stories); Pink Twine (American Crafts); Archival Dye Ink (Clearsnap)

Love It and Save It to Pinterest!

Secret Message Mini Book by Dana Tatar for Scrapbook Adhesives by 3L

Foiled Candle Birthday Card

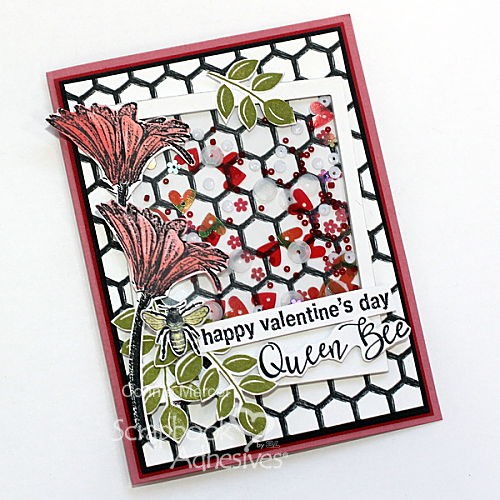
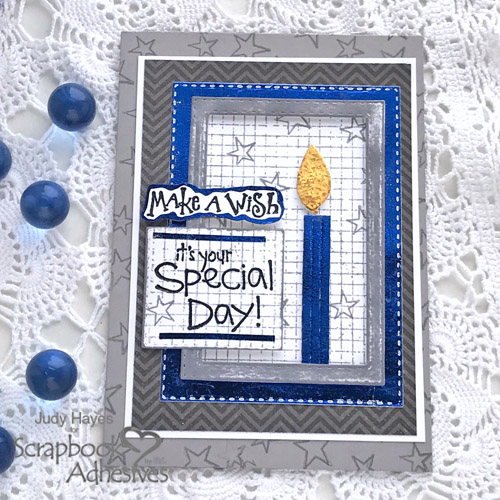
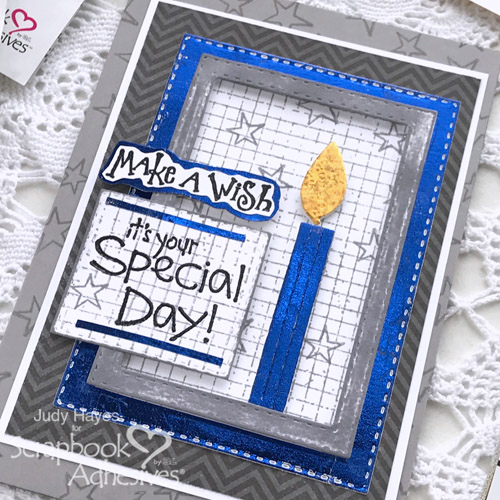
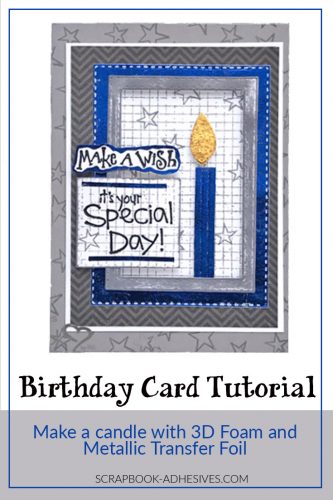
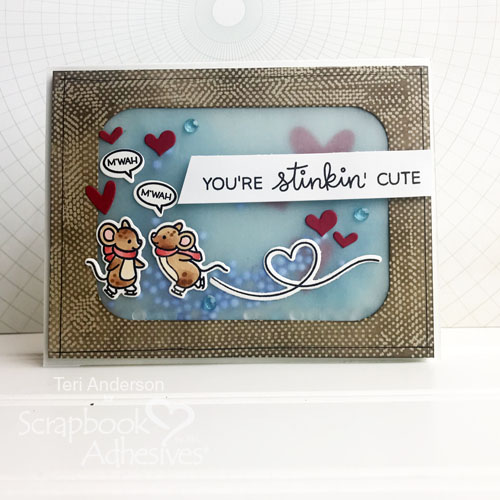
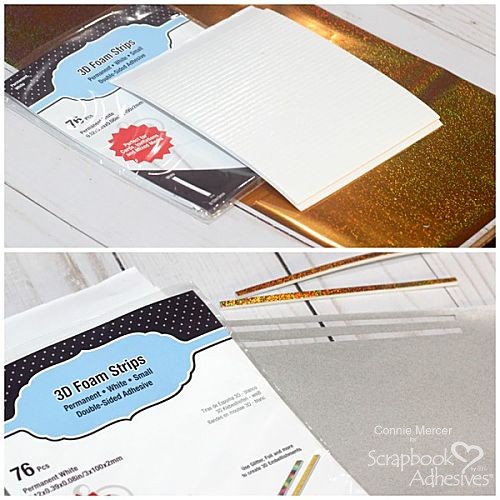
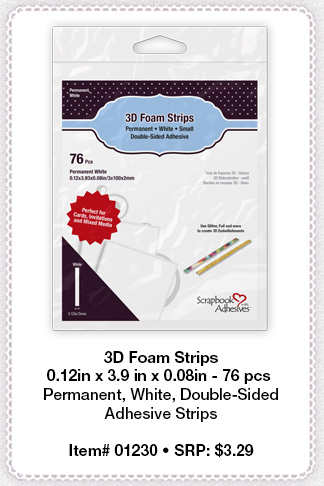
Hello blog friends! Today, I’m sharing a Foiled Candle Birthday Card that features NEW 3D Foam Strips. They are 1/8-inch strips of 3D Foam with permanent double-sided adhesive. Can you see where I’m using them?

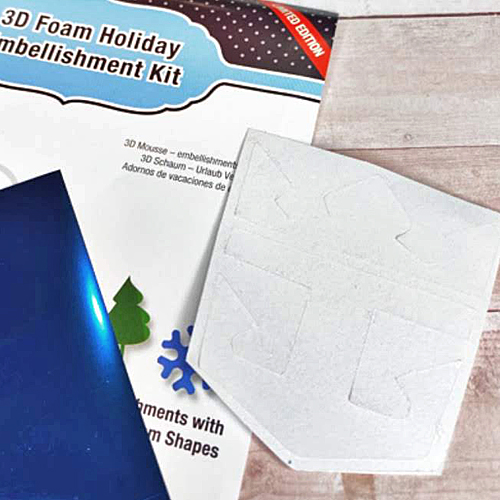
The three strips of the 3D Foam Strips make the foiled candle. Simply cut the strips to size and apply blue foil from Metallic Transfer Foil Sheets Variety Colors to make a shiny candle! And the flame, that’s a leaf shape from 3D Foam Leaves that I covered with Metallic Transfer Foil Sheets Holographic Colors!

Foiled Candle Birthday Card by Judy Hayes for Scrapbook Adhesives by 3L

Making the Layers of the Card Base

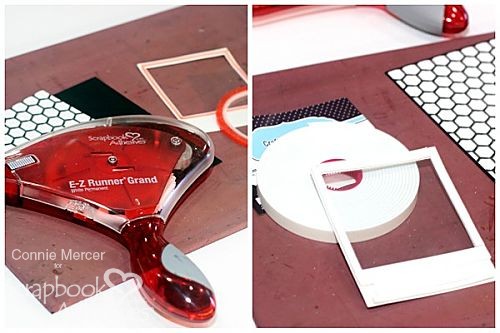
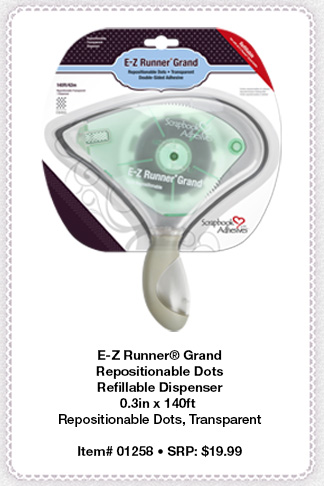
To make this card, I stamp stars on a gray card base. For the card panel, attach patterned paper to a white mat and then to the card base with E-Z Runner® Petite Permanent Dots Refillable Dispenser.

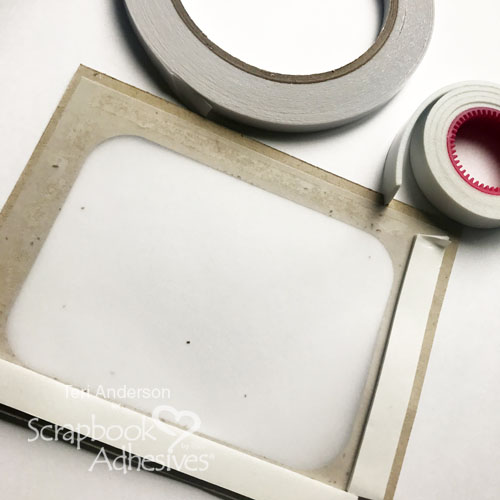
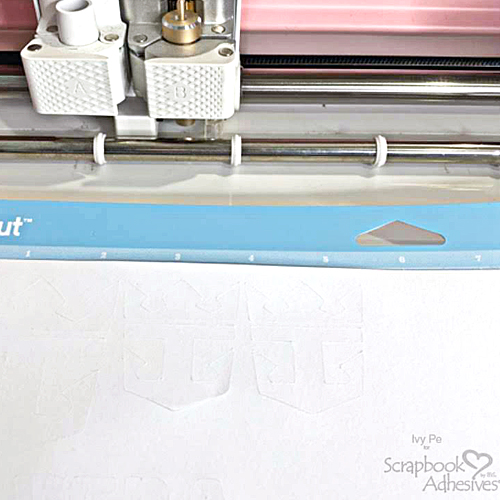
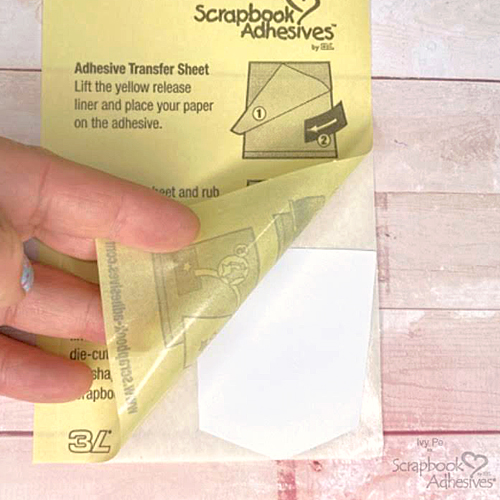
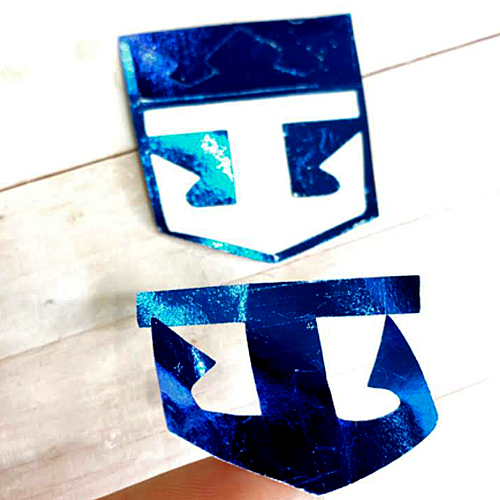
To make the blue foiled mat, apply Adhesive Sheets 4 x 6 inch on one side of a piece of white cardstock. Die-cut the cardstock into a rectangle shape. With the blue foil from the Metallic Transfer Foil Sheets Variety Colors, foil the outside edges colored side up, rub with your fingertips to transfer the color, and remove the foil sheet. Reapply as needed.

For the next layer, die-cut a smaller frame rectangle shape with white cardstock and rub the front with gray ink to color it.

Using the gray rectangle frame as a guide, cut a piece of white cardstock to fit behind the opening. Stamp a grid pattern and stars with gray ink.

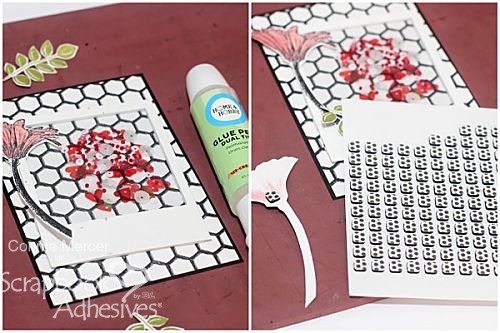
Using the E-Z Runner® Petite Permanent Dots Refillable Dispenser on the back edges of the stamped cardstock and center on top of the foiled layer. The exposed Adhesive Sheet in the foiled layer will help secure in the center.

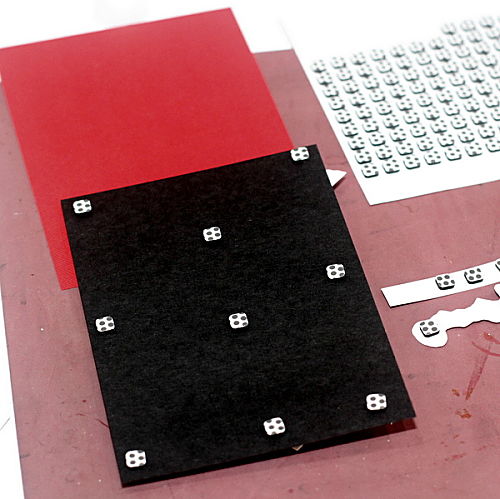
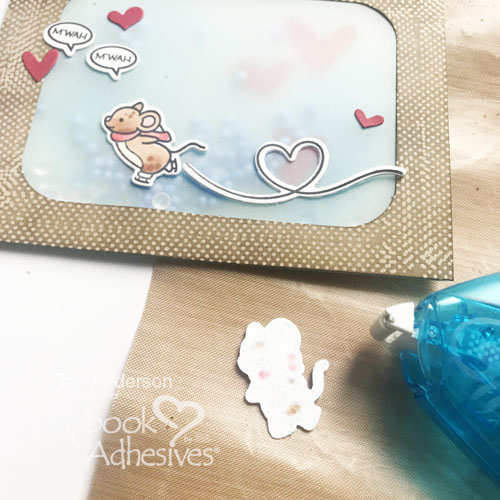
Finally, use the new 3D Foam Strips on the back of the gray frame and center it on the card front. It’s perfect to add dimension to a narrow frame like this!

Foiled Candle Birthday Card by Judy Hayes for Scrapbook Adhesives by 3L

Add the Foiled Candle

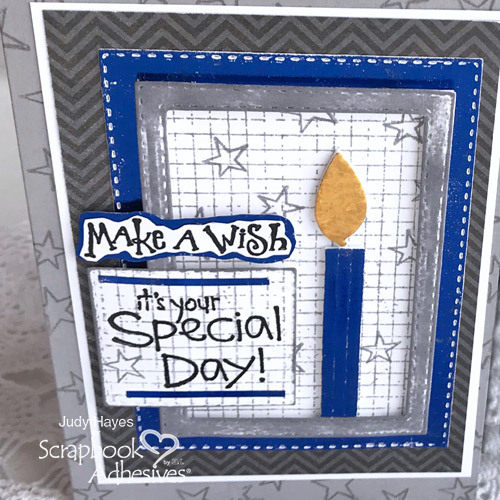
Now the fun part, adding the candle! Carefully peel three strips of the 3D Foam Strips together off the sheet and cut to length. Place them on the card front on top of the stamped white cardstock, remove the liner and foil with the blue foil, colored side up and rub to transfer. To add the flame, add the leaf shape from the 3D Foam Leaves, remove the top liner and foil with the gold foil from the Metallic Transfer Foil Sheets Holographic Colors using the same steps as above. See how easy it is to make a foiled candle?

Completing the Card

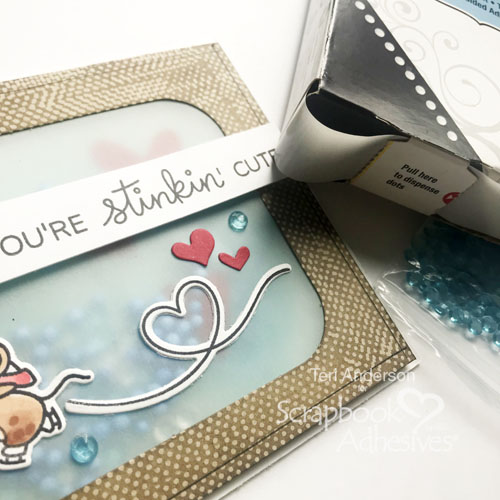
To match the layered card panel, stamp the same grid pattern on white cardstock for verse piece and edge it with gray ink. After the ink dries, stamp It’s Your Special Day! in black ink and clear heat emboss it. Stamp a grey star as well. To make the foil borders at the top and the bottom, add Premium Double-Sided Tape ⅛-inch, remove the liner and cover with blue foil. Pop it up on the card with 3D Foam Squares White Mix.

For the Make a Wish sentiment, stamp on a scrap piece of white cardstock with black ink and clear heat emboss. First fussy cut around it. Then create a foiled mat by adding a piece of Adhesive Sheets 4 x 6 inch to another piece of scrap white cardstock, peel the liner off and cover it with the blue foil. Attach the Make a Wish sentiment to the foiled piece with E-Z Runner® Petite Permanent Dots Refillable Dispenser. Fussy cut around edges.

Designer’s Tip: use a blue marker to color edges.

Then fastened to the card front with 3D Foam Squares White Mix and you are done with the Foiled Candle Birthday Card! This bright card is a great masculine birthday card. Change the colors of foil and paper to make it appropriate for any birthday.

Thanks for Visiting!
Judy

Foiled Candle Birthday Card by Judy Hayes for Scrapbook Adhesives by 3L

Creative Time: 45 minutes
Skill Level: Intermediate

Materials Needed
Scrapbook Adhesives by 3L®

HomeHobby™ by 3L
Premium Double-Sided Tape 1/8 in.

Other
Imagine Crafts/Tsukineko Versafine Onyx Black Ink; Our Daily Bread Double Stitched Rectangles; Penny Black Sweet Wishes Stamp Set; Stampers Anonymous Tim Holtz Graph and Croc; Ranger Cool Graphite Dye Ink; Ranger Clear Embossing Powder; Simple Stories December Documented Paper; Card Stock – Gray, White; Blue Marker

Save It on Pinterest!

Foiled Candle Birthday Card by Judy Hayes for Scrapbook Adhesives by 3L

Visit our Website and Blog!
Sign up for our Newsletter so you never miss a contest or giveaway!

instagram purple icon facebook icon purple pinterest purple icon twitter purple icon YouTube icon blog subscription purple icon

Rainbow Cupcake Birthday Cards

Happy Monday! Shellye McDaniel here with a pair of delightful Rainbow Cupcake Cards perfect to celebrate birthdays!

Rainbow Cupcake Birthday Cards by Shellye McDaniel for Scrapbook Adhesives by 3L

Rainbow Cupcake Card Bases

First I started with an A2 card base and cut patterned paper to the same size. Next, I attached the paper with E-Z Runner® Grand Permanent Dots. After I cut the yellow striped paper to 3.75″ X 5″, I used Crafty Foam Tape White 13ft to adhere to the base paper.

Rainbow Cupcake Birthday Cards by Shellye McDaniel for Scrapbook Adhesives by 3L

Embellishing the Card

For the decorations, I began with the 3D Foam Pennants and topped them with the gold glitter from the Metallic Transfer Foils Holographic

Rainbow Cupcake Birthday Cards by Shellye McDaniel for Scrapbook Adhesives by 3L

For the cupcake, I used a die set along with the 3D Foam Creative Sheets Small White. I decorated the top of the cupcake with the rainbow transfer foil. Love how the rainbow cupcakes turned out!

Rainbow Cupcake Birthday Cards by Shellye McDaniel for Scrapbook Adhesives by 3L

In finishing, I used 3D Foam Squares White Small to attach the stickers.

Thanks for joining me today!
Shellye

Creative Time: 30 minutes
Skill Level: Beginner

Materials Needed:
Scrapbook Adhesives by 3L®

E-Z Runner® Grand Permanent Dots
Crafty Foam Tape White 13ft
3D Foam Pennants
3D Foam Squares White Small
Metallic Transfer Foil Sheets Holographic Colors
3D Foam Creative Sheets Small White

Other
Patterned Papers and Stickers: Echo Park; Bow: Paper Mart

Love It! Save It to Pinterest!

Rainbow Cupcake Birthday Cards by Shellye McDaniel for Scrapbook Adhesives by 3L

Visit our Website and Blog!
Sign up for our Newsletter so you never miss a contest or giveaway!

instagram purple icon facebook icon purple pinterest purple icon twitter purple icon YouTube icon blog subscription purple icon

Vellum Shaker Card with Masking Technique

Hi, friends! Can you believe Valentine’s Day is just three weeks away? Teri here, and I’ve got a fun vellum shaker card you can make to tell your sweetheart you love them!

Vellum Shaker Card with Masking Technique by Teri Anderson for Scrapbook Adhesives by 3L

Creating the Vellum Shaker Card Window

You’ll first want to do some cutting. You will need a card base, plus two cardstock panels and one vellum panel to fit on top. You’ll also want to cut a rectangle out of one of the cardstock panels.

Vellum Shaker Card with Masking Technique by Teri Anderson for Scrapbook Adhesives by 3L

Sponge a little blue ink on the blue panel. It doesn’t need to look perfect. It just needs to add the look of texture.

Masking Technique

Also repeatedly apply removable dots with the E-Z Dots® Repositionable Refillable Dispenser to the second panel of cardstock. (Please note it’s key that you use removable adhesive and not permanent. You’ll see why in a minute.) Don’t worry if your dots overlap or your lines are uneven! It will add to the handmade look of your finished card!

Vellum Shaker Card with Masking Technique by Teri Anderson for Scrapbook Adhesives by 3L

Set the kraft panel of cardstock on a craft mat or a scratch piece of paper. Gently sponge brown ink onto the panel. Use your finger to rub off the adhesive!

Vellum Shaker Card with Masking Technique by Teri Anderson for Scrapbook Adhesives by 3L

Make the Shaker Feature

Flip the panel upside down and adhere the vellum onto it. Then “frame” the window with Crafty Foam Tape.

Vellum Shaker Card with Masking Technique by Teri Anderson for Scrapbook Adhesives by 3L

Set a mixture of embellishments on the window. Sequins, beads and gems all make wonderful shaker filler! Adhere three die-cut hearts to the blue panel and affix the blue panel to the shaker window. Mount the shaker to a card created from cardstock.

Vellum Shaker Card with Masking Technique by Teri Anderson for Scrapbook Adhesives by 3L

Finishing off the Card

Decorate the shaker with stamped critters and die-cut hearts. (I used mice but you may want to use some other cute stamps! The decision is up to you.) Here’s a trick for adhering super small stamped images to a card. Set them upside down on a piece of scratch paper and apply adhesive to them with the E-Z Dots® Permanent Refillable Dispenser. It’s the perfect tool for getting adhesive completely on the small parts of those images!

Vellum Shaker Card with Masking Technique by Teri Anderson for Scrapbook Adhesives by 3L

Complete the Vellum Shaker Card by stamping a sentiment on a strip of adhering it to the card with 3D Foam Squares. Add a few embellishments as well.

Vellum Shaker Card with Masking Technique by Teri Anderson for Scrapbook Adhesives by 3L

Thanks for stopping by today! I hope you will be inspired to make a vellum shaker card of your own!

Happy creating!
Teri Anderson

Vellum Shaker Card with Masking Technique by Teri Anderson for Scrapbook Adhesives by 3L

Creative Time: 60 Minutes
Skill Level: Intermediate

Materials Needed
Scrapbook Adhesives by 3L®

HomeHobby™ by 3L

Other
White Cardstock and Vellum: Neenah Paper; Blue and Kraft Cardstock: My Favorite Things; Stamps: Lawn Fawn (Stinkin’ Cute, Mice on Ice and Sealed with a Kiss Stamp Sets); Dies: Paper Smooches (Hearts) and My Favorite Things (Rectangle); Black and Brown Ink Pads: Ranger Ink; Blue Ink Pad: My Favorite Thing; Gems and Foam Balls: Jillibean Soup; Markers: Copic

Save to Pinterest!

Vellum Shaker Card with Masking Technique by Teri Anderson for Scrapbook Adhesives by 3L

Visit our Website and Blog!
Sign up for our Newsletter so you never miss a contest or giveaway!

instagram purple icon facebook icon purple pinterest purple icon twitter purple icon YouTube icon blog subscription purple icon

Custom Luggage Tags Tutorial

Hi, Ivy Pe here! Are you planning on a vacation soon? How about making custom luggage tags to accent your bags! I am so excited because we are going on a cruise – my husband’s first time! Using these Self-Laminating Tags with Loops will make it so easy. Let me show you!

Custom Luggage Tags Tutorial by Ivy Pe for Scrapbook Adhesives by 3L

Custom Luggage Tags Instructions

These tags need to stick out so why not make my design BOLD with the Metallic Transfer Foil Sheets. First I had to cut out my design with label paper to give it support and to make it a foiled sticker. Using the washi tape setting of my electronic file cutting machine, I cut my shape.

Custom Luggage Tags Tutorial by Ivy Pe for Scrapbook Adhesives by 3L

Once cut and peeled off the mat, I placed it cut side down on the Adhesive Sheet 4 x 6-in. Simply peel off the liner, place the paper down and replace the liner and rub the paper to transfer the adhesive.

Designer’s Tip: Burnish well with your fingertips, rounded side of a bone folder or plastic card for a good transfer.

Custom Luggage Tags Tutorial by Ivy Pe for Scrapbook Adhesives by 3L

Foiling My Design

Once you have your edge-to-edge adhesive coverage, you are ready to foil! There are five colors of the Metallic Transfer Foil in the 3D Foam Holiday Embellishment Kit. I chose the blue color. Place the color side up, over the design and gently rub the foil to transfer the color.

If you missed a spot or two, reapply the foil. I love that you don’t need a machine for this step. Instant gratification! LOL!

Custom Luggage Tags Tutorial by Ivy Pe for Scrapbook Adhesives by 3L

Creating the Tag Base

Cut two pieces of 2.25 x 3.34-inch patterned paper. one for the front and one for the back. Place the foiled design in the center of the front piece and our contact information on the back piece. Attach them together using the E-Z Runner Petite Permanent Dots.

Custom Luggage Tags Tutorial by Ivy Pe for Scrapbook Adhesives by 3L

Now it’s the fun part! Center the cardstock onto the inside of the Self-Laminating Tag, making sure the color side is covering the contact information for a little privacy and the clear side is covering the design side. Pull the liner off and assemble the tag. Thread the loop through the opening and you’re done!

Custom Luggage Tags Tutorial by Ivy Pe for Scrapbook Adhesives by 3L

Make these Custom Luggage Tags for all your bags for your vacation. Thanks for stopping in! Bon Voyage!
Ivy

Creative Time: 40 minutes
Skill Level: Advanced

Materials Needed:
Scrapbook Adhesives by 3L®

Adhesive Sheets 4 x 6 in.
3D Foam Holiday Embellishment Kit
E-Z Runner® Petite Permanent Dots Refillable Dispenser

HomeHobby™ by 3L
Self-Laminating Tags with Loops

Love It and Save It to Pinterest!

Custom Luggage Tags Tutorial by Ivy Pe for Scrapbook Adhesives by 3L

Visit our Website and Blog!
Sign up for our Newsletter so you never miss a contest or giveaway!

instagram purple icon facebook icon purple pinterest purple icon twitter purple icon YouTube icon blog subscription purple icon

Adhesive Solutions for a Dimensional Layout

Hello crafty friends and welcome to 2020! Tracy here, and today I have my first creation of the new year. Today I am sharing a dimensional layout and some Adhesive Solutions for those tricky dimensional products. Keep reading for all of the details.

Adhesive Solutions for a Dimensional Layout by Tracy McLennon for Scrapbook Adhesives by 3L

Adhesive Solution Ideas

I start by creating a simple layered background, matting the photo in white cardstock, then a larger mat of patterned paper and then another layer of white cardstock, all with the edges distressed. I’m useing the E-Z Runner® Ultra Strong Refillable Dispenser for the photo and then Crafty Foam Tape White for the other layers.

Adhesive Solution #1:

The first tricky piece that I need to adhere is the branch of flowers across the bottom of the layout. The layout is going to be framed and everything needs to be adhered securely place. I used Adhesive Lines across the entire branch to make sure it was firmly in place.

Adhesive Solutions for a Dimensional Layout by Tracy McLennon for Scrapbook Adhesives by 3L

Adhesive Solution #2:

Continue to add the dimensional flowers around the photo and more around the branch. Here I’m using Adhesive Dots Medium to make sure all of these tricky pieces stay in place.

Adhesive Solutions for a Dimensional Layout by Tracy McLennon for Scrapbook Adhesives by 3L

Adhesive Solution #3:

The paper collection includes a stunning sheet of very intricate paper die cuts. As always, I wanted to pop these up to create lots of dimension. The tricky part is that most of them are very fine.

For this I cut very narrow strips of 3D Foam Creative Sheets Mix, then cut those into smaller pieces to fit each piece. I added them around the matted photo and the dimensional branch.

Adhesive Solutions for a Dimensional Layout by Tracy McLennon for Scrapbook Adhesives by 3L

Thanks so much for stopping by and exploring some Adhesive Solutions.
Tracy McLennon

Creative Time: 60 Minutes
Skill Level: Intermediate

Materials Needed
Scrapbook Adhesives by 3L®

Crafty Foam Tape White
E-Z Runner® Ultra Strong Refillable Dispenser
Adhesive Dots Medium
Adhesive Lines
3D Foam Creative Sheets Mix

Other
Patterned Papers and Die Cuts: 49 & Market; Flowers: Prima Marketing Inc.; White Cardstock; Paper Distresser Tool

Save It to Pinterest!

Adhesive Solutions for a Dimensional Layout by Tracy McLennon for Scrapbook Adhesives by 3L

Visit our Website and Blog!
Sign up for our Newsletter so you never miss a contest or giveaway!

instagram purple icon facebook icon purple pinterest purple icon twitter purple icon YouTube icon blog subscription purple icon

A Heart Shaped Valentine’s Day Gift Box

Hi, Connie here with an older heart-shaped Valentine’s Day gift box that desperately needs a makeover. I’ll upcycle it using Scrapbook Adhesives by 3L® and some pretty paper, keep reading for the tutorial. Once this is done I’ll be all ready for Valentine’s Day, but don’t tell hubby!!

A Heart Shaped Valentine's Day Gift Box Tutorial by Connie Mercer for Scrapbook Adhesives by 3L

Wrap the Chocolates

A Heart Shaped Valentine's Day Gift Box Tutorial by Connie Mercer for Scrapbook Adhesives by 3L

Cut decorative paper into 1″ x 3″ strips of paper. Using the E-Z Runner® Petite Permanent Dots, on both ends of the paper, wrap around the chocolate bars. Add the small heart to the candy using the 3D Foam Circles for dimension.

A Heart Shaped Valentine's Day Gift Box Tutorial by Connie Mercer for Scrapbook Adhesives by 3L

Upcycling the Valentines Day Gift Box

Using the NEW 3D Foam Strips and Metallic Transfer Foil Sheets Holographic colors, adding sparkle to the tag will be easy and fast. How? Simple take the top liner off and place the Metallic Transfer Foil colored side up, rub with fingertips to transfer the color and peel off. Just add the foiled strips to the bottom of the tags and trim the excess.

A Heart Shaped Valentine's Day Gift Box Tutorial by Connie Mercer for Scrapbook Adhesives by 3L

To complete the Valentine’s Day Gift Box add heart-shaped die cuts, ribbon and embellishments to the tag cluster using 3D Foam Squares. This will add a great dimension to the die cuts. Adhere the tag cluster to the top of the box using Extreme Double-Sided Tape 1/4-inch.

A Heart Shaped Valentine's Day Gift Box Tutorial by Connie Mercer for Scrapbook Adhesives by 3L

Now it’s completed and re-purposed! Here are a few looks at the completed Valentine’s Day Gift Box.

Thanks for stopping by!
Connie Mercer

A Heart Shaped Valentine's Day Gift Box Tutorial by Connie Mercer for Scrapbook Adhesives by 3L

Creative Time: 40 minutes
Skill Level: Intermediate

Materials Needed:
Scrapbook Adhesives by 3L®

E-Z Runner® Petite Permanent Dots Refillable Dispenser
3D Foam Strips
3D Foam Circles White Mix
Metallic Transfer Foil Sheets Holographic Colors

Other
Pattern paper: Doodlebug Design; Photo image: Darkroom Door; Trim: May Arts Ribbon

Love It! Save It to Pinterest!

A Heart Shaped Valentine's Day Gift Box Tutorial by Connie Mercer for Scrapbook Adhesives by 3L

Visit our Website and Blog!
Sign up for our Newsletter so you never miss a contest or giveaway!

instagram purple icon facebook icon purple pinterest purple icon twitter purple icon YouTube icon blog subscription purple icon

2020 New Product Announcement!

Greetings from Creativation in sunny Phoenix AZ!

Creativation

Come visit us in Booth 2400 if you’re on site! See the new products and join us for Make and Takes with a special gift!

Couldn’t make it? Follow us on Instagram and Facebook for some behind the scenes fun!

01230 3D Foam Strips by Scrapbook Adhesives by 3L
E-Z Runner Grand Repositionable Dots Dispenser by Scrapbook Adhesives by 3L
E-Z Runner Grand Permanent Dots Dispenser by Scrapbook Adhesives by 3L
Adhesive Dispenser Value Pack by Scrapbook Adhesives by 3L
Crafty Foam Tape 108ft by Scrapbook Adhesives by 3L

We hope you love them! Ask for our products at your favorite retailers!

Visit our Website and Blog!
Sign up for our Newsletter so you never miss a contest or giveaway!

instagram purple icon facebook icon purple pinterest purple icon twitter purple icon YouTube icon blog subscription purple icon

Celebrate Card with 3D Foam Pennants Card

Hi everyone, it’s Yvonne here with a Celebrate card showcasing a technique called Wear Your Adhesive on the Outside. With this technique, you use your Adhesive not just between layers for adhering, but on the top, as an embellishment on your card! And with lots of Metallic Transfer Foil and glitter, this card is extra sparkly!

Celebrate Card with 3D Foam Pennants Card by Yvonne van de Grijp for Scrapbook Adhesives by 3L

Celebrate Card with 3D Foam Pennants

I used every bit of the 3D Foam Pennants set to create a fun design and these shapes make cardmaking super easy!

Start by trimming a piece of white cardstock to a rectangle size to make the card panel. Place the pennant and triangle shapes from the 3D Foam Pennants onto the panel in a geometrical pattern. Make sure to leave space at the bottom to stamp a sentiment.

Celebrate Card with 3D Foam Pennants Card by Yvonne van de Grijp for Scrapbook Adhesives by 3L

Designer’s Tip: lightly draw a horizontal line in pencil to help line up the shapes easily. Simply erase the line after adhering the shapes.

Next, add 3D Foam Circles to the panel design. Then stamp the Celebrate sentiment on the panel using a black ink pad.

Wear Your Adhesive on the Outside

To Wear Your Adhesive on the Outside, remove the top liner from the 3D Foam Circles White Mix, place your desired color from the Metallic Transfer Foil Sheets Holographic Colors (color side UP), and rub with your fingertips to transfer the color to the circles.

Celebrate Card with 3D Foam Pennants Card by Yvonne van de Grijp for Scrapbook Adhesives by 3L

Remove the liners of the triangle shapes and repeat the same steps with the Metallic Transfer Foil Sheets Variety Colors.

For the pennant shapes, we will use a different medium glitter! Simply remove the liner of the pennant shapes, sprinkle glitter on top and gently burnish the glitter into the adhesive. Tap off the excess glitter and done. Isn’t this a fun effect!

Making the
Card Base

Adhere the
glittered Pennants panel onto a slightly larger pink panel using the E-Z
Runner®
Permanent Strips Refillable Dispenser
.

Secure the panel onto a white card base again using the E-Z Runner® Permanent Strips Refillable Dispenser.

And…voila…your Celebrate card is ready! I hope you enjoyed this simple tutorial and wish you happy crafting!
Yvonne van de Grijp

Celebrate Card with 3D Foam Pennants Card by Yvonne van de Grijp for Scrapbook Adhesives by 3L

Creative Time:30 minutes
Skill Level: Beginner

Materials needed:
Scrapbook Adhesives by 3L®

Other
Cardstock (White, Pink); Clear stamps (Avery Elle: Sentimental); Black inkpad; Acrylic Stamp block; Glitter (Gold, Green); Paper Trimmer; Scissors, Ruler; Pencil; Eraser

Love It! Save It to Pinterest!

Celebrate Card with 3D Foam Pennants Card by Yvonne van de Grijp for Scrapbook Adhesives by 3L

Visit our Website and Blog!
Sign up for our Newsletter so you never miss a contest or giveaway!

instagram purple icon facebook icon purple pinterest purple icon twitter purple icon YouTube icon blog subscription purple icon