You are in our US store • Switch to Europe store

3D Foam Star Constellation Layout

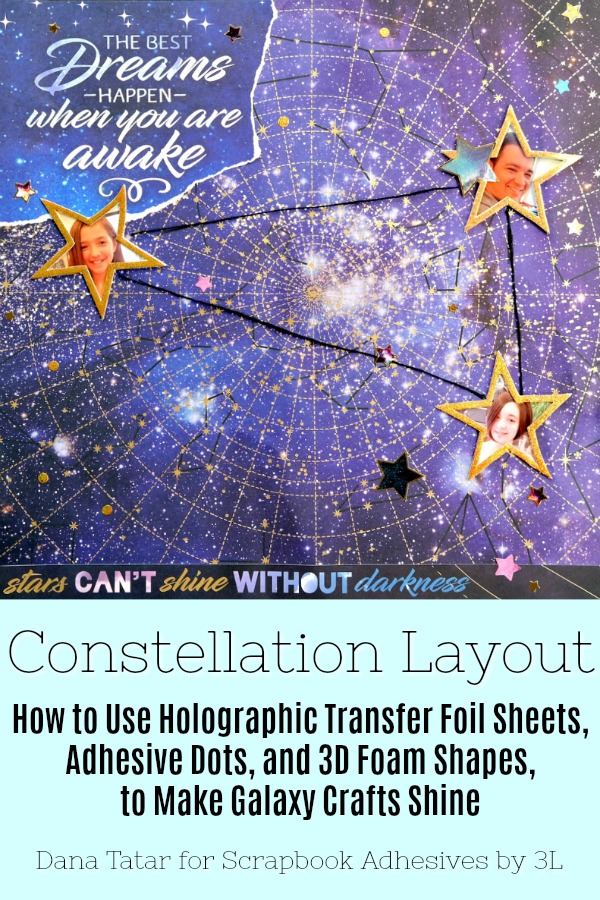
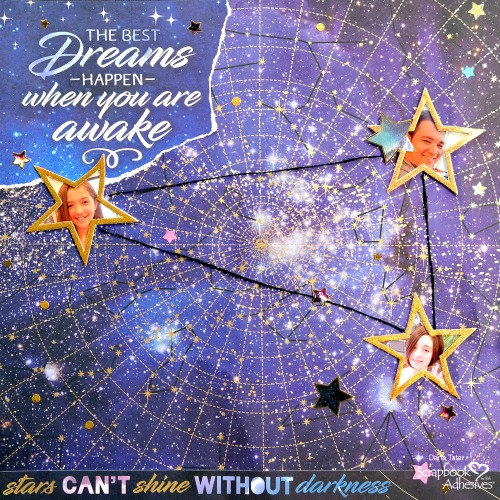
Hi friends! Dana Tatar here today sharing a scrapbook layout that was inspired by the night sky. My husband and two daughters are the shining stars in my life. I created my own constellation for a scrapbook layout using their photos, 3D Foam Stars, and Holographic Metallic Transfer Foil Sheets.

Constellation Scrapbook Layout by Dana Tatar for Scrapbook Adhesives by 3L

Making Frames with Foiled 3D Foam Stars

Metallic Transfer Foil + 3D Foam Star Photo Frames by Dana Tatar for Scrapbook Adhesives by 3L

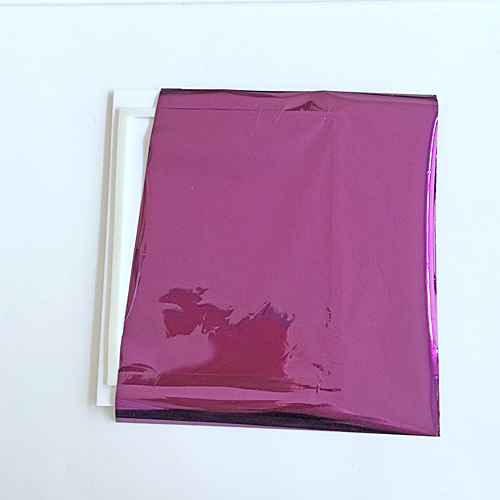
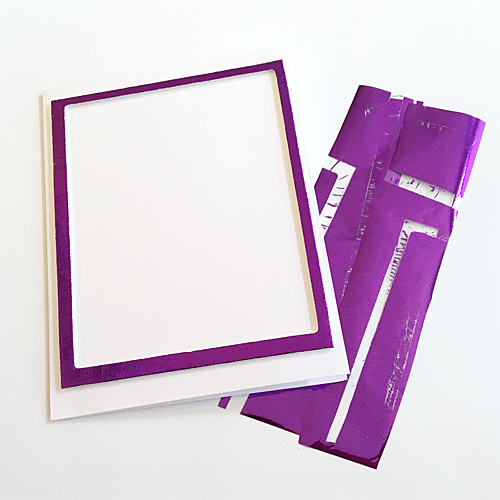
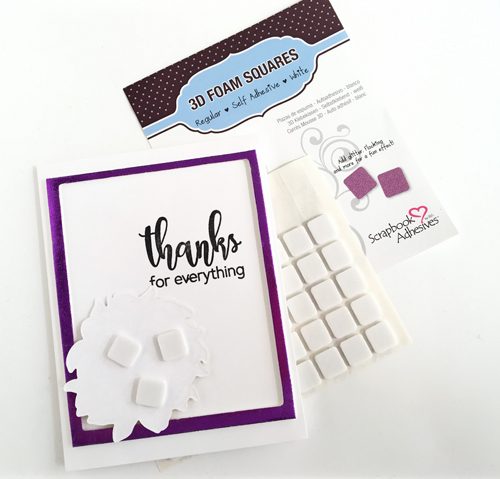
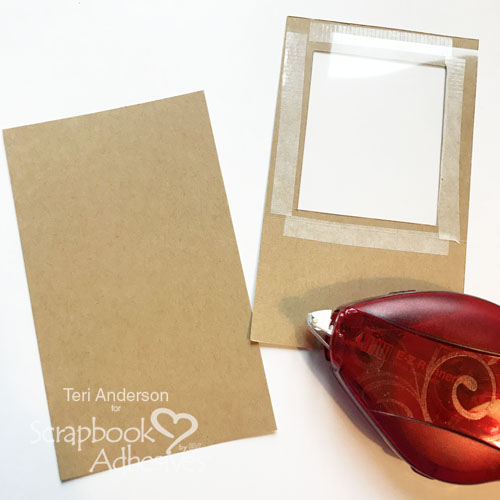
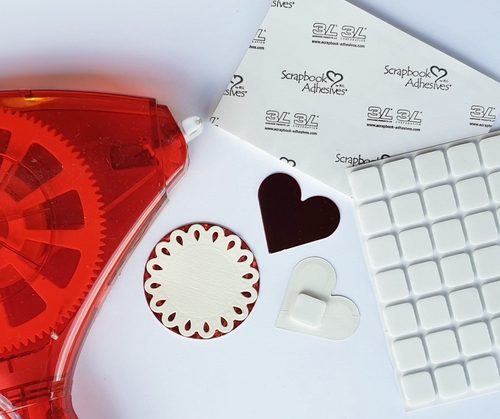
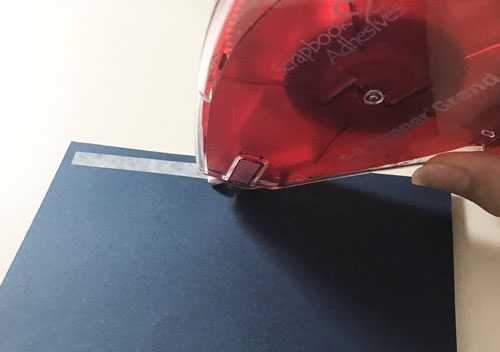
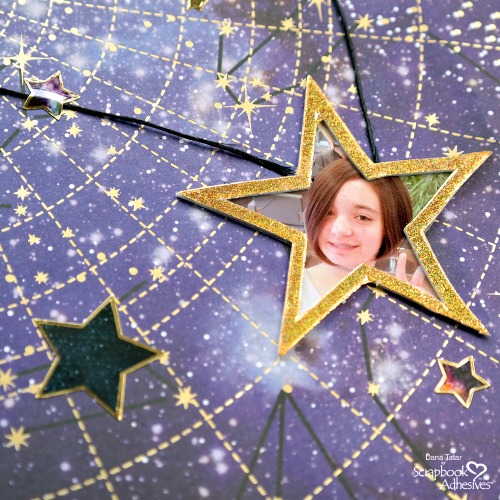
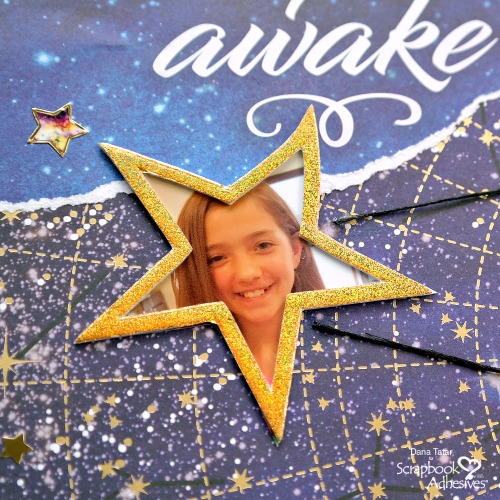
Start by printing wallet size photos and place 3D Foam Stars onto them. Next, cut around the outer edge of the shape, creating a star-shaped photo frame. Secure them to the layout using the E-Z Runner Ultra Strong Refillable Dispenser. To add gold sparkle, I peeled off the top paper liner, pressed the gold Holographic Transfer Foil onto the adhesive, and then gently lifted the foil away from the foam.

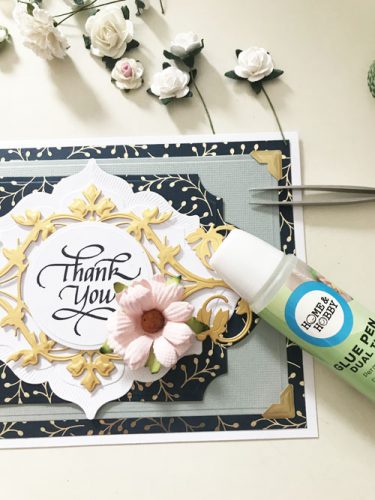
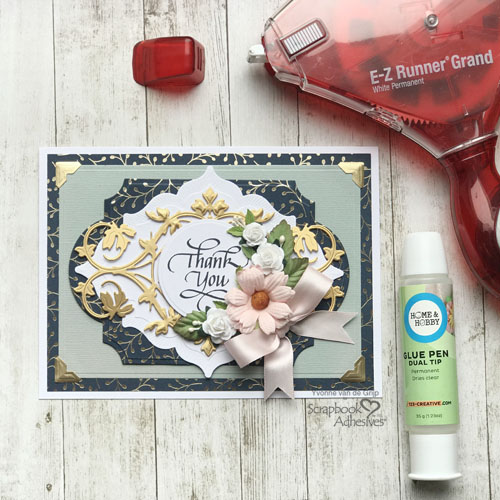
The three star photos are connected with black twine and secured to the page using the Dual Tip Glue Pen. I created my own constellation to mimic the print of the patterned paper.

Adding Texture and Dimension with Layers

Metallic Transfer Foil + 3D Foam Star Photo Frames by Dana Tatar for Scrapbook Adhesives by 3L

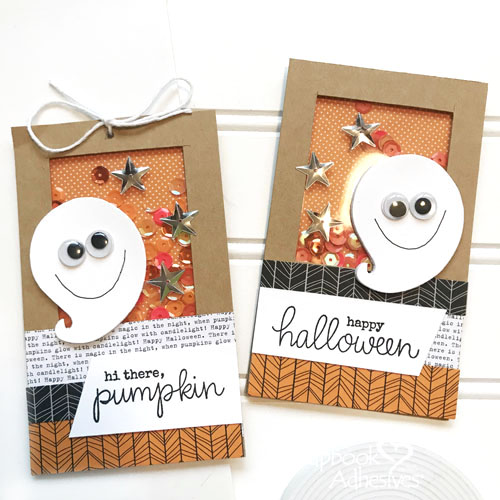
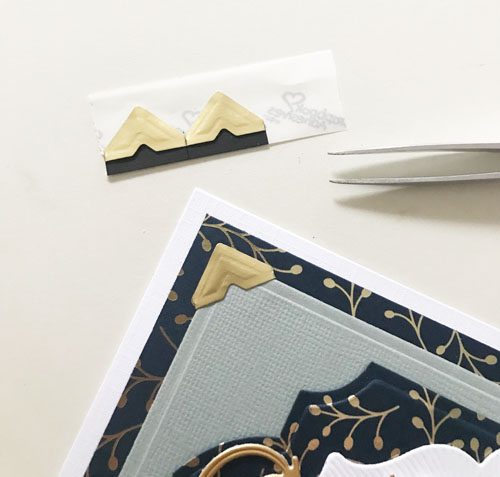
Stickers are a great way to add a second layer to a design without adding extra bulk. I applied several sizes of gold-edged stickers to help add depth to the galaxy background.

Metallic Transfer Foil + 3D Foam Star Photo Frames by Dana Tatar for Scrapbook Adhesives by 3L

Tearing, instead of cutting patterned paper adds contrast to the page. The raw edge of the paper helps to balance the sparkly foil accents on the scrapbook page.

An Adhesive Dot Galaxy

Twinkle Stars using Adhesive Dots, by Dana Tatar for Scrapbook Adhesives by 3L

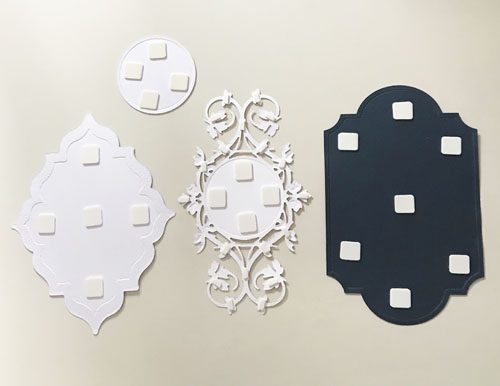
Mini Adhesive Dots make great twinkle stars! They have a strong bond that makes them perfect for intricate surfaces and small objects such as sequins and foil. I applied gold Holographic Transfer Foil (using the same method as above) to Mini Adhesive Dots placed randomly around the page.

Thanks so much for joining me today!
~Dana Tatar

Creative Time: 45 Minutes
Skill Level: Intermediate

Materials Needed
Scrapbook Adhesives by 3L®

E-Z Runner® Ultra Strong Refillable Dispenser
Adhesive Dots Mini
3D Foam Stars
Metallic Transfer Foil Sheets Holographic Colors

HomeHobby by 3L®
Dual Tip Glue Pen

Other
Patterned Paper (Paper House Productions); Stickers (Paper House Productions); Black Twine (American Crafts)

Love It! Pin It!

Constellation Scrapbook Layout with Holographic Foiled Star Photo Frames and Twinkle Adhesive Dots Galaxies by Dana Tatar for Scrapbook Adhesives by 3L

National Coffee Day Blog Hop and I Love Coffee Card Tutorial

Hello coffee, tea or cocoa lovers! It’s Judy here today to celebrate National Coffee Day with the Coffee Lovers Community and you! I have an I Love Coffee card for you..and a friend! Grab a cuppa and see how I put it together!

It’s National Coffee Day and we’re excited to be part of the National Coffee Day Blog Hop with the Coffee Lovers Community! The Coffee Lover’s Blog brews up inspirational coffee-related posts. Read to the end for a chance to win our ADHESIVE GIVEAWAY!! Who are the Coffee Lovers? We’re a coffee-loving (or tea or cocoa) group of card makers that’s open to everyone.

I Love Coffee Card

I Love Coffee Card by Judy Hayes for Scrapbook Adhesives by 3L

To make this I Love Coffee card, first start with an off-white card base that’s 3.75 x 5.5 inches. Cut patterned paper and red cardstock mat to fit the card base. Stamp a verse in the corner of your patterned paper with black ink and then heat emboss with clear embossing powder. Use E-Z Dots® Permanent Refillable Dispenser to fasten the pieces to card front.

Next cut a circle of gray patterned paper and a slightly larger circle from red cardstock. Sand the edge of the gray paper to expose the white edge. Adhere them with E-Z Dots® Permanent Refillable Dispenser, then to the card front, with the circles extending about .25-inch beyond card edge.

For the coffee cups, cut dotted and striped paper large enough to fit your die. Attach each piece to 3D Foam Creative Sheets White Small. Cut off-white paper large enough for each cup top attach to 3D Foam Creative Sheets.

Die cut the cup from dotted and striped pieces, and then two tops from off-white pieces. Remove the liner from the tops and adhere to each cup. Die cut and emboss two cup wraps from kraft cardstock.

Heat Embossing with 3D Foam Hearts

Stamp two “I Coffee” on off-white paper with black ink. Trim each to fit across the cup. Place a small 3D Foam Heart on each stamped piece. To emboss, remove the liner from each heart, apply red embossing powder and heat emboss.

Attach one verse to each cup wrap, and then a cup wrap to each cup using the E-Z Runner® Ultra Refillable Dispenser.

Remove the liners from the back of each cup and adhere to the circle on the card front.

Now tie two small bows of twine and attach them to the cups with Adhesive Dots Micro.

I Love Coffee Card by Judy Hayes for Scrapbook Adhesives by 3L

To finish the cups, cut a corner piece of striped paper and add that across the top corner using E-Z Dots® Permanent Refillable Dispenser. Use a hole punch to make three red dots. Press each dot against adhesive on E-Z Dots® Permanent Refillable Dispenser and then place on the striped corner.

I Love Coffee Card by Judy Hayes for Scrapbook Adhesives by 3L

I hope you love my I Love Coffee card! Keep reading for the Blog Hop prize entry details below! Thanks for Visiting!

Judy Hayes

  • Creative Time: 45 Minutes
  • Skill Level: Intermediate

Materials Needed
Scrapbook Adhesives by 3L®

Other:
Etched Dies: Spellbinders® Paper Arts Circle Dies; Fancy Pants Patterned Paper; Gray Patterned Paper; Our Daily Bread Stamps and Dies; Ranger® Embossing Powder; Imagine Crafts/Tsukineko Versafine Onyx Black Ink; Cardstock (Off-White, Kraft, Red)

Love It. Pin It!

I Love Coffee Card by Judy Hayes for Scrapbook Adhesives by 3L - Pinterest

Coffee Lovers Blog Hop Details

Coffee Lovers Blog Hop Sept 29-Oct 5, 2019 Logo

Enter to win our GIVEAWAY of +$30 Prize Package of Adhesives!

Can’t find the comment section at the bottom of this post? Click below and scroll to the bottom of the post.

Keep on Hopping! Find the list of National Coffee Day Blog Hoppers HERE!

You are invited to the Inlinkz link party!

Click here to enter

Visit our Website and Blog!
Sign up for our Newsletter so you never miss a contest or giveaway!

instagram purple icon facebook icon purple pinterest purple icon twitter purple icon YouTube icon blog subscription purple icon

Halloween Popcorn Box Pocket Album

Fall Greetings! Shellye McDaniel here today with a unique way to use popcorn boxes to make an accordion style pocket album. This would also make a cute happy mail project for your Halloween lovin’ friends. I love making stuffed envelope style projects, and that’s what I based this Halloween Popcorn Box Pocket Album on.

Halloween Popcorn Box Pocket Mail Tutorial by Shellye McDaniel for Scrapbook Adhesives by 3L

Creating with Popcorn Boxes

Happy Mail is one of my favorite things to create, so when I found these flat popcorn boxes boxes I immediately decided to make a pocket album that fits in the mail! Halloween Happy Mail!

To get started I pulled out four of the 3x3x4-in striped popcorn boxes, some Halloween papers and embellishments, and my favorite adhesives!

Begin by decorating the front of the flat popcorn box using Extreme Double-Sided Tape 1/2in to attach the pre-made chipboard spider. Next layer on the witch sticker and scalloped circle with 3D Foam Squares.

Next, to hold the pocket pages together, make strips of 3×12-in patterned and then fold them in half. Adhere the strips to the front and then back of the boxes with Extreme Double-Sided Tape 1/2in. Make sure that the folds of the paper extend further than the edge so they easily fold. The folds are alternated to make it an accordion style, as shown below.

Halloween Popcorn Box Pocket Mail Tutorial by Shellye McDaniel for Scrapbook Adhesives by 3L

Filling the Pockets

Onto the fillers: I crafted paper wands, tags and ephemera pieces!

Tags for Halloween Popcorn Bucket Pocket Mail Tutorial by Shellye McDaniel for Scrapbook Adhesives by 3L
Halloween Popcorn Bucket Pocket Mail Tutorial by Shellye McDaniel for Scrapbook Adhesives by 3L

I love using Adhesive Dots 3D for attaching bows, die cuts and buttons to projects. These tags fit perfectly in the flattened popcorn boxes.

Wands for Halloween Popcorn Box Pocket Mail Tutorial by Shellye McDaniel for Scrapbook Adhesives by 3L

Finally these paper wands above are my favorites! Top each paper straw with a Halloween eraser. To hold the erasers on, wind Extreme Double-Sided Tape 1/4in around one end 3-4 times to create a thickness. The erasers are there to stay!

Halloween Popcorn Box Pocket Mail Tutorial by Shellye McDaniel for Scrapbook Adhesives by 3L

Next add a glittered stripe to the straws. To do this carefully wrap Extreme Double-Sided Tape 1/8in between the purples stripes. Remove the red liner and sprinkle with orange glitter. I love these!

You can find these cute mini popcorn containers at just about any craft supply store and they’re very inexpensive! I can’t wait to try out more themes for upcoming holidays.

Halloween Popcorn Box Pocket Mail Tutorial by Shellye McDaniel for Scrapbook Adhesives by 3L

Thanks for joining me today! Have you made pocket mail? Take a second to comment and tell me what you made. Be sure to pin this idea if you love it!

Shellye

Creative Time: 1 Hour
Skill Level: Intermediate

Materials Needed
Scrapbook Adhesives by 3L®

HomeHobby by 3L®

Other: Oriental Trading-mini popcorn boxes; Paper Mart-ribbon, paper straws; Dollar General- erasers; Walmart- glittered embellishments; Doodlebug Design- patterned papers, die-cuts, enamel dots and stickers

Love it! Pin it!

Visit our Website and Blog!
Sign up for our Newsletter so you never miss a contest or giveaway!

instagram purple icon facebook icon purple pinterest purple icon twitter purple icon YouTube icon blog subscription purple icon

Foiled Frame Thanks for Everything Card

For a simple and clean style card, I choose to use Metallic Transfer Foil Sheets Variety Pack and 3D Foam Frames shape to make a foiled frame. This will anchor my stamped flower and a stamped sentiment. I love the look! Don’t we all need a thank you note ready to go? I’d like to share how I created mine so let’s get started!

Foiled Frame Thanks for Everything Card by Margie Higuchi for Scrapbook Adhesives by 3L

Create a Foiled Frame

On a white A2-sized (4.5 x 5.5-inch) card base, I placed the largest frame from the 3D Foam Frames shape by removing the top liner. Then flip it over to adhere on top of the card base.

Foiled Frame Thanks for Everything Card by Margie Higuchi for Scrapbook Adhesives by 3L

Once the frame is in place, remove the liner and apply the Metallic Transfer Foil Sheets Variety Pack in purple. Make sure the color side is UP and gently rub with your fingers to transfer the color to the frame shape. You can touch up/refoil until the frame is covered completely.

Foiled Frame Thanks for Everything Card by Margie Higuchi for Scrapbook Adhesives by 3L

Stamping the Flower Accent and Sentiment

Using the directions on the packaging, it was SO easy to stamp each layer without fail. Next, cut the image with its coordinating die through a manual die-cutting machine.

Foiled Frame Thanks for Everything Card by Margie Higuchi for Scrapbook Adhesives by 3L

I stamped the sentiment with black ink, in the upper right corner of the card inside the foiled rectangle.

Foiled Frame Thanks for Everything Card by Margie Higuchi for Scrapbook Adhesives by 3L

Lastly, add three 3D Foam Squares on the back of the stamped flower die cut and place it in the lower left corner.

Foiled Frame Thanks for Everything Card by Margie Higuchi for Scrapbook Adhesives by 3L

The simple design with dimension and sparkle is a fabulous look. I hope you will try these elements in your next card making creation!

Thanks for stopping by!
MargieH

Creative Time: 30 minutes
Skill Level: Intermediate

Materials Needed
Scrapbook Adhesives by 3L®
Metallic Transfer Foil Sheets Variety Pack
3D Foam Squares White in Regular Size
3D Foam Frame Shapes

Other
Stamps and Craft Die: Altenew (Build-A-Flower Bundle: Japanese Mums and Japanese Mums Craft Die Set); Tools: Spellbinders® Paper Arts (Platinum 6 Die-Cutting and Embossing Machine), Waffle Flower (Water Media Mat) and My Sweet Petunia (MISTI); White Cardstock; Yellow and Black Inks

Love It. Pin It!

Foiled Frame Thanks for Everything Card by Margie Higuchi for Scrapbook Adhesives by 3L Pinterest Image

Visit our Website and Blog!
Sign up for our Newsletter so you never miss a contest or giveaway!

instagram purple icon facebook icon purple pinterest purple icon twitter purple icon YouTube icon blog subscription purple icon

Ghost Shaker Card and Tag Tutorial for Halloween

Hi, everyone! Teri here today with a frightfully fun ghost shaker tag and card to get you in the mood for Halloween. These projects are easy to make, and you can decide to make either the card or tag! Let me show you how.

Hi There Pumpkin tag and Happy Halloween Ghost card shaker tutorial by Teri Anderson for Scrapbook Adhesives by 3L

Making the Ghost Shaker Card

Start by cutting two 3 x 5-inch rectangles from cardstock. Cut a square window out of one of them, and then add a piece of transparency film to the window on the back side. I’m using E-Z Runner® Refillable Permanent Strips.

Apply patterned paper to the solid rectangle. Adhere several strips of patterned paper to the front of the rectangle with the window.

Flip the rectangle with the window over, and add several strips of Crafty Foam Tape to it. You can also use rectangles and strips cut from a 3D Foam Creative Sheet.

Place some sequins on the solid rectangle and mount the rectangle with the window to it.

Apply a piece of white cardstock to a piece of 3D Foam Creative Sheets Medium. Die-cut a ghost from it. Don’t have a die like mine? Use a pencil and draw a ghost, then use cut it out with scissors.

Place the ghost on the window, and leave the top liner on the ghost. Add wiggle eyes and use a pen to draw a smile. Stamp a sentiment on a strip of cardstock and position it under the ghost.

Finish the card by mounting the rectangles to a card and adding some sequin stars or die-cut stars, adhered with Adhesive Dots Micro.

Happy Halloween Ghost shaker card tutorial by Teri Anderson for Scrapbook Adhesives by 3L

Creating a Ghost Shaker Tag

You can easily make a tag to coordinate with the card! Rather than adhering your rectangles to a card, use a hole punch to poke a hole above the window.

Hi There Pumpkin shaker tag tutorial by Teri Anderson for Scrapbook Adhesives by 3L

Finish the ghost shaker tag by adding a little twine or ribbon to it. Use your completed tag to decorate a gift or add a touch of fun to a bag of Halloween candy!

Hi There Pumpkin tag and Happy Halloween Ghost card shaker tutorial by Teri Anderson for Scrapbook Adhesives by 3L

I hope you are inspired to make a Halloween-inspired ghost shaker tag and card of your own! Thanks for stopping by today!

Teri Anderson

Creative Time: 60 Minutes
Skill Level: Intermediate

Materials Needed
Scrapbook Adhesives by 3L®

Other
Frightfully Fun Stamp Set by My Favorite Things; White and Kraft Cardstocks by Neenah Paper; Spooktacular Paper Pad by Bella BLVD; Black Pen by Muji; Ghost Die by Paper Smooches; Sequins by Cartwright’s Sequins; Wiggle Eyes by Darice; Black Ink Pad by Ranger Ink; Transparency Sheet by Staples; Twine by Whisker Graphics; Hole Punch

Love it! Pin It!

Hi There Pumpkin tag and Happy Halloween Ghost card shaker tutorial by Teri Anderson for Scrapbook Adhesives by 3L

Visit our Website and Blog!
Sign up for our Newsletter so you never miss a contest or giveaway!

instagram purple icon facebook icon purple pinterest purple icon twitter purple icon YouTube icon blog subscription purple icon

Monkeying Around Card Tutorial

Hello crafty friends! Tracy here today with a fun and easy little card. I’ve been “monkeying around” with this adorable monkey stamp and coordinating die set, featuring some of my go-to adhesives. Keep reading for the tutorial and all of the details.

Monkeying Around Card Tutorial by Tracy McLennon for Scrapbook Adhesives by 3L

Monkeying Around with the Background Colors

Let’s start by creating a simple blended background using a combination of yellow and green water reactive inks with a blending tool.

I mixed two other darker green ink colours to stamp the background image on top of the blended card panel.

Lastly, I added a border of watered down brown to the edges of the card to create a one layer dimension.

Making a background with Distress Oxide inks on Monkeying Around Card Tutorial by Tracy McLennon for Scrapbook Adhesives by 3L

Adhere the blended background card panel to a white cardstock panel, using the Double-Sided Tape Runner Strips Permanent Refillable. (This is the HomeHobby by 3L equivalent product to our E-Z Runner Refillable Permanent Strips.) Then add the layered panel to the white cardstock card base using 3D Foam Squares White Regular Size for a pop of layer.

Monkeying Around Card Tutorial by Tracy McLennon for Scrapbook Adhesives by 3L

Die-cut the circular frame with white cardstock. Cut narrow strips of 3D Foam Creative Sheets and then slice those into small pieces. It makes it easier to add the white cardstock die cut to the card front.

Monkeying Around Card Tutorial by Tracy McLennon for Scrapbook Adhesives by 3L

Monkeying Around with Details

Stamp the monkey image with black ink. Colour the image using watercolor markers and a water brush. Die-cut the image using the coordinating die from the set. Add to the front of the card using 3D Foam Squares White Regular Size.

Thanks so much for stopping by!
Tracy

Creative Time: 45 Minutes
Skill Level: Intermediate

Materials Needed
Scrapbook Adhesives by 3L®

3D Foam Squares White Regular Size
3D Foam Creative Sheets

HomeHobby by 3L®
Double-Sided Tape Runner Strips Permanent

Other
Stampendous (Fern Garden 6×6 Background Cling Stamp, Monkey Cling Stamp and Die Set), Distress Oxide Ink (Lucky Clover, Iced Spruce, Twisted Citron, Squeezed Lemonade, Vintage Photo, Cracked Pistachio), Archival Ink – Jet Black, White Cardstock, Distress Stickles – Tea Dye, Heartfelt Creations Circle Die, Zig Clean Color Markers, Waterbrush, Water Mister

Love It. Pin It!

Monkeying Around Card Tutorial by Tracy McLennon for Scrapbook Adhesives by 3L

Visit our Website and Blog!
Sign up for our Newsletter so you never miss a contest or giveaway!

instagram purple icon facebook icon purple pinterest purple icon twitter purple icon YouTube icon blog subscription purple icon

Mini Mason Jar Party Favor Tutorial

Hi everyone, Christine here today with a tutorial for decorating mini mason jars. I espied these in my local bargain store and they really are mini and very cute. With the addition of some fabric, twine and die cuts, they make perfect table favors or gifts. It’s very easy to do with Scrapbook Adhesives by 3L®!

Decorating Mini Mason Jars

Select some pretty fabric, I had a fat quarter, a linen design with small hearts but any scraps will do. In fact a perfect opportunity to use up fabric as you only need a slim strip for each mini jar.

Mini Mason Jar Party Favor Tutorial by Christine Emberson for Scrapbook Adhesives by 3L

Cut a strip of fabric long enough to go around the jars. Oo the reverse of each fabric strip, apply Extreme Double-Sided Tape 1/2 inch. This super strong tape sticks to most surfaces, including paper, chipboard, glass, fabric, plastic, wood and metal. Wrap the fabric strip around the jar with the join meeting behind the handle, this conceals it well.

Mini Mason Jar Party Favor Tutorial by Christine Emberson for Scrapbook Adhesives by 3L

Decorating the Jar Front

Next step is decorating the jars with some die cuts and/or punch shapes. I selected a circle, round flourish, heart, and butterfly. You can tailor these to suit the occasion. Using both E-Z Runner® Grand Refillable Dispenser and 3D Foam Squares White Mix to assemble the embellishments. The 3D Foam Squares are perfect for dimension.

Mini Mason Jar Party Favor Tutorial by Christine Emberson for Scrapbook Adhesives by 3L

Position the decorations and affix into place with some more of that amazing Extreme Double-Sided Tape 1/2 inch, this ensures they will stay in place during any event. Adding a little pearl to the center of the butterflies is a nice touch. Wrap twine around the neck of each jar and tie with a bow.

Mini Mason Jar Party Favor Tutorial by Christine Emberson for Scrapbook Adhesives by 3L

Fill the adorable mini Mason jar with candy. You could use alternative treats inside if you don’t have a sweet tooth!

Mini Mason Jar Party Favor Tutorial by Christine Emberson for Scrapbook Adhesives by 3L

Thanks for stopping by and don’t forget to check out the great products on the website.
Christine

Creative Time: 25 Minutes
Skill Level: Beginner

Materials Needed
Scrapbook Adhesives by 3L®

Home Hobby by 3L®

Other
Mini Mason Jars; Ivory and Red Foil Card; Etched Dies (Spellbinders Paper Arts: Sapphire Basics A); Paper Punch Butterfly; Twine; Pearls; Candy (optional)

Love It. Pin It!

Visit our Website and Blog!
Sign up for our Newsletter so you never miss a contest or giveaway!

instagram purple icon facebook icon purple pinterest purple icon twitter purple icon YouTube icon blog subscription purple icon

Comparison of Thin and Original 3D Foam

Hi it’s Beth, and today we’re going to compare our very popular 3D Foam products. I made 2 similar cards using Thin 3D Foam and our original height 3D Foam for this comparison.

Comparing Thin 3D Foam Squares and 3D Foam Squares + Card Mailing Tip by Beth Pingry for Scrapbook Adhesives by 3L

3D Foam Features and Benefits

Our 3D Foam is high density foam that doesn’t crush or dent. It retains it’s shape and height. It is acid free and archival safe for all your crafts.

3D Foam is double-sided with permanent adhesive. It adheres to Metallic Transfer Foil, glitter, embossing powder, micro-beads, flock and more! Decorating the top of our adhesives is called Wear Your Adhesive on the Outside, click to see lots of examples. The liners are easy to remove. It is a versatile adhesive, use it on paper, photos, metal, glass, plastic, vellum, fabric, ribbon and more.

Our 3D Foam comes in either Black or White, in a variety of shapes and sizes. Original 3D Foam is 0.08in or 2mm in height, and Thin 3D Foam comes in 0.04in or 1mm in height.

We offer 3D Foam Squares and Circles in both 1/4 and 1/2 inch sizes in the packages. Our Crafty Foam Tape is 13ft x 0.08in. These products are crafters’ favorites, and they’re the work horses of the foam product line!

For die cutting, punching or scissors/trimmers, we have uncut sheets. You’ll find Creative Foam Sheets Small White or Black or Mixed packages with 4 x 5 x 0.04in, or Creative Foam Sheets Medium White 6 x 12 x 0.08in. Each of these contain two sheets in the package.

Now for quick and easy crafting we offer 14 pre-cut Creative Shapes (Hearts, Trees, Stars, Frames, Pennants, Wings, Leaves, Snowflakes, Christmas Mix, Garden Mix, Cupcakes, Easter Mix, Party Mix, Butterflies) Just add a shape to your project, remove the liner and top with your favorite material like glitter, etc.

Does 1mm Make a Difference?

My cards feature almost all the same materials, but on the Hi There card I used the 3D Foam Circles and Squares in White, and on Good Luck I used Thin 3D Foam Squares in Black. I used the same cardstock and patterned papers on both cards. From the front they look very similar, right?

Good Luck card using Thin 3D Foam Squares + Card Mailing Tip by Beth Pingry for Scrapbook Adhesives by 3L
Good Luck Card using Thin 3D Foam Squares
Hi There card using 3D Foam Squares + Card Mailing Tip by Beth Pingry for Scrapbook Adhesives by 3L
Hi There Card using 3D Foam Squares and 3D Foam Circles

Look closer at the amount of shadow between layers.

Comparing Thin 3D Foam Squares and 3D Foam Squares + Card Mailing Tip by Beth Pingry for Scrapbook Adhesives by 3L

From the side view notice these differences:

  1. The Hi There card using 2mm 3D Foam Circles (above, right) is twice as high as Good Luck (above, left).
  2. The Black Thin 3D Foam on Good Luck is camouflaged within the darker papers. You don’t see a contrasting color between the layers, and it is practically invisible. White 3D Foam is visible between dark layers. When using light papers, use white 3D Foam to reduce the contrast. You can color the edges with permanent markers or ink if you really want to make the 3D Foam match.
Comparing Thin 3D Foam Squares and 3D Foam Squares + Card Mailing Tip by Beth Pingry for Scrapbook Adhesives by 3L

You can see above, from the side there is difference between the height of the two cards.

Dimensional Card Mailing Tip

Since our 3D Foam is high density and crush proof, it’s safe to use on cards you mail. The machinery at the post office won’t damage the foam. When pressed or squeezed, 3D Foam pops right up to it’s original height.

In the US, envelopes thicker than 1/4 inch (6.35mm) are subject to additional postage. That means you get up to 3 layers of original 3D Foam + your card/envelope materials, OR up to 6 layers with Thin 3D Foam Squares. That’s a lot of layers!

I hope you found this useful when deciding which 3D Foam height to use for cards, scrapbooking and mixed media projects. Be sure to PIN this post so you can refer back to it!

Mail it Monday Logo

Visit Mail It Monday on Instagram for more mailing tips and enter to win the giveaways this week!

Creative Time: 15 Minutes
Skill Level: Beginner

Thanks for Visiting!

Beth Pingry

Materials Needed
Scrapbook Adhesives by 3L®

Other:
Patterned Paper, Sentiment Stamp, Black Ink

Visit our Website and Blog!
Sign up for our Newsletter so you never miss a contest or giveaway!

instagram purple icon facebook icon purple pinterest purple icon twitter purple icon YouTube icon blog subscription purple icon

Create a Multi-Layered Thank You Card

Hi everyone, Yvonne here today sharing how to make a multi-layered flourished card. I love elegant cards and thank you cards are always handy to have because you never know when you need one!

Create a Multi-Layered Thank You Card by Yvonne van de Grijp for Scrapbook Adhesives by 3L

Thin 3D Foam Squares White Mix are great for layering without making the card too thick. We like to mail these cards without extra postage! HA! My card has seven layers BUT it only measures about 1/8 inch thick. Come on and let’s get started!

Multi-Layered Card Details

Stamp sentiment with black ink onto white cardstock. Then die-cut and emboss it into a circle shape.

Tip: Use washi tape to keep the die from shifting while die-cutting.

Create a Multi-Layered Thank You Card by Yvonne van de Grijp for Scrapbook Adhesives by 3L

Next die-cut and emboss the golden detailed flourished layer, as well as a white label panel, a blue label and a grey rectangle panel.

Create a Multi-Layered Thank You Card by Yvonne van de Grijp for Scrapbook Adhesives by 3L

Then adhere Thin 3D Foam Squares White Mix to the back of the panels (except for the grey rectangle).

Create a Multi-Layered Thank You Card by Yvonne van de Grijp for Scrapbook Adhesives by 3L

For the flourished golden panel I cut some small 3D Foam Squares into two so they fit the die-cut without foam sticking out from under the die-cut.

Then remove the liners of the Thin 3D Foam Squares White Mix and stack the panels.

Make the Card Base

First, make a white card base and adhere a blue patterned and the grey die-cut panel.

To adhere the blue panel to the card base use the E-Z Runner® Grand Refillable Dispenser.

Create a Multi-Layered Thank You Card by Yvonne van de Grijp for Scrapbook Adhesives by 3L

Before adhering the grey panel to the card base, place Creative Photo Corners Gold to all four corners.

Create a Multi-Layered Thank You Card by Yvonne van de Grijp for Scrapbook Adhesives by 3L

Finally, adhere the stacked label and flourish panel to the card base with Thin 3D Foam Squares White Mix.

The Final Embellishments

First I adhered some mulberry flowers and leaves to the card using Adhesive Dots. For the flowers and larger leaves, I used Adhesive Dots Large and for the small leaves, I used Adhesive Dots Micro.

Then I used the Dual Tip Glue Pen to adhere stamens. Then add a satin bow with Crafty Foam Tape.

Create a Multi-Layered Thank You Card by Yvonne van de Grijp for Scrapbook Adhesives by 3L

And voila…your multi-layered flourished Thank You card is ready!
I hope you enjoyed the tutorial and wish you happy crafting.

Create a Multi-Layered Thank You Card by Yvonne van de Grijp for Scrapbook Adhesives by 3L

Creative Time: 50 minutes
Skill Level: Intermediate

Materials Needed
Scrapbook Adhesives by 3L®

Thin 3D Foam Squares White Mix
E-Z Runner® Grand Refillable Dispenser
Adhesive Dots Large
Adhesive Dots Micro
Creative Photo Corners Gold
Crafty Foam Tape White

HomeHobby by 3L®

Dual Tip Glue Pen

Other

Etched Dies: Spellbinders® Paper Arts (Standard Circles Small Etched Dies, Round Leaf Label by Stacey Caron Etched Dies, Labels Twenty-Eight Etched Dies, Renaissance Jubilee by Stacey Caron Etched Dies, 5×7 Matting Basics A Card Creator Etched Dies, Platinum 6 Die-cutting and Embossing Machine); Cardstock (white, gold); Patterned Cardstock (Recollections™: Indigo Kraft & Champagne); QuietFire Design (Thank You Stamp set); black ink pad; Mulberry flowers, Leaves, Stamens; Satin Ribbon; Paper Trimmer; Bone Folder

Love It. Pin It! 

Create a Multi-Layered Thank You Card by Yvonne van de Grijp for Scrapbook Adhesives by 3L Pinterest

Visit our Website and Blog!
Sign up for our Newsletter so you never miss a contest or giveaway!

instagram purple icon facebook icon purple pinterest purple icon twitter purple icon YouTube icon blog subscription purple icon

Spooktacular Halloween Craft Line Up

We gathered a Spooktacular gallery of ideas and tutorials to get your Halloween on! Sit for a spell and churn up your own little treat.

Oh, and please park all brooms at the door, unless you’re cleaning the house

Be Spooky Mini Acrylic Album by Shellye McDaniel for Scrapbook Adhesives by 3L
Ghostly Greetings Trick-or-Treat Halloween Card with 3D Foam by Dana Tatar for Scrapbook Adhesives by 3L

Be Spooky Mini Acrylic Album

Ghostly Greetings Card Tutorial

Hello Pumpkin card by Teri Anderson for Scrapbook Adhesives by 3L
Halloween Plaid Card Tutorial by Michele Kovack for Scrapbook Adhesives by 3L

Hello Pumpkin Card Tutorial

Halloween Plaid Card Tutorial

Punching and Embossing Adhesive Sheets from Scrapbook Adhesives by 3L

Halloween Lantern Tutorial by Asia King for  Scrapbook Ahesives by 3L

Embossing with Adhesive Sheets Scrapbook Tutorial

Halloween Lantern Tutorial


Want to see more?

—–

Follow our Halloween Pinterest Board

Visit our Website and Blog!
Sign up for our Newsletter so you never miss a contest or giveaway!

instagram purple icon facebook icon purple pinterest purple icon twitter purple icon YouTube icon blog subscription purple icon