You are in our US store • Switch to Europe store

Personalize Soccer Party Favor Bags

Hi friends! Dana Tatar here today sharing a quick tutorial for how to embellish team goody bags for a soccer party. Both of my daughters play soccer. You can usually find me looking for shin guards and cleats, washing uniforms, driving the soccer car pool, or cheering on the sidelines (rain or shine). Sometimes, my soccer mom duties include a fun craft project like this!

DIY Soccer Ball Goody Bag with Self-Laminating Player Card Key Chain Charms -Personalize Soccer Party Favor Bags Tutorial by Dana Tatar for Scrapbook Adhesives by 3L

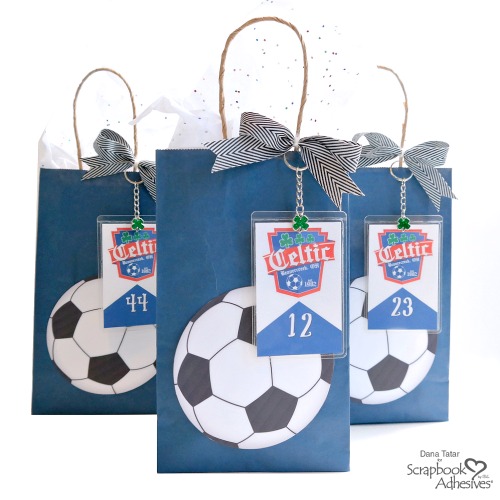
My younger daughter recently traveled out of state for a soccer tournament. Several of the soccer moms worked together to make goody bags for the players. Word got out that I’m crafty, so I was assigned the super fun job of decorating the bags.

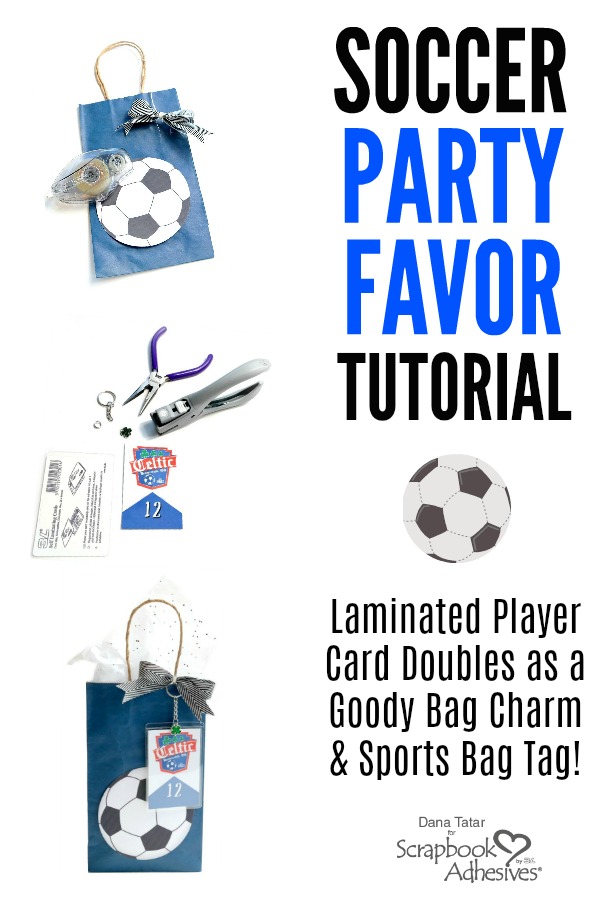
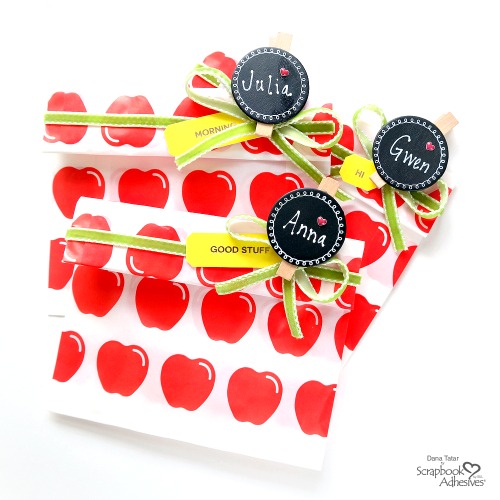
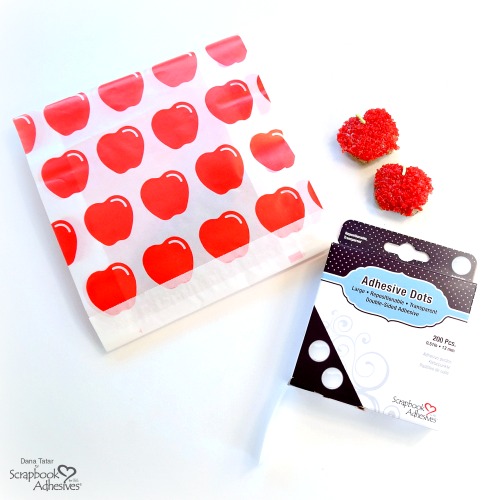
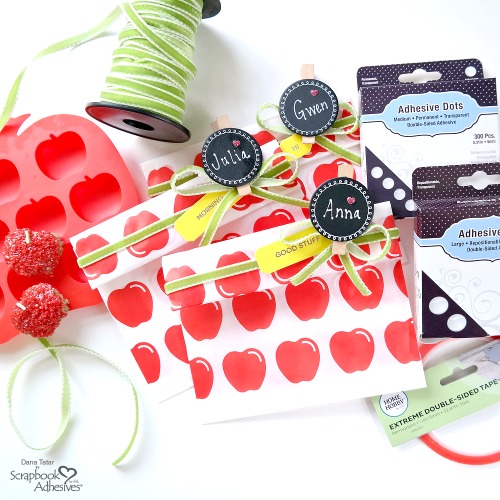
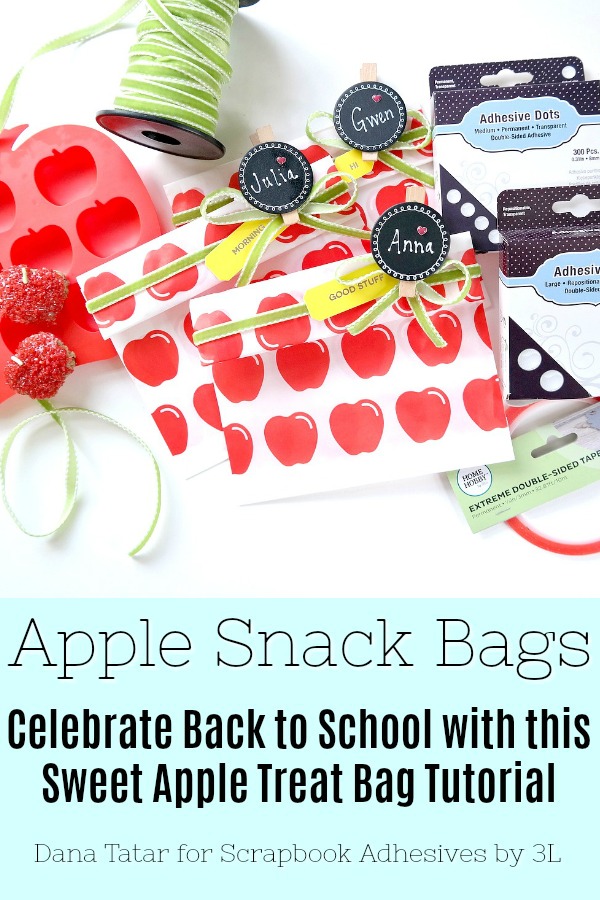
Embellishing the Soccer Party Bag

How to Embellish a Dollar Store Bag with a Clip Art Soccer Ball -Personalize Soccer Party Favor Bags Tutorial by Dana Tatar for Scrapbook Adhesives by 3L

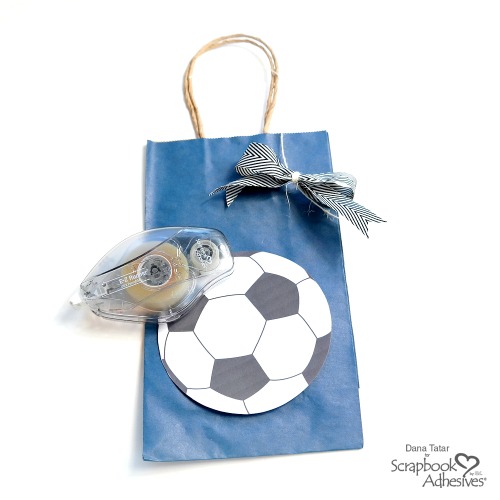
Select a sports ball image from the clip art library of a word processing program and print it out onto white cardstock and trim with scissors. Use the E-Z Runner® Ultra Strong Refillable Dispenser to secure the soccer ball to the front of the bag. This clear line of adhesive is immediately tacky and perfect for use on mixed media and paper construction such as boxes, bags, books, and other 3D projects.

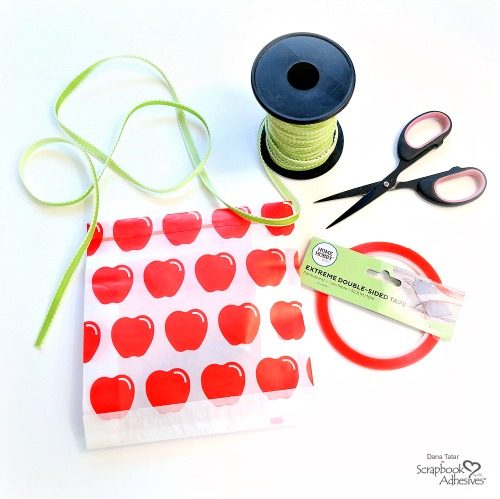
Tie a ribbon bow around the handle of the gift bag.

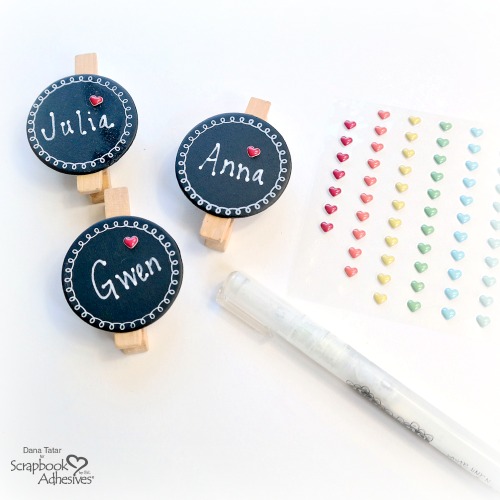
Player Cards with Self-Laminating Pouches

How to Create a Soccer Player Tag Using Self Laminating Cards

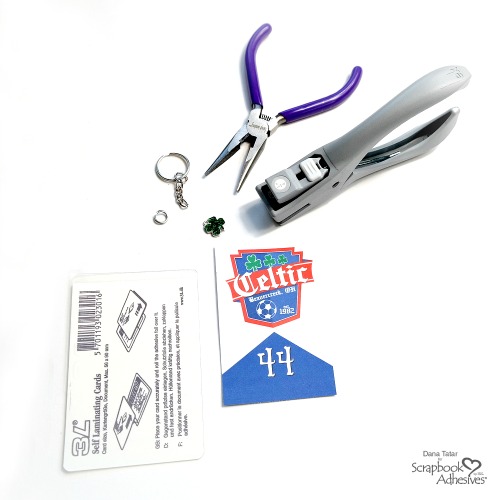
Acid-free, archival quality Self-Laminating Pouches are cold laminating, so no machine is needed for this step! First, create player cards with the soccer team logo and player numbers. Next, print the cards to size, align the card inside the pouch, and remove the liner while pressing the sides together. Self-Laminating Pouches are clear and durable, and they safely protect the contents from handling and the elements.

Soccer Player Number Key Chain Bag Tags created with HomeHobby by 3L Self-Laminating Cards -Personalize Soccer Party Favor Bags Tutorial by Dana Tatar for Scrapbook Adhesives by 3L

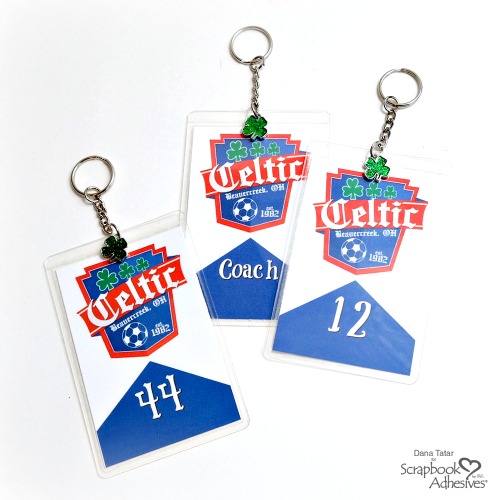
Next, punch holes in the top of each card and attach a charm and a key chain. A player initial would also look great!

DIY Soccer Ball Goody Bag with Self-Laminating Player Card Key Chain Charm -Personalize Soccer Party Favor Bags Tutorial by Dana Tatar for Scrapbook Adhesives by 3L

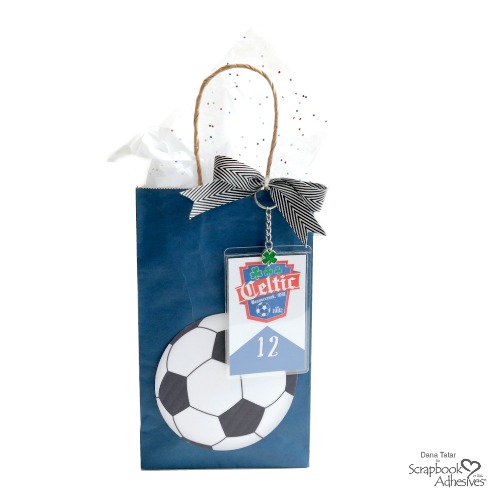
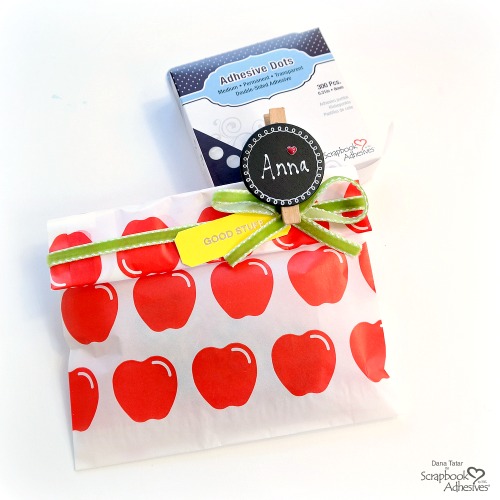
Finally, attach the key chain to the handle of the bag. Fill the goody bag with treats and pass out to the team. Once the goody bag is empty, remove the key chain charm from the bag and attach it to the soccer player’s sports bag.

Thanks for stopping by today! Adapt this simple soccer party favor for any sports team by simply changing the ball embellishment and ribbon and bag colors.

Until next time,
~Dana

Creative Time: 1 Hour
Skill Level: Beginner

Materials Needed:
Scrapbook Adhesives by 3L®

E-Z Runner Ultra Strong Refillable Dispenser

HomeHobby by 3L®
Self-Laminating Pouches – Cards Small

Other
Party Favor Bags; White Cardstock; Ribbon (May Arts); Shamrock Charms; Key Chains; Tissue Paper

Love It! Pin It! 

Personalize Soccer Party Favor Bags Tutorial by Dana Tatar for Scrapbook Adhesives by 3L

Shiny Merry Christmas Card

Hello blog friends! Judy here with a Shiny Merry Christmas card with greenery. Before the pressure of the holidays is upon us, I like to experiment with a few different Christmas card designs around this time of year. This is one of my first for the season. What do you think?

Shiny Merry Christmas Card by Judy Hayes for Scrapbook Adhesives by 3L

Make the Shiny Merry Christmas

For the top layer of the background I have with a grid design die cut, using black cardstock and applying water reactive ink on it. I like the way it looks! Adhere this piece over dusty sage green cardstock, using a combination of E-Z Dots® Permanent Refillable Dispenser (wider areas) and E-Z Runner® Micro Refillable Dispenser (narrow areas).

Fasten the shiny red mat to the green cardstock with E-Z Dots® Permanent Refillable Dispenser. Lightly spray the gray card base with the green ink spray to create speckles. When dry, fasten the grid layered panel the card.

Apply an Adhesive Sheets 4 x 6 inch to the back side of red metallic cardstock and die-cut “Merry Christmas.” Remove the liner from the back side of the die cut and adhere the words onto the grey grid paper. No additional adhesive is required.

Shiny Merry Christmas Card by Judy Hayes for Scrapbook Adhesives by 3L

More Card Making Details

I die-cut different greenery branches from several colors of green cardstock. Apply Adhesive Sheets 4 x 6 inch on the back side of a piece of brown cardstock before die-cutting into pine branches. This makes it easy to assemble the boughs. I did the same for the tiny cream berries and overlay pieces of branches with oval leaves.

After cutting the greenery pieces, spray them with green ink spray. Attach the greenery to the card with Adhesive Dots Micro at the top where the bow will hide the ends.

Next use Adhesive Dots Micro to adhere the bow pieces together and place it over the greenery. The shiny Merry Christmas sentiment, bow and mat border adds a nice contrast to this more muted card and background. This card is 5.5 x 7 inches in size.

Shiny Merry Christmas Card by Judy Hayes for Scrapbook Adhesives by 3L

Thanks for Visiting!
Judy Hayes

Creative Time: 45 Minutes
Skill Level: Intermediate

Materials Needed
Scrapbook Adhesives by 3L®

Other
Etched Dies: Sizzix Tim Holtz Christmas Ribbon, Large Funky Festive, Festive Repeat; Cardstock: Black, Gray, Three Shades Green, Brown, Red Metallic, Cream; Ranger Ink Distress Oxide Iced Spruce Spray

Love It. Pin It!

Shiny Merry Christmas Card by Judy Hayes for Scrapbook Adhesives by 3L Pinterest

Visit our Website and Blog!
Sign up for our Newsletter so you never miss a contest or giveaway!

instagram purple icon facebook icon purple pinterest purple icon twitter purple icon YouTube icon blog subscription purple icon

Hey Honey, Here’s a Quick and Easy Card

Welcome back, crafty friends! Tracy here, and today I have a Hey, Honey card that’s quick and oh SO easy to create. You’ll “Bee” happy to have a card to make ‘on the fly!’ Keep reading for all of the details.

Hey Honey Quick & Easy card tutorial by Tracy McClennon for Scrapbook Adhesives by 3L

Hey Honey, Let’s Make this Card!

Start the project with a card base that is 8.5×5.5, and fold in half. Then cut off a 1-inch piece from the front of the card base.

Next, cut the patterned paper pieces for the front. The yellow patterned paper is 5.25 x 3-inch, and the blue patterned paper is 5.25 x 1.25-inch. Add the blue strip using the trusty E-Z Runner® Petite Permanent Dots Refillable Dispenser and add the yellow patterned paper using Creative Photo Corners White.

The inside of the card is kept simple. Add the die cut sentiment and the bee patterned strip using the E-Z Runner® Petite Permanent Dots Refillable Dispenser.

The front of the card features Creative Photo Corners in White, which frame the yellow patterned paper. Add a line of E-Z Runner® Petite Permanent Dots to adhere the paper to the card front, so it can hold the weight of the die cuts.

For the perfect pop of dimension on my card, I grabbed the Thin 3D Foam Squares Black Mix and used it to add the vase, flower and bee die cuts. If you want one die cut higher than another, just double up the 3D Foam Squares. The Thin 3D Foam Squares Black Mix is the perfect go-to adhesive for this quick & easy card.

Hey Honey Quick & Easy card tutorial by Tracy McClennon for Scrapbook Adhesives by 3L

Just like that, my Hey Honey card is done! You could be out the door in under 15 minutes with a beautiful card!

Hey Honey Quick & Easy card tutorial by Tracy McClennon for Scrapbook Adhesives by 3L

Thanks so much for stopping by to check out my card tutorial!
Tracy

Creative Time: 15 minutes
Skill Level: Beginner

Materials Needed
Scrapbook Adhesives by 3L®

E-Z Runner® Petite Permanent Dots Refillable Dispenser
Creative Photo Corners White
Thin 3D Foams Squares Black Mix

Other
White Cardstock, Natural Burlap String, Patterned Paper and Die Cuts: Vicki Boutin (Wildflower and Honey Collection)

Love It. Pin It! 

Hey Honey Quick & Easy card tutorial by Tracy McClennon for Scrapbook Adhesives by 3L -Pinterest

Visit our Website and Blog!
Sign up for our Newsletter so you never miss a contest or giveaway!

instagram purple icon facebook icon purple pinterest purple icon twitter purple icon YouTube icon blog subscription purple icon

Be Spooky Acrylic Mini Album

Hello! Shellye McDaniel here with a project that I love creating…Halloween mini-albums! Today I’m using a pre-cut acrylic album along with the fantastic adhesives from Scrapbook Adhesives to make a Be Spooky Acrylic Mini Album.

Be Spooky Acrylic Mini Album by Shellye McDaniel for Scrapbook Adhesives by 3L

Be Spooky Mini Instructions

To get started I prepped all of the base papers approximately 1-inch smaller than the acrylic base. I used Extreme Double-Sided Tape 1/2in to adhere the papers to the acrylic.

Be Spooky Acrylic Mini Album by Shellye McDaniel for Scrapbook Adhesives by 3L

In decorating the cover, I used a strip of the Adhesive Sheets 4×6 inch on top of one of the sentiment strips and then added glitter! I also die-cut flowers from coordinating papers and assembled with 3D Foam Squares White Small.

Be Spooky Acrylic Mini Album by Shellye McDaniel for Scrapbook Adhesives by 3L

On the above page I used Adhesive Dots Micro to add sequins to the cute accent page. The larger elements, such as the buttons, are secured with Adhesive Dots Small.

Be Spooky Acrylic Mini Album by Shellye McDaniel for Scrapbook Adhesives by 3L

Alpha beads are all the rage, here I used them to spell out “yoself” using the Adhesive Dots Micro.

Be Spooky Acrylic Mini Album by Shellye McDaniel for Scrapbook Adhesives by 3L

Next, there’s so much goodness to check out above image! I’ve used Extreme Double-Sided Tape 1/8in to adhere the pom pom trim and along the top seam of the flip card.

Be Spooky Acrylic Mini Album by Shellye McDaniel for Scrapbook Adhesives by 3L

I love adding glitter dots so I randomly placed Adhesive Dots Mini, sprinkle the tops with glitter, and press to secure it in place before tapping off the excess.

Be Spooky Acrylic Mini Album by Shellye McDaniel for Scrapbook Adhesives by 3L

In finishing, I fashioned a fun layered bow and then added to the ring. The album is all set and ready for spooky Halloween photos!

Thank you for stopping by!
Shellye

Creative Time: 2 Hours
Skill Level: Intermediate

Materials Needed
Scrapbook Adhesives by 3L®

HomeHobby by 3L®

Other
Patterned Paper, Stickers, and Chipboard: Crate Paper; Sequins and Enamel Dots: Doodlebug Design; Ribbon: Paper Mart

Love It. Pin It!

Be Spooky Acrylic Mini Album by Shellye McDaniel for Scrapbook Adhesives by 3L Pinterest

Visit our Website and Blog!
Sign up for our Newsletter so you never miss a contest or giveaway!

instagram purple icon facebook icon purple pinterest purple icon twitter purple icon YouTube icon blog subscription purple icon

Hello Pumpkin Card Tutorial

Hi, everyone! Teri here today with a Hello Pumpkin card sure to get you in the mood for Fall. This card is easy to create, let me show you how!

Hello Pumpkin Card by Teri Anderson for Scrapbook Adhesives by 3L

Making the Hello Pumpkin Card Background

Start by cutting a panel of orange of cardstock and adhering it to scratch paper with E-Z Dots® Repositionable Refillable. Next apply E-Z Dots® Repositionable Refillable to the back of a stencil. Repositionable Adhesive holds strong until you remove it. You can reposition and restick without the need to apply more adhesive. It won’t damage paper, photos or other surfaces, and removes easily by rubbing with your finger.

Stenciling on a card, Hello Pumpkin Card by Teri Anderson for Scrapbook Adhesives by 3L

Set the stencil on top of your orange cardstock panel and sponge ink over it. Remove the stencil and rub off the repositionable E-Z Dots adhesive from it. Adhere the stenciled panel to a white cardstock base using E-Z Dots® Permanent Refillable Dispenser.

stenciling on a card, Hello Pumpkin Card by Teri Anderson for Scrapbook Adhesives by 3L

Die-cut two pumpkins and hearts from cardstock. Assemble the jack-o-lanterns and mount them to your card with 3D Foam Squares White Regular. This will give them some height and dimension. Secure the hearts to the card with E-Z Dots® Permanent Refillable Dispenser.

Hello Pumpkin Card by Teri Anderson for Scrapbook Adhesives by 3L

Stamp a sentiment on a strip of cardstock. Snip one edge with your scissors and adhere it to the card with 3D Foam Squares White Regular.

Adding Metallic Transfer Foil

Add a little glitz and glam to the card by randomly adhering Adhesive Dots Micro to the front. Once you’ve placed as many dots as you’d like on the card, you’ll want to rub some Metallic Transfer Foil onto them.

Adding Metallic Transfer Foil, Hello Pumpkin Card by Teri Anderson for Scrapbook Adhesives by 3L

For easy application, cut a small piece of Metallic Transfer Foil Sheets Holographic Colors in silver and then place it over each dot, with the colored side facing up. Use your fingers to rub the foil until it entirely covers each dot.

Hello Pumpkin Card by Teri Anderson for Scrapbook Adhesives by 3L

Are you inspired by my card to make your own Halloween card? I’d love to see it! Leave a link for in the comments field so I can check it out, or tag us on social media #scrapbookadhesivesyb3l!

Hello Pumpkin Card by Teri Anderson for Scrapbook Adhesives by 3L

Happy creating!

Creative Time: 60 Minutes
Skill Level: Intermediate

Materials Needed
Scrapbook Adhesives by 3L®

Other
Buffalo Plaid Stencil by Paper Smooches; White Cardstock by Neenah Paper; Orange, Green, Yellow and Red Cardstocks by My Favorite Things; Face Off Stamp Set and Pumpkin and Heart Dies by Paper Smooches; Orange Ink Pad by My Favorite Things; Black Ink Pad by Ranger Ink

Love It. Pin It!

Hello Pumpkin Card by Teri Anderson for Scrapbook Adhesives by 3L -Pinterest

Visit our Website and Blog!
Sign up for our Newsletter so you never miss a contest or giveaway!

instagram purple icon facebook icon purple pinterest purple icon twitter purple icon YouTube icon blog subscription purple icon

Romantic Believe in You Card Tutorial

Don’t you love romantic cards with a wonderful sentiment? I know I do! This ‘Believe in You’ sentiment is very special to me at the moment. My card is full of intricate and dimensional designs that include detailed die cuts. Some may hesitate in assembling such a card, but Scrapbook Adhesives by 3L® products make it easy. Let me show you how.

Romantic Believe in You Card Tutorial by Yvonne van de Grijp for Scrapbook Adhesives by 3L

Making Romantic Layers

Start by die-cutting and embossing the intricate romantic frame die cut from white cardstock. Cut off the small tabs on each side using scissors.

Cut a window opening in a rectangle patterned paper card panel. Make sure it is the same shape as the white frame die cut center. You should have enough space at the bottom to place a satin ribbon and bow.

Heighten the Layers

To lift the white frame die cut, use 3D Foam Squares White Regular Size and cut them into small strips with a craft knife. Careful place the die cut on top of the patterned window card panel. Be sure the openings are matched up before securing.

With a piece of white satin ribbon, adhere the ends to the back of the card panel using the E-Z Runner® Permanent Strips Refillable Dispenser.

Assembling the Card Base

Stamp the “Believe in You” sentiment with black ink, onto a rectangular piece of white cardstock that is smaller than the patterned card panel. Adhere the stamped sentiment behind the window opening using 3D Foam Squares White Regular Size.

Now fold a white card base and adhere the layered panel on top of it using the E-Z Runner® Permanent Strips Refillable Dispenser.

Embellishing the Card

First, fold a double satin bow and adhere to the card front using Adhesive Dots Large. Next, adhere mulberry flowers and leaves onto the card panel using Adhesive Dots Large. To adhere the stamens, I used the Dual Tip Glue Pen behind the leaves. Finish the card with self-adhesive pearls.

Romantic Believe in You Card Tutorial by Yvonne van de Grijp for Scrapbook Adhesives by 3L

Voila! My romantic “Believe in You” card is ready.

Wishing you happy crafting!

Hugs,
Yvonne

Romantic Believe in You Card Tutorial by Yvonne van de Grijp for Scrapbook Adhesives by 3L

Creative Time: 60 minutes
Skill Level: Intermediate

Materials Needed
Scrapbook Adhesives by 3L®

E-Z Runner® Permanent Strips Refillable Dispenser
3D Foam Squares White Regular Size
Adhesive Dots Large

HomeHobby by 3L®

Dual Tip Glue Pen

Other
Etched Dies and Die Cutting Machine: Spellbinders® Paper Arts (Grand Arch 3D Card Etched Dies Elegant 3D Vignettes by Becca Feeken, Platinum 6 Die-Cutting, and Embossing Machine); White and Blue Patterned Cardstock; Black Inkpad; Quietfire Design Rubber Stamp (The Best Thing); Mulberry Flowers and Leaves; Stamens; Satin Ribbon; Self-Adhesive Rhinestones; Scissors; Paper Trimmer

Love It! Pin It!

Romantic Believe in You Card Tutorial by Yvonne van de Grijp for Scrapbook Adhesives by 3L

Visit our Website and Blog!
Sign up for our Newsletter so you never miss a contest or giveaway!

instagram purple icon facebook icon purple pinterest purple icon twitter purple icon YouTube icon blog subscription purple icon

Sending Love Card with a Foiled Photo Corner Border

I love to use Creative Photo Corners in out-of-the-box ways. Today I have a card we used as a make and take at a recent retailer event. See how I use our Metallic Transfer Foil to make a foiled Photo Corner border. Take a look at how FAST and EASY this is!

Sending Love Card with a Foiled Photo Corner Border by Beth Pingry for Scrapbook Adhesives by 3L

Creating a Foiled Photo Corner Border

Sending Love Card with a Foiled Photo Corner Border by Beth Pingry for Scrapbook Adhesives by 3L

Start with a standard sized cardstock card base, 5.5 wide x 4.25 inches with a top fold. Cut 1/2 inch off the front. For this example I kept the front a simple stamped sentiment to show off the foiled photo corner border technique.

When folded, the front will be 1/2 inch shorter than the back.

I’m using Black Creative Photo Corners, but you could use any of the colors we offer (Black, White, Ivory, Kraft, Gold, Silver). For the Metallic Transfer Foil, I’m working with the large silver pattern in the Holographic package. Any of the foil colors will work.

Cut two strips from the sheet of Creative Photo Corners. Fold the back liner, leaving the points covered by the liner, as shown above.

Apply the strip – not individual corners – to the inside front of the card. I found it’s easiest this way, the Creative Photo Corners stay perfectly lined up! Gently burnish the adhesive to the cardstock then pull away the liner.

Next add two corners from the second sheet, they fit perfectly across the card without the need to trim the edges.

Now you have exposed adhesive on the front of the card. Next up, Metallic Transfer Foil!

How to Add Metallic Transfer Foil

  1. Place the Metallic Transfer Foil sheet on top of the exposed adhesive, the ‘pretty’ side should be facing up.
  2. Gently burnish the foil onto the adhesive with your finger.
  3. Peel away the foil sheet.

Notice the color of the foil, it IS silver but it reflects colors beautifully. The rainbow of color you see in the photos are reflections from various lights and objects in the rooms where I shot the photos.

Ah, so pretty! Let’s add more! A strip of Crafty Power Tape across the bottom works perfectly with Metallic Transfer Foil.

We call this technique Wear Your Adhesive on the Outside, and you could use glitter, embossing powder, flock, micro beads, or other media on the adhesive. Metallic Transfer Foil is FAST and EASY, with no other tools required, no drying time, and no mess!

Do the same thing, remove the liner from the Crafty Power Tape, add the Metallic Transfer Foil pretty side up onto the adhesive, burnish lightly, then remove the foil sheet.

The sentiment is ‘Sending Love’ so of course, I have to use a 3D Foam Heart. Place it on the card front, remove the liner, add the Metallic Transfer Foil pretty side up, gently burnish and remove the foil sheet.

Voila!…Oh wait, I didn’t stop there. I took a black fine tip pen (pro tip: use a ruler!) and outlined the tape line and 3D Foam Heart to mimic the black outline on the Creative Photo Corners.

Sending Love Card with a Foiled Photo Corner Border by Beth Pingry for Scrapbook Adhesives by 3L

This is really a quick and easy project, I hope you enjoy the detailed photos. Give it a try and tag us on Instagram, use #scrapbookadhesivesby3l.

Thanks for Visiting!

Beth Pingry

Creative Time: 15 Minutes
Skill Level: Beginner

Materials Needed
Scrapbook Adhesives by 3L®

Other:
Stamp: Lawn Fawn Grand Greetings; Kraft Cardstock; Black Ink; Black Fine Tip Pen

Love it! Pin it!

Sending Love Card with a Foiled Photo Corner Border by Beth Pingry for Scrapbook Adhesives by 3L

See More Creative Photo Corner Ideas

Click on the text at the bottom of each image to go to the blog post.

Visit our Website and Blog!
Sign up for our Newsletter so you never miss a contest or giveaway!

instagram purple icon facebook icon purple pinterest purple icon twitter purple icon YouTube icon blog subscription purple icon

Apple Treat Bags Tutorial for Back to School

Hi friends! Dana Tatar here today sharing a tutorial for sweet back to school apple treat bags. My daughter loves to bake and craft with me. The other day we baked sparkly apple granola bites and made personalized tags to share with her friends.

Apple Treat Bags for Back to School with Chalkboard Name Clips

The apple treat bags came with the baking mix, so I dressed up and I’m using some of my favorite go-to adhesives. A bright green ribbon and a small chalkboard name clip helped to give these sweet treats a special personalized touch.

A-peel-ing Embellishments

How to Use Repositionable Adhesive Dots to Seal Snack Bags

To begin, insert several apple bites or other sweet treats into the pre-made bag. Next, place an Adhesive Dot Large Repositionable on the backside of the bag. Finally, fold the top edge of the bag down over the Adhesive Dot and press to seal. This will keep the bag closed, but easy to open and reseal. Insert the treat into the apple print bag.

How to Adhere Ribbon with HomeHobby Extreme Double Sided Tape

Place your filled apple treat bags face down on a work surface. Apply Extreme Double-Sided Tape 1/8 inch around the top edge of the bag. Then peel off the red liner and press the ribbon onto the adhesive to secure the ribbon.

Mini Chalkboard Name Clips for Back to School Snack Bags

Personalize chalkboard clips with names using a white paint pen. Apply a small heart sticker for a fun pop of color.

Apple-y Ever After

How to Use Adhesive Dots to Attach Tags to Back to School Treat Bags

Fold down the top edge of the treat bag and secure with a clothespin clip. Next, apply an Adhesive Dot Medium to the underside of a sentiment tag. Tuck the tag under the clip and press to seal.

Sweet Apple Treat Bags for Back to School by Dana Tatar for Scrapbook Adhesives by 3L

Have fun passing these sweet treats out to friends. Give one to the teacher and move straight to the top of the class!

Thanks for Visiting!
Dana

Creative Time: 15 Minutes
Skill Level: Beginner

Materials Needed
Scrapbook Adhesives by 3L®

HomeHobby by 3L®

Other
Apple Print Treat Bags; Ribbon (Maya Road); Chalkboard Clips (American Crafts); Sentiment Die-Cuts (Studio Calico); Small Heart Stickers; White Paint Pen (Ranger)

Love It. Pin It!

Back to School Apple Snack Bag Tutorial

Visit our Website and Blog!
Sign up for our Newsletter so you never miss a contest or giveaway!

instagram purple icon facebook icon purple pinterest purple icon twitter purple icon YouTube icon blog subscription purple icon

Layered Landscape Scene Card Tutorial

Hello everyone! It’s Judy here today to share Layered Landscape Scene Card. This card tutorial has Thin 3D Foam Squares between the layers to create depth between the tree die cuts. Follow along to see how to make this card.

Layered Landscape Scene Card Tutorial by Judy Hayes for Scrapbook Adhesives by 3L

Inking the Background

Apply various green Distress Stains on two pieces of kraft cardstock. Make one darker and one lighter. Next die cut a tree line from each. Apply blue Distress Stains to kraft cardstock and add a touch of white stain. When dry, blend in touches of orange and yellow inks for sunset/sunrise. Cut the cardstock to 3.5 x 5.75 inches. Cut pieces of light brown card stock to make hills. Apply Distress Stains to each, and make some darker. Apply small amount of black along top edges for shadows.

Layered Landscape Scene Card Tutorial by Judy Hayes for Scrapbook Adhesives by 3L

Assemble the Layered Landscape Scene

These are the pieces ready to be assembled. Tip: Lay out your scene for placement of pieces. Use E-Z Dots® Repositionable Refillable Dispenser to temporarily hold the pieces in place. It’s easy to lift and move without damaging the papers.

Layered Landscape Scene Card Tutorial by Judy Hayes for Scrapbook Adhesives by 3L

Place Thin 3D Foam Squares Black on the back of the darker treeline. Cut Foam Squares in smaller pieces to fit on trees. Adhere the trees over the sky background, towards the left edge of the background paper. Add small hill pieces over each edge of treeline using Thin 3D Foam Squares. Use more Thin 3D Foam Squares on the other tree line so its below and to right of the first tree line.

Layered Landscape Scene Card Tutorial by Judy Hayes for Scrapbook Adhesives by 3L

Add Thin 3D Foam Squares Black to the backside of some of the landscape pieces and attach them across the base of trees. Stack two layers of Thin 3D Foam Squares at the lower edges to create more dimension.

Layered Landscape Scene Card Tutorial by Judy Hayes for Scrapbook Adhesives by 3L

Apply the final landscape piece in place. Use more Thin 3D Foam Squares Black along the bottom edge than I have shown in the photo.

Layered Landscape Scene Card Tutorial by Judy Hayes for Scrapbook Adhesives by 3L

Fasten 3.75 x 6-inch black cardstock to the front of the 4.25 x 6.5-inch olive card using E-Z Dots® Permanent Refillable Dispenser and E-Z Runner® Ultra Strong Refillable Dispenser. Use Ultra Strong on corners and Dots Permanent along sides and center. Next use E-Z Runner® Ultra Refillable Dispenser to apply adhesive to the back of the scene. It’s immediately tacky and strong and especially good to hold paper inked paper flat. Attach the scene over black cardstock.

Layered Landscape Scene Card Tutorial by Judy Hayes for Scrapbook Adhesives by 3L

Finishing Details

Stamp “Have a Great Day” verse with black ink on kraft card stock and trim to size. Cut a slightly larger piece of black card stock for a mat and adhere the layers together using E-Z Dots® Permanent Refillable Dispenser.

Layered Landscape Scene Card Tutorial by Judy Hayes for Scrapbook Adhesives by 3L

Place Thin 3D Foam Squares Black on back of verse. Stack two Thin 3D Foam Squares as needed to compensate for different levels of the landscape. Fasten verse in place.

Layered Landscape Scene Card Tutorial by Judy Hayes for Scrapbook Adhesives by 3L

Now you have a finished Layered Landscape Scene Card!

Layered Landscape Scene Card Tutorial by Judy Hayes for Scrapbook Adhesives by 3L

Thanks for Visiting!
Judy Hayes

Creative Time: 45 Minutes
Skill Level: Intermediate

Materials Needed
Scrapbook Adhesives by 3L®

Other
Etched Dies: Sizzix Tim Holtz Tree Line; Distress Stains: Peeled Paint, Forest Moss, Black Soot, Broken China, Faded Denim, Picket Fence; Distress Inks: Mustard Seed, Carved Pumpkin, Dried Marigold; Card Stock: Kraft, Light Brown, Black; WorldWin Cardstock: Olive; Verse Stamp; Ink: Imagine Crafts/Tsukineko Versafine Onyx Black

Love it! Pin it!

Layered Landscape Scene Card Tutorial by Judy Hayes for Scrapbook Adhesives by 3L Pinterest Image

Visit our Website and Blog!
Sign up for our Newsletter so you never miss a contest or giveaway!

instagram purple icon facebook icon purple pinterest purple icon twitter purple icon YouTube icon blog subscription purple icon

Gingerbread Organizer Notepad

Greetings! Shellye here today with a Christmas project to get you prepped for the upcoming holiday. Who can resist this adorable gingerbread organizer notepad? I promise you – it’s easy to create!

Gingerbread Organizer Notepad Instructions

To begin, I’ve taken two 5 x 7-inch legal notepads and sandwiched two together.

NOTE: Place the two pads so that the chipboard backing is on the front and back. I used Extreme Double-Sided Tape 1/2in along the top band to hold the pads together.

At the juncture of the two pads, I attached patterned paper to create a divider. To the divider, I added one of the largest Keepsake Envelopes. Here I can store tags, gift cards, etc.

To the chipboard covers, I attached pieces of the Adhesive Sheets 4 x 6 inch and then topped with patterned paper.

Embellishing the Cover

Now onto the cover! Mats of cardstock and patterned paper were added to the front with the Crafty Foam Tape White.

To embellish the cover, I made this cute Christmas tree made of Creative Photo Corners White. Cut a triangular from a piece of paper. Using the triangle as a guide, arrange the photo corners as shown in the image. Add Ric Rac trim to the tree with Extreme Double-Sided Tape 1/8in.

Place the gingerbread man from the 3D Foam Holiday Embellishment Kit on top of the tree. To embellish him, remove the top liner and sprinkle brown glitter on top. Press your finger into the glitter to secure and then tap off excess.

I love little notepads for jotting down recipes to try, decorating ideas and wish lists! This gingerbread organizer notepad is a quick and easy project for craft bazaars and gifts.

Thank you for joining me today!
Shellye

Creative Time: 45 minutes
Skill Level: Intermediate

Materials Needed
Scrapbook Adhesives by 3L®

Home Hobby by 3L®

Other
Patterned paper and sticker sentiment: Authentique Paper; Ric-Rac Trim: May Arts Ribbon; Brown Glitter: Doodlebug Design

Love It. Pin It!

Visit our Website and Blog!
Sign up for our Newsletter so you never miss a contest or giveaway!

instagram purple icon facebook icon purple pinterest purple icon twitter purple icon YouTube icon blog subscription purple icon