You are in our US store • Switch to Europe store

A Trio of Notebooks Tutorial

Hi everyone, Christine here today with a trio of notebooks! Call me traditional but I still like to use a notebook for many things, I’ve yet to put everything on my cell phone! I always carry a notebook in my purse and it makes me smile when they are pretty as well as useful. My notebooks are easy to make and I detail how to insert that elastic strap, which is great for holding receipts and business cards. These also make super teacher gifts. Let me show you how to make this trio of notebooks with Scrapbook Adhesives by 3L®.

A Trio of Notebooks by Christine Emberson for Scrapbook Adhesives by 3L

A Trio of Notebooks Step by Step

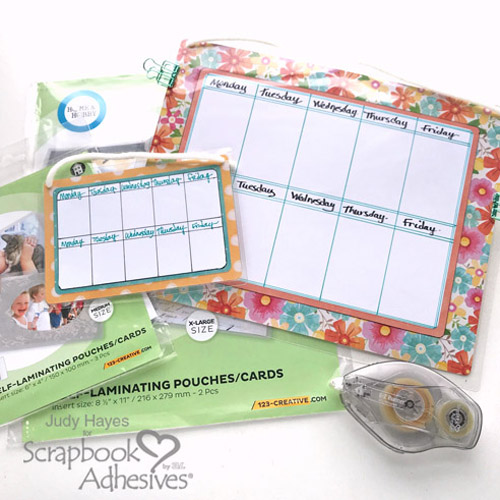
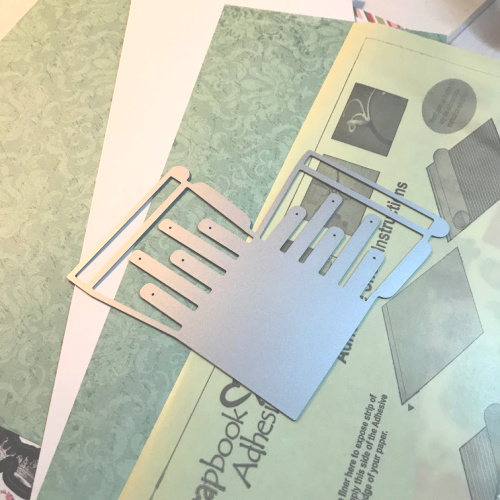
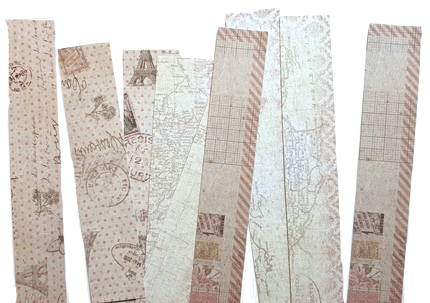
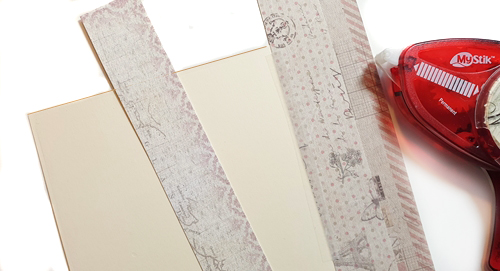
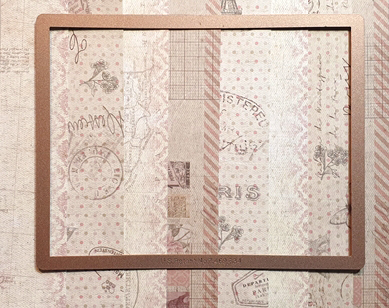
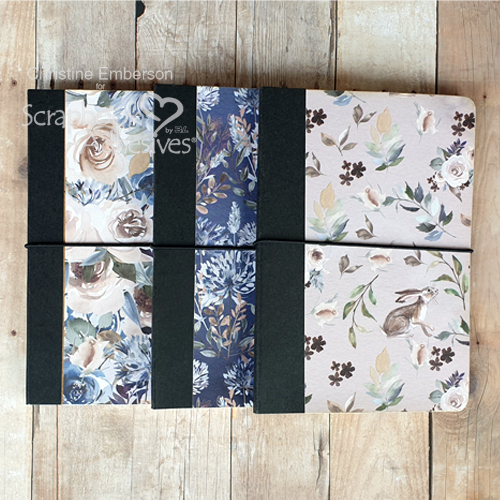
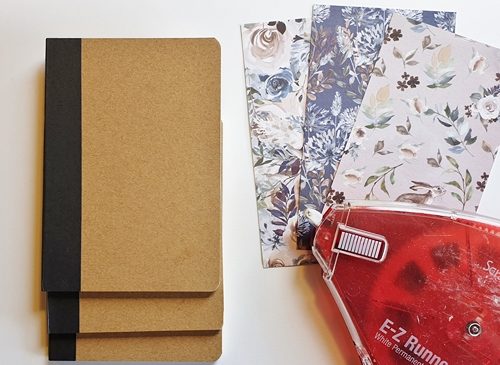
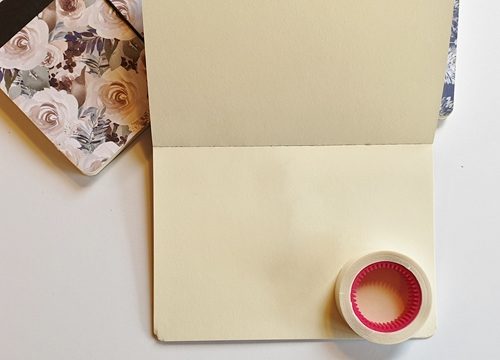
I purchased 3 inexpensive mini notebooks from a local store. Next, I measured and cut 6 pieces of patterned paper, this is for the front and back of each notebook. Affix the patterned paper into place with E-Z Runner Grand Refillable Dispenser. You can aapply edge to edge adhesive so no worries of the paper lifting.

A Trio of Notebooks by Christine Emberson for Scrapbook Adhesives by 3L

Use a nail file to sand the edges and this will also enable you to keep those attractive curved corners.

A Trio of Notebooks by Christine Emberson for Scrapbook Adhesives by 3L

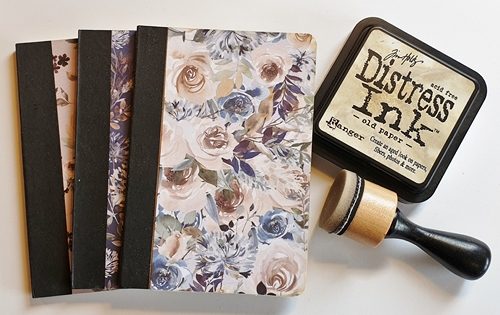
Apply a little Distress Ink to the edges, I chose to use Old Paper.

A Trio of Notebooks by Christine Emberson for Scrapbook Adhesives by 3L

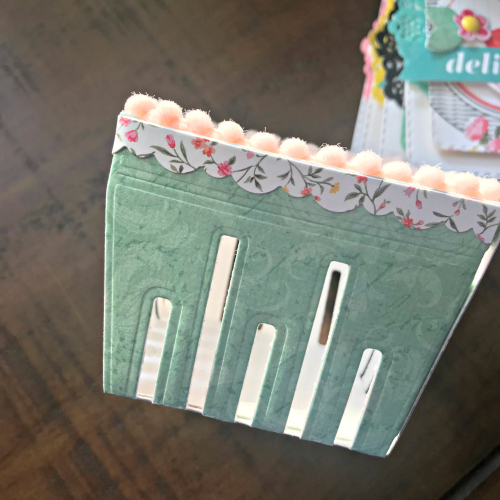
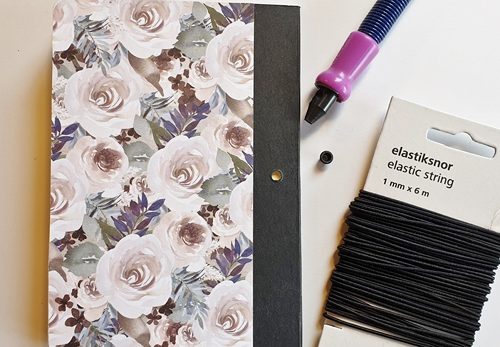
Using an eyelet setting tool, create a hole half way down the back cover of the notebooks and set a small eyelet. Thread a double length of thin elastic through the hole. Measure the elastic beforehand so that the loop slots around the notebook firmly.

A Trio of Notebooks by Christine Emberson for Scrapbook Adhesives by 3L

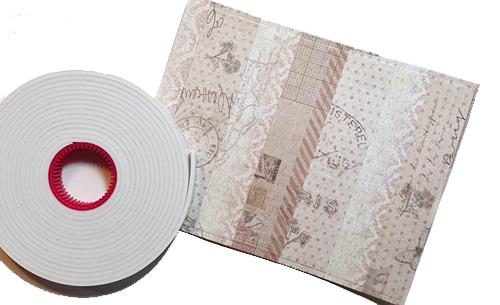
Secure the two elastic ends in place with Extreme Double-Sided Tape 1/2 inch. You don’t want these to move so you need this excellent tape to guarantee a firm grip.

A Trio of Notebooks by Christine Emberson for Scrapbook Adhesives by 3L

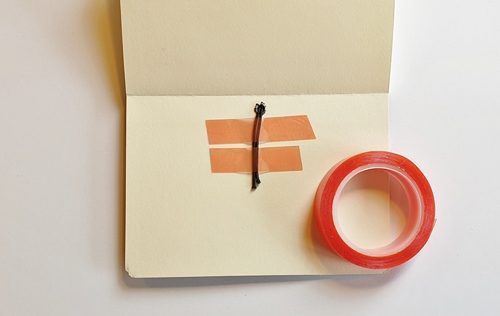
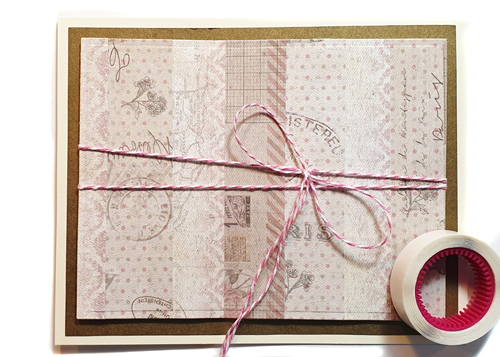
To hide the elastic ends secure down a page with Crafty Power Tape. Carry out this procedure for all three notebooks.

A Trio of Notebooks by Christine Emberson for Scrapbook Adhesives by 3L

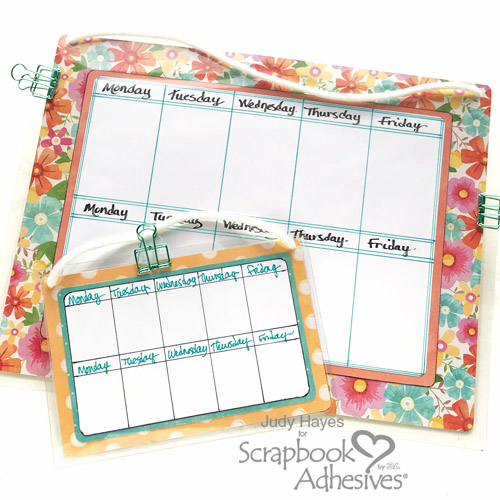
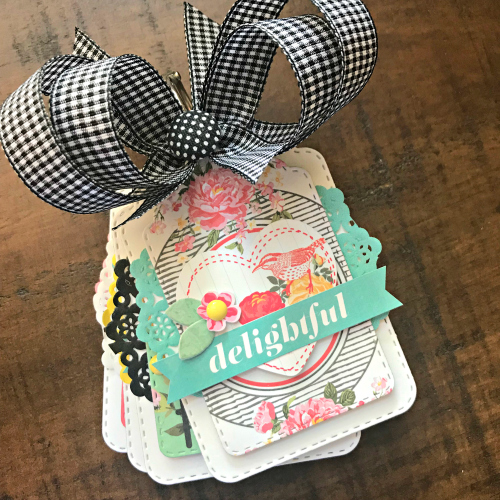
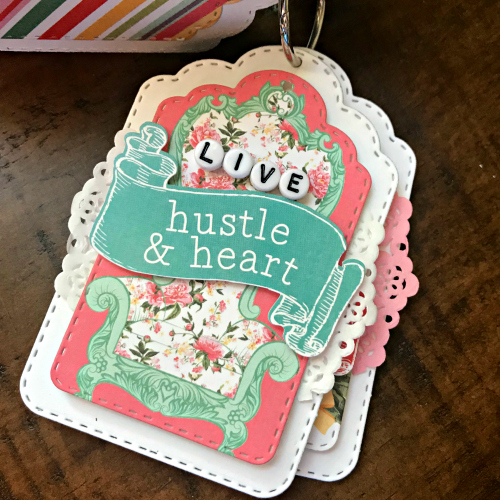
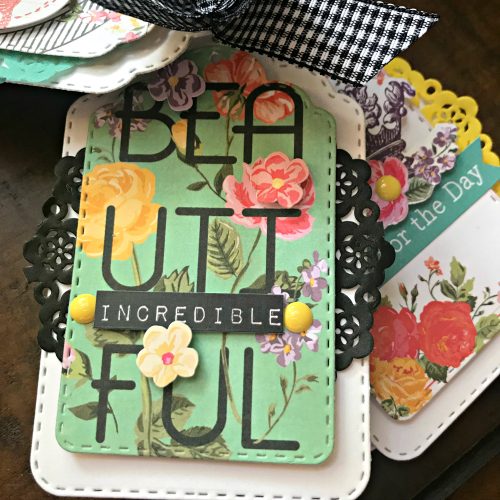
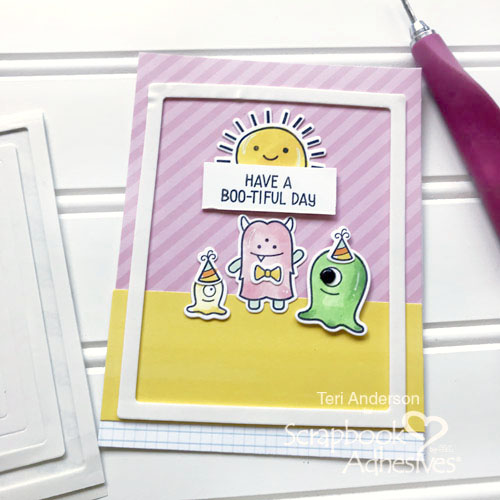
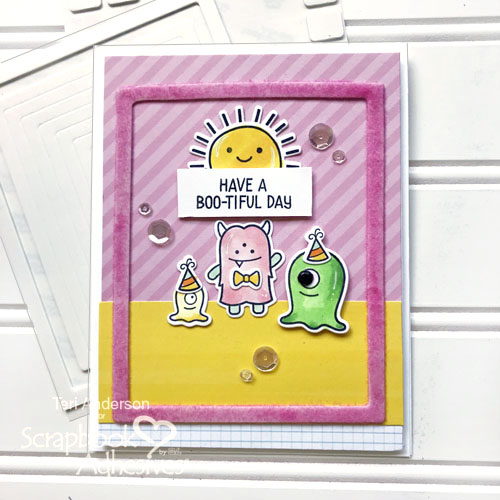
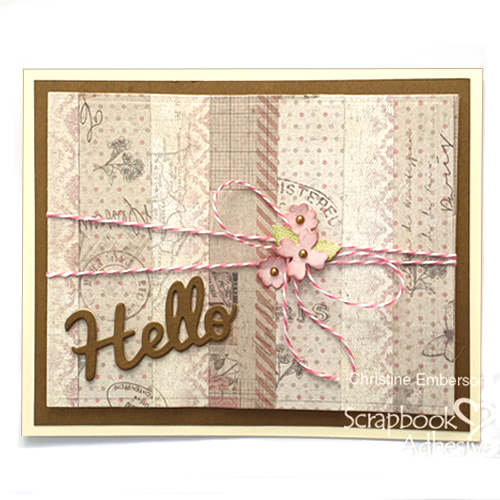
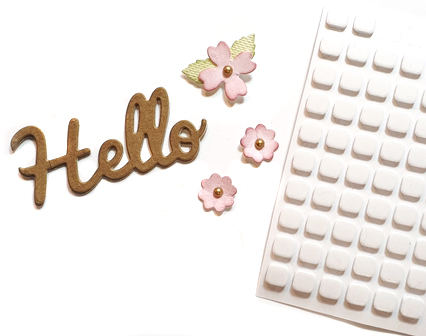
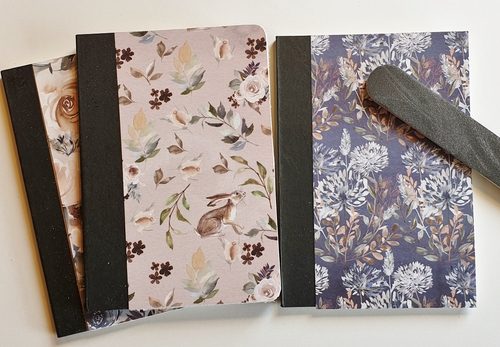
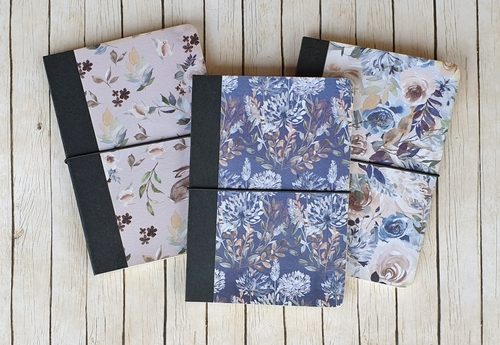
Here is the finished trio. By switching out the patterned paper you can make them for many occasions.

A Trio of Notebooks by Christine Emberson for Scrapbook Adhesives by 3L

Thanks for stopping by and don’t forget to check out the great products on the website.
Christine

Creative Time: 25 Minutes
Skill Level: Beginner

Materials Needed
Scrapbook Adhesives by 3L®

E-Z Runner Grand Refillable Dispenser
Crafty Power Tape

HomeHobby by 3L®
Extreme Double-Sided Tape 1/2 inch

Other
Mini Notebooks; Patterned Paper (The Paper Tree – Lakeside Blooms); Distress Ink; Eyelet Setting Tool; Eyelets; Thin Elastic.
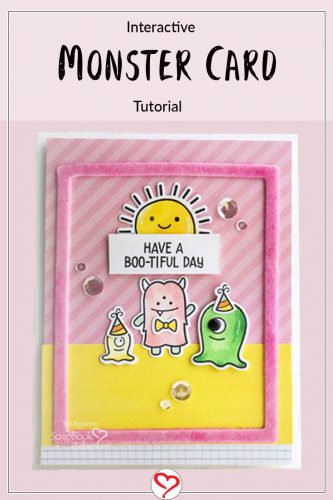
Pin It!

A Trio of Notebooks by Christine Emberson for Scrapbook Adhesives by 3L Pinterest Image

Visit our Website and Blog!
Sign up for our Newsletter so you never miss a contest or giveaway!

instagram purple icon facebook icon purple pinterest purple icon twitter purple icon YouTube icon blog subscription purple icon

Patriotic Scrapbooking with Holographic Foil

Hi friends! Dana Tatar here today sharing a patriotic scrapbooking layout. What better way to remember the excitement of the July 4th holiday than by adding extra sparkle to the page?! In addition to glittery embellishments, I use Metallic Transfer Foil in Holographic colors on chipboard fireworks.

Patriotic Scrapbooking with Holographic Foil by Dana Tatar for Scrapbook Adhesives by 3L

I just love the colorful shimmer and shine the Metallic Transfer Foil adds to my design! All the sheets of Metallic Transfer Foil are quick and easy to apply using Scrapbook Adhesives by 3L® products. No additional tools, gels, powders, or heat are required, which makes this process super fun.

Make Patriotic Scrapbooking Embellishments

Patriotic Scrapbooking with Holographic Foil by Dana Tatar for Scrapbook Adhesives by 3L

To begin, I adhered the base layers of patriotic patterned paper with the E-Z Runner® Grand Refillable Dispenser. Then I created layered embellishments for the page.

For additional texture, I stitched a couple of the larger patterned paper designs. Then I attached the starburst pieces to the layout with 3D Foam Circles.

Patriotic Scrapbooking with Holographic Foil by Dana Tatar for Scrapbook Adhesives by 3L

Smaller hand-cut embellishments can also create dimension. Attach small designs using Adhesive Dots Small and press firmly onto the center of the embellishment and curl up the edges.

Patriotic Scrapbooking with Holographic Foil by Dana Tatar for Scrapbook Adhesives by 3L

The patterned papers I used for this page have a matte finish. To add shimmer to my design, I selected shiny and glittery embellishments. I used Crafty Power Tape to secure the ribbon to the page. Ultra Thin Adhesive Dots are perfect for adhering plastic embellishments to all types of surfaces. They are nearly flat but strong enough to hold bulkier embellishments without extra height.

Add Foil to a Chipboard Die Cut

Patriotic Scrapbooking with Holographic Foil by Dana Tatar for Scrapbook Adhesives by 3L

Prepare the chipboard firework for foiling. First, apply a layer of adhesive using a 12×12 Adhesive Sheet. Next, place the silver foil onto the adhesive surface and gently rub with a finger. To finish, peel away to reveal the foiled embellishment. Holographic Metallic Transfer Foils add colorful shine and dazzling luster to any adhesive surface.

Thanks for stopping by today!
~Dana

Creative Time: 60 minutes
Skill Level: Intermediate

Materials Needed
Scrapbook Adhesives by 3L®
Adhesive Sheets 12×12 Inch
Metallic Transfer Foil Sheets Holographic
Adhesive Dots Medium Ultra Thin
Adhesive Dots Small
Crafty Power Tape Dispenser 81ft
3D Foam Circles White Mix
E-Z Runner Grand® Refillable Dispenser

Other
Patterned Paper (Pink Paislee); Stickers (American Crafts); Chipboard (Creative Embellishments); Plastic Glitter Bow (American Crafts); Ribbon (Offray); Floss

Pin It!

Patriotic Scrapbooking with Holographic Foil by Dana Tatar for Scrapbook Adhesives by 3L Pinterest

Visit our Website and Blog!
Sign up for our Newsletter so you never miss a contest or giveaway!

instagram purple icon facebook icon purple pinterest purple icon twitter purple icon YouTube icon blog subscription purple icon

Sparkling 4th of July Card Tutorial

Hi everyone, it’s Lisa Adametz guest blogging today. I’m so happy to share with you my Sparkling 4th of July card. If you’ve seen my previous posts, you may notice that I have a love for all things red, white and blue, including our beautiful flag. Enjoy my tutorial on how I used the 3D Foam Stars to create my card.

Sparkling 4th of July Card Tutorial by Lisa Adametz for Scrapbook Adhesives by 3L

Sparkling 4th of July Card Steps

To create a textured background, I embossed white cardstock with a stars embossing folder.

Sparkling 4th of July Card Tutorial by Lisa Adametz for Scrapbook Adhesives by 3L

I’m using 3D Foam Stars  from the 3D Foam Holiday Embellishment Kit, which also includes Red, Blue and Silver Foil sheets. Starting with the large nested star, remove one liner and add red, blue or silver foil. To do this, place the foil sheet on the exposed adhesive with the pretty sided color facing up. Then rub gently all over the shape to transfer the foil and peel it off. For extra sparkle, apply a very fine glitter onto the inner portions of the largest star. Make sure to burnish and remove excess glitter.

Sparkling 4th of July Card Tutorial by Lisa Adametz for Scrapbook Adhesives by 3L

Sparkling 4th of July Card Tutorial by Lisa Adametz for Scrapbook Adhesives by 3L

Sparkling 4th of July Card Tutorial by Lisa Adametz for Scrapbook Adhesives by 3L

Sparkling 4th of July Card Tutorial by Lisa Adametz for Scrapbook Adhesives by 3L

Creating the Sparkling Stripes

For the stripes, I like to use Crafty Power Tape. Lay out the tape strips  across the textured card panel. Cut the excess ends and burnish it to the panel. Remove the liner and add Metallic Transfer Foil or glitter onto the tape stripes.


Sparkling 4th of July Card Tutorial by Lisa Adametz for Scrapbook Adhesives by 3L

Sparkling 4th of July Card Tutorial by Lisa Adametz for Scrapbook Adhesives by 3L

Next, carefully apply the stars to the card front. Use either tweezers or the tip of a pair of scissors to retail the shapes.

Now adhere the card front to a slightly larger layer of blue cardstock. My very favorite adhesive is the E-Z Runner® Ultra Strong Refillable Dispenser. Wrap the right side of the piece with twine at this point.

Sparkling 4th of July Card Tutorial by Lisa Adametz for Scrapbook Adhesives by 3L

Die-cut the letters USA from 3D Foam Creative Sheets Small White. Use the blue foil from the 3D Foam Holiday Embellishment Kit to foil the letters. Now adhere the letters to the card.

Sparkling 4th of July Card Tutorial by Lisa Adametz for Scrapbook Adhesives by 3L

Next die-cut patterned paper and adhere it to cover the card base. Apply Thin 3D Foam Squares White Mix to the back of the blue cardstock. Adhere the entire blue piece (with stars on the front) offset to the bottom and right side of the card base.

Sparkling 4th of July Card Tutorial by Lisa Adametz for Scrapbook Adhesives by 3L

Thank you for having me! I wish you all a safe and happy sparkling Independence Day!
Lisa

Creative Time: 45 minutes
Skill Level: Intermediate

Materials Needed
Scrapbook Adhesives by 3L®
E-Z Runner® Ultra Strong Refillable Dispenser
3D Foam Holiday Embellishment Kit
3D Foam Creative Sheets Small White
Crafty Power Tape 81 ft.
Thin 3D Foam Squares White Mix

Pin It!

Sparkling 4th of July Card Tutorial by Lisa Adametz for Scrapbook Adhesives by 3L

Visit our Website and Blog!
Sign up for our Newsletter so you never miss a contest or giveaway!

instagram purple icon facebook icon purple pinterest purple icon twitter purple icon YouTube icon blog subscription purple icon

Easy to Make Erasable Calendar

Hi everyone! Judy here today to share an easy to make Erasable Calendar using the Self-Laminating Pouches – Card X-Large. I found a fast and easy way to keep track of doctors’ appointments. This could also work as a meal planner! The solution lies in the Self-Laminating Pouches from HomeHobby by 3L®!

Erasable Calendar by Judy Hayes for Scrapbook Adhesives by 3L

I’ve been helping my parents as my mom is recovering from a back injury. With all the therapy, doctor and other appointments, it’s been hard to keep track of it all. I made this erasable calendar to display on the refrigerator. Now we can see all the appointments in one place.

Self-Laminating Pouches are easy to write on with dry erase markers. I made it double-sided so we can see four weeks. I made smaller calendar for myself to keep at home as a reminder of each day. WIN WIN!

Erasable Calendar by Judy Hayes for Scrapbook Adhesives by 3L
Front sides of Erasable Calendars

Making the Erasable Calendar

To start, choose a double-sided patterned paper for a background and cut it 8.5 x 11 inches to fit inside the X-Large Self-Laminating Pouches. Cut a 6.75 x 9 inch paper in a contrasting color for a mat, one for each side. For the days of the week, use a piece of white cardstock cut to 6.25 x 8.5 inches.

Next, draw the dividing lines and handwrite the days of the week. Round all the corners with a corner rounder punch. Alternately, you could design this part on the computer and print it. Secure the both sides’ layers back to back, with the E-Z Runner® Ultra Refillable Dispenser.

Using Self-Laminating Pouches

Place the calendar pages into one X-Large Self-Laminating Pouch. Remove the narrow strip of the liner near the hinge. Center the calendar in the pouch and press the top edge against exposed adhesive. Then gradually remove the remaining liner and press the adhesive side of pouch against the calendar. I use a bone folder to firmly press it along all the edges.

Watch this video to see how to use the Self-Laminating Pouches:

It’s so fun to see the calendar enclosed in Self-Laminating Pouches! To hang it on the refrigerator punch holes in top corners and add a cord for hanging. To complete the calendar, add a dry erase marker and clips. Now it’s ready to keep the family organized!

I made a smaller calendar in the same way, using the Medium Self-Laminating Pouches. The only other difference is that I didn’t use a mat to save space.

Erasable Calendar by Judy Hayes for Scrapbook Adhesives by 3L
Reverse sides of Erasable Calendars

Thanks for visiting!
Judy

Creative Time: 45 Minutes
Skill Level: Beginner

Materials Needed
Scrapbook Adhesives by 3L®
E-Z Runner® Ultra Refillable Dispenser
E-Z Runner® Ultra Refill

Home Hobby by 3L®
Self-Laminating Pouches – Cards X-Large
Self-Laminating Pouches – Cards Medium

Other
Jillibean Soup “Bowl of Dreams” Collection; White Cardstock; Cord; 1/4 Corner Punch

Pin It!

Erasable Calendar by Judy Hayes for Scrapbook Adhesives by 3L

Visit our Website and Blog!
Sign up for our Newsletter so you never miss a contest or giveaway!

instagram purple icon facebook icon purple pinterest purple icon twitter purple icon YouTube icon blog subscription purple icon

With A Click 12 x 12 Page and DIY Foil Accents

Hey there, Latrice Murphy here today guest designing! I am sharing a fun Summer page with some DIY foil accents for a bold look. The weather is still very unpredictable here in the Midwest. I love revisiting photos so I pulled out some great images from my business shoot last Summer in Colorado.

When choosing colors for this layout I went bold and pulled colors from the photo. Loved the blues and golds. I love to mix solids with patterns and adding small embellishments to accent.

With a Click Scrapbook Page and DIY Foil Accents by Latrice Murphy for Scrapbook Adhesives by 3L

Creating DIY Foil Accents

Begin the page by creating a sunburst from cardstock and use it as a template. Using that template, I cut the sunburst patterns from the 3D Foam Creative Sheets Medium White. Just peel off one side and place it onto your Metallic Transfer Foil Gold Holographic Sheet. Rub, rub, rub and done! I totally recommend this DIY Foil Accents technique! It’s so amazing and a fast way to add interest. These 3D Foam Creative sheets are perfect for die cutting also.

With a Click Scrapbook Page and DIY Foil Accents by Latrice Murphy for Scrapbook Adhesives by 3L

With a Click Scrapbook Page and DIY Foil Accents by Latrice Murphy for Scrapbook Adhesives by 3L

With a Click Scrapbook Page and DIY Foil Accents by Latrice Murphy for Scrapbook Adhesives by 3L

With a Click Scrapbook Page and DIY Foil Accents by Latrice Murphy for Scrapbook Adhesives by 3L

To complete the page, I layered one 4 x 4-inch photo with a 4 x 6-inch photo and lift one side with a few 3D Foam Squares. For my wood veneer cameras, I used a little bit of the E-Z Dots® Permanent and foiled on top for more sparkle. Add a couple cardstock stickers and chipboard letters for the title.

With a Click Scrapbook Page and DIY Foil Accents by Latrice Murphy for Scrapbook Adhesives by 3L

With a Click Scrapbook Page and DIY Foil Accents by Latrice Murphy for Scrapbook Adhesives by 3L

This was a fun layout to create! The 3D Foam Creative Sheets Medium White are so fun to work with and who doesn’t love the Metallic Transfer Foil Sheets Holographic!

Thanks for stopping by today. Go out and create.
– Latrice

Creative Time: 60 minutes
Skill Level: Intermediate

Materials Needed
Scrapbook Adhesives by 3L®
E-Z Dots® Permanent Refillable Dispenser
3D Foam Creative Sheets Medium White
Metallic Transfer Foil Sheets Holographic Colors
3D Foam Squares Mix White

Other
Solid Cardstock (American Crafts); Patterned Paper and Chipboard Stickers (Pink Paislee); Wood Veneer and Sequins (Studio Calico); Camera Paper Clip

Pin It!

With a Click Scrapbook Page and DIY Foil Accents by Latrice Murphy for Scrapbook Adhesives by 3L

Visit our Website and Blog!
Sign up for our Newsletter so you never miss a contest or giveaway!

instagram purple icon facebook icon purple pinterest purple icon twitter purple icon YouTube icon blog subscription purple icon

Delightful Tag Album and Berry Box Tutorial

Welcome, Summer! Shellye McDaniel here to share a Delightful Tag Album and Berry Box ensemble that will make a sweet summertime gift for a friend.

Delightful Tag Album and Berry Box Tutorial by Shellye McDaniel

Delightful Tag Album and Berry Box

To begin, start with the gorgeous paper crafting kit, a sheet of 110 lb. white cardstock and a sheet of Adhesive Sheets 12×12 inch.

Delightful Tag Album and Berry Box Tutorial by Shellye McDaniel for Scrapbook Adhesives by 3L

Attach the patterned paper to the cardstock with the Adhesive Sheet. Next, die-cut the paper twice with a berry box-shaped die. For the assembly of the box, use Extreme Double-Sided Tape 1/8in, it’s immediately tacky and strong. It holds right away!

Delightful Tag Album and Berry Box Tutorial by Shellye McDaniel

Once you assemble the box, move on to making the tags for the album. Die-cut five 2.5 x 4 inch tags from white cardstock. Next, select various journal cards from the kit and die cut them with a 2 x 3.25 inch tag die.

Delightful Tag Album and Berry Box Tutorial by Shellye McDaniel

Now layer the smaller tags onto the larger ones with Crafty Foam Tape White. I like to add colorful doilies between the layers. When adding the stickers, you can use various sizes of 3D Foam Squares. Don’t forget to cover the back sides with coordinating patterned papers!

Delightful Tag Album and Berry Box Tutorial by Shellye McDaniel

To finish the box, decorate the top inside with pom trim and attach it with Extreme Double-Sided Tape 1/4in.

Finally, add a ring to hold the tags together and viola! A quick and simple tag album with a precious presentation!

Thank you for joining me today!
Shellye McDaniel

Creative Time: 30 Minutes
Skill Level: Intermediate

Materials Needed
Scrapbook Adhesives by 3L®

Other

Photo Play Paper – Paper crafting Kit; Paper Mart- Ribbon; Offray- Pom Trim

Pin It!

Delightful Tag Album and Berry Box Tutorial by Shellye McDaniel

Visit our Website and Blog!
Sign up for our Newsletter so you never miss a contest or giveaway!

instagram purple icon facebook icon purple pinterest purple icon twitter purple icon YouTube icon blog subscription purple icon

Puppy Love and a 3D Foam Creative Sheet Title

How many times do you have the pieces for a title but it’s just too flat?  Or the wrong color? Christine joining you today with a quick and easy technique for solving both of those problems. Use a 3D Foam Creative Sheet to customize your title so it’s one of a kind! Let’s dive into this simple technique on my Puppy Love layout.

Puppy Love and a 3D Foam Creative Sheet Title by Christine Meyer for Scrapbook Adhesives by 3L

My title “love” was created using the 3D Foam Creative Sheets in the Small Size. But the great news is, they come in 4×6-in and 6×12-in sizes, so you certainly aren’t limited!

Create Puppy Love with a 3D Foam Creative Sheet

Puppy Love and a 3D Foam Creative Sheet Title by Christine Meyer for Scrapbook Adhesives by 3L

First, you need to get out any size of the 3D Foam Creative Sheets.  Remove the backing from one side and adhere it to whatever cardstock or patterned paper works with your project.

Puppy Love and a 3D Foam Creative Sheet Title by Christine Meyer for Scrapbook Adhesives by 3L

Next set your metal die onto the 3D Foam Creative Sheet and run it through your machine. Despite its thickness, I didn’t find it hard to run through at all! 3D Foam is high density and will compress in a die cut machine, but regain it’s full height when the pressure is released.

Puppy Love and a 3D Foam Creative Sheet Title by Christine Meyer for Scrapbook Adhesives by 3L

Finally, pull it out and carefully remove the back liner.

Quick Tip: Save the extra sheet parts to use with punches or other small metal dies.

Puppy Love and a 3D Foam Creative Sheet Title by Christine Meyer for Scrapbook Adhesives by 3L

Although I have a small raised bump from the hole in the metal die where you are supposed to push out a thin paper, it doesn’t bother me. The Puppy Love title has the look and feel of those awesome 3D stickers out there, but is custom cut to be exactly what I need!

One of my favorite things about really digging into my adhesives is the creative possibilities go SO far beyond the obvious! What are some of your favorite unique tricks with adhesives?

Thanks so much for joining me today!

Christine

Creative Time: 40 minutes
Skill Level: Beginner

Materials needed
Scrapbook Adhesives by 3L®

E-Z Runner® Grand Refillable Dispenser
Thin 3D Foam Squares White Mix
3D Foam Creative Sheets

Pin It!

Puppy Love and a 3D Foam Creative Sheet Title by Christine Meyer for Scrapbook Adhesives by 3L Pinterest

Visit our Website and Blog!
Sign up for our Newsletter so you never miss a contest or giveaway!

instagram purple icon facebook icon purple pinterest purple icon twitter purple icon YouTube icon blog subscription purple icon

Interactive Monster Card Tutorial

Hi, everyone! Do you like to make cards that have lots of details? Teri here, and I’m going to show you today how to create an interactive “monster” fun card with several decorative elements!

Interactive Monster Card Tutorial by Teri Anderson for Scrapbook Adhesives by 3L

Monster Card Base and Panel

To make this card, start by creating a standard card base. You’ll also want to cut a panel of cardstock to fit onto it.

Cover the panel of cardstock with strips of patterned paper. Stamp, cut and color a couple of monsters. Place a Thin 3D Foam Square behind one of the monsters. Leave the back liner on it. You’ll see why in the minute.

Interactive Monster Card Tutorial by Teri Anderson for Scrapbook Adhesives by 3L

Make the Monster Interactive

Set the monster on the panel. Use a piercing tool (or a push pin) to poke a hole through the monster’s eye and the card panel.

Interactive Monster Card Tutorial by Teri Anderson for Scrapbook Adhesives by 3L

Place a brad through both holes. This will allow your monster to move around!

Interactive Monster Card Tutorial by Teri Anderson for Scrapbook Adhesives by 3L

Interactive Monster Card Tutorial by Teri Anderson for Scrapbook Adhesives by 3L

Add the two the remaining monsters to the panel using E-Z Runner Petite Permanent Dots adhesive. Stamp, color and die-cut a sunshine and adhere it the panel. Next, stamp a sentiment on a strip of cardstock and add it to the panel with Thin 3D Foam Squares.

Flock to Frame Interactive Monster

Now we want to frame the scene. Add a 3D Foam Frame to the panel that’s large enough to include all the elements inside it. Remove the liner paper and dump flock all over the exposed adhesive on the frame.

Interactive Monster Card Tutorial by Teri Anderson for Scrapbook Adhesives by 3L

Interactive Monster Card Tutorial by Teri Anderson for Scrapbook Adhesives by 3L

With your fingers, really push the flock into the adhesive frame. Next remove the excess flock. I recommend tapping the panel a few times on scratch paper and then brushing the panel with an old paint brush or a dryer sheet to remove any remaining loose fibers.

Finishing the Interactive Monster Card

Next, adhere the paper panel to the card base with a couple strips of Crafty Foam Tape. Be sure to place the tape pieces so they don’t butt up against the brad in any way and prevent your monster from moving around.

Finish the card with one more ounce of detail to it. Use Adhesive Dots Micro to add some sequins or gems to the scene. Use as few or as many sequins as you like!

Interactive Monster Card Tutorial by Teri Anderson for Scrapbook Adhesives by 3L

Interactive Monster Card Tutorial by Teri Anderson for Scrapbook Adhesives by 3L

I hope you enjoyed this tutorial and use some of these ideas to add extra details to your own cards and scrapbook pages.

Creative Time: 1 Hour
Skill Level: Beginner

Materials Needed
Scrapbook Adhesives by 3L®

Thin 3D Foam Squares White Mix
Crafty Foam Tape White
E-Z Runner® Petite Permanent Dots Refillable
3D Foam Frames
Adhesive Dots Micro

Other
Stamp and Craft Die Sets: Paper Smooches (Sunnyville Stamp set and Sunnyville Icons Dies) & Lawn Fawn (Monster Mash Stamp Set and Monster Mash Dies); Ink: Ranger Inks; Cardstock: Neenah Paper (White); Patterned Papers (Lawn FawnBeads: Jillibean Soup; Markers: Copic; Sequins: Pretty Pink Posh; Flock: Stampendous!; Brad

Pin It!

Interactive Monster Card Tutorial by Teri Anderson for Scrapbook Adhesives by 3L Pinterest

Visit our Website and Blog!
Sign up for our Newsletter so you never miss a contest or giveaway!

instagram purple icon facebook icon purple pinterest purple icon twitter purple icon YouTube icon blog subscription purple icon

Three Solutions to Tricky Embellishments

Welcome back crafty friends, Tracy here and today I have a scrapbook layout to share that has a couple of tricky sticky situations. I will share what favourite adhesives I used to remedy those tricky sticky situations on my Remember Always scrapbook layout.

I adore a layout with lots of dimensions and use more than just paper. That includes ribbon, resin, acrylic and more. For each of these tricky to stick materials, there is a perfect adhesive to use.

Three Solutions to Tricky Embellishments by Tracy McLennon for Scrapbook Adhesives by 3L

When creating my simple layered background using patterned paper and cardstock, I simply grabbed my E-Z Runner® Permanent Strips Refillable Dispenser. This is my go-to for paper.

Tricky Sticky Situation and Solutions

My first tricky sticky situation was this gorgeous die cut title “Remember Always”. This title is a patterned paper weight die cut, that was oh so very fine. So I grabbed my Dual Tip Glue Pen. The fine point of this pen was perfect for this delicate title.

Three Solutions to Tricky Embellishments by Tracy McLennon for Scrapbook Adhesives by 3L

The patterned paper and cardstock layers beneath the resin frame were adhered to the layout using Crafty Foam Tape White. Then the die cut embellishments surrounding the paper layers were added using 3D Foam Squares White Mix. Sometimes to get the die cuts slightly higher than the paper layers, I would double up the 3D Foam pieces.

Three Solutions to Tricky Embellishments by Tracy McLennon for Scrapbook Adhesives by 3L

Finally, it was time to add the photo and resin frame, the final tricky sticky situation. I used Extreme Double-Sided Tape 1/2 in. in back of the resin frame, then attached the photo. Then using the same Extreme Double-Sided Tape 1/2 in., I adhered the frame with photo to the patterned paper layout base.

Using these fabulous adhesives, these tricky sticky situations are no more.

Three Solutions to Tricky Embellishments by Tracy McLennon for Scrapbook Adhesives by 3L

Thanks so much for stopping by!
Tracy McLennon

Creative Time: 60 minutes
Skill Level: Intermediate

Materials Needed
Scrapbook Adhesives by 3L®

E-Z Runner® Permanent Strips Refillable Dispenser
3D Foam Squares White Mix
Crafty Foam Tape White

HomeHobby by 3L®
Extreme Double-Sided Tape 1/2 in.
Dual Tip Glue Pen

Other
White Cardstock, Paper Distresser, 49 & Market Patterned Paper, and Embellishments, Prima Resin Frame

Three Solutions to Tricky Embellishments by Tracy McLennon for Scrapbook Adhesives by 3L Pinterest

Visit our Website and Blog!
Sign up for our Newsletter so you never miss a contest or giveaway!

instagram purple icon facebook icon purple pinterest purple icon twitter purple icon YouTube icon blog subscription purple icon

Hello Card – Stash Busting Tutorial

Hi everyone, Christine here today with a stash busting card. I think nearly every crafter finds it difficult not to keep every single scrap of pretty paper, it is always going to come in handy at some point! My Hello card tutorial will have you putting those scraps to good use along with the fantastic Scrapbook Adhesives by 3L® adhesives.

Hello Card - Stash Busting Tutorial by Christine Emberson for Scrapbook Adhesives by 3L

Stash Busting Card Step Outs

To start rummage through those scraps and cut paper strips approximately 3/4 inch wide. I’ve chosen beige and pink, leftovers from a paper pad, you can go as bright/muted as you wish.

Hello Card - Stash Busting Tutorial by Christine Emberson for Scrapbook Adhesives by 3L

On a piece of scrap card, apply the strips (vertically or horizontally, whichever you prefer) using MyStik Permanent Strips Dispenser. This dispenser will give you an edge to edge adhesive has a unique fold-away design, you can personalize it too.

Hello Card - Stash Busting Tutorial by Christine Emberson for Scrapbook Adhesives by 3L

Once all your strips are affixed in place, cut a rectangle with a trimmer or use a die if you prefer.

Hello Card - Stash Busting Tutorial by Christine Emberson for Scrapbook Adhesives by 3L

For perfect dimension affix Crafty Foam Tape onto the reverse. Don’t forget Crafty Foam Tape is also available in black too.

Hello Card - Stash Busting Tutorial by Christine Emberson for Scrapbook Adhesives by 3L

Before you mat onto a card base wrap and tie twine around, affix in place with Crafty Power Tape. The backing easily pulls away and gives a secure hold.

Hello Card - Stash Busting Tutorial by Christine Emberson for Scrapbook Adhesives by 3L

To embellish the card, die cut some little flowers and a Hello sentiment. 3D Foam Squares White Small fit neatly on the back.

Hello Card - Stash Busting Tutorial by Christine Emberson for Scrapbook Adhesives by 3L

See the embellishments positioned and in place.

Hello Card - Stash Busting Tutorial by Christine Emberson for Scrapbook Adhesives by 3L

Now you have a finished card ready to be sent and you’ve made a little dent in those scraps of paper too!

Hello Card - Stash Busting Tutorial by Christine Emberson for Scrapbook Adhesives by 3L

Thanks for stopping by and don’t forget to check out the great products on the website.
Christine

Creative Time: 25 Minutes
Skill Level: Beginner

Materials Needed
Scrapbook Adhesives by 3L®

3D Foam Squares White Small
MyStik Permanent Strips Dispenser
Crafty Foam Tape
Crafty Power Tape

Other
Craft Dies: Spellbinders® Paper Arts (A2 Matting Basics, Phrase Set Two, Swallow and Heart (for flowers)); Ivory Card Base; Bronze Card; Paper Scraps (Craftwork Cards); Twine; Pearls


Pin It!

Hello Card - Stash Busting Tutorial by Christine Emberson for Scrapbook Adhesives by 3L Pinterest