You are in our US store • Switch to Europe store

Morgan Family: Holiday 2018 Documented

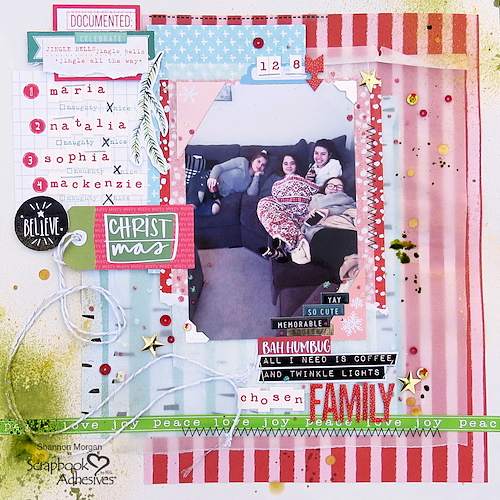
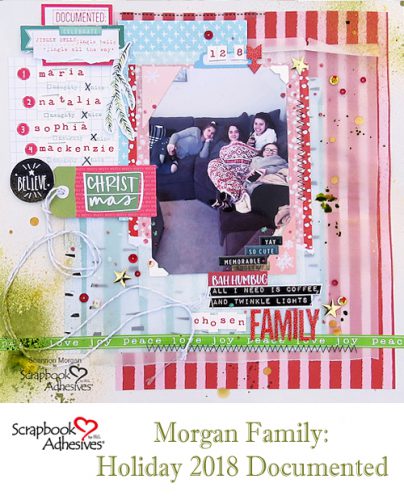
The holidays are flying by, it’s almost New Year’s Eve! Meanwhile, I am still trying to record 2018 in the books before it ends. At least, I documented one event of family time in a scrapbook layout  – catching family time was a priority especially in December. Everyone had a great night!

Morgan Family: Holiday 2018 Documented by Shannon Morgan for Scrapbook Adhesives by 3L

Starting the Documented Layout

Look for colors that compliment your picture, I chose a mix of non-traditional Christmas colors with the standard of red, green, and white in my patterned papers and embellishments.

Morgan Family: Holiday 2018 Documented by Shannon Morgan for Scrapbook Adhesives by 3L

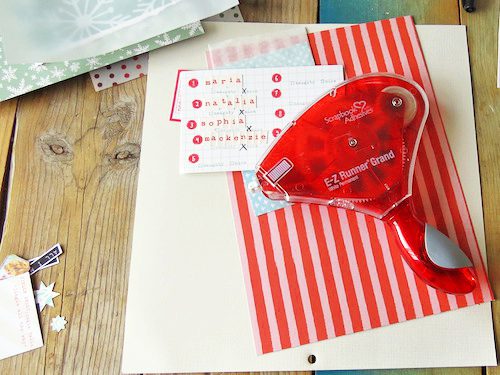
Focusing around that perfectly imperfect photo, I created layers for dimension and interest. Of course, my go-to adhesive to assemble for all this is the E-Z Runner® Grand Dispenser. It’s the tool I reach for on every single project.

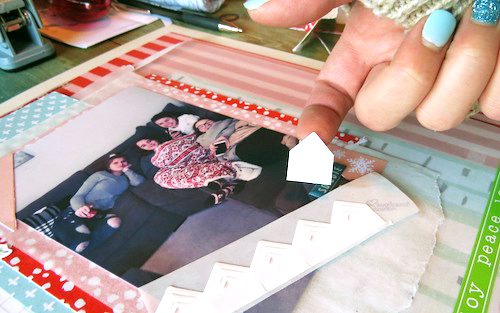
I love Creative Photo Corners! You just need two corners for this layout. The Creative Photo Corners White are perfect accents for the look I was going for.

Morgan Family: Holiday 2018 Documented by Shannon Morgan for Scrapbook Adhesives by 3L

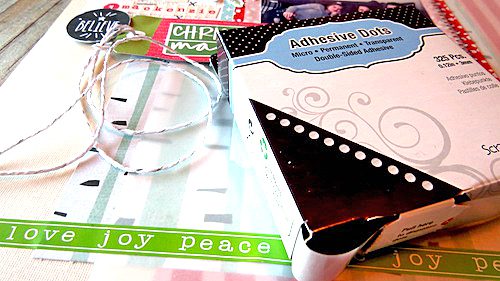
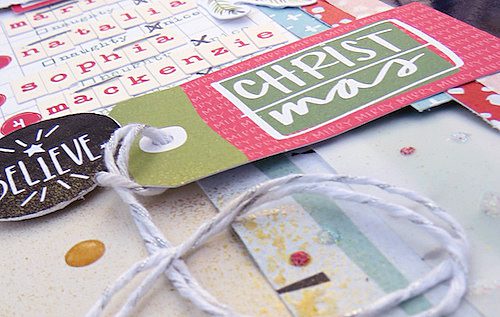
Did you know there are many different sizes of Adhesive Dots available from Scrapbook Adhesives by 3L®? One of the best sizes in my honest opening is the Adhesive Dots Micro. It is so versatile! For this project, I used them for placing my twine and sequins.

Morgan Family: Holiday 2018 Documented by Shannon Morgan for Scrapbook Adhesives by 3L

If you are looking for an easy way to create dimension, you need to look at 3D Foam Squares! There are many 3D Foam products to choose from Thin 3D Foam Squares to 3D Foam Circles to 3D Foam Shapes. There’s bound to be one that fits your project needs.

Morgan Family: Holiday 2018 Documented by Shannon Morgan for Scrapbook Adhesives by 3L

Creative Time: 60 minutes
Skill Level: Beginner

Materials Needed
Scrapbook Adhesives by 3L®

Adhesive Dots Micro
3D Foam Squares Black Regular Size
E-Z Runner® Grand Refillable Dispenser 
Creative Photo Corners White

Other
SRM Stickers, My Minds Eye, Cocoa Daisy, October Afternoon, Elle’s Studio, Illustrated Faith, Twine, Sequins, Staples

Pin It!

Morgan Family: Holiday 2018 Documented by Shannon Morgan for Scrapbook Adhesives by 3L Pinterest

Create a Winter Window Layout Tutorial

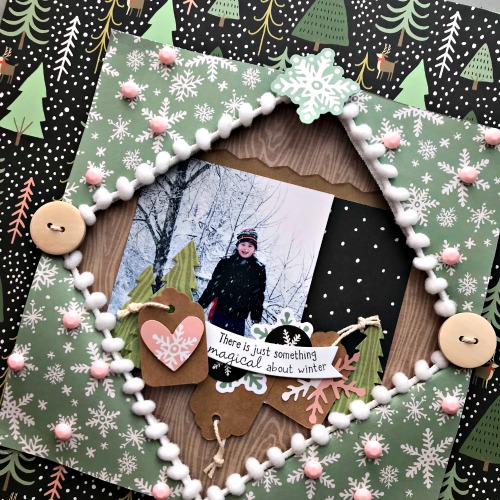
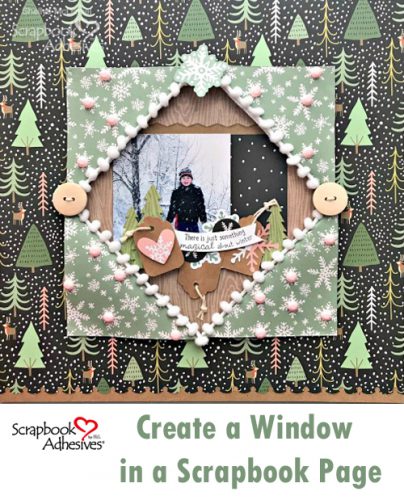
Hello, all!  Shellye McDaniel here with a sweet dimensional scrapbook layout with a window feature. It’s a simple way to draw focus to a single  photo, so let’s get started!

Create a Winter Window Layout by Shellye McDaniel for Scrapbook Adhesives by 3L

Create the Window Feature

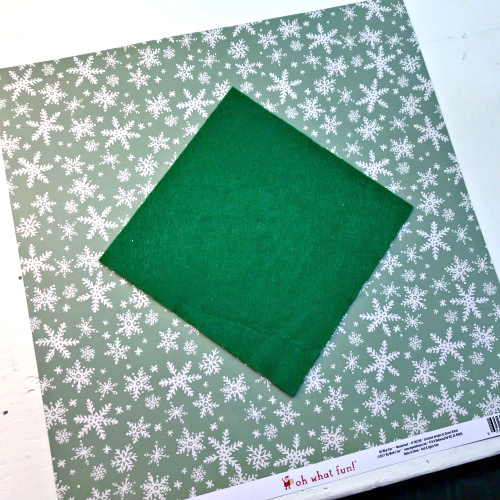
To begin take a 12×12-inch sheet of double-sided scrapbook paper and place a 6×6-inch square in the center for tracing.

Create a Winter Window Layout by Shellye McDaniel for Scrapbook Adhesives by 3L

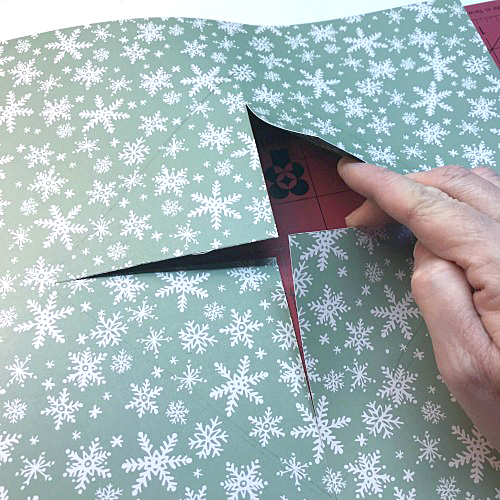
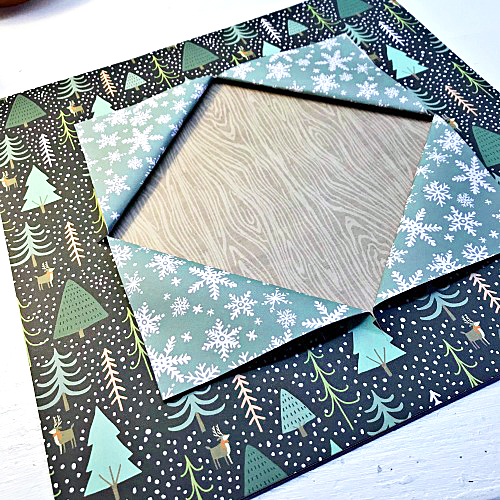
Next cut from point-to-point of the traced square, from the center, as shown below.

Create a Winter Window Layout by Shellye McDaniel for Scrapbook Adhesives by 3L

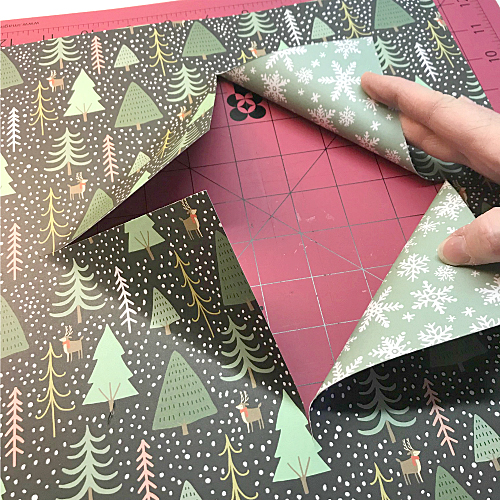
Fold the edges back gently by bringing the flaps over the front of the patterned paper.

Create a Winter Window Layout by Shellye McDaniel for Scrapbook Adhesives by 3L

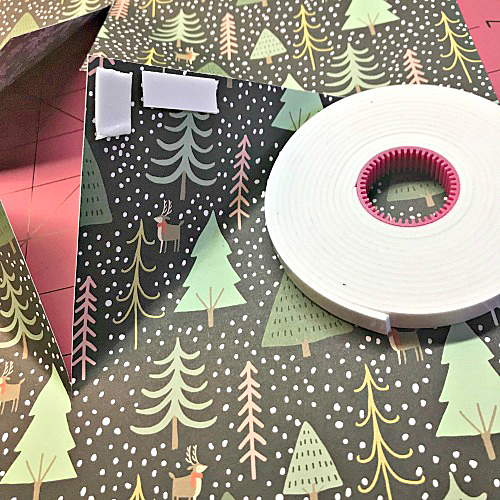
Now use small pieces of Crafty Foam Tape and attach it to the backside of each corner of the flaps.

Create a Winter Window Layout by Shellye McDaniel for Scrapbook Adhesives by 3L

Attach the flaps to the front of the scrapbook paper. Make sure that each of the flaps is evenly spaced and forms a neat square.

Making the Second Layer

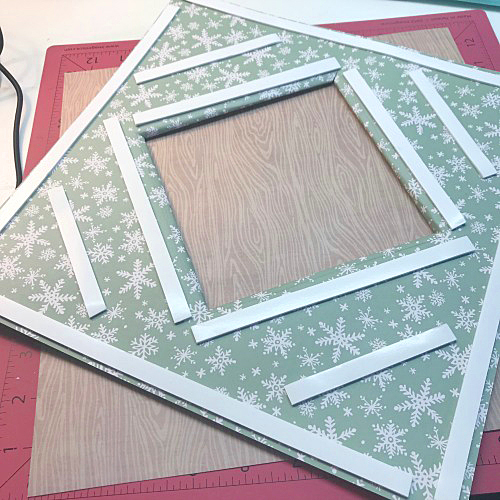
For the second layer attach a wood-grain patterned paper to the back of the page using strips of the Crafty Foam Tape as shown below.

Create a Winter Window Layout by Shellye McDaniel for Scrapbook Adhesives by 3L

I now have the perfect background slate for photos and embellishments!

Create a Winter Window Layout by Shellye McDaniel for Scrapbook Adhesives by 3L

The Embellishing Details

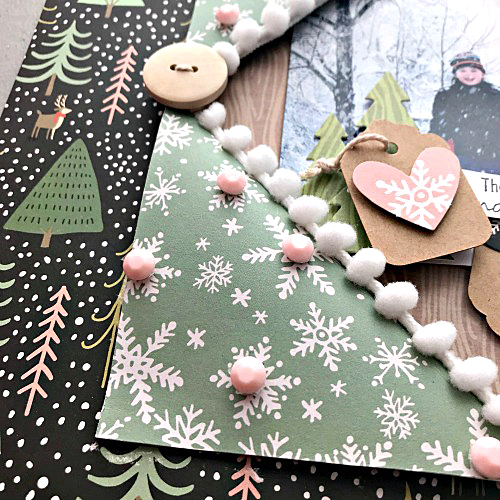
Add pom trim to the inside of the window with strips of Extreme Double-Sided Tape 1/8in to hold it in place.

After threading with twine, attach two wooden buttons to the sides of the window with Adhesive Dots 3D.

Create a Winter Window Layout by Shellye McDaniel for Scrapbook Adhesives by 3L

Of course, the snowflakes need some bling, use pink rhinestones with the smallest of the 3D Foam Circles White Mix. By using 3D Foam I can continue the dimensional effect!

Create a Winter Window Layout by Shellye McDaniel for Scrapbook Adhesives by 3L

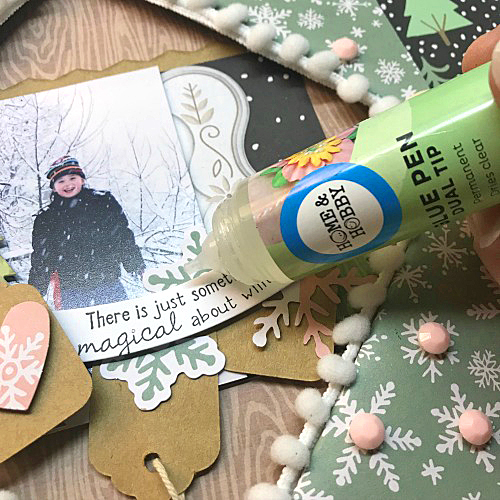
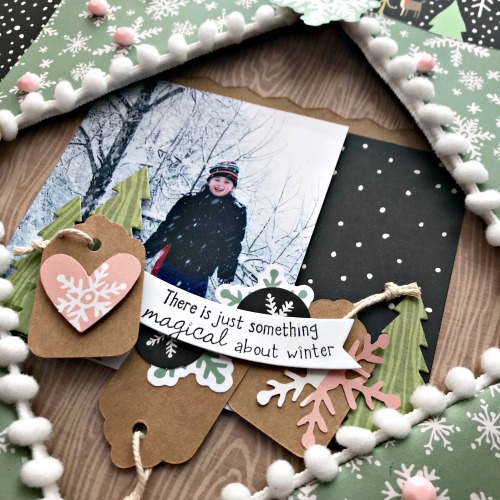
Add the cardstock tags and then with the Dual Tip Glue Pen attach pieces of the die-cut snowflakes. I like using just a small dollop of the glue so that the die-cuts aren’t completely flat.

Create a Winter Window Layout by Shellye McDaniel for Scrapbook Adhesives by 3L

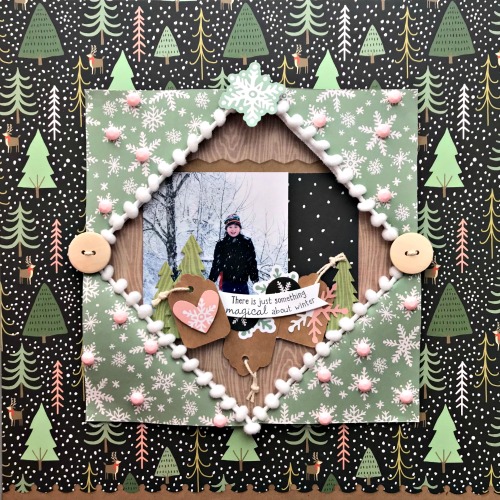
Create a Winter Window Layout by Shellye McDaniel for Scrapbook Adhesives by 3L

Create a Winter Window Layout by Shellye McDaniel for Scrapbook Adhesives by 3L

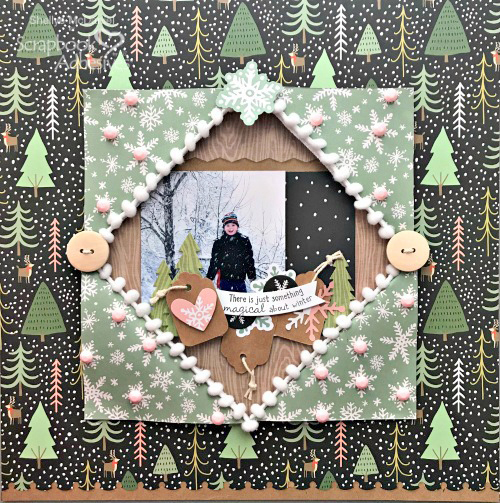
Finally, my Winter Window Layout is complete!  It’s like peering outside and seeing my little one enjoying a snowy day 🙂

Thank you for stopping by!

Creative Time: 30 Minutes
Skill Level: Intermediate

Materials Needed
Scrapbook Adhesives by 3L®

Crafty Foam Tape
3D Foam Circles White Mix
Adhesive Dots 3D

HomeHobby by 3L®
Extreme Double-Sided Tape 1/8in
Dual Tip Glue Pen

Other
Patterned Paper: Fancy Pants (Trees) and We R Memory Keepers (Woodgrain); Die Cuts: Fancy Pants; Pom Trim: Offray; Pink Rhinestones: Paper Studio; Kraft Tags; Kraft Border; Buttons

Pin It!

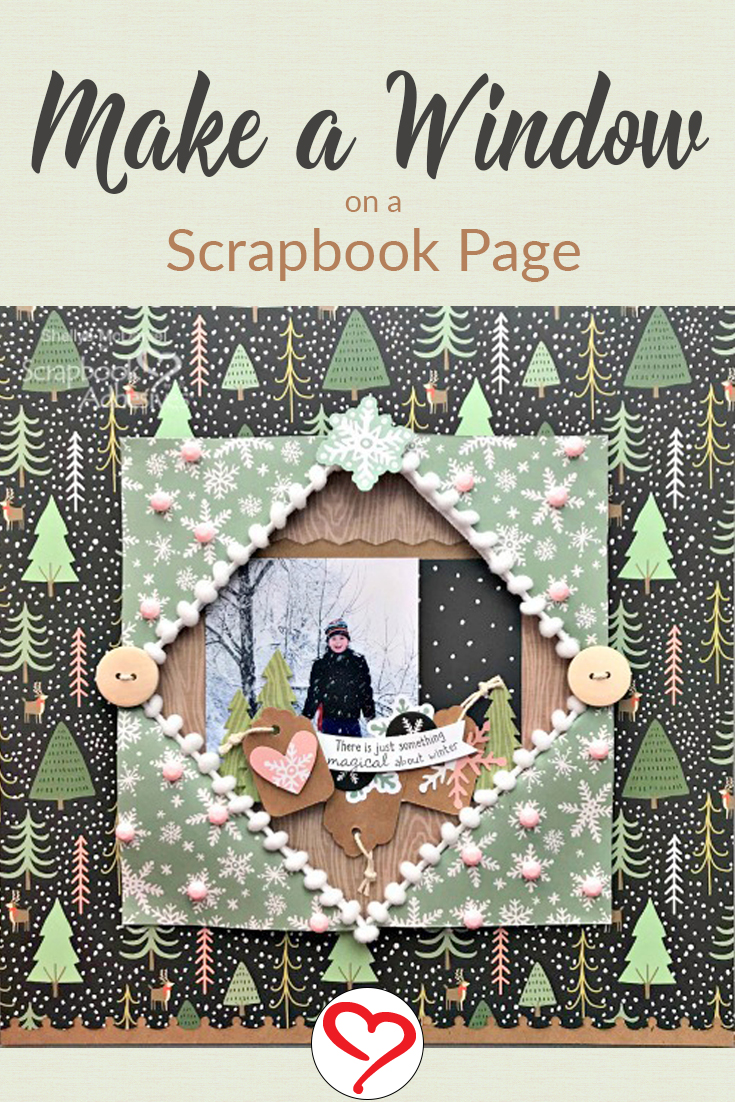
Create a Winter Window Layout by Shellye McDaniel for Scrapbook Adhesives by 3L

Visit our Website and Blog!
Sign up for our Newsletter so you never miss a contest or giveaway!

instagram purple icon facebook icon purple pinterest purple icon twitter purple icon YouTube icon blog subscription purple icon

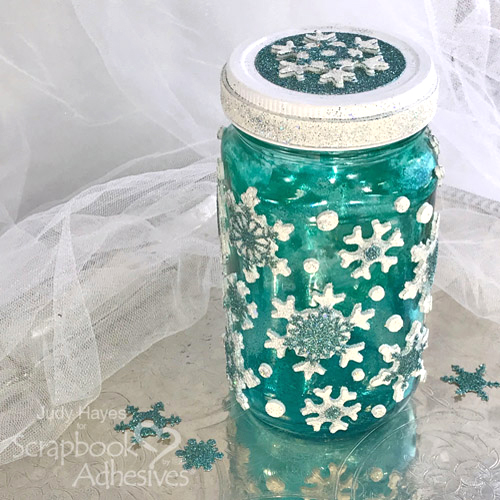
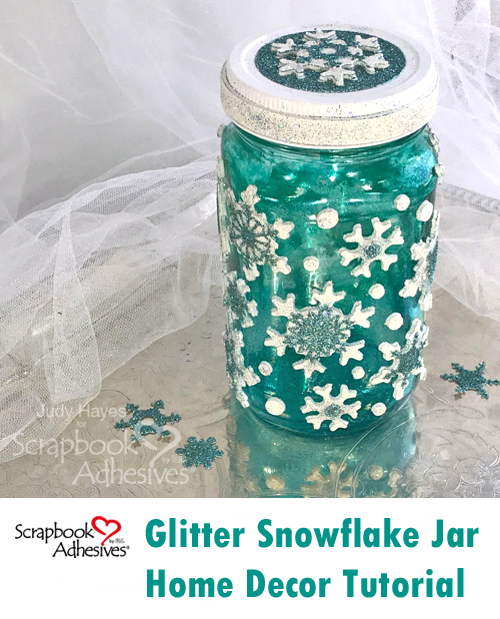
Glitter Snowflakes Jar

Christmas has past and I wanted something to replace my holiday decorations and brighten my décor through the winter months. For me, winter means snow, so I made this Glitter Snowflakes Jar in my favorite color with 3D Foam Snowflakes and Adhesive Sheets 4 x 6 inch. It can be used as a home décor piece as it is or with little battery LED lights or a candle.  Even empty it sparkles!  It would be pretty filled with cotton balls!


Glitter Snowflake Steps

I chose to use a recycled clear jar for my Glitter Snowflakes Jar.  Color was added to the inside with alcohol inks.  That step can be skipped by using a colored jar.


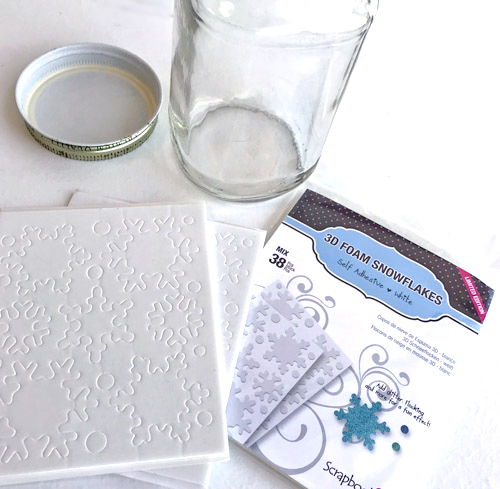
I used 3D Foam Snowflakes along with 6 different small die cut paper snowflakes. I chose  snowflake dies that fit the 3D Foam Snowflakes.


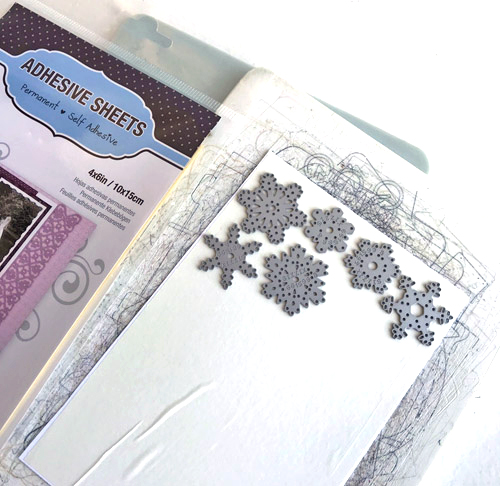
For the die cut snowflakes, apply Adhesive Sheets 4 x 6 inch to white cardstock on one side.


Cut several snowflakes of each design with dies placed on side of paper with Adhesive Sheet. That will be front side on the jar. Tape may be needed to hold dies in place as the Adhesive Sheets liner is slippery.


Wear Your Adhesive on the Outside

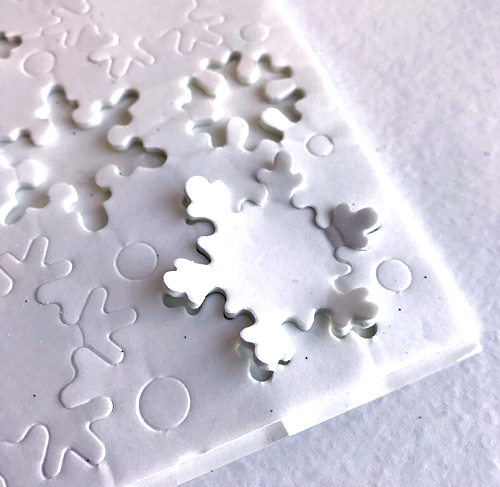
The next step is to place 3D Foam Snowflakes on the jar. To remove snowflakes from sheet, gently lift each point and then remove the whole snowflake. That method keeps the snowflake from getting too distorted. Place 3-4 snowflakes at a time on the jar.

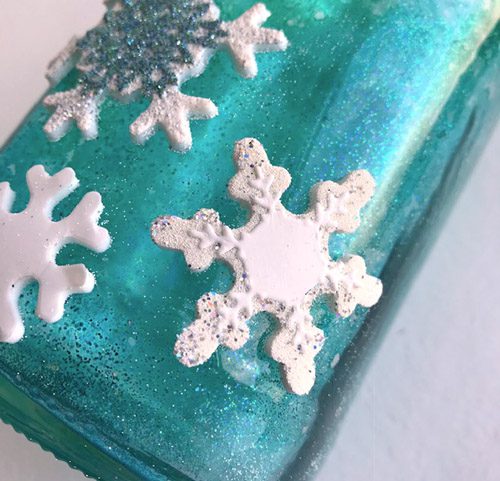
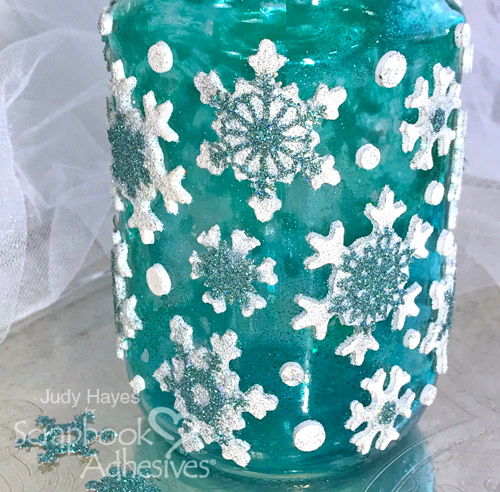
Remove the liner from each 3D Foam Snowflake and place a paper snowflake on each one.  I varied the styles to add variety. Do not remove liner on paper snowflakes yet! Cover each with embossing powder and press it into the foam snowflake and shake off the excess. Use a dry paint brush to remove excess around snowflake points as it tends to cling to the glass.

Glitter Snowflakes Jar by Judy Hayes for Scrapbook Adhesives by 3L

This photo shows closest snowflake with embossing powder applied to it. The liner is still in place on paper snowflake.  The next step is to remove the liners on paper snowflake and sprinkle with glitter, then heat emboss. Repeat to cover jar with snowflakes.  Add circles (from 3D Foam Snowflakes sheet) between snowflakes and heat emboss.  (The snowflake steps are same as shown below with jar lid.)


Jar Lid Detailing

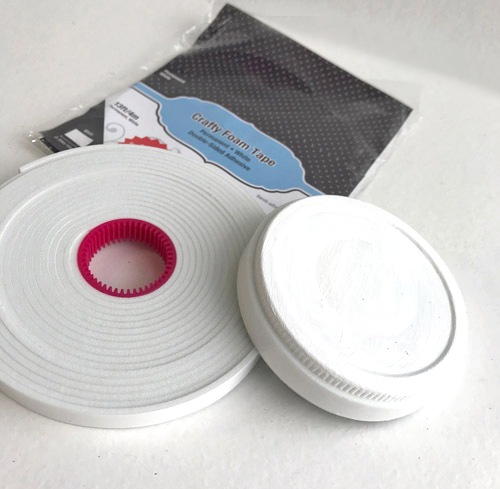
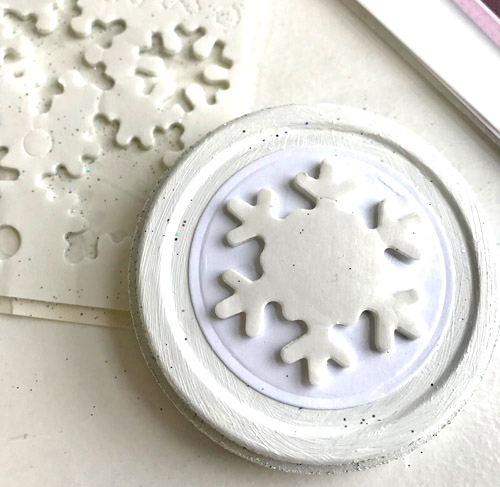
Paint jar lid white and wrap Crafty Foam Tape White around lid edge. Remove the liner and cover with embossing powder.  Heat to emboss.


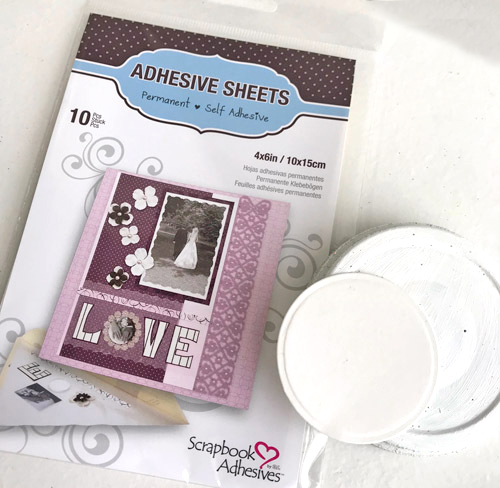
Apply Adhesive Sheets 4 x 6 inch to both sides of piece of white cardstock.  Die cut circle to fit jar lid. Peel liner from back side and fasten to jar lid.


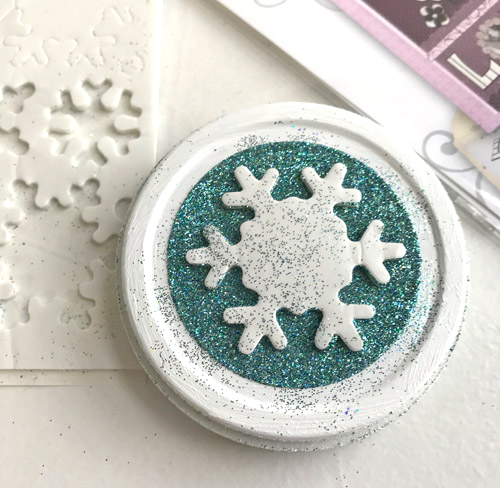
Remove liner from top side.  Place large 3D Foam Snowflake on circle. Do not remove liner from snowflake.


Sprinkle glitter over circle and press in place.  Shake off excess and use soft dry paint brush to remove loose glitter.  (My paint was not fully dry so glitter clung to it.)


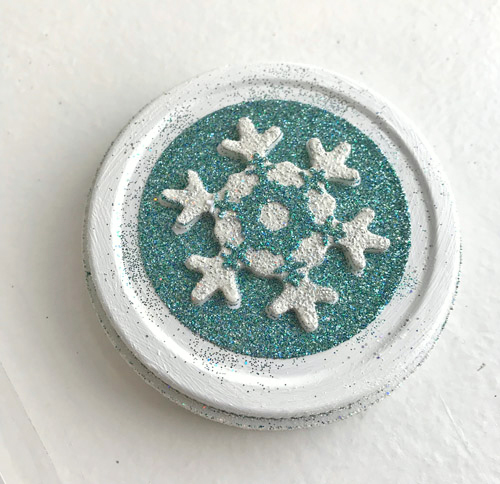
Remove liner from 3D Foam Snowflake and place die cut paper snowflake on it with adhesive liner side up. Do not remove liner from paper snowflake yet. Sprinkle with embossing powder. Remove liner from small paper snowflake and sprinkle with glitter, then heat emboss.

These are same steps I used for snowflakes on jar.  It has 19 snowflakes on it.


That completes Glitter Snowflakes Jar! I hope you enjoyed this project!

Thanks for visiting!
Judy

Creative Time: 90 Minutes
Skill Level: Intermediate

Materials Needed
Scrapbook Adhesives by 3L®

3D Foam Snowflakes
Adhesive Sheets 4 x 6 inch
Crafty Foam Tape White

Other:
DecoArt® Americana Satin Paint – Cottonball; Ranger Ink Alcohol Inks: Bottle, Pool, Juniper; Ranger Ink Snowflake Tinsel Embossing Powder; Sizzix® Paper Snowflakes Mini Dies; Sparkle N’ Sprinkle® Glitter Seaspray; Spellbinders® Standard Circles SM; White Cardstock

Pin It!

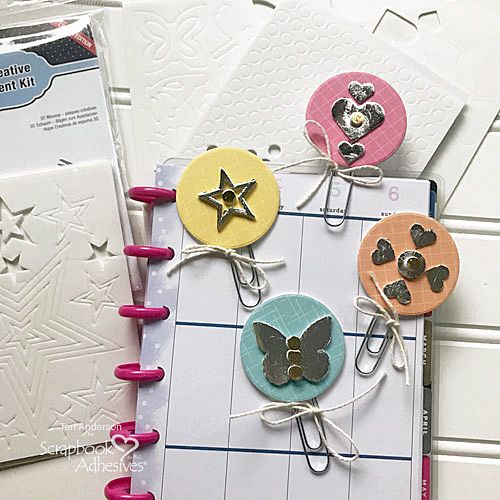
DIY Foiled Planner Clips Tutorial

Can you believe it’s almost 2019? The New Year means it is time to set up your next planner! Teri here today, and I’m going to show you a fun way to add a touch of creativity and organization to your planner by making some simple DIY Foiled Planner Clips to use in it!

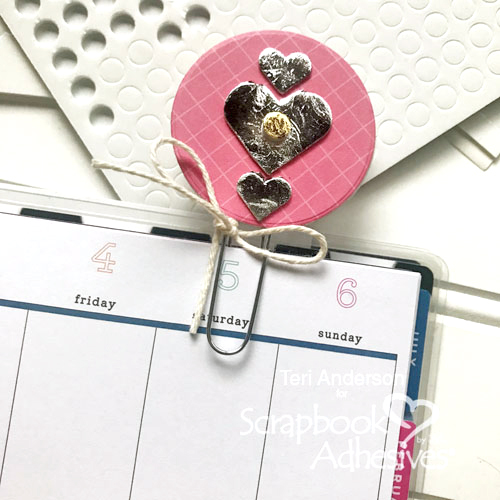
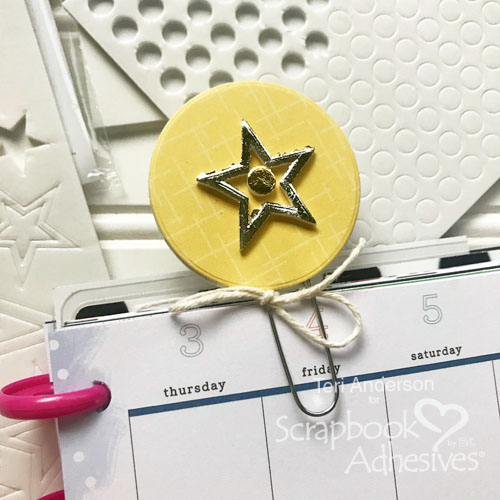
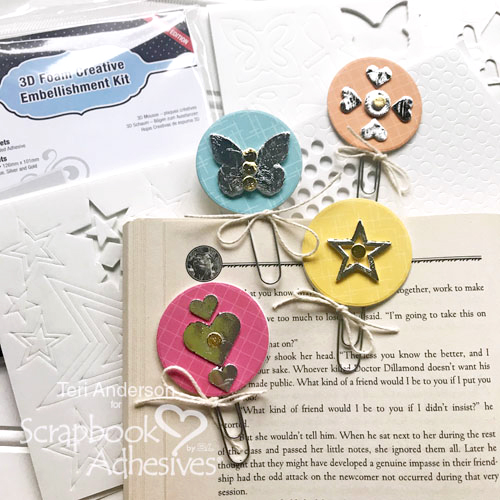
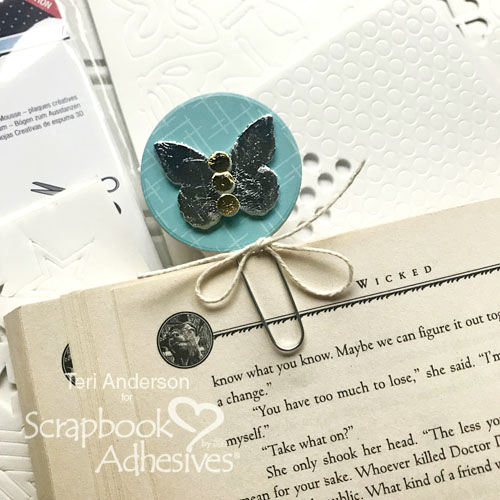
DIY Foiled Planner Clips by Teri Anderson for Scrapbook Adhesives by 3L

These sweet paperclips are easy to make with 3D Foam Products from Scrapbook Adhesives by 3L.

Making the Planner Clips

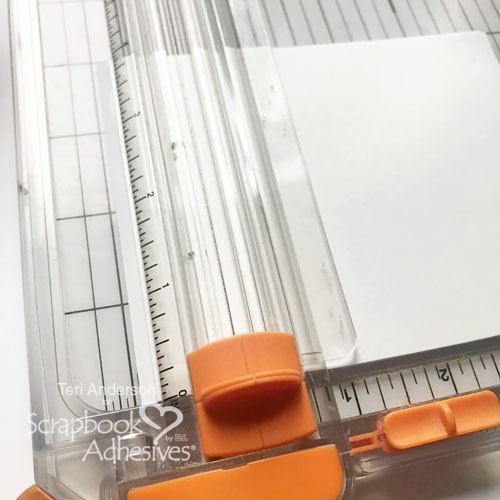
Start by cutting down one 3D Foam Creative Sheet with your paper trimmer to 4 inches by 4 inches. The 3D Foam Sheets are from the 3D Foam Creative Embellishment Kit. If you don’t have a paper trimmer you can use scissors. Simply mark a line with a pencil and cut. It’s that easy.

DIY Foiled Planner Clips by Teri Anderson for Scrapbook Adhesives by 3L

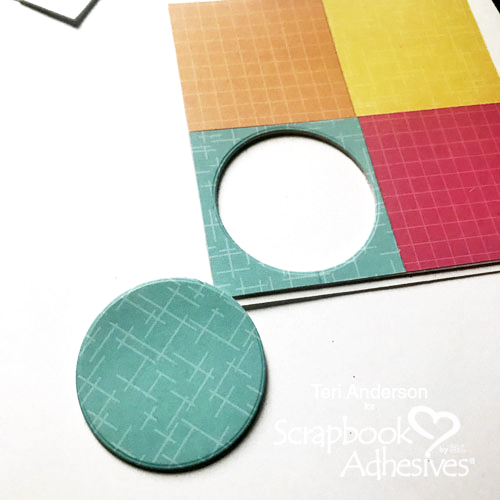
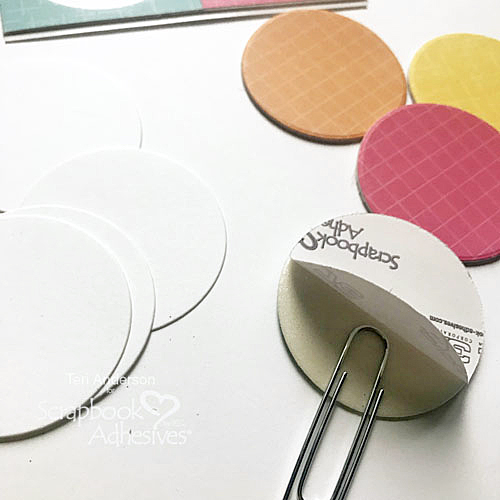
Cut four squares of patterned paper. Remove the backing paper on one side of the 3D Foam Creative Sheet. Place the paper pieces on it. Set a circle die over the sheet and run it through your die-cutting machine. You’ll repeat this process until you end up with four patterned paper circles. Alternatively, you could use a circle punch.

DIY Foiled Planner Clips by Teri Anderson for Scrapbook Adhesives by 3L

You’ll also want to use your circle die to cut four circles from white cardstock.

DIY Foiled Planner Clips by Teri Anderson for Scrapbook Adhesives by 3L


Flip your patterned paper circles over. Remove the other piece of backing paper from each one. Set a paperclip on each circle. Be sure to put the single loop side onto the adhesive.

Place one of the cardstock circles over the clip and onto each circle. Repeat this process until you have four circle-topped paperclips.

Decorating the Planner Clips

Now, it’s the time for the fun part: decorating the planner clips.

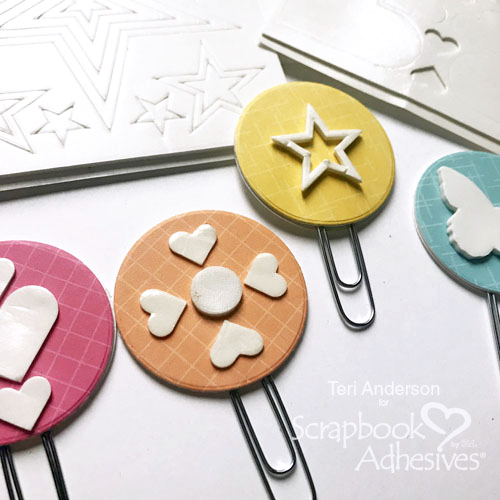
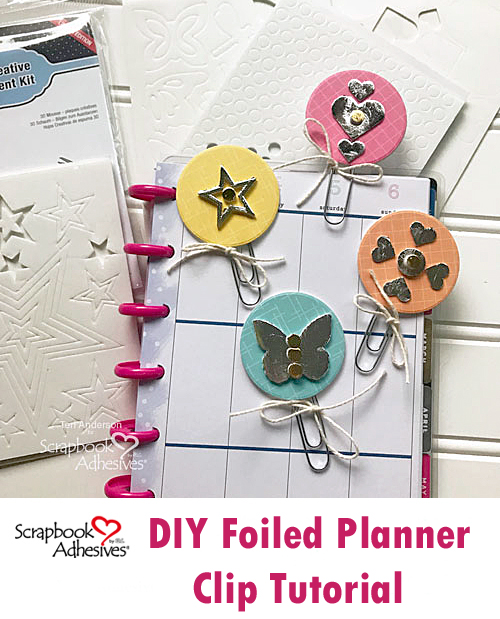
Scrapbook Adhesives by 3L has a number of awesome fun 3D Foam Shapes that work for this project! We’re going to use the 3D Foam Stars, 3D Foam Hearts and 3D Foam Butterflies today. but you may want to use a different shape on future clips.

DIY Foiled Planner Clips by Teri Anderson for Scrapbook Adhesives by 3L

Take some of the 3D Foam embellishments and mount them to each clip. Be creative! Look for ways to use different shapes together to make an interesting design.

DIY Foiled Planner Clips by Teri Anderson for Scrapbook Adhesives by 3L

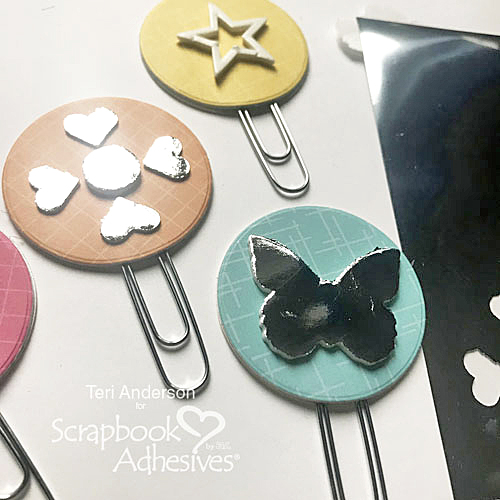
Remove the paper liner on top of each 3D Foam Shape. Use your fingers to burnish foil onto each shape. There are five different colors of foil that are included in each of the foil kits: 3D Foam Creative Embellishment Kit, Metallic Transfer Foil Variety and Metallic Transfer Foil Holographic kit.

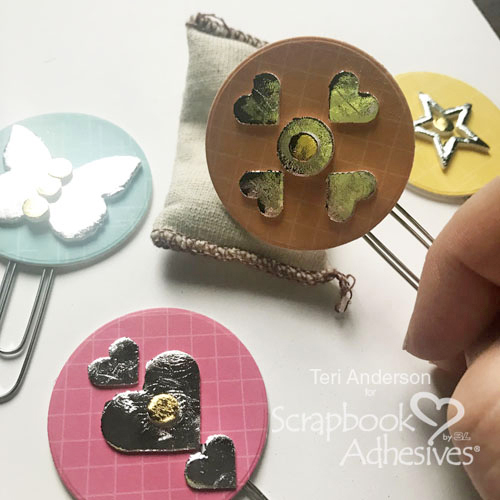
You could call things good, but we are going for a two-toned foiled look with these clips! Take some 3D Foam Circles and adhere them onto each clip. You can place them on or next to the shapes you’ve already added foil to.

Select a second color of foil and then burnish it to each of the 3D Foam Circles.

If you are worried about there being any sticky residue from the foam on your clips, rub each clip on a non-static embossing bag. Don’t have one of those? Use a sheet of fabric softener instead!

DIY Foiled Planner Clips by Teri Anderson for Scrapbook Adhesives by 3L

Complete your clips by adding a bow to each one with twine or ribbon.

Using the Clips

These clips look amazing when used in a planner!

DIY Foiled Planner Clips by Teri Anderson for Scrapbook Adhesives by 3L

DIY Foiled Planner Clips by Teri Anderson for Scrapbook Adhesives by 3L

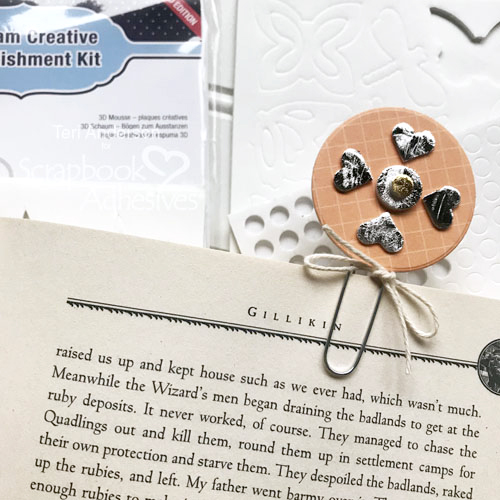
They also make great bookmarks! You may want to make a few to use as you tackle your reading list for the new year.

DIY Foiled Planner Clips by Teri Anderson for Scrapbook Adhesives by 3L

DIY Foiled Planner Clips by Teri Anderson for Scrapbook Adhesives by 3L

DIY Foiled Planner Clips by Teri Anderson for Scrapbook Adhesives by 3L

Creative Time: 30 Minutes
Skill Level: Beginner

Materials Needed
Scrapbook Adhesives by 3L®
3D Foam Circles White Mix
3D Foam Creative Embellishment Kit with Foil
3D Foam Shapes: 3D Foam Stars, 3D Foam Hearts and 3D Foam Butterflies
Metallic Transfer Foil Holographic
Metallic Transfer Foil Variety

Other:
The Brights 6×6 Paper Pad by Avery Elle; Twine by Whisker Graphics; Circle Die by Spellbinders; Paperclips; White Cardstock

Pin It!

DIY Foiled Planner Clips by Teri Anderson for Scrapbook Adhesives by 3L Pinterest

Faux Wax Seals with Adhesives Dots 3D

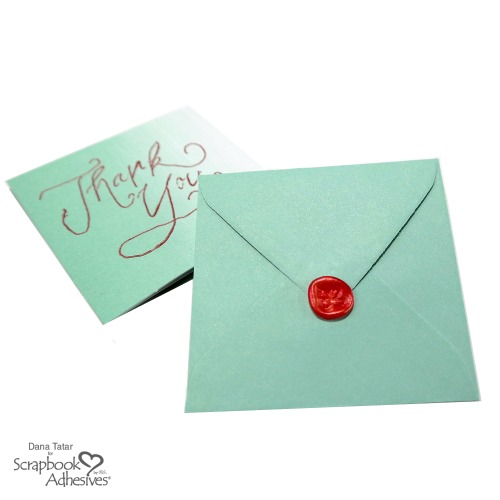
Hi! Dana Tatar here today sharing a fun way to dress up a simple Thank You card. I like to have extra cards on hand this time of year. I elevated a store-bought box of cards with foil lettering and used Adhesive Dots 3D to create faux wax seals. These simple techniques help add that special touch without taking too much time.
Faux Wax Seals with Adhesives Dots 3D by Dana Tatar for Scrapbook Adhesives by 3L

How to Apply Foil Lettering to a Card

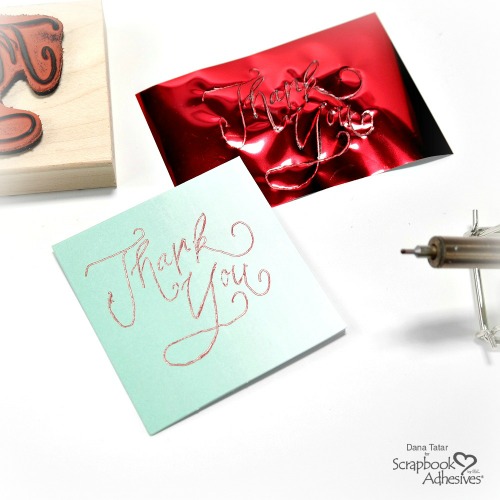
Faux Wax Seals with Adhesives Dots 3D by Dana Tatar for Scrapbook Adhesives by 3L

1. Use a stamp to apply a sentiment onto the colored side of a transfer foil sheet. Transfer Foil Sheets are included in both the 3D Foam Creative Embellishment Kit and the 3D Foam Holiday Embellishment Kit.

2. Place the foil transfer sheet over the front of a card. Use a heat tool to trace the stamped sentiment, sealing the foil onto the front of the card. Another option for this step would be to die-cut a sentiment from an Adhesive Sheet or piece of 3D Foam and apply foil to that adhesive.

3. Lift off the foil transfer sheet.

How to Create a Faux Wax Seal with Adhesive Dots 3D

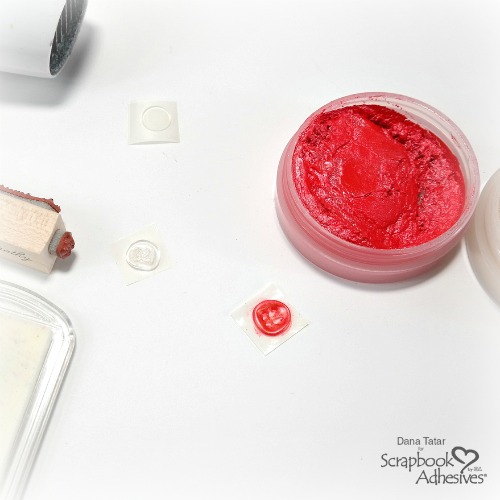
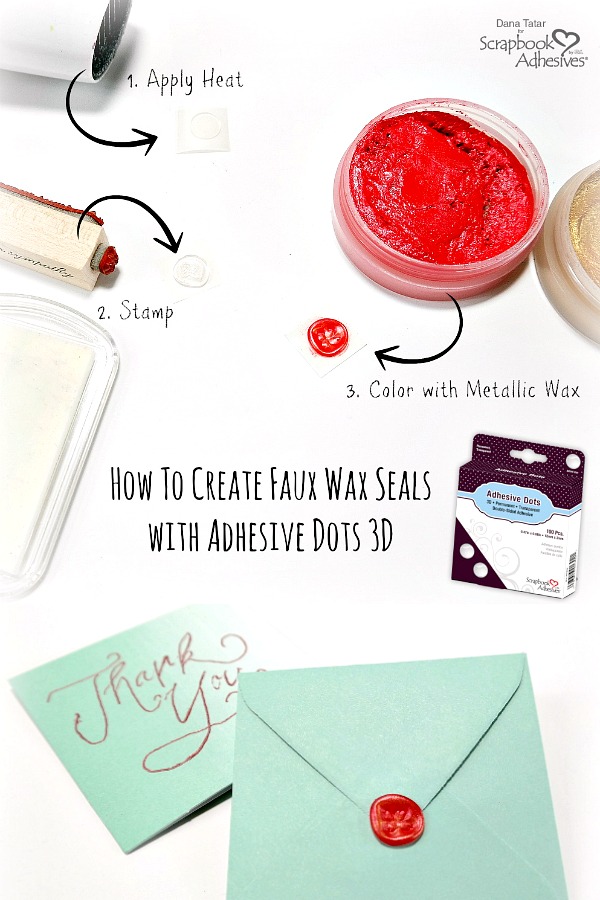
Faux Wax Seals with Adhesives Dots 3D by Dana Tatar for Scrapbook Adhesives by 3L1. Heat an Adhesive Dot 3D for 15 seconds.

2. Apply watermark ink onto a small stamp and press and hold onto the hot dot for 15 seconds. The watermark ink is necessary for this step. It allows the stamp to lift cleanly from the adhesive dot.

3. Rub the stamped dot with one or more colors of metallic wax and buff to a shine.

4. Carefully remove the dot from the liner and apply over the flap of an envelope.

Thanks for stopping by today!
~Dana

Creative Time: 30 Minutes
Skill Level: Beginner

Materials Needed
Scrapbook Adhesives by 3L®
Adhesive Dots 3D
3D Foam Creative Embellishment Kit

Other: Card and Envelope Set (American Crafts); Thank You Stamp (Paper Source); Clover Stamp (Memory Box); Watermark Ink (Clearsnap); Metallic Wax (DecoArt); HotMarks Tool (Walnut Hollow)

Pin It!

Faux Wax Seals with Adhesives Dots 3D by Dana Tatar for Scrapbook Adhesives by 3L Pinterest

Decorative Stamped Christmas Card

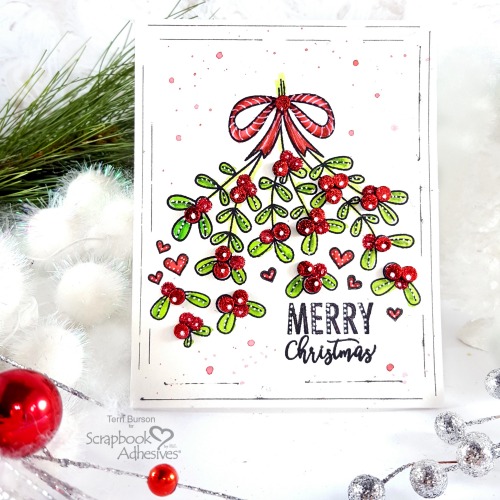
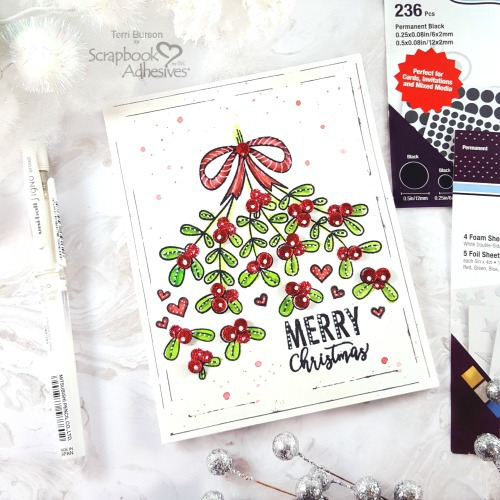
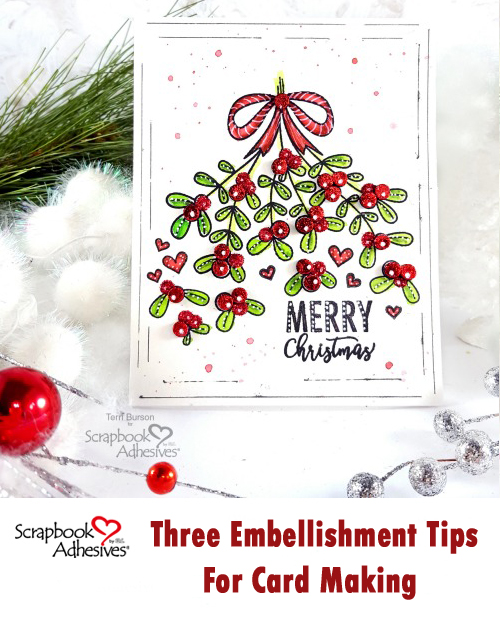
Hello friends, Terri here, and today I’m showing you some of my favorite embellishment tips for decorative stamped Christmas cards.  Get ready to foil, glitter and color!

Decorative Stamped Christmas Card by Terri Burson for Scrapbook Adhesives by 3L

Finding Your Decorative Focal Points

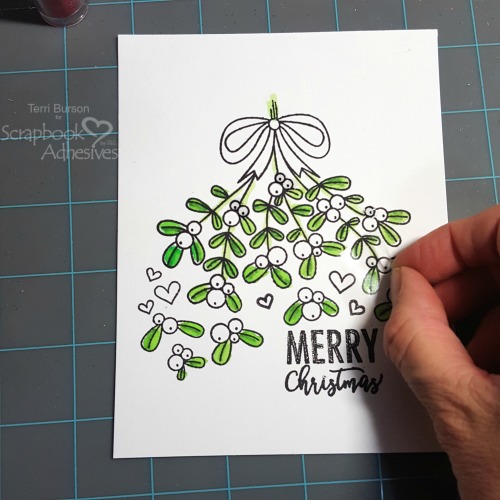
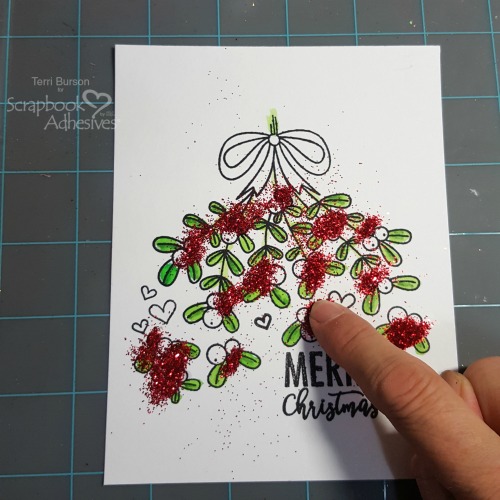
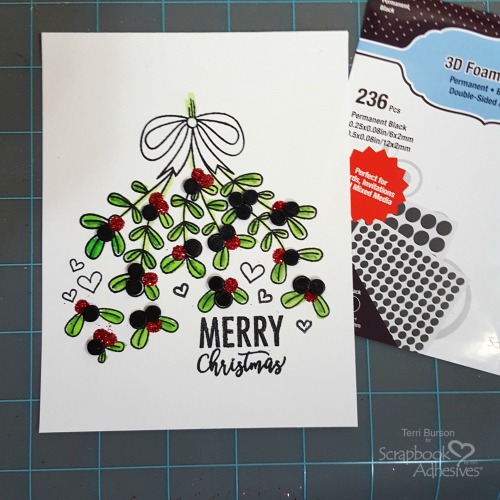
This Avery Elle mistletoe stamp has lots of berries which is perfect for this project.  This will be the focus for embellishing with the wonderful products from Scrapbook Adhesives by 3L.  To begin, add lots of Adhesive Dots Micro to the smallest berries.

Decorative Stamped Christmas Card by Terri Burson for Scrapbook Adhesives by 3L

Add Glitter For Decorative Sparkle

You can top your adhesives dots in so many ways; embossing powder, glitter and foil to name a few.  Today, we’ll be adding red glitter.  Sprinkle liberally, then press the glitter into the Adhesive Dots Micro to better fuse the glitter to the dots.  Tap off the excess and replace into your glitter jar.

Decorative Stamped Christmas Card by Terri Burson for Scrapbook Adhesives by 3L

Add Dimension For That Wow Factor

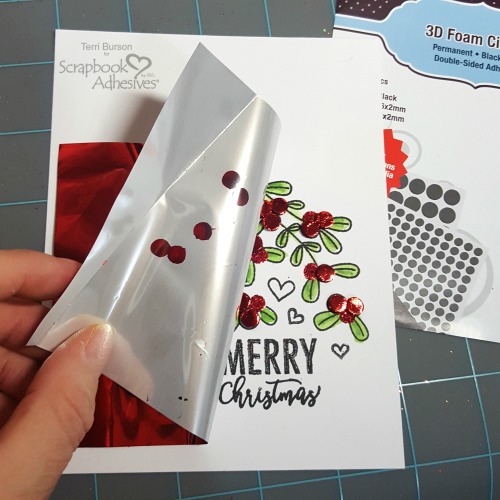
Dimension is always a plus and using the 3D Foam Circles Black Mix is the perfect choice for the larger berries.  Instead of glitter, I’m using the red foil from the 3D Foam Creative Embellishment Kit.  Also, I’m only using the small black foam circles, as opposed to white.  It offers a shadow effect that I love.

Decorative Stamped Christmas Card by Terri Burson for Scrapbook Adhesives by 3L

Simply lay your red foil, shiny side up, on the foam dots, gently rub, then peel off the lining.  Grab your camera and show your friends how amazing you are!  It’s a great way to Wear Your Adhesives On The Outside!

Decorative Stamped Christmas Card by Terri Burson for Scrapbook Adhesives by 3L

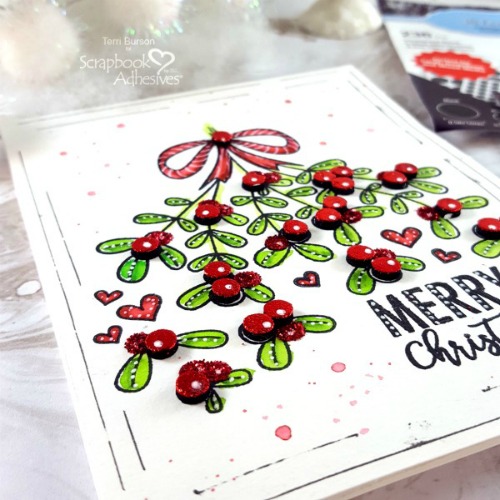
To finish off my card, I used a white gel pen and dotted my berries, my leaves and added stripes to my colored ribbon.  Use whatever coloring tools that suit your needs for the leaves and ribbon.

Decorative Stamped Christmas Card by Terri Burson for Scrapbook Adhesives by 3L

Additionally, my mixed media paper panel was popped up with Crafty Foam Tape White and applied to a 5.5 x 4.5 inch top fold white card. I also added watercolor splatters and drew a faux frame along the edges with a black glitter pen.

Decorative Stamped Christmas Card by Terri Burson for Scrapbook Adhesives by 3L

Thanks so much for following along today.  If you’d like more information on the products used, please visit my blog at Waving My Wand.  See you next time, Terri

Creative Time: 30 minutes
Skill Level: Beginner

Materials Needed
Scrapbook Adhesives by 3L®
Adhesive Dots Micro
3D Foam Circles Black Mix
3D Foam Creative Embellishment Kit
Crafty Foam Tape White

Other:
Neenah cardstock, Canson mixed media paper, red glitter, Signo white gel pen, Arteza black glitter pen, Kuretake Zig Real Clean Color Brush, Jane Davenport watercolor paint, Catherine Pooler Ink, Misti stamp positioner, We R Memory Keepers Trimmer, Avery Elle stamps

Pin It!

Decorative Stamped Christmas Card by Terri Burson for Scrapbook Adhesives by 3L Pinterest

Visit our Website and Blog!
Sign up for our Newsletter so you never miss a contest or giveaway!

instagram purple icon facebook icon purple pinterest purple icon twitter purple icon YouTube icon blog subscription purple icon

The Positive and Negative of Christmas Gift Boxes

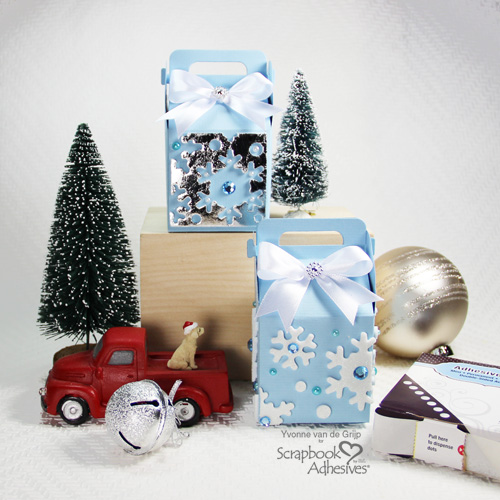
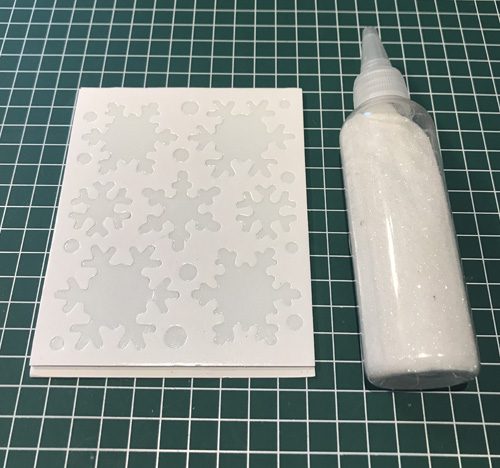
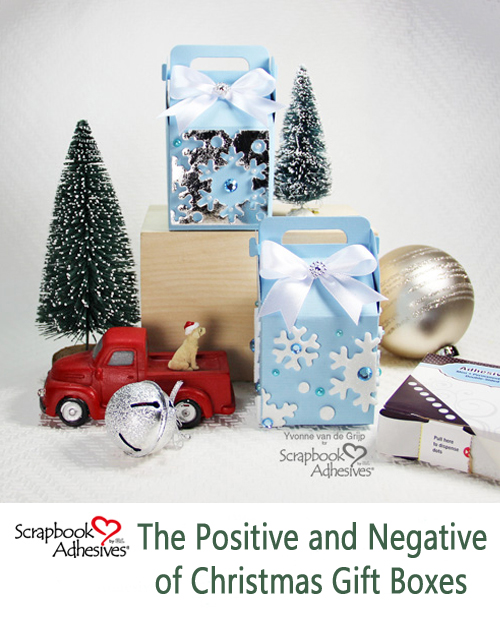
Hi everyone! With only a few days before Christmas, I have some quick and easy to make Christmas Gift Boxes, decorated with a sheet of 3D Foam Snowflakes from my 3D Foam Holiday Embellishment Kit. The fun part is that you can use both the positive and negative parts of the sheet so there is no waste!

The Positive and Negative of Christmas Gift Boxes by Yvonne van de Grijp for Scrapbook Adhesives by 3L

Creating the Christmas Gift Boxes

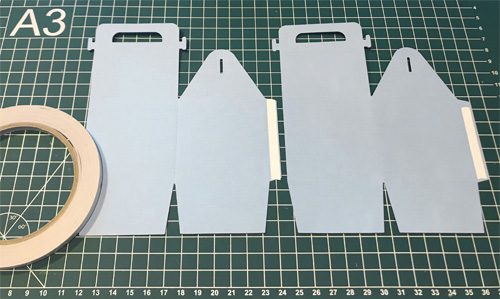
First die-cut two (half) box shapes from soft blue cardstock per gift box. I made two gift boxes, so die-cut a total of four box shapes.

The Positive and Negative of Christmas Gift Boxes by Yvonne van de Grijp for Scrapbook Adhesives by 3L

Then assemble the box with Premium Double-Sided Tape 1/4in to adhere both parts of the box pieces together and secure the bottom side of the box too.

Embellish the First Gift Box

Now for the fun part! Let me show you how to embellish the boxes with the 3D Foam Snowflakes in both the positive and negative pieces.

With your sheet of 3D Snowflakes Foam, remove the top liners of the snowflake shapes.

The Positive and Negative of Christmas Gift Boxes by Yvonne van de Grijp for Scrapbook Adhesives by 3L

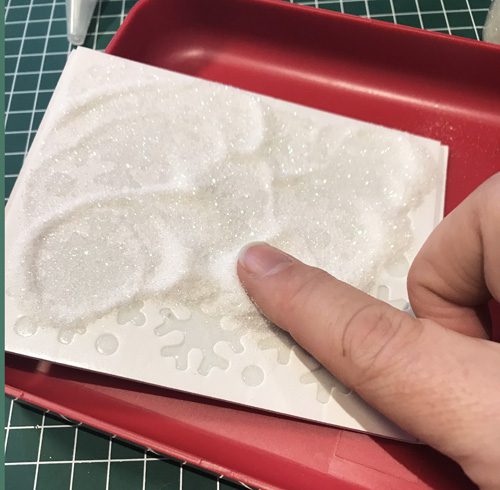
Sprinkle white glitter on top and rub the glitter onto the snowflake shapes. Tap off or use a brush to remove the excess glitter.

The Positive and Negative of Christmas Gift Boxes by Yvonne van de Grijp for Scrapbook Adhesives by 3L

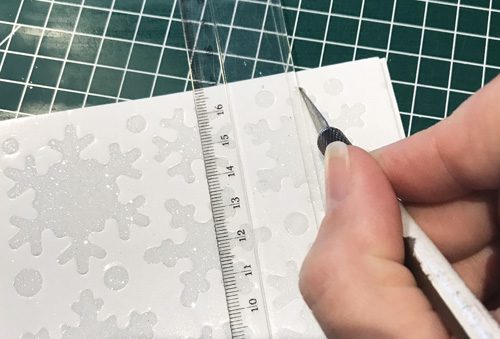
Take a ruler and a craft knife to cut some of the snowflakes in half. Be careful that you do not cut into the sheet – the negative space – around the snowflakes. You will be using that for the second box.

The Positive and Negative of Christmas Gift Boxes by Yvonne van de Grijp for Scrapbook Adhesives by 3L

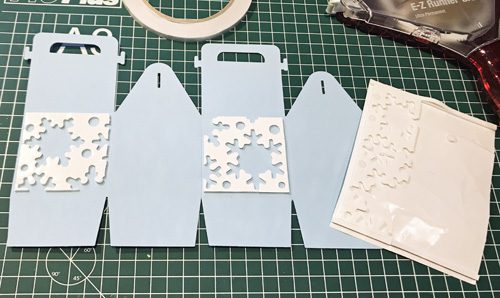
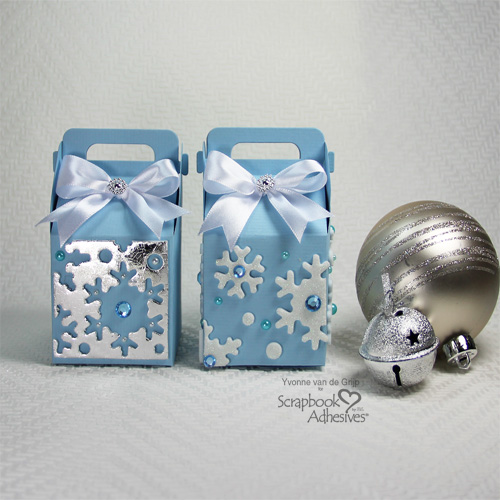
Next gently remove both the full and cut snowflakes and dots from the 3D Foam Snowflakes sheet and adhere to the box in the desired pattern. Add rhinestones and pearls to the gift box using Adhesive Dots. For a finishing touch, adhere a bow and small button to the box top with Adhesive Dots.

Decking out the Second Gift Box

For the next gift box, the negative piece of the 3D Foam Snowflakes sheet will be used. First, cut squares just slightly smaller than the box sides into the leftover 3D Foam Snowflake sheet and adhere them to the box side. Assemble the gift box using Premium Double-Sided Tape 1/4in.

The Positive and Negative of Christmas Gift Boxes by Yvonne van de Grijp for Scrapbook Adhesives by 3L

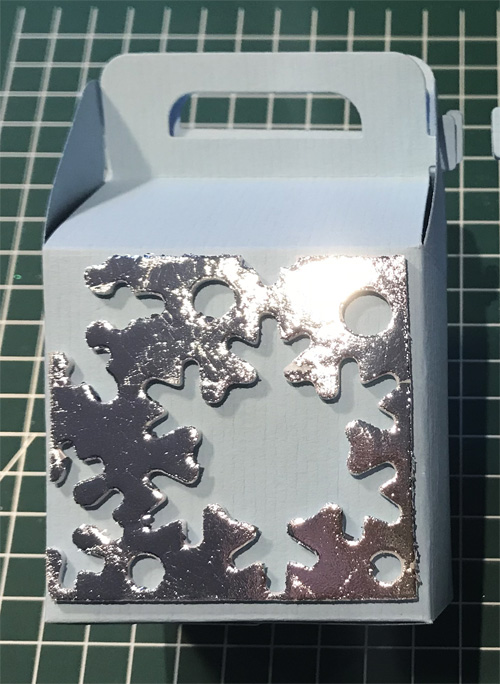
Next, remove the top liner of the negative piece on the sides of the box. Use your choice of foil, I used silver, from the 3D Foam Holiday Embellishment Kit to transfer the color to the negative pieces. Remember to use the colored side of foil facing UP and gently rub to transfer. Then remove the sheet to reveal the stunning result!

The Positive and Negative of Christmas Gift Boxes by Yvonne van de Grijp for Scrapbook Adhesives by 3L

Lastly, put the finishing touches on the gift box with rhinestones, pearls, and bow using Adhesive Dots like the first box.

The Positive and Negative of Christmas Gift Boxes by Yvonne van de Grijp for Scrapbook Adhesives by 3L

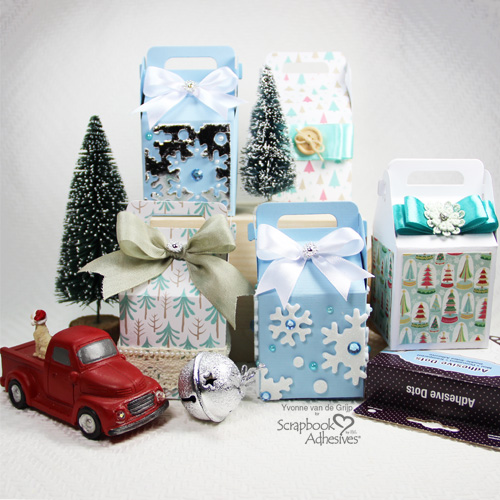
Just for some extra inspiration, I made some more Christmas Gift Boxes 🙂

The Positive and Negative of Christmas Gift Boxes by Yvonne van de Grijp for Scrapbook Adhesives by 3L

Wishing lots of fun creating your own gift boxes!

Happy Holidays everyone!
Yvonne

Creative Time: 60 minutes
Skill Level: intermediate

Materials Needed
Scrapbook Adhesives by 3L®

3D Foam Holiday Embellishment Kit
Adhesive Dots Micro
Adhesive Dots Mini

HomeHobby by 3L®
Premium Double-Sided Tape 1/4in

Other:
Spellbinders® Paper Arts (Charming Cottage Box by Becca Feeken), Blue Cardstock, White Glitter, Craft Knife, Ruler

Pin It!

The Positive and Negative of Christmas Gift Boxes by Yvonne van de Grijp for Scrapbook Adhesives by 3L Pinterest

Visit our Website and Blog!
Sign up for our Newsletter so you never miss a contest or giveaway!

instagram purple icon facebook icon purple pinterest purple icon twitter purple icon YouTube icon blog subscription purple icon

Holiday Wreath Layout

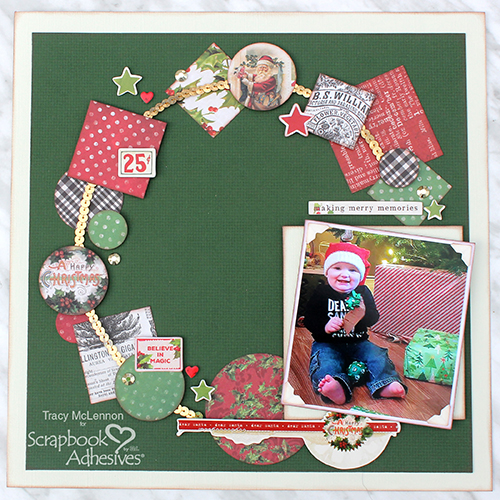
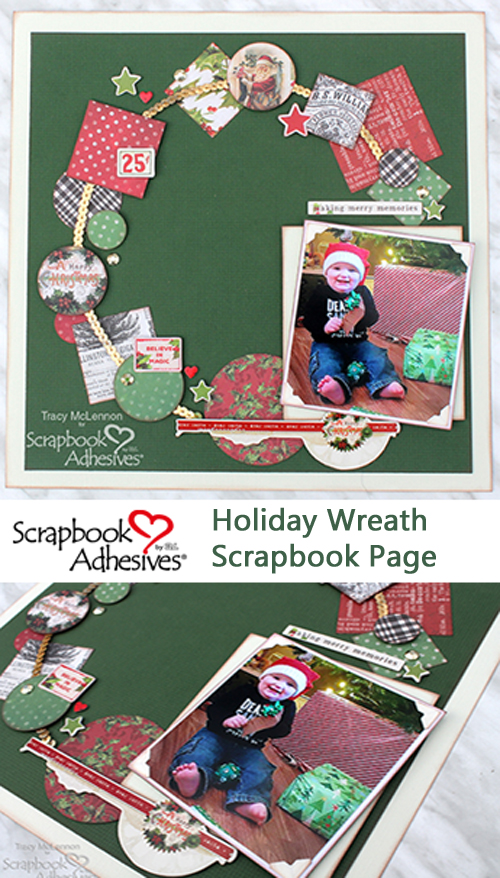
Welcome back, crafty friends! Tracy here, and today I have a fun and easy to create Holiday Wreath Layout to share. Christmas is right around the corner, and I’m sure for some of you the festivities have already begun. It’s a time for family and friends to be together and with that comes lots of holiday photo ops. That’s why I thought I would share another fun and easy holiday layout.

Holiday Wreath Layout by Tracy McLennon for Scrapbook Adhesives by 3L

Holiday Wreath Layout Details

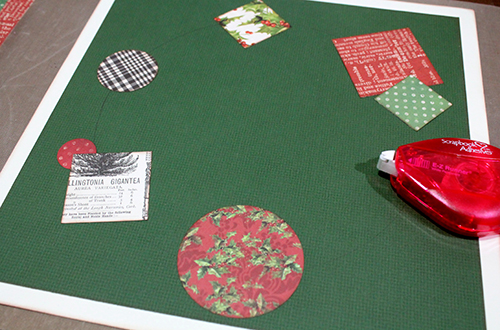
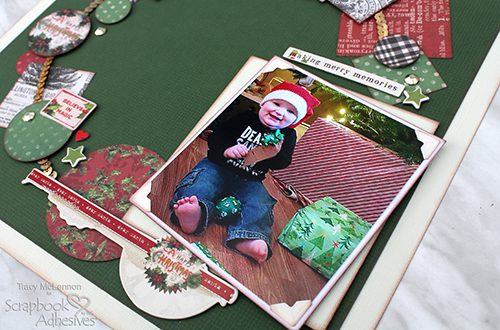
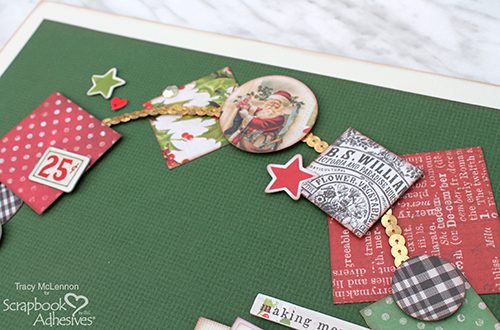
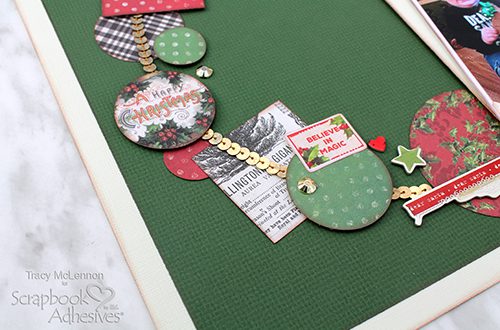
Start the layout by first creating a layered cardstock background and trace a large circle in the middle of the layout. Then I began adding patterned paper circles and squares in different sizes using the E-Z Runner® Permanent Strips Refillable Dispenser.

Holiday Wreath Layout by Tracy McLennon for Scrapbook Adhesives by 3L

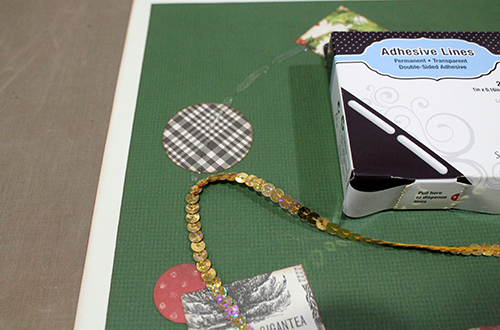
The next layer I created was this gold sequins trim circle. Add Adhesive Lines around the circle and attach the sequins trim as you go.

Holiday Wreath Layout by Tracy McLennon for Scrapbook Adhesives by 3L

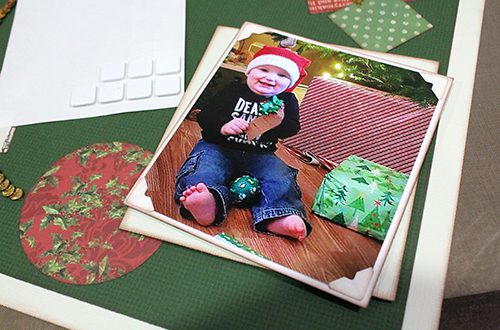
Mat the cropped photo in 2 layers of cardstock, and offset them adhering the layers using 3D Foam Squares White Mix and add Creative Photo Corners Ivory to the photo.

Holiday Wreath Layout by Tracy McLennon for Scrapbook Adhesives by 3L

Also using 3D Foam Squares White Mix, continue adding more layers of patterned circles, squares and dies cuts. Then added a few more chipboard stickers and gems.

Holiday Wreath Layout by Tracy McLennon for Scrapbook Adhesives by 3L

This Holiday Wreath Layout is just such a great way to use smaller bits and pieces of a favourite holiday collection.

Holiday Wreath Layout by Tracy McLennon for Scrapbook Adhesives by 3L

Thanks so much for stopping by and Happy Holidays.
Tracy

Creative Time:  45 Minutes
Skill Level:  Intermediate

Materials Needed
Scrapbook Adhesives by 3L®

Adhesive Lines
E-Z Runner® Permanent Strips Refillable Dispenser
Creative Photo Corners Ivory
3D Foam Squares White Mix

Other:
Cardstock (Dark Green, Ivory), Simple Stories- Simple Vintage Christmas Collection (patterned paper, chipboard stickers, die cuts), Gold Gems, Sequins Trim, 1-inch, 1.75-inch, and 2.75-inch Circle Punches

SAVE IT on Pinterest

Holiday Wreath Layout by Tracy McLennon for Scrapbook Adhesives by 3L Pinterest

Visit our Website and Blog!
Sign up for our Newsletter so you never miss a contest or giveaway!

instagram purple icon facebook icon purple pinterest purple icon twitter purple icon YouTube icon blog subscription purple icon

Lip Balm Tall Tags Tutorial

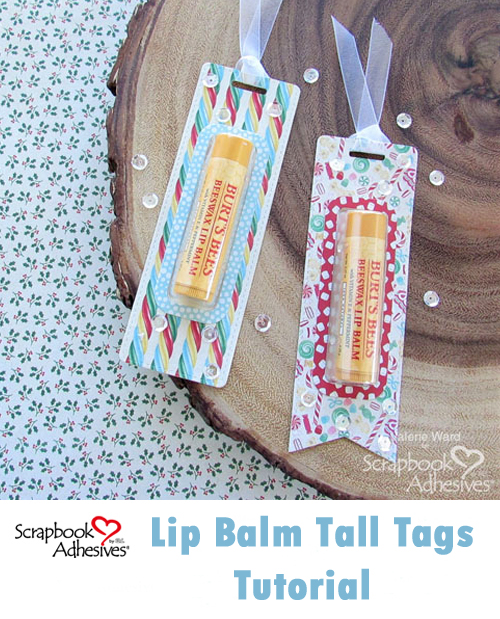
Hello, crafters! Valerie here today! The Holidays are quickly approaching, and my project, Lip Balm Tall Tags, would be great for a gift exchange, a teacher’s gift, party favors, and many other holiday situations you’ll find yourself in!
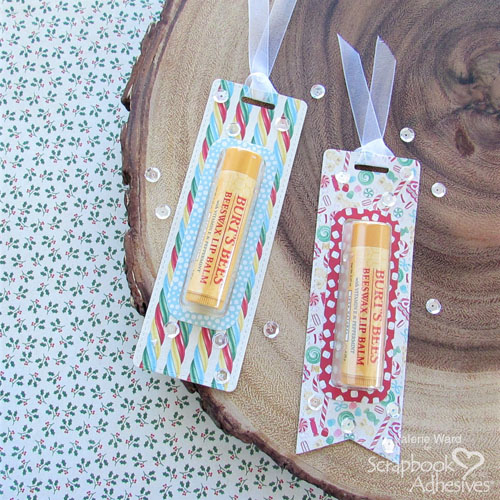
Lip Balm Tall Tags Tutorial by Valerie Ward for Scrapbook Adhesives by 3L

Step 1 – Die-cutting

First, I used 2 tag die-cutting sets to cut the pieces needed (however, at the end of the post, I have an image showing the dimensions to cut these pieces at if you don’t have a die set &/or don’t want to buy one). One set is a Tall Tag die set, and the other set is a Lip Balm Pouch die set.
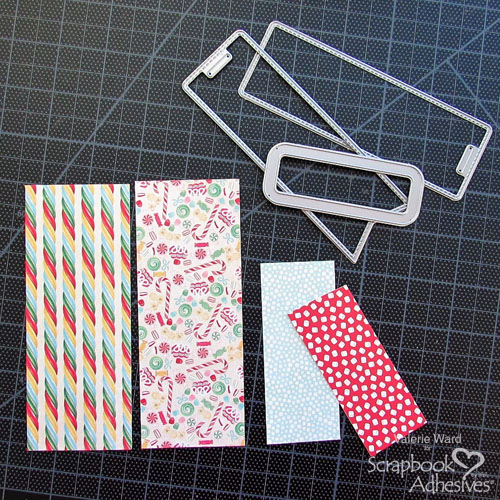

Lip Balm Tall Tags Tutorial by Valerie Ward for Scrapbook Adhesives by 3L

Second, I die cut the openings for the lip balm pouches (again, dimensions are provided towards the end of the post for these openings, so you can cut them yourself without dies).
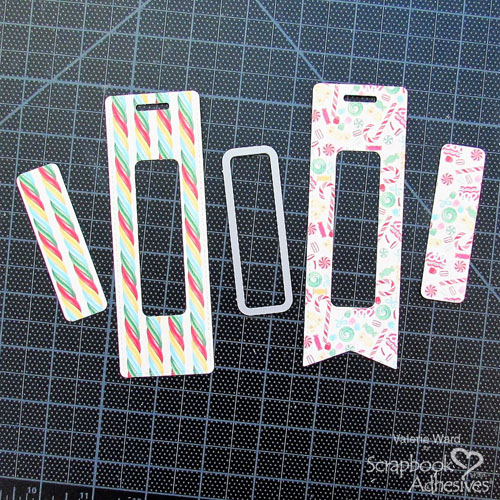
Lip Balm Tall Tags Tutorial by Valerie Ward for Scrapbook Adhesives by 3L

Step 2 – Adhere Lip Balm Pouches

To adhere the lip balm pouches I used the E-Z Runner Micro Refill.
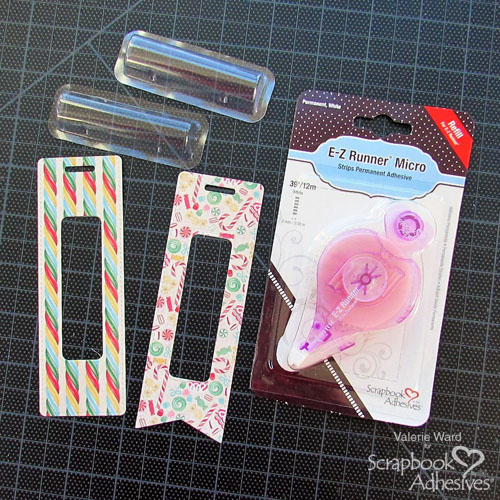
Lip Balm Tall Tags Tutorial by Valerie Ward for Scrapbook Adhesives by 3L

I didn’t have the E-Z Runner Micro Refillable Dispenser, but that’s OK. Using a different dispenser I had on-hand works because all these E-Z Runner refills interchange with the E-Z Runner Refillable Dispensers!
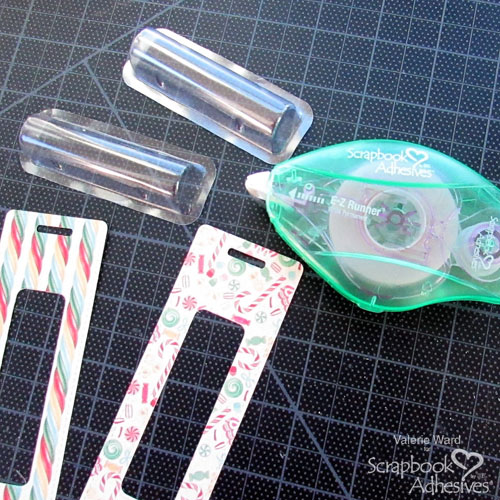
Lip Balm Tall Tags Tutorial by Valerie Ward for Scrapbook Adhesives by 3L

Apply the E-Z Runner Micro Refillable Dispenser adhesive all around the perimeter of the opening on the back of the tag.
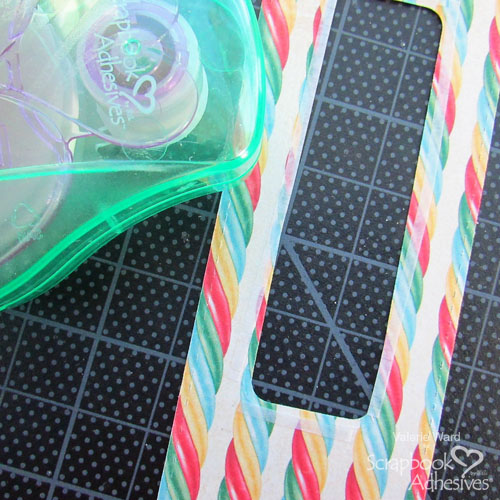

Lip Balm Tall Tags Tutorial by Valerie Ward for Scrapbook Adhesives by 3L

Then you stick the lip balm pouch into the opening from the back; the adhesive worked like a gem to hold the pouch in place!
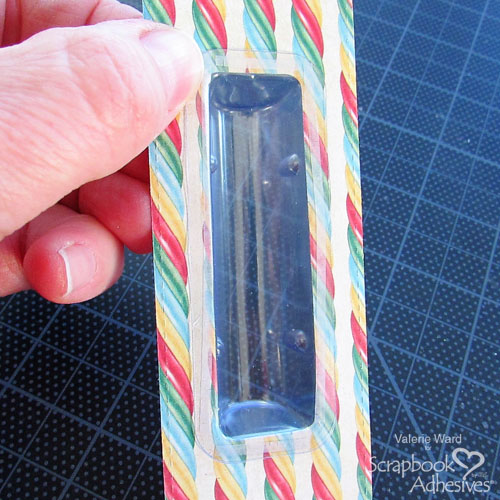
Lip Balm Tall Tags Tutorial by Valerie Ward for Scrapbook Adhesives by 3L

Here is the front after you attach the lip balm pouch.
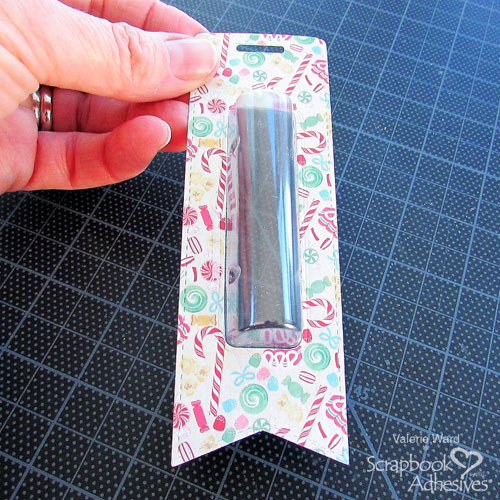
Lip Balm Tall Tags Tutorial by Valerie Ward for Scrapbook Adhesives by 3L

You could leave the front like this, or the next steps show the opening with the frame applied around it.

Step 3 – Add Lip Balm Pouch Frames & Insert Lip Balm

Here is where I needed my E-Z Runner Micro Refill again (remember, it is shown in a different dispenser, but works just the same!): I attached the die-cut pouch opening frames with this adhesive to the front of the tags.
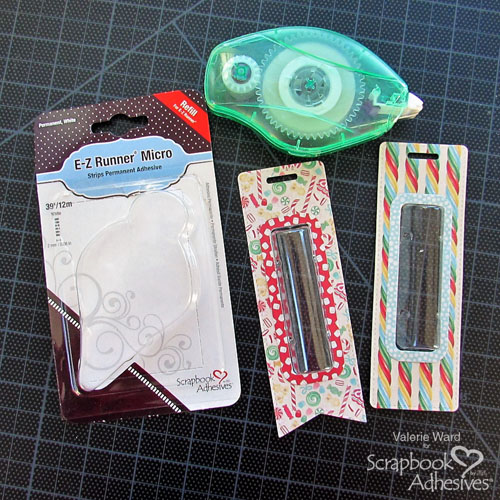
Lip Balm Tall Tags Tutorial by Valerie Ward for Scrapbook Adhesives by 3L

Here’s a fun part – you put the lip balm into the pouches!
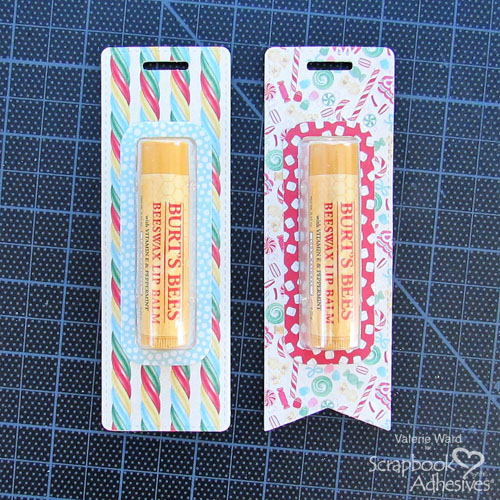
Lip Balm Tall Tags Tutorial by Valerie Ward for Scrapbook Adhesives by 3L

So here you see the backs, with the openings where you put the lip balms in:
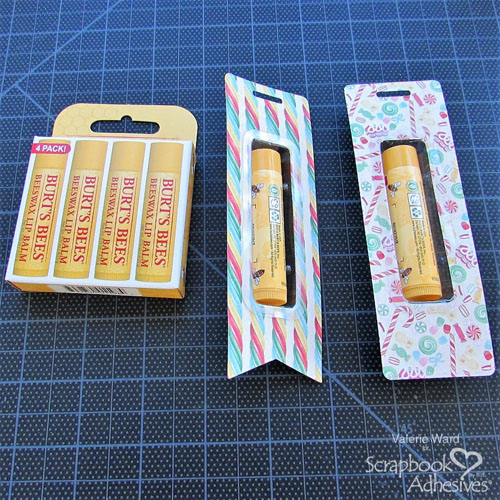
Lip Balm Tall Tags Tutorial by Valerie Ward for Scrapbook Adhesives by 3L

Step 4 – Attach Tall Tags’ Backs

Here is where I need to attach the backs to the Tall Tags. I used my E-Z Runner® Grand Refillable Dispenser  that has the E-Z Runner Grand Ultra Stong Refill inside, AND my  E-Z Dots Permanent Refillable Dispenser.
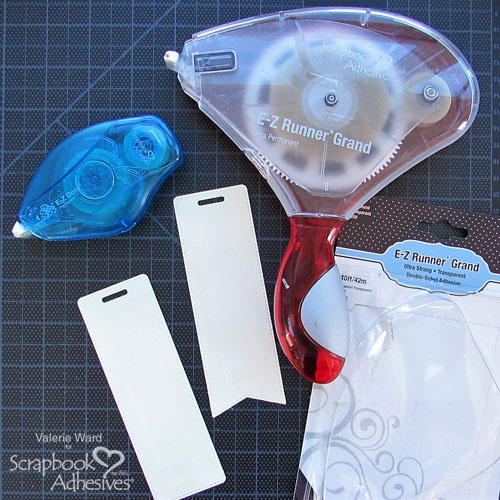

Lip Balm Tall Tags Tutorial by Valerie Ward for Scrapbook Adhesives by 3L

I used the E-Z Dots Permanent Refillable Dispenser adhesive on the top around the opening for the ribbon. Then I used E-Z Runner Grand Ultra Stong Refill adhesive around the perimeter of the remainder of the tag.
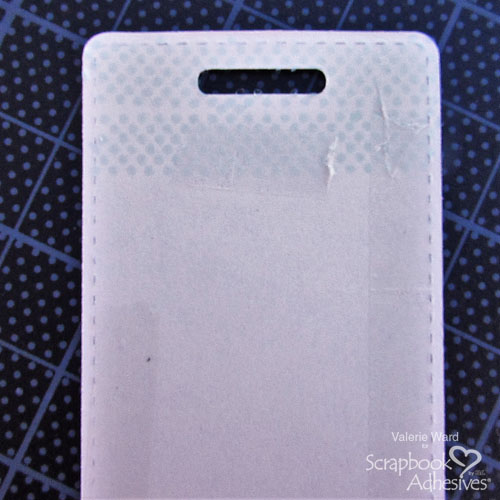
Lip Balm Tall Tags Tutorial by Valerie Ward for Scrapbook Adhesives by 3L

Adhere those to the backs of your projects. Here you’ll see them attached:
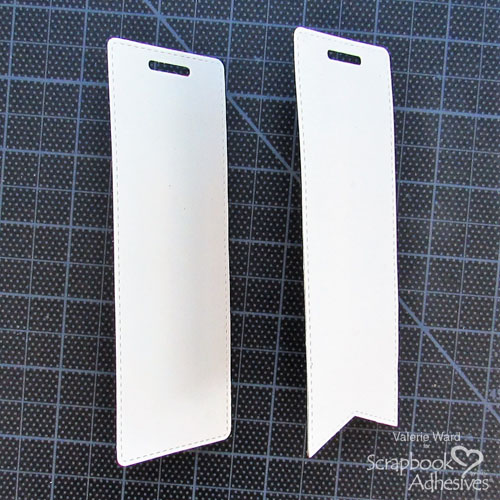
Lip Balm Tall Tags Tutorial by Valerie Ward for Scrapbook Adhesives by 3L

Step 5 – Add Embellishments

Now you are at the Finishing Touches part of this project! I added the ribbon to the tags at the tops; I wanted to make sure the ribbon did not come loose, so I added an Adhesive Dots Micro inside the knot part to hold it together.
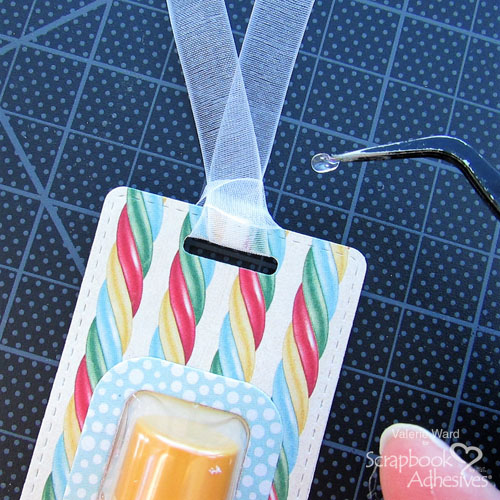
Lip Balm Tall Tags Tutorial by Valerie Ward for Scrapbook Adhesives by 3L

Then I decided I wanted a little bit of bling, so I used the Adhesive Dots Micro again to add sequins to the fronts of the tags. Now the project is finished!
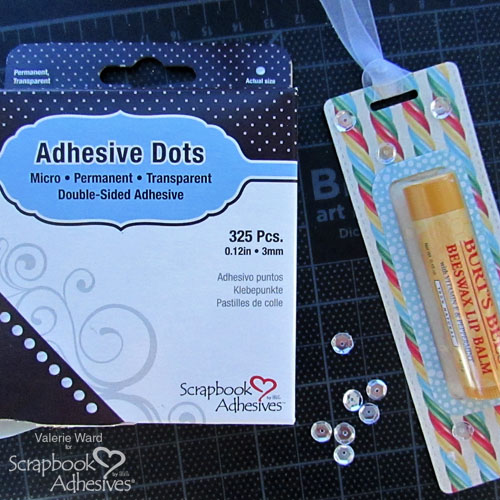
Lip Balm Tall Tags Tutorial by Valerie Ward for Scrapbook Adhesives by 3L

Tag Dimensions for Cutting Shapes & Openings Without a Die Set

You do not NEED to have the die set to make these tag shapes and openings; here are the dimensions so you can cut them out yourself! Then you can just use a hole punch to create a hole at the top for the ribbon.
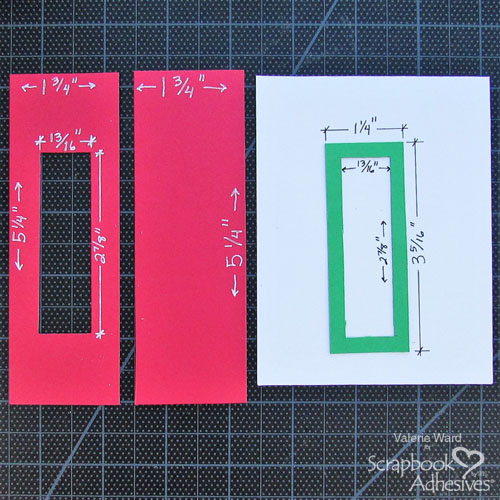

Lip Balm Tall Tags Tutorial by Valerie Ward for Scrapbook Adhesives by 3L

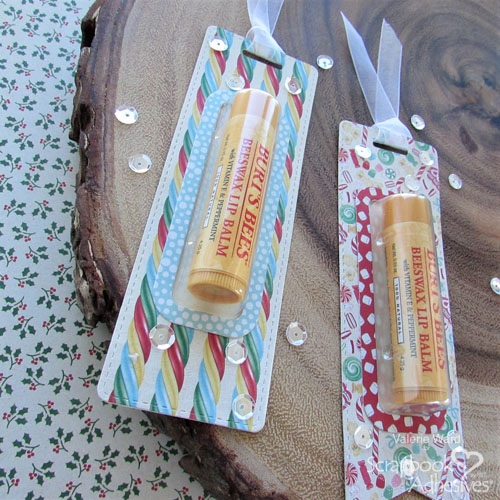
So here we are, all finished: 2 sweet little gifts perfect for many occasions!

Lip Balm Tall Tags Tutorial by Valerie Ward for Scrapbook Adhesives by 3L

Lip Balm Tall Tags Tutorial by Valerie Ward for Scrapbook Adhesives by 3L

Thank you very much for stopping by today! I hope you have a great remainder-of-the-week wrapping up all your last minute things-to-do!
Valerie

Creative Time: 30 Minutes
Skill Level: Beginner

Materials Needed
Scrapbook Adhesives by 3L®

E-Z Runner® Grand Refillable Dispenser and E-Z Runner Grand Ultra Stong Refill
E-Z Runner Micro Refill
Adhesive Dots Micro
E-Z Dots Permanent Refillable Dispenser

Other: Tags die set & lip balm die set (both not necessary, though), patterned paper, lip balm, ribbon, sequins

Pin It!
Lip Balm Tall Tags Tutorial by Valerie Ward for Scrapbook Adhesives by 3L Pinterest

Holiday Treat Bag Tutorial

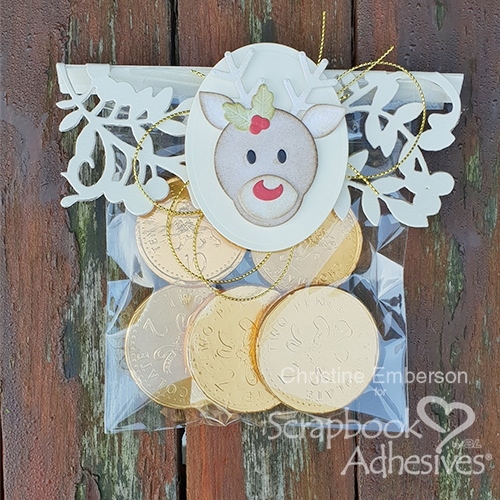
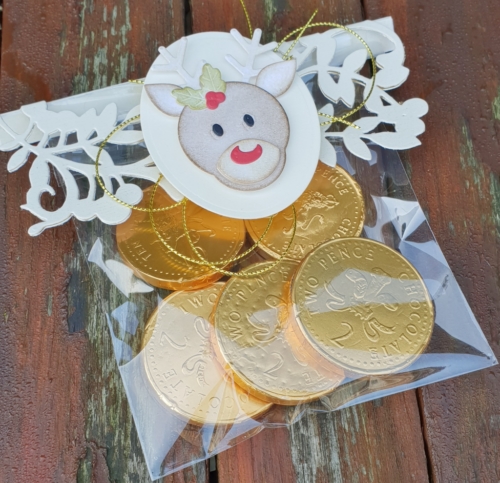
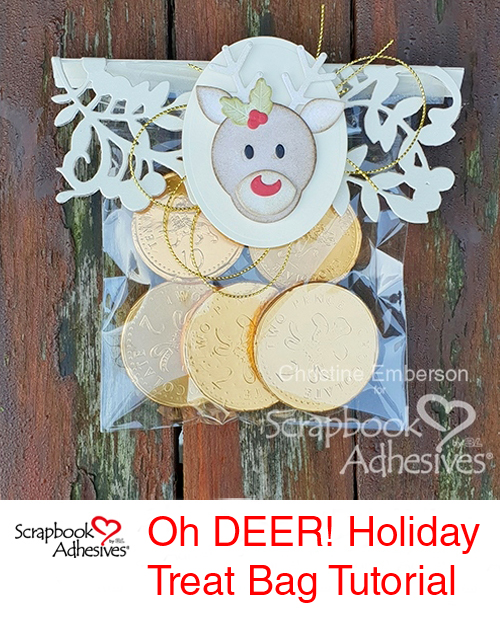
Hi everyone, Christine here today with a reindeer themed holiday treat bag. These are a perfect teacher and workplace gifts and also great for table favors. Set aside a little relaxing time to make these before the Christmas mayhem!

Holiday Treat Bag Tutorial by Christine Emberson for Scrapbook Adhesives by 3L

The “How-To” on a Holiday Treat Bag

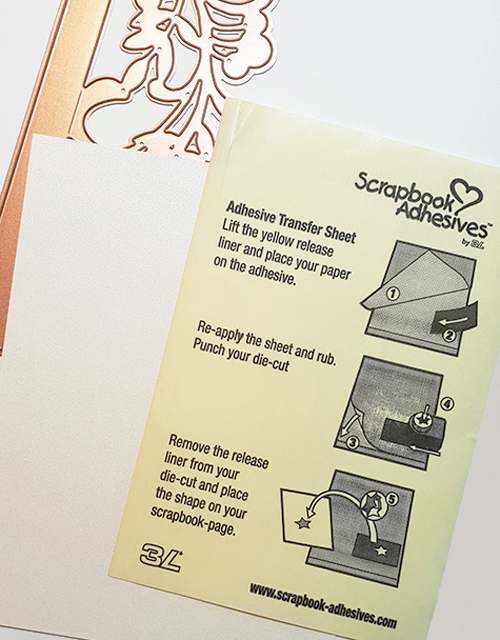
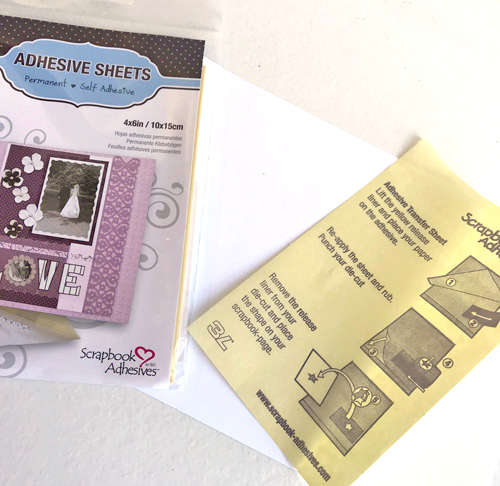
Adhesive Sheets and die cutting are a match made in heaven! Whenever you want to achieve a drop shadow with foil card these sheets are your answer.

  1. Remove yellow backing paper.
  2. Align card onto the adhesive.
  3. Smooth the entire card to the adhesive.
  4. Run through your die cutting machine.
  5. Remove the back liner and adhere.


The “How-To” on Adhesive Sheets

See this short How to Use Adhesive Sheets for Die Cutting video below:

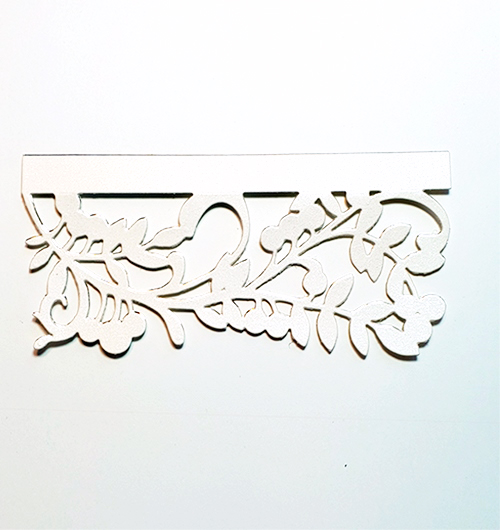
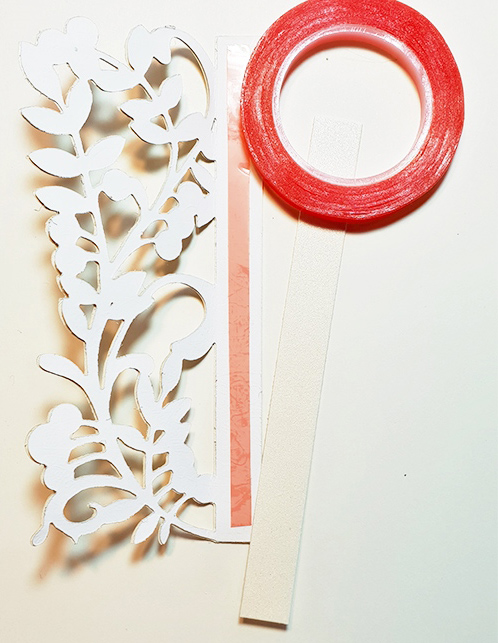
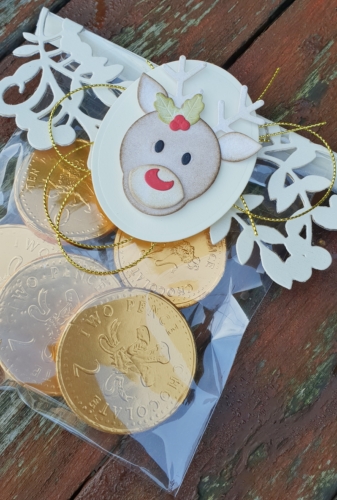
This die cut is going to create a topper for your gift bag.  To ensure it stays in place use Extreme Double Sided Tape – 1/4 inch.


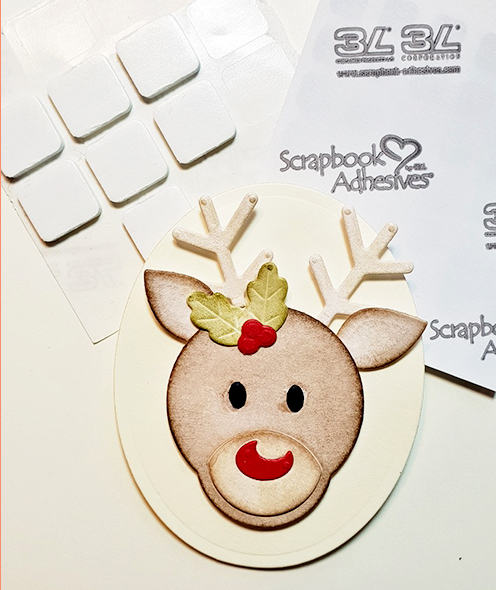
For further decoration, I created a reindeer embellishment and used 3D Foam Squares White Regular Size on the reverse.


Again use the trusty 3D Foam Squares White Regular Size to hold in place loops of gold twine.

For healthier treats fill the bags with cosmetics or perhaps fill with reindeer food and leave out for Santa, those reindeer get very hungry!

Thanks for stopping by and wishing you a wonderful festive season!

Creative Time: 30 Minutes
Skill Level: Intermediate

Materials Needed
Scrapbook Adhesives by 3L®

Adhesive Sheets
3D Foam Squares White Regular Size
HomeHobby by 3L®
Extreme Double Sided Tape – 1/4 inch.

Others:
Craft Dies: Spellbinders® Paper Arts (Reindeer, Mistletoe Gatefold); Gold mirror cardstock; Ivory, red and black cardstock; Cellophane Bag; Candy/Treats

Pin It!
Holiday Treat Bag Tutorial by Christine Emberson for Scrapbook Adhesives by 3L Pinterest