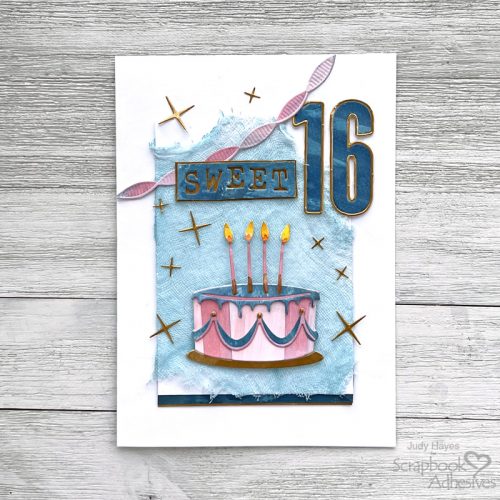
Hi, everyone! Going on a summer vacation? Teri here to show you how to make some memory cards to take with you so can remember all your road trip adventures.
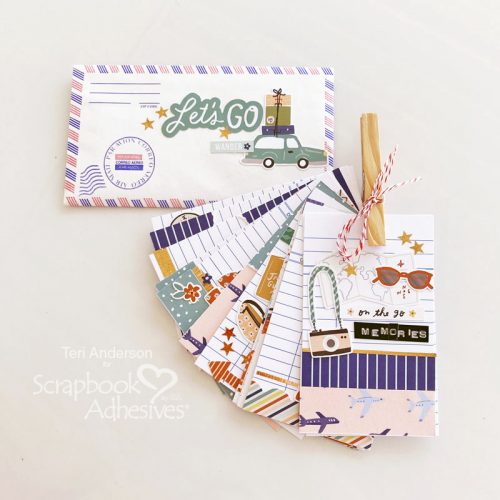
These cards are perfect to put in a travel journal or turn into a mini scrapbook about your trip and all the fun you had.
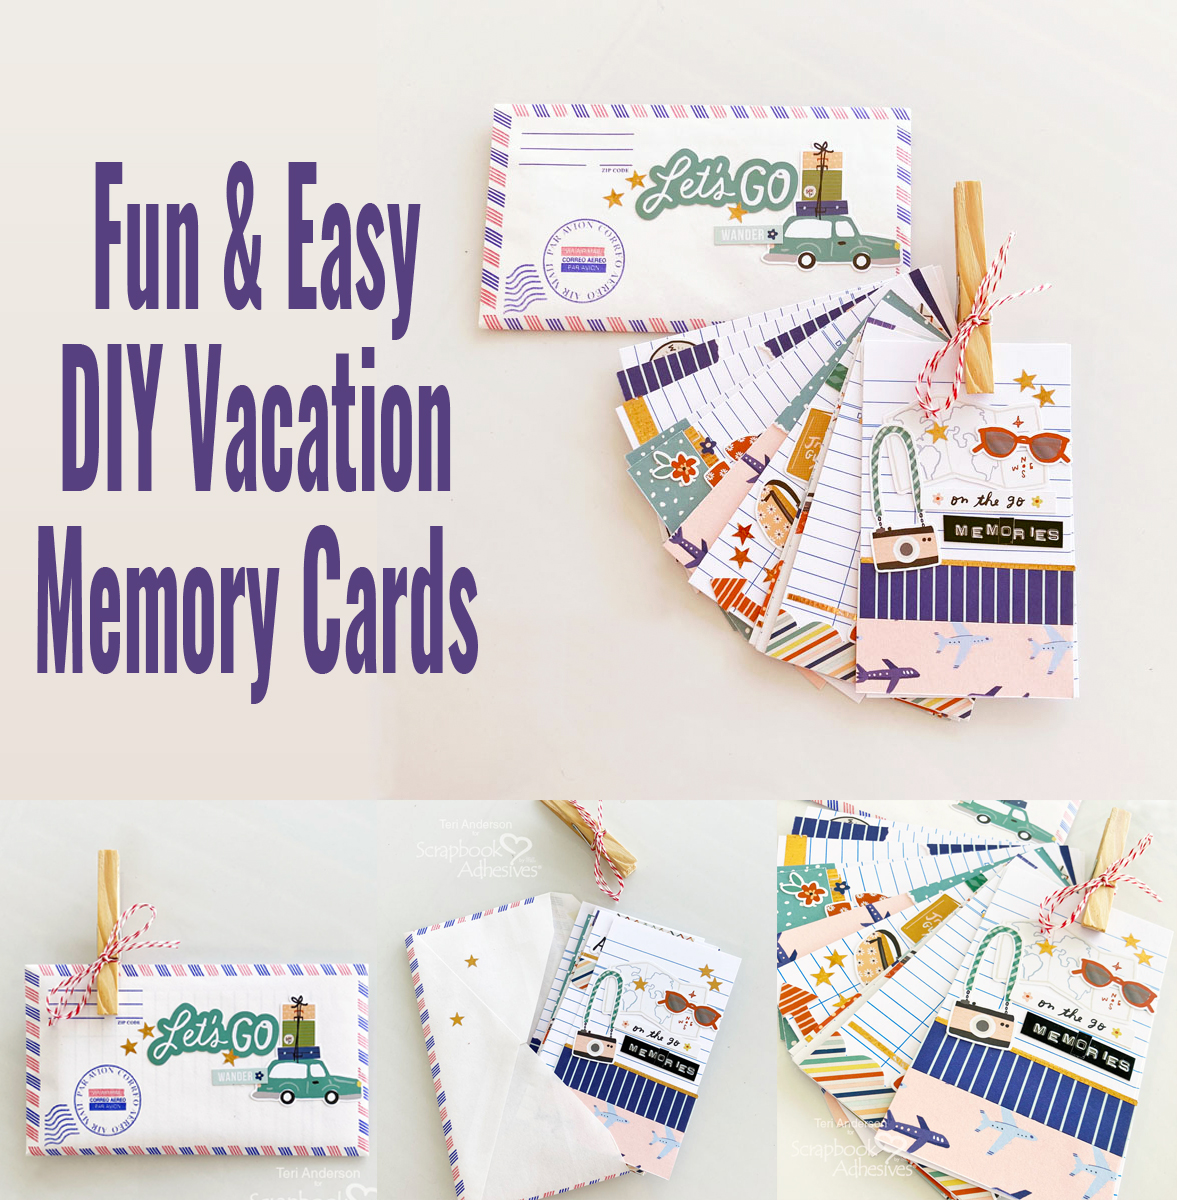
Make the Memory Cards
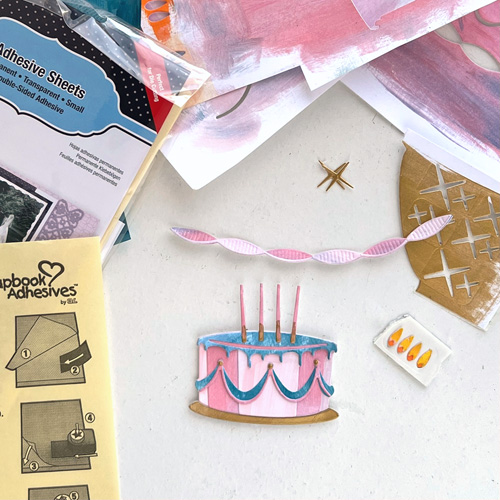
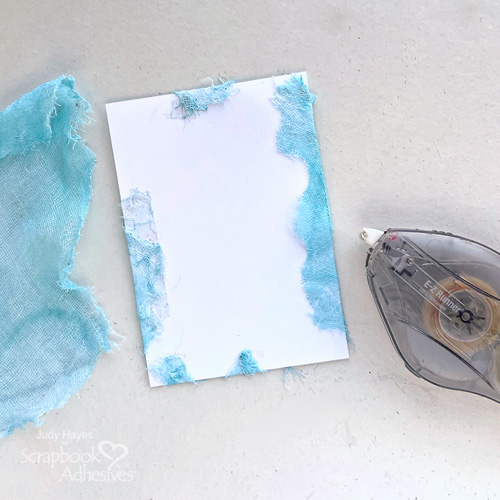
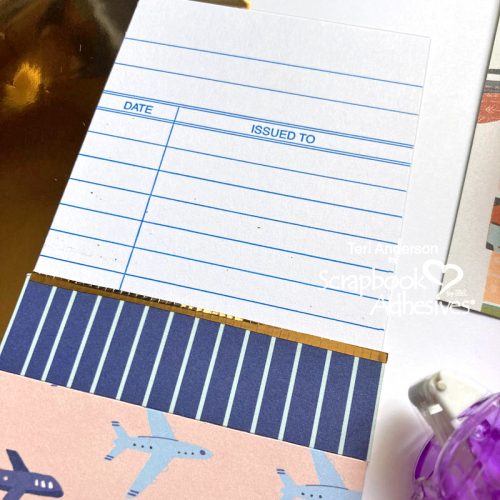
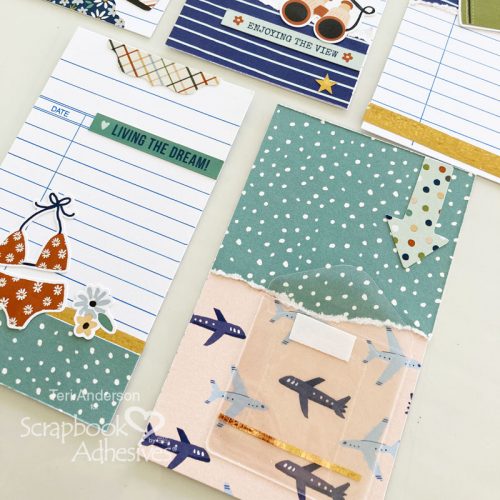
Start by picking a base for your memory cards. Use pre-made cards, like library cards, or create your own cards from cardstock. Each card should be the same size.
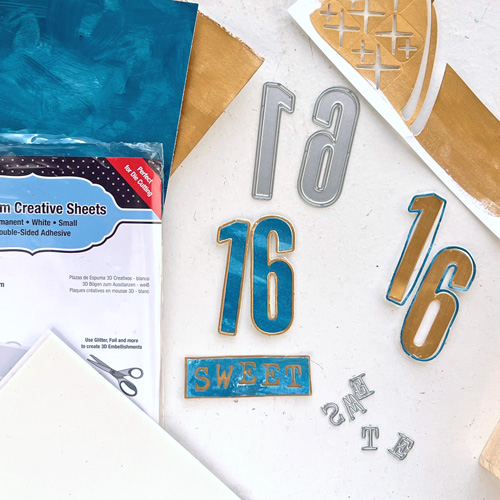
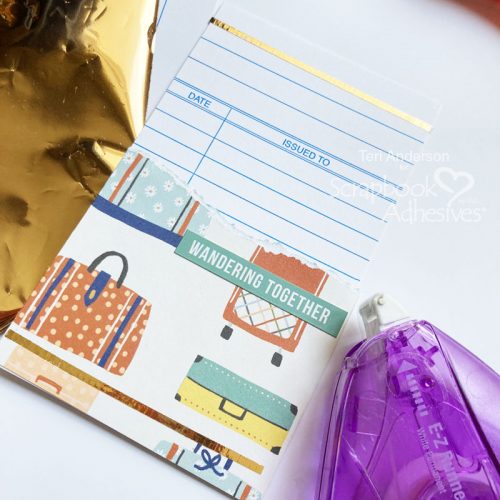
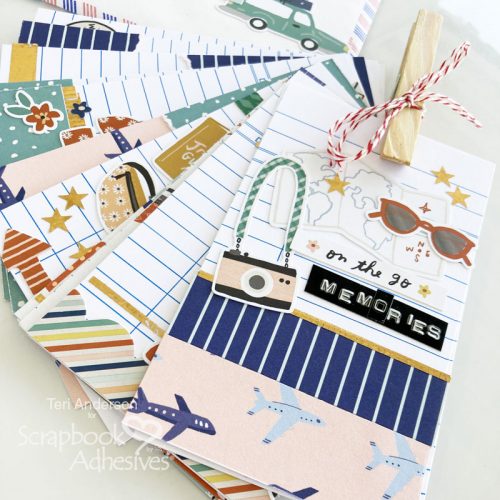
Create a cover card by decorating a card with patterned paper and then add a thin line of the E-Z Runner® Micro on top of it. Burnish the foil from the Metallic Transfer Foil Sheets in Nature Colors onto the adhesive (color side up). Add to your cover card by adding some travel-themed stickers or die-cuts to it, as well as a few adhesive stars from the E-Z Runner® Stars Refillable Dispenser with foil placed on them.
Additional Memory Cards
Create a card for memorabilia by covering one of your cards with patterned paper and adding a Keepsake Envelope to it. You can also cut a small piece of paper to place inside the pocket. Just add a little adhesive under to it keep it from falling out before you add a trinket (like a foreign coin) to your pocket.
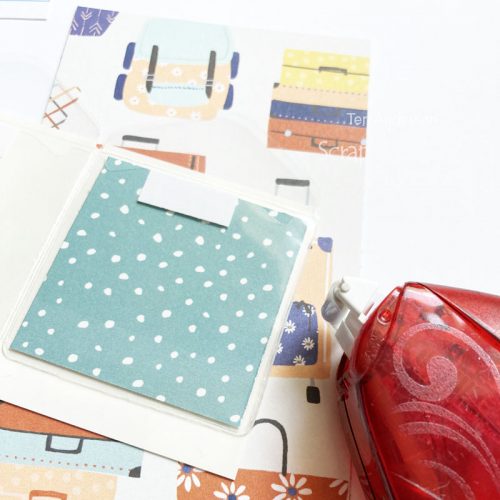
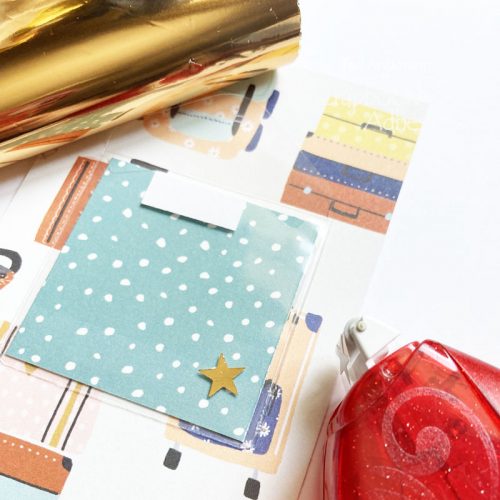
Embellish the pocket by rolling a star from the E-Z Runner® Stars Refillable Dispenser on top of it. Apply by rubbing a foil piece from the Metallic Transfer Foil Sheets in Nature Colors to it.
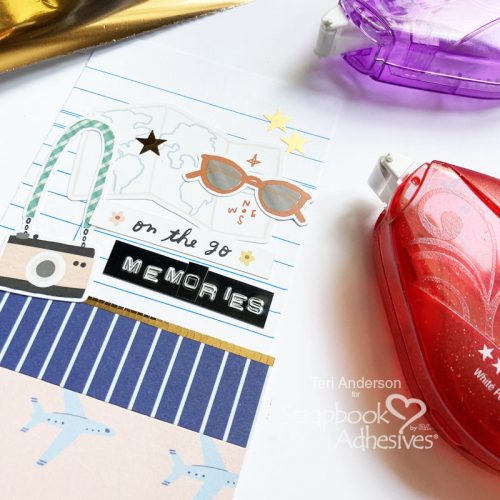
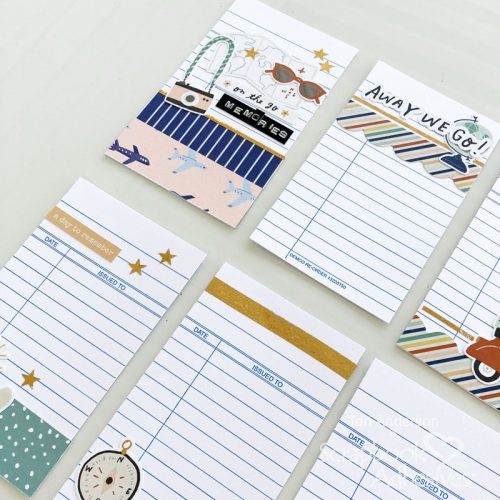
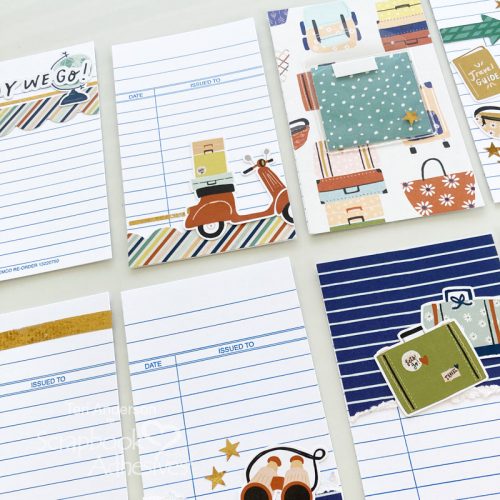
Create a variety of journaling cards by adding patterned paper to them. Keep adding foil to your cards by applying thin lines with the E-Z Runner® Micro and stars from the E-Z Runner® Stars Refillable Dispenser. By adding foil to all your memory cards, they will have a consistent look.
Let the creative process inspire you and just have fun creating more memory cards for your set.
Bind Your Cards Together or Store Them in an Envelope
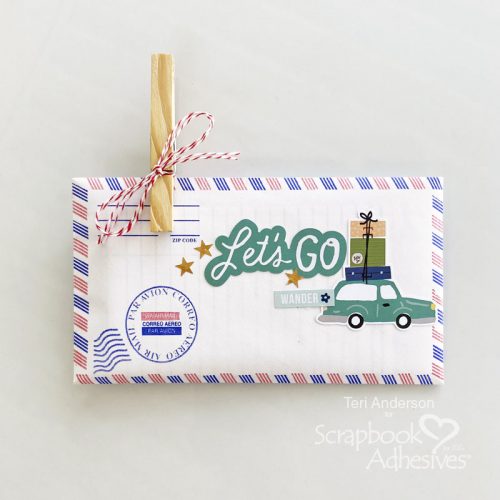
After you have completed all your memory cards, you are going to want to put them together. Stack them up and then use a clothespin or binding clip to hold them together. Another option would be to punch a hole in each card and then connect them together with twine or ribbon.
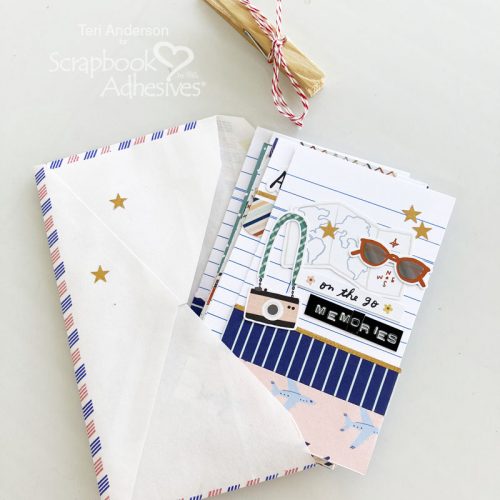
You can also just tuck them in an envelope. Consider using an old air mail envelope and embellishing it with travel icons. You can also add foil from the Metallic Transfer Foil Sheets in Nature Colors to the envelope by applying E-Z Runner® Stars Refillable Dispenser on it and burnishing foil on the top.
Don’t forget the back of your envelope! Add a few stars from the E-Z Runner® Stars Refillable Dispenser and foil from the Metallic Transfer Foil Sheets in Nature Colors to them as well.
I hope you are inspired to make some memory cards of your own to take on your next vacation! Thanks for stopping by today!
Happy Creating!
Creative Time: 90 mins
Skill Level: Intermediate
Materials Needed:
Scrapbook Adhesives by 3L®
E-Z Runner® Permanent Strips Refillable Dispenser
E-Z Runner® Micro Refillable Dispenser
E-Z Runner® Stars Refillable Dispenser
Metallic Transfer Foil Sheets Nature Colors
Other: Patterned Paper and Stickers: Simple Stories (Safe Travels Collection); Label Maker: Dymo; Twine: The Twinery; Air Mail Envelope; Clothespin; Library Cards
Save to Pinterest!
Visit our Website and Blog!
Sign up for our Newsletter so you never miss a contest or giveaway!